
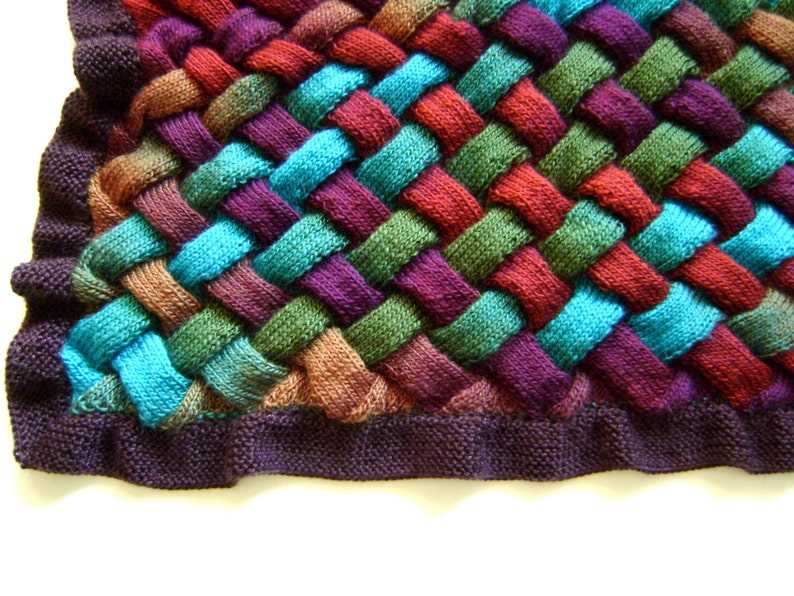
Looking for a new knitting project that will challenge your skills and yield stunning results? Look no further than the entrelac blanket! This unique knitting technique creates a beautifully textured fabric that resembles woven blocks.
The entrelac pattern may look complicated, but with a little bit of practice, you’ll be able to create this eye-catching blanket. And the best part? We’re offering a free entrelac blanket knitting pattern that will guide you through each step of the process.
With this pattern, you’ll learn how to knit the basic entrelac blocks and join them seamlessly to create a gorgeous blanket. Whether you’re a seasoned knitter looking to expand your repertoire or a beginner ready to tackle a new challenge, this pattern is perfect for you.
Entrelac Blanket Knitting Pattern: How to Create a Free Pattern
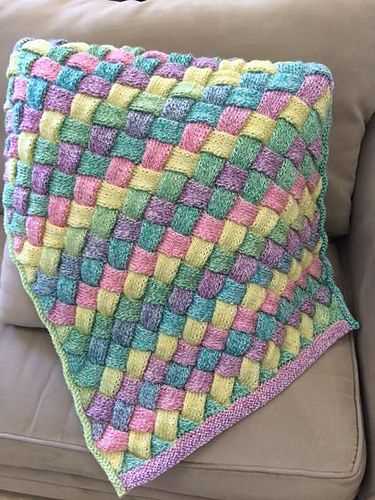
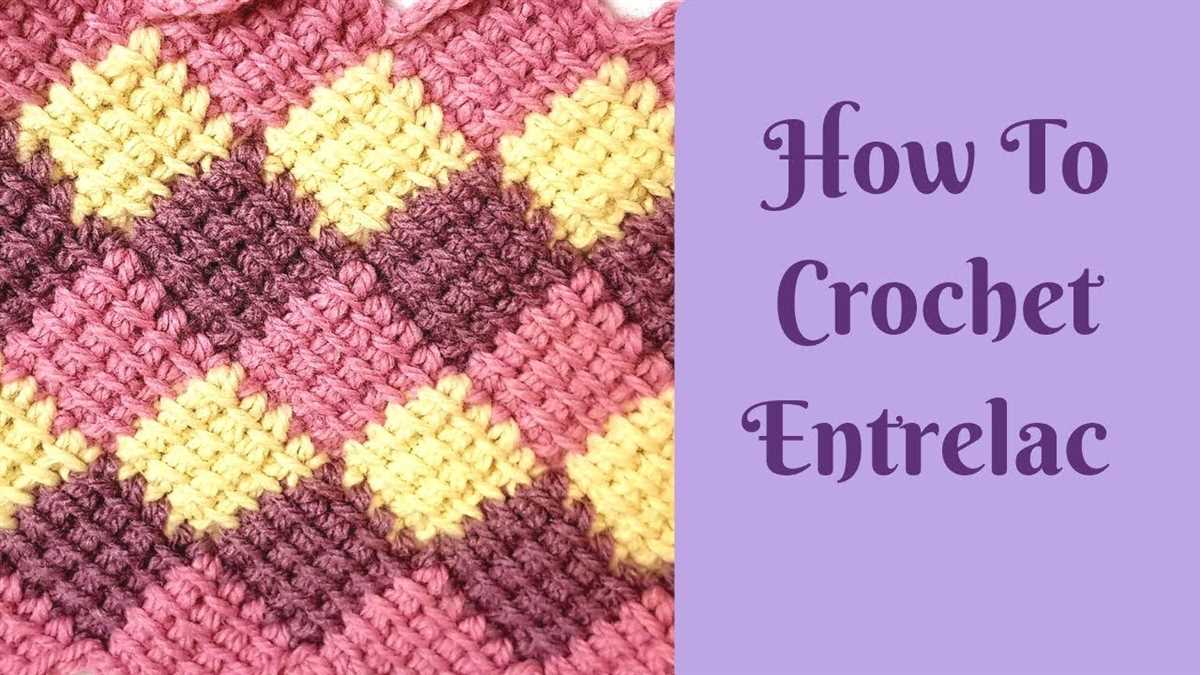
If you’re looking for a unique and eye-catching knitting project, an entrelac blanket might be just what you need. Entrelac is a technique that creates a textured, woven appearance by knitting squares in a modular fashion. By alternating between knitting squares from left to right and right to left, you can create the illusion of interwoven strips of fabric. It may seem complicated at first, but with the right pattern and some practice, you’ll be able to create your own beautiful entrelac blanket.
To create a free entrelac blanket knitting pattern, you’ll need to start by understanding the basics of the entrelac technique. The pattern will consist of a series of squares, each made up of smaller squares or triangles. You’ll need to determine the size of the squares you want to knit, as well as the overall dimensions of the blanket. You can choose to knit the squares in a single color or create a more dynamic look by using multiple colors.
To start your pattern, begin by casting on the desired number of stitches for the width of your blanket. This will determine the number of squares you’ll need to knit across each row. For example, if you want to knit a blanket that is 30 squares wide, you’ll need to cast on a multiple of 30 stitches. Once you have your desired number of stitches, divide them evenly among your knitting needles and join in the round.
Next, you’ll begin knitting the squares for your entrelac pattern. To knit a square, start by picking up stitches along the edge of your previous square. Use your knitting needle to pick up and knit the required number of stitches, and then turn your work. You’ll then knit the stitches you just picked up, creating a rectangular shape. To create the illusion of woven strips, you’ll alternate between knitting squares from left to right and right to left.
As you continue knitting your squares, you’ll notice that the pattern starts to take shape. To add depth to your entrelac blanket, you can experiment with different stitch patterns or colorwork techniques. For example, you could incorporate cables or lace patterns into your squares, or use variegated yarn to create a more colorful design. The possibilities are endless, so get creative!
In conclusion, creating a free entrelac blanket knitting pattern requires a basic understanding of the entrelac technique and the ability to knit squares in a modular fashion. By choosing your desired dimensions, selecting the appropriate number of stitches, and experimenting with different stitch patterns or colorwork techniques, you can create a unique and captivating entrelac blanket. Whether you’re a beginner or an advanced knitter, this project is sure to challenge and inspire you.
Choose your yarn and needles
When it comes to knitting the perfect entrelac blanket, one of the most important decisions you will make is choosing the right yarn and needles. The yarn you choose will not only affect the appearance and texture of your blanket, but it will also impact how easy or difficult the knitting process will be.
First, consider the weight and fiber of the yarn. For an entrelac blanket pattern, it is generally recommended to use a medium to bulky weight yarn. The entrelac technique creates a textured fabric, so using a thicker yarn will emphasize this texture. Additionally, choosing a yarn with a high wool content will add warmth and coziness to your blanket.
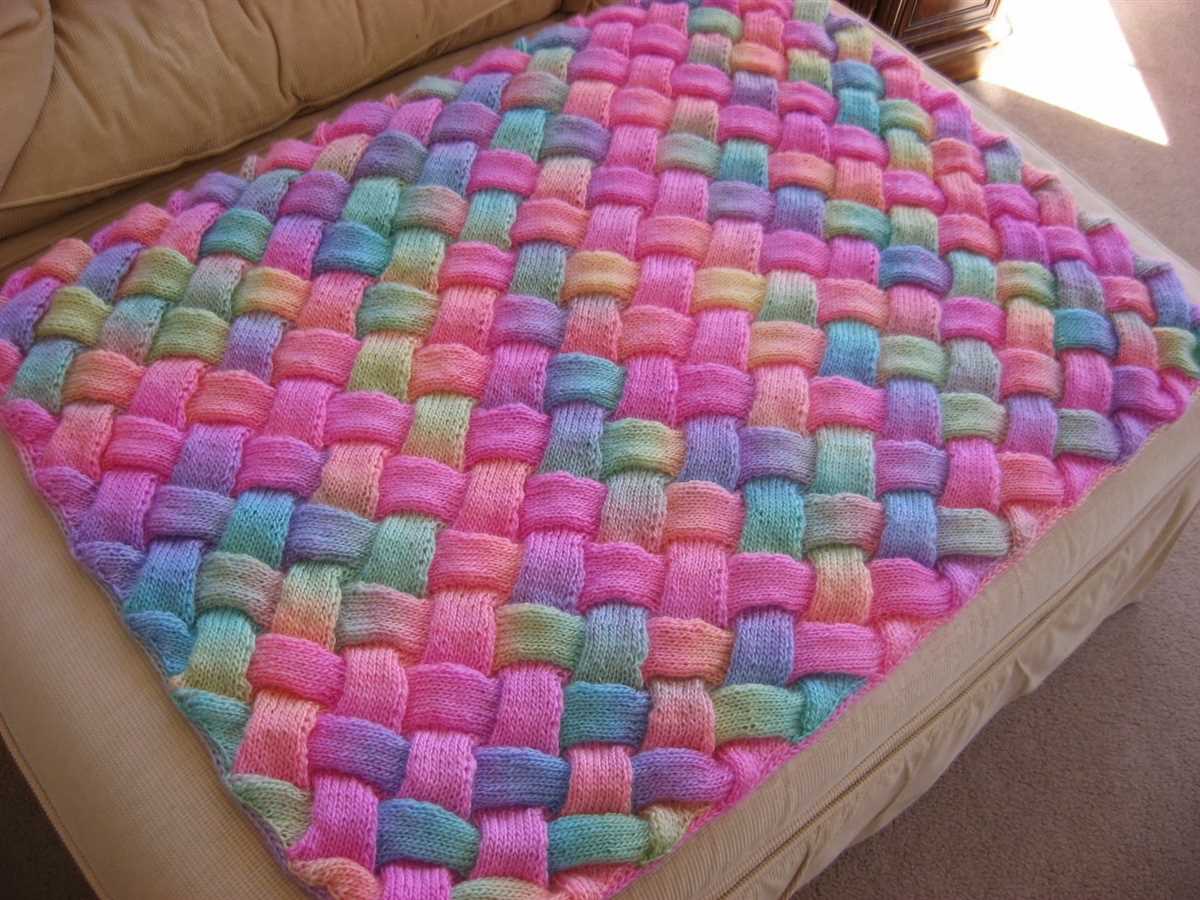
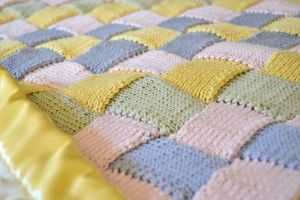
Next, think about the color and pattern of the yarn. Entrelac is a knitting technique that creates a series of interlocking blocks, so choosing a yarn with variegated or self-striping colors can highlight the geometric pattern. On the other hand, if you prefer a more subtle look, solid or tonal yarns can be a great choice.
Finally, select the right needles for your project. The recommended needle size for an entrelac blanket will depend on the weight of your chosen yarn. Generally, larger needle sizes, such as US 10 or US 11, are recommended for a medium to bulky weight yarn. However, it’s important to check the gauge of your pattern and adjust the needle size accordingly to achieve the desired dimensions. Circular needles are often preferred for larger projects like blankets, as they can accommodate a large number of stitches.
In summary, when choosing your yarn and needles for a free entrelac blanket knitting pattern, consider the weight and fiber of the yarn, the color and pattern, and the appropriate needle size. By carefully selecting these elements, you can ensure that your finished blanket will be both beautiful and functional.
Learn the basics of entrelac knitting
If you are looking to add an interesting texture and visual appeal to your knitting projects, entrelac knitting is a technique worth exploring. This unique style of knitting creates a quilted, woven appearance that resembles basket weaving. While it may appear complex at first glance, mastering the basics of entrelac knitting is easier than you might think.
What is entrelac knitting?
Entrelac knitting is a technique that involves knitting small squares or diamonds in a modular fashion. These individual squares are then joined together to create a larger fabric. The squares are knitted in a tiered pattern, with each row building upon the previous one. This creates the illusion of an interwoven fabric.
The basics of entrelac knitting
- Cast on: To begin your entrelac knitting project, you will need to cast on an initial number of stitches, which will determine the width of your squares or diamonds. You can use any cast-on method you prefer.
- Build the base triangles: The first row of squares in entrelac knitting is made up of base triangles. These triangles are formed by picking up stitches along the edge of the previous square. You will continue to pick up stitches and create triangles until you reach the desired width.
- Work the tiers: Once you have completed the base triangles, you can move on to the next tier. This involves picking up stitches along the edge of the previous tier and knitting more squares or diamonds. Each tier will have one less square or diamond than the previous tier, creating a tiered effect.
- Joining the squares: As you work through each tier, you will need to join the squares or diamonds together. This can be done using a variety of methods, such as knitting them together or using a separate joining stitch.
- Repeat and finish: Continue working through each tier, joining the squares or diamonds together until you reach the desired length of your project. Once you have completed all the tiers, you can bind off your stitches to finish your entrelac knitting.
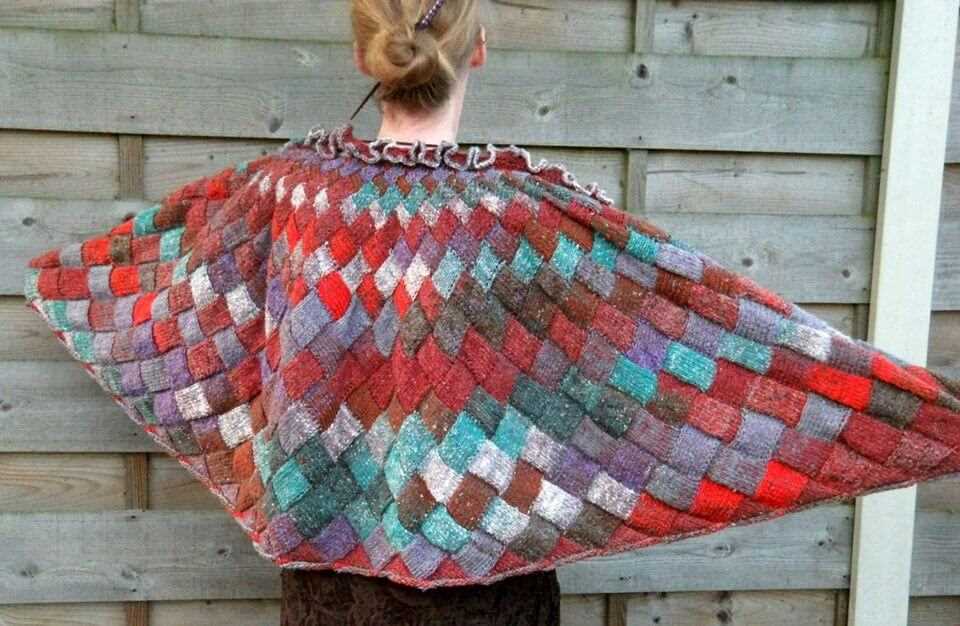
With practice, you will become more comfortable with the entrelac knitting technique and can experiment with different patterns and designs. Whether you choose to create a free entrelac blanket or incorporate entrelac panels into other projects, this technique will add a touch of elegance and sophistication to your knitting.
Cast on and create the base triangle
The first step in knitting an entrelac blanket is to cast on and create the base triangle. To begin, you will need to determine the number of stitches you want in your base triangle. This will depend on the size of the blanket you want to make, as well as your gauge and yarn choice. You can use a calculator or reference a knitting pattern to help you determine the appropriate number of stitches.
Once you have determined the number of stitches, you will cast on this amount using your preferred cast-on method. Make sure to leave a long tail for weaving in later. After casting on, you can create the base triangle by working short rows.
To work the short rows, you will knit or purl a certain number of stitches, then turn your work and knit or purl back in the opposite direction. This creates a series of wedges that form the base triangle. Each wedge will have one more stitch than the previous wedge, gradually increasing the width of the triangle.
Continue working the short rows until your base triangle reaches the desired size. This will depend on your pattern or personal preference. Once you have completed the base triangle, you can move on to the next step in the entrelac blanket pattern.
Knit the first tier of squares
To begin creating the entrelac blanket, you will first need to knit the first tier of squares. This will serve as the foundation for the rest of the blanket’s pattern. Using the free knitting pattern provided, you can follow along with the instructions to create each square in the tier.
Start by casting on the required number of stitches for the first square. The pattern will specify the exact number you need to cast on. Once your stitches are cast on, you can begin knitting the square using the specified stitch pattern. You may need to alternate between knit and purl stitches to achieve the desired texture.
If the pattern indicates that you need to make increases or decreases within the square, be sure to follow those instructions as well. These shaping techniques will help create the unique diamond shape characteristic of entrelac knitting.
Working the squares in tiers
Once you have completed the first square, you can move on to the next square in the first tier. Follow the pattern’s instructions to join the new square to the previous square. This may involve picking up stitches or working the two squares together.
Continue working each square in the first tier of the entrelac pattern, joining them together as specified in the pattern. As you progress, you will start to see the pattern take shape and the squares build upon each other to form a cohesive design.
Remember to refer to the knitting pattern instructions for any specific details or techniques required for knitting the first tier of squares. Take your time and enjoy the process of building the foundation for your entrelac blanket.
Join the squares together
Once you have completed all the individual entrelac squares for your blanket, it’s time to join them together to create a beautiful finished piece. There are a few different methods you can use to join your squares, depending on your preference and the desired look of your blanket.
1. Whip stitch method: One common method for joining entrelac squares is the whip stitch method. To do this, line up the edges of two squares and use a yarn needle to stitch through both layers, creating a seam. Repeat this process for each square until all the squares are joined together. This method creates a visible seam, adding a decorative touch to your blanket.
Note: If you are using a different color yarn to join your squares, it can create a striking contrast and enhance the visual appeal of your blanket.
2. Mattress stitch method: Another option for joining entrelac squares is the mattress stitch method. This method creates an invisible seam, giving your blanket a seamless and polished finish. To use this method, place the squares with their right sides together and use a yarn needle to stitch through the loops of each square, creating an almost invisible seam. Repeat this process for all the squares until your blanket is fully joined together.
Note: The mattress stitch method requires a bit more precision and attention to detail, but the end result is a seamless finish that is worth the extra effort.
3. Crochet join method: If you’re comfortable with crochet, you can also join your entrelac squares using a crochet hook. Simply single crochet through both loops of each square, joining them together. This method creates a decorative and sturdy join that adds a unique texture to your blanket.
Note: Experiment with different crochet stitches or yarn colors to create a customized join that complements your entrelac squares.
Regardless of the method you choose, joining your entrelac squares is an exciting step towards completing your blanket. Take your time and enjoy the process, knowing that each stitch brings you closer to a beautiful finished project.
Complete the second tier of squares
Now that you have completed the first tier of squares for your entrelac blanket, it’s time to move on to the second tier. This next step will continue to build upon the foundation you have already established and add even more depth and dimension to your blanket.
To begin the second tier, you will again cast on the necessary number of stitches for the first square. Follow the pattern instructions for each square, working your way across the row. Once you have reached the end of the row, you will turn your work and begin the next square, following the same process.
Note: Remember to always pick up stitches along the edges of the previous squares in order to connect them and create the entrelac pattern. This will ensure that your blanket maintains its beautiful and intricate design.
Continue to work through each square in the second tier, repeating the process of knitting and picking up stitches until you have completed all of the squares in this tier. As you progress, you will notice the blanket taking shape and the entrelac pattern becoming more prominent.
Tip: It can be helpful to use stitch markers or different colored yarn to keep track of which squares you have completed in each tier. This will help you stay organized and avoid any confusion as you work through the pattern.
Once you have finished the second tier, you can move on to subsequent tiers or continue repeating the process for additional layers of squares. The choice is yours! Just remember to follow the pattern instructions and take your time with each square to ensure that your entrelac blanket turns out beautifully.
Continuing Knitting Additional Tiers
Once you have completed the first few tiers of the entrelac pattern, you can continue knitting additional tiers to make your blanket larger. Here are the steps to follow:
1. Pick up Stitches
Start by picking up stitches along the leftmost edge of the completed tier. Insert your needle into the first stitch on the edge, wrap the working yarn around the needle, and pull it through to create a new stitch. Repeat this process, picking up stitches evenly along the edge until you have the desired number of stitches for your next tier. This will create a new set of base triangles.
2. Knit the Base Triangles
Once you have picked up the required number of stitches, you will now knit the base triangles for the new tier. Follow the same entrelac pattern as before, knitting each base triangle in turn. Remember to always start with a purl row and then alternate between knit and purl rows for each triangle.
3. Join the Squares
As you knit each base triangle, you will notice that it forms a square with the previously completed tier. To join the squares together, simply knit the last stitch of each base triangle together with the last stitch of the corresponding triangle from the previous tier. This will create a seamless transition between tiers and help secure the squares in place.
4. Repeat Steps 1-3
Continue repeating steps 1-3 until you have reached the desired size for your blanket. Each additional tier will add more squares and increase the overall size. Make sure to maintain the same pattern and tension throughout to ensure consistency in the finished blanket.
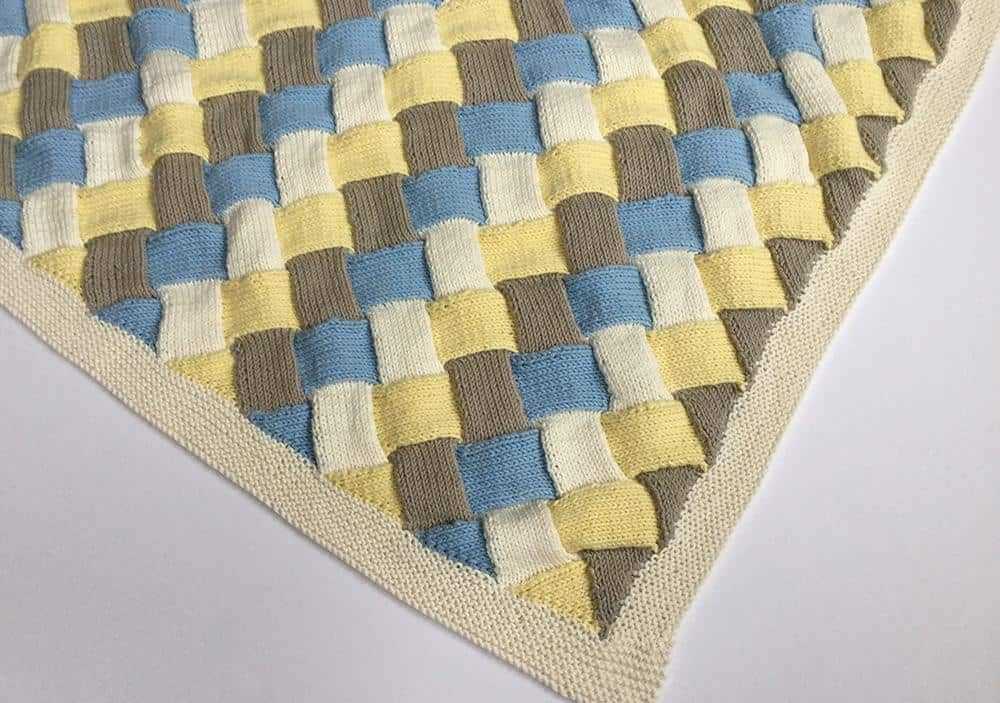
Add a border to your entrelac blanket
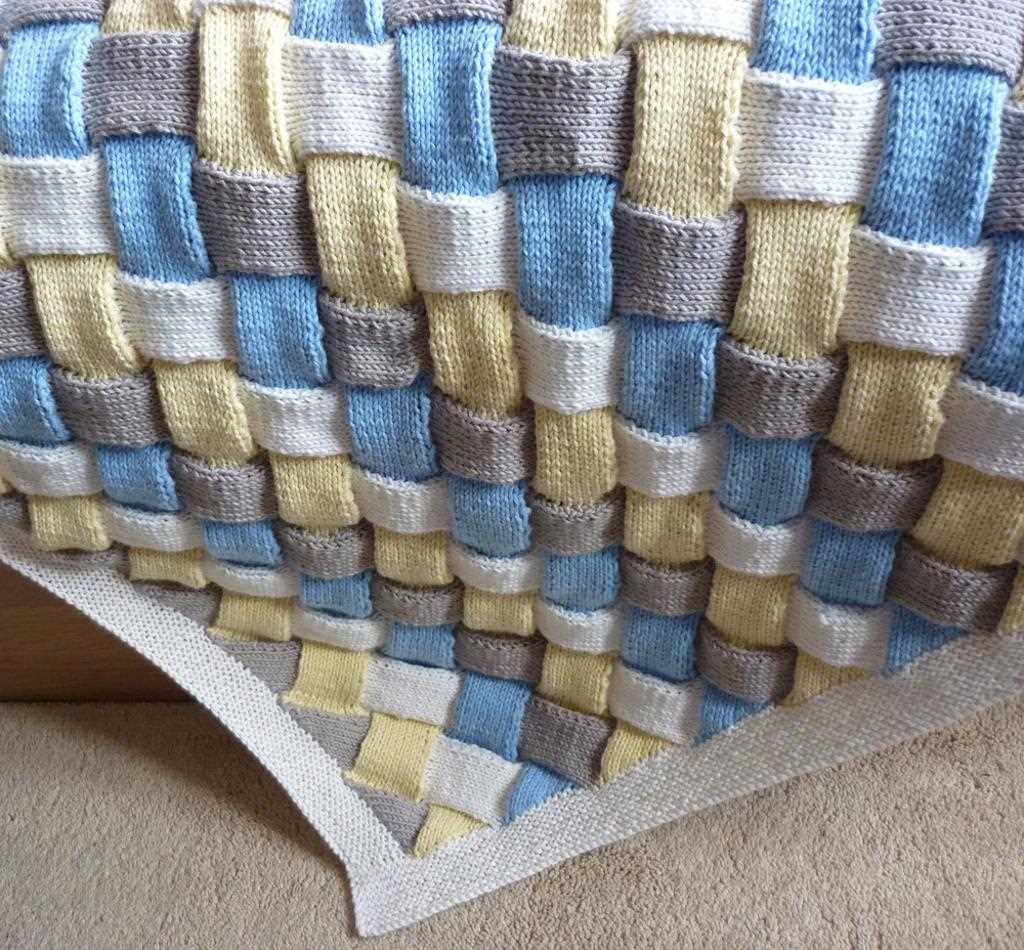
If you have just finished knitting an entrelac blanket, you might be wondering how to give it a finished look. One way to achieve this is by adding a border around the edges of the blanket. A border can help to frame the entrelac pattern and give it a neat and polished appearance.
To add a border to your entrelac blanket, you can use a contrasting color yarn or continue with the same color you used for the entrelac squares. This will depend on your personal preference and the overall look you want to achieve. You can also experiment with different stitch patterns or textures to create an interesting border.
A simple border option is to use a garter stitch. To do this, you will knit every stitch along the edges of the blanket, creating a neat and even border. This can be done by picking up stitches along the edges or by knitting additional rows around the blanket.
If you want a more decorative border, you can try using a lace pattern. This will add an airy and delicate touch to your entrelac blanket. Look for lace stitch patterns that complement the entrelac design, such as leaf or flower motifs. You can find a wide variety of lace stitch patterns in knitting stitch dictionaries or online resources.
Alternatively, you can also add a ribbed border to your entrelac blanket. This will give it a more structured and textured look. You can choose between different ribbing patterns, such as 1×1 or 2×2 ribbing, depending on your preference. Ribbing can be worked by alternating knit and purl stitches along the edges of the blanket.
Whatever border option you choose, make sure to take the measurements of your entrelac blanket before starting. This will help you determine the number of stitches and rows needed for the border. Don’t forget to block your blanket before adding the border to ensure that it lays flat and the stitches are even throughout. With a beautiful border, your entrelac blanket will be ready to keep you warm and cozy!
Weave in loose ends and block your blanket
Once you have finished knitting your entrelac blanket, you will need to weave in any loose ends to ensure that your blanket has a neat and finished appearance. This step is important as it helps to secure the yarn and prevent it from unraveling over time. To weave in the ends, thread the loose end onto a yarn needle and sew it through the stitches on the wrong side of the fabric, following the path of the yarn. Make sure to sew in the ends securely, but without puckering or distorting the fabric.
After weaving in all the loose ends, it is time to block your blanket. Blocking is the process of shaping your knitted fabric to the desired dimensions and allowing it to relax into its final shape. To block your entrelac blanket, first, fill a basin or sink with lukewarm water and add a small amount of mild detergent. Gently submerge the blanket in the water, making sure it is fully saturated. Allow it to soak for about 15 minutes.
Next, carefully remove the blanket from the water and gently squeeze out the excess water. Lay the blanket flat on a clean towel and roll it up to remove any remaining moisture. Unroll the towel and lay the blanket flat on a blocking board or any flat surface that can be pinned into.
Using T-pins or blocking wires, shape the blanket to the desired dimensions, pulling and straightening the fabric as you go. Pay special attention to the edges and corners to ensure they are nice and even. Once you are satisfied with the shape, leave the blanket to dry completely. This may take a day or two, depending on the climate and thickness of the fabric.
Once the blanket is dry, carefully remove the pins or wires and admire your beautifully blocked entrelac blanket. Blocking helps to open up the stitches and even out any inconsistencies in tension, resulting in a professional-looking finished project. Your blanket is now ready to be used and enjoyed or given as a thoughtful gift.
Tips and Tricks for Creating a Beautiful Entrelac Blanket
Knitting an entrelac blanket can be a rewarding and enjoyable experience. However, it can also be a bit challenging, especially for beginners. To help you create a stunning entrelac blanket, here are some tips and tricks to keep in mind:
1. Choose the right yarn
Select a yarn that is soft and comfortable, as you want your blanket to be cozy and warm. Opt for yarns with good stitch definition to enhance the pattern of the entrelac design. Wool blends and acrylic are popular choices for entrelac blankets.
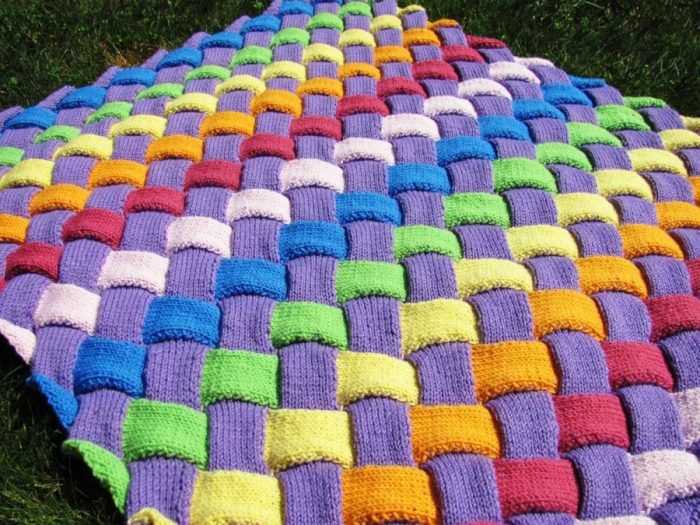
2. Use different colors
Playing with color is one of the highlights of entrelac knitting. Experiment with different color combinations to create a visually appealing blanket. You can use a mix of solid colors, variegated yarns, or even gradient yarns to achieve stunning effects.
3. Block your squares
Blocking is an essential step in ensuring that each square in your entrelac blanket is the same size and shape. This process involves soaking your knitted squares in water and then pinning them to the desired dimensions. It helps create a uniform look and makes joining the squares easier.
4. Pay attention to tension
Consistent tension is crucial when knitting entrelac. The tension affects the overall appearance of the squares and how they fit together. Take your time to ensure that you are knitting each square with the same tension to achieve a polished and professional-looking blanket.
5. Join the squares with care
The final step in creating your entrelac blanket is joining the individual squares together. Use a joining technique that suits your preference, such as mattress stitch or whip stitch. Take your time and be careful to align the squares properly to maintain the pattern continuity.
6. Don’t be afraid to try new stitches
Entrelac knitting offers an excellent opportunity to experiment with different stitch patterns. While the basic entrelac pattern is worked using knit and purl stitches, you can incorporate more intricate stitches within each square for added texture and interest.
By following these tips and tricks, you’ll be well-equipped to create a beautiful entrelac blanket that showcases your knitting skills. Have fun with the process and enjoy the satisfaction of completing such a remarkable project!