
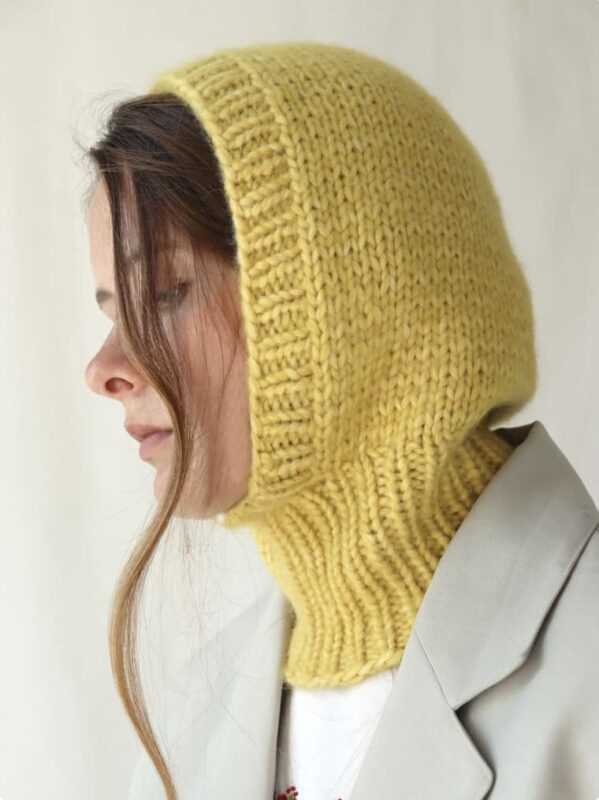
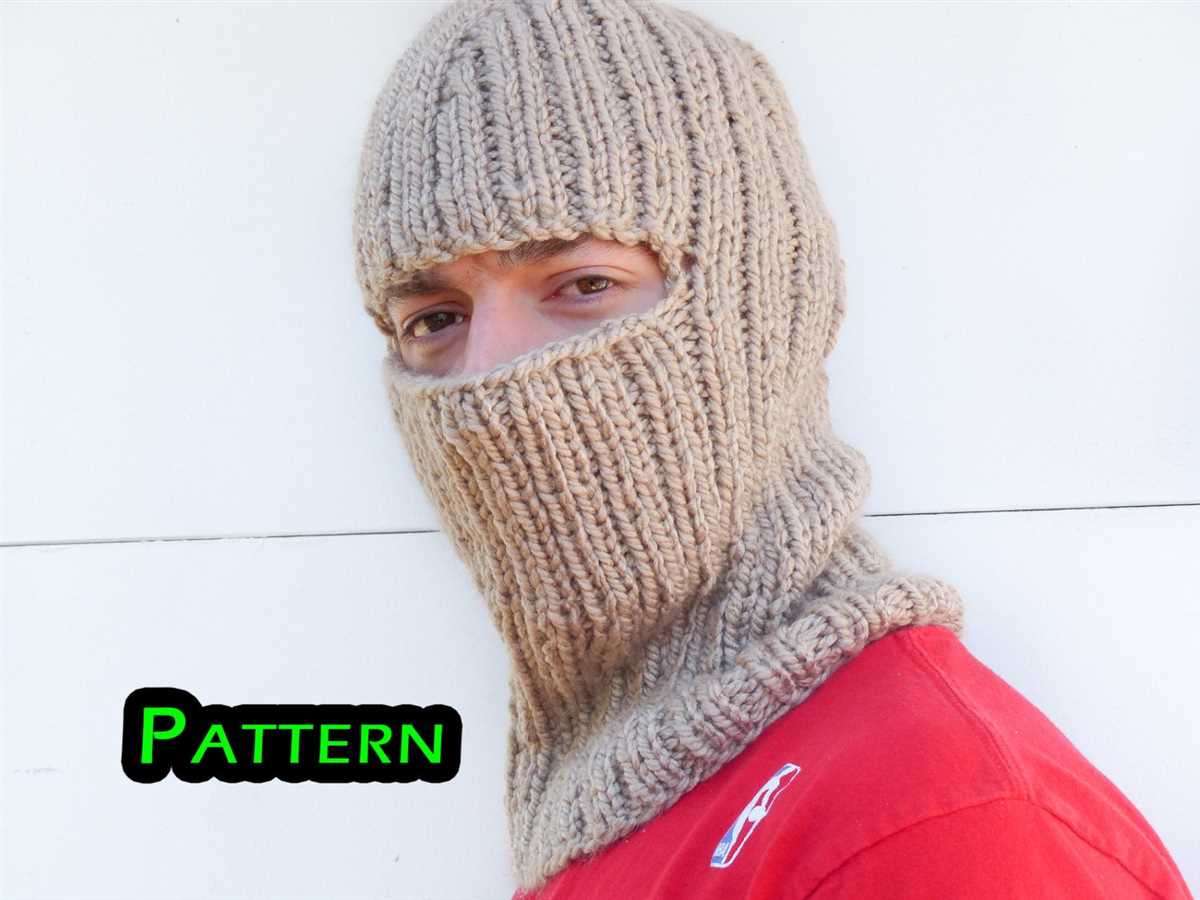
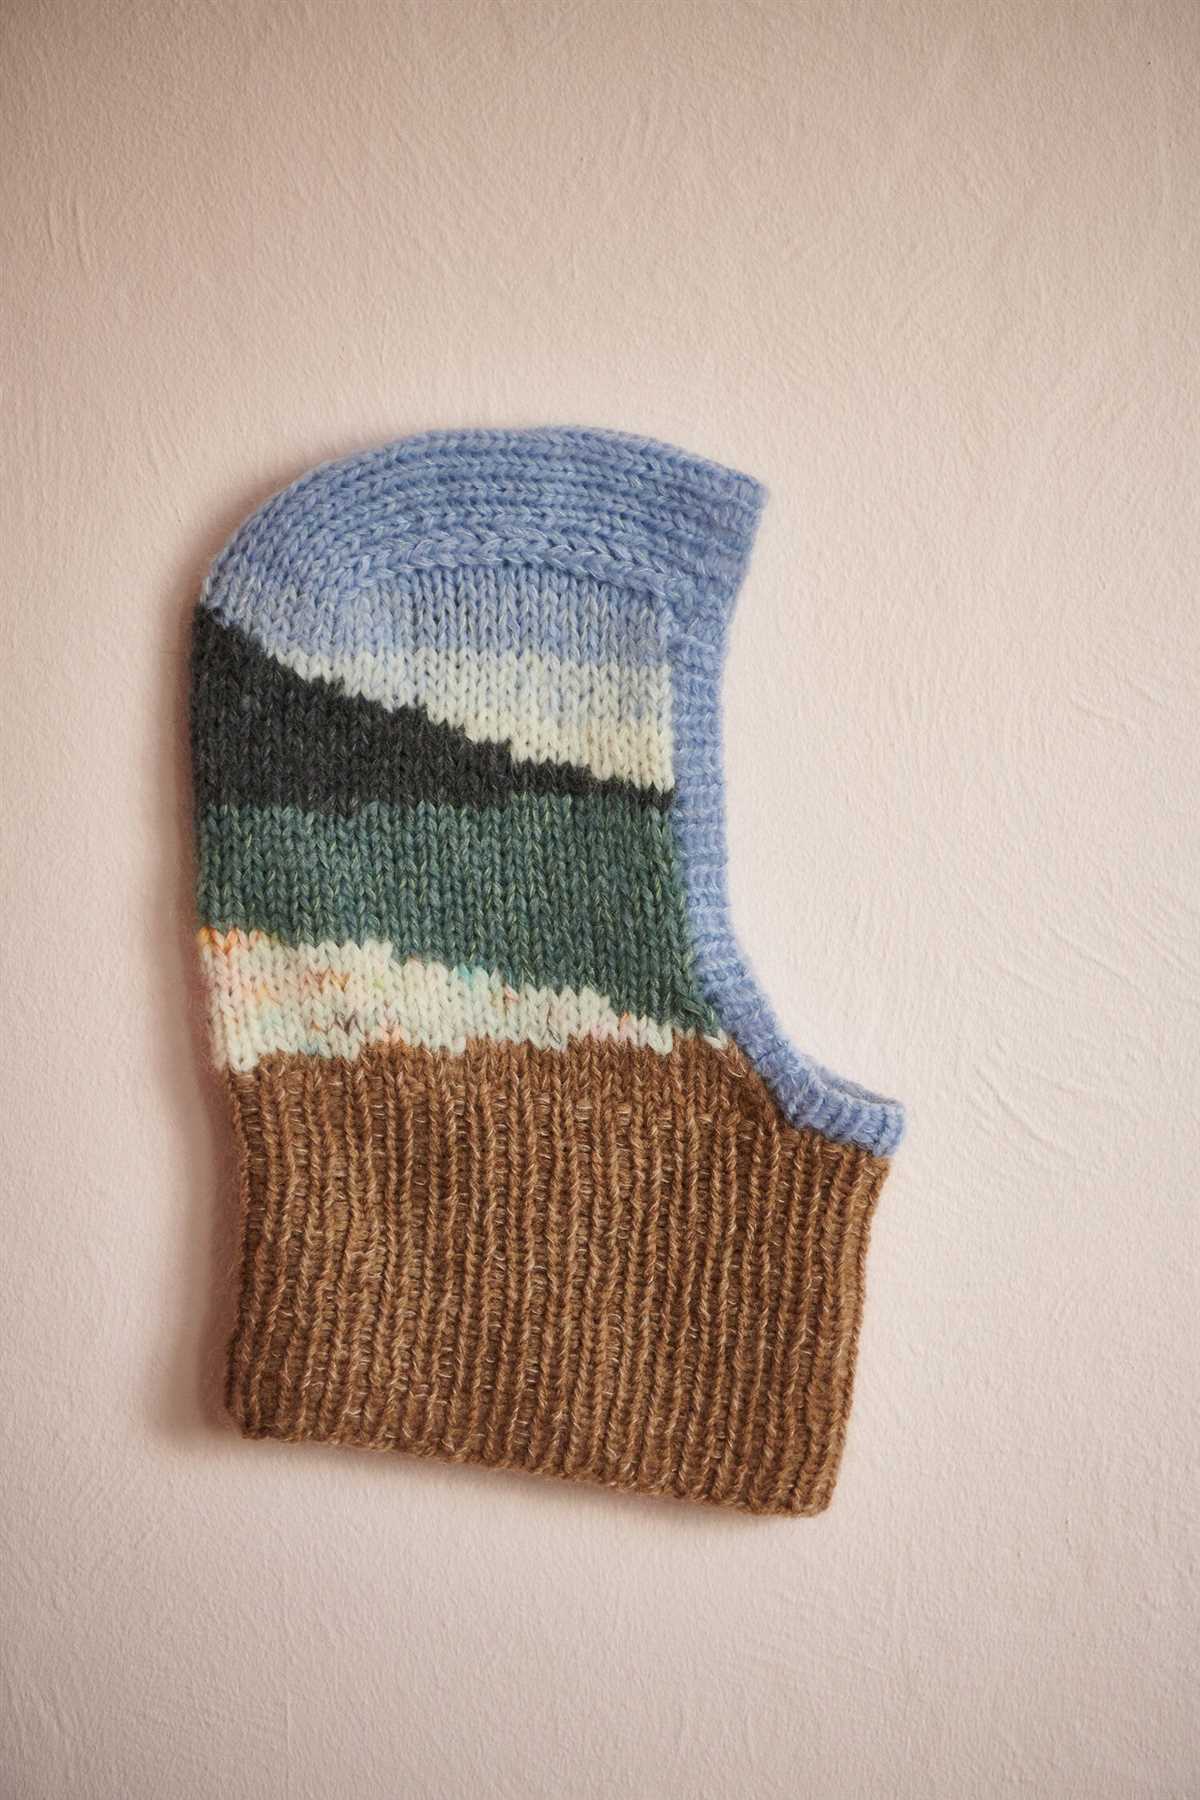
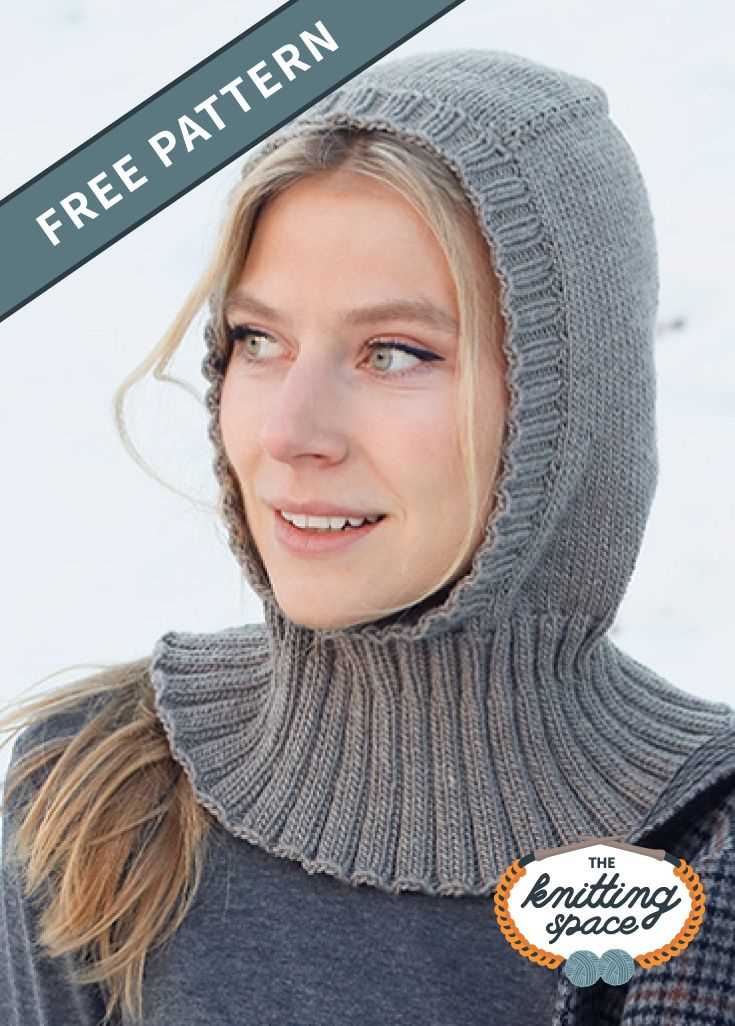
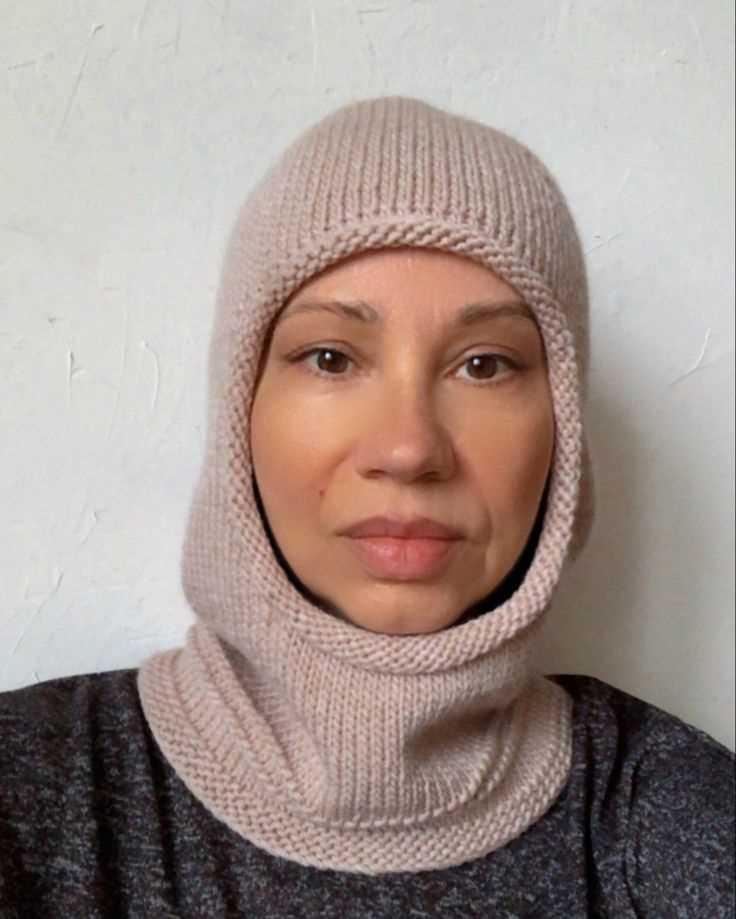
Balaclavas are a warm and stylish accessory to have during the winter months. They cover not only your head, but also your neck and sometimes even your face, providing the ultimate protection against cold temperatures and wind. If you are an avid knitter and love creating your own unique pieces, then look no further. We have a free balaclava knitting pattern that can be done using straight needles, making it accessible for knitters of all skill levels.
This pattern is perfect for those who are not yet comfortable using circular needles or prefer the simplicity of straight needles. With this pattern, you will be able to create a beautiful and functional balaclava that will keep you warm and cozy during the winter months. Whether you are a beginner or an experienced knitter, this pattern is a great option for anyone looking to add a stylish and practical accessory to their winter wardrobe.
The best part about this free balaclava knitting pattern is that it requires basic knitting skills and materials that are easily accessible. You will need straight knitting needles, yarn of your choice, and a few other knitting accessories. The pattern includes a step-by-step guide with detailed instructions and helpful tips to ensure your balaclava turns out perfect every time. So grab your knitting needles and get ready to create a fashionable and functional accessory that will keep you warm all winter long.
How to Knit a Free Balaclava Pattern with Straight Needles
Knitting a balaclava is a great way to keep yourself or your loved ones warm during colder months. In this tutorial, we will guide you through the process of knitting a balaclava using straight needles. This pattern is perfect for beginners and requires basic knitting skills.
Materials:
- Straight knitting needles (size 8)
- Worsted weight yarn (approximately 200 yards)
- Tapestry needle
- Scissors
Instructions:
- Start by casting on 72 stitches.
- Begin the pattern by knitting 2 stitches, then purling 2 stitches. Repeat this pattern until the end of the row.
- Continue knitting in a rib stitch pattern (knit 2, purl 2) for the next 2 inches.
- After knitting the rib stitches, switch to stockinette stitch by knitting every row. Continue knitting in stockinette stitch until the piece measures approximately 9 inches.
- Next, it’s time to shape the crown of the balaclava. Decrease 1 stitch at the beginning and end of every other row until you have 44 stitches remaining.
- Once you have 44 stitches, continue knitting in stockinette stitch until the piece measures approximately 15 inches from the cast-on edge.
- Now, it’s time to create the face opening. Knit the first 22 stitches, bind off the next 20 stitches, and then knit the last 22 stitches.
- After completing the face opening, continue knitting each section separately. Knit 22 stitches, then decrease 1 stitch at the beginning of every row until you have 10 stitches remaining.
- Finally, bind off the remaining 10 stitches and weave in any loose ends.
Once you’ve finished knitting the balaclava, you can fold up the bottom edge for added warmth or leave it as is. This pattern is versatile and can be customized to fit your preferences. Feel free to experiment with different yarn colors and stitch patterns to create a unique balaclava. Stay warm and enjoy your handmade balaclava!
Materials and Tools
Before you start knitting your balaclava, it’s important to gather all the necessary materials and tools. Here’s a list of what you’ll need:
- Straight knitting needles: You’ll need a pair of straight knitting needles, preferably in a size that is comfortable for you to work with. The size of the needles will depend on the yarn weight you choose.
- Yarn: Choose a yarn that is suitable for the balaclava pattern you are using. Look for a soft and warm yarn that will keep you comfortable in cold weather. The amount of yarn you’ll need will also vary depending on the pattern.
- Tapestry needle: A tapestry needle is essential for weaving in loose ends and sewing any seams or stitches together. Make sure to choose a needle with a large eye that can accommodate your yarn.
- Stitch markers: Stitch markers are helpful for keeping track of specific stitches or sections in your knitting. You can use commercial stitch markers or make your own with scraps of yarn or safety pins.
- Measuring tape: A measuring tape is useful for checking your gauge and measuring the size of your finished balaclava. Make sure to choose a flexible measuring tape that is suitable for measuring fabric.
- Scissors: A pair of sharp scissors is necessary for cutting yarn and trimming any excess fabric. Choose a pair of scissors that is comfortable to hold and has a pointed tip for precision cutting.
- Row counter: A row counter can be a handy tool for keeping track of the number of rows you’ve knitted. It helps you stay organized and ensures that you follow the pattern accurately.
Having these materials and tools ready before you start knitting will make the process much smoother and more enjoyable. Make sure your needles and yarn are in good condition, and double-check your pattern for any additional materials or tools that may be required.
Choosing the Right Yarn
When it comes to knitting a balaclava, choosing the right yarn is crucial. The yarn you select will determine the warmth, durability, and overall comfort of the final product. It is important to consider a few key factors when choosing yarn for your balaclava knitting project.
1. Fiber Content
The first thing to consider is the fiber content of the yarn. For a warm and cozy balaclava, it is best to choose a yarn made of natural fibers such as wool or alpaca. These fibers have excellent insulating properties and will keep you warm even in cold and windy conditions. Synthetic fibers like acrylic or nylon can also be used, but they may not provide the same level of warmth as natural fibers.
2. Weight and Thickness
The weight and thickness of the yarn will determine the overall feel of the balaclava. Thicker yarns will result in a chunkier and warmer balaclava, while thinner yarns will create a more lightweight and breathable garment. Consider the climate and the intended use of the balaclava when selecting the weight and thickness of the yarn.
3. Care Instructions
It is important to consider the care instructions of the yarn, especially if you plan to wear the balaclava frequently or in outdoor activities. Some yarns require special care, such as hand washing or drying flat, while others can be machine washed and dried. Choose a yarn that fits your lifestyle and preferences when it comes to care instructions.
4. Color and Design
The color and design of the yarn can add a personal touch to your balaclava. Consider your personal style and the purpose of the balaclava when choosing the color and design. A solid color yarn can create a classic and versatile balaclava, while a yarn with variegated colors or patterns can add a fun and unique flair.
By considering these factors and choosing the right yarn for your balaclava knitting project, you can create a comfortable and stylish garment that will keep you warm in any weather.
Casting On
When starting a knitting project, one of the first steps is casting on. Casting on is the process of creating the first row of stitches on the knitting needles. In the case of a balaclava pattern, casting on is particularly important as it sets the foundation for the entire project.
To cast on for a balaclava using straight needles, start by making a slipknot. This is done by creating a loop with the yarn, crossing the working end over the tail end and pulling it through the loop to create the knot. Place the slipknot on one of the knitting needles.
Next, hold the knitting needle with the slipknot in your right hand, and with your left hand, hold the working yarn over your fingers. Insert the needle into the slipknot from front to back, wrapping the yarn around the needle. Pull the loop of yarn through the slipknot, creating a new stitch on the needle.
Continue to cast on stitches by repeating this process until you have the required number of stitches for your balaclava pattern. Make sure to maintain an even tension on the yarn to create uniform stitches. Once all the stitches are cast on, you can proceed with the next steps of the pattern, such as knitting the first row.
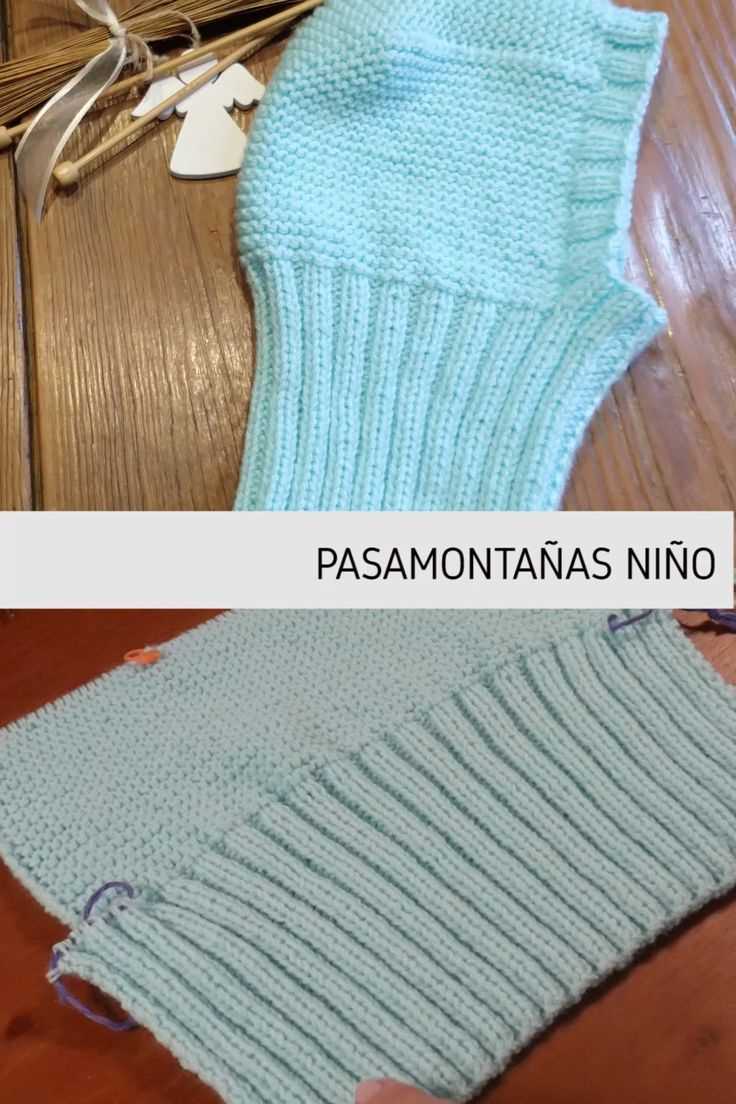
The Ribbing
The ribbing is an essential part of any balaclava knitting pattern as it provides elasticity and a snug fit. It is typically worked at the beginning of the pattern to create the brim or edge of the balaclava. The ribbing is often done using a smaller needle size to create a tighter, stretchy fabric.
Materials: To knit the ribbing, you will need straight knitting needles and your chosen yarn. It is recommended to use a worsted weight yarn and needles that match the recommended gauge for the yarn.
Instructions:
- Cast on the required number of stitches using the long-tail cast on method. This will create a neat and stretchy edge for the ribbing.
- Once the stitches are cast on, begin working in a rib stitch pattern. The most common rib stitch pattern is the 1×1 rib, which alternates between knitting one stitch and purling one stitch.
- Continue working in the rib stitch pattern for the desired length of the ribbing. This will depend on the particular balaclava pattern you are following, so be sure to consult the instructions for the recommended length.
- After completing the ribbing, you can transition to the main body of the balaclava pattern as specified in the instructions.
Remember to keep your tension consistent throughout the ribbing to ensure a professional-looking finish. It may also be helpful to use stitch markers to indicate the beginning of the round or any pattern repeats.
Overall, the ribbing is an important element of a balaclava knitting pattern as it provides structure and a comfortable fit. By following the instructions and working the ribbing with care, you will be well on your way to creating a cozy and stylish balaclava.
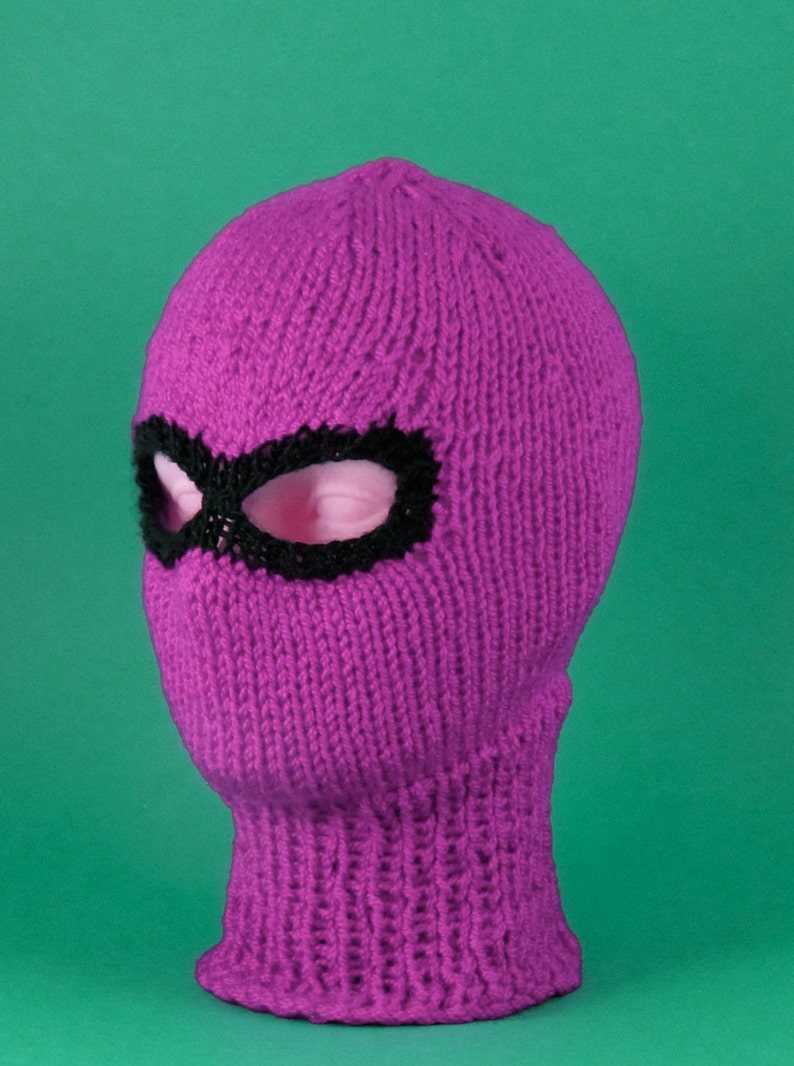
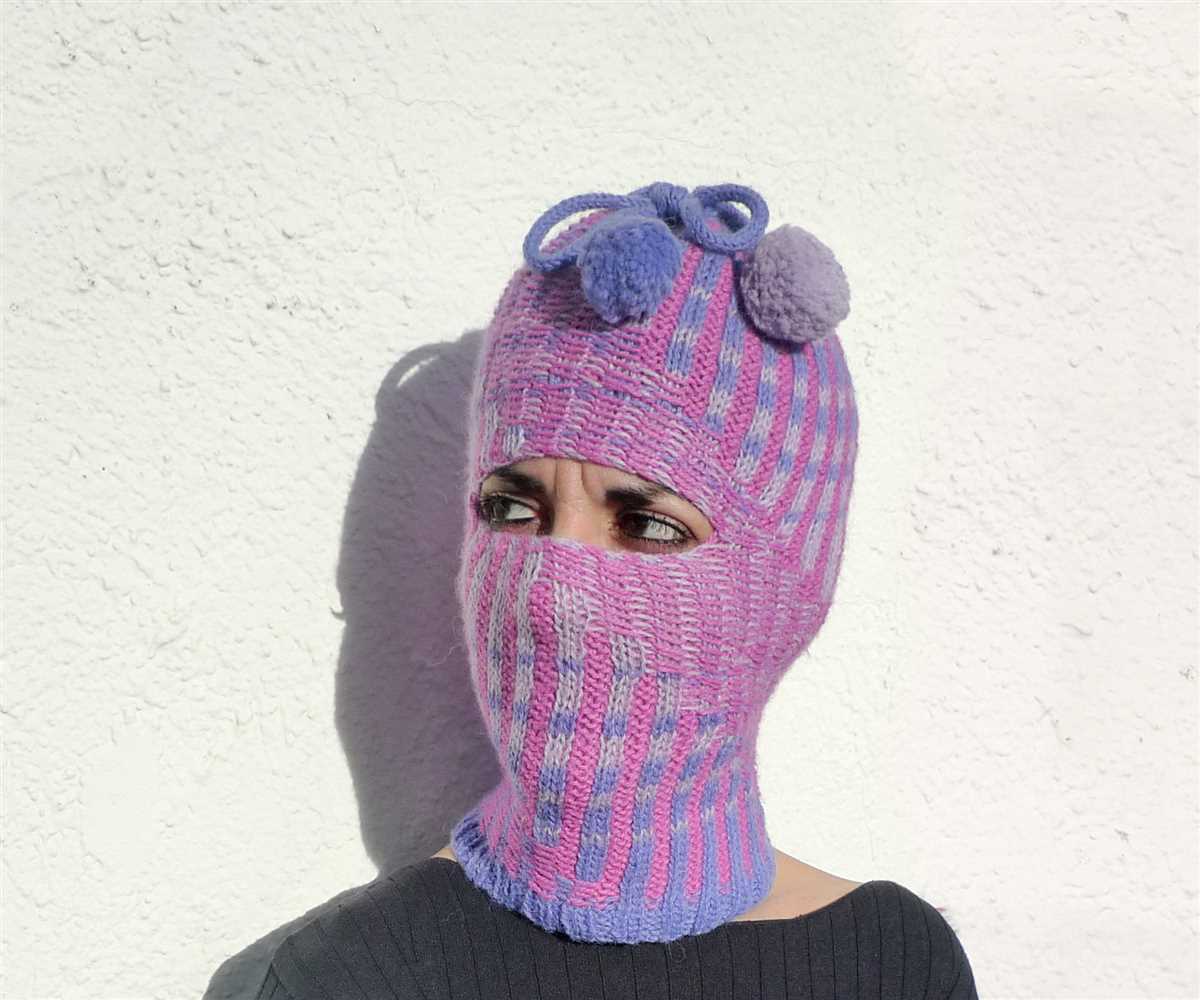
Creating the Face Opening
When knitting a balaclava, creating the face opening is an important step to ensure a comfortable fit and proper coverage. The face opening is where the wearer’s eyes and mouth will be exposed, allowing for clear vision and easy breathing while keeping the rest of the face warm and protected.
To create the face opening, you can start by marking the center of your work with a stitch marker. This will serve as a guide when working on the face opening. Then, you will need to decrease the stitches in the marked section to form a hole. You can achieve this by knitting two stitches together at regular intervals on each side of the center marker. This will gradually decrease the number of stitches in the face opening section.
It’s important to refer to the specific pattern you are following for the exact number of stitches to decrease and the interval at which to do so. This will ensure that the face opening is the correct size and shape for the balaclava. Additionally, you may need to adjust the tightness of your knitting to ensure a snug fit around the face opening. If the opening is too loose, you can try knitting tighter or using smaller needles. If it is too tight, you can try knitting looser or using larger needles.
Knitting the Main Body
To begin knitting the main body of the balaclava, you will first need to cast on a certain number of stitches. The number of stitches you cast on will depend on the size of the balaclava you are making and the gauge of your knitting needles and yarn. You can refer to the pattern for the specific number of stitches to cast on.
Once you have cast on the stitches, you will then begin knitting in the round using a stockinette stitch. This means that you will knit every round, creating a smooth and even fabric. You can use a set of double-pointed needles or use the magic loop technique with a long circular needle, depending on your personal preference.
To maintain the shape and structure of the balaclava, it is important to ensure that your tension remains consistent throughout. Be mindful of your knitting technique, keeping your stitches and tension even. This will help to prevent any inconsistencies in the finished product.
Continue knitting the main body of the balaclava for the specified number of rounds, following the pattern instructions. Pay attention to any shaping or stitch pattern changes that may be needed. Once the main body is complete, you can move on to the next steps of the pattern, such as shaping the face opening, adding ear flaps, or creating the top crown of the balaclava.
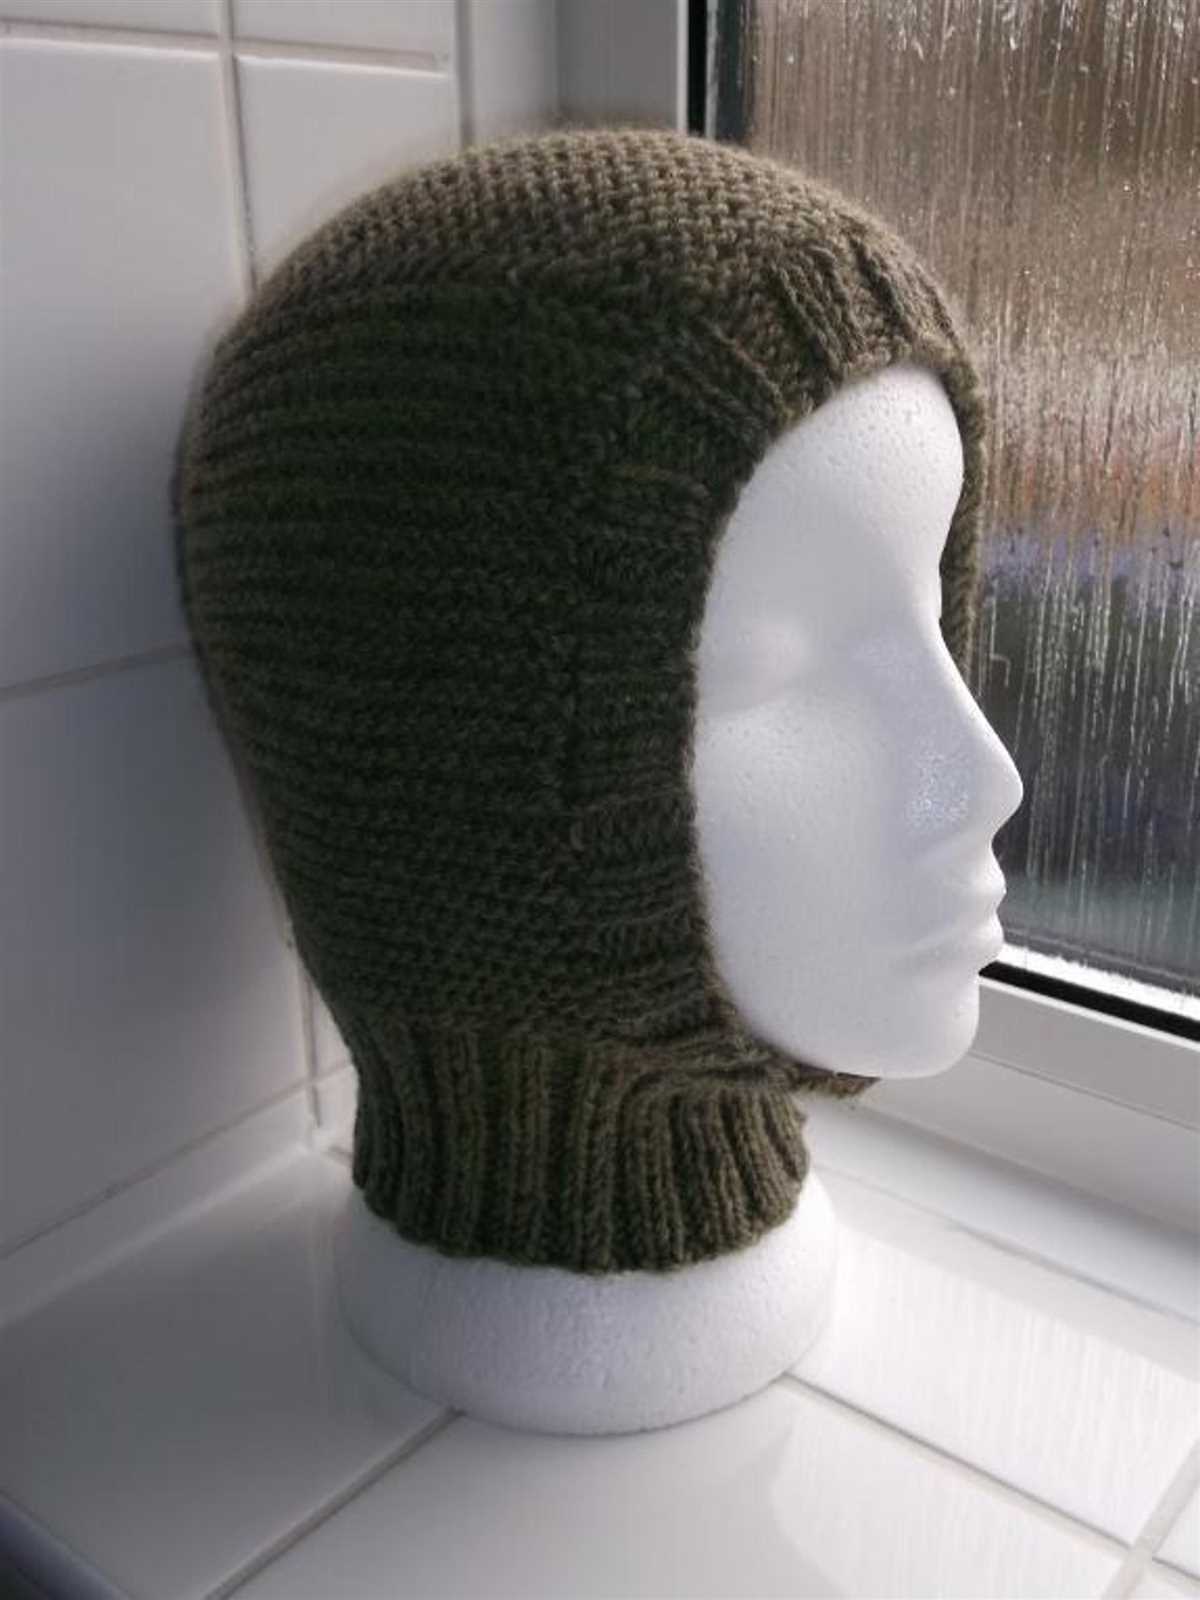
Shaping the Top

Once you’ve completed the required number of decreases for the balaclava, it’s time to shape the top. This is where you’ll be creating the opening for the face and the crown of the head. The shaping is done by continuing to decrease stitches in a specific pattern.
Start by knitting a few rows even, maintaining the established stitch pattern. Then, begin the decreasing rounds. You can use a variety of decrease stitches, such as knit two together (k2tog) or slip slip knit (ssk), to shape the top. Follow the instructions for the pattern you’re using to determine the specific decrease stitches and rounds.
Here’s an example of how you can shape the top:
- Row 1: Knit all stitches
- Row 2: Purl all stitches
- Row 3: Knit all stitches
- Row 4: Purl all stitches
- Row 5: *K2tog, knit 2 stitches. Repeat from * to end of row
- Row 6: Purl all stitches
- Row 7: *K2tog, knit 1 stitch. Repeat from * to end of row
- Row 8: Purl all stitches
- Row 9: Knit all stitches
Repeat these rows, decreasing stitches as instructed, until the desired number of stitches remains. This will create a snug opening for the face and shape the crown of the balaclava.
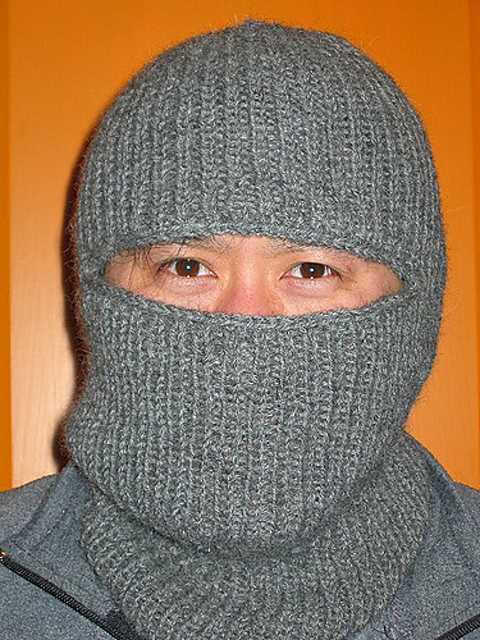
Knitting the Eye Opening
When knitting a balaclava with straight needles, the eye opening is an important component to consider. The eye opening allows the wearer to have clear visibility while keeping their face protected. It is important to create a snug and secure eye opening that will not stretch out over time. Here are some steps to follow when knitting the eye opening.
Step 1: Begin by knitting the balaclava following the pattern instructions for the main body. Once you reach the desired length for the face portion, it is time to start creating the eye opening.
Step 2: To start the eye opening, knit across the desired number of stitches in the row. This will create the base for the eye opening. The number of stitches will depend on the desired width of the eye opening and can be adjusted according to personal preference.
Step 3: Next, purl the next row to create a smooth transition between the knitted and purled rows. This will help prevent any bumps or unevenness along the eye opening edge.
Step 4: Continue knitting and purling the eye opening rows according to the pattern instructions. It is important to maintain consistency and accuracy while creating the eye opening to ensure it is symmetrical and well-finished.
Step 5: Once the eye opening is complete, continue knitting the remaining rows for the main body of the balaclava. Make sure to follow the pattern instructions carefully to avoid any mistakes or inconsistencies.
Step 6: Finally, bind off the stitches once you have reached the desired length for the face portion of the balaclava. This will ensure a neat and clean finish.
By following these steps, you can successfully knit the eye opening for a balaclava using straight needles. Remember to pay attention to the pattern instructions and adjust the number of stitches according to personal preference. With a well-crafted eye opening, the balaclava will not only keep the wearer warm, but also provide clear visibility when needed.
Finishing and Binding Off
After completing the main body of the balaclava, it’s time to finish the edges and bind off your knitting. The finishing touches will give your balaclava a polished look and ensure that it stays in place while being worn.
To finish the edges, you can use several techniques depending on the look you want to achieve. One option is to add ribbing to the bottom edge of the balaclava. You can do this by switching to smaller needles and knitting a few rows in a 1×1 or 2×2 rib stitch. This will create a stretchy edge that will help the balaclava fit securely around the wearer’s face.
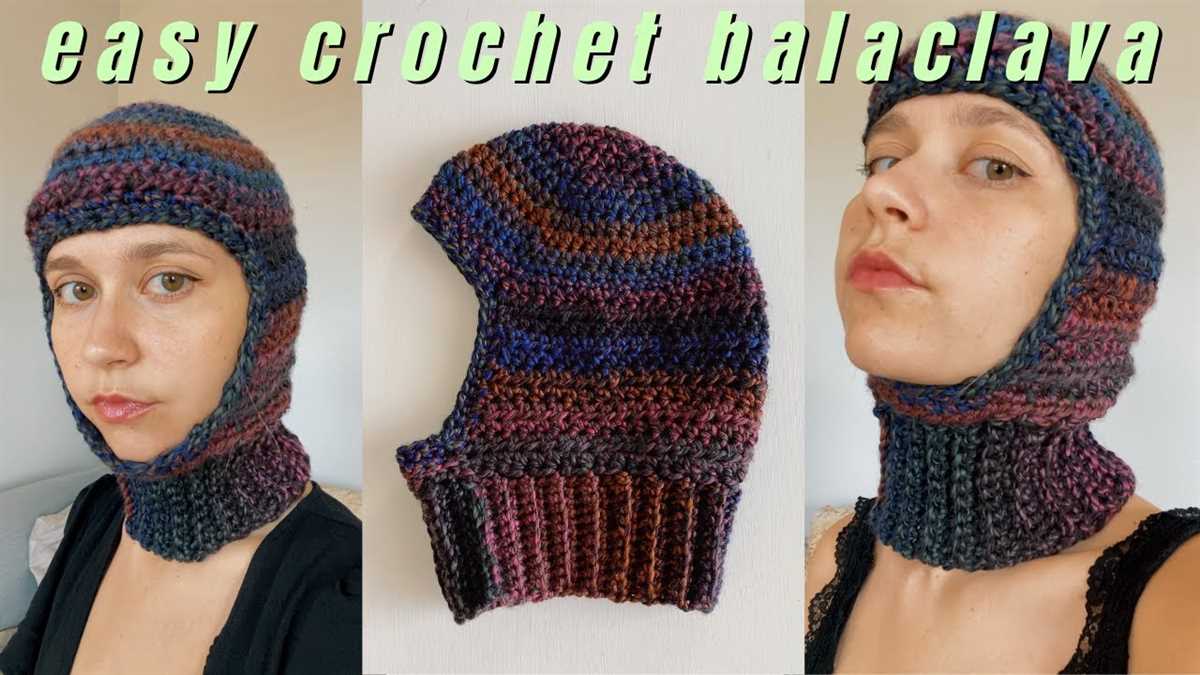
Another option is to add a crochet border to the edges. This can be done by using a crochet hook to pick up stitches along the edge of the balaclava and working a simple crochet stitch around the edge. This will create a neat and finished edge that will prevent the knitting from unraveling.
Once the edges are finished, you can bind off your knitting. This is the process of securing the stitches and creating a neat edge. To bind off, knit the first two stitches. Then, using your left needle, lift the first stitch over the second stitch and off the needle. Knit the next stitch and repeat the process of lifting the previous stitch over the new one. Continue in this way until you have one stitch remaining, then cut the yarn and pull it through the remaining stitch to secure it.
With the finishing and binding off complete, your balaclava is ready to be worn or given as a gift. The final result will be a cozy and stylish accessory that provides warmth and protection in cold weather.
Customization Options
When it comes to knitting a balaclava using straight needles, there are several customization options available. These options allow you to modify the pattern to suit your personal preferences and needs. Here are a few ideas:
Sizing
One of the main customization options is adjusting the size of the balaclava. You can easily make it smaller or larger by either increasing or decreasing the number of stitches in the pattern. It’s important to consider the head circumference of the wearer and make adjustments accordingly.
Length
The length of the balaclava is another aspect that can be customized. Some people prefer a shorter style that only covers the neck and part of the face, while others may want a longer version that provides more coverage. By adding or removing rows to the pattern, you can easily adjust the length to your liking.
Color
Personalize your balaclava by choosing your favorite color. With an array of yarn colors available, you can create a balaclava that matches your style or complements your winter wardrobe. Consider using bold and vibrant colors to make a statement or opt for more neutral tones for a classic look.
Pattern Modifications
If you’re feeling adventurous, you can make additional modifications to the pattern to add unique features. For example, you could incorporate cables or lace panels to make your balaclava stand out. You could also experiment with different stitch patterns or texture techniques to create a one-of-a-kind design.
Conclusion
Knitting a balaclava using straight needles provides a great opportunity for customization. Whether it’s adjusting the size, length, or incorporating unique design elements, you can create a balaclava that fits your style and meets your specific needs. Get creative and enjoy the process of making a personalized balaclava that will keep you warm and stylish during the winter months.