
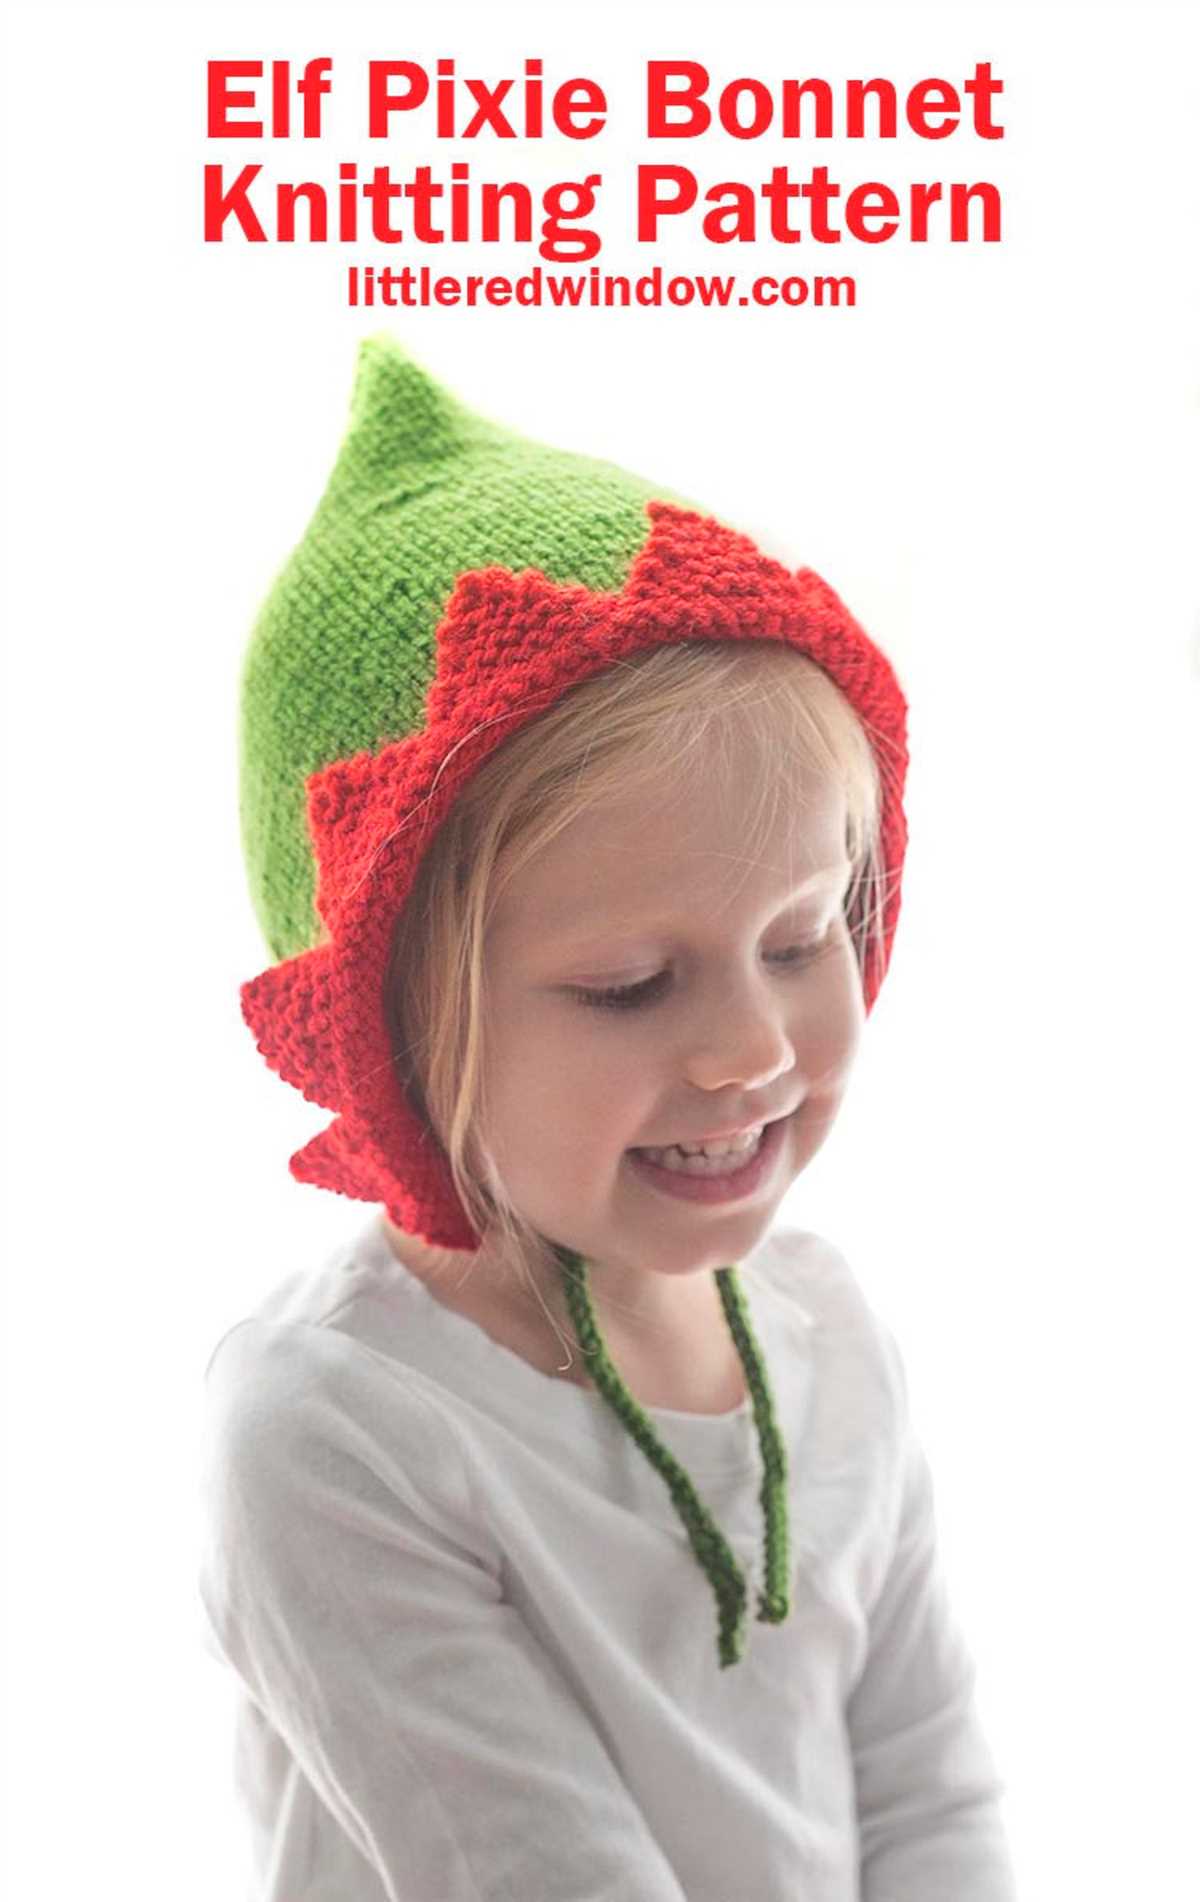
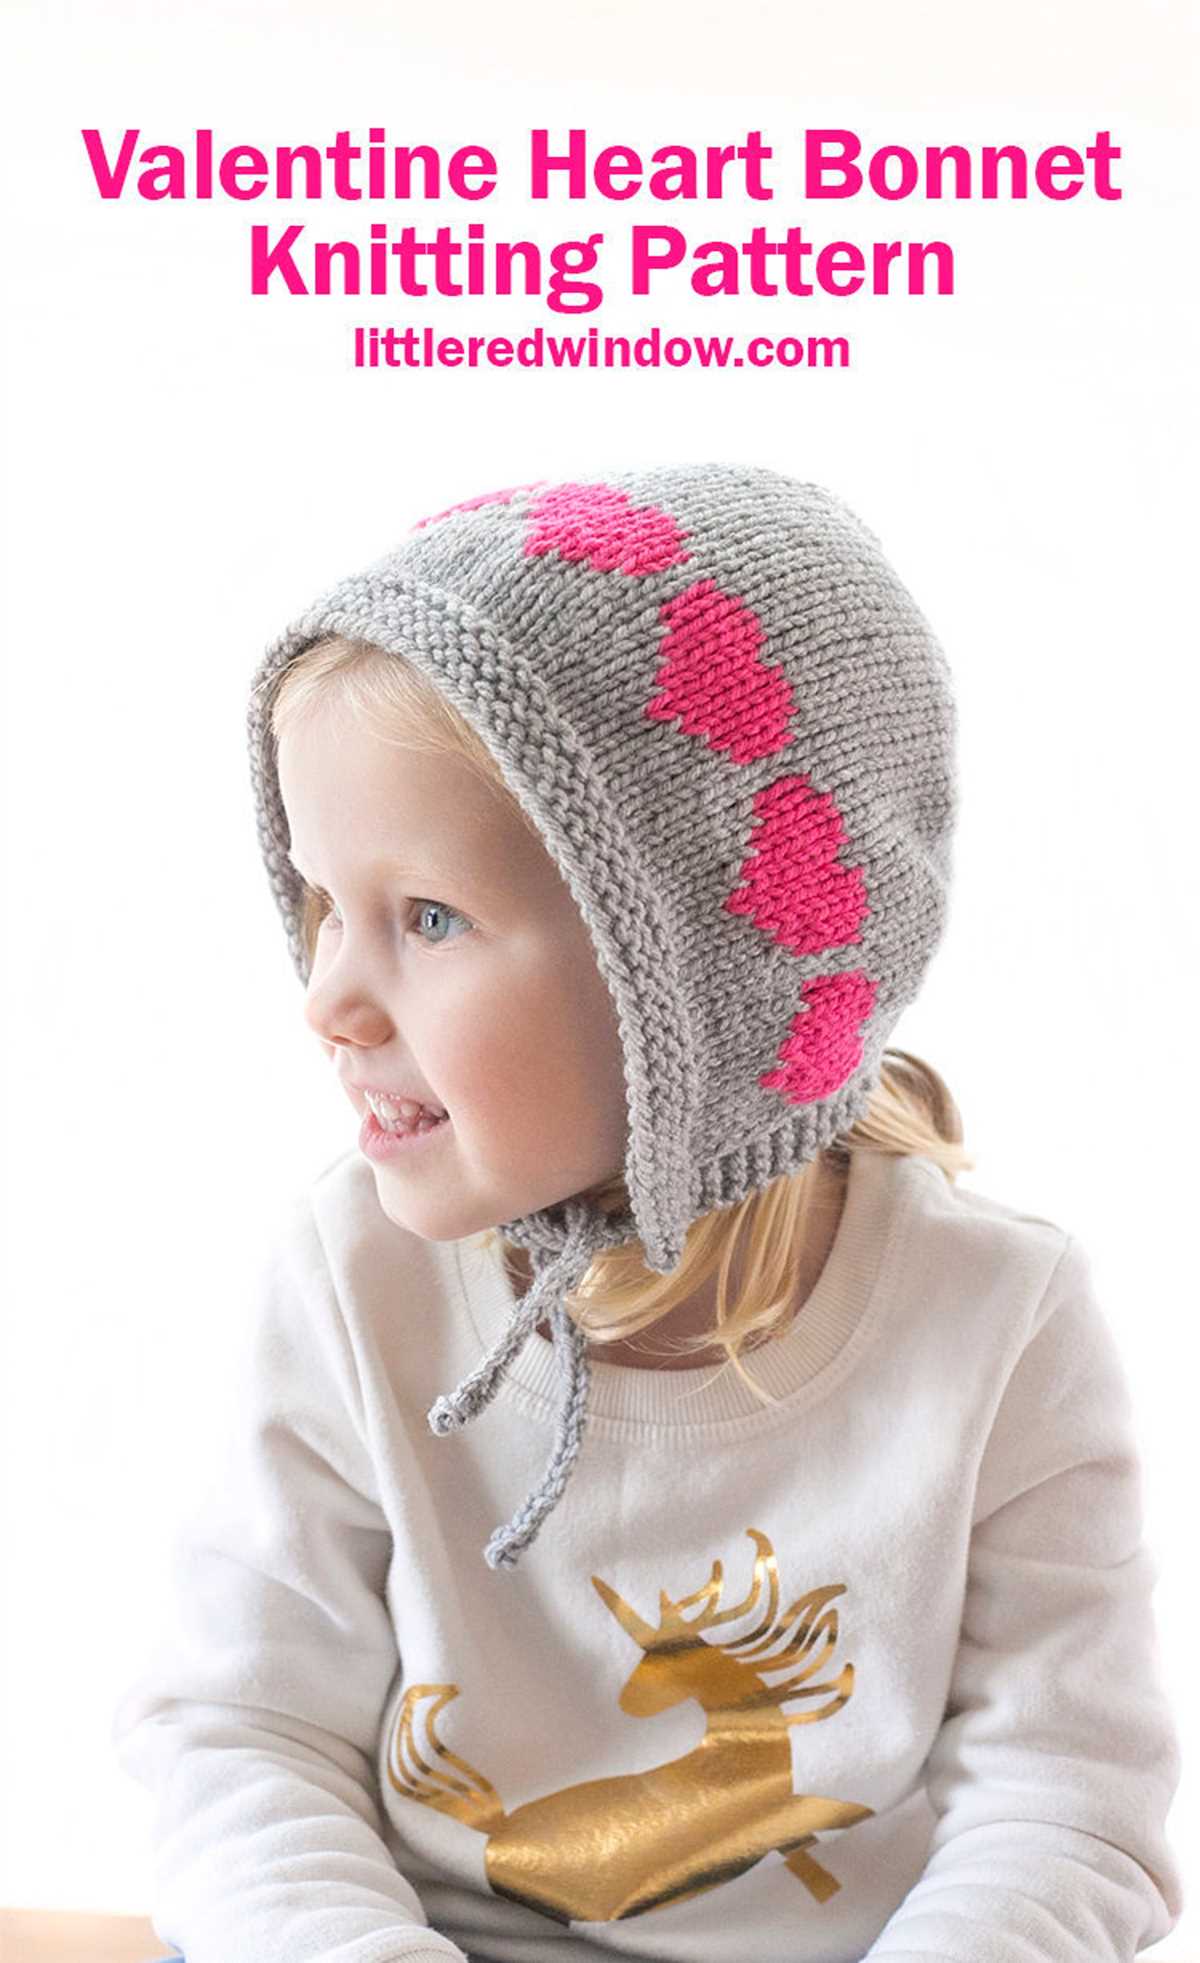
With Easter just around the corner, it’s time to start thinking about those festive accessories to complete any holiday outfit. One classic Easter accessory is the Easter bonnet, and what better way to make it even more special than by knitting your own? Knitting your own Easter bonnet allows you to add your personal touch and create a one-of-a-kind piece that will surely turn heads.
Knitting an Easter bonnet may seem like a daunting task, but with the right pattern and a little patience, anyone can create a beautiful and unique bonnet. Whether you’re a seasoned knitter or just starting out, this Easter bonnet knitting pattern is a great project to test your skills and create something special for yourself or a loved one.
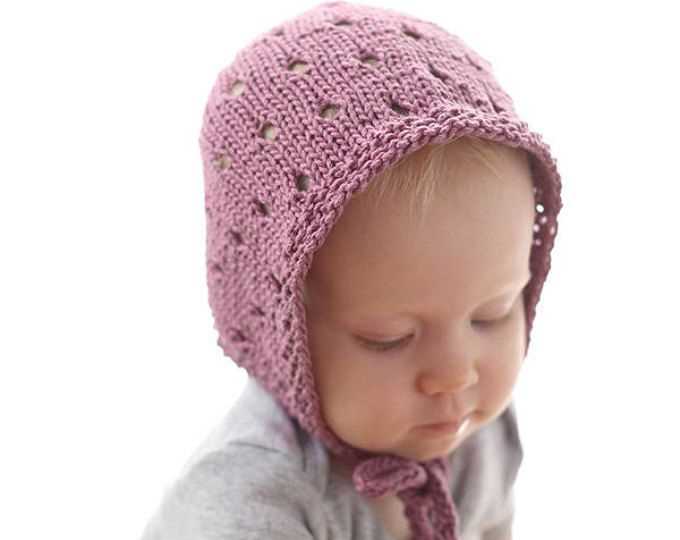
This Easter bonnet pattern features a delicate lace design with a touch of whimsy. With step-by-step instructions and detailed diagrams, you’ll be able to knit this beautiful bonnet with ease. The pattern includes options for different sizes, so you can create a bonnet for adults and children alike.
Easter Bonnet Knitting Pattern
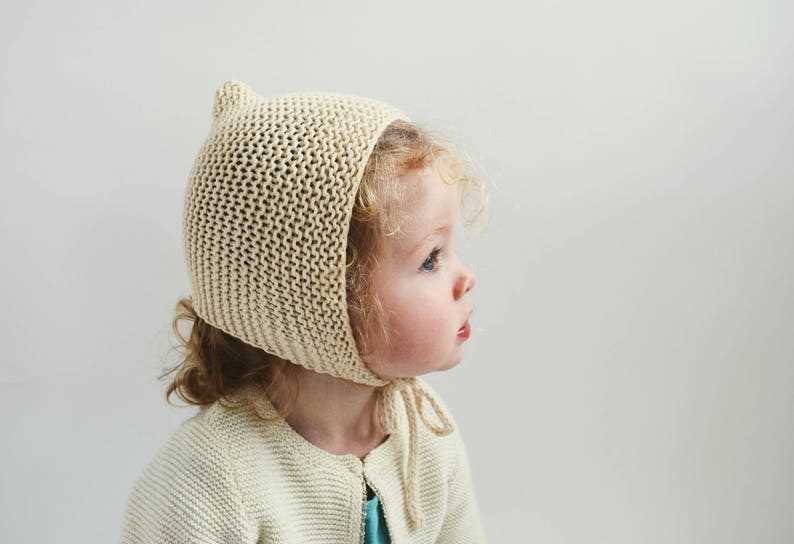
Easter is a time for celebration and creativity, and what better way to showcase your knitting skills than with an Easter bonnet? Whether you’re attending an Easter parade or simply want to add a festive touch to your outfit, knitting your own bonnet is a fun and rewarding project. With an Easter bonnet knitting pattern, you can create a unique and personalized accessory that is sure to turn heads.
The first step in knitting an Easter bonnet is to choose your pattern. There are many different patterns available, ranging from simple and classic designs to more intricate and decorative styles. You can opt for a traditional bonnet shape with a brim and ties, or get creative with a unique design like a bunny or chick-themed bonnet. The pattern you choose will determine the size and shape of your bonnet, as well as the stitches and techniques you will need to use.
Materials
- Knitting needles
- Yarn
- Tape measure
- Scissors
Once you have your pattern and materials, it’s time to start knitting! Begin by casting on the required number of stitches, as specified in your pattern. Then, follow the pattern instructions to create the body of the bonnet, working in your chosen stitch pattern. This may involve shaping the crown, adding decorative details, or incorporating colorwork.
After completing the main body of the bonnet, you will typically need to work on the brim and ties. Again, the pattern will provide instructions on how to achieve the desired shape and length. This may involve using different needle sizes or stitches, or even adding ribbons or other embellishments.
Once you have finished knitting all the components of your bonnet, it’s time to assemble them. This may involve sewing or stitching the brim to the body, attaching the ties, or adding any final touches. Follow the pattern instructions carefully to ensure that your bonnet looks just as you envisioned.
When your bonnet is complete, don’t forget to try it on and make any necessary adjustments. You want it to fit comfortably and securely, so you can wear it with confidence. Then, proudly show off your handmade creation at Easter festivities or simply enjoy wearing it as a festive accessory. Knitting an Easter bonnet allows you to showcase your skills and creativity, while also adding a personal touch to your holiday attire.
Choosing the Right Yarn
When it comes to knitting an Easter bonnet, choosing the right yarn is essential for creating a beautiful and durable hat. There are various factors to consider when selecting the yarn, such as the fiber type, weight, and color.
Fiber Type: Different fibers have different qualities, so it’s important to choose one that suits both the look and feel you desire for your Easter bonnet. Wool is a popular choice as it is warm, breathable, and has excellent stitch definition. Cotton is another option that is lightweight and breathable, making it ideal for warmer weather. Acrylic yarns are great for beginners as they are easy to work with and usually more affordable.
Weight:
The weight of the yarn affects the drape and warmth of the bonnet. For a lightweight and delicate bonnet, opt for a lace or fingering weight yarn. If you want a more substantial and cozy bonnet, choose a worsted or bulky weight yarn. Keep in mind that the chosen weight must match the desired pattern, as using a different weight may alter the final result.
Color:
The color of the yarn is an important consideration when knitting an Easter bonnet. Pastel shades such as baby blue, soft pink, and mint green are popular choices for the spring season and can give your bonnet a festive and cheerful look. If you prefer a more traditional and elegant style, neutral colors like cream, beige, or white can create a timeless and versatile bonnet that can be paired with any outfit.
Selecting the Right Needles

When it comes to knitting an Easter bonnet, selecting the right needles is crucial for achieving the desired look and texture. The size and type of needles you choose can greatly impact the overall outcome of your project.
Size: The size of the needles will determine the gauge and the size of the stitches in your bonnet. For a more delicate and intricate design, you may opt for smaller needles, such as US size 2 or 3. On the other hand, if you prefer a chunkier and more textured bonnet, larger needles like US size 9 or 10 can be used. It’s essential to consider the yarn weight and the desired outcome when selecting the appropriate needle size.
Type: There are various types of knitting needles available, including straight needles, circular needles, and double-pointed needles. Straight needles are the traditional choice for knitting flat pieces, while circular needles allow for seamless knitting in the round. Double-pointed needles are primarily used for knitting small, circular items such as hats or socks. Depending on your knitting style and the desired construction of your Easter bonnet, you can choose the needle type that works best for you.
Material: Needles are made from different materials, such as aluminum, bamboo, or plastic. Each material has its own unique properties that can affect your knitting experience. Aluminum needles are durable and lightweight, making them ideal for faster knitting. Bamboo needles are known for their smoothness and flexibility, providing a comfortable grip. Plastic needles are lightweight and affordable, making them a popular choice for beginners. Consider the texture, weight, and durability of the needles when making your selection.
Casting on Stitches
When starting a new knitting project, one of the first steps is casting on stitches. This is the process of creating the foundation row of stitches that will be used to start knitting the actual project. There are several different methods for casting on stitches, and the method used can depend on personal preference and the specific project.
One common method for casting on stitches is the long-tail cast on. To do this, you will need to estimate the amount of yarn needed to cast on the desired number of stitches, plus a little extra for the tail. The tail should be about three times the width of the finished project. To begin, make a slip knot with the tail end of the yarn and place it on the knitting needle. Then, using the working yarn, bring the yarn over the needle and through the slip knot, creating a new stitch. Continue this process for the desired number of stitches.
Another method for casting on stitches is the knitted cast on. This method is similar to the long-tail cast on, but instead of using a slip knot, you will make a loop with the working yarn and place it on the knitting needle. Then, using the other needle, knit into the loop and slip the new stitch onto the original needle. Repeat this process for the desired number of stitches.
- The long-tail cast on method requires estimating the amount of yarn needed.
- The knitted cast on method involves making a loop with the working yarn.
These are just a few examples of the many different methods for casting on stitches in knitting. Each method has its own unique qualities and may be better suited for certain projects or personal preferences. It’s important to practice and experiment with different methods to find the one that works best for you.
Knitting in the Round
Knitting in the round is a technique used to create seamless tubes, such as hats, socks, and sweaters, without the need for seams. It is a popular method among knitters as it eliminates the need to sew pieces together, resulting in a more polished and professional-looking finished project.
When knitting in the round, you can use either circular needles or double-pointed needles, depending on your preference and the project at hand. Circular needles are long, flexible needles connected by a cable, while double-pointed needles come in sets of four or five and allow you to work on a small circumference.
One advantage of knitting in the round is that it allows for continuous knitting without the need for turning your work. You can simply keep knitting in a spiral, creating a seamless tube. This makes it ideal for projects like hats, where you want to avoid a seam running down the back.
Another benefit of knitting in the round is that it allows for more intricate colorwork and pattern designs. With no seams to break up the pattern, you can create more complex and visually appealing designs. Fair Isle knitting, for example, is much easier to do in the round.
When knitting in the round, you will need to be familiar with techniques such as joining in the round, knitting in the round, and purling in the round. It may take some practice to get used to working with circular or double-pointed needles, but once you become comfortable with the technique, you may find yourself choosing to knit in the round for many of your projects.
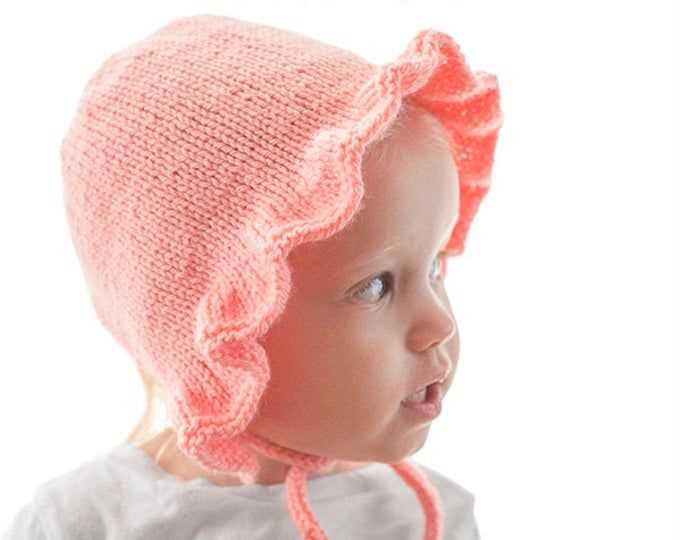
Creating the Brim
Once you have completed the main body of the bonnet, it’s time to move on to creating the brim. The brim is an essential part of an Easter bonnet as it adds structure and shape to the design. To start, you will need to gather your supplies, including the yarn you have chosen and the appropriate size knitting needles.
Begin by casting on the required number of stitches for the brim. This number will vary depending on the size of your bonnet and the desired width of the brim. It’s important to follow the pattern instructions closely to ensure the correct number of stitches. Once you have cast on, you can start working the brim in the desired stitch pattern.
One popular stitch pattern for the brim is the ribbing stitch, which creates a stretchy and textured effect. To work the ribbing stitch, alternate between knitting and purling stitches in each row. This creates a pattern of raised ribs and recessed valleys. Repeat the ribbing stitch pattern for the desired length of the brim, making sure to maintain the correct stitch count.
If you prefer a simpler look, you can also opt for a basic garter stitch or stockinette stitch for the brim. The garter stitch involves knitting every stitch in every row, while the stockinette stitch alternates between knitting and purling rows. Consider the overall design of your bonnet and choose a stitch pattern that complements the style.
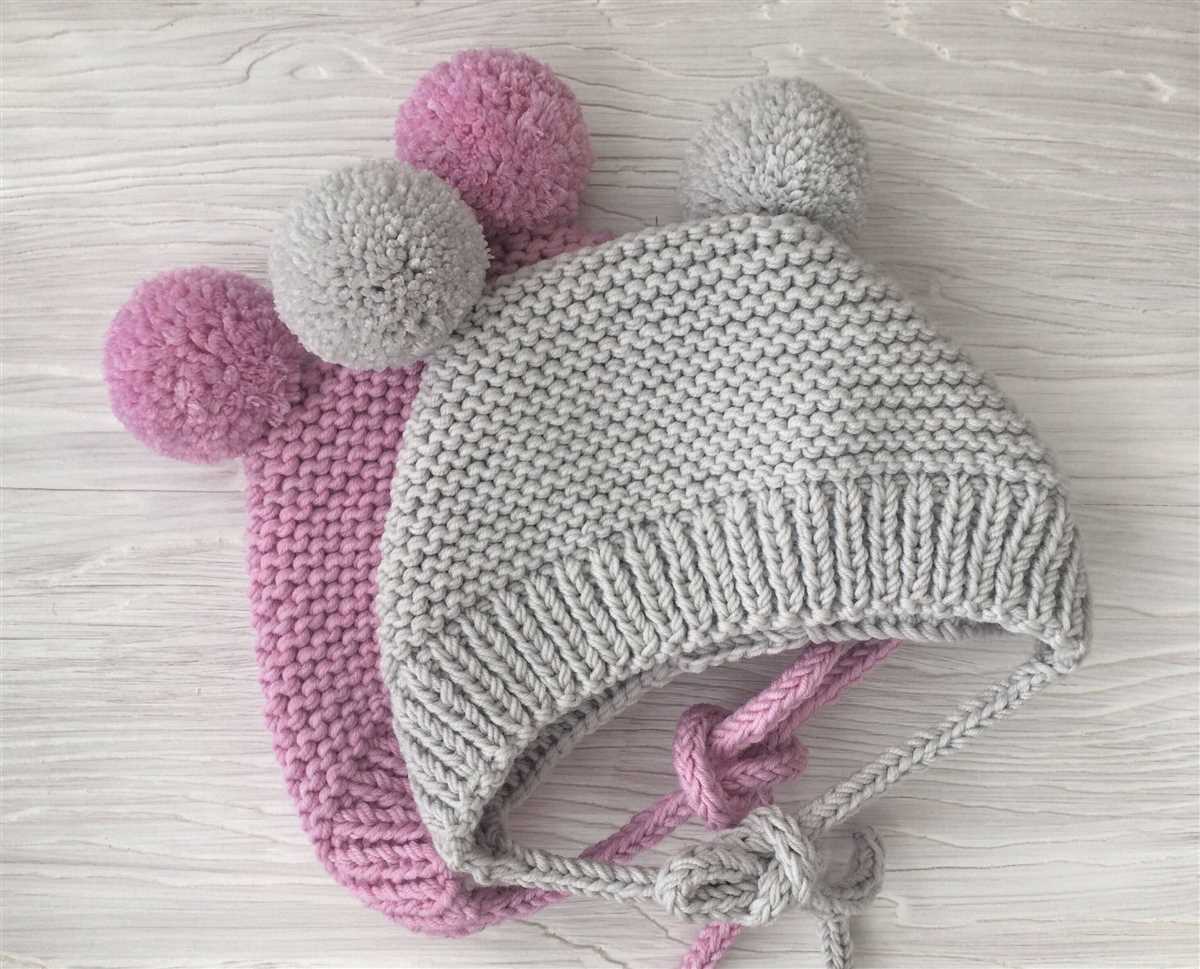
Shaping the Crown
When knitting an Easter bonnet, one of the key elements to consider is the shaping of the crown. This is the part of the hat that sits on top of the head and gives it its distinctive shape. There are different techniques you can use to achieve the desired crown shape, depending on the style of bonnet you are making.
Increasing stitches: One common method for shaping the crown is to increase stitches gradually as you work your way up from the brim. This can be achieved by knitting or purling into the front and back of a stitch, or by using other increase stitches such as yarn overs. By increasing stitches at regular intervals, you can create a rounded or conical shape for the crown.
Decreasing stitches: Another technique for shaping the crown is to decrease stitches as you work your way up. This is often done in a symmetrical pattern to maintain the overall shape of the bonnet. You can use decrease stitches such as knit two together, slip slip knit, or other variations to achieve the desired shape. Decreasing stitches can create a more fitted or tapered crown.
It’s important to carefully follow the instructions in the Easter bonnet knitting pattern to ensure the correct crown shaping. This will ensure that your bonnet fits comfortably and looks the way it is intended. Remember to check your gauge and make any necessary adjustments to achieve the correct size and shape for your bonnet. With careful attention to detail and a steady hand, you can create a beautiful Easter bonnet with a perfectly shaped crown.
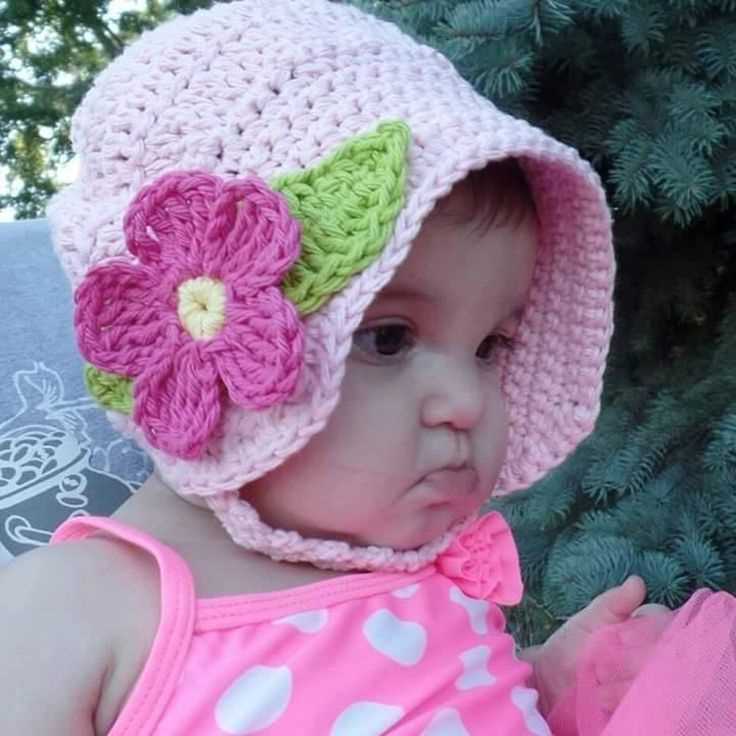
Adding Decorative Details
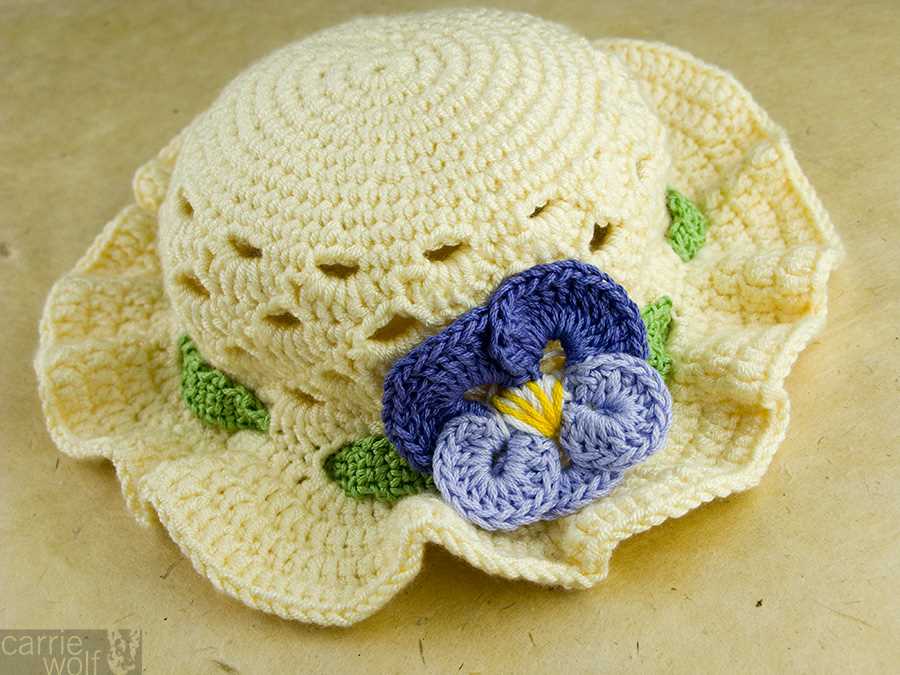
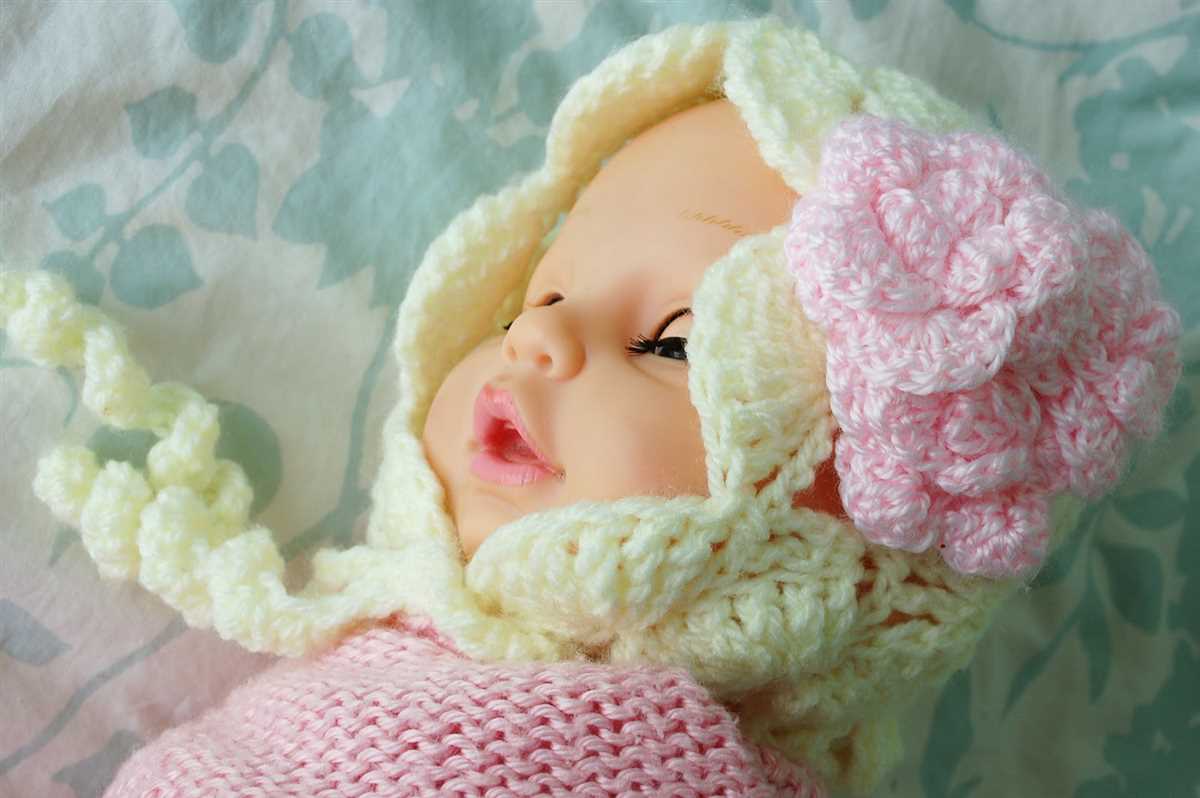
To make your Easter bonnet truly unique and eye-catching, you can add a variety of decorative details. One popular option is to use floral embellishments such as knitted flowers or crochet flowers. These can be attached to the brim or crown of the bonnet to create a beautiful and feminine look. You can choose different colors and sizes of flowers to create a personalized design.
Another way to add decorative details is by incorporating ribbons and bows. You can attach a ribbon around the crown of the bonnet and tie it into a bow on the side or back. This will give your bonnet a lovely finishing touch and add a touch of elegance. You can also add small bows or ribbons as accents on the brim or crown.
If you want to add a touch of sparkle to your Easter bonnet, you can use sequins or beads. You can sew or glue these onto the bonnet in a pattern or design of your choice. This will give your bonnet a festive and glamorous look. Just make sure to use a strong adhesive or sturdy thread to secure the sequins or beads.
Finally, you can also consider adding small accessories such as feathers, pearls, or buttons. These can be attached to the bonnet using glue or small stitches. Feathers can add a whimsical and playful touch, while pearls or buttons can add a touch of elegance and sophistication. Be creative and have fun experimenting with different decorative details to make your Easter bonnet truly unique and personalized.
Blocking the Bonnet
After you have finished knitting your Easter bonnet using the provided pattern, it’s time to block it. Blocking is an important step in knitting that helps to give your finished project a polished and professional look. It involves shaping and stretching the knitted fabric to the desired measurements and allowing it to dry in that shape.
To block your bonnet, you will need a few supplies. First, you’ll need some rustproof T-pins or blocking wires. These will be used to secure the bonnet to the blocking surface. You’ll also need a blocking surface, such as a foam mat or an old towel, and a measuring tape to ensure that the bonnet is blocked to the correct dimensions.
Start by filling a basin or sink with lukewarm water and add a small amount of wool wash or mild detergent. Gently submerge the bonnet in the water, making sure that it is fully saturated. Allow the bonnet to soak for about 15 minutes, then carefully remove it from the water and gently squeeze out any excess moisture. Avoid wringing or twisting the bonnet, as this can cause it to lose its shape.
Next, lay out your blocking surface and place the bonnet on top. Use the measuring tape to carefully stretch the bonnet to the desired measurements, making sure that it is symmetrical and all edges are straight. Pin or secure the bonnet to the blocking surface using the T-pins or blocking wires, taking care not to distort the shape. Leave the bonnet to dry completely before removing the pins or wires.
Once the bonnet is dry, you can remove the pins or wires and admire your beautifully blocked creation. Blocking not only helps to shape and size your bonnet, but it also helps to even out any uneven stitches and gives the fabric a smoother and more professional finish. So don’t skip this important step – take the time to block your bonnet and you’ll be rewarded with a hat that looks and fits perfectly!
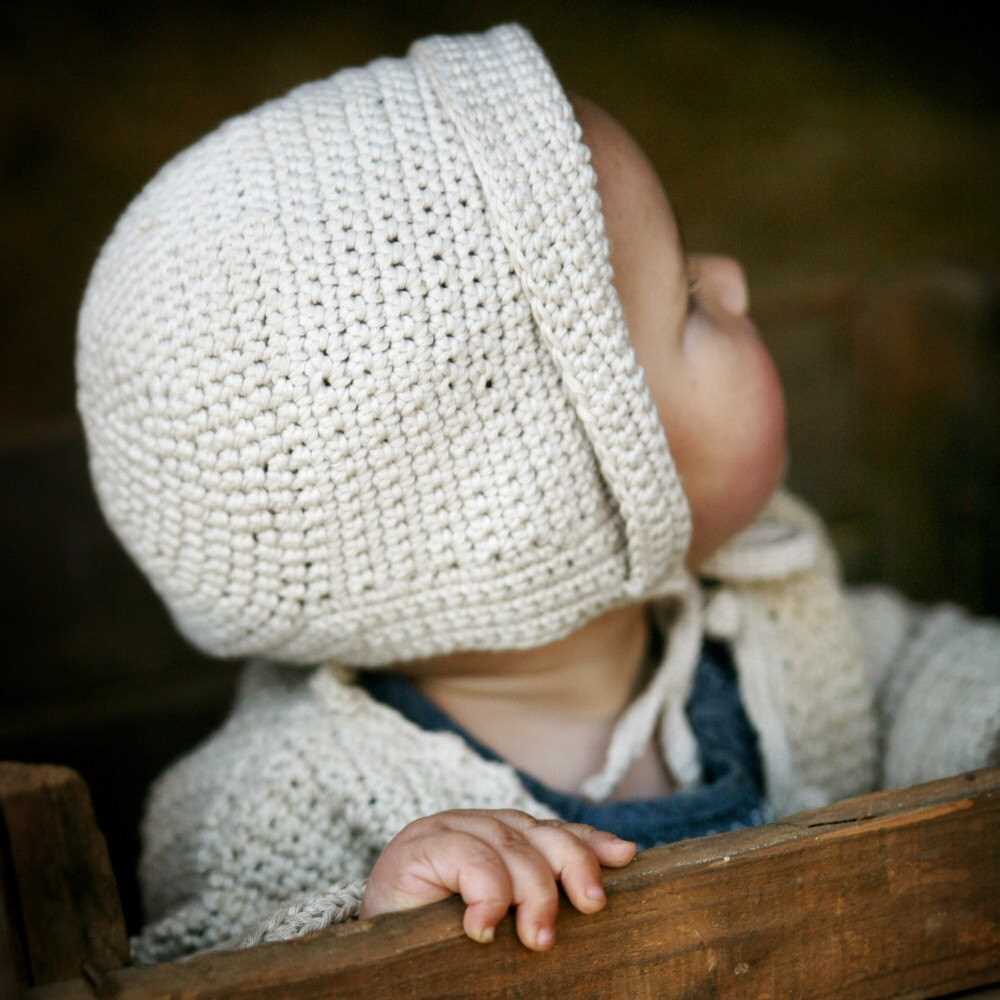
Attaching Ribbons or Strings
When it comes to completing your Easter bonnet, attaching ribbons or strings can add the perfect finishing touch. Not only do they provide a decorative element, but they also serve a functional purpose by helping to keep the bonnet securely on your head.
To attach ribbons or strings to your Easter bonnet, you have a few options. One option is to sew them directly onto the hat using a needle and thread. This method ensures that the ribbons or strings are securely attached and won’t come loose. Another option is to use fabric glue to attach the ribbons or strings. This is a quick and easy method, but keep in mind that the glue may not be as durable as stitching.
Steps to attach ribbons or strings using a needle and thread:
- Choose ribbons or strings that complement the colors and design of your Easter bonnet.
- Cut the ribbons or strings to the desired length, keeping in mind that you will need enough length to tie them securely under your chin.
- Thread a needle with a coordinating thread color.
- Position the ribbons or strings on the bonnet where you want them to be attached.
- Starting from the inside of the bonnet, push the needle through both the ribbon and the bonnet fabric.
- Pull the thread all the way through, leaving a small tail on the inside of the bonnet.
- Repeat this process several times, creating a secure stitch to hold the ribbons or strings in place.
- Once you have stitched the ribbons or strings to the bonnet, tie a knot at the end of the thread and cut off any excess.
By following these steps, you can easily attach ribbons or strings to your Easter bonnet, adding a beautiful and functional element to your holiday accessory.
Finishing Touches
In order to complete your Easter bonnet, it’s important to add some finishing touches that will make it truly stand out. One of the first things you can do is add a decorative ribbon to the brim of the bonnet. This will not only add a pop of color, but it will also give the bonnet a more polished and finished look. You can choose a ribbon that matches the colors in your bonnet or opt for a contrasting color for a bold and eye-catching effect.
Another way to add some extra flair to your Easter bonnet is by attaching some decorative flowers or embellishments. You can use crocheted or knitted flowers that complement the design of your bonnet, or you can purchase pre-made flowers from a craft store. Glue or stitch the flowers onto the bonnet, arranging them in a pleasing pattern. This will give your bonnet a beautiful and feminine touch.
If you want to add a bit of whimsy to your Easter bonnet, consider attaching some small ornaments or trinkets. Miniature Easter eggs, small birds or butterflies, or even tiny bows can be attached to the brim or crown of the bonnet. These small details will add an element of surprise and playfulness to your bonnet, making it truly unique.
Once you have added all the finishing touches to your Easter bonnet, take a step back and admire your handiwork. The little details make all the difference, and with the right embellishments, your bonnet will be ready to be shown off at Easter celebrations or parades. Remember to have fun and let your creativity shine through as you add those final touches to your beautiful Easter bonnet.
Final Thoughts
In conclusion, knitting an Easter bonnet can be a fun and enjoyable project for crafters of all skill levels. Whether you are an experienced knitter looking for a new challenge or a beginner looking to try something new, there are plenty of patterns available to suit your needs.
The Easter bonnet knitting pattern discussed in this article is a great starting point for those who are new to knitting or who want a simple and quick project. With its easy-to-follow instructions and basic stitches, it is an excellent choice for beginners.
Knitting an Easter bonnet allows you to showcase your creativity and add a personal touch to your springtime attire. With a wide range of yarn colors and embellishments to choose from, you can customize your bonnet to match your style and personality.
Remember, knitting is not only a relaxing and therapeutic hobby but also a practical skill that can be used to create beautiful and functional items. By following a pattern like the Easter bonnet knitting pattern, you can learn new techniques and improve your knitting skills while creating a stylish accessory for the Easter season.
So why not give it a try? Grab your knitting needles and yarn, and start stitching your own Easter bonnet today!