
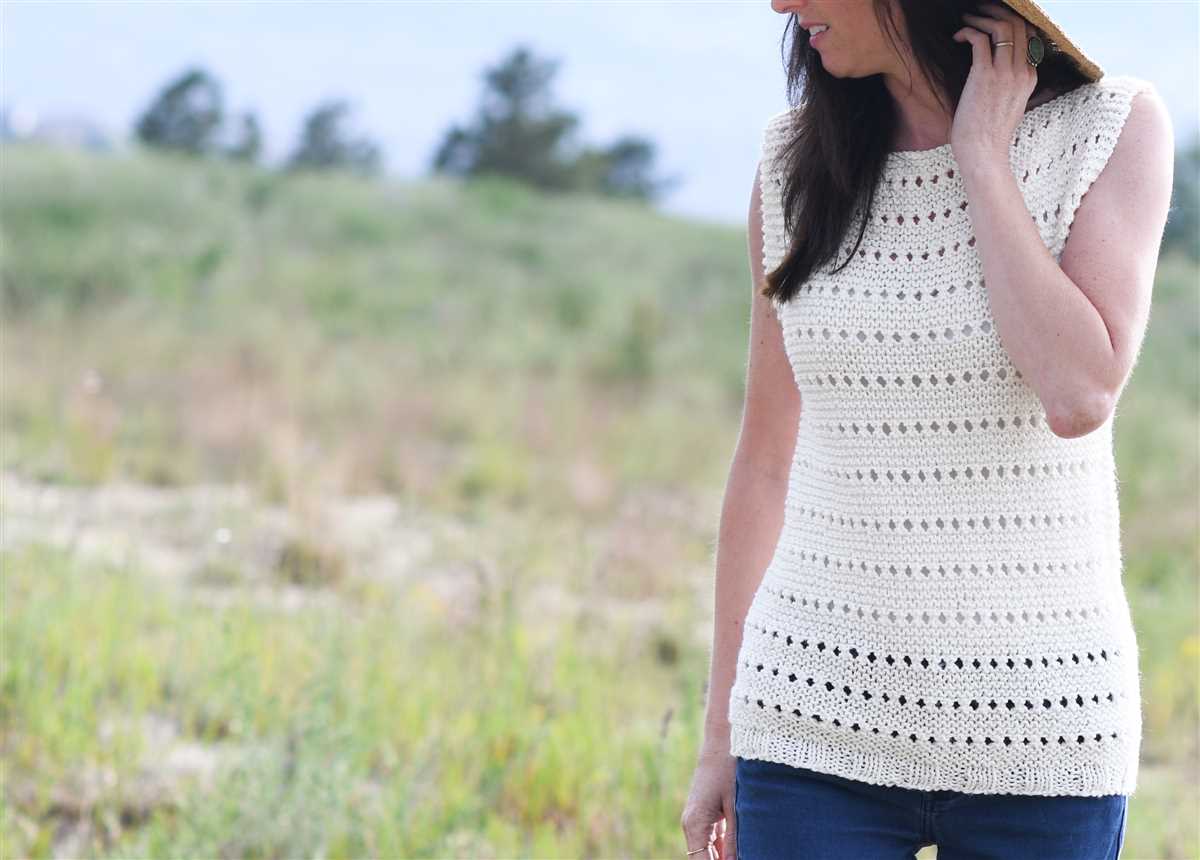
If you’re looking for a stylish and versatile addition to your wardrobe, the DK tank top knitting pattern is perfect for you. With its lightweight and breathable design, this tank top is ideal for those warm summer days or as a layering piece during the cooler months.
Knitted with a DK weight yarn, this tank top is quick and easy to make. The pattern features a simple yet eye-catching stitch pattern, making it suitable for knitters of all skill levels. Whether you’re a beginner or an experienced knitter, you’ll enjoy creating this tank top and showing off your handiwork.
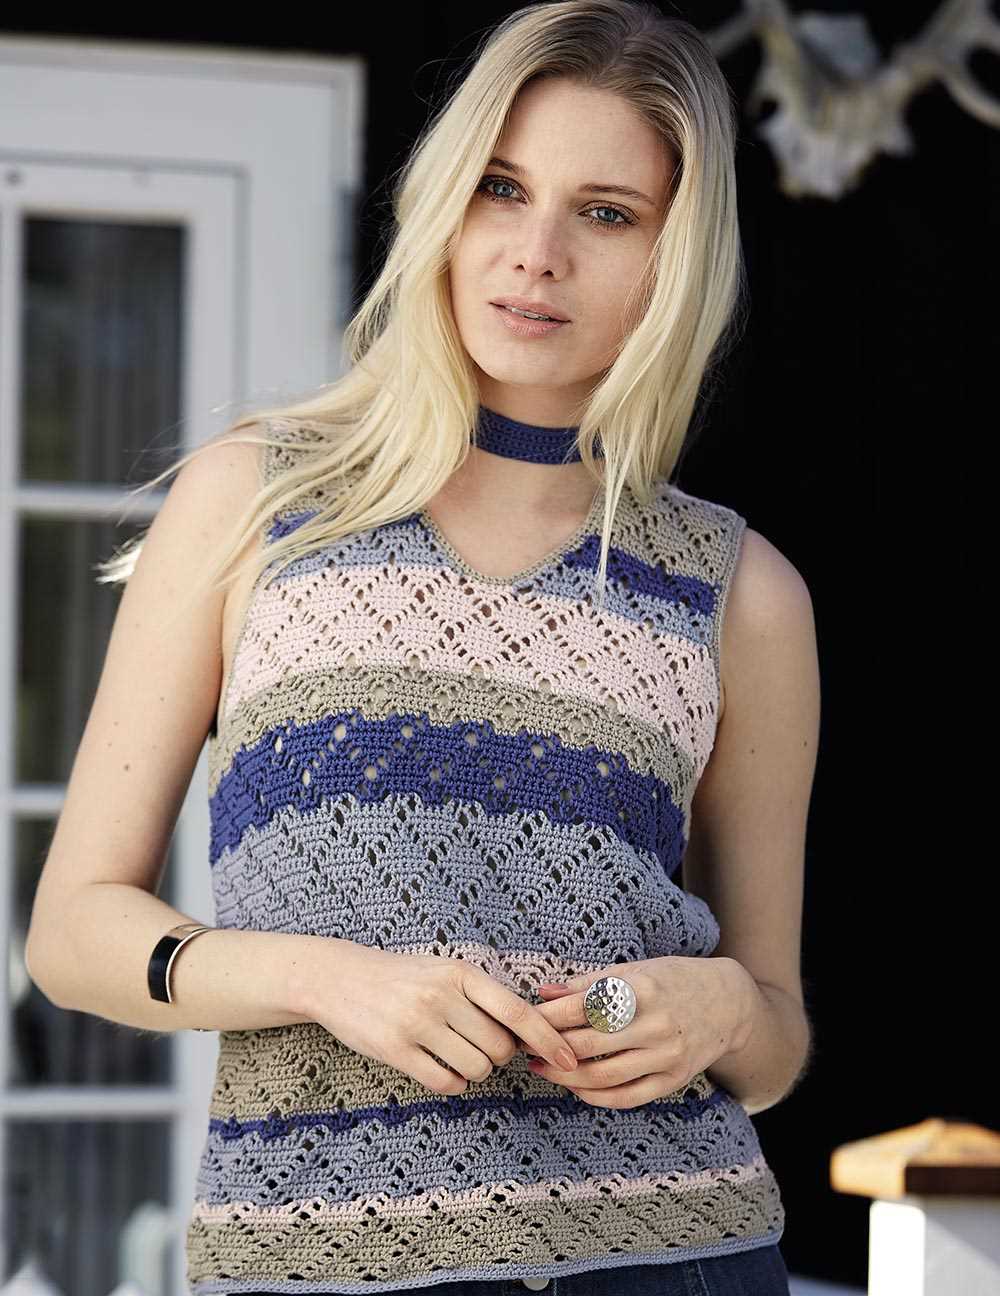
Not only is the DK tank top practical and comfortable, but it’s also a great way to experiment with different colors and yarns. You can choose to knit it in a solid color for a classic look, or get creative and mix and match colors for a fun and unique effect. The possibilities are endless!
Why knit your own tank top
Knitting your own tank top can be a rewarding and fulfilling project. It allows you to create a unique and personalized garment that fits your style and body perfectly. Whether you are a beginner or an experienced knitter, making your own tank top can be a fun and challenging project that will enhance your knitting skills.
One of the main reasons to knit your own tank top is the ability to choose your own yarn and color. Knitting patterns often come with recommendations for specific yarns, but the beauty of making your own tank top is that you can experiment with different fibers and colors to achieve the desired look. You can mix and match different yarns to create interesting textures or play with different dyeing techniques to achieve unique color combinations.
Furthermore, knitting your own tank top gives you the freedom to customize the design according to your preferences. You can choose from a wide range of knitting patterns and modify them to fit your style and body shape. Whether you prefer a loose-fitting or a more fitted tank top, you can easily adjust the pattern to achieve the desired fit.
In addition, knitting your own tank top allows you to create a high-quality and long-lasting garment. When you knit something yourself, you have full control over the materials and construction. You can choose sturdy and durable yarns that will withstand wear and tear, and take the time to ensure that the seams are strong and secure. This way, you can create a tank top that will last for years and become a staple in your wardrobe.
Finally, knitting your own tank top can be a therapeutic and relaxing activity. Knitting has been proven to reduce stress and anxiety, and can provide a sense of accomplishment and satisfaction. The repetitive nature of the stitches can be meditative, allowing you to disconnect from the outside world and focus on the creative process. Knitting your own tank top can therefore not only result in a beautiful garment, but also provide you with a soothing and enjoyable experience.
Benefits of knitting your own tank top
Knitting your own tank top can be a rewarding and enjoyable experience. Not only does it allow you to create a unique and personalized garment, but it also provides a range of benefits that can enhance your knitting skills and overall well-being.
Creative expression: Knitting your own tank top gives you the opportunity to express your personal style and creativity. You can choose from a wide range of patterns, colors, and yarns, allowing you to create a tank top that truly reflects your individuality.
Custom fit: When you knit your own tank top, you have the ability to customize the fit to your exact measurements. This ensures that the tank top will flatter your body shape and provide a comfortable and tailored fit.
Relaxation and stress relief: Knitting has been shown to have a calming and meditative effect on the mind. The repetitive motions and focus required during knitting can help reduce stress and anxiety, promoting relaxation and overall well-being.
Improved dexterity and coordination: Knitting involves precise hand movements and coordination, which can help improve finger dexterity and motor skills. Regular knitting practice can enhance hand-eye coordination and keep your fingers nimble.
Economical: Knitting your own tank top can be a cost-effective option compared to purchasing one from a store. By buying yarn in bulk and reusing knitting needles, you can save money in the long run while enjoying the satisfaction of creating a high-quality garment.
Environmental sustainability: Knitting your own tank top allows you to be more environmentally conscious. By using natural and sustainable yarns, you can reduce your carbon footprint and contribute to a more sustainable fashion industry.
Sense of accomplishment: Completing a knitting project, such as a tank top, provides a sense of achievement and pride. Being able to wear a garment that you made with your own hands can boost your self-esteem and confidence.
In conclusion, knitting your own tank top offers a range of benefits, from creative expression and custom fit to relaxation and environmental sustainability. So why not pick up your knitting needles and start creating your own unique tank top today?
Choosing the right DK yarn for your tank top
When it comes to knitting a tank top, choosing the right DK yarn is essential for creating a garment that not only looks great but also feels comfortable to wear. DK yarn, also known as double knitting yarn, is the perfect weight for creating a tank top that is not too heavy or too light.
Consider the fiber content: One of the first things to consider when choosing a DK yarn for your tank top is the fiber content. Common options include cotton, wool, acrylic, and blends. Cotton is excellent for warm weather as it is breathable and lightweight. Wool provides warmth and insulation, making it ideal for colder months. Acrylic is affordable and easy to care for, making it a practical choice for everyday wear. Blends of different fibers can combine the best properties of each.
Think about the drape: The drape of the yarn refers to how it hangs and moves when worn. For a tank top, you’ll want a yarn with a good drape that will follow the contours of your body without sagging or feeling stiff. Yarns with silk or bamboo fibers tend to have excellent drape, while pure cotton yarns can be stiffer. Keep the design of your tank top in mind when choosing the drape of the yarn.
Consider the color and pattern: DK yarn comes in a wide range of colors and patterns, allowing you to get creative with your tank top design. Whether you prefer solid colors, variegated yarns, or subtle tonal shades, there’s a DK yarn out there for everyone. Consider the style and occasion for which you’re knitting the tank top and choose a color or pattern that works well in that context.
Check the recommended gauge: Before starting your tank top project, make sure to check the recommended gauge for the pattern. This will ensure that your finished garment is the correct size and fits you well. DK yarn typically has a gauge of around 22 stitches and 28 rows per 4 inches on size US 6-7 knitting needles, but be sure to check the specific pattern’s gauge recommendations.
Final thoughts: Choosing the right DK yarn for your tank top involves considering the fiber content, drape, color and pattern, as well as checking the recommended gauge. Take the time to explore different options and find a yarn that fits your style and preferences. With the right DK yarn, you’ll be able to knit a tank top that is not only fashionable but also comfortable to wear.
Essential Tools for Knitting a Tank Top
When it comes to knitting a tank top, having the right tools is essential for achieving a successful and professional-looking finished project. Here are some of the must-have tools for knitting a tank top:
1. Knitting Needles
Choose a pair of knitting needles that are the appropriate size for your chosen yarn weight and gauge. Circular needles are often preferred for knitting tank tops, as they allow for easy knitting in the round. Make sure to select needles that feel comfortable in your hands and provide a smooth knitting experience.
2. Stitch Markers
Stitch markers are useful for marking specific points in your knitting, such as the beginning of a round or the location of pattern repeats. They can help you keep track of your progress and make it easier to follow complex knitting instructions.
3. Tape Measure
A tape measure is essential for accurate measurements, especially when knitting a tank top that needs to fit well. Take measurements of your bust, waist, and hips, and compare them to the pattern’s size chart to ensure you are knitting the correct size.
4. Yarn and Yarn Bowl
Choose a yarn that is suitable for a tank top – lightweight and breathable. A yarn bowl can be a useful tool for keeping your yarn from rolling away while you knit. It keeps the yarn tidy and prevents tangles.
5. Stitch Holders or Scrap Yarn
Stitch holders or scrap yarn are useful for holding stitches that you need to put on hold temporarily. They ensure that the stitches remain secure and can easily be picked up later when needed.
6. Darning Needle
A darning needle, also known as a tapestry needle, is essential for weaving in loose ends and seaming your tank top together. Choose a needle with a large eye to accommodate your yarn.
With these essential tools in hand, you’ll be well-equipped to knit a tank top and create a beautiful garment that you can enjoy wearing all summer long.
Getting started with your tank top

Before you begin knitting your tank top, gather all the materials you’ll need. You’ll need a pair of knitting needles, preferably in the size recommended in the pattern. You’ll also need your chosen yarn in the specified amount, along with any additional materials, such as stitch markers or a tapestry needle for finishing. Take your time to read through the pattern and make sure you understand all the instructions before you start.
Choosing the right pattern
When selecting a Dk tank top knitting pattern, consider your knitting skill level and the style you want to achieve. Some patterns may be better suited for beginners, while others may require more advanced techniques. Look for a pattern that includes clear instructions and any necessary diagrams or charts. Pay attention to the sizing options provided in the pattern to ensure the tank top will fit you properly.
Swatching and gauge
To ensure your tank top turns out the correct size and fit, it’s important to swatch and check your gauge. This means knitting a small sample using the recommended needles and yarn, and measuring how many stitches and rows you have per inch. Adjust your needle size as needed to match the gauge specified in the pattern. Remember that everyone knits with slightly different tension, so it’s important to swatch to achieve accurate results.
Following the pattern
Once you have your materials ready and have swatched for gauge, it’s time to start knitting your tank top! Carefully follow the pattern instructions, keeping track of your stitches and rows as you go. Be sure to use any stitch markers provided in the pattern to help you keep track of pattern repeats or shaping. If you come across any unfamiliar techniques or stitches, consult knitting resources or tutorials for guidance.
Preparing your knitting needles
Before you begin knitting your DK tank top, it’s important to make sure your knitting needles are prepared and ready for use. Taking the time to properly set up your needles will ensure that your stitches are smooth and even throughout the project.
1. Choose the right size needles: The recommended needle size for your DK tank top pattern will typically be listed in the instructions. Be sure to check the gauge of your pattern and select needles that will give you the correct tension. Using the wrong size needles can result in a finished garment that is too loose or too tight.
2. Check the condition of your needles: Inspect your needles for any signs of damage or wear. Look for any bent or broken needles, as well as rough spots or snags on the surface. If you notice any issues, it’s best to replace your needles to avoid any problems while knitting.
3. Prepare your needles: Before starting your project, it’s a good idea to prepare your needles by giving them a quick cleaning. Use a mild soap and warm water to gently wash the needles, removing any dirt or debris. Rinse them thoroughly and pat them dry with a clean towel. This will help to remove any residue and ensure that your stitches glide smoothly on the needles.
4. Organize your needles: Keep your needles organized and easily accessible by storing them in a needle case or knitting needle roll. Sort them by size and length to make it easier to find the right needles for each project. This will also help prevent accidental damage to your needles.
5. Test your needles: Before you dive into your project, take a few moments to work a small swatch or test sample with your chosen needles. This will help you get familiar with the feel of the needles and ensure that you’re comfortable with the size and tension of your stitches.
By properly preparing your knitting needles, you can set yourself up for success and enjoy a smoother knitting experience as you create your DK tank top.
Casting on stitches for your tank top
When starting your knitting project, casting on the correct number of stitches is crucial to ensure that your tank top fits properly. In order to determine how many stitches to cast on, you will need to refer to the pattern instructions provided.
Typically, the pattern will specify the recommended yarn weight and needle size to use. This information will help you determine the gauge, which is the number of stitches and rows per inch that should be achieved. By measuring your gauge, you can calculate the number of stitches needed to create the desired width of your tank top.
Once you have determined the number of stitches to cast on, you can begin the casting on process. There are several methods for casting on stitches, including the long-tail cast on, the knitted cast on, and the cable cast on.
The long-tail cast on is a commonly used method and involves using both the working yarn and a length of yarn from the tail to create the initial row of stitches. The knitted cast on is similar to the long-tail cast on but only requires the working yarn. The cable cast on is a method that creates a firm edge and is often used for ribbing or borders.
Choose the casting on method that you are most comfortable with and begin casting on the required number of stitches. Take your time to ensure that each stitch is properly formed and even. Once all of the stitches have been cast on, you can proceed with the next steps of your tank top knitting pattern.
Working the body of your tank top
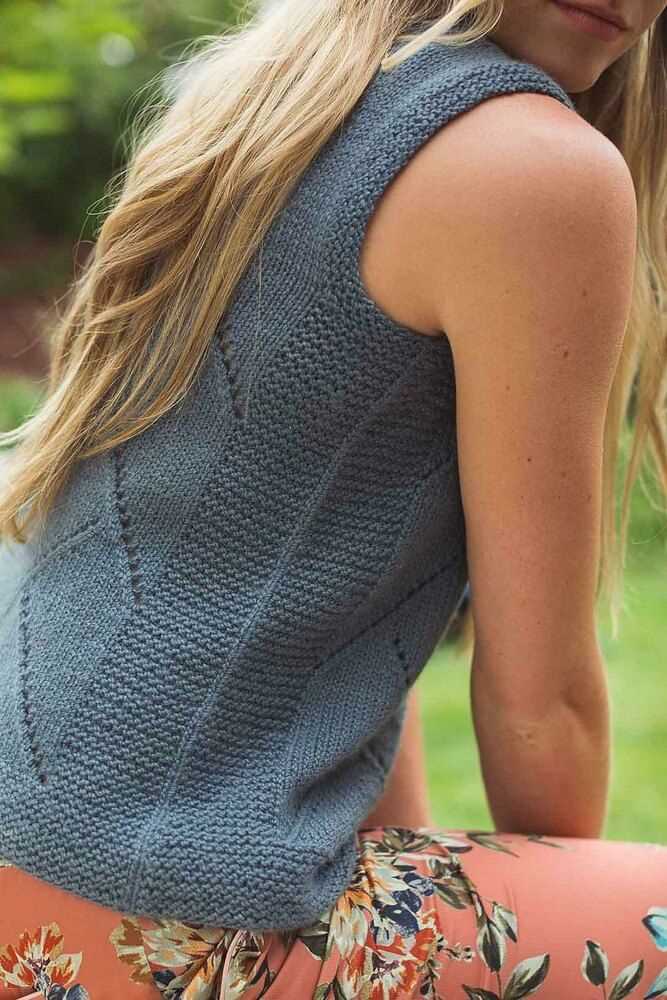
After finishing the ribbing, you will begin working the body of your tank top. This is where you will start to see the shape of the garment take form. Following the instructions in the knitting pattern, you will continue to work in the main stitch pattern, which may include techniques such as stockinette stitch, garter stitch, or lace patterns.
Depending on the design of your tank top, you may need to make increases or decreases to shape the garment. These shaping techniques can be achieved through various methods, such as knitting or purling multiple stitches together, or working yarn overs to create eyelet holes. Be sure to carefully follow the pattern instructions to achieve the correct shaping at the appropriate points.
As you work the body of your tank top, it is important to regularly check your gauge to ensure that your measurements are accurate. This will help to ensure that your tank top fits well and looks as intended. If you find that your gauge is off, you may need to make adjustments by using a different needle size or adjusting your tension.
To keep track of your progress and ensure that you are following the pattern correctly, it can be helpful to use stitch markers to mark specific points or sections of your knitting. This can help you keep track of increases, decreases, or pattern repeats, and can make it easier to identify any mistakes or errors.
Continue working the body of your tank top until you reach the desired length, as specified in the pattern. Once you have completed the body, you can move on to the next step, which may be adding straps or finishing the neckline. Following the pattern instructions and taking your time with each step will ensure that you create a beautiful and well-fitting tank top.
Adding the finishing touches
Once you have completed your DK tank top knitting pattern, it’s time to add the finishing touches to give your garment a polished look.
Blocking: Before adding any final touches, it’s important to block your tank top. Blocking involves wetting the garment and then reshaping it to the desired measurements. This step helps to even out the stitches, relax the fibers, and ensure that your tank top looks its best when worn.
Seaming: If your tank top was knit in separate pieces, you will need to seam them together to create the final garment. This can be done using a yarn needle and the mattress stitch, which creates an invisible seam. Make sure to match up the stitches and take your time to achieve a seamless finish.
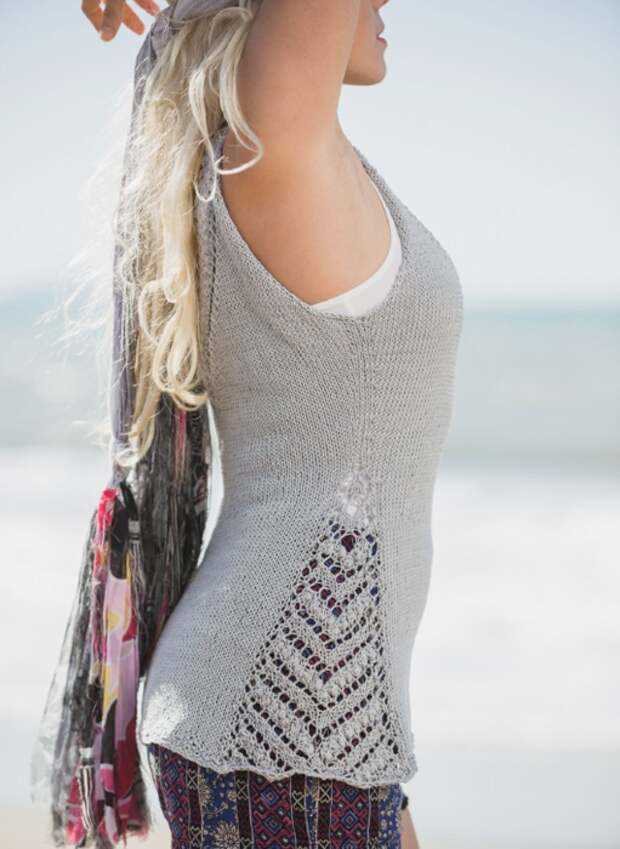
Edgings: To give your tank top a professional look, consider adding edgings to the armholes and neckline. This could be a simple ribbed or garter stitch border or a more intricate lace or cable pattern. Follow the instructions provided in your knitting pattern or get creative and design your own edging.
Weaving in ends: Lastly, don’t forget to weave in any loose ends from joining new skeins of yarn or finishing off your project. Use a yarn needle to carefully weave the ends into the stitches of your tank top, ensuring they are secure and hidden from view. This step will give your garment a neat and tidy appearance.
Final touches: Now that your DK tank top is blocked, seamed, and with all loose ends woven in, you can add any final touches, such as buttons, embellishments, or even a label with your name on it. These small details can add a personal touch to your tank top and make it truly unique.
By following these steps and adding the finishing touches, your DK tank top knitting pattern will be transformed into a beautiful and stylish garment to wear and enjoy.
Creating the neckline for your tank top
When knitting a tank top, one of the important steps is creating the neckline. The neckline is not only a functional part of the top, but it also adds style and character to the overall design. There are several ways to create a neckline, including using different stitch patterns or adding decorative elements.
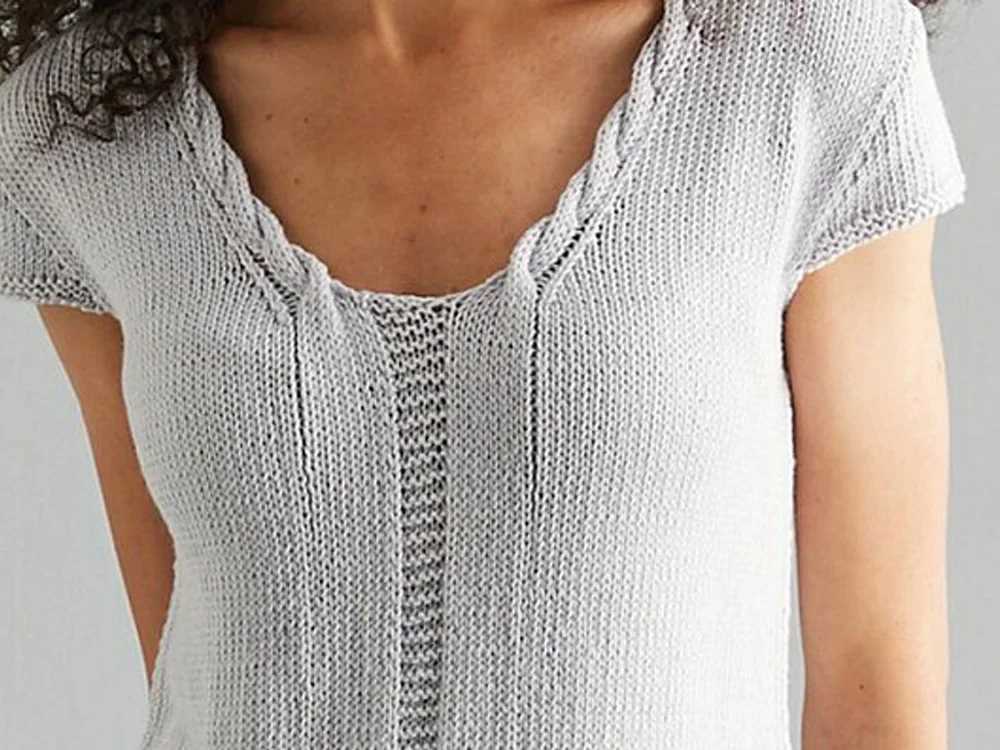
1. Ribbed neckline: A ribbed neckline is a classic choice for tank tops. It adds a clean and polished look to the top, while also providing a snug fit around the neck. To create a ribbed neckline, you can use a combination of knit and purl stitches. A common pattern is to alternate between knitting two stitches and purling two stitches for a few rows.
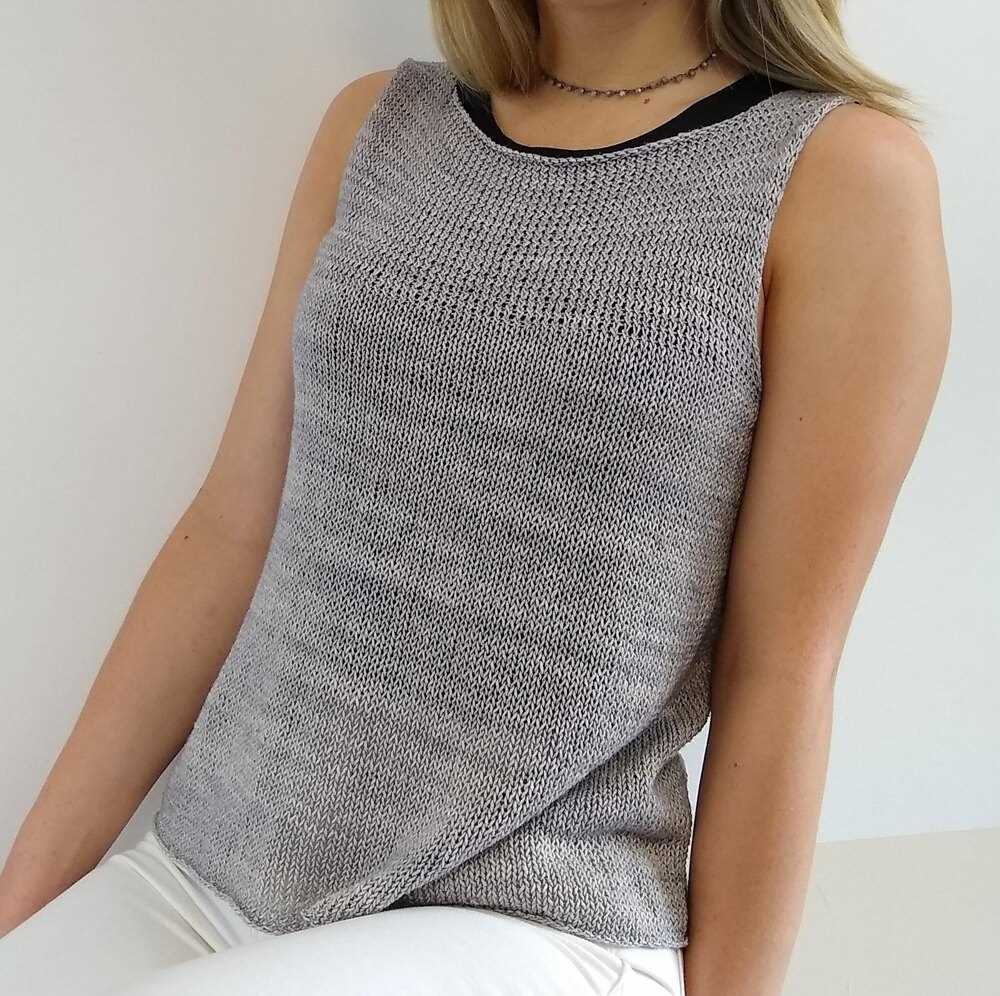
2. Scoop neckline: If you prefer a more open and feminine look, a scoop neckline is a great option. To create a scoop neckline, you can gradually decrease the number of stitches as you work towards the neckline. This will create a wider opening at the front. You can also add a rolled edge or a facing to give the neckline a finished look.
3. V-neck: A V-neck neckline adds an elegant touch to a tank top. To create a V-neck, you will need to shape the neckline by decreasing stitches gradually. Start by decreasing stitches in the center front, and then continue shaping the neckline on each side. You can also add a ribbed or garter stitch border to define the V-neck shape.
4. Cowl neckline: For a cozy and stylish look, you can opt for a cowl neckline. To create a cowl neckline, you will need to add extra fabric to the front of the top. This can be done by knitting a separate piece and attaching it to the neckline or by picking up stitches along the neckline and knitting in the round. The cowl can be worn folded over or draped loosely for different looks.
Overall, the neckline of your tank top can be customized to suit your personal style and preferences. Whether you choose a ribbed, scoop, V-neck, or cowl neckline, make sure to follow the pattern instructions carefully for the best results. Experimenting with different necklines can add versatility to your tank top collection and make each piece unique.
Adding Ribbing to the Bottom of Your Tank Top
When it comes to knitting a tank top, adding ribbing to the bottom can provide not only a decorative touch but also help the garment to fit better around the waist. Ribbing is a knitting technique that creates a stretchy fabric, making it an ideal choice for the bottom hem of a tank top. Follow these steps to add ribbing to the bottom of your tank top and give it a professional-looking finish.
1. Calculate the number of stitches: Measure the circumference of the bottom edge of your tank top. In order to create ribbing, you will need to work a multiple of stitches that is a factor of the total stitches. For example, if you have 100 stitches, you can use multiples like 2, 4, or 10.
2. Choose your ribbing pattern: There are various ribbing patterns you can try, such as 1×1 (knit one, purl one), 2×2 (knit two, purl two), or 3×1 (knit three, purl one). Experiment with different ribbing patterns to find the one that suits your tank top design best.
3. Work the ribbing: Start by knitting the first row according to your chosen ribbing pattern. For example, if you’re using a 1×1 ribbing pattern, knit one stitch, then purl one stitch, and repeat until the end of the row. Continue working the ribbing pattern for the desired length.
4. Transition to the main body: Once you’ve completed the ribbing, switch to the main body stitch pattern of your tank top. This could be stockinette stitch, garter stitch, or any other stitch pattern you prefer. Make sure to maintain the established pattern from this point onward.
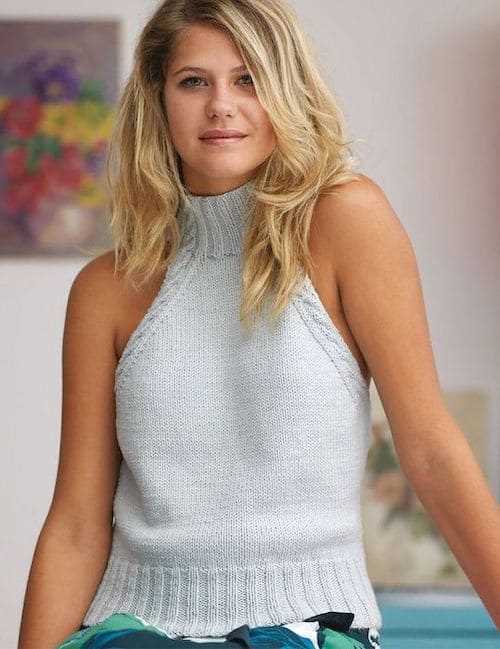
5. Bind off: When you’ve reached the desired length for your tank top, bind off the stitches to create a clean edge. Use a stretchy bind-off method, such as the tubular bind-off, to match the ribbing and ensure a comfortable fit around the bottom hem.
By adding ribbing to the bottom of your tank top, you not only create an attractive detail but also improve the fit of your garment. Follow these steps and experiment with different ribbing patterns to create a tank top that is uniquely yours.
Blocking and Seaming your Tank Top
After completing the knitting portion of your DK tank top, it’s time to block and seam the garment to give it a finished look and ensure that it fits properly. Blocking is the process of shaping and stretching the knitted fabric to its desired dimensions, while seaming involves joining the different pieces of the tank top together.
To block your tank top, you will need to follow these steps:
- Wet block: Fill a basin or sink with lukewarm water and gently submerge the tank top. Allow it to soak for about 15 minutes.
- Remove excess water: Carefully lift the tank top out of the water and gently squeeze to remove excess water. Avoid wringing or twisting the fabric.
- Lay flat to dry: Lay the tank top on a clean, dry towel and shape it to the desired dimensions. Smooth out any wrinkles or puckering. Leave it to dry completely.
While the tank top is drying, you can begin seaming the different pieces together. Here’s how:
- Arrange the pieces: Lay out the front and back pieces of the tank top with the right sides facing up.
- Seam the shoulders: Use a tapestry needle and matching yarn to sew the shoulder seams. Start by inserting the needle through the first stitch on the front piece and then through the corresponding stitch on the back piece. Repeat this process until the seam is complete.
- Seam the sides: Fold the tank top in half, matching the side edges. Use the same seaming technique as for the shoulders to join the side seams.
- Weave in ends: Trim any excess yarn and use the tapestry needle to weave in the loose ends into the seams or the fabric itself for a clean finish.
Once you have blocked and seamed your tank top, give it one final inspection to ensure that everything is secure and the garment is properly shaped. You can also consider adding any desired finishing touches, such as ribbing or a decorative edging, to enhance the overall look of your tank top.
With the blocking and seaming process complete, your DK tank top is now ready to be worn and enjoyed!