
Hand knitting and machine knitting are two popular methods of creating knitted items. Hand knitting allows for more customization and creativity, while machine knitting offers speed and efficiency. But what if you want to convert a hand knitting pattern to a machine knitting pattern, so you can achieve the best of both worlds? This article will guide you through the process of converting a hand knitting pattern to a machine knitting pattern, so you can enjoy the benefits of both techniques.
Converting a hand knitting pattern to a machine knitting pattern requires a good understanding of both techniques. While the basic stitches and techniques are similar, there are some key differences that need to be considered. For example, hand knitting patterns often include stitch patterns and textures that are not easily replicated on a knitting machine. Additionally, hand knitting patterns may have stitch counts and shaping instructions that are not compatible with machine knitting.
When converting a hand knitting pattern to a machine knitting pattern, it’s important to start by analyzing the pattern and identifying any elements that need to be modified or adjusted. You may need to simplify stitch patterns or adjust stitch counts to make them suitable for machine knitting. It’s also important to take into account the gauge and tension of the knitting machine, as this can affect the final size and fit of the knitted item.
Step-by-Step Guide to Convert Hand Knitting Pattern to Machine Knitting
Converting a hand knitting pattern to a machine knitting pattern requires some adjustments and modifications to ensure that the finished product turns out as desired. Here is a step-by-step guide to help you convert a hand knitting pattern to machine knitting:
1. Understand the Differences
The first step in converting a hand knitting pattern to machine knitting is to understand the differences between the two techniques. Hand knitting allows for more flexibility and customization, while machine knitting is faster and more efficient. It is important to keep these differences in mind when making modifications to the pattern.
2. Analyze the Hand Knitting Pattern
Take a close look at the hand knitting pattern and understand its construction and stitch patterns. Identify any repeating sections or motifs that can be easily translated to the machine knitting technique. Make notes of any specific instructions or techniques that may need to be adjusted for machine knitting.
3. Adjust the Stitch Patterns
Machine knitting operates on a different scale than hand knitting, so it is often necessary to adjust the stitch patterns to achieve the desired effect. Consider the gauge and tension settings of your machine and make the necessary changes to the stitch patterns. This may involve changing the number of stitches, altering the stitch types, or adjusting the tension settings.
4. Modify the Shaping Instructions
Hand knitting patterns often include detailed instructions for shaping, such as increases and decreases, to achieve the desired fit. These shaping instructions may need to be modified for machine knitting. Consider the capabilities of your machine and make any necessary adjustments to the shaping instructions to ensure a proper fit.
5. Test and Adjust
Once you have made all the necessary modifications to the hand knitting pattern, it is important to test the machine knitting version. Start with a small sample or swatch to see how the stitch patterns and shaping instructions translate to the machine. Make any adjustments or refinements as needed before starting on the full project.
By following these steps and taking the time to make necessary adjustments and modifications, you can successfully convert a hand knitting pattern to machine knitting technique. Remember to always test and adjust as needed to achieve the desired results.
Understanding the Differences Between Hand Knitting and Machine Knitting
In the world of knitting, there are two main methods: hand knitting and machine knitting. While both result in beautiful and unique garments, there are several important differences between these two techniques.
1. Speed and Efficiency: One of the most obvious differences between hand knitting and machine knitting is the speed at which the fabric is created. Hand knitting is a slow, meticulous process, with each stitch being individually formed by the knitter’s hands. In contrast, machine knitting is a much faster method, as the machine can produce multiple stitches simultaneously.
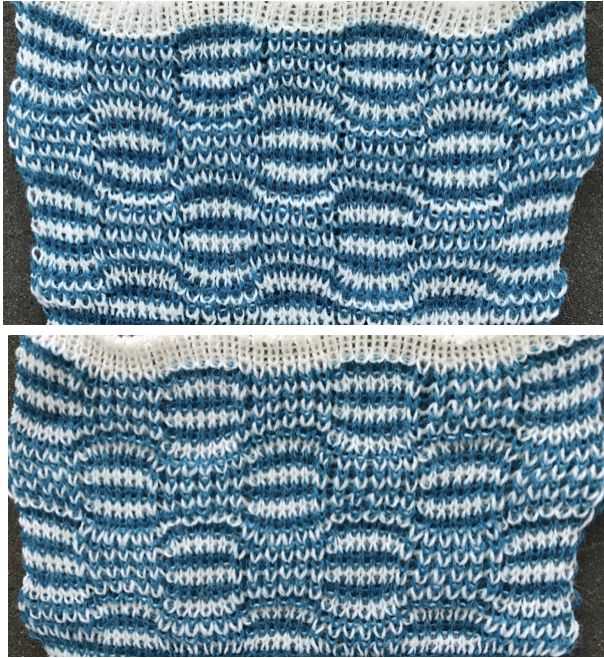
2. Stitch Variation: Hand knitting allows for a wide range of stitch patterns and textures, as the knitter can manipulate the needles in various ways. With machine knitting, the options for stitch variation are more limited, as the machine operates on pre-set patterns and designs. However, machine knitters can still achieve intricate patterns by using different types of yarn and adjusting machine settings.
3. Skill Level: Hand knitting requires a certain level of skill and experience to create professional-looking garments. It involves a deep understanding of various techniques, such as casting on, binding off, and increasing and decreasing stitches. Machine knitting, on the other hand, can be more accessible for beginners, as the machine handles many of the technical aspects and allows for easier repetition of patterns.
4. Customization and Creativity: Hand knitting offers a high level of customization and creativity, as knitters can easily modify patterns and experiment with different yarns and textures. Machine knitting, while still allowing for creativity, may require more planning and preparation to achieve the desired result, as the machine is more limited in its flexibility.
5. Cost and Accessibility: Hand knitting can be a relatively low-cost hobby, as it requires only a set of knitting needles and yarn. Machine knitting, on the other hand, can be more expensive, as the initial investment in a knitting machine can be significant. Additionally, hand knitting is accessible to anyone with basic knitting supplies, while machine knitting may require access to a machine and specialized knowledge.
In conclusion, whether you choose hand knitting or machine knitting, both methods have their own unique advantages and appeal. Hand knitting offers a slower, more hands-on approach that allows for a high level of customization and creativity. Machine knitting, on the other hand, offers speed and efficiency, making it suitable for large-scale production and repetitive patterns. Ultimately, the choice between hand knitting and machine knitting depends on personal preference, skill level, and the desired outcome.
Gathering the Necessary Tools and Materials
When converting a hand knitting pattern to machine knitting, it’s important to have the right tools and materials on hand. Here are some essential items you’ll need:
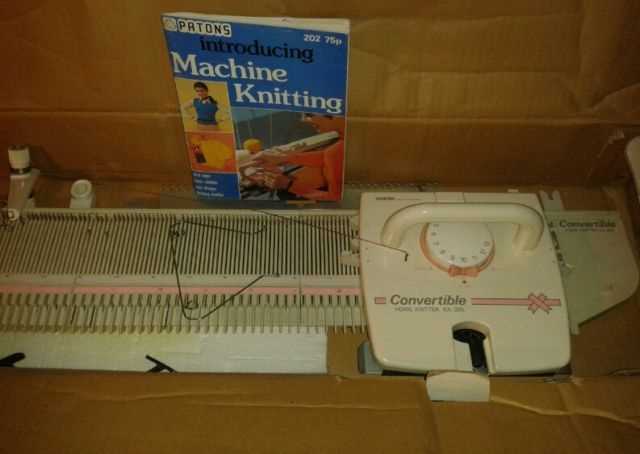
1. Knitting Machine
A knitting machine is the main tool you’ll need for machine knitting. There are various types and models available, so choose one that suits your needs and budget. Make sure it has the capabilities required for the pattern you’re converting.
2. Machine Knitting Yarn
Unlike hand knitting, machine knitting requires specific types of yarn that are suitable for the machine. Look for yarn that is specifically labeled for use with knitting machines. Consider the weight and fiber content of the yarn to ensure it matches the pattern requirements.
3. Machine Knitting Needles
Machine knitting needles are different from hand knitting needles. They are usually flat and have hooks on both ends to catch the yarn while knitting. Make sure you have the appropriate needle sizes for your machine and the pattern you’re converting.
4. Stitch Patterns and Manuals
Having stitch patterns and manuals specific to your knitting machine is crucial for successfully converting the pattern. These resources will help you understand the machine’s capabilities and how to create different stitches.
5. Notions and Accessories
Aside from the main tools, you’ll also need various notions and accessories such as a row counter, yarn tensioner, cone holder, and weights to keep your knitting in place. These small tools can make a big difference in the knitting process.
By gathering these necessary tools and materials, you’ll be well-equipped to convert your hand knitting pattern to machine knitting. Remember to refer to the machine’s manual and seek guidance from experienced machine knitters if needed. With practice and patience, you’ll be able to create beautiful machine-knit pieces using your favorite hand knitting patterns.
Analyzing the Hand Knitting Pattern
In order to convert a hand knitting pattern to a machine knitting pattern, it is important to carefully analyze the original hand knitting pattern. By understanding the structure and stitches used in the hand knitting pattern, you can make the necessary adjustments to create a machine knitting pattern that will produce a similar result.
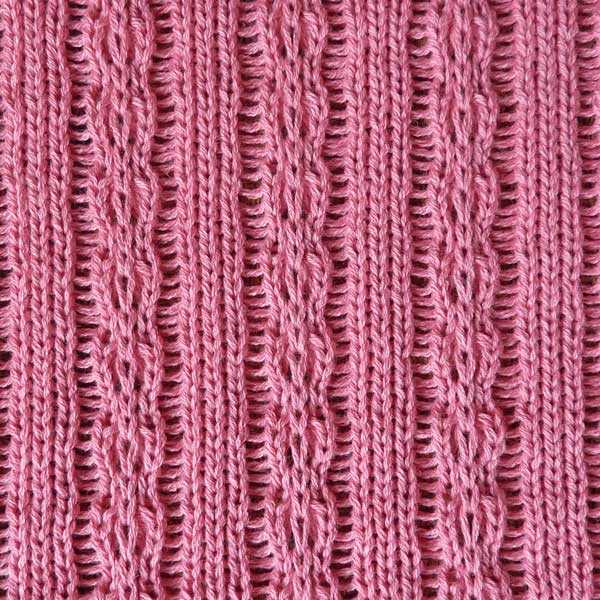
1. Stitch Types: Begin by identifying the different types of stitches used in the hand knitting pattern. This can include basic stitches such as knit and purl, as well as more complex stitches like cables or lace patterns. Understanding the stitch types will help determine which machine knitting techniques to use.
2. Gauge and Tension: Next, examine the gauge and tension information in the hand knitting pattern. This will give you an idea of the size and tension of the final knitted piece. Consider the recommended needle size and yarn weight, as well as any specific tension requirements. Translate this information into the appropriate machine knitting settings.
3. Construction and Shaping: Take note of the construction and shaping techniques used in the hand knitting pattern. This can include instructions for casting on and off, increases and decreases, and shaping the garment. Analyzing the construction will help you determine how to adapt these techniques for machine knitting.
4. Pattern Repetition: Look for any pattern repeats in the hand knitting pattern. This can help simplify the conversion process, as you may be able to create a repeating section that can be easily programmed into the knitting machine. Pay attention to the number of stitches and rows in each repeat.
5. Finishing Techniques: Lastly, consider any finishing techniques mentioned in the hand knitting pattern. This can include instructions for sewing seams, adding buttons or closures, or blocking the finished piece. Determine how these techniques can be incorporated into the machine knitting process.
By carefully analyzing the hand knitting pattern, you can ensure a smooth transition to machine knitting. Take note of the stitch types, gauge and tension, construction and shaping techniques, pattern repeats, and finishing techniques. With this information, you will be equipped to convert the hand knitting pattern to a machine knitting pattern effectively.
Calculating the Gauge for Machine Knitting
Before you can begin converting a hand knitting pattern to a machine knitting pattern, it is essential to calculate the gauge. The gauge refers to the number of stitches and rows per inch in the knitted fabric. This measurement will determine the size and fit of the final knitted piece, so it is crucial to get it right.
To calculate the gauge for machine knitting, you will need a few tools: a knitting machine with a sample setting, a ruler or tape measure, and the yarn you plan to use for the project. Start by casting on a sample number of stitches, typically around 20-30 stitches, on the knitting machine. Knit a few rows in the desired stitch pattern at a steady pace to create a fabric swatch.
Once you have the fabric swatch, use the ruler or tape measure to measure the number of stitches and rows in an inch. Count the number of stitches horizontally and vertically within a one-inch span. For example, if you count 18 stitches and 24 rows per inch, your gauge would be 18 stitches by 24 rows.
Remember to measure the gauge with the same tension and settings you plan to use for your project. This is important because different knitting machines and yarns may require different settings, and the tension can affect the size and drape of the knitted fabric.
If the gauge you measured does not match the gauge specified in the hand knitting pattern, you will need to adjust the settings on your knitting machine. This could involve changing the tension, stitch size, or even the yarn thickness. Experiment with different settings until you achieve the desired gauge.
Calculating the gauge for machine knitting is an essential step in converting hand knitting patterns. By adjusting the machine settings to match the gauge, you can ensure that your machine knit project will have the correct size and fit.
Adjusting the Stitch Pattern
When converting a hand knitting pattern to a machine knitting pattern, it is often necessary to adjust the stitch pattern to accommodate the different techniques used in each type of knitting. Hand knitting typically involves using needles to manually create knit and purl stitches, while machine knitting usually relies on the use of automated needles or hooks to create stitches. Therefore, it is important to modify the stitch pattern to ensure it can be easily replicated on a knitting machine.
Identify the stitch pattern: The first step in adjusting the stitch pattern is to identify the specific stitches and techniques used in the hand knitting pattern. This may involve reading through the pattern instructions and creating a chart or written list of the stitches used. By understanding the stitch pattern, you can better determine how to replicate it on a knitting machine.
Analyze the stitch pattern: Once the stitch pattern has been identified, it is important to analyze it to determine how it can be adjusted for machine knitting. Consider the differences between hand knitting and machine knitting, such as the ability for a machine to create intricate stitch patterns or the limitations of certain techniques on a machine. This analysis will help guide the adjustments needed to make the stitch pattern machine-friendly.
Make necessary modifications: Based on the analysis of the stitch pattern, make any necessary modifications to ensure it can be easily replicated on a knitting machine. This may involve simplifying complex stitch patterns, adjusting stitch counts, or reworking the pattern to fit the machine’s capabilities. It is important to take note of these modifications and update the pattern instructions accordingly.
Test and adjust: Once the modifications have been made, it is crucial to test the adjusted stitch pattern on the knitting machine before proceeding with the project. This will help identify any remaining issues or challenges and allow for further adjustments as needed. It may take some trial and error to achieve the desired result, but testing and adjusting the stitch pattern will ensure a successful machine-knitted outcome.
In conclusion, adjusting the stitch pattern when converting a hand knitting pattern to a machine knitting pattern is an essential step in ensuring that the pattern can be easily replicated using a knitting machine. By identifying, analyzing, and modifying the stitch pattern as needed, you can create a machine-friendly version of the original pattern and achieve the desired result in your machine-knitted project.
Modifying the Size and Measurements
When converting a hand knitting pattern to a machine knitting pattern, one of the key considerations is modifying the size and measurements to fit the desired size. Hand knitting patterns are typically written for a specific size, whereas machine knitting patterns can be adjusted to fit different measurements.
To modify the size and measurements of a hand knitting pattern, you will need to determine the gauge of your machine and calculate the number of stitches and rows required for the desired size. This can be done by swatching with your machine and measuring the gauge. Once you have the gauge, you can use it to calculate the number of stitches and rows needed to achieve the desired measurements.
Making adjustments to the pattern:
- Calculate the number of stitches and rows needed based on your machine’s gauge.
- Adjust the stitch and row counts in the pattern accordingly.
- Consider the ease you want to add or subtract from the garment and adjust the measurements accordingly.
- Make any necessary changes to the shaping of the garment, such as increasing or decreasing stitches at certain points.
- Keep track of the changes you make so that you can replicate them consistently throughout the pattern.
It is important to note that adjusting the size and measurements of a hand knitting pattern for machine knitting may require some experimentation and trial and error. It is recommended to test your modifications on a small swatch before applying them to the entire project. Additionally, it can be helpful to consult resources and guides specifically tailored to machine knitting for further guidance and tips on modifying patterns.
Choosing the Right Yarn for Machine Knitting
When it comes to machine knitting, selecting the right yarn is crucial for achieving the desired results. Machine knitting requires specific qualities in yarn to ensure smooth operation and consistent tension. Here are some important factors to consider when choosing yarn for machine knitting:
Fiber Content: The fiber content of the yarn plays a significant role in its suitability for machine knitting. Natural fibers like wool, cotton, and silk are often the preferred choice, as they tend to have good stretch and drape. However, synthetic fibers like acrylic and nylon can also be used, as long as they have a smooth texture and good tension control.
Yarn Weight: The weight of the yarn determines the thickness and density of the knitted fabric. Machine knitting can accommodate a wide range of yarn weights, from fine lace to bulky. It’s important to choose a yarn weight that is compatible with the machine’s needle size and gauge. Using a yarn weight that is too thick or too thin can result in uneven stitches or machine jams.
Texture and Twist: The texture and twist of the yarn can affect the appearance and durability of the knitted fabric. Smooth, tightly spun yarns are generally easier to work with on a machine and create neater stitches. However, textured or loosely spun yarns can add interesting visual effects to the finished piece. It’s important to consider the intended use and look of the final garment when selecting the yarn texture and twist.
Color and Dyeing: The color of the yarn is a personal preference, but it’s important to consider how the dye will behave during machine knitting. Some dyes may bleed or fade when exposed to the heat and friction of the knitting machine. It’s best to choose yarns that have been specifically dyed for machine knitting or to test the colorfastness of the yarn before using it.
Availability and Cost: Finally, it’s important to consider the availability and cost of the chosen yarn. Machine knitting often requires larger quantities of yarn, so it’s wise to choose a yarn that is readily available and affordable. However, it’s also worth investing in higher-quality yarns if the project calls for it, as they can make a significant difference in the final result.
- Choose a yarn with the right fiber content, ensuring good tension control and stretch.
- Select a yarn weight that is compatible with the machine’s needle size and gauge.
- Consider the texture and twist of the yarn, based on the desired appearance and durability.
- Opt for yarns with colorfast dyes to avoid any issues with bleeding or fading.
- Balance availability and cost, ensuring there is enough yarn for the project without breaking the budget.
Understanding and Adapting Hand Knitting Techniques for Machine Knitting
Hand knitting and machine knitting are two popular techniques used to create beautiful and intricate designs with yarn. While hand knitting involves using knitting needles to manually create stitches, machine knitting involves using a knitting machine to automate the process. While the two techniques may seem similar, there are significant differences that need to be understood in order to successfully adapt a hand knitting pattern for machine knitting.
One of the key differences between hand knitting and machine knitting is the gauge or tension of the stitches. Hand knitting typically produces a looser tension compared to machine knitting, which usually requires a tighter tension. This means that when adapting a hand knitting pattern for machine knitting, adjustments need to be made to ensure that the stitches are the correct size and tension for the machine. This may involve using a different size of yarn or adjusting the settings on the knitting machine.
Another important consideration when adapting hand knitting techniques for machine knitting is the structure of the pattern. Hand knitting patterns often involve complex stitch patterns and shaping techniques that may not be easily replicated on a knitting machine. It may be necessary to simplify or adapt the pattern to ensure that it can be successfully knit on a machine. This might involve replacing intricate stitch patterns with simpler ones or modifying shaping techniques to fit the constraints of the machine.
When adapting a hand knitting pattern for machine knitting, it is also important to consider the limitations of the machine itself. Knitting machines have a set number of needles and can only work with a certain number of stitches at a time. This means that patterns with a large number of stitches or complex cables may need to be modified to fit within the limitations of the machine. Additionally, it is important to consider the specific features and capabilities of the machine being used, as different machines may have different settings and limitations.
In summary, understanding and adapting hand knitting techniques for machine knitting requires a thorough understanding of the differences between the two techniques, as well as an ability to make adjustments to accommodate the specific requirements and limitations of machine knitting. With careful consideration and adaptation, it is possible to successfully convert hand knitting patterns for use on a machine, opening up a whole new world of possibilities for creating beautiful knitted designs.
Using the Correct Tension and Settings on the Knitting Machine
When converting a hand knitting pattern to a machine knitting pattern, it is important to use the correct tension and settings on the knitting machine to ensure that the finished garment comes out as intended. Each knitting machine has its own tension dial or settings, and it is essential to adjust these according to the yarn and stitch pattern being used.
Tension: The tension on a knitting machine determines how tightly or loosely the stitches are formed. If the tension is too loose, the resulting fabric may be too stretchy and lack structure. On the other hand, if the tension is too tight, the fabric may be stiff and not drape well. It is important to find the right tension setting by knitting a swatch and adjusting the tension dial or settings until the desired fabric is achieved.
Stitch Length: The stitch length on a knitting machine refers to the distance between each stitch. A shorter stitch length will create a denser fabric, while a longer stitch length will create a looser fabric. When converting a hand knitting pattern to a machine knitting pattern, it is important to consider the stitch length and adjust it accordingly to match the original pattern. This can be done by changing the settings on the machine or using a different needle bed.
Stitch Pattern: When converting a hand knitting pattern to a machine knitting pattern, it is important to choose a stitch pattern that is suitable for the machine. Some intricate stitch patterns may be difficult to replicate on a knitting machine, so it is important to choose a pattern that can be easily achieved. It is also important to consider the gauge of the machine and adjust the stitch pattern accordingly.
Machine Settings: In addition to tension and stitch length, there may be other settings on the knitting machine that need to be adjusted when converting a hand knitting pattern. This may include the type of stitch to be used (e.g. stockinette, ribbing, or lace), the carriage speed, and any special features or attachments that the machine may have. It is important to consult the user manual or seek guidance from experienced machine knitters to ensure that the correct settings are used for the desired outcome.
By using the correct tension and settings on the knitting machine, it is possible to successfully convert a hand knitting pattern to a machine knitting pattern. This allows for greater efficiency and speed in creating garments, while still achieving the desired look and fit. With practice and experimentation, machine knitting can open up a whole new world of possibilities for knitters.
Understanding and Using Machine Knitting Patterns
Machine knitting patterns are a valuable resource for knitters who want to produce high-quality garments efficiently. However, understanding and using these patterns can be challenging, especially for those who are used to hand knitting. Here are some tips to help you navigate through machine knitting patterns effectively.
1. Read the pattern carefully
Before you start knitting, take the time to thoroughly read the pattern. Pay attention to the stitch and row counts, as well as any special instructions or abbreviations. Make sure you understand the overall construction of the garment, including the shaping techniques used.
2. Familiarize yourself with the machine’s capabilities
Each knitting machine has its own set of features and limitations. Before using a pattern, it’s important to understand what your machine can do. Check the gauge of your machine and compare it to the gauge specified in the pattern. This will help you determine if you need to make any adjustments to achieve the desired size and fit.
3. Adapt hand knitting patterns if necessary
If you have a favorite hand knitting pattern that you want to convert to machine knitting, you can do so by making some modifications. Start by creating a tension swatch using your machine, then compare it to the gauge of the hand knitting pattern. Adjust the stitch and row counts accordingly to achieve the same measurements.
4. Take advantage of machine-specific techniques
Machine knitting offers unique possibilities that are not possible with hand knitting. Experiment with different textures, stitch patterns, and techniques that are specific to machine knitting. This will not only expand your repertoire but also allow you to create garments that have a professional finish.
5. Practice, practice, practice
Like any new skill, machine knitting requires practice. Start with simpler patterns and gradually work your way up to more complex projects. As you gain experience, you’ll become more comfortable with reading and executing machine knitting patterns.
By following these tips and putting in the time and effort to learn, you’ll soon be able to confidently use machine knitting patterns to create beautiful, well-fitting garments.
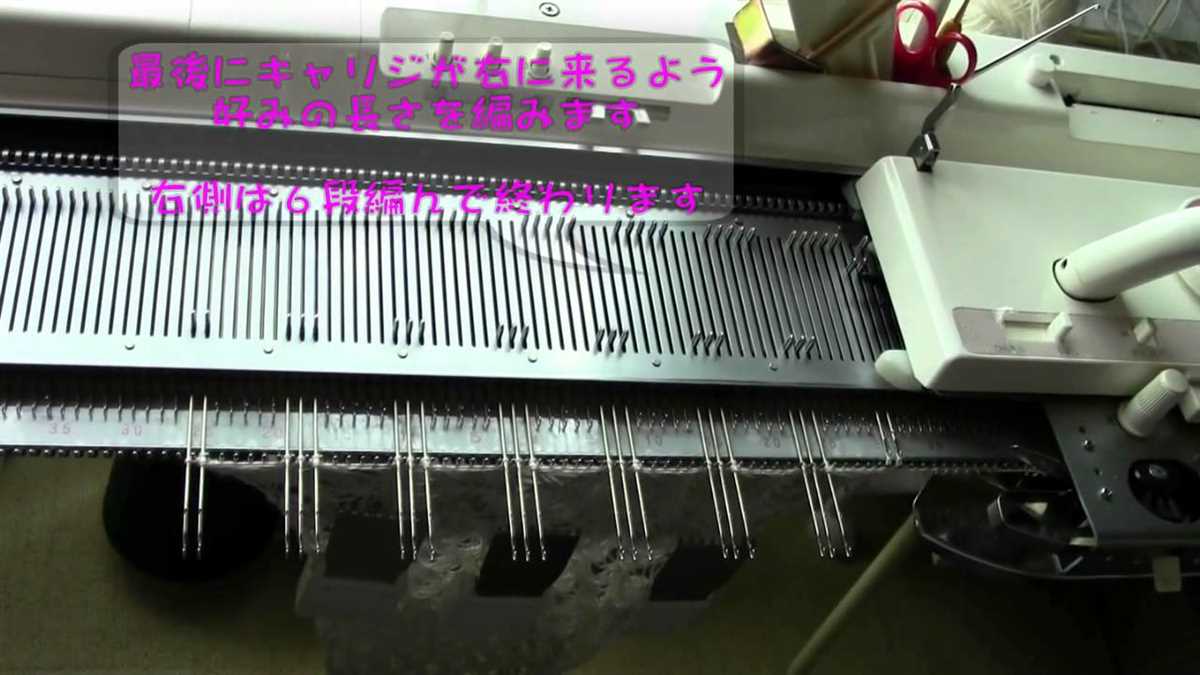
Testing and Adjusting the Machine Knitted Swatch
When converting a hand knitting pattern to a machine knitting pattern, it is important to thoroughly test and adjust the machine knitted swatch before continuing with the project. This ensures that the final product will have the desired fit and appearance.
First, it is necessary to carefully examine the machine knitted swatch to check for any errors or inconsistencies. This includes checking for dropped stitches, uneven tension, or missed increases or decreases. By identifying and fixing these issues early on, you can avoid potential problems later in the project.
Testing the Swatch
Testing the swatch involves measuring its dimensions to ensure that it matches the required gauge specified in the pattern. This is particularly important when converting from hand knitting to machine knitting, as the tension and scale of the stitches may vary. Use a ruler or measuring tape to measure both the width and height of the swatch and compare it to the gauge specified in the pattern. If the measurements don’t match, adjustments will be needed.
Another important aspect of testing the swatch is evaluating its stitch definition and fabric drape. Machine knitting can produce different results compared to hand knitting, so it’s essential to evaluate how the chosen stitch pattern and yarn work together. Pay attention to the texture and appearance of the swatch, ensuring that it matches the desired look of the final project.
Adjusting the Swatch
If the measurements of the swatch differ from the required gauge, adjustments will need to be made. This can involve changing the tension settings on the knitting machine or using different needles to achieve the correct gauge. It may also be necessary to adjust the stitch pattern or yarn choice to achieve the desired fabric drape and texture.
Additionally, if any errors or inconsistencies were identified in the swatch during testing, make sure to correct them before proceeding with the project. This may involve re-knitting certain sections or making adjustments to the knitting technique.
By thoroughly testing and adjusting the machine knitted swatch, you can ensure that your final project will turn out as desired. It provides an opportunity to identify and fix any issues early on, resulting in a successful conversion of the hand knitting pattern to machine knitting.
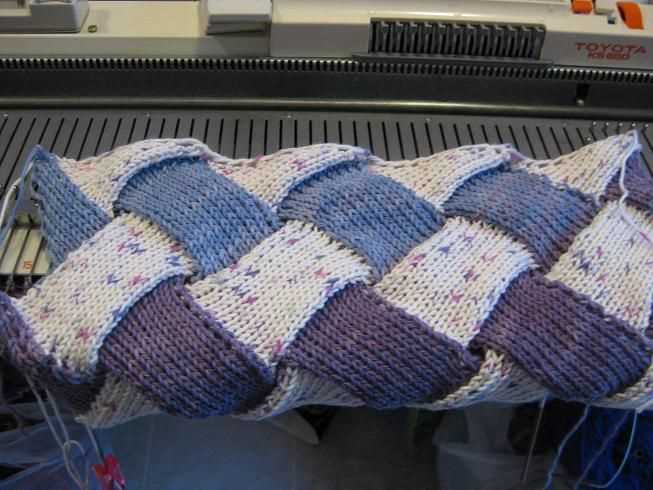
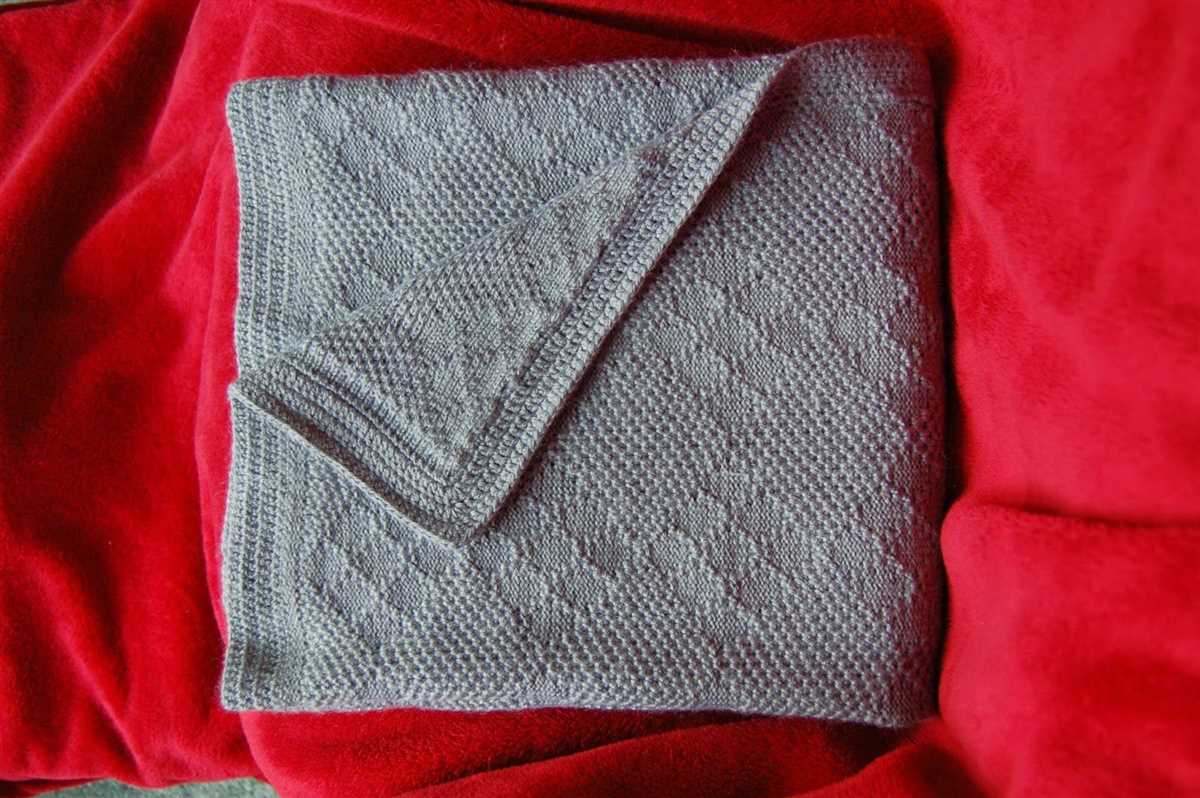
Finishing and Blocking the Machine Knitted Project
Once you have completed knitting your project on the machine, there are a few steps you can take to finish and block it to give it a polished and professional look. Finishing and blocking are essential steps in the knitting process that help to improve the drape, size, and overall appearance of your finished project.
First, you will need to weave in any loose ends of yarn that may be present on your project. This can be done with a tapestry needle by carefully threading the loose ends through the stitches on the wrong side of the fabric. It is important to securely weave in these ends to ensure that they do not come undone during use or washing.
After weaving in the ends, you can proceed to block your machine knitted project. Blocking involves washing or dampening the knitted fabric, then reshaping it to the desired size and laying it flat to dry. This step is particularly important for machine knitting as it helps to even out tension and smooth any irregularities in the fabric.
To block your machine knitted project, start by filling a basin or sink with lukewarm water and a mild detergent. Carefully submerge the project in the water, making sure not to agitate or twist it. Allow the project to soak for about 15 minutes, then gently squeeze out excess water. Avoid wringing or twisting the fabric, as this can distort the stitches.
Next, lay out a clean towel on a flat surface and place the damp project on top. Roll up the towel, gently pressing to remove more water from the project. Unroll the towel and carefully transfer the project to a padded blocking mat or another clean towel.
Using rustproof pins or blocking wires, stretch and pin the project into the desired shape and dimensions. Pay attention to any specific shaping instructions from the knitting pattern. Allow the project to air dry completely before unpinning. This may take a day or two, depending on the thickness of the fabric.
Once your machine knitted project is dry, remove the pins or wires and assess the results. You should notice an improvement in the drape and overall appearance of the fabric. If necessary, you can also gently steam the project using an iron on a low setting. Be sure to use a pressing cloth to protect the fabric from direct heat.
In conclusion, finishing and blocking are important steps to ensure that your machine knitted project looks its best. By weaving in loose ends and blocking the fabric, you can achieve a polished and professional finish that is sure to impress.