
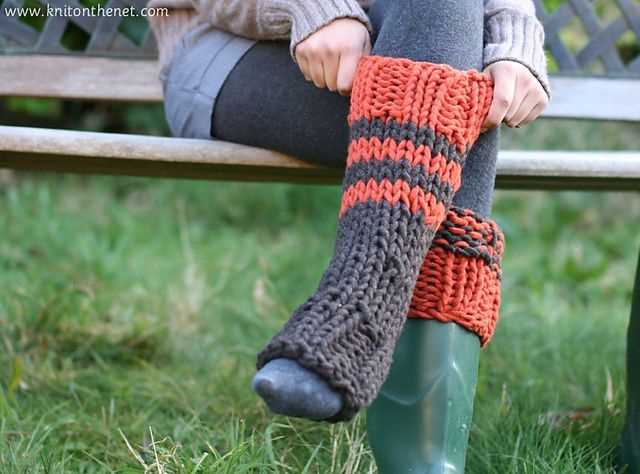
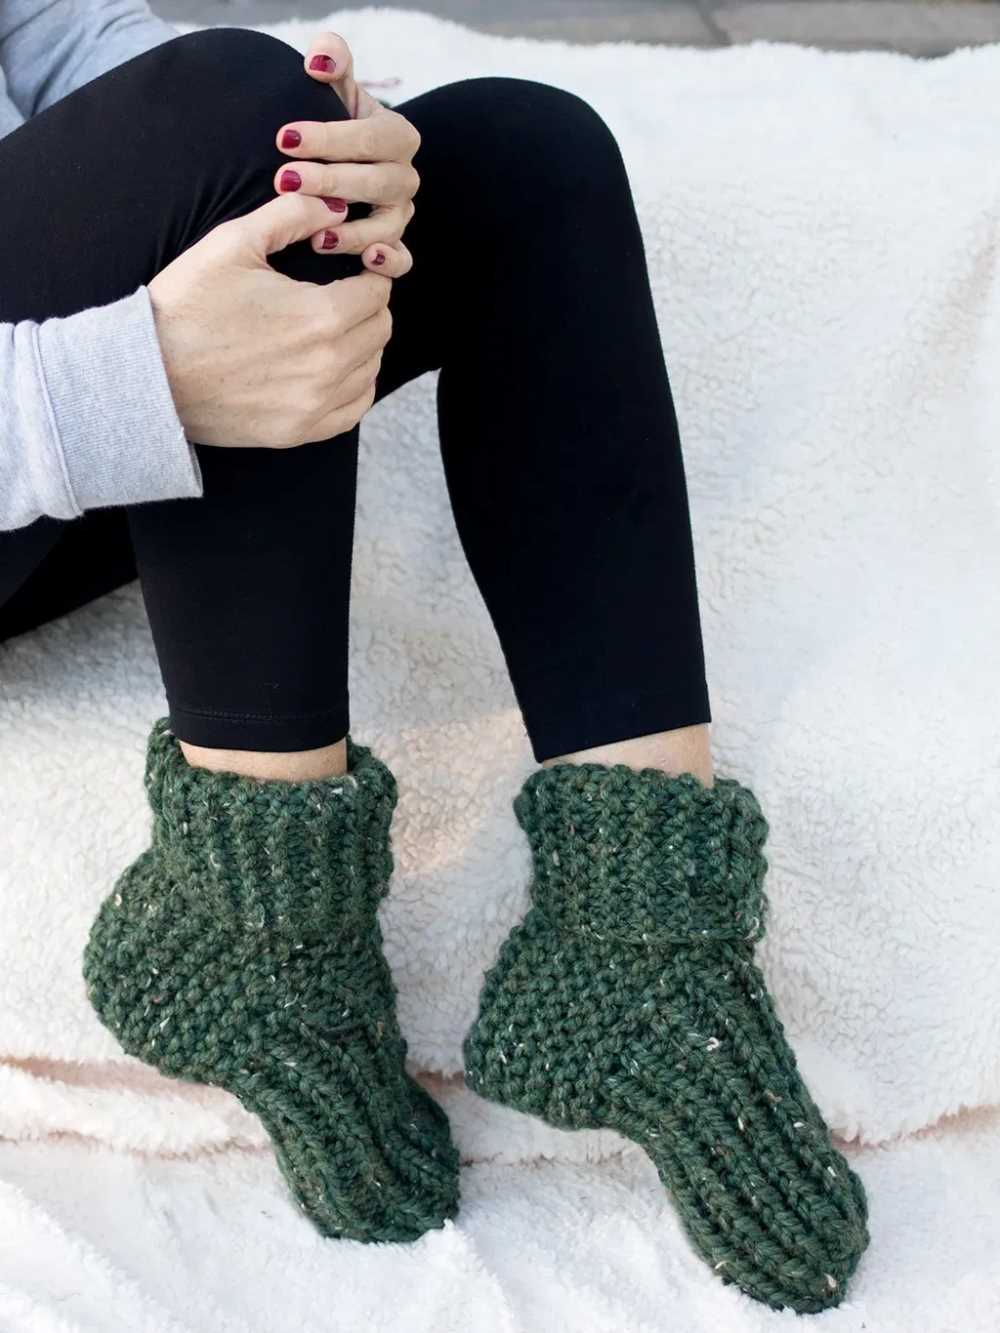
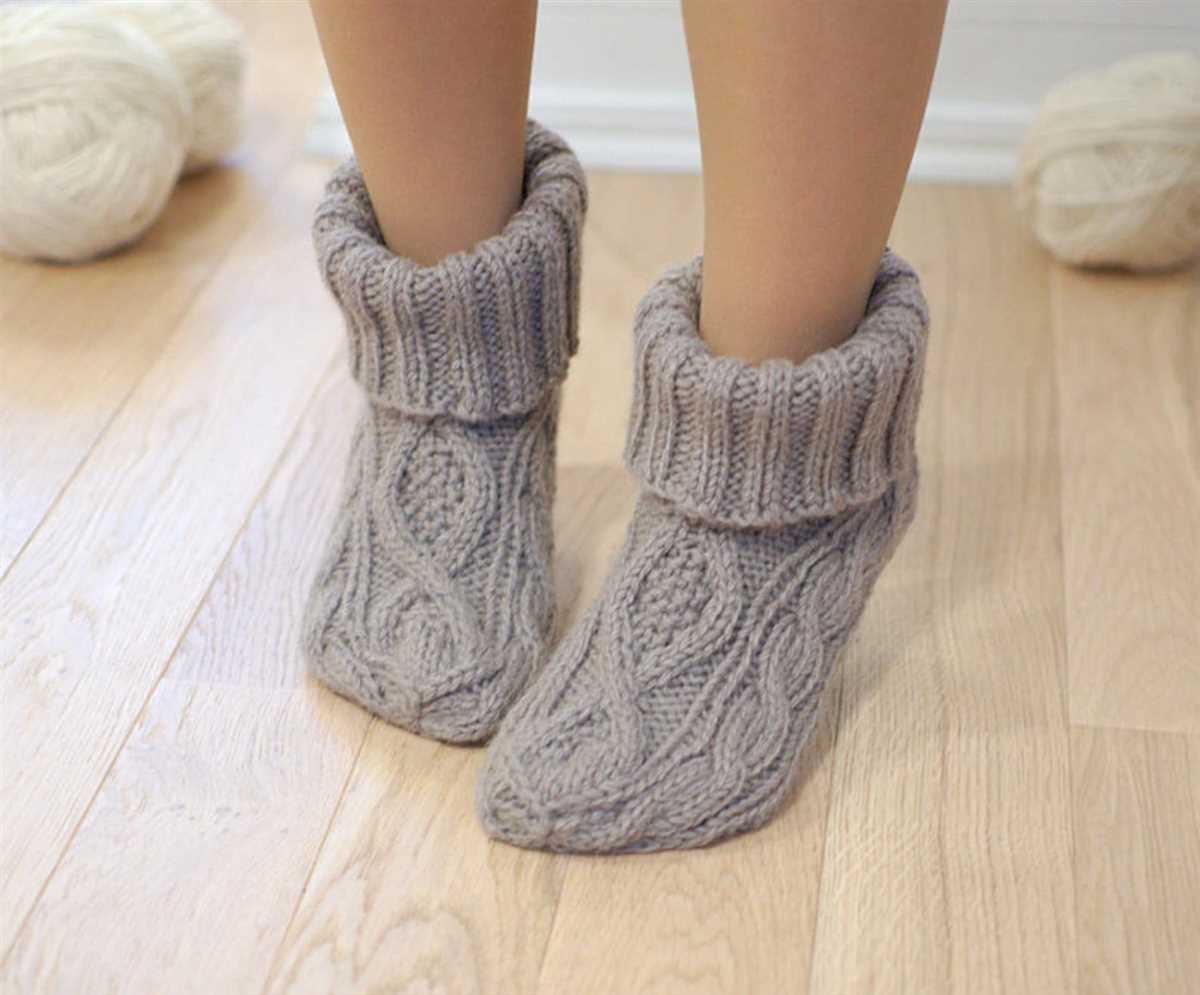
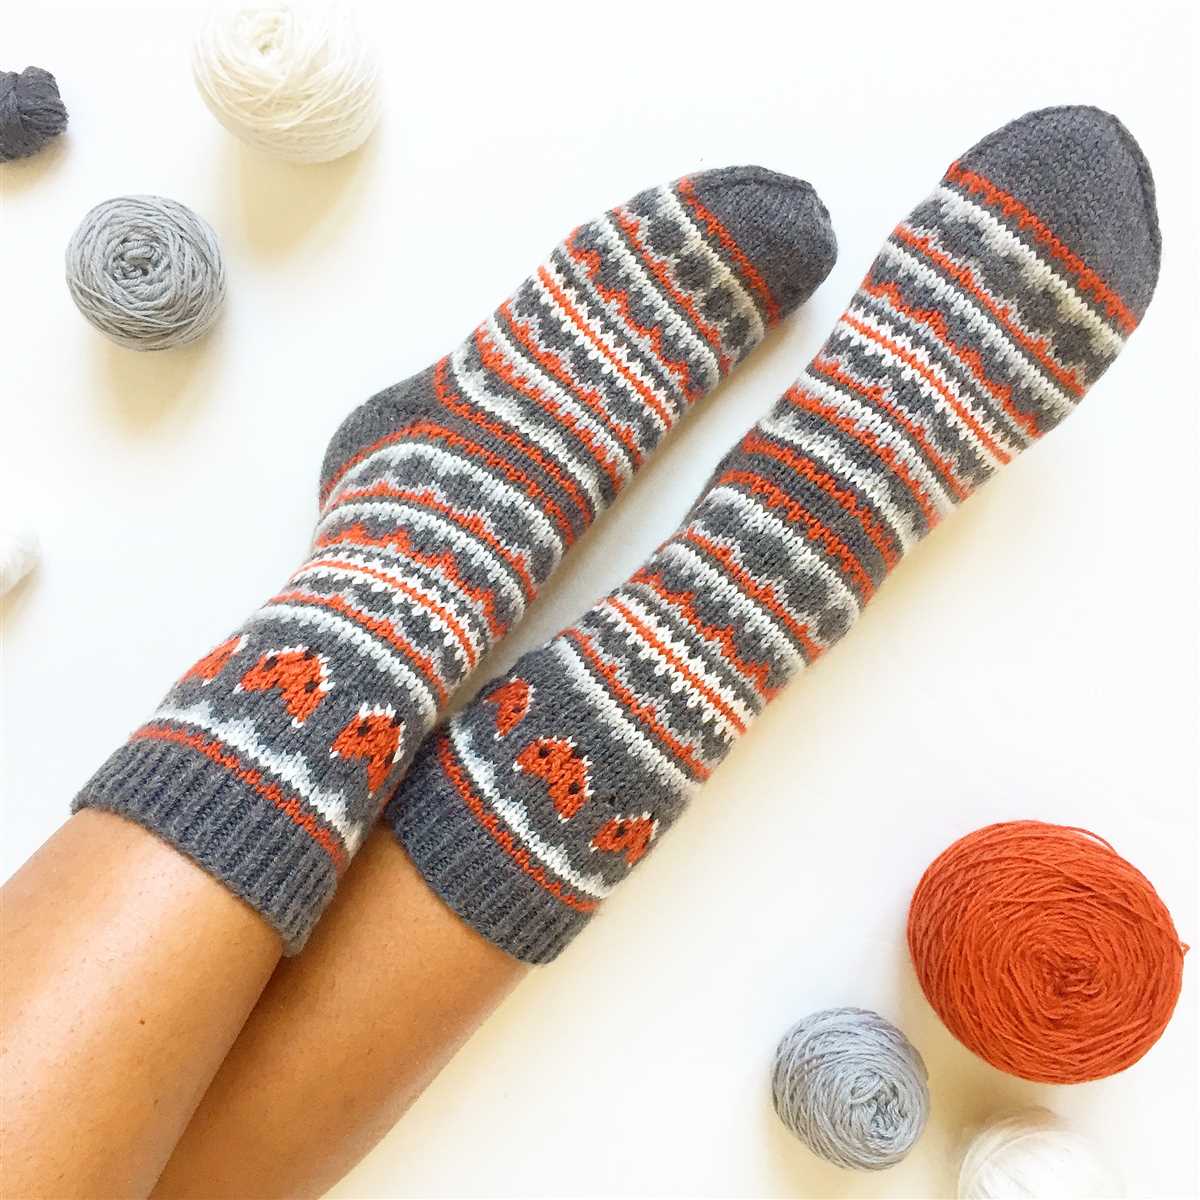
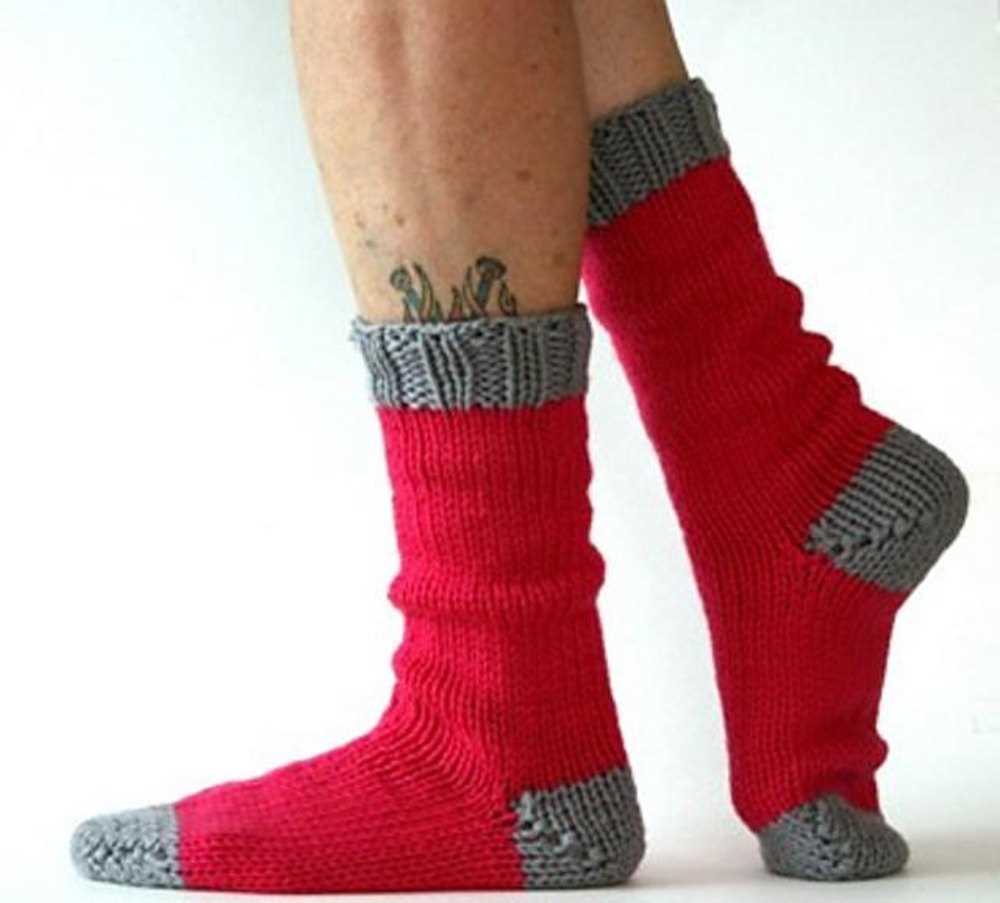
Winter is the perfect time to cozy up and keep warm with a pair of chunky knitted socks. There’s something special about wearing handmade socks that keep your feet snug and stylish at the same time. If you’re looking for a fun knitting project to tackle this season, look no further than a chunky knitted socks pattern.
Chunky knitted socks are not only fashionable but also practical. Made with thick yarn and large needles, these socks are both quick and easy to knit. They are the perfect choice for beginners who want to try their hand at knitting socks, as well as experienced knitters who are looking for a relaxing project to unwind with.
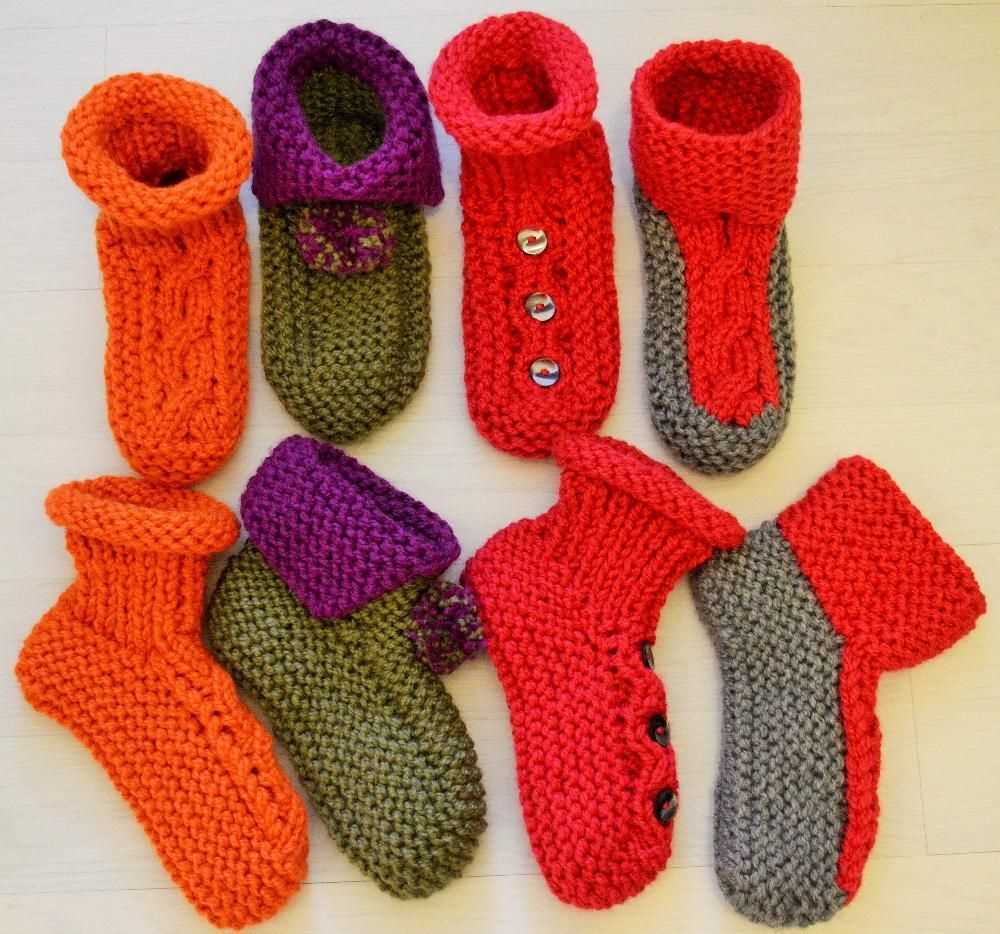
One of the great things about chunky knitted socks is their versatility. They can be customized to fit any foot size or style preference. Whether you prefer ankle socks, knee-highs, or something in between, you can easily adjust the pattern to create the perfect pair.
Chunky Knitted Socks Pattern
Chunky knitted socks are the perfect accessory for keeping your feet warm and cozy during the colder months. Whether you’re lounging around at home or heading out for a winter adventure, these socks will provide the ultimate comfort and insulation.
To create your own chunky knitted socks, you’ll need a set of double-pointed knitting needles and some thick, chunky yarn. The beauty of this pattern is its simplicity – even beginner knitters can easily master the basic techniques required.
Start by casting on the desired number of stitches, usually around 40-50, using the long-tail cast-on method. Divide the stitches evenly across three needles, and join in the round, being careful not to twist the stitches.
Next, follow a basic ribbing pattern for the cuff of the sock, alternating between knit and purl stitches. This will create a stretchy and comfortable cuff that will help keep the socks in place.
Once the cuff is complete, switch to stocking stitch for the main body of the sock. Continue knitting in the round until the sock reaches the desired length, usually around 7-8 inches from the cuff.
To shape the heel, you’ll need to work short rows. This involves knitting a certain number of stitches, then turning the work and knitting back in the opposite direction. These short rows create a curve, helping the sock to fit snugly around the heel.
After shaping the heel, continue knitting in stocking stitch until the sock reaches the desired length for the foot, typically around 9-10 inches from the cuff. Finally, it’s time to shape the toe with a series of decreases, gradually reducing the number of stitches until you have just a few remaining.
Finish off the sock by grafting the stitches together using the Kitchener stitch, or simply bind off the stitches and sew up any remaining seams.
With this chunky knitted socks pattern, you can create a cozy and stylish accessory that will keep your feet warm all winter long. Experiment with different colors and yarns to make each pair unique to your personal style.
Materials and Tools
When it comes to making chunky knitted socks, you’ll need a few specific materials and tools to get started. Here’s a list of the essential items you’ll need:
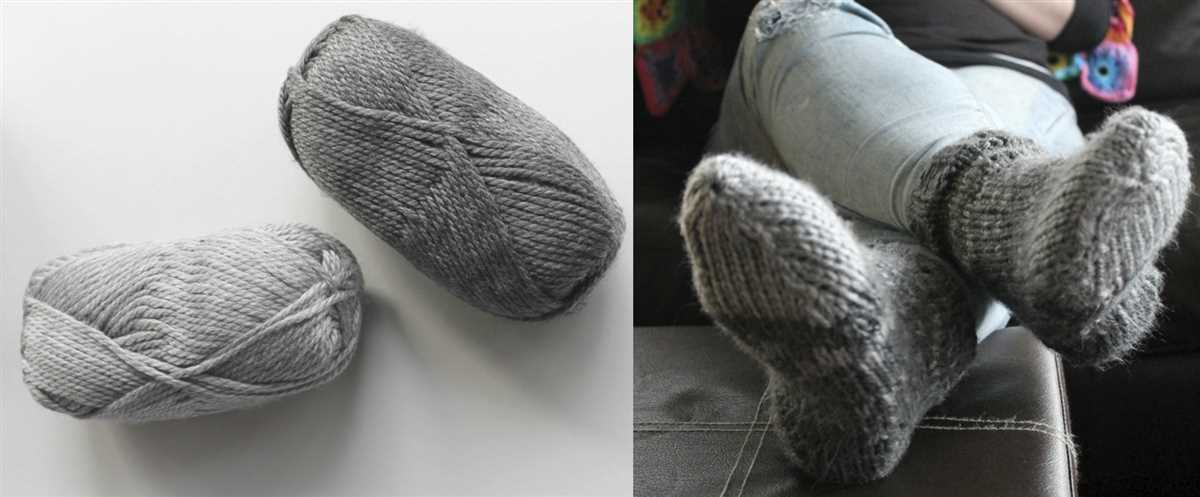
- Chunky yarn: The key to creating thick and cozy socks is using chunky yarn. Look for a soft and durable yarn that will keep your feet warm during the colder months.
- Knitting needles: Choose a pair of knitting needles that are suitable for working with chunky yarn. Circular or double-pointed needles are commonly used for sock knitting.
- Tape measure: Accurate measurements are crucial for ensuring a proper fit. A tape measure will help you measure the length of your foot and the circumference of your leg.
- Darning needle: This needle is used for sewing in loose ends and finishing touches on your socks.
- Scissors: A pair of sharp scissors is necessary for cutting yarn and trimming any excess.
Additionally, you may also want to have the following tools and accessories handy:
- Stitch markers: These small plastic or metal rings are used to mark specific stitches or sections in your knitting.
- Row counter: A row counter can be helpful for keeping track of your stitch count and progress.
- Stitch holders: Stitch holders are useful for holding stitches in place while you work on other sections of your sock.
- Pom pom maker: If you want to add a decorative touch to your socks, a pom pom maker can help you create fluffy and playful pom poms.
With these materials and tools at your disposal, you’ll be well-equipped to create your own pair of cozy and stylish chunky knitted socks.
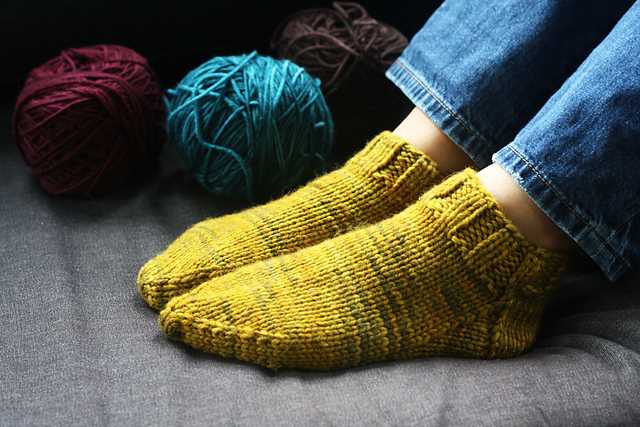
Choosing the Right Yarn
When knitting chunky knitted socks, it is important to choose the right yarn that will provide warmth, durability, and comfort. The type of yarn used can greatly affect the final result and overall quality of the socks.
Fiber content: One of the first things to consider when choosing yarn for chunky knitted socks is the fiber content. Common options include wool, acrylic, alpaca, and blends of these fibers. Wool is known for its excellent insulation and moisture-wicking properties, making it a popular choice for warm and cozy socks. Acrylic yarn is a synthetic option that is lightweight, durable, and easy to care for. Alpaca yarn is known for its softness and warmth, making it a luxurious choice for chunky socks. Blends of different fibers can offer a combination of qualities, such as the warmth of wool and the softness of alpaca.
Weight and thickness: Another important factor to consider is the weight and thickness of the yarn. Chunky yarn is typically thicker than standard yarn, which means it will create a bulkier and warmer fabric. The weight of the yarn is usually indicated on the yarn label, ranging from super bulky to bulky. It is important to choose a yarn weight that is suitable for the chosen pattern and desired outcome. Thicker yarns will create quicker projects, but they may also require larger knitting needles or hooks.
Color and texture: The color and texture of the yarn can also play a role in the decision-making process. The color can add an element of style and personal preference to the socks, whether it be bold and vibrant or subtle and neutral. The texture of the yarn can also enhance the overall look and feel of the socks, whether it be smooth and sleek or fluffy and textured. It is important to choose a yarn color and texture that will complement the chosen pattern and suit the recipient’s taste.
Overall, choosing the right yarn for chunky knitted socks involves considering factors such as fiber content, weight and thickness, as well as color and texture. By carefully selecting the yarn, knitters can ensure that their chunky knitted socks are not only visually appealing but also provide the desired warmth and comfort.
Selecting the Needles
When it comes to knitting chunky socks, selecting the right needles is crucial. The size of the needles directly affects the overall look and feel of the finished product. It also determines the gauge or tension of your knitting, which in turn affects the size and fit of the socks.
For chunky knitted socks, it is recommended to use larger needle sizes to create a looser, more open fabric. This not only adds to the cozy and warm feel of the socks but also makes them quicker to knit. Generally, needle sizes between 7mm and 9mm are suitable for chunky knitting. However, keep in mind that the exact size will depend on your personal knitting style, yarn thickness, and desired tension.
A good starting point is to choose a needle size that is larger than what is indicated on the yarn label. This will help you achieve the desired chunky look and feel. It’s also a good idea to knit a gauge swatch before starting the socks to ensure that you are using the correct needles and achieving the desired tension.
Additionally, consider the type of needles you prefer to work with. Some knitters prefer using straight needles, while others prefer circular needles or double-pointed needles for knitting socks. Each type of needle has its own advantages and disadvantages, so choose the one that you find most comfortable and efficient for your knitting style.
Gauge Swatch
In order to ensure that your chunky knitted socks will fit correctly, it is important to create a gauge swatch before starting your project. The gauge swatch allows you to check your tension and adjust your needle size if necessary.
To create a gauge swatch, you will need to use the same type of yarn and needles that you plan to use for your socks. Cast on a number of stitches recommended in the pattern, typically around 30 stitches is a good starting point. Knit a few rows in the specified pattern, paying close attention to your tension and the size of the stitches.
Once you have completed a few rows, measure your swatch using a ruler or tape measure. Compare the number of stitches and rows per inch to the gauge specified in the pattern. If your swatch does not match the recommended gauge, you may need to adjust your needle size. If the stitches are too small, try using a larger size needle. If the stitches are too large, try using a smaller size needle.
Creating a gauge swatch may seem like an extra step, but it is an important one to ensure that your chunky knitted socks turn out the correct size. Taking the time to check your tension and make any necessary adjustments will result in a better-fitting and more comfortable finished product. Happy knitting!
Getting Started
Knitting chunky knitted socks can be a fun and rewarding project for both beginners and experienced knitters. These cozy socks are perfect for keeping your feet warm during the colder months, and they make great gifts for family and friends.
Materials
Before getting started, make sure you have all the necessary materials. For this project, you will need:
- Chunky yarn in your desired color
- Knitting needles in the appropriate size for the yarn
- A yarn needle for sewing in ends
- Scissors to cut the yarn
Gauge
Next, it is important to check your gauge before starting the pattern. Gauge refers to the number of stitches and rows per inch of knitting. It ensures that your finished socks will fit properly. To check your gauge, create a small swatch of knitting using the chunky yarn and needles. Measure the number of stitches and rows in a 1-inch square. If your gauge does not match the pattern’s gauge, you may need to adjust your needle size.
Pattern
Once you have gathered all the materials and checked your gauge, you are ready to start knitting your chunky knitted socks. The pattern will provide you with step-by-step instructions on how to create the socks, including casting on, knitting the body and heel flap, shaping the gusset, and finishing the toe. It is important to follow the pattern closely to ensure that your socks turn out as desired.
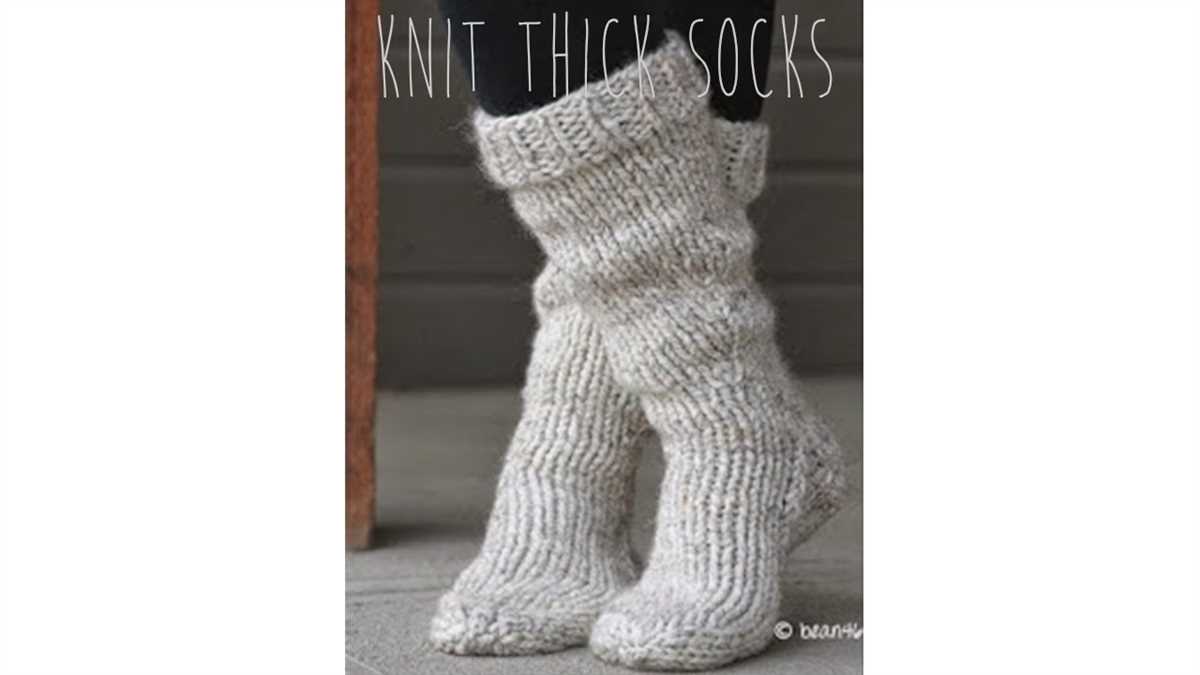
Knitting the Ribbed Cuff
The ribbed cuff is an essential part of chunky knitted socks. It not only adds a decorative touch to the socks but also provides a snug fit around the ankle, preventing them from slipping off. Knitting the ribbed cuff is relatively easy and can be done using basic knitting techniques.
To begin, cast on the desired number of stitches using a ribbing stitch pattern, such as knit 2, purl 2. This creates a stretchy and textured cuff. Make sure to use the appropriate size needle to achieve the desired tension and fit. If you want a tighter cuff, you can go down a needle size.
Once you have cast on the stitches, continue knitting in the ribbing stitch pattern for the desired length of the cuff. You can make the cuff as long as you like, but typically a cuff that measures around 1-2 inches is sufficient. Remember to keep track of your rows if you want the ribbing pattern to be consistent.
When you have reached the desired length, you can either bind off the stitches in pattern or use a stretchy bind-off method, such as the Jeny’s Surprisingly Stretchy Bind-Off. This will ensure that the cuff has enough stretch to comfortably fit over the foot and ankle.
Once you have finished knitting the ribbed cuff, you can continue with the rest of the sock pattern, such as knitting the leg, heel, and foot. The ribbed cuff sets the foundation for the rest of the sock and adds a stylish touch to the overall design.
In summary, knitting the ribbed cuff for chunky knitted socks involves casting on the desired number of stitches using a ribbing stitch pattern, knitting in the ribbing pattern for the desired length, and binding off in pattern or using a stretchy bind-off method. This creates a snug and decorative cuff that enhances the overall look and fit of the socks. Happy knitting!
Knitting the Leg

Once you have finished knitting the cuff of your chunky knitted sock, it’s time to start knitting the leg. The leg is the part of the sock that goes up the calf, and it can be knit to any desired length.
To begin, continue using your chosen stitch pattern from the cuff, or you can switch to a different stitch pattern for the leg. This is a great opportunity to add some texture or interesting design elements to your sock.
Row 1: Start by knitting across the row, following your stitch pattern.
Row 2: Purl across the row, again following your stitch pattern.
Continue knitting rows 1 and 2 until the leg is the desired length. You can measure the leg by trying on the sock or by using a tape measure. Keep in mind that the leg should be long enough to reach just below the knee or to the desired length specified in the pattern you are following.
Once the leg is the desired length, you can move on to knitting the heel of the sock.
Remember to keep track of your stitches and rows to ensure that both socks are the same length. This can be done by using stitch markers and row counters or by counting your stitches and rows as you go.
Shaping the Heel
In order to create the heel of the chunky knitted socks, you will need to divide your stitches into three sections. The first section will be for the heel flap, the second section will be for the heel turn, and the third section will be for the gusset.
Heel Flap: To start the heel flap, you will work back and forth in rows over half of your total stitches. This will create a flat piece that covers the back of the heel. You will typically use a slip stitch pattern, such as the Eye of Partridge stitch, for added durability and stretch.
Heel Turn: Once the heel flap is complete, you will begin shaping the heel turn. This involves creating diagonal lines of decreases to create a cup shape for the heel. You will continue to work back and forth in rows, decreasing at each end of the needle until you have a certain number of stitches remaining.
In addition to shaping the heel turn, you will also need to create a small gap in the knitting, called the “spine,” to allow for a smooth transition when picking up stitches for the gusset later on.
Gusset: After shaping the heel turn, you will move on to the gusset. This involves picking up stitches along the sides of the heel flap and working in the round again. The gusset helps to create a comfortable fit and allows the sock to hug the foot more securely.
Once you have completed the shaping of the heel, you can continue with the rest of the sock, such as knitting the foot and toe. Following a well-designed pattern and understanding the techniques involved in shaping the heel will ensure that your chunky knitted socks fit comfortably and look professionally made.
Knitting the Foot
Once you have completed the cuff of your chunky knitted socks, it’s time to start knitting the foot. This is the part of the sock that covers the bottom of your foot and extends from the cuff to the toe. The foot section is typically worked in stockinette stitch, which creates a smooth and stretchy fabric.
To begin knitting the foot, you will continue working in the round, just as you did for the cuff. If you are following a specific pattern, make sure to carefully follow the instructions for the foot section. Some patterns may have specific stitch counts or shaping techniques that you need to follow.
Stockinette Stitch: When knitting the foot, you will be working in stockinette stitch, which means you will knit every round. This creates a smooth fabric on the right side of the sock and a purl fabric on the inside.
- Round 1: Knit all stitches
- Repeat Round 1 for desired length
Shaping: Depending on the pattern, you may need to shape the foot section of your sock. This can include decreasing or increasing stitches to create a better fit. Follow the pattern instructions carefully to ensure the proper shaping.
Continue knitting the foot section until you have reached the desired length, usually measured from the back of the heel to the tip of the toe. Keep trying on the sock as you go to ensure the perfect fit. Once the foot section is complete, you can move on to knitting the toe of your chunky knitted sock.
Shaping the Toe
To shape the toe of the chunky knitted socks, you will need to decrease gradually to create a rounded, tapered end. This will ensure a comfortable fit for the wearer.
Step 1: Decrease Stitches
Start by decreasing stitches evenly across the front of the foot. You can do this by knitting two stitches together at regular intervals. This will narrow down the width of the sock and create a more fitted shape.
Step 2: Shaping the Taper
Once you have decreased enough stitches, you will begin to shape the taper of the toe. To do this, continue knitting in rounds, decreasing stitches at the beginning and end of each row. This will create a smooth, rounded shape that tapers towards the end of the sock.
Step 3: Finishing the Toe
After shaping the taper, you will have a small number of stitches left. To finish the toe, cut the yarn and thread it through the remaining stitches, pulling tight to close the gap. This will create a neat and seamless toe.
By following these steps, you can easily shape the toe of your chunky knitted socks and create a comfortable and stylish pair of socks for yourself or a loved one. Enjoy the process of knitting and the cozy warmth of the finished product!
Finishing Touches
Once you have completed knitting your chunky knitted socks, it’s time to add the finishing touches to give them a polished look. Here are a few steps you can follow to make sure your socks are perfect:
Secure Loose Ends
First, check your work and make sure there are no loose ends or stray yarn ends hanging out. Use a tapestry needle to weave in any loose ends on the inside of the socks. This will ensure that your socks are comfortable to wear and will not unravel.
Block Your Socks
Blocking your knitted socks can improve their overall appearance and help them retain their shape. To block your socks, soak them in lukewarm water and a gentle wool wash. Gently squeeze out the excess water and reshape the socks to their desired size. Place them on a clean towel and let them air dry.
Add Ribbed Cuffs
For an extra touch of style, you can add ribbed cuffs to your chunky knitted socks. This will not only make them look more professional but also help them stay in place on your legs. To add ribbed cuffs, pick up stitches along the top of the sock and knit in a rib stitch pattern for a few inches. This will create a stretchy and snug cuff.
Embroider Personalization
If you want to add a personal touch to your chunky knitted socks, consider embroidering initials or a small design on the side. Using embroidery floss and a needle, carefully stitch your desired pattern onto the sock. This will make your socks unique and add a personalized touch.
By following these finishing touches, you can elevate your chunky knitted socks from basic to beautiful. Take the time to add these extra details, and you’ll be rewarded with a pair of socks that are not only cozy but also stylish.
Tips and Troubleshooting
Knitting chunky socks can be a fun and rewarding project, but it’s not without its challenges. Here are some tips and troubleshooting suggestions to help you along the way:
1. Use the right yarn and needle size
Make sure to choose a chunky yarn that is suitable for socks. Look for a yarn that has a good combination of warmth, durability, and softness. Additionally, check the recommended needle size for the yarn and use the appropriate size to achieve the desired gauge.
2. Check your gauge
Before starting your project, knit a swatch using the chosen yarn and needles to check your gauge. This will ensure that your socks will fit properly. If your gauge is too tight, try using larger needles. If it’s too loose, switch to smaller needles.
3. Pay attention to tension
When knitting chunky socks, it’s important to maintain an even tension. Avoid pulling the yarn too tightly or leaving it too loose. Consistent tension will result in socks that fit well and have a professional finish.
4. Follow the pattern instructions
Read the pattern instructions carefully and follow them closely. If there are any abbreviations or special techniques that you’re unfamiliar with, take the time to learn them before starting. Following the pattern accurately will ensure that your socks turn out as intended.
5. Fixing mistakes
If you make a mistake in your knitting, don’t panic! Depending on the mistake, you may be able to “tink” (knit backwards) to undo the stitches and fix the error. For more complicated mistakes, you may need to “frog” (rip out) a few rows and re-knit. Remember, mistakes happen to everyone, so don’t get discouraged.
6. Finishing techniques
Once you’ve completed knitting your chunky socks, don’t forget about the finishing touches. Weave in any loose ends of yarn using a tapestry needle. You can also block your socks to give them a more polished look. Follow the specific blocking instructions for your chosen yarn to achieve the best results.
Summary
Knitting chunky socks can be a fun and satisfying project. By choosing the right yarn and needle size, checking your gauge, maintaining even tension, following the pattern instructions, and fixing any mistakes that arise, you can create a pair of cozy and stylish socks that you’ll love to wear.