
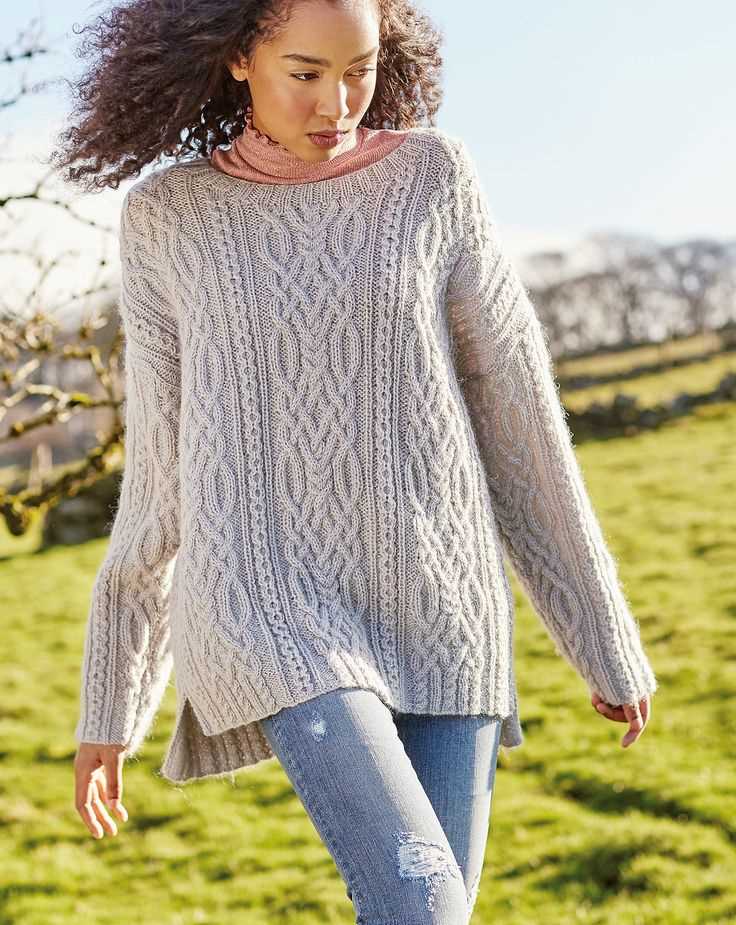
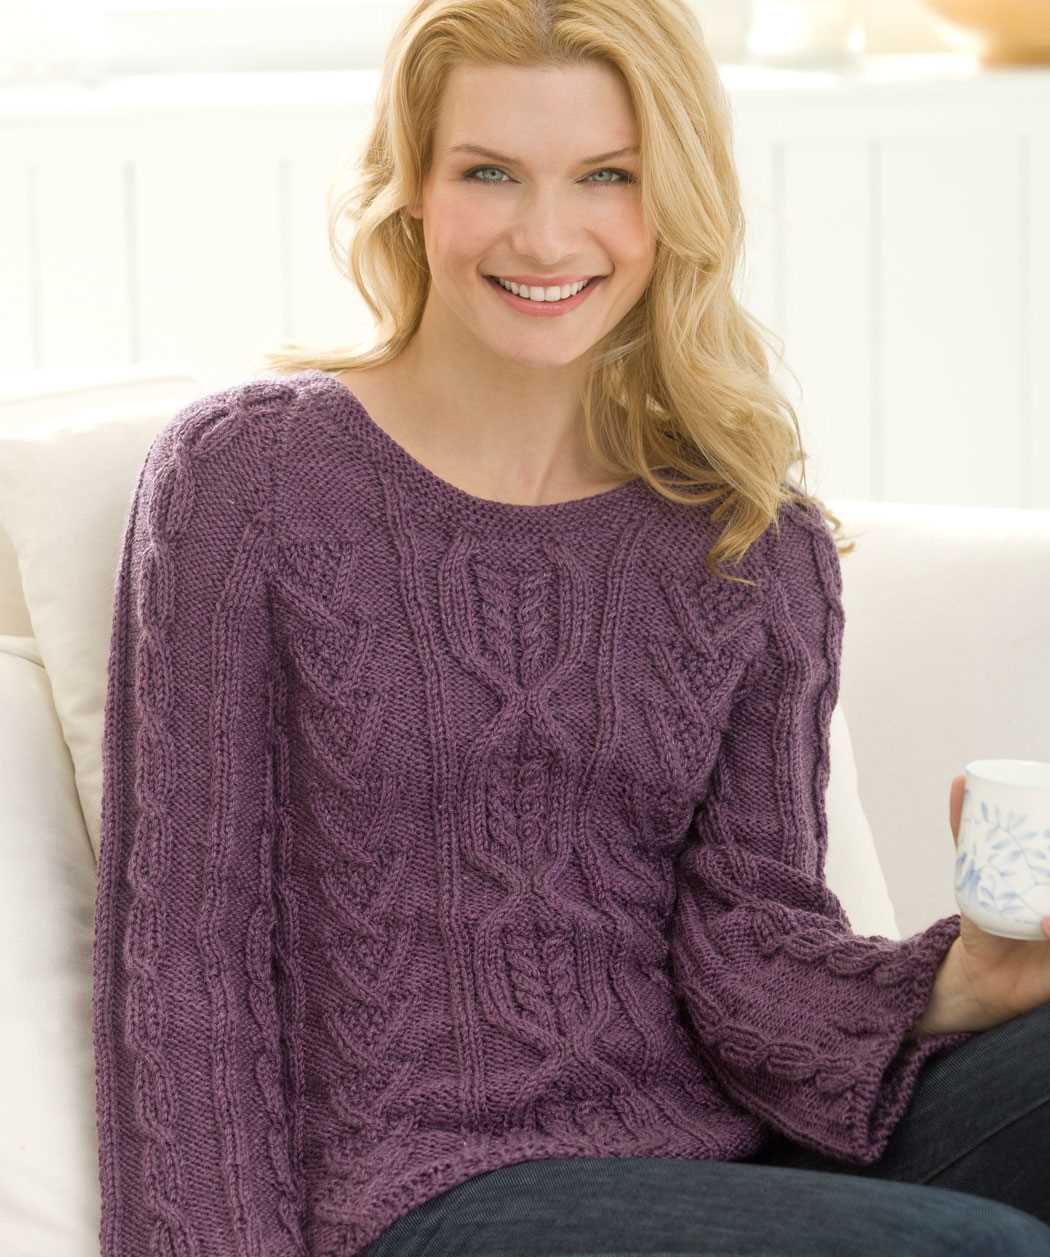
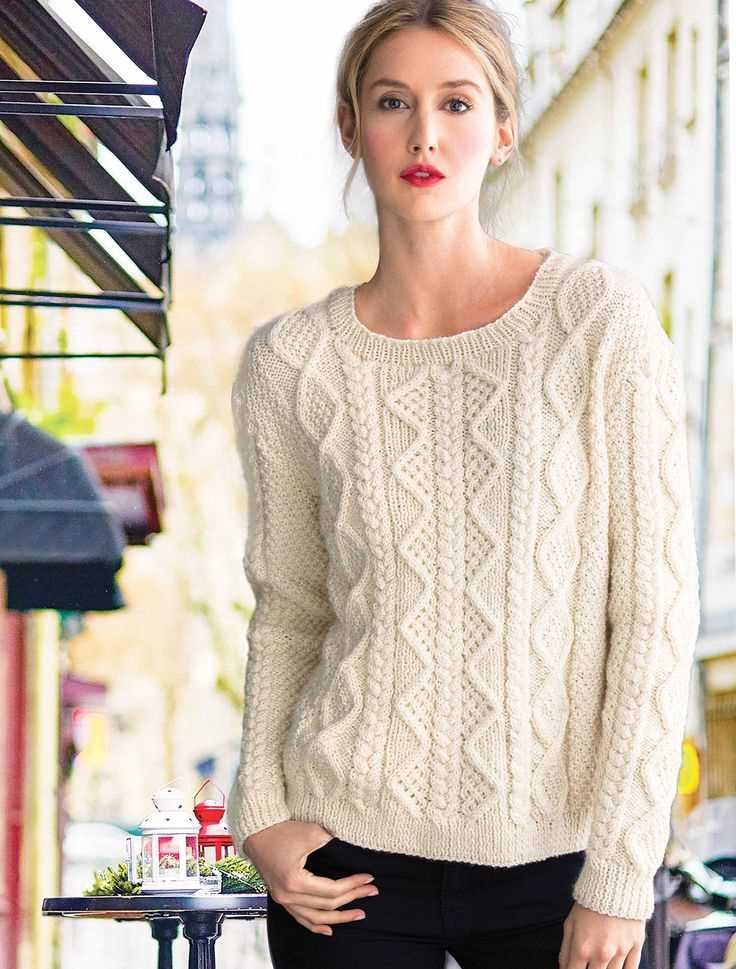
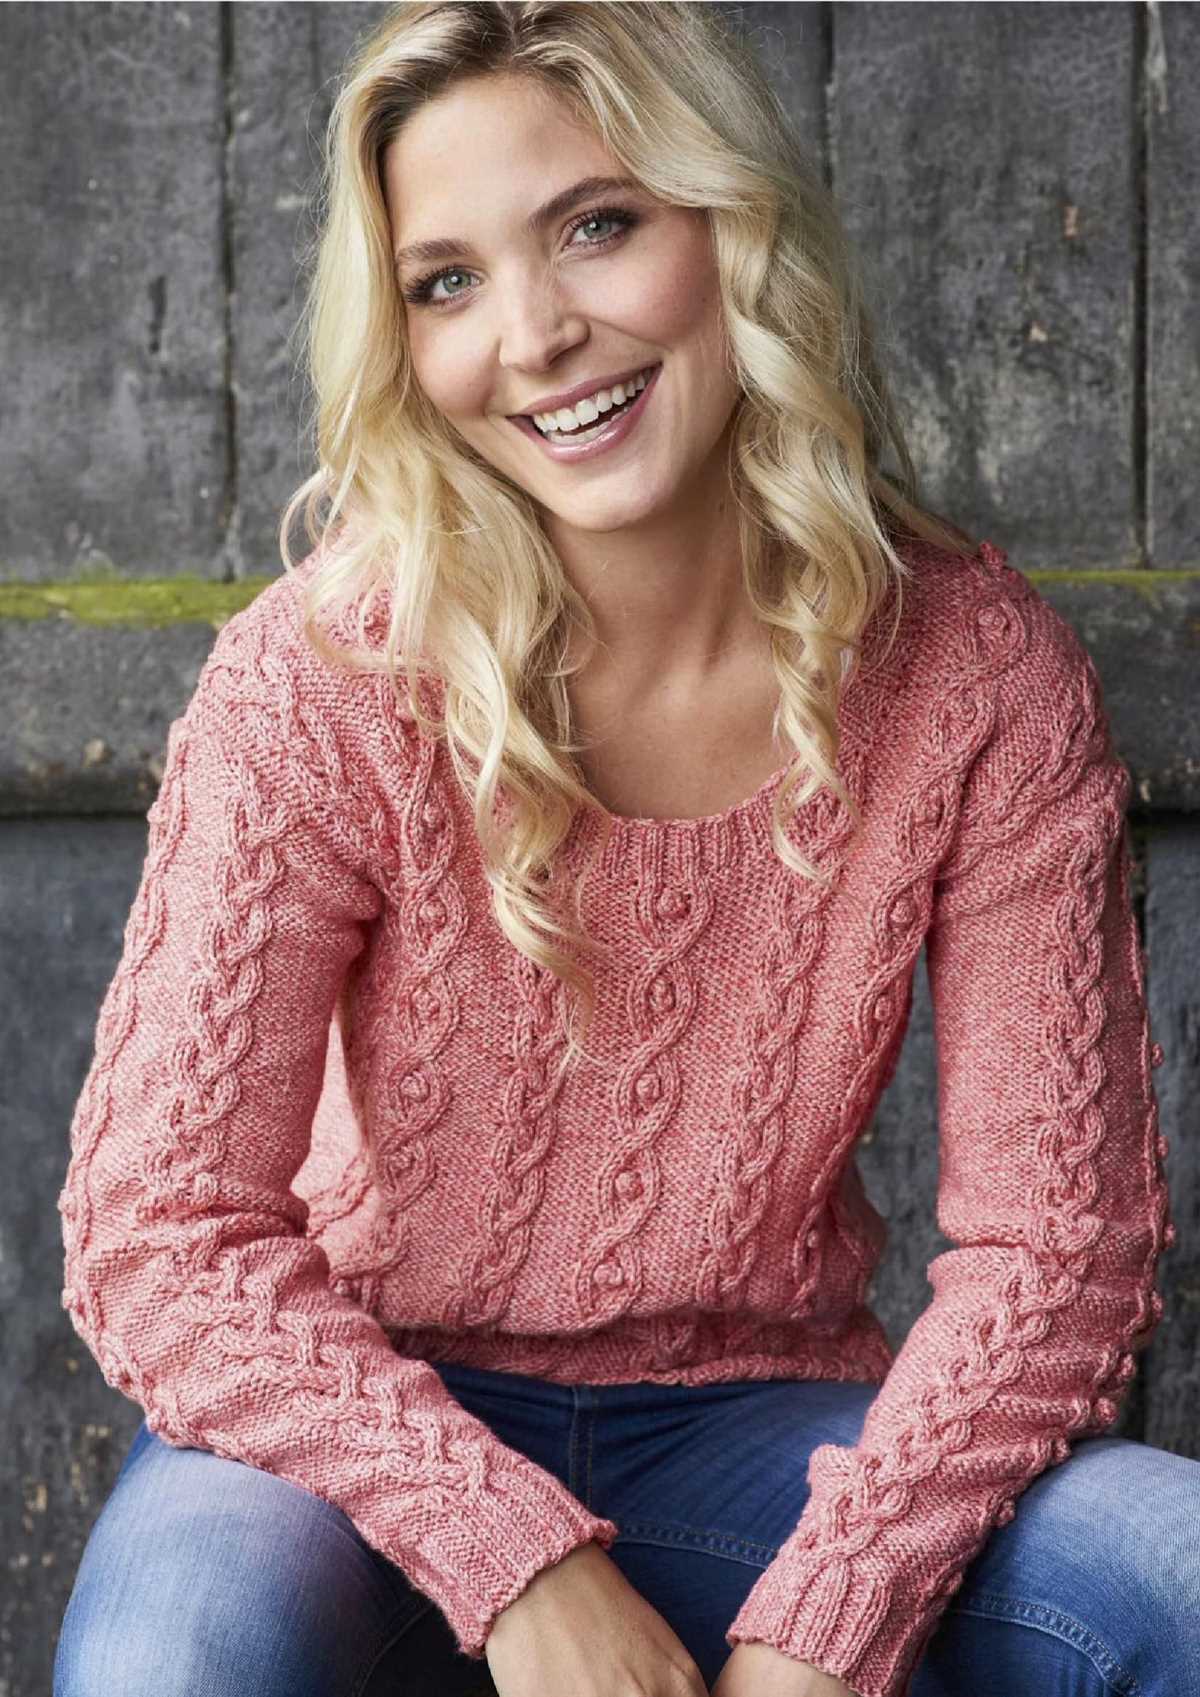
If you’re a fan of knitting and are looking for a new project to tackle, then a cabled pullover might be just what you need. Cables are a popular design element in knitting, adding texture and visual interest to any garment. A cabled pullover is a versatile piece that can be worn in any season, and it makes for a cozy and stylish addition to any wardrobe.
Creating a cabled pullover may seem intimidating at first, but with a little patience and practice, you’ll be able to master this knitting technique. This article will walk you through a step-by-step cabled pullover knitting pattern that is perfect for beginners and experienced knitters alike. From choosing the right yarn and needle size to following the intricate cable stitches, you’ll learn everything you need to know to create your own beautiful cabled pullover.
One of the most important factors when knitting a cabled pullover is choosing the right yarn. The yarn you choose will affect the drape, warmth, and overall look of your finished garment. Depending on the season and your personal preference, you can opt for a lightweight cotton yarn for a summery pullover or a cozy, bulky wool yarn for a winter-ready sweater. Consider the fiber content, weight, and color of the yarn to ensure it matches your vision for the final product.
Cabled Pullover Knitting Pattern
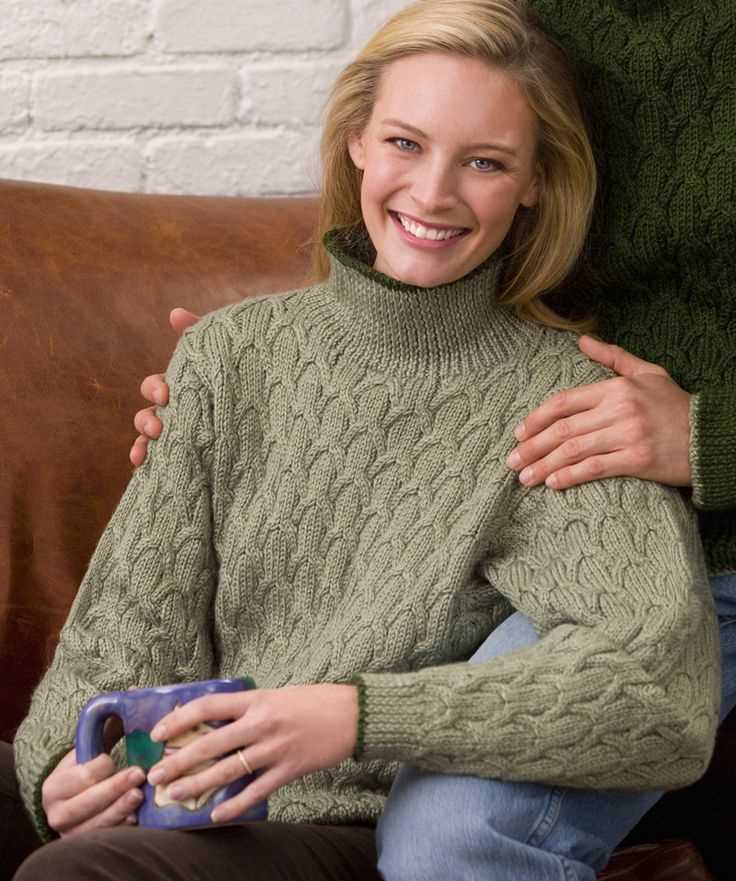
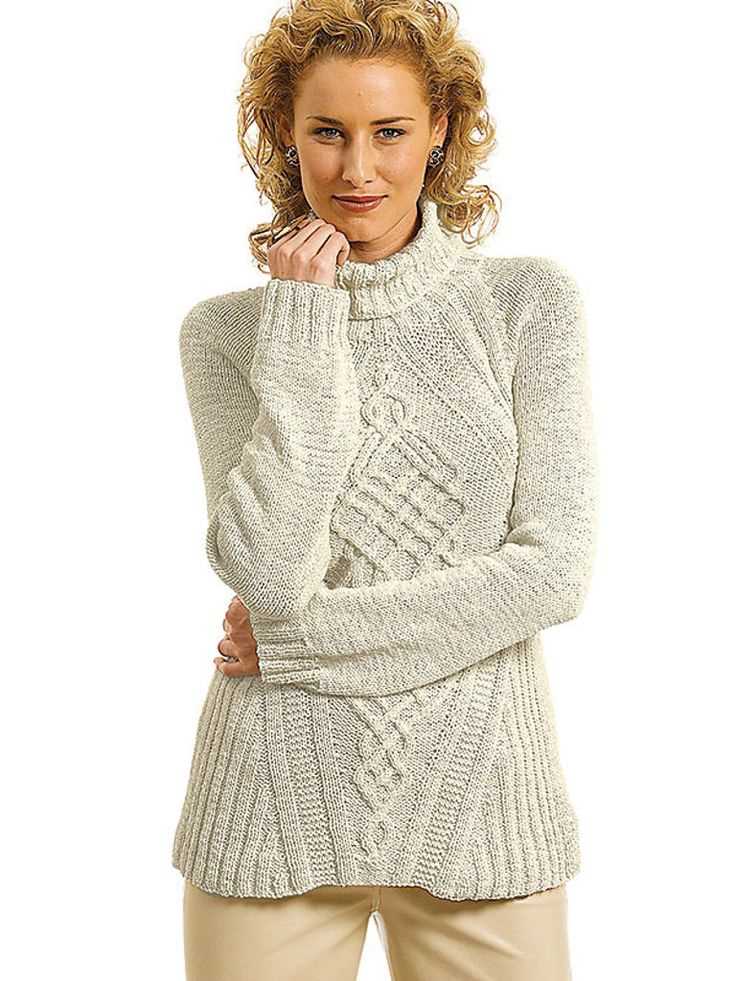
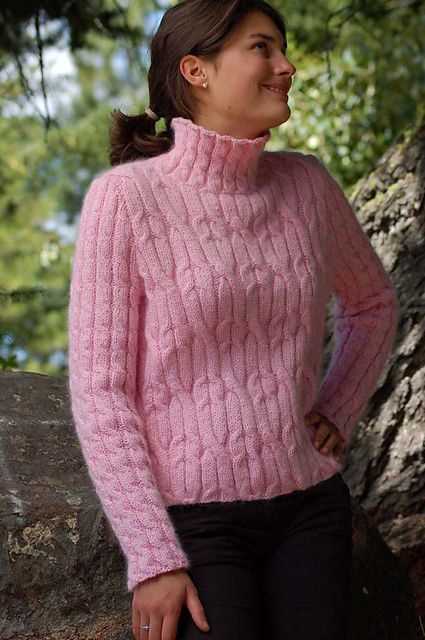
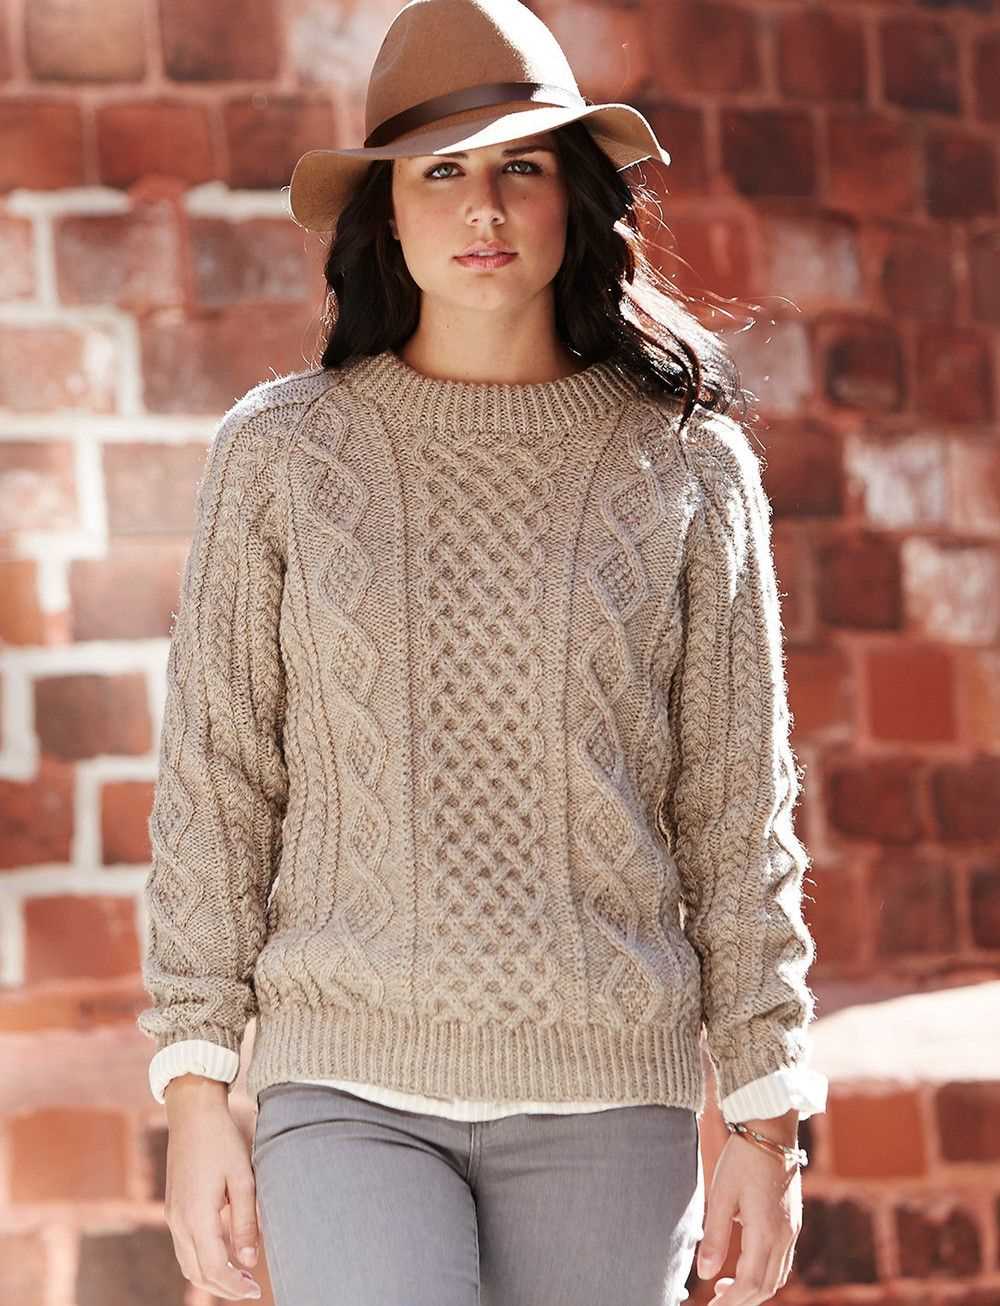
A cabled pullover knitting pattern is a popular choice for knitters who want to create a classic, timeless garment. The intricate cable stitches add texture and visual interest to the pullover, making it an impressive piece to wear or gift. This pattern typically involves working multiple cables across the front and back of the pullover, with a combination of knit and purl stitches to create the cable designs.
One key element in knitting a cabled pullover is selecting the right type of yarn. A medium-weight yarn, such as worsted or aran, is often preferred for this type of pattern, as it provides the right amount of structure and drape for the cables. It’s also important to choose a yarn that has good stitch definition, as this will help showcase the cable design.
Instructions:
- Start by casting on the required number of stitches, following the pattern instructions. This will vary depending on your desired size and the specific design of the pullover.
- Work the ribbing for the hem, cuffs, and neckline, typically using a smaller needle size than the main body of the pullover.
- Begin working the main body of the pullover, following the cable chart or written instructions provided in the pattern. This will involve crossing stitches over each other to create the cable pattern.
- Continue knitting the body of the pullover to the desired length, then shape the armholes and neckline as instructed in the pattern.
- Once the main body is complete, move on to the sleeves. These may involve simple ribbing or incorporate the same cable design as the body for a cohesive look.
- Finally, seam the sleeves and sides of the pullover together, weave in any loose ends, and block the finished garment to give it a polished, professional appearance.
A cabled pullover knitting pattern is a rewarding project for knitters of all skill levels. Whether you’re a beginner looking to try your hand at cables or an experienced knitter looking for a new challenge, this pattern offers a great opportunity to create a beautiful, cozy pullover that will be cherished for years to come.
Materials Needed
To knit the cabled pullover, you will need the following materials:
- Yarn: Worsted weight yarn in your desired color. The exact amount will depend on the size you are knitting.
- Knitting Needles: Size US 8 (5.0mm) straight needles or size needed to obtain gauge.
- Cable Needle: A cable needle is necessary to create the intricate cable patterns in the pullover.
- Tapestry Needle: You will need a tapestry needle for weaving in ends.
- Stitch Markers: Stitch markers are helpful for keeping track of pattern repeats and shaping.
- Scissors: A pair of scissors is necessary for trimming yarn ends.
- Measuring Tape: You will need a measuring tape to check your gauge and determine the correct size to knit.
With these materials on hand, you will be ready to start knitting your cabled pullover!
Choosing the Right Yarn
When it comes to knitting a cabled pullover, choosing the right yarn is essential. The yarn you select will determine not only the appearance and texture of your finished garment but also how well it holds its shape and wears over time.
Fiber content: Consider the fiber content of the yarn you choose. Different fibers have different properties, and you’ll want to select a yarn that is well-suited for a cabled pullover. Wool, alpaca, and cotton are popular choices for their warmth, softness, and durability.
- Wool: Wool is a classic choice for cabled pullovers. It is warm, lightweight, and has excellent elasticity, making it ideal for showing off intricate cable patterns. Additionally, wool is known for its durability, so your pullover will continue to look great for years to come.
- Alpaca: Alpaca yarn is known for its luxurious softness and warmth. It has a natural sheen and drape that adds elegance to cable patterns. Alpaca fibers are also lightweight, making them perfect for cozy pullovers.
- Cotton: Cotton yarn is a great choice if you’re looking for a lighter-weight pullover or live in a warmer climate. It has a smooth texture and is breathable, keeping you comfortable even on summer evenings.
Weight: Consider the weight of the yarn when selecting materials for your cabled pullover. The weight will determine how thick or thin your finished garment will be. Bulky weight yarns will create a chunkier, warmer pullover, while finer weight yarns will result in a more delicate and lightweight sweater.
Color and texture: Finally, consider the color and texture of the yarn. Cabled pullovers often look best in solid or semi-solid colors, as they allow the intricate cable patterns to shine. However, if you prefer a more playful look, you can opt for variegated or self-striping yarns. Additionally, consider the texture of the yarn and how it will enhance the cable patterns. Yarns with a slight halo or tweed effect can add depth and interest to your finished garment.
Gauge Swatch
Before starting your cabled pullover project, it is essential to create a gauge swatch. This small sample of knitting will help you determine whether your tension matches the pattern’s recommended gauge. The gauge, typically expressed as the number of stitches and rows per inch, ensures that your finished pullover will have the correct size and fit.
To create a gauge swatch, you will need the same needles and yarn specified in the pattern. It’s crucial to knit your swatch in the same stitch pattern as the cabled pullover to obtain accurate measurements. Make sure to measure the swatch after blocking, as blocking can affect the final gauge.
Begin by casting on more stitches than the specified gauge to allow for a proper measurement. Knit a few rows in the stitch pattern following the instructions in the pattern. Then, measure the width and height of the swatch using a ruler or tape measure. Count the number of stitches and rows within a one-inch square to determine your gauge.
If your gauge matches the pattern’s recommended gauge, you can proceed with confidence, knowing that your pullover will likely have the correct size. However, if your gauge is different, you may need to adjust your needle size or tension to achieve the correct gauge. Making these adjustments will ensure that your finished pullover matches the intended measurements and will fit you properly.
Remember, taking the time to create a gauge swatch is an essential step in knitting any project. While it may add a few extra minutes to your overall knitting time, it will save you from potential disappointment by ensuring that your finished cabled pullover fits you perfectly.
Casting On
When starting your cabled pullover knitting project, the first step is to cast on your stitches. This is the process of creating a foundation row of stitches on your needle, which will be the starting point for your knitting. There are several methods of casting on, but for this pattern, we recommend using the long-tail cast on method.
To begin the long-tail cast on, start by leaving a long tail of yarn, measuring about four times the width of your finished garment. Make a slipknot near the end of the tail, leaving a small loop. Insert your needle through the loop and tighten it around the needle, creating your first stitch.
With the slipknot created, you can now start adding more stitches. Hold the needle in your right hand and use your left hand to hold the yarn. Bring the yarn behind the needle, so it creates a loop. Use your right thumb and index finger to pinch the loop, creating another stitch.
Continue this process of creating loops and stitches until you have cast on the required number of stitches for your pattern. It is important to maintain an even tension as you work, ensuring that your stitches are not too loose or too tight. Once all the stitches are cast on, you are ready to begin the next step of your cabled pullover knitting pattern.
Ribbing
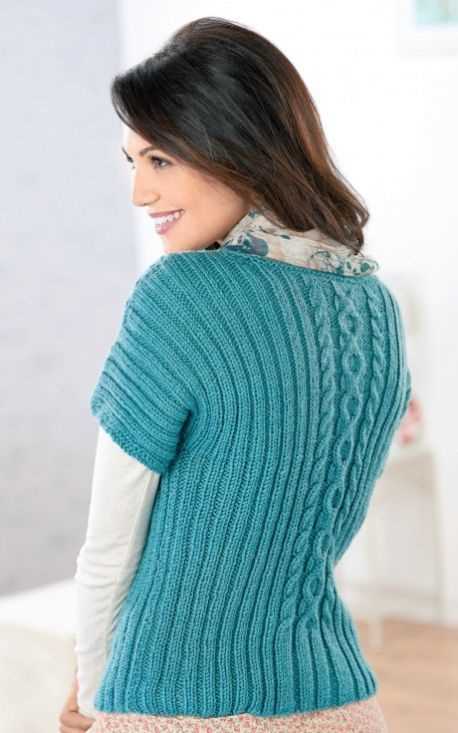
Ribbing is a commonly used technique in knitting patterns, including cabled pullovers. It is a type of stitch pattern that creates a stretchy and elastic fabric, making it ideal for creating cuffs, collars, and hems. Ribbing is often used at the beginning and end of a garment or section to provide structure and ensure a snug fit.
The most basic form of ribbing is called K1, P1 ribbing, where you alternate knitting one stitch and purling one stitch across a row. This creates a pattern of raised columns and recessed valleys, giving the fabric its characteristic ribbed texture. Another common form is K2, P2 ribbing, where you alternate knitting two stitches and purling two stitches.
In addition to creating an attractive texture, ribbing also has functional benefits. The stretchiness of ribbed fabric allows it to conform to the body and provide a close fit, while still allowing for movement and flexibility. This is particularly important for items like sweaters and pullovers, where a snug fit is desired.
Ribbing can be used not only for cuffs and hems but also for other design elements, such as borders and panels. By varying the width and combination of knits and purls, you can create a wide range of ribbed patterns, adding visual interest to your knitting projects.
To create ribbing, you will need to know how to knit and purl stitches. With these basic skills, you can easily follow a ribbing pattern and incorporate it into your cabled pullover knitting project. Whether you choose a simple K1, P1 ribbing or experiment with more complex ribbing patterns, ribbing is sure to add a professional and polished finish to your garment.
- Key phrases: ribbing, knitting patterns, cabled pullovers, stitch pattern, stretchy fabric, elastic fabric, cuffs, collars, hems, structure, snug fit, K1 P1 ribbing, K2 P2 ribbing, raised columns, recessed valleys, texture, functional benefits, movement, flexibility, close fit, design elements, borders, panels, visual interest, knitting projects, knit stitches, purl stitches, ribbing pattern, professional finish, polished finish, garment.
Cable Stitch
The cable stitch is a knitting technique that creates a raised design in the fabric, resembling a twisted rope or braided pattern. It is achieved by crossing stitches over each other, resulting in a textured and visually interesting look. Cable stitches are commonly used in sweaters, scarves, and other garments to add depth and dimension to the piece.
To create a cable stitch, you will need a cable needle, which is a short, double-pointed needle. The cable needle is used to hold stitches temporarily while you work other stitches. Here’s how to knit a basic cable stitch:
- Slip a certain number of stitches onto the cable needle and hold it in front or back of the work, depending on the desired direction of the cable.
- Knit the same number of stitches from the left-hand needle.
- Knit the stitches from the cable needle onto the right-hand needle, maintaining the order of the stitches.
There are various types of cable stitches, such as the 1/1 right cable, 1/1 left cable, 2/2 right cable, 2/2 left cable, and so on. Each type creates a different twist or braid pattern. The number before the slash indicates the number of stitches involved in the cable, while the number after the slash indicates the direction of the cable (right or left).
When working with cable stitches, it’s important to keep track of your rows and pattern repeats. Cable stitches usually require specific row counts to achieve the desired design. Using a stitch marker or a row counter can be helpful in keeping track of your progress.
Body of the Pullover
The body of the pullover is the main part of the garment, knitted in a combination of stockinette stitch and cable patterns. The body is knit from the bottom up, starting with the ribbed hem. The ribbing creates a snug and flattering fit around the hips. For the body, the pattern calls for a specific number of stitches, which can be adjusted based on the desired size.
To knit the body, you will begin by casting on the required number of stitches, following the pattern instructions. Once the ribbing is complete, you will switch to stockinette stitch, knitting all rows to create a smooth fabric. The length of the body can be customized to your preference, following the measurements provided in the pattern.
As you knit the body, you will also incorporate cable patterns to add interest and texture to the pullover. The cable patterns will be worked over a specific number of stitches and rows, following the chart or written instructions provided in the pattern. The cables can be simple or more intricate, depending on the design of the pullover.
In addition to the cable patterns, the body may also include shaping techniques such as increases and decreases. These techniques are used to create a more tailored fit and can be strategically placed to flatter the body shape. The pattern will specify when and where to make these shaping adjustments.
Once the body is complete, you will either continue knitting the sleeves separately and then attach them to the body, or you may choose to pick up stitches for the sleeves directly from the body. This will depend on the construction method specified in the pattern. The body of the pullover sets the foundation for the overall fit and style of the garment, so it is important to follow the pattern instructions carefully to achieve the desired result.
Shaping the Neckline
When knitting a cabled pullover, shaping the neckline is an important step to achieve a comfortable and attractive fit. The neckline can be shaped in various ways, depending on the desired style and design of the sweater.
One common method to shape the neckline is by using short rows. Short rows are partial rows of knitting that create extra fabric in certain areas. To shape the neckline, short rows can be worked across a portion of the stitches, creating a gentle curve. This technique is often used for round or scooped necklines. By gradually adding or decreasing stitches, the shape of the neckline can be customized to fit the wearer’s preferences.
Another method to shape the neckline is by using decreases or increases. Decreases are used to create a V-neck or a squared neckline, while increases can be used to create a boat neck or a keyhole neckline. These shaping techniques involve working the decreases or increases at regular intervals along the edges of the neckline. To maintain the continuity of the cabled pattern, it is important to carefully plan the decreases or increases so that they align with the stitch pattern.
Once the shaping is complete, the neckline can be finished with various edge techniques. This can include ribbing, garter stitch, or a decorative bind-off. The choice of edge treatment can further enhance the overall design of the cabled pullover.
By carefully shaping the neckline, a cabled pullover can not only be a cozy and stylish garment but also a flattering one that suits the wearer’s body shape and personal style. Whether using short rows or decreases/increases, the key to shaping the neckline is to maintain the integrity of the cabled pattern while achieving a comfortable and well-fitting neckline.
Sleeves
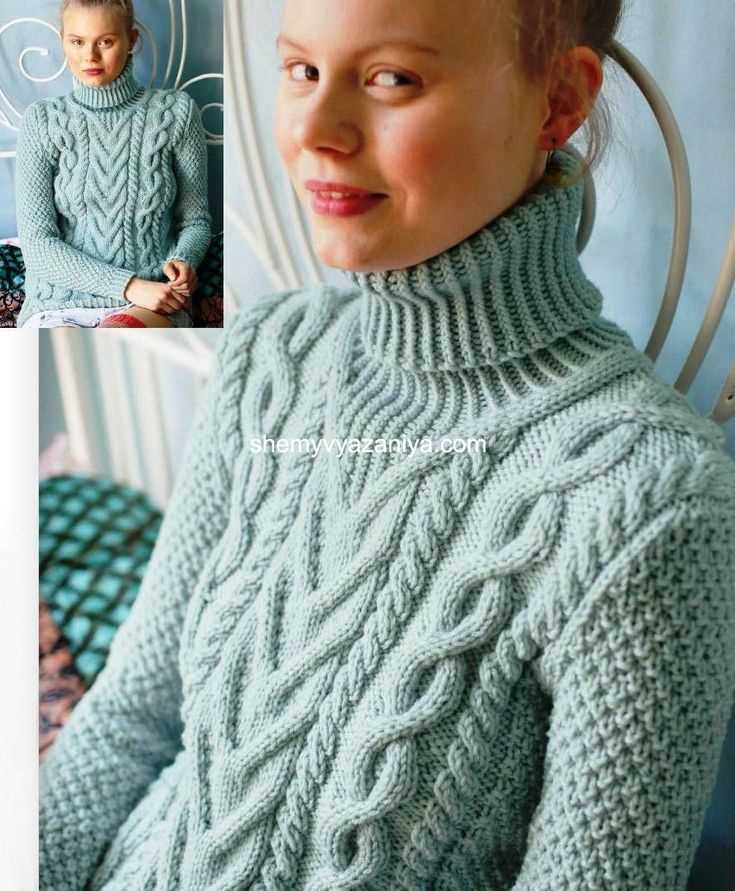
The sleeves of this cabled pullover are an essential part of the design, adding both style and functionality to the garment. Knitted in the same cable pattern as the body, they create a cohesive look that is visually appealing.
One important aspect to consider when knitting the sleeves is the fit. It is crucial to measure the arm circumference accurately to ensure the sleeves will be the right size. This will help to avoid any discomfort or restriction of movement when wearing the pullover.
To create the cabled pattern on the sleeves, the same stitch pattern used for the body is followed. The cable twists and turns, creating a beautiful texture that adds interest to the sleeves. The pattern may require some concentration and attention to detail, but the end result is well worth the effort.
When knitting the sleeves, it is important to keep track of your progress and count your rows to ensure both sleeves are the same length. This will help to maintain symmetry and balance in the finished garment. Using stitch markers can be helpful in keeping track of where to start and end each cable section.
Once the sleeves are complete, they can be seamed to the body of the pullover using the appropriate technique, such as mattress stitch. This creates a seamless look and ensures a strong and durable seam. Care should be taken to align the cable pattern on the sleeves with that of the body to create a smooth and cohesive transition.
Overall, the sleeves of the cabled pullover are an important element of the design, adding both style and functionality. By carefully following the pattern and paying attention to detail, you can create beautifully textured sleeves that complement the body of the pullover and enhance its overall appearance.
Finishing Touches
Once you have completed knitting your cabled pullover, it’s time to add those finishing touches that will bring your project to perfection. One important step is blocking your garment to ensure that the stitches lay flat and even. This can be done by gently washing the pullover in lukewarm water, pressing out the excess moisture, and then laying it flat to dry. Blocking will help to smooth out any uneven tension and give your pullover a professional finish.
Another finishing touch that can enhance the overall look of your cabled pullover is adding buttons. Choose buttons that complement the color and style of your pullover, whether you opt for classic, vintage, or trendy designs. Sew the buttons securely onto the front band of your pullover, making sure they are evenly spaced and aligned. This simple addition can add a touch of elegance or personality to your finished pullover.
For a polished appearance, consider adding some decorative topstitching around the neckline, cuffs, and hem of your cabled pullover. This can be done using a coordinating or contrasting color of yarn. Experiment with different stitches and patterns to create a unique and eye-catching detail. Whether you choose a simple single crochet border or an elaborate embroidery design, the extra effort will be worth it for the final result.
Lastly, don’t forget to weave in any loose ends to ensure that your cabled pullover is tidy and durable. Use a tapestry needle to carefully thread the ends through the stitches on the wrong side of the garment, making sure they are secure and invisible. Taking the time to finish off your knitting project properly will not only improve its longevity but also give you a sense of satisfaction and accomplishment.
Remember, the finishing touches are what make your cabled pullover truly special. So take your time, pay attention to detail, and enjoy the process of adding those final elements that will transform your knitted project into a beautiful wearable garment.
Blocking
Blocking is an essential part of the knitting process, especially when working with cabled pullover patterns. It involves shaping and setting the knitted fabric to its desired measurements and shape by gently stretching and pinning it into place.
To block a cabled pullover, you will need a set of blocking mats or a clean, flat surface. Start by filling a basin or sink with lukewarm water and adding a small amount of wool wash or mild detergent. Gently immerse the knitted pullover in the water, making sure it is fully saturated. Allow it to soak for about 15 minutes, then drain the water and carefully squeeze out the excess moisture without wringing or twisting the fabric.
Once the excess water has been removed, lay the pullover flat on your blocking mats or surface. Use blocking pins to secure the edges and shape the fabric according to the pattern’s measurements. For cabled pullovers, pay special attention to the cable design and make sure it is stretched and defined. Use a tape measure or ruler to ensure the correct length and width.
Leave the pullover to dry completely in a well-ventilated area, away from direct sunlight or heat sources. This process may take several days, depending on the thickness of the yarn and the ambient temperature. Once the pullover is completely dry, carefully remove the blocking pins and gently shake out any remaining stiffness or creases. Your cabled pullover is now ready to be worn and enjoyed!
Care Instructions
Proper care of your cabled pullover is essential to maintain its quality and longevity. Follow these care instructions to keep your pullover looking its best:
- Hand wash: It is recommended to hand wash your cabled pullover to prevent stretching and damage. Use lukewarm water and mild detergent. Gently squeeze the garment to remove excess water and lay it flat to dry.
- Machine wash: If you prefer to machine wash your pullover, use the delicate cycle with cold water. Place the garment in a mesh laundry bag to protect it from getting tangled with other clothes. Avoid using harsh detergents or bleach.
- Drying: Always lay your pullover flat to dry to maintain its shape. Avoid hanging it, as this can cause stretching or distortion of the cables.
- Ironing: If necessary, iron your pullover on a low setting with a cloth or towel between the garment and the iron. Avoid ironing directly on the cables to prevent flattening or misshaping.
- Storage: When storing your cabled pullover, fold it neatly and store it in a cool, dry place. Avoid hanging it for long periods of time, as this can cause stretching or hanger marks on the shoulders.
By following these care instructions, you can ensure that your cabled pullover remains beautiful and in excellent condition for years to come.