
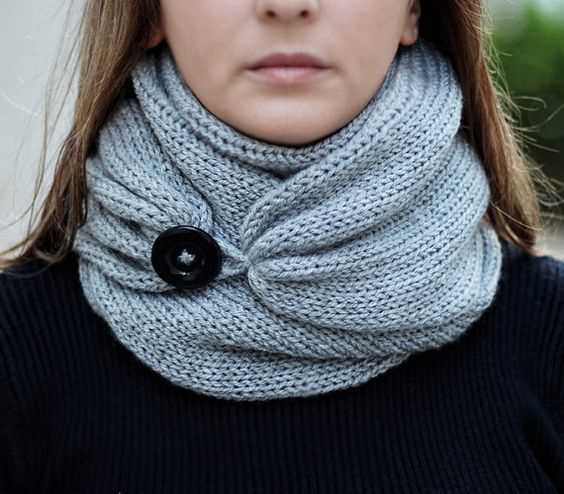
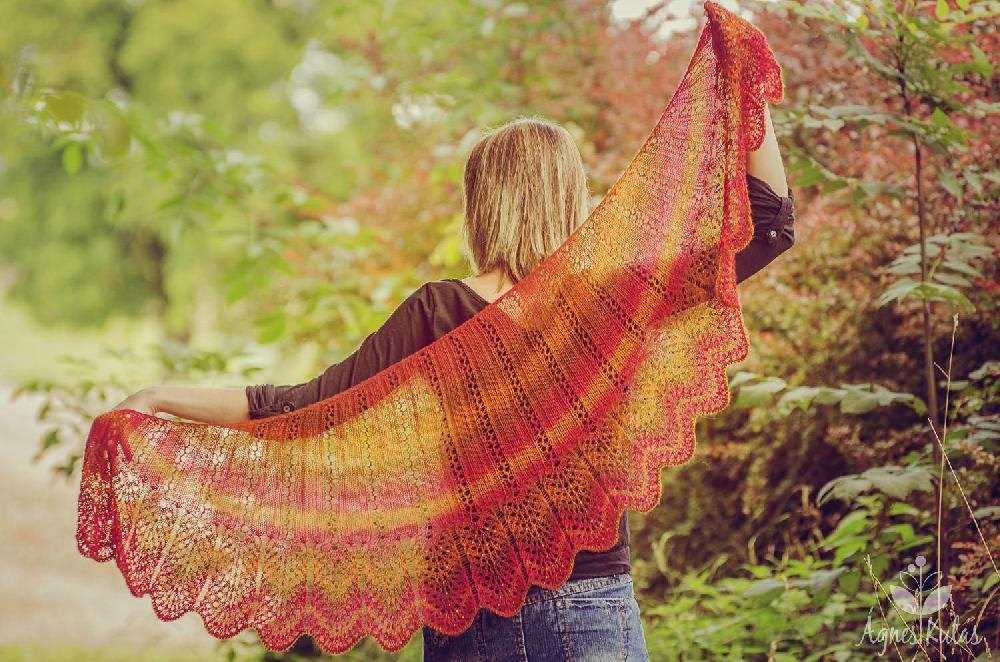
Knitting is a popular and versatile craft that allows you to create beautiful and functional items. One such item is the button shawl, which is not only fashionable but also practical. A button shawl, also known as a capelet or poncho, is a versatile accessory that can be worn in various ways. It can be draped over the shoulders, worn as a scarf, or fastened with buttons for a more fitted look.
Knitting a button shawl is a great project for knitters of all skill levels. Whether you are a beginner or an experienced knitter, you can easily create a button shawl using a simple knitting pattern. There are countless button shawl knitting patterns available, ranging from basic stitches to more complex lace patterns. Depending on your preference and skill level, you can choose a pattern that suits your style.
A button shawl can be knitted using different yarn weights, from lightweight fingering yarn to bulky yarn. The type of yarn you choose will determine the final look and feel of your button shawl. If you want a lightweight and elegant shawl, you can opt for a laceweight or fingering weight yarn. On the other hand, if you prefer a cozy and warm shawl, you can use a bulky or chunky yarn.
Materials Needed for Button Shawl Knitting
When knitting a button shawl, it is important to gather all the necessary materials before starting the project. Having the right tools and materials on hand will ensure a smooth and enjoyable knitting experience, and will help you create a beautiful and functional shawl. Here is a list of materials you will need:
- Yarn: Choose a soft and cozy yarn that is suitable for shawl knitting. The yardage will depend on the size of the shawl and the desired level of drape. Consider using a yarn that has a good stitch definition to show off the intricate pattern of the shawl.
- Knitting Needles: Select a pair of knitting needles that are appropriate for the yarn you have chosen. The size of the needles will also depend on the gauge and tension required by the pattern. Make sure to use knitting needles that you are comfortable with and that allow you to achieve the desired tension.
- Buttons: The button shawl pattern will specify the number and size of buttons needed. Choose buttons that complement the yarn and overall design of the shawl. It is helpful to have a few extra buttons on hand, in case of any mishaps or changes in the design.
- Tapestry Needle: A tapestry needle is essential for weaving in loose ends and sewing on buttons. Choose a needle with a large eye that can accommodate the yarn, and make sure it is sharp enough to easily go through the fabric.
- Stitch Markers: Depending on the pattern, you may need stitch markers to help keep track of your progress and mark important points in the design. Choose stitch markers that are easily removable and won’t snag on the yarn.
- Scissors: A pair of sharp scissors is necessary for cutting the yarn and trimming any excess. Make sure the scissors are small enough to fit in your knitting bag or project pouch.
- Measuring Tape: A measuring tape or ruler is useful for checking the gauge and measuring the size of the shawl as you knit. This will help ensure that your shawl turns out to be the desired dimensions.
With these materials in hand, you are all set to start knitting your button shawl. Make sure to follow the pattern instructions carefully and take your time to create a beautiful and unique accessory that you can wear with pride.
Choosing the Right Yarn for Your Button Shawl
When it comes to knitting a button shawl, choosing the right yarn is crucial. The yarn you select will impact the overall look and feel of your finished project, so it’s important to consider a few factors before making your choice.
1. Weight and fiber content: The weight of the yarn refers to its thickness, and different weights will produce different results. For a button shawl, you’ll typically want to use a medium or bulky weight yarn, as this will create a warm and cozy finished piece. As for fiber content, consider the season and climate you’ll be wearing the shawl in. Natural fibers like wool and alpaca are great for colder weather, while cotton or linen may be more appropriate for warmer temperatures.
2. Color and pattern: The color and pattern of your yarn will play a big role in the overall aesthetic of your button shawl. Consider whether you want a solid color or a variegated yarn, and think about how it will complement your wardrobe and personal style. If you’re using a patterned yarn, keep in mind how the pattern will appear when worked up in the chosen stitch pattern of your shawl.
3. Yardage and cost: Before starting your button shawl, it’s important to determine how much yarn you’ll need. Most patterns will provide an estimate of the required yardage, but it’s always a good idea to buy a little extra, just in case. Additionally, consider the cost of the yarn, as some fibers can be more expensive than others. If you’re on a budget, look for affordable yarn options that still meet your desired criteria.
4. Texture and drape: The texture and drape of the yarn will affect how your button shawl falls and drapes when worn. Some yarns have a soft and fluffy texture, while others may be more structured or have a slight sheen. Consider the desired texture and drape of your finished shawl and choose a yarn that will achieve that effect.
By carefully considering these factors and choosing the right yarn for your button shawl, you’ll be well on your way to creating a beautiful and functional accessory that you’ll love to wear.
Gauge and Needle Size for Button Shawl Knitting
When it comes to knitting a button shawl, one of the most important factors to consider is the gauge. The gauge determines how many stitches and rows are required to create a fabric of a certain size. It is crucial to achieve the correct gauge in order for the finished shawl to have the desired drape and fit.
To determine the gauge for your button shawl, you will need to use the recommended needle size and yarn specified in the knitting pattern. The pattern will usually provide a gauge swatch, which is a small sample of knitting worked in the specified stitch pattern and blocked to the recommended measurements. By knitting the gauge swatch and measuring it, you can determine if your tension matches the pattern’s gauge.
Needle size is an important factor in achieving the correct gauge for your button shawl. Different needle sizes can produce different fabric densities and drapes. If your gauge swatch is too small, try knitting with larger needles to create a looser fabric. Conversely, if your gauge swatch is too large, try knitting with smaller needles to create a tighter fabric.
It is also important to note that personal knitting tension can vary, so it is always recommended to knit a gauge swatch before starting your button shawl project. This ensures that you will have the correct measurements and fit for your finished shawl.
Overall, achieving the correct gauge and needle size for your button shawl is essential for creating a well-fitting and stylish accessory. By following the knitting pattern’s recommendations and knitting a gauge swatch, you can ensure that your finished shawl will be exactly as intended.
Understanding the Pattern Instructions for Button Shawl
Knitting a button shawl can be a fun and rewarding project, but it’s important to understand the pattern instructions before getting started. By carefully reading through the pattern and taking note of any specific techniques or stitches required, you can ensure a successful knitting experience. Here are some tips to help you navigate the pattern instructions for a button shawl:
1. Familiarize Yourself with the Materials and Gauge:
Before beginning any knitting project, it’s important to gather all the necessary materials and determine the correct gauge. The pattern instructions will typically provide a list of recommended yarn, needle size, and other supplies. Take the time to gather these materials and swatch for gauge, as this will ensure that your finished shawl matches the dimensions specified in the pattern.
2. Pay Attention to the Stitch Abbreviations and Chart Symbols:
Most knitting patterns use abbreviations and symbols to represent certain stitches or techniques. Be sure to familiarize yourself with the stitch abbreviations and their meanings before starting the button shawl pattern. This will help you understand the instructions and prevent any confusion or mistakes. The pattern may also include a chart with symbols that correspond to different stitches, so make sure to review and understand these as well.
3. Follow the Pattern Row by Row:
When starting the button shawl, it’s important to follow the pattern instructions row by row. Take your time to carefully read and understand each step before moving on to the next. The pattern may include instructions for different sections or panels of the shawl, so make sure to follow the appropriate instructions for each section. It can be helpful to use a stitch marker or highlighter to keep track of your progress and avoid any confusion.
4. Check for Any Special Techniques or Instructions:
Some button shawl patterns may include special techniques or instructions, such as buttonholes, cables, or lace stitches. If the pattern includes any of these elements, make sure to read and understand the instructions before attempting them. It can be helpful to practice the technique on a small swatch before incorporating it into your shawl. If you are unsure about any part of the instructions, don’t hesitate to seek clarification from the pattern designer or other experienced knitters.
By following these tips and taking the time to understand the pattern instructions, you can confidently knit a beautiful button shawl. Remember to enjoy the process and embrace any challenges that may arise. Happy knitting!
Casting On Stitches for Button Shawl
When starting to knit a button shawl, the first step is to cast on the required number of stitches. The number of stitches will depend on the size of the shawl you want to create, as well as the stitch pattern you will be using. It’s important to have an accurate count of the stitches to ensure that your shawl turns out the right size.
To cast on stitches, you can use any method that you are comfortable with. Some knitters prefer the long-tail cast-on method, while others may opt for the cable cast-on or the knitted cast-on. The choice of cast-on method is entirely up to you and will not affect the final outcome of your button shawl.
Long-tail cast-on: One common method for casting on stitches is the long-tail cast-on. To do this, start by making a slip knot and placing it on the left needle. Then, bring the working yarn over the needle with your right hand and insert the right needle tip from left to right into the slip knot. Keep the slip knot loose enough so that it can easily slide up the needle as you work. Finally, pull the working yarn through the slip knot to create a new stitch, and slip the old stitch off the left needle.
Cable cast-on: Another option is the cable cast-on method. This method creates a sturdy edge and is great for adding stitches to an existing piece of knitting. To do the cable cast-on, insert the right needle between the first two stitches on the left needle, from front to back. Wrap the yarn around the right needle and pull it through the loop, creating a new stitch. Slip the new stitch onto the left needle and repeat the process until you have cast on the desired number of stitches.
Once you have cast on all the stitches for your button shawl, you can begin working the pattern as directed. Remember to keep track of your stitches and check your work regularly to ensure that you are following the pattern correctly. With practice and patience, you’ll soon have a beautiful button shawl to wear and show off!
Knitting the Main Body of the Button Shawl
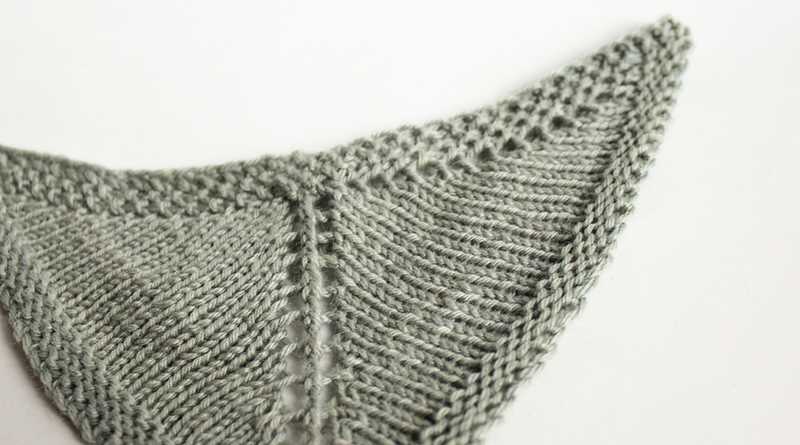
Once you have completed the initial setup and border of the button shawl, it’s time to start knitting the main body. This is where you will see the shawl really take shape and start to showcase the beautiful button details.
Start by continuing in the established pattern, following the instructions for the stitch pattern. Use your stitch markers to indicate the edges of the shawl and keep track of your progress.
Row 1:
Knit the first stitch, then purl to the last stitch before the stitch marker. Slip the marker, knit the next stitch, and then purl to the end of the row.
Row 2:
Purl the first stitch, then knit to the last stitch before the stitch marker. Slip the marker, purl the next stitch, and then knit to the end of the row.
Repeat these two rows until you have reached your desired length for the main body of the button shawl.
Note: It’s important to regularly check your stitch count and pattern to ensure that you are knitting correctly and maintaining the correct stitch pattern.
As you progress, you may notice the buttonholes starting to form naturally within the stitch pattern. These will create the perfect spaces for your buttons, allowing you to easily fasten the shawl around your shoulders.
Continue knitting until you have reached the desired length specified in the pattern. Remember to end on a row that allows for easy buttonhole placement.
Once the main body is complete, you can move on to adding the buttonholes and finishing touches to complete your button shawl.
Creating Buttonholes in the Button Shawl
When knitting a button shawl, one important element to consider is how to create buttonholes. Buttonholes are necessary to allow the buttons to pass through, securing the shawl in place. There are several different methods for creating buttonholes, and the method you choose will depend on your personal preference and the design of your shawl.
One common method for creating buttonholes is the yarn over buttonhole. This technique involves simply creating a yarn over (YO) in your knitting, which will create an opening for the button. To do this, yarn over as usual, but instead of knitting or purling the next stitch, slip it onto the right-hand needle. On the following row, you can either knit or purl the yarn over and the slipped stitch together to create a clean buttonhole. This method is relatively simple and creates a small, discreet buttonhole.
List of different methods for creating buttonholes:
- Yarn over buttonhole
- Horizontal buttonhole
- Two-row buttonhole
- Slit buttonhole
- Eyelet buttonhole
Another method for creating buttonholes is the horizontal buttonhole. This technique involves working short rows to create an opening for the button. To do this, you will knit to the desired buttonhole location, then turn the work and work back to the same point, leaving a small gap in the knitting. On the next row, you will close the gap by working the stitches together or picking up the wraps, depending on the pattern. This method creates a larger, more visible buttonhole that can accommodate larger buttons.
The two-row buttonhole is another commonly used method. This technique involves working a series of stitches on one row, then creating an opening for the button on the next row. This can be done by binding off a set number of stitches, then casting on the same number of stitches on the next row. This method creates a neat, square buttonhole that is easy to work.
Other methods for creating buttonholes include the slit buttonhole, which involves cutting the knitting and securing the edges with a button band, and the eyelet buttonhole, which involves creating a decorative eyelet opening for the button. These methods can add extra visual interest to the button shawl, but may require more advanced knitting skills.
Adding Decorative Stitches to Your Button Shawl
The button shawl is a versatile and stylish accessory that can add warmth and flair to any outfit. One way to make your button shawl stand out even more is to incorporate decorative stitches into your knitting pattern. These stitches can add texture, interest, and visual appeal to your finished piece. Here are a few ideas for adding decorative stitches to your button shawl:
Cable Stitch: One of the most popular decorative stitches for button shawls is the cable stitch. This stitch creates a twisted, braided pattern that adds a beautiful and intricate look to your shawl. You can create simple cables or more complex designs depending on your skill level and preference. Adding a cable stitch to your button shawl can give it a sophisticated and elegant touch.
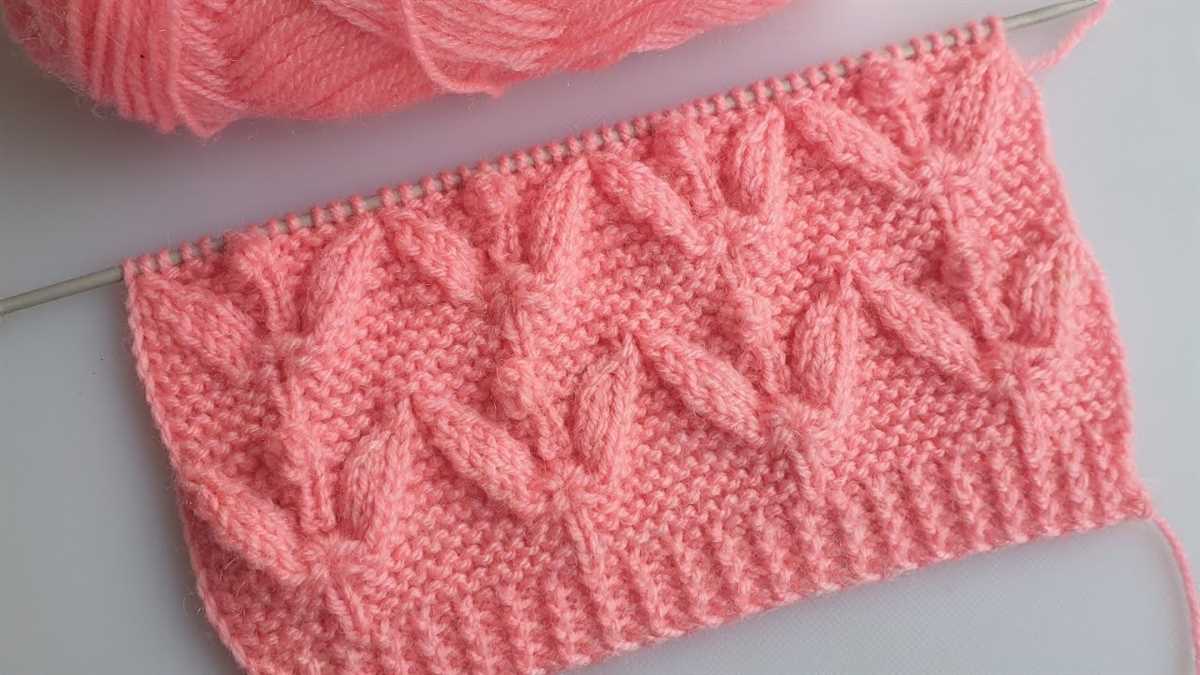
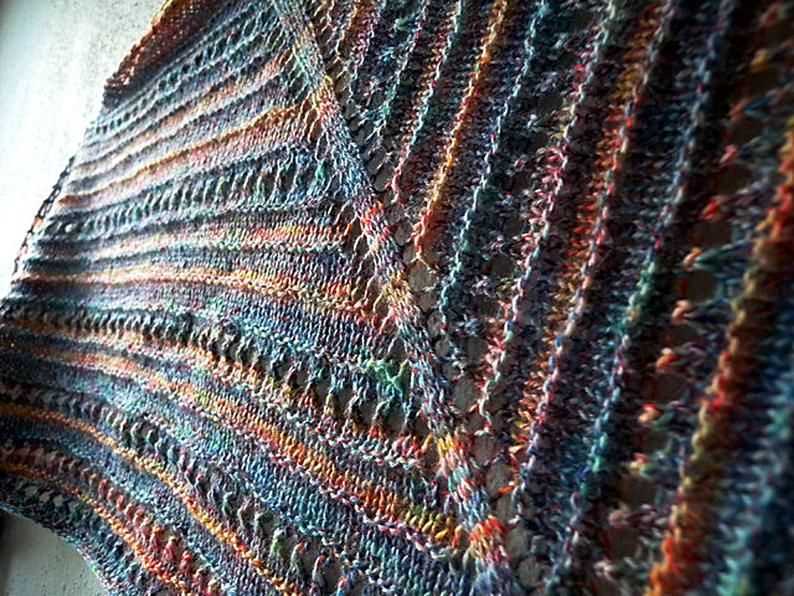
- Eyelet Stitch: Another option for adding decorative stitches to your button shawl is the eyelet stitch. This stitch creates small, decorative holes that can form a pattern or be scattered throughout the shawl for a more subtle effect. Eyelet stitches are often used to create lacy and delicate designs, giving your button shawl a feminine and romantic look.
- Bobble Stitch: If you want to create a fun and playful button shawl, consider using the bobble stitch. This stitch forms small, raised bumps on your fabric, adding texture and visual interest. You can use bobble stitches sparingly for a more subtle effect or create a pattern of bobbles for a bold and eye-catching design.
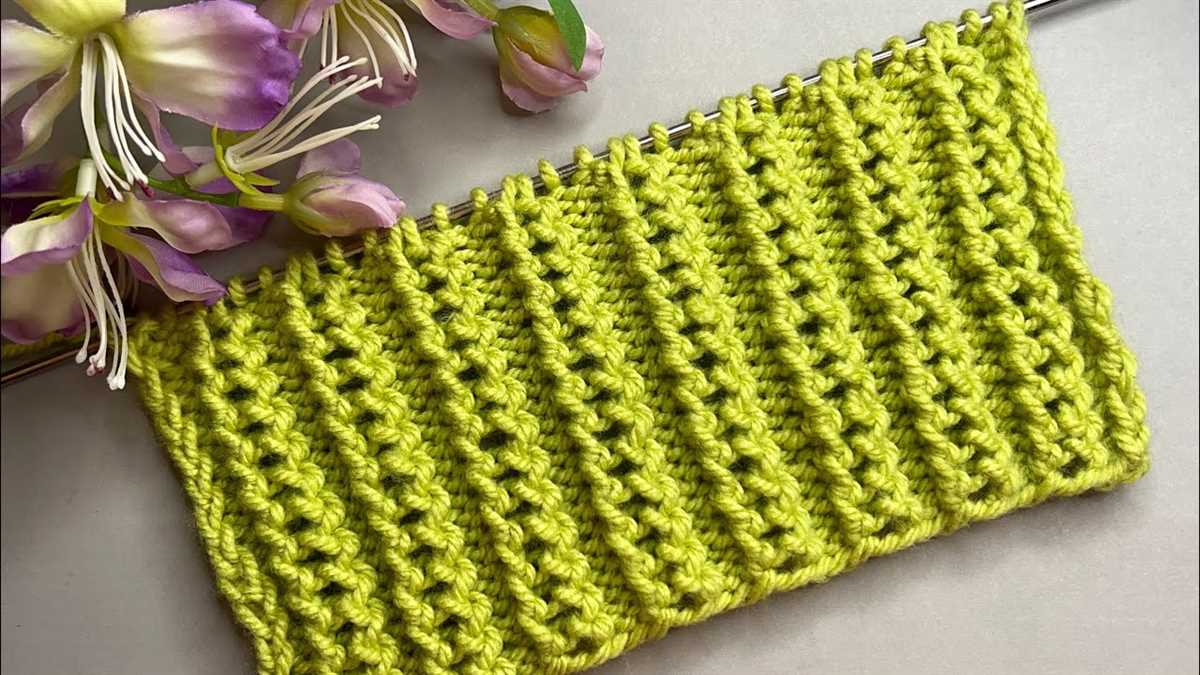
- Ribbing: Ribbing is a simple but effective way to add texture and stretch to your button shawl. By alternating knit and purl stitches, you can create vertical or horizontal ribbing patterns. Ribbing can give your shawl a cozy and classic look, perfect for colder seasons.
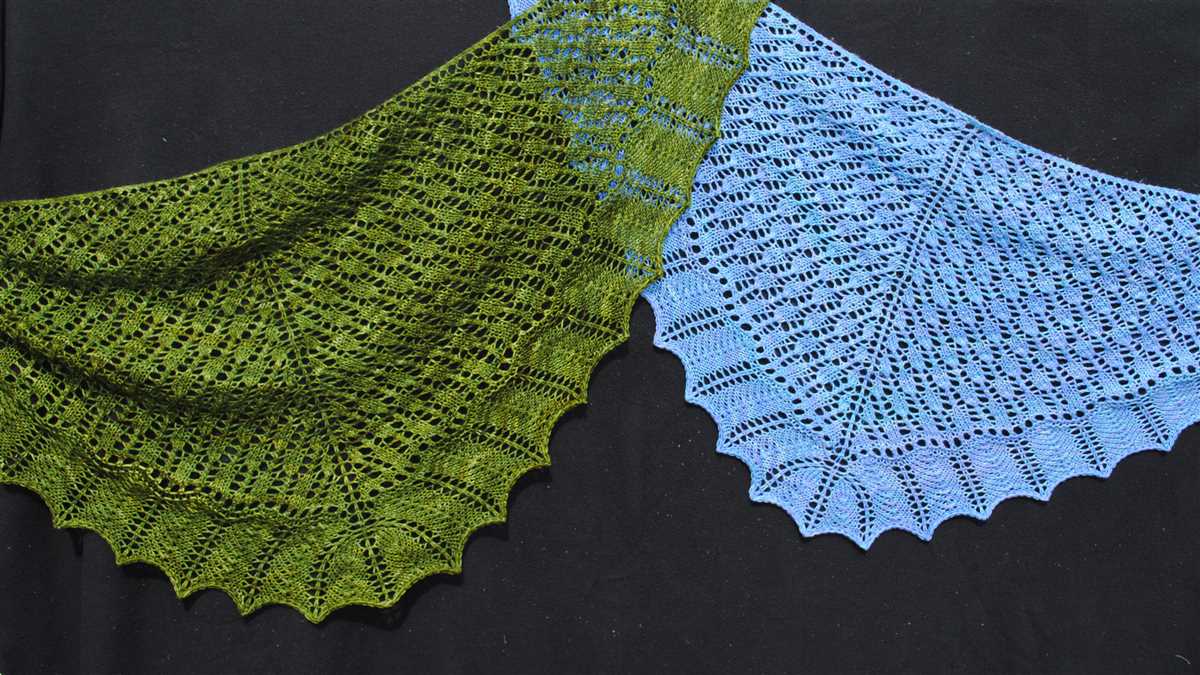
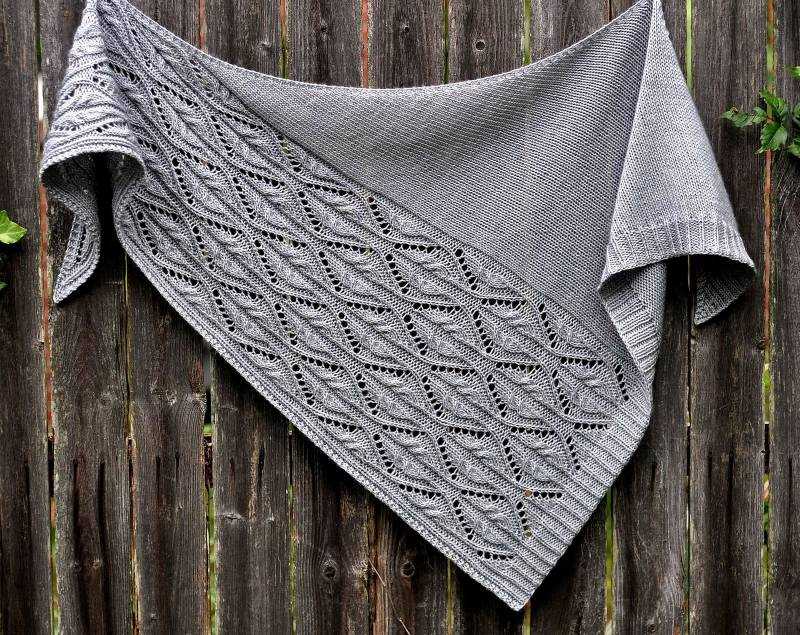
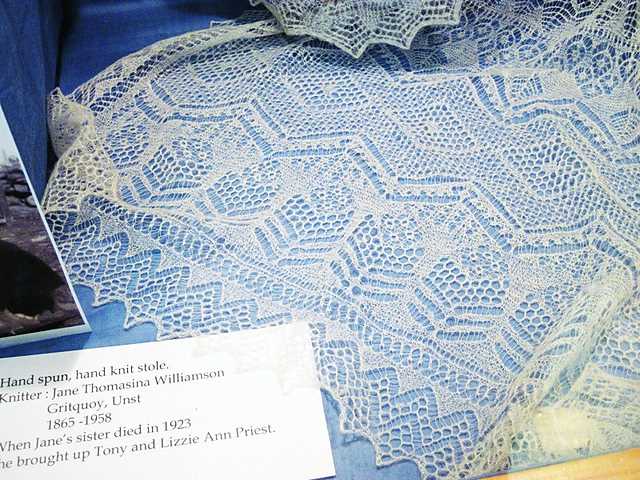
- Lace Stitch: For an elegant and airy button shawl, consider using lace stitches. Lace stitches create delicate, openwork patterns that can be as intricate or as simple as you like. Lace stitches can add a touch of femininity and sophistication to your shawl, making it perfect for special occasions or dressier outfits.
When incorporating decorative stitches into your button shawl, it’s important to consider the overall design and style you want to achieve. Experiment with different stitches and patterns to find the one that best complements your yarn choice and personal style. Adding decorative stitches can take your button shawl to the next level, turning it into a unique and eye-catching accessory.
Finishing the Edge of the Button Shawl
When it comes to finishing the edge of a button shawl, there are several options to consider. One popular choice is to add a simple crochet border. This can be done by using a contrasting color of yarn and a crochet hook. Start by attaching the yarn to one corner of the shawl and work your way around, creating single crochet stitches along the edge. This will create a clean and polished look, while also adding a bit of structure to the edge.
If you prefer a more decorative finish, you can also consider adding a knitted lace border. This can be achieved by picking up stitches along the edge of the shawl and knitting in a lace pattern. There are countless lace patterns to choose from, ranging from simple to intricate. Choose a pattern that complements the overall design of the shawl and adds a touch of elegance to the finished piece.
Another option for finishing the edge of a button shawl is to add a picot trim. This is a delicate and feminine choice that can add a delicate touch to the shawl. To create a picot trim, start by knitting a few rows or rounds in the main color of the shawl. Then, using a smaller needle, knit a row or round of stitches. On the next row or round, make a yarn over, knit two stitches together, and then repeat this pattern across the row or round. This will create a series of small loops or picots along the edge of the shawl.
An alternative to these decorative finishes is to simply bind off the edge of the button shawl. To do this, simply knit the last row or round as usual, and then bind off the stitches. This will create a clean and simple edge that can be left as is or adorned with buttons or other closures. This option is especially popular for shawls with detailed patterns or textures, as it allows the beauty of the stitches to shine without distraction.
In conclusion, there are several ways to finish the edge of a button shawl, each offering its own unique look. Whether you choose a crochet border, a knitted lace border, a picot trim, or a simple bind-off, the key is to select a finish that enhances the overall design of the shawl and adds the perfect finishing touch.
Blocking and Washing Your Button Shawl
Blocking and washing your button shawl is an important step in the knitting process. Blocking helps to open up the stitches and create a uniform shape, while washing removes any dirt or oils that may have accumulated during the knitting process or from regular wear.
Before blocking your button shawl, you will need to gather a few supplies. Firstly, you will need some blocking mats or a clean, flat surface to lay your shawl out on. You will also need some rust-proof pins or blocking wires to help shape the shawl. Additionally, a spray bottle filled with water will be useful for dampening the shawl.
To block your button shawl, start by laying it out flat on the blocking mats or surface. Use the rust-proof pins or blocking wires to pin the edges of the shawl in place, making sure to maintain the desired shape and measurements. If you are using blocking wires, insert them into the edges of the shawl and secure them in place with the rust-proof pins.
Next, lightly mist the shawl with water using the spray bottle. Be careful not to saturate the shawl, as this can cause stretching or distortion of the stitches. Once the shawl is damp, leave it to dry completely. This can take several hours or even overnight, depending on the size and thickness of the shawl.
After the shawl is completely dry, carefully remove the pins or blocking wires. The shawl should now be beautifully shaped and ready for wearing or adding buttons. If desired, you can also give the shawl a gentle steam with an iron to help set the shape.
For washing your button shawl, it is best to follow the care instructions specified for the yarn you used. Most shawls can be hand washed in cool water with a gentle detergent, and then laid flat to dry. Avoid wringing or twisting the shawl, as this can damage the stitches. Once the shawl is dry, you can proceed with the blocking process as described above.
By taking the time to block and wash your button shawl, you will ensure that it looks its best and retains its shape over time. With proper care, your button shawl will be a stylish and functional accessory that you can enjoy for years to come.
Styling and Wearing Your Button Shawl
Once you complete knitting your button shawl using the pattern provided, you’ll want to make sure you style and wear it in a way that showcases its beauty and functionality. Here are some tips to help you get the most out of your button shawl:
1. Choose the Right Buttons: Buttons play a vital role in the overall look and functionality of your shawl. Select buttons that complement the color and style of your shawl. Consider the size and weight of the buttons to ensure they don’t overpower the delicate knitwork.
2. Experiment with Button Placement: Don’t be afraid to get creative with button placement. Depending on the length and width of your shawl, you can try different button positions to achieve various styles. Try spacing the buttons evenly along the edge or adding multiple rows of buttons for a unique twist.
3. Layer it with Other Garments: Use your button shawl as a versatile layering piece. Pair it with a simple tee or sweater for an effortless yet cozy look. You can also wear it over a dress or blouse to add a touch of elegance to your outfit. Experiment with different textures and colors to create interesting combinations.
4. Show off the Stitch Pattern: The beauty of a hand-knit shawl lies in the intricate stitch pattern. When wearing your button shawl, be mindful of how it drapes and how the stitch pattern is visible. Adjust the folds and arrange the shawl in a way that allows the pattern to shine.
5. Dress it up or down: A button shawl can be dressed up or down depending on the occasion. Pair it with jeans and a casual top for a relaxed daytime look, or wear it over a little black dress for a more formal event. The versatility of a button shawl makes it a must-have accessory for any wardrobe.
By following these simple styling tips, you can turn your button shawl into a fashionable and functional accessory that adds warmth and style to your outfits.