
Knitting blankets is a popular and fulfilling pastime for many crafters. It allows for creativity and the ability to create cozy and warm items for yourself or to give as gifts. If you’re looking for a new pattern to try, the bubble stitch blanket may be just what you need.
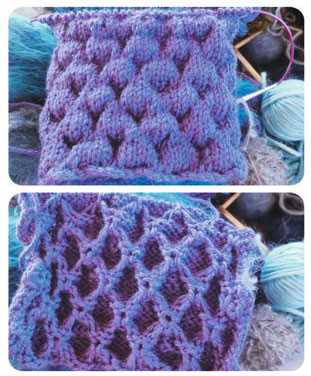
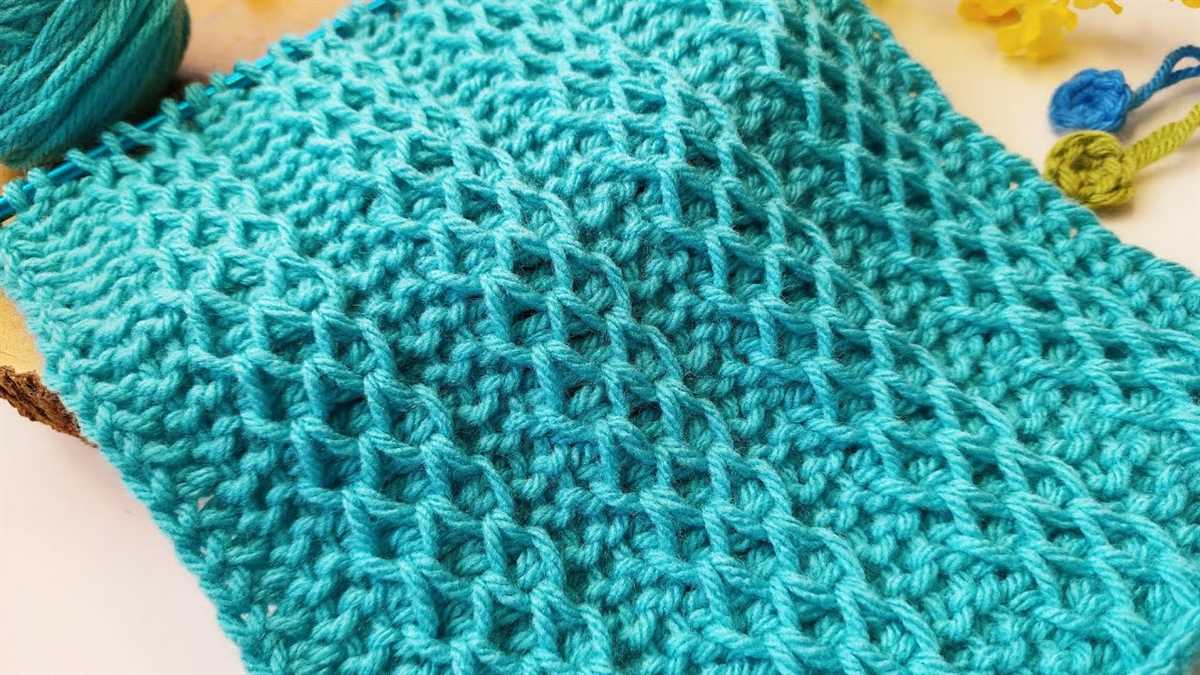
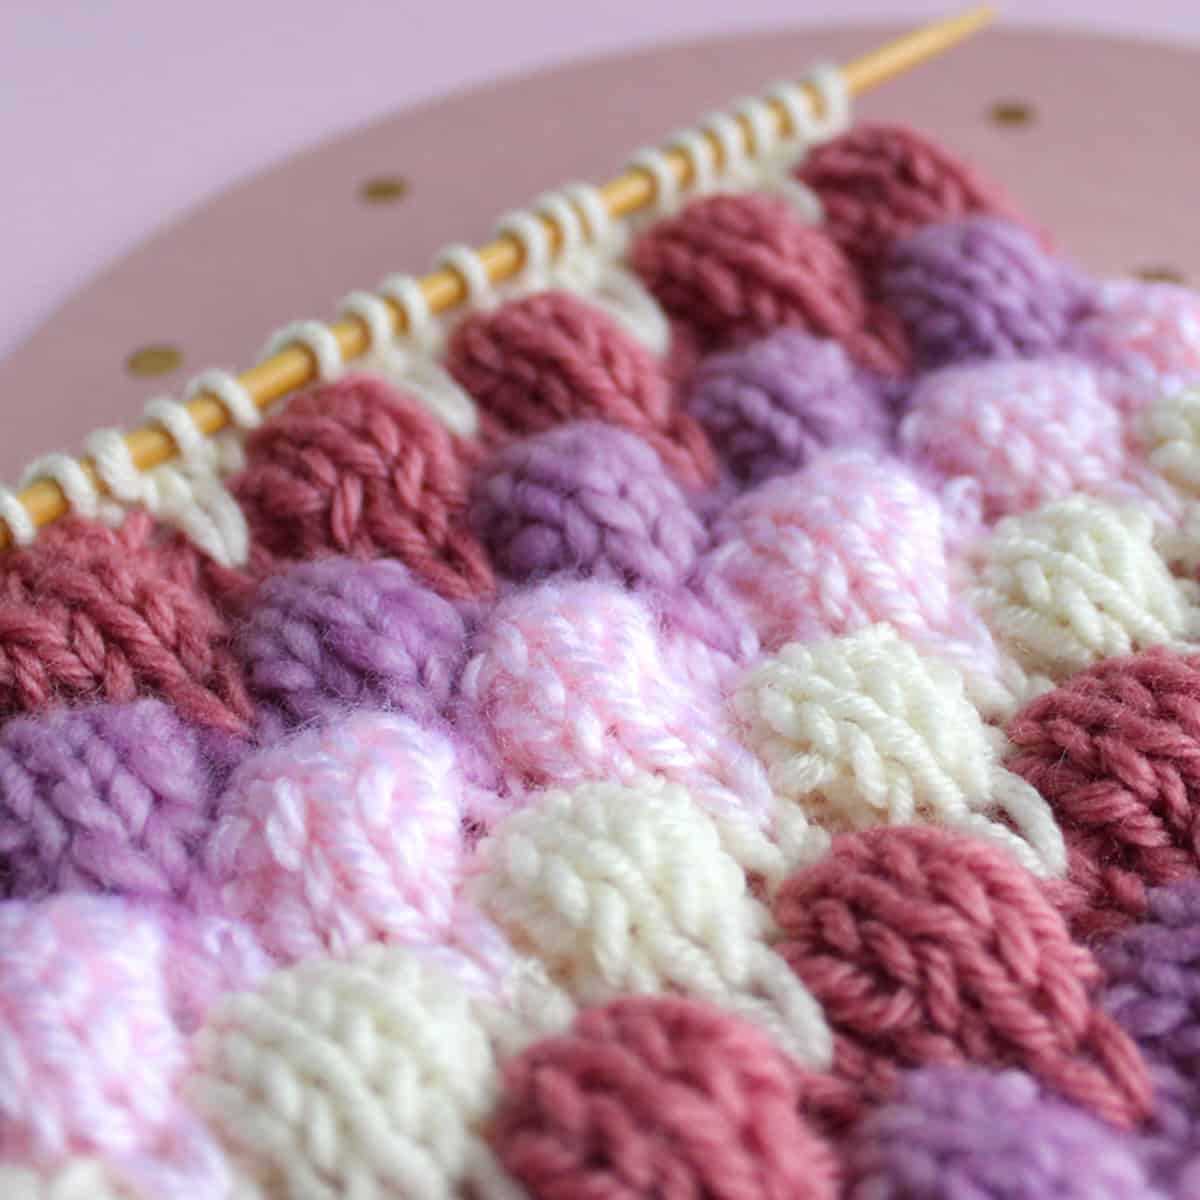
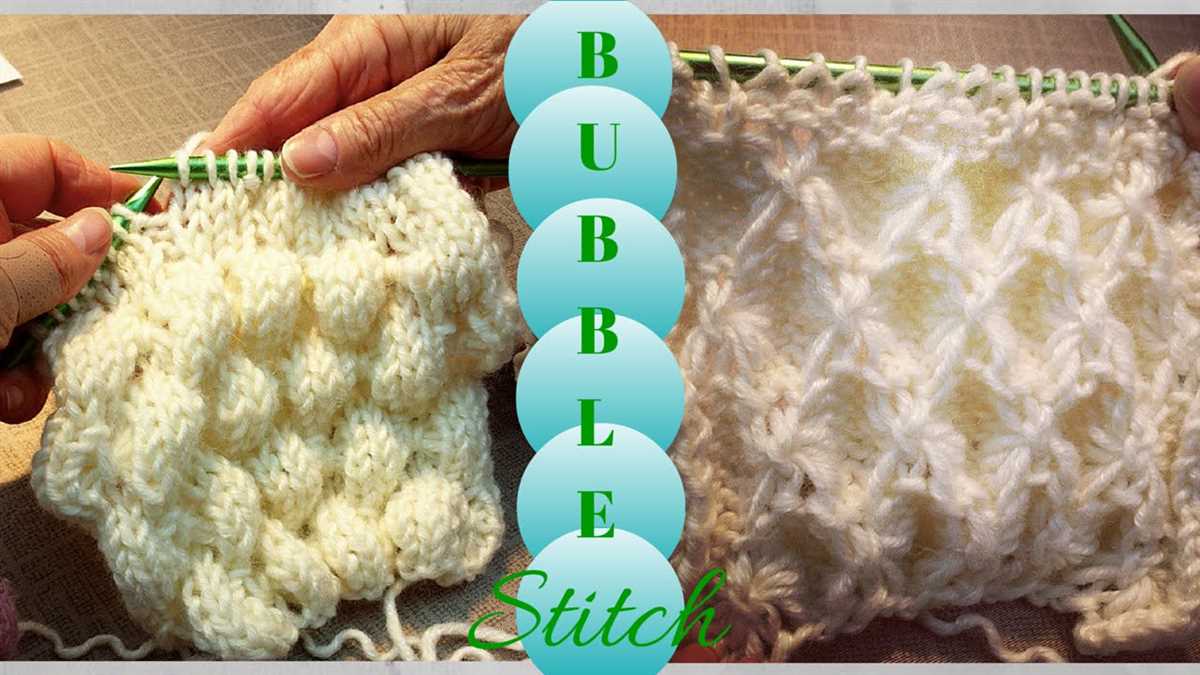
The bubble stitch blanket is a beautiful and unique design that adds texture and interest to any room. The technique creates a three-dimensional effect that resembles bubbles, giving the blanket a playful and whimsical appearance. It’s a fun pattern that is sure to keep you engaged as you knit.
The bubble stitch blanket is also a great project for knitters of all skill levels. Whether you’re a beginner or an experienced knitter, this pattern is easily adaptable and can be customized to suit your preferences. The repetitive nature of the stitch makes it easy to master, and once you get the hang of it, you’ll be able to create a stunning blanket in no time.
Bubble Stitch Blanket Knitting Pattern
A bubble stitch blanket is a beautiful and unique knitting project. The bubble stitch creates a raised, textured pattern that adds visual interest and dimension to the blanket. This pattern is perfect for those looking to make a statement with their knitting and create a cozy and stylish blanket.
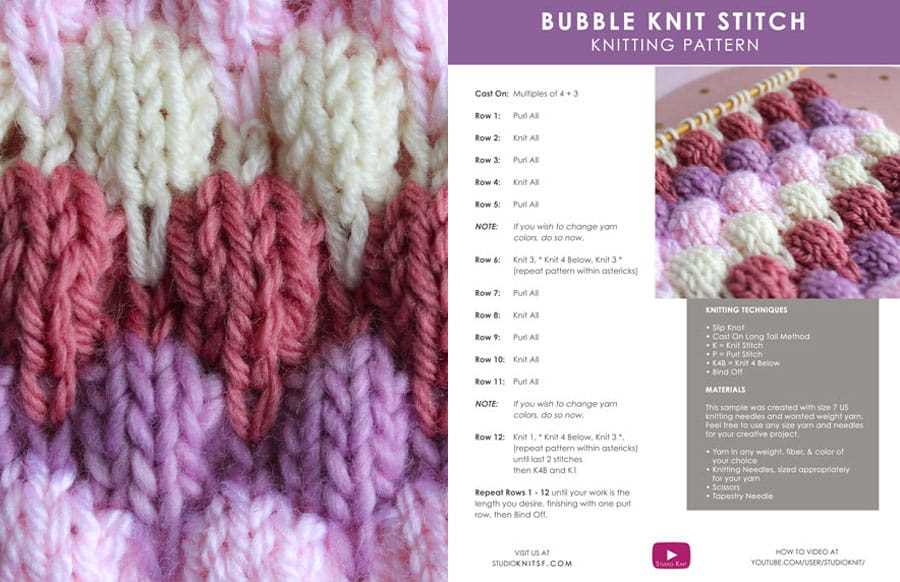
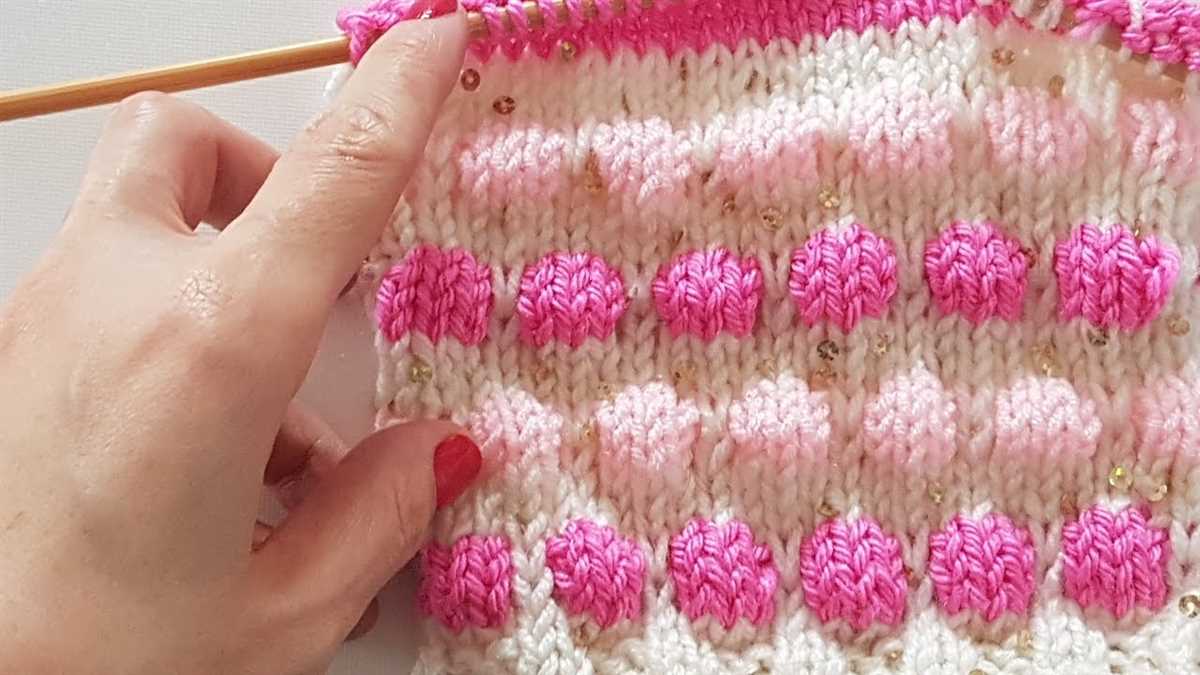
To create a bubble stitch blanket, you will need a basic understanding of knitting techniques, such as casting on, knitting, purling, and binding off. The bubble stitch itself is created by knitting into the same stitch multiple times to create clusters of stitches that protrude from the fabric.
Here is a step-by-step guide to knitting a bubble stitch blanket:
- Choose your yarn and needle size. A thicker yarn and larger needles will create bigger bubbles, while a thinner yarn and smaller needles will create smaller bubbles.
- Cast on an even number of stitches for your desired blanket width.
- Begin the bubble stitch pattern by knitting two stitches together to create the first bubble. Knit into the same stitch again, creating three stitches in total.
- Repeat step 3 across the row, creating a bubble in every other stitch.
- On the next row, purl all stitches.
- Repeat steps 3-5 until your blanket reaches the desired length.
- Bind off and weave in any loose ends.
Once you have finished knitting your bubble stitch blanket, you can customize it by adding a border or using different colors to create a unique design. This blanket is sure to be a conversation piece and a cozy addition to any home.
Materials Needed for Bubble Stitch Blanket
To make a bubble stitch blanket, you will need the following materials:
- Yarn: Choose a soft and cozy yarn that is suitable for blankets. You can select any color you prefer for your blanket.
- Knitting Needles: Use knitting needles that are appropriate for the yarn you have chosen. The recommended size is usually stated on the yarn label.
- Tapestry Needle: A tapestry needle will be needed for weaving in the loose ends of yarn and sewing the different pieces of the blanket together.
- Scissors: A good pair of scissors is essential for cutting the yarn and trimming any excess.
- Stitch markers: Stitch markers can be helpful for keeping track of your stitches, especially if you are working on a larger blanket.
- Measuring Tape: A measuring tape will be useful for checking the size of your blanket as you work on it.
Once you have gathered all the necessary materials, you will be ready to start knitting your bubble stitch blanket. Make sure to have a comfortable and well-lit space to work in, and enjoy the process of creating a beautiful and cozy blanket.
Step-by-Step Instructions for Bubble Stitch Blanket
Are you ready to get started on knitting a beautiful bubble stitch blanket? Follow these step-by-step instructions to create a cozy and textured blanket that will be perfect for snuggling up on chilly nights.
Materials Needed:
- Yarn: Choose a soft and bulky yarn in the color of your choice. This will give your blanket a thick and cozy feel.
- Knitting Needles: Use large knitting needles to accommodate the bulky yarn. Size 10-15 needles should work well.
- Tapestry Needle: This will be used for weaving in ends and seaming your blanket.
- Scissors: You’ll need a pair of scissors for cutting yarn.
Step 1: Cast On
Start by casting on the desired number of stitches for your blanket. You can determine the width of your blanket by checking the gauge recommended on the yarn label, or you can cast on as many stitches as you’d like for a customizable size.
Step 2: Knit the First Row
Knit the first row of your blanket using the basic knit stitch. This will create a foundation for the bubble stitch pattern.
Step 3: Begin the Bubble Stitch Pattern
To create the bubble stitch pattern, you’ll need to follow a specific sequence of knitting and purling. Here’s how to do it:
- Knit 2 stitches together, but do not remove them from the left needle.
- Bring the yarn forward, and purl the same 2 stitches together. This creates one bubble.
- Repeat this sequence across the row, knitting 2 stitches together and then purling them together to create bubbles.
Step 4: Continue the Bubble Stitch Pattern
Continue knitting the bubble stitch pattern until your blanket reaches the desired length. Remember to knit a plain row between each row of bubbles to add structure to your blanket.
Step 5: Bind Off
Once you’ve reached your desired length, it’s time to bind off. Knit 2 stitches, then pass the first stitch over the second stitch and off the needle. Repeat this process across the row until you have one stitch remaining. Cut the yarn, leaving a long tail, and pull it through the last stitch to secure.
Step 6: Finishing Touches
Weave in any loose ends using a tapestry needle. If desired, you can also block your blanket to give it a neater appearance. Simply wet the blanket, gently squeeze out the excess water, and lay it flat to dry. Once dry, your bubble stitch blanket is ready to be enjoyed!
Tips for Successfully Knitting a Bubble Stitch Blanket
Knitting a bubble stitch blanket can be a fun and challenging project that results in a cozy and textured finished product. To help you with your knitting journey, here are some tips to ensure that your blanket turns out beautifully:
1. Choose the Right Yarn: The yarn you choose for your bubble stitch blanket can greatly impact the final result. Look for a yarn that is soft, durable, and machine washable. Bulky or super bulky yarns work best for creating the bubble stitch texture.
2. Practice the Bubble Stitch: Before you start knitting your blanket, it’s a good idea to practice the bubble stitch on a small swatch. This will help you get comfortable with the technique and ensure that you achieve the desired texture and tension.
3. Use Stitch Markers: Stitch markers are a useful tool when knitting the bubble stitch pattern. They can help you keep track of your stitches and ensure that you don’t lose your place in the pattern. Place stitch markers at regular intervals to divide your stitches into sections.
4. Keep Your Tension Consistent: Consistent tension is key to achieving an even and professional-looking bubble stitch pattern. Pay attention to your tension as you work and make sure to maintain it throughout the entire blanket.
5. Block Your Finished Blanket: Blocking is an important step in finishing your bubble stitch blanket. This process involves wetting the blanket and then shaping it to the desired dimensions. Blocking helps to even out the stitches and give the blanket a polished look.
6. Take Breaks and Relax: Knitting a blanket can be a time-consuming project, so it’s important to take breaks and give your hands a rest. Set aside some time each day to relax and enjoy the process of knitting.
7. Enjoy the Journey: Knitting a bubble stitch blanket is not only about the end result but also about the journey. Embrace the process, try out different color combinations, and enjoy creating a cozy and beautiful blanket that will keep you warm for years to come.
Different Variations of Bubble Stitch Blankets
When it comes to creating a bubble stitch blanket, there are endless possibilities for variations and customization. The bubble stitch itself creates a three-dimensional texture that is perfect for adding visual interest and warmth to your blanket. Here are a few different variations you can try:
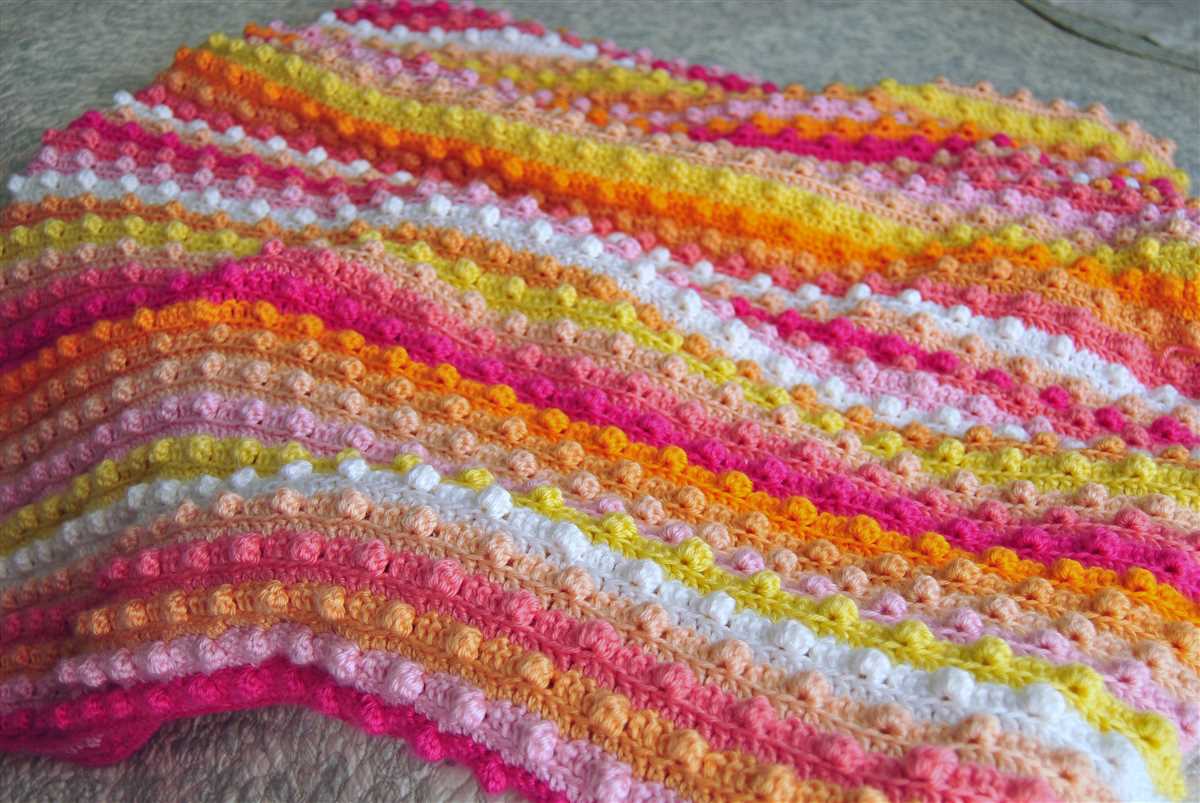
1. Colorful Bubble Stitch Blanket
Add a pop of color to your bubble stitch blanket by using multiple shades of yarn. You can create a gradient effect by starting with one color and gradually transitioning to another, or you can use a variety of colors to create a vibrant and playful blanket. This variation is perfect for adding a touch of personality to your knitting project.
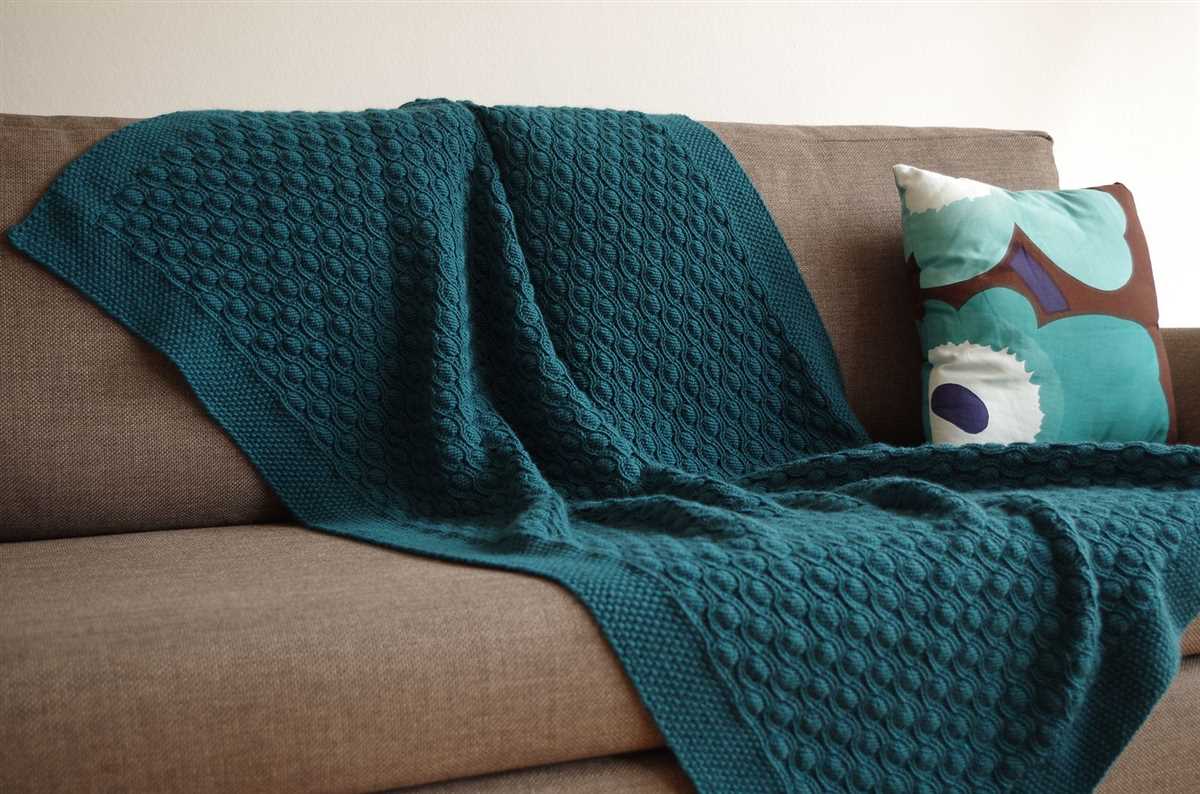
2. Textured Bubble Stitch Blanket
If you want to enhance the texture of your bubble stitch blanket, you can experiment with different yarn weights and textures. By combining yarns with different thicknesses or using a textured yarn such as boucle or chenille, you can create a blanket with even more depth and visual interest. This variation is perfect for those who love a cozy and tactile knitting project.
3. Patterned Bubble Stitch Blanket
Add a touch of sophistication to your bubble stitch blanket by incorporating pattern stitches alongside the bubbles. You can create a checkerboard pattern, stripes, or even a lattice design by alternating the bubble stitch rows with other stitch patterns. This variation is perfect for those who enjoy more complex knitting techniques and want to create a truly unique blanket.
4. Chunky Bubble Stitch Blanket
If you want to create a blanket with a super cozy and chunky appearance, you can opt for using a thick and bulky yarn for your bubble stitch blanket. The larger stitches and thicker yarn will create an extra plush and warm blanket that is perfect for snuggling up with on cold winter nights. This variation is great for those who want a quick and satisfying knitting project.
These are just a few examples of the different variations you can try when knitting a bubble stitch blanket. Feel free to get creative and experiment with different colors, yarns, and patterns to create a blanket that is truly unique and tailored to your personal style.
Choosing the Right Yarn for Your Bubble Stitch Blanket
A bubble stitch blanket is a beautiful and cozy addition to any home, and choosing the right yarn is an important part of creating a stunning finished product. The yarn you choose will determine the overall look, feel, and durability of your blanket, so it’s essential to choose wisely.
Fiber Content: When selecting yarn for your bubble stitch blanket, consider the fiber content. Natural fibers like wool, alpaca, and cotton are popular choices as they provide warmth, breathability, and softness. Synthetic fibers like acrylic and nylon are also common options as they are durable and easy to care for. Think about the characteristics you want in your blanket and choose a fiber content that aligns with your preferences.
Weight: The weight of the yarn will impact the drape and thickness of your blanket. Bulky or chunky weight yarns will create a thicker and warmer blanket, perfect for colder climates or for snuggling up on the couch. Lighter weight yarns will create a more delicate and lightweight blanket, suitable for warmer weather or as a decorative accent. Consider the intended use of your blanket and choose a yarn weight accordingly.
Texture: The texture of the yarn will add another dimension to your bubble stitch blanket. Smooth, tightly spun yarns will give your blanket a sleek and polished look. On the other hand, yarns with a halo or fuzzy texture can create a more cozy and comforting feel. Take into account the aesthetic you want to achieve when selecting the texture of your yarn.
Color: The color of your yarn will greatly impact the overall appearance of your bubble stitch blanket. You could choose a solid color for a classic and timeless look or opt for variegated or self-striping yarn to add visual interest. Consider the color scheme of your home and the intended purpose of the blanket when selecting the color or colors of your yarn.
Quality: Lastly, consider the quality of the yarn and its durability. Investing in high-quality yarn will ensure that your bubble stitch blanket will stand the test of time and retain its beauty even with frequent use and washing. Check for any signs of pilling or shedding and choose a yarn that is well-constructed and tightly spun.
By taking into consideration the fiber content, weight, texture, color, and quality of the yarn, you can make an informed decision when choosing the right yarn for your bubble stitch blanket. Remember to consider your personal preferences and the intended use of the blanket to create a finished product that you will love and cherish for years to come.
How to Adjust the Size of Your Bubble Stitch Blanket
If you have a bubble stitch blanket knitting pattern that you love, but it’s not the size you want, don’t worry! Adjusting the size of your bubble stitch blanket is actually quite simple. There are a few key factors to consider when making adjustments, such as the number of stitches and rows needed, and the yarn weight and needle size you plan to use.
1. Determine the desired size: Start by deciding how big or small you want your bubble stitch blanket to be. This will help you calculate the number of stitches and rows you’ll need to achieve your desired dimensions.
2. Calculate the stitch and row count: To adjust the size, you’ll need to change the stitch and row count accordingly. If you want to make the blanket wider, you’ll need to increase the number of stitches. Conversely, if you want to make it narrower, you’ll need to decrease the number of stitches. Similarly, if you want to make the blanket longer, you’ll need to add more rows, and if you want to make it shorter, you’ll need to subtract rows.
3. Adjust the pattern: Once you have calculated the required stitch and row count, you’ll need to adjust the pattern accordingly. For example, if the original pattern calls for 100 stitches and you want to make it wider by 10 stitches, you’ll need to add 10 extra stitches in the pattern. Make sure to distribute the additional stitches evenly across the pattern to maintain the bubble stitch design.
4. Consider the yarn and needle size: Changing the size of your blanket may require a change in yarn weight and needle size. If you’re making a larger blanket, you may need thicker yarn and larger needles to maintain the same tension and overall appearance of the bubble stitch pattern. Conversely, if you’re making a smaller blanket, you may need thinner yarn and smaller needles to achieve the desired density of bubbles.
5. Make a gauge swatch: Before you start working on your adjusted bubble stitch blanket, it’s crucial to make a gauge swatch. This will help you determine if the stitch and row count adjustments are working as planned and if any further adjustments are necessary. Use the new yarn and needle size to create a swatch and measure its gauge against the original pattern’s gauge. Adjust as needed.
6. Follow the pattern: Once you’ve made all the necessary adjustments, you can start knitting your bubble stitch blanket according to the modified pattern. Follow the instructions carefully, giving attention to the changed stitch and row count, as well as any alterations in yarn and needle size.
By following these steps, you can easily adjust the size of your bubble stitch blanket to suit your preferences. Don’t be afraid to experiment and make changes along the way, as knitting is a flexible and creative craft that allows for customizations.
Adding Borders and Edgings to Your Bubble Stitch Blanket
Once you have completed knitting your bubble stitch blanket, you may want to add a border or edging to give it a finished look. There are several options to consider when selecting the perfect border or edging for your blanket.
1. Simple Ribbed Border

A simple ribbed border is a classic choice that adds a neat and structured finish to your bubble stitch blanket. To create a ribbed border, you can knit a few rows of knit and purl stitches in a pattern, such as knit two, purl two, and repeat, around the edges of your blanket.
2. Garter Stitch Edge
If you prefer a more textured and squishy finish, a garter stitch edge is a great option. To achieve a garter stitch edge, you can knit every row along the edges of your blanket. This creates a border with ridges for added visual interest.
3. Lacy Edge
If you want to add a delicate and feminine touch to your bubble stitch blanket, a lacy edge is a beautiful choice. You can choose from a variety of lace patterns, such as a simple eyelet stitch or a more intricate lace motif, to create a border that complements the bubbly texture of your blanket.
4. Seed Stitch Border
A seed stitch border is another option to consider if you want to add texture and interest to your bubble stitch blanket. The seed stitch is created by alternating knit and purl stitches, and it results in a bumpy and textured fabric. Knitting a few rows of seed stitch around the edges can give your blanket a lovely finished look.
5. Scallop Edging
If you want to add a decorative and whimsical touch to your bubble stitch blanket, a scallop edging is a charming choice. You can achieve a scallop pattern by incorporating increases and decreases in your knitting, creating a wavy edge that resembles the shape of a scallop shell.
When selecting a border or edging for your bubble stitch blanket, consider the overall aesthetic you want to achieve and the level of difficulty you are comfortable with. Experiment with different options and find the perfect finishing touch for your beautiful bubble stitch blanket.
Pattern Ideas for Using the Bubble Stitch in Other Projects
The bubble stitch is a fun and versatile knitting pattern that can be used in a variety of projects. While it is commonly seen in blankets, there are many other ways to incorporate this stitch into your knitting repertoire. Whether you want to add texture to a scarf or create a unique hat, the bubble stitch is a great option.
Scarf with Bubble Stitch: One way to use the bubble stitch is to create a scarf with an interesting textured pattern. By alternating rows of bubble stitch with rows of a simpler stitch, such as stockinette or garter stitch, you can create a scarf with a unique and eye-catching design. The bubbles will add depth and dimension to your scarf, making it stand out from the crowd.
Bubble Stitch Hat: Another project idea is to use the bubble stitch to create a hat. The bubbles can be arranged in various patterns, such as spirals or scattered randomly, to create a whimsical and playful look. This would be a great project for a baby or child, as the bubbles will add an extra element of fun to their winter wardrobe.
Bubble Stitch Pillow: If you’re looking to add a touch of texture to your home decor, consider using the bubble stitch to create a cozy and stylish pillow. By knitting two squares with the bubble stitch pattern and sewing them together, you can easily create a beautiful and unique cushion for your couch or bed. The bubbles will add an extra layer of comfort and visual interest to your space.
Bubble Stitch Sweater: For a more advanced and ambitious project, why not try incorporating the bubble stitch into a sweater design? The bubbles can be used to create interesting patterns on the front or back of the sweater, or even along the sleeves. This will add a unique and eye-catching element to your knitwear, making it a true statement piece.
Overall, the bubble stitch is a versatile and fun pattern that can be used in a variety of knitting projects. Whether you’re looking to add texture to a scarf, create a whimsical hat, or give your home decor a bit of flair, the bubble stitch is a great choice. Experiment with different patterns and placements to create your own unique designs, and enjoy the process of knitting with this delightful stitch.
Common Mistakes to Avoid When Knitting a Bubble Stitch Blanket
A bubble stitch blanket is a beautiful and textured project that can be a bit challenging for beginners. To ensure that your blanket turns out just as you envision it, it’s important to avoid some common mistakes that can happen during the knitting process.
1. Incorrect tension:
One of the most common mistakes knitters make when working on a bubble stitch blanket is having inconsistent tension. This can result in uneven and sloppy-looking stitches. Make sure to maintain an even tension throughout your knitting, neither too tight nor too loose, to achieve a polished and professional finish.
2. Skipping stitch markers:
Stitch markers are essential when knitting a bubble stitch blanket, as they help you keep track of your pattern and ensure that the bubbles are evenly distributed. Skipping these markers can easily lead to mistakes and uneven spacing between the bubbles. Be sure to use stitch markers and place them correctly according to your pattern to avoid any errors.
3. Not checking gauge:
Gauge refers to the number of stitches and rows per inch in your knitting. Failing to check your gauge before knitting your bubble stitch blanket can result in a too small or too large finished product. Take the time to swatch and measure your gauge accurately to ensure that your blanket turns out the right size and fits your desired measurements.
4. Ignoring proper blocking:
Blocking is an important step in finishing your bubble stitch blanket. It helps to even out stitches, relax the fabric, and give your project a more polished look. Skipping this step can result in an unevenly textured blanket. Follow the blocking instructions in your pattern and take the time to properly block your finished blanket for the best result.
5. Not counting stitches:
When knitting a bubble stitch blanket, it’s crucial to count your stitches regularly to ensure that you haven’t accidentally added or dropped any stitches. Even one extra or missed stitch can disrupt the pattern and affect the appearance of the bubbles. Count your stitches at the end of each row or repeat to catch any errors early on.
Avoiding these common mistakes will help you create a beautiful and well-executed bubble stitch blanket that you can be proud of. Remember to take your time, follow the pattern instructions carefully, and enjoy the process of knitting this intricate and stunning project.
Inspiring Bubble Stitch Blanket Knitting Projects
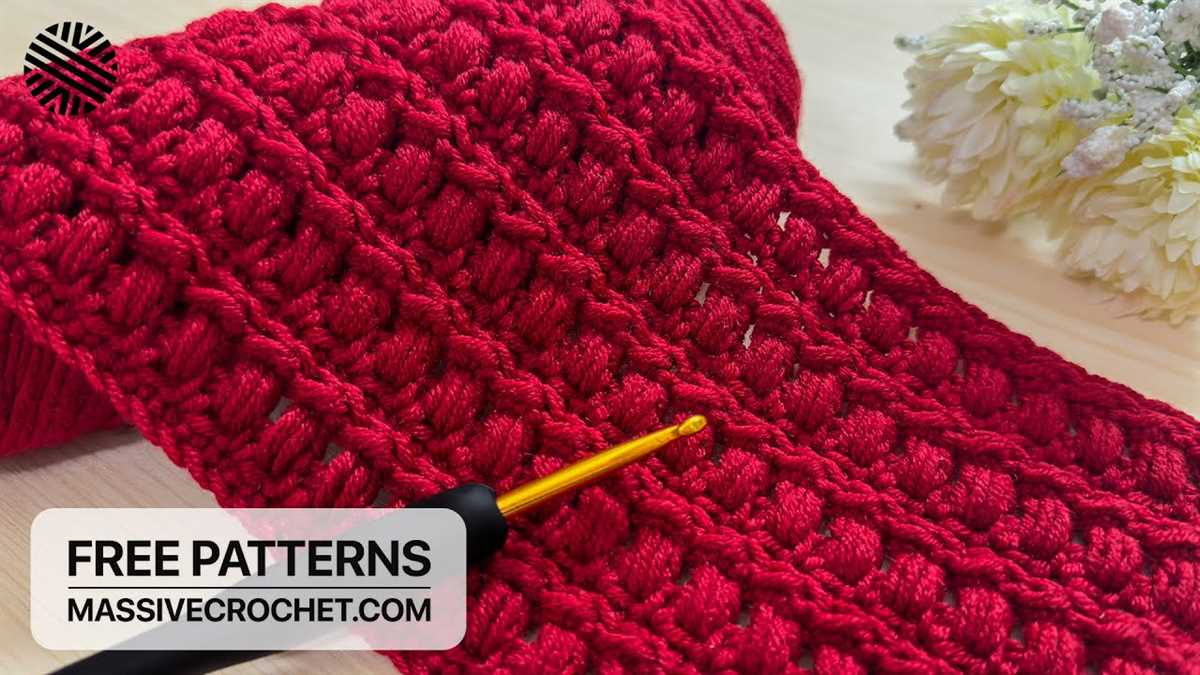
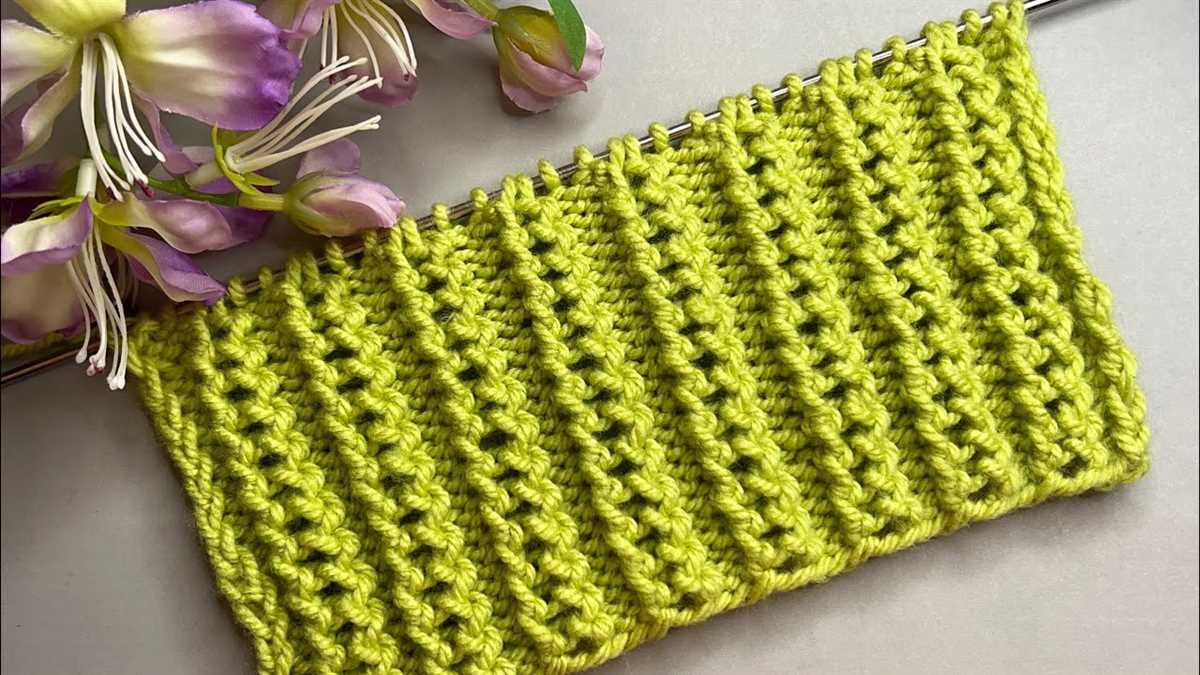
Knitting a bubble stitch blanket is not only a relaxing and enjoyable project, but it also creates a stunning and visually appealing finished product. The bubble stitch, characterized by its raised, puffy texture, adds depth and dimension to the blanket, making it a unique and eye-catching piece.
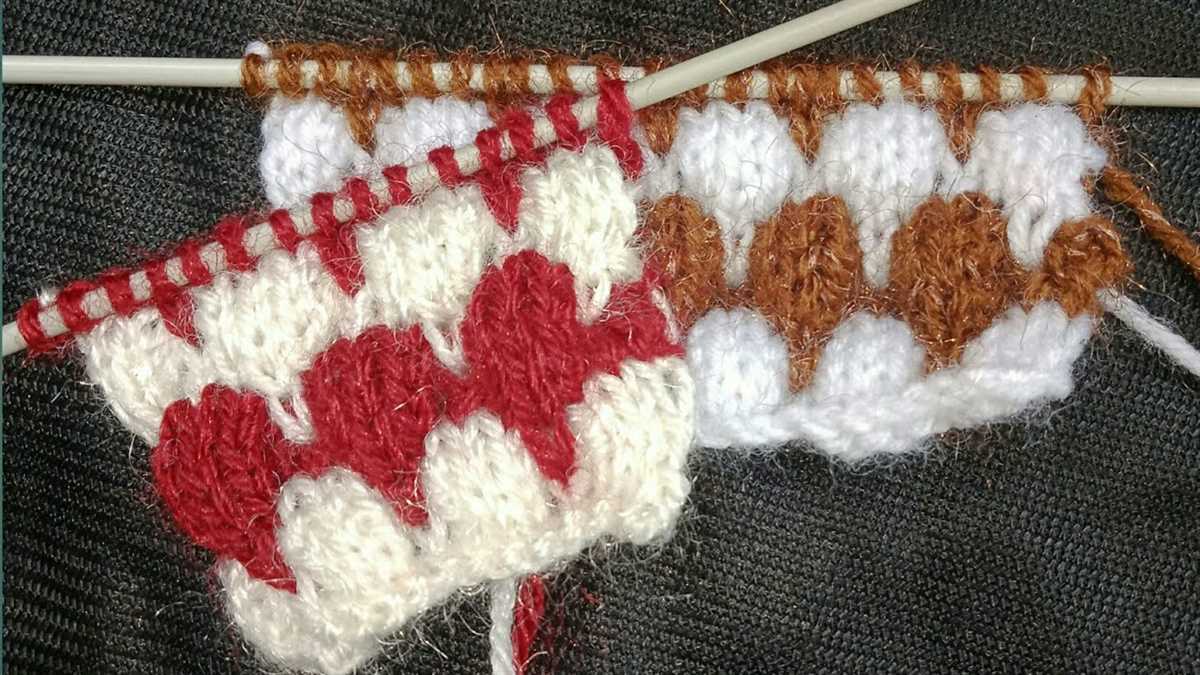
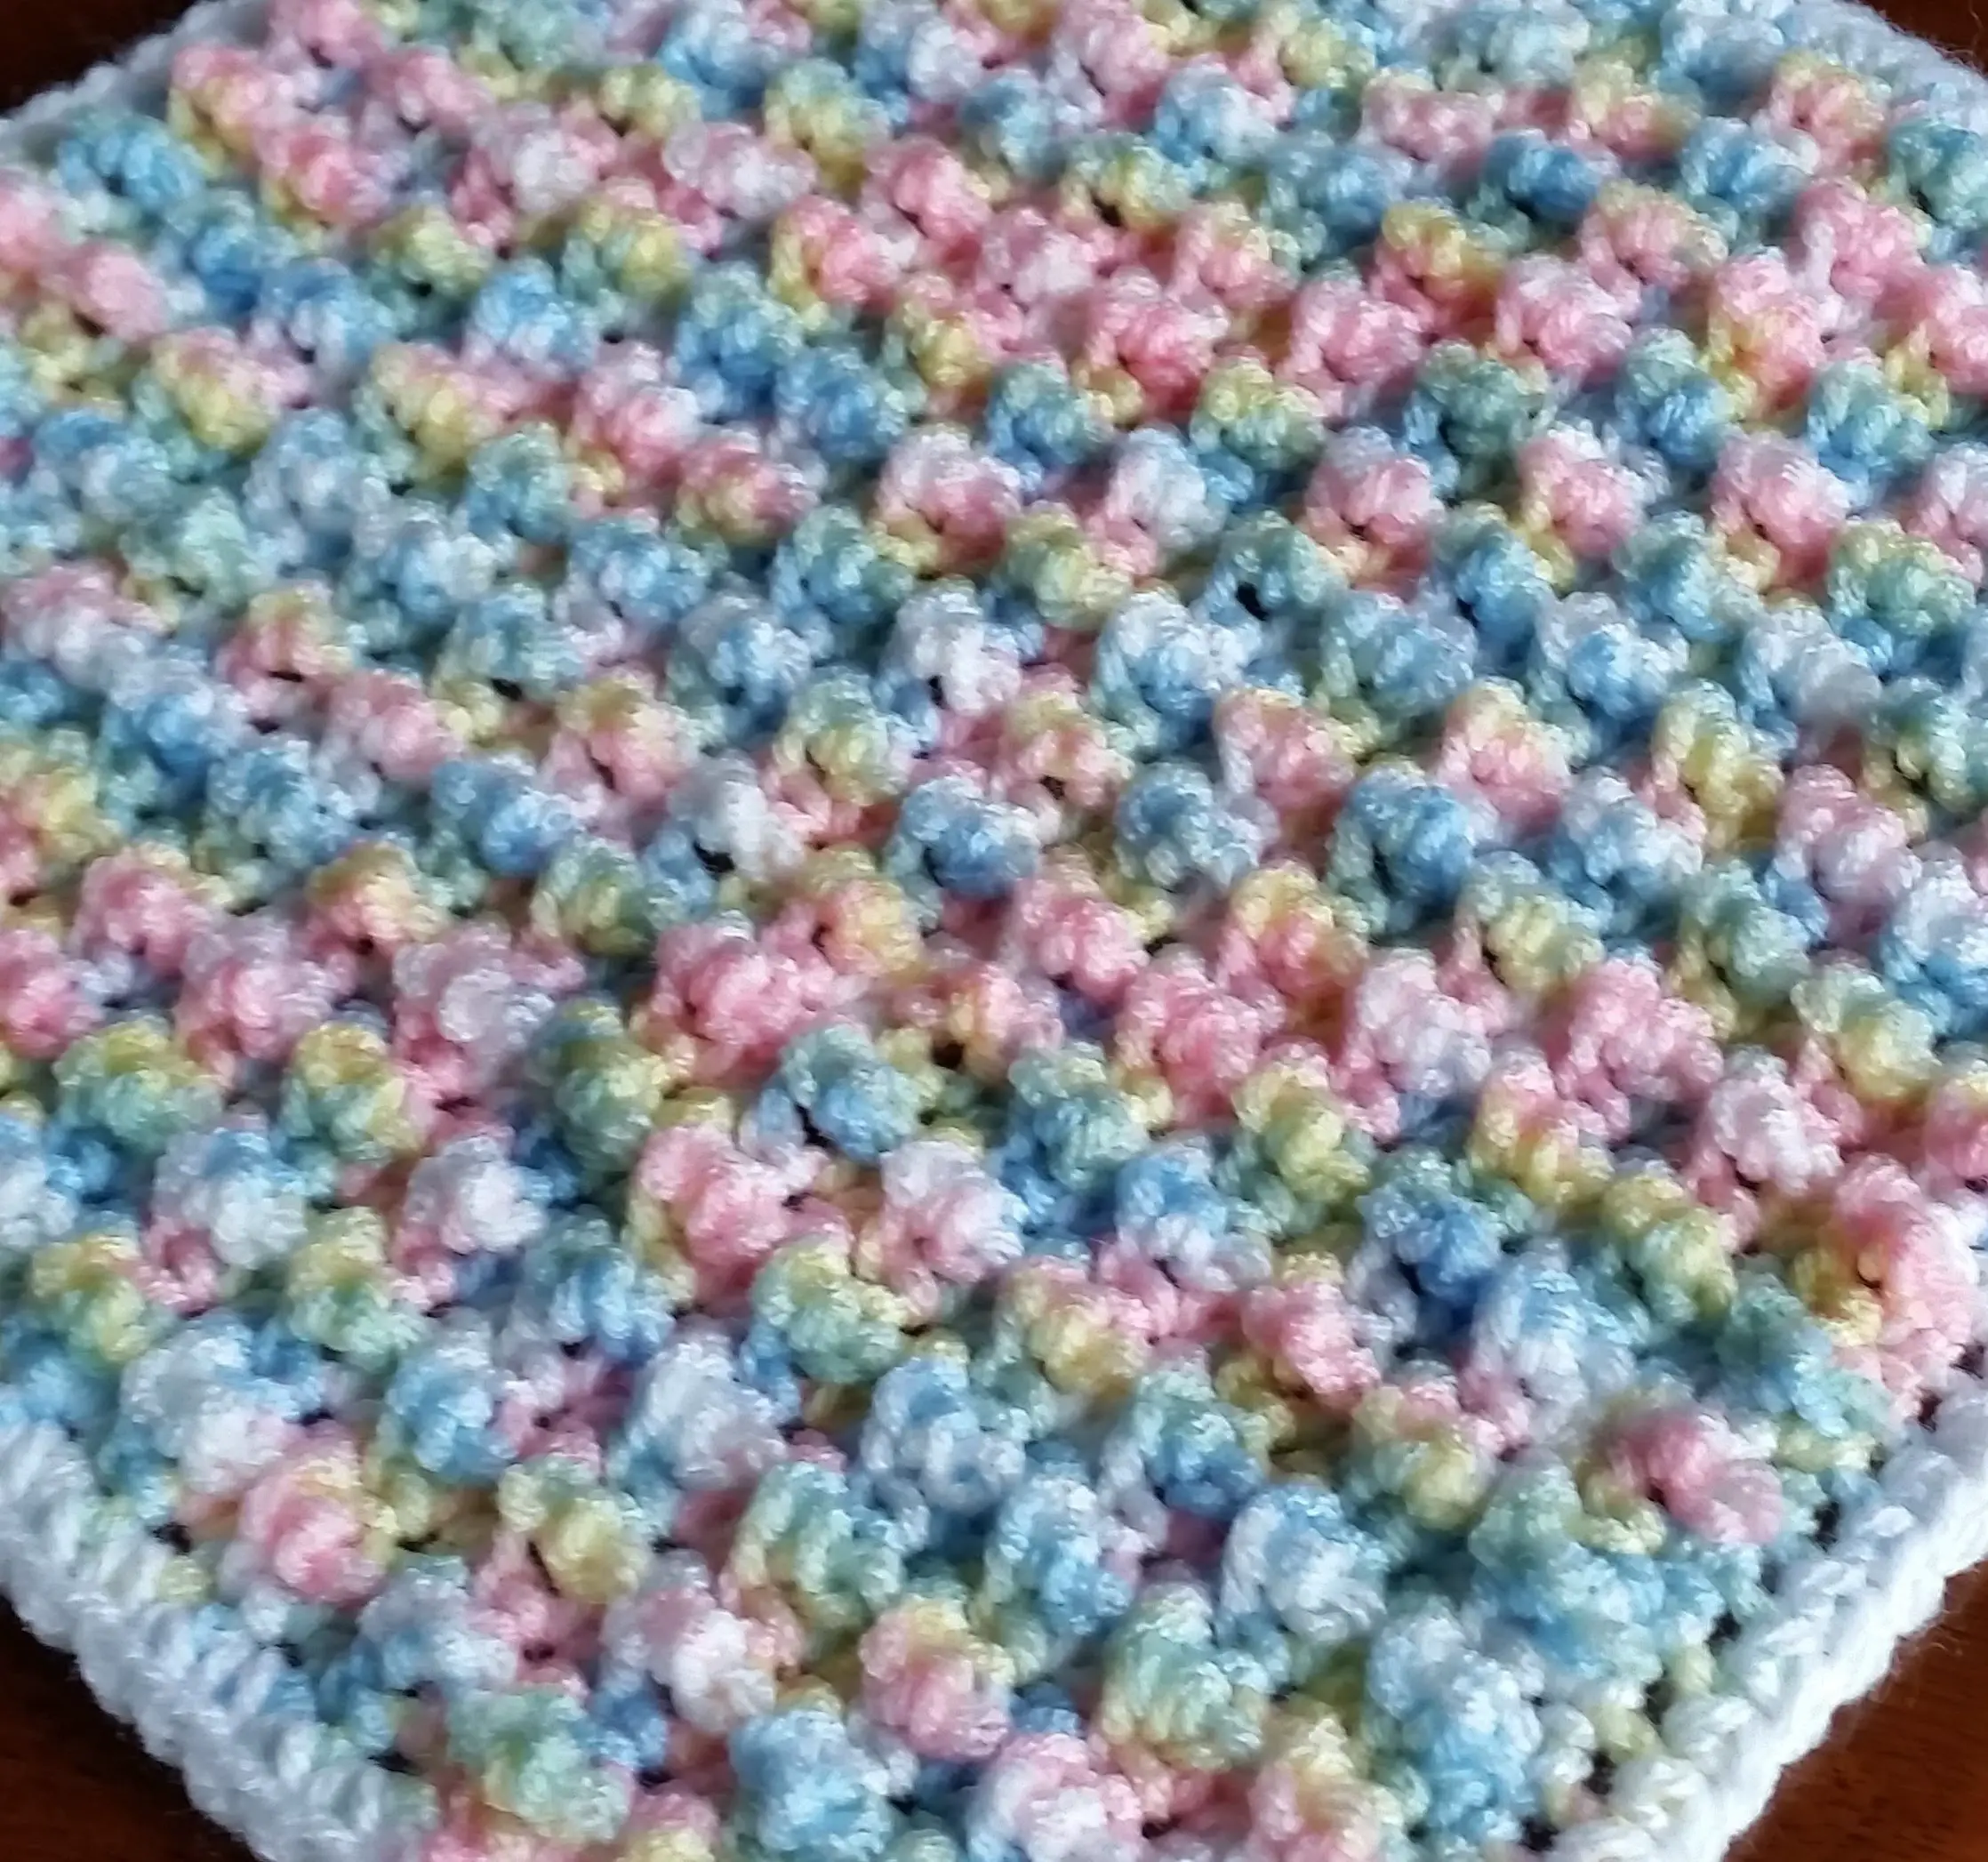
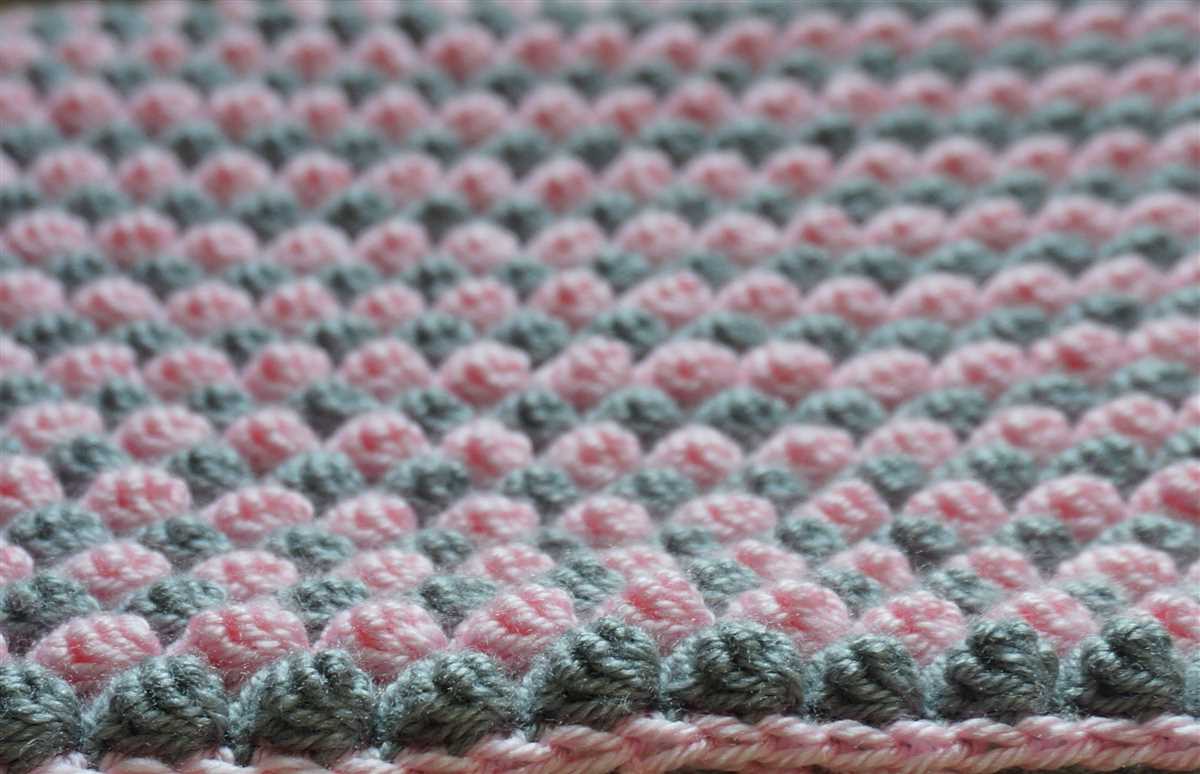
One inspiring idea for a bubble stitch blanket is to use a combination of bold and vibrant colors. By incorporating bright shades such as pink, yellow, and blue, the blanket becomes a cheerful and playful addition to any room. This project is perfect for those who love to experiment with color and want to create a statement piece that stands out.
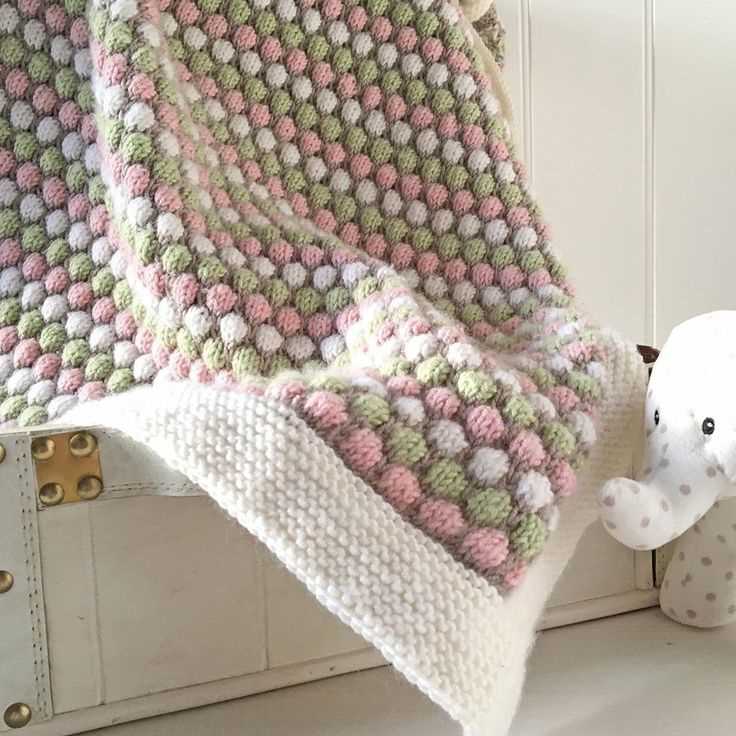
Another inspiring bubble stitch blanket project is to create a gradient effect using different shades of the same color. For example, starting with a light pink at one end and gradually transitioning to a deep and rich magenta at the other, creates a beautiful ombre effect. This project requires careful planning and attention to detail, but the end result is a visually stunning and elegant blanket.
A unique twist on the bubble stitch blanket is to incorporate other stitch patterns within the design. For instance, alternating rows of bubble stitch with a simpler knit or purl pattern can create a dynamic and textured look. This project allows knitters to showcase their creativity by mixing different stitch patterns and creating a truly one-of-a-kind blanket.
Whether you choose to go bold with vibrant colors, create a gradient effect, or experiment with different stitch patterns, knitting a bubble stitch blanket offers endless possibilities for creative expression. With its unique texture and eye-catching design, this project is sure to inspire both the knitter and anyone who sees the finished product.
How to Care for and Wash Your Bubble Stitch Blanket
When it comes to caring for your bubble stitch blanket, proper washing and maintenance is essential to keep it looking beautiful and in good condition. Here are some tips to help you care for your blanket:
- Follow the care instructions: Before washing your blanket, always check the care instructions provided by the manufacturer. Different materials may have specific washing instructions that should be followed to avoid damaging the blanket.
- Pre-treat stains: If you notice any stains on your bubble stitch blanket, it’s best to pre-treat them before washing. You can use a mild detergent or stain remover specifically designed for the type of fabric your blanket is made of. Follow the instructions on the product and gently dab or rub the stained area.
- Wash on a gentle cycle: To prevent your blanket from getting damaged or losing its shape, wash it on a gentle cycle with cold or lukewarm water. Use a mild detergent that is suitable for delicate fabrics. Avoid using bleach or harsh chemicals that can weaken the fibers of the blanket.
- Avoid excessive agitation: When washing your bubble stitch blanket, avoid excessive agitation that can cause the stitches to become loose or unravel. Set your washing machine to a gentle cycle with a low speed or choose the delicate or hand wash setting if available.
- Air dry or tumble dry on low: After washing, it’s best to air dry your blanket to preserve its shape and prevent shrinkage. Lay it flat on a clean surface or drape it over a drying rack. If you prefer to use a dryer, set it to a low heat or air fluff setting to avoid damaging the fabric.
By following these care instructions, you can ensure that your bubble stitch blanket stays soft, cozy, and beautiful for years to come. Regular cleaning and maintenance will help prevent dirt and odors from building up and keep your blanket looking like new.
Final Thoughts on the Bubble Stitch Blanket Knitting Pattern
Knitting a bubble stitch blanket can be both enjoyable and rewarding. The bubble stitch pattern creates a beautiful texture, adding depth and dimension to your finished project. Whether you are knitting the blanket for yourself or as a gift, it is sure to be cherished and appreciated.
One of the best things about the bubble stitch blanket knitting pattern is its versatility. You can choose any color combination or yarn type to match your personal style and preferences. Additionally, the pattern can be easily adjusted to create a blanket of any size, making it suitable for babies, children, or adults.
The bubble stitch itself is relatively easy to learn and execute, even for beginner knitters. The repeatable pattern makes it an excellent project for practicing and improving your knitting skills. As you become more proficient in knitting the bubble stitch, you can experiment with different variations and modifications to create unique and customized designs.
Overall, the bubble stitch blanket knitting pattern is a fantastic choice for knitters who want to create a visually appealing and cozy blanket. Whether you are a beginner or an experienced knitter, this pattern is sure to provide you with hours of enjoyable knitting and a beautiful finished product.