
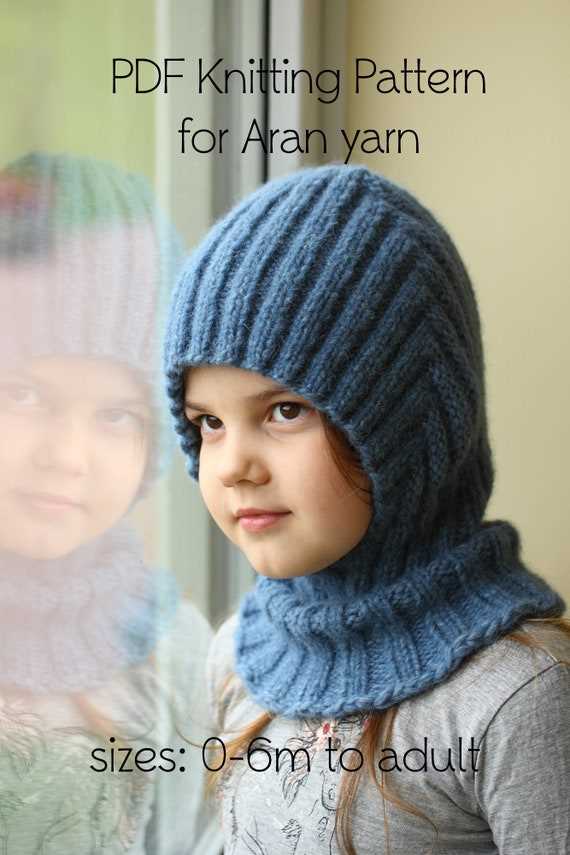
If you’re new to knitting and want to try making a warm and cozy balaclava, then this beginner-friendly knitting pattern is just what you need!
A balaclava is a versatile accessory that covers your head, neck, and face to keep you warm in cold weather. It’s perfect for outdoor activities like skiing, snowboarding, or just walking in a winter wonderland. Knitting your own balaclava allows you to customize the fit, yarn, and color to match your style.
This beginner balaclava knitting pattern is designed with simplicity in mind, making it a great project for knitters who are new to working with double-pointed needles. The pattern includes clear instructions and step-by-step photos to guide you through each stage of the knitting process.
You’ll need basic knitting skills, such as casting on, knitting, purling, and decreasing, to complete this pattern. If you’re not familiar with these techniques, don’t worry! There are plenty of online tutorials and videos available to help you master them.
So, grab your knitting needles and yarn, and get ready to create your very own balaclava! With this beginner balaclava knitting pattern, you’ll enjoy the process of knitting as much as wearing the finished product.
What is a balaclava?
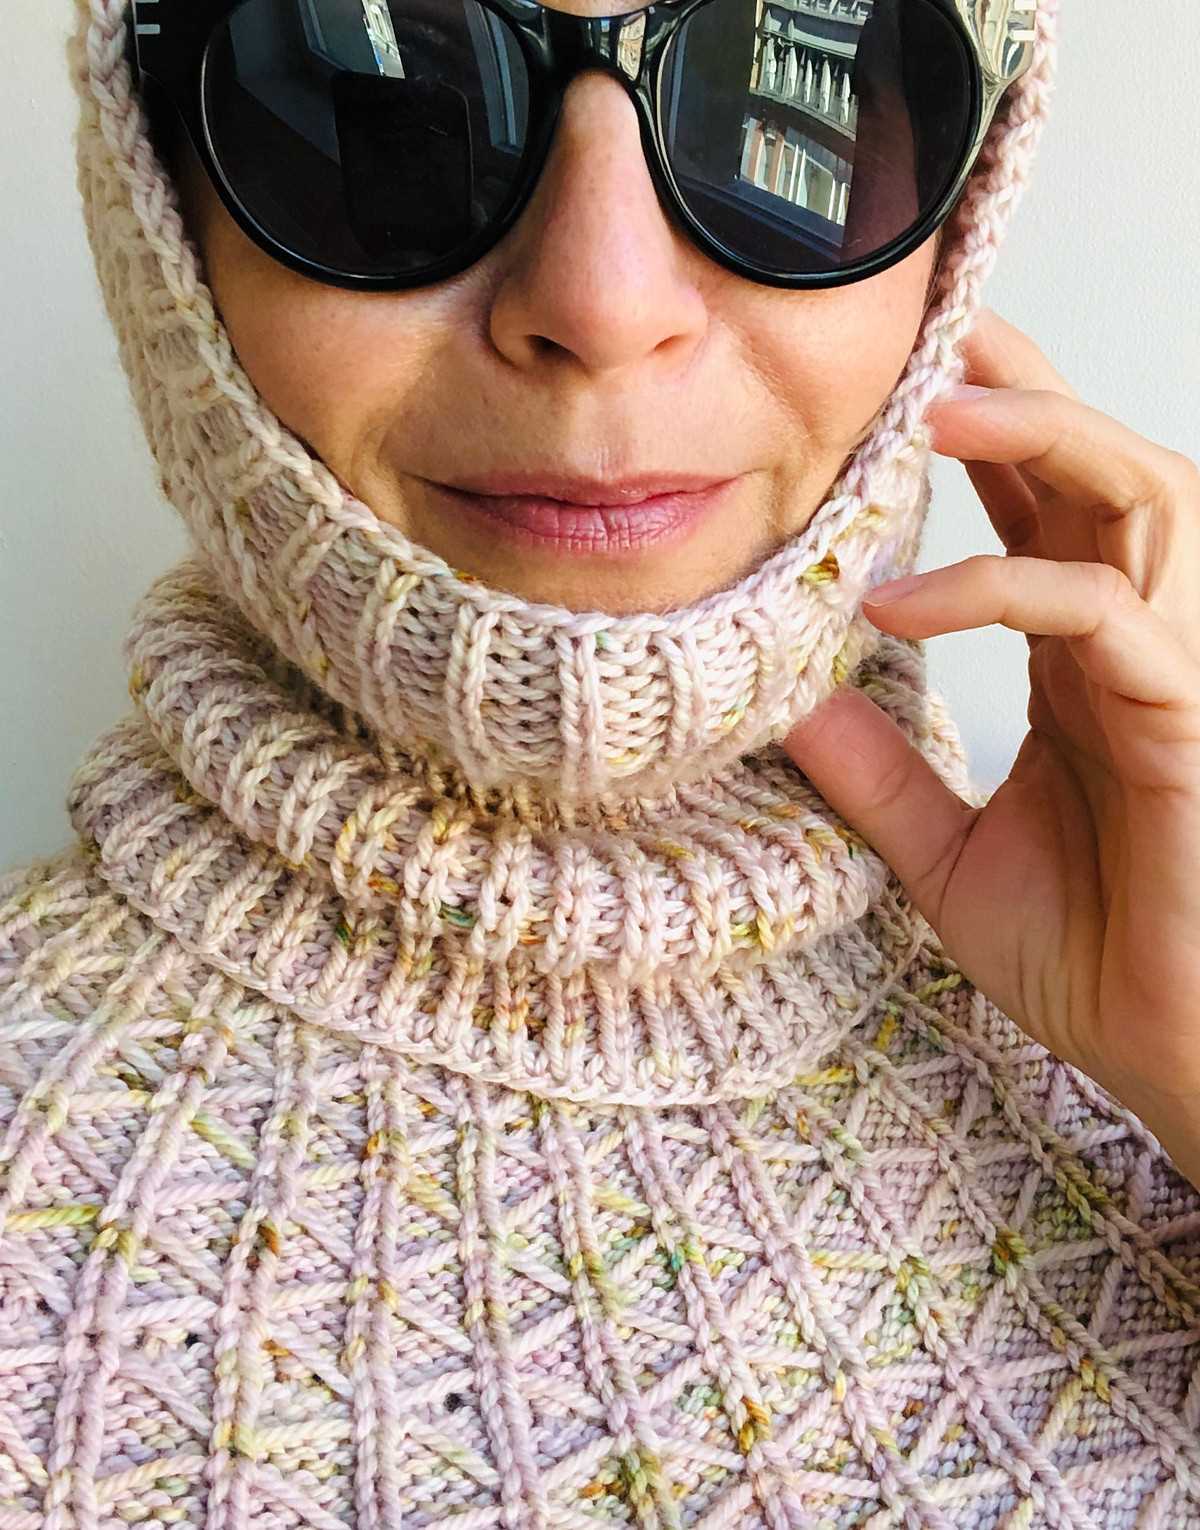
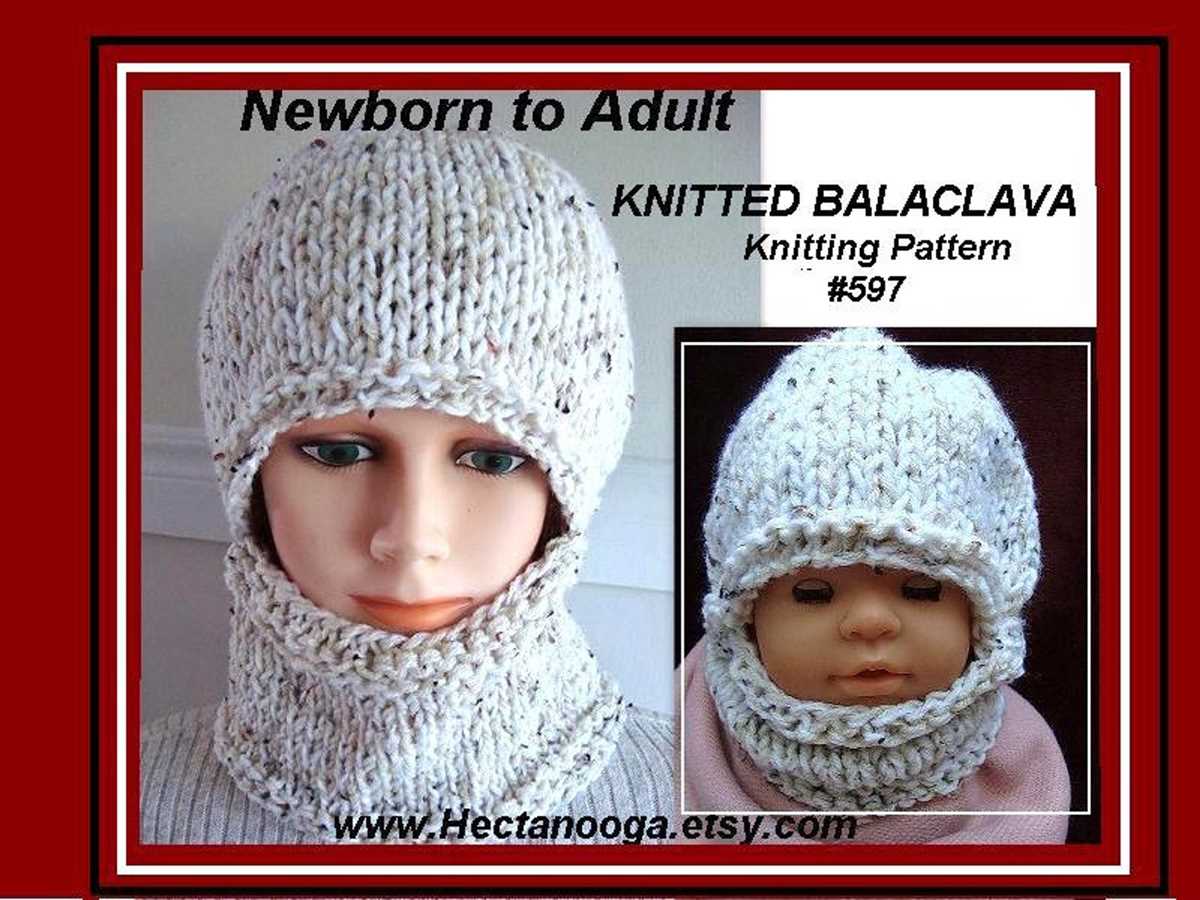
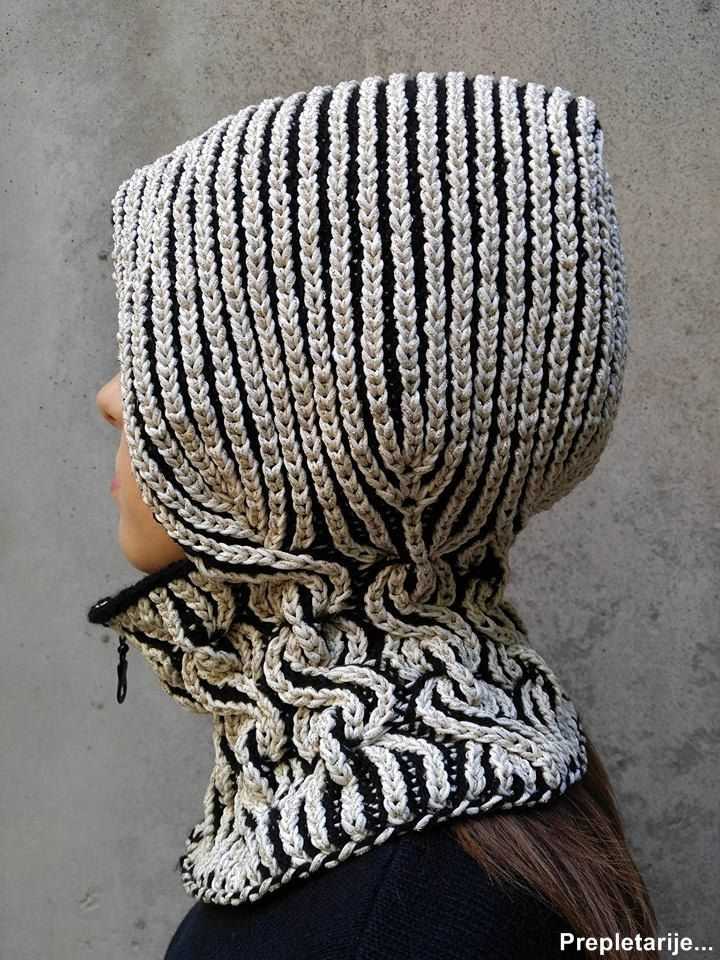
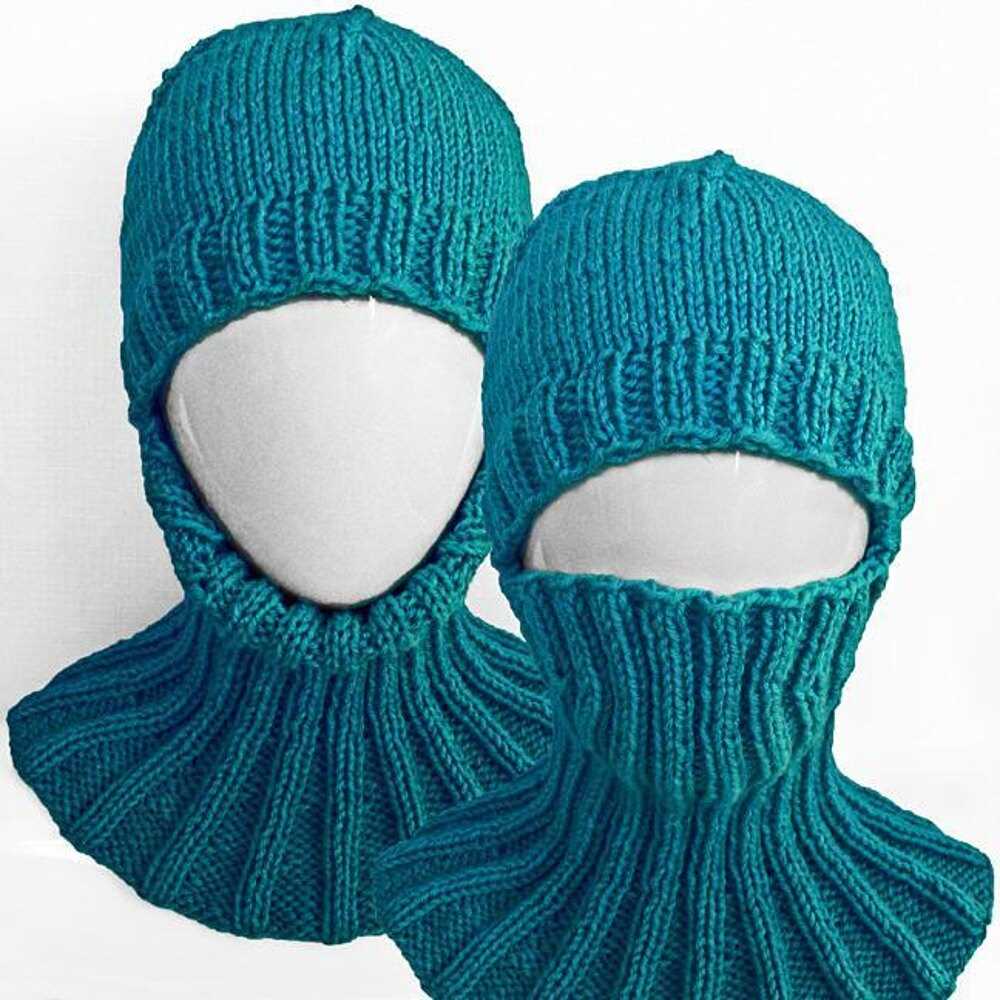
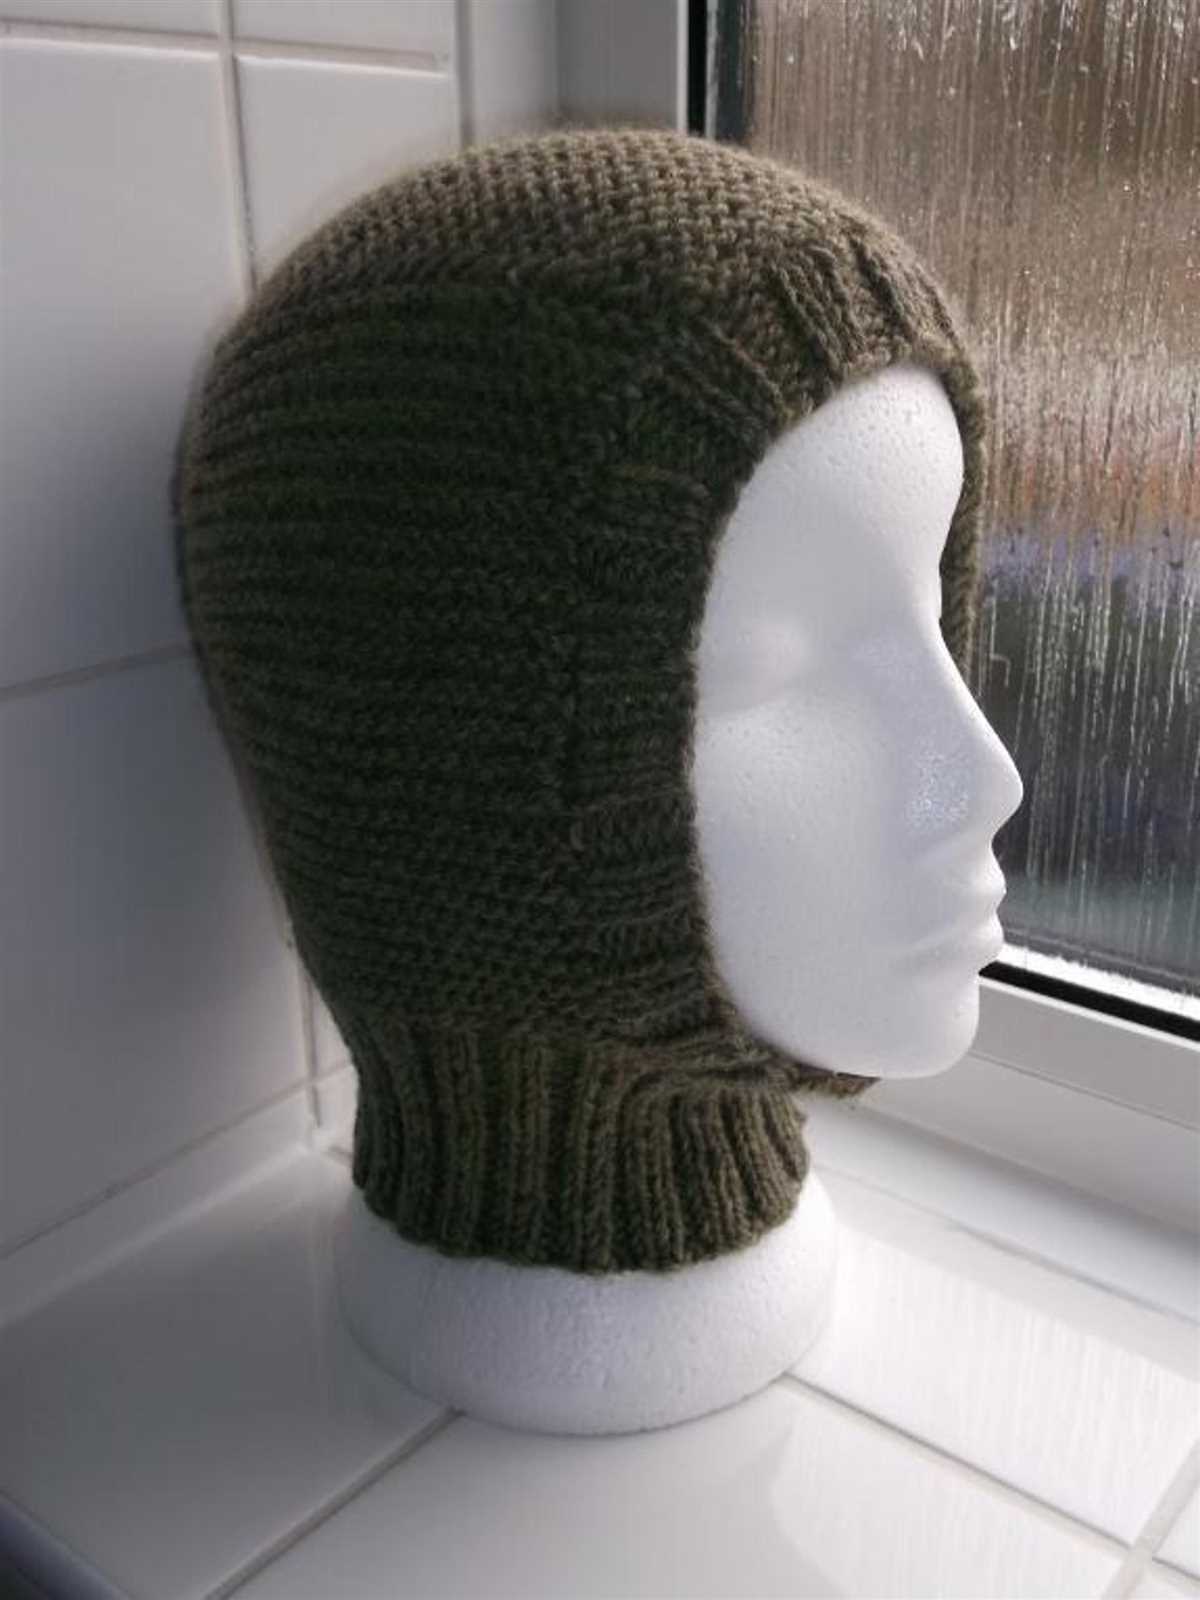
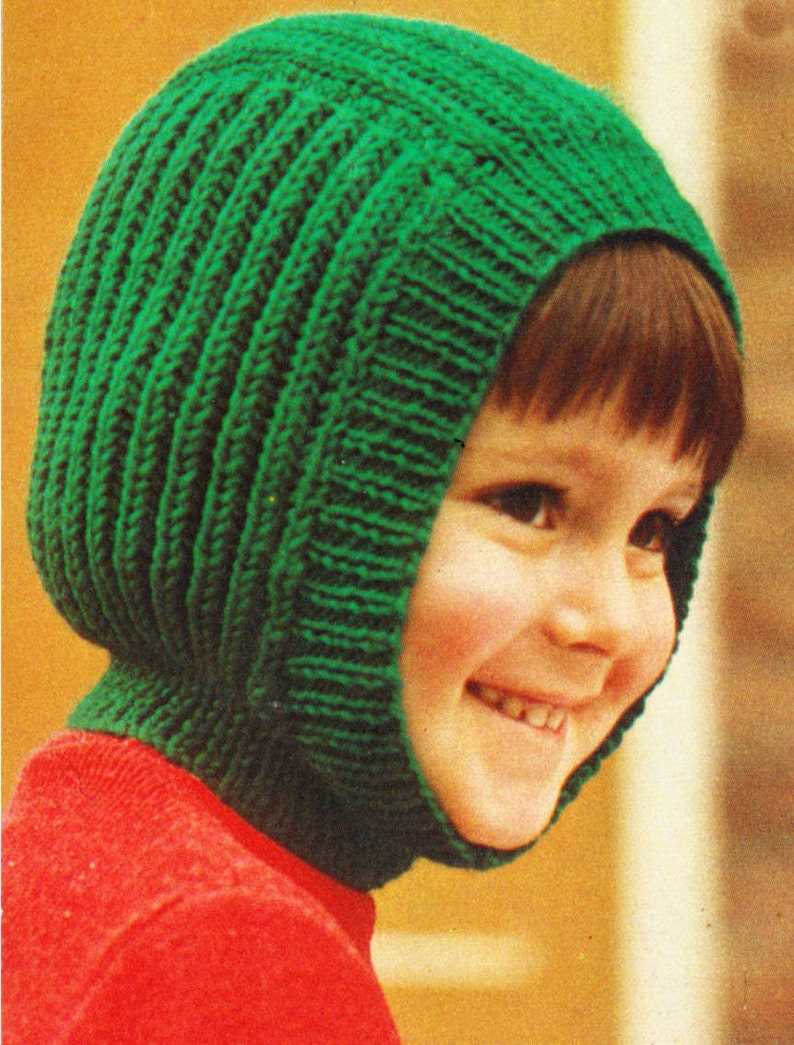
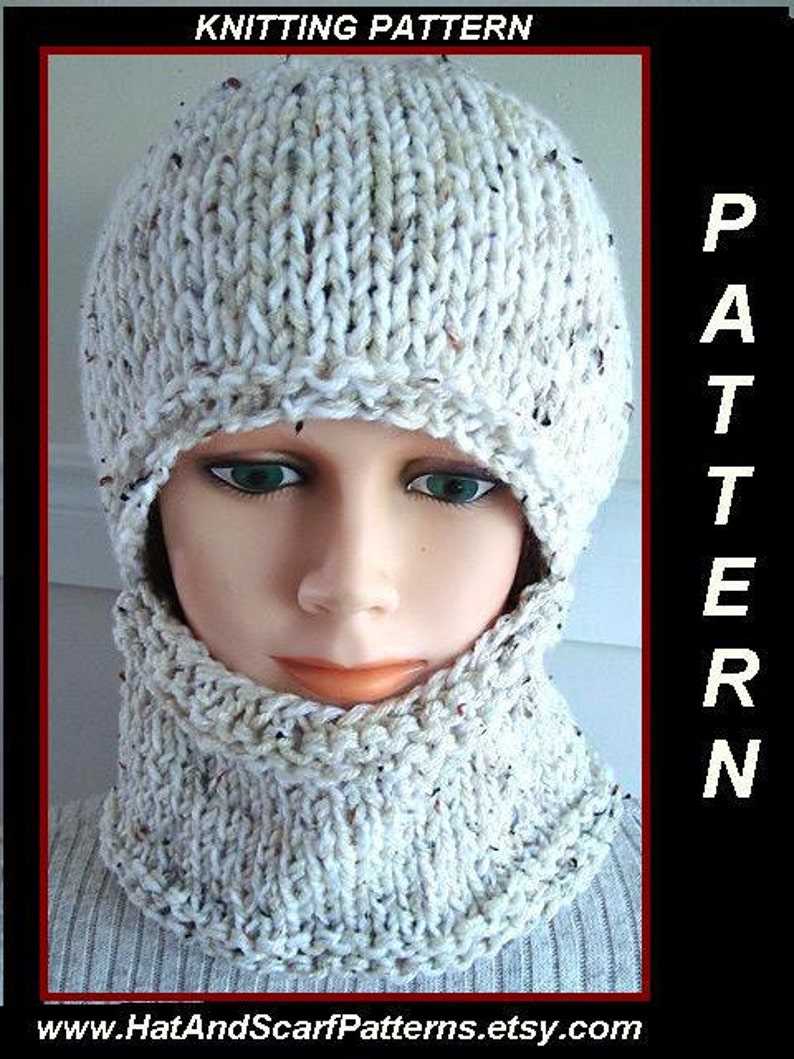
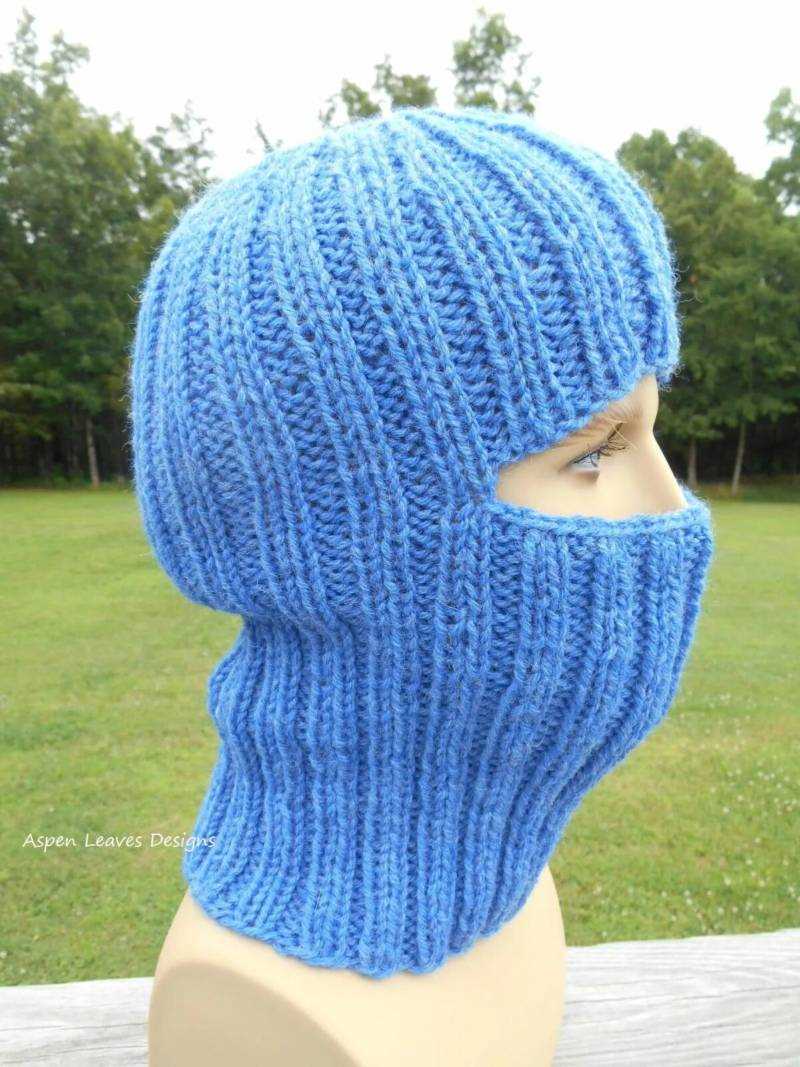
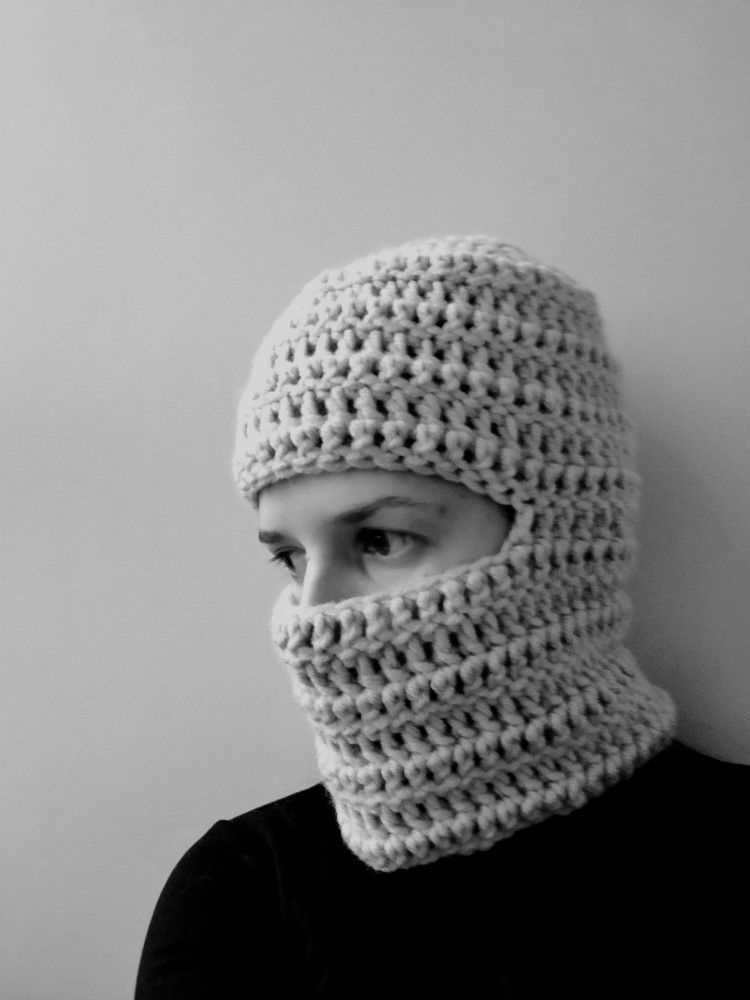
A balaclava is a type of headgear that covers the whole head, neck, and sometimes the face. It is typically made of knitted fabric and is often worn in cold weather to provide warmth and protection. Balaclavas are versatile accessories that can be worn by both men and women.
The name “balaclava” originated from the Battle of Balaclava during the Crimean War in the 19th century. The soldiers at that time wore similar headgear to protect themselves from the harsh winter conditions. Since then, the term has been used to refer to this type of headgear.
Balaclavas have a close-fitting design that fully covers the head, leaving only the face exposed. They often have openings for the eyes and sometimes for the mouth as well. This provides protection from wind, cold temperatures, and even dust or debris.
The use of balaclavas extends beyond cold weather protection. They are also popular among motorcyclists, skiers, snowboarders, and other outdoor enthusiasts who need to protect their face and head from extreme weather conditions. Additionally, balaclavas can be used for costume purposes, such as in theatrical performances or during Halloween.
Why knit a balaclava?
Knitting a balaclava can be a rewarding and practical project for several reasons.
Firstly, a balaclava is an essential accessory for those who enjoy outdoor activities in cold weather. Whether you enjoy skiing, snowboarding, hiking, or simply walking in the winter, a balaclava can provide excellent protection for your face and head from the biting wind and freezing temperatures.
Secondly, knitting a balaclava allows you to customize it to your specific needs and preferences. You can choose the yarn and color that you like, ensuring that the balaclava will match your other winter gear or personal style. Additionally, you can adjust the pattern to fit your head size perfectly, ensuring a snug and comfortable fit.
Moreover, knitting a balaclava can be an enjoyable and relaxing activity. It allows you to engage your creativity and focus on a project that will result in a functional and useful item. Knitting can also be a therapeutic and stress-relieving hobby, allowing you to unwind and take a break from the hectic pace of everyday life.
Lastly, knitting a balaclava can also be a thoughtful and personalized gift. You can knit a balaclava for your loved ones, demonstrating your care and warmth through your handiwork. A hand-knit balaclava can make a unique and meaningful present that will be cherished and used for years to come.
Materials needed for knitting a balaclava
To knit a beginner balaclava, you will need the following materials:
- Yarn: Choose a soft and warm yarn suitable for cold weather. A medium weight (worsted or aran) yarn is recommended.
- Knitting needles: Use a set of circular knitting needles in the appropriate size for your yarn. A size 8 (5mm) or 9 (5.5mm) needle is a good starting point.
- Stitch markers: These will help you keep track of your stitches and pattern repeats.
- Tape measure: This will be useful for measuring your gauge and ensuring the correct fit of your balaclava.
- Tapestry needle: You will need this needle to weave in ends and sew any seams.
- Scissors: A pair of sharp scissors will come in handy for cutting yarn.
- Row counter: This is optional but can be helpful for keeping track of your rows and pattern repeats.
Make sure to gather all the necessary materials before starting your knitting project. Having everything ready will make the process more efficient and enjoyable.
Choosing the right yarn for your balaclava
When it comes to knitting a balaclava, it is important to choose the right yarn that will not only provide warmth and comfort, but also maintain its shape and durability. Here are some key factors to consider when selecting the perfect yarn for your beginner balaclava knitting project.
1. Fiber content
The fiber content of the yarn plays a crucial role in determining the properties of the finished balaclava. For a warm and insulating balaclava, opt for yarns with a high percentage of wool or alpaca. These natural fibers provide excellent insulation, wick moisture away from the skin, and are soft against the skin. If you prefer a lighter and more breathable option, yarns with a blend of wool and silk or cotton can also be a good choice.
2. Weight and thickness
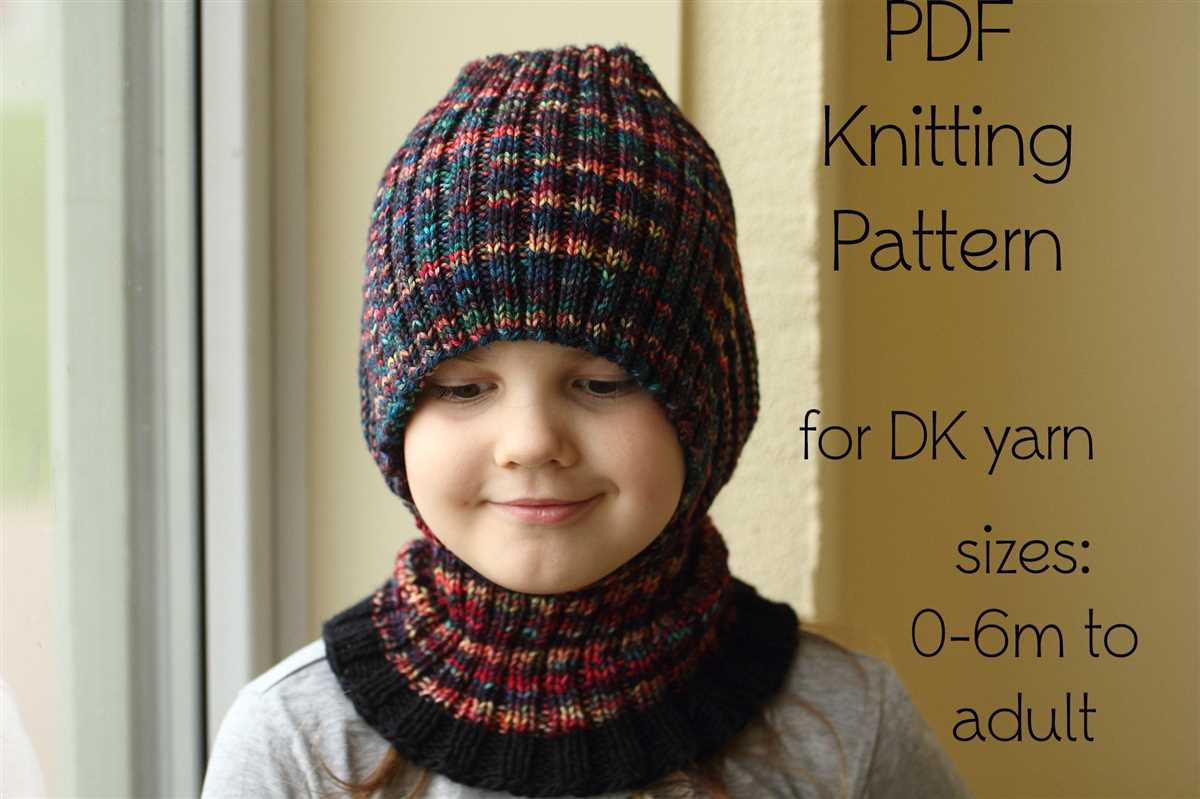
The weight and thickness of the yarn will determine the warmth and thickness of the balaclava. For a beginner balaclava pattern, it is recommended to choose a worsted or bulky weight yarn that knits up quickly and provides ample warmth. However, if you prefer a lighter and more versatile balaclava, a sport or DK weight yarn can also be used. Keep in mind that the weight of the yarn will also affect the size of the finished balaclava, so make sure to check the gauge before starting your project.
3. Color and texture
The color and texture of the yarn can add an extra touch of style to your balaclava. While it ultimately comes down to personal preference, consider choosing a yarn color that complements your winter wardrobe or matches your outdoor activities. Additionally, textured yarns such as tweeds or variegated options can add visual interest to your balaclava. Just keep in mind that highly textured yarns may not be suitable for intricate stitch patterns or cables.
By considering the fiber content, weight and thickness, as well as color and texture of the yarn, you can ensure that your balaclava not only keeps you warm but also reflects your personal style. So go ahead and select the perfect yarn for your beginner balaclava knitting project and enjoy the process of creating a cozy accessory for the colder months ahead!
Getting started: Casting on stitches

Before you can begin knitting your balaclava, you first need to cast on the required number of stitches. Casting on is the process of adding the first row or round of stitches to your needle. It is an essential step in any knitting project and determines the width of your finished piece.
There are various methods of casting on stitches, but for this beginner balaclava pattern, we will use the long-tail cast on method. This is a versatile and widely used method that creates a neat and stretchy edge.
To begin, make a slipknot by forming a loop with the working yarn and pulling the tail through it. Place the slipknot on your needle and hold the needle in your right hand. With your left hand, hold the tail and yarn together, using your thumb and index finger. Leave a long enough tail to cast all the required stitches.
To cast on, use the needle in your right hand to go under the strand of yarn that is connected to the ball of yarn (yarn over) and then bring it through the loop on the needle (yarn under). Pull the yarn gently to tighten the stitch, but not too tightly. Repeat this step until you have cast on the required number of stitches.
Once you have cast on all the stitches, you are ready to begin knitting the balaclava according to the pattern instructions. Keep in mind that the number of stitches you cast on may vary depending on your yarn choice, needle size, and desired size of the balaclava. Always refer to the pattern to determine the specific number of stitches to cast on.
Knitting the main body of the balaclava

Once you have completed the ribbing for the brim of the balaclava, it’s time to move on to knitting the main body. This is where the bulk of the balaclava will be knitted.
Using your chosen yarn and knitting needles, continue to knit in the desired stitch pattern for the main body. This could be a simple stockinette stitch, or you can get creative and choose a different stitch pattern, such as a seed stitch or a cable pattern. Knit rows back and forth to create a rectangular shape that is wide enough to cover the head when worn.
If you are following a knitting pattern, make sure to carefully read and follow the instructions for the main body. Pay attention to any shaping or stitch pattern changes that may be required. Keep track of your row count to ensure that you are on track with the pattern and that your balaclava will turn out the right size.
As you work on knitting the main body, check the fit of the balaclava by occasionally trying it on. This will help you gauge the length and adjust accordingly. Remember that the balaclava should cover the head comfortably and fully, but not be too tight or restrictive.
Continue knitting until you have reached the desired length for the main body of the balaclava. Once you are satisfied with the length, you can move on to the next step, which might be shaping the top or adding any additional design elements.
Shaping the balaclava: Decreasing stitches
Decreasing stitches is an important step in shaping the balaclava. By reducing the number of stitches, you create a snugger fit around the face, ensuring maximum warmth and comfort. There are various methods you can use to decrease stitches, depending on the pattern you’re following and your preferred technique.
1. Knit Two Together (K2tog)
One common method to decrease stitches is the knit two together (K2tog) technique. To do this, insert your right-hand needle into the next two stitches on the left-hand needle as if to knit, and then knit them together as one stitch. This decreases the total stitch count by one.
2. Slip, Slip, Knit (SSK)
Another commonly used decrease technique is the slip, slip, knit (SSK). To execute this decrease, slip the next two stitches onto the right-hand needle one at a time as if to knit. Then, insert the left-hand needle through the front loops of both slipped stitches and knit them together as one stitch. This also decreases the total stitch count by one.
3. Purl Two Together (P2tog)
If you’re working with a pattern that requires purl stitches, you can use the purl two together (P2tog) decrease. Similar to the K2tog decrease, insert your right-hand needle into the next two stitches on the left-hand needle as if to purl, and then purl them together as one stitch. This decreases the total stitch count by one.
It’s important to follow the specific pattern instructions provided to determine which decrease method to use and when. It’s also helpful to mark your decreases with stitch markers to keep track of your progress and ensure accuracy. With careful attention to decreasing stitches, you can shape your balaclava precisely to your desired fit and achieve a professional-looking finished product.
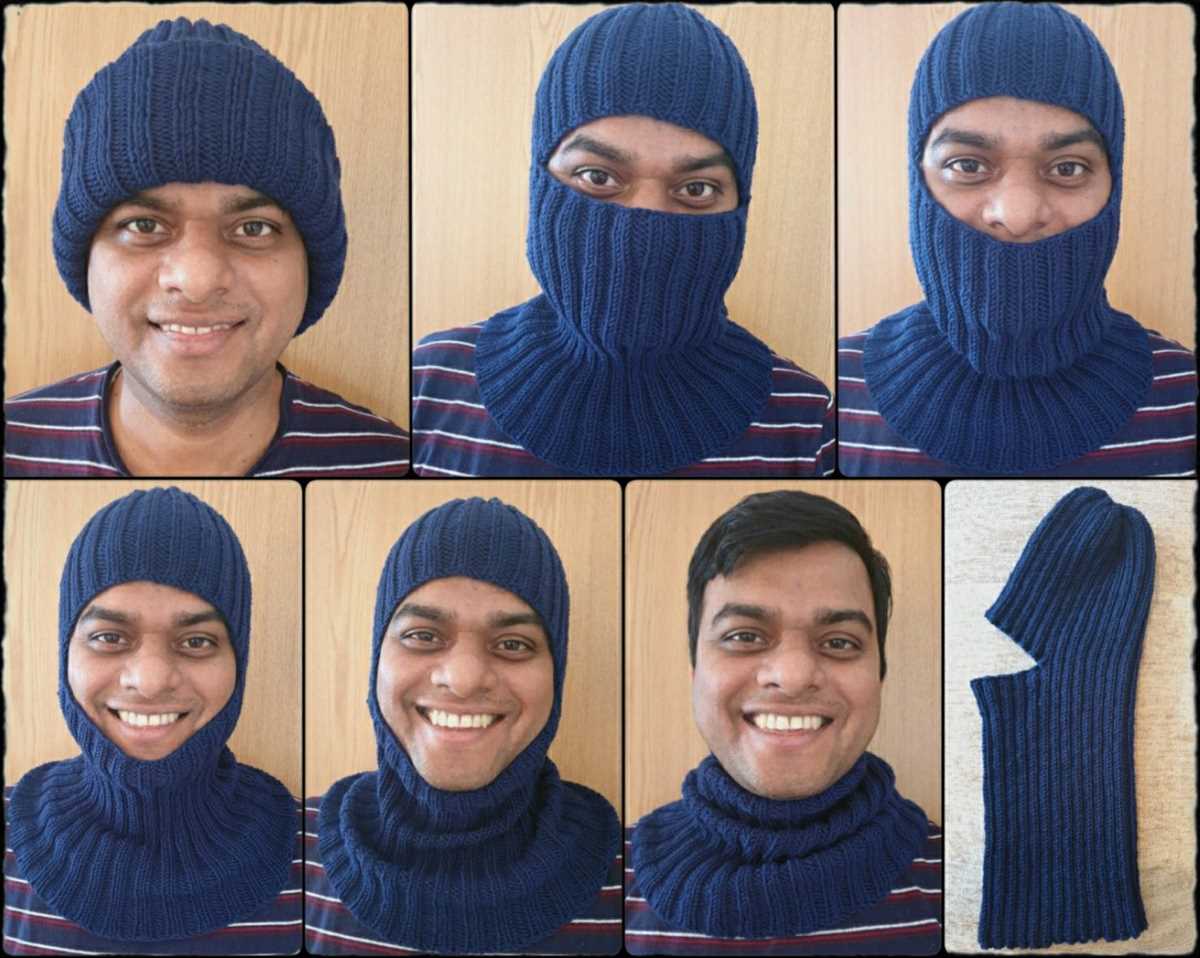
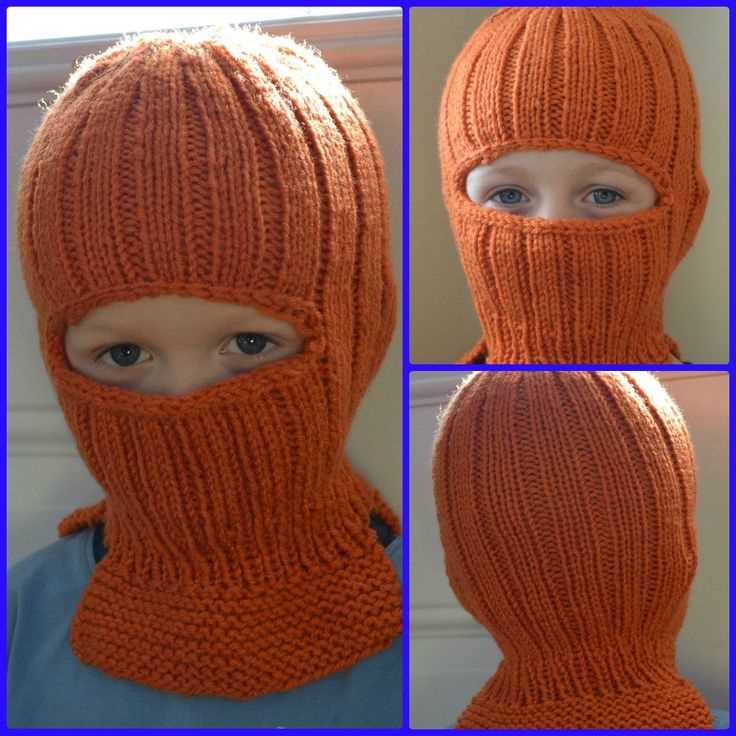
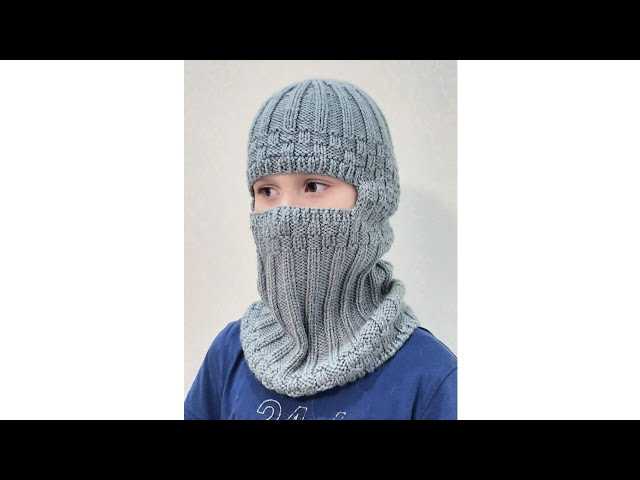
Working the eye and mouth holes
Once you have completed all the necessary knitting for the body of the balaclava, it’s time to start working on the eye and mouth holes. These holes are essential for providing visibility and breathability while wearing the balaclava.
To create the eye holes, you will need to carefully cut two small slits in the knitted fabric. These slits should be positioned at eye level and should be wide enough for the wearer to see through comfortably. It’s important to measure and mark the placement of the slits before cutting to ensure they are positioned correctly.
The mouth hole is also an important feature of the balaclava, as it allows the wearer to breathe comfortably. To create the mouth hole, you will need to remove a section of the knitted fabric. This can be done by carefully cutting a rectangular shape in the center of the fabric, just below the nose level. Make sure to measure and mark the placement of the mouth hole before cutting to ensure it is positioned correctly.
Once the eye and mouth holes are created, you can finish the edges to prevent them from unraveling. This can be done by sewing around the edges using a running stitch or by knitting a small border around the holes. It’s important to make sure the edges are neat and secure to ensure the longevity of the balaclava.
Working the eye and mouth holes requires precision and careful measuring to ensure the proper fit and functionality of the balaclava. Once completed, these holes will provide the necessary visibility and breathability for the wearer, making the balaclava a practical and functional accessory for colder weather.
Finishing touches: Bind off and seam the balaclava
Once you have completed knitting the balaclava according to the beginner pattern, it’s time to give it the finishing touches by binding off and seaming the edges.
To bind off, start by knitting two stitches. Then, using the left-hand needle, lift the first stitch over the second stitch and off the needle. Continue this process until only one stitch remains on the right-hand needle. Cut the yarn, leaving a tail of about 6 inches, and pull it through the remaining stitch to secure it.
To seam the edges, you will need a tapestry needle and the tail of yarn left from binding off. Starting at the top of the balaclava, fold it in half so that the two short edges align. Thread the tapestry needle with the yarn tail and insert it through the first stitch on the edge, going from the inside to the outside.
Note: When seaming, it is important to match the stitch pattern as closely as possible to create an even and seamless finish.
Gently pull the yarn to tighten the seam, being careful not to pull too tightly to avoid distortion. Continue seaming by inserting the needle through the next stitch on the opposite edge, going from the outside to the inside. Repeat this process, alternating between the two edges, until you reach the end of the balaclava.
Once you have finished seaming, weave in any loose ends of yarn to ensure a clean and professional finish. Congratulations! Your beginner balaclava is now complete and ready to keep you warm and cozy in the colder months.
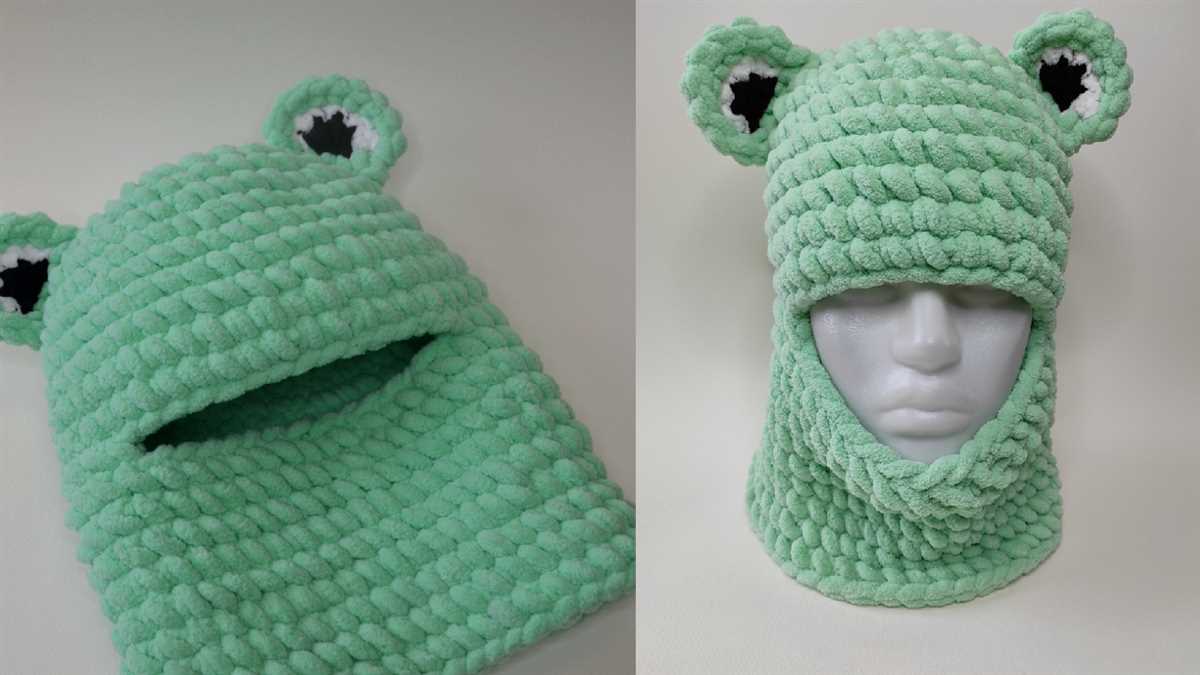
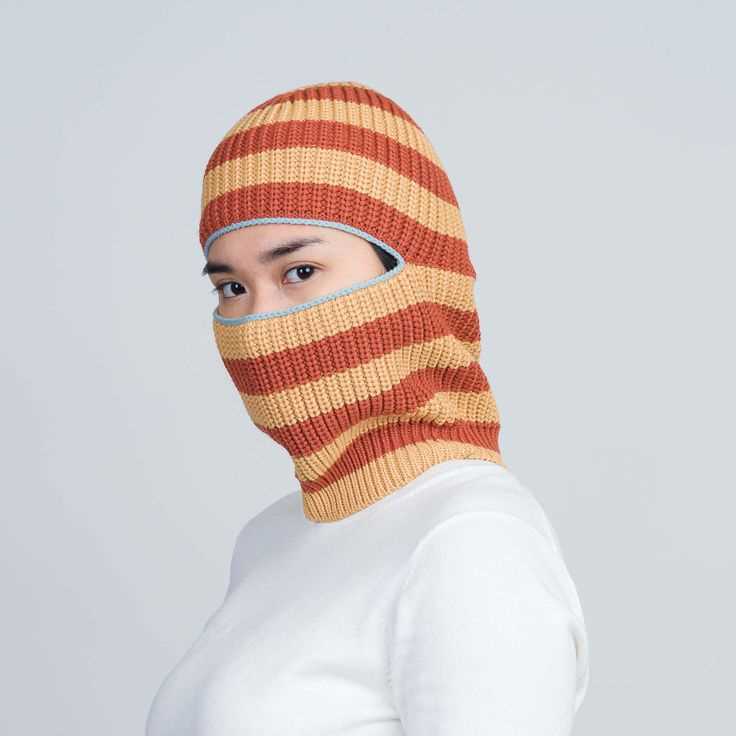
Optional variations and customizations
Once you have mastered the basic balaclava knitting pattern, you can start experimenting with different variations and customizations to make your balaclava truly unique. Here are a few ideas to get you started:
Color variations
Instead of knitting the balaclava in a single color, you can use multiple colors to create a striped or color-blocked effect. You can also use variegated yarn for a more complex and interesting pattern. Get creative with your color choices to make a balaclava that reflects your personal style.
Pattern variations
While the basic balaclava pattern is simple and versatile, you can also experiment with different stitch patterns to add texture and visual interest. You could try knitting the body of the balaclava in a seed stitch or ribbing pattern, or even incorporate cables or lace for a more intricate design.
Embellishments
If you want to add some extra flair to your balaclava, you can consider adding embellishments such as pom-poms, tassels, or buttons. These small details can make a big difference in the overall look of your balaclava.
Remember, these variations and customizations are optional and completely up to you. Feel free to experiment and make the balaclava pattern your own. Happy knitting!