
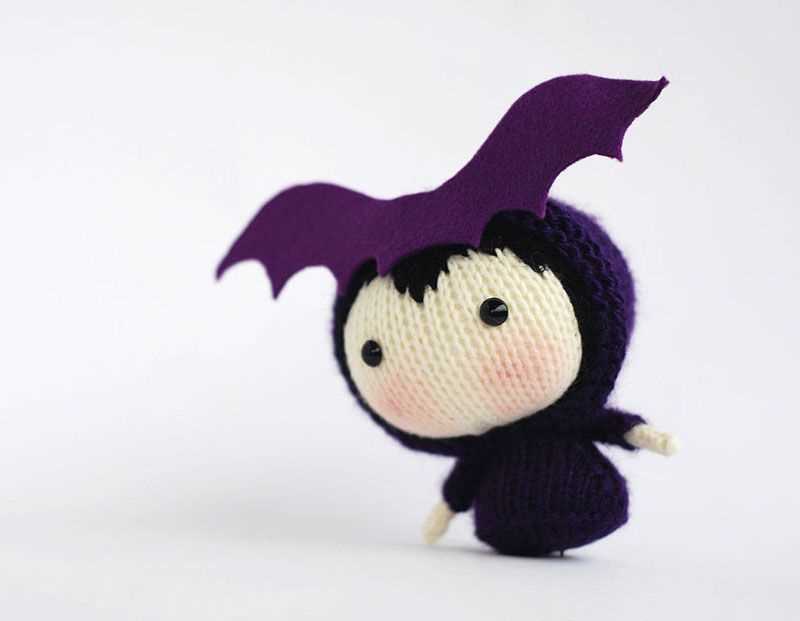
Knitting toys is a fun and creative way to expand your knitting skills. If you’re looking for a charming and unique project to work on, why not try knitting a bat toy? Bats have a whimsical and mysterious quality that makes them perfect for knitted toys, and they’re also a great way to celebrate these amazing creatures.
With this bat toy knitting pattern, you can create your own adorable bat in no time. The pattern is suitable for knitters of all skill levels, and the finished toy is sure to delight children and adults alike. Whether you want to make a Halloween decoration, a cute gift for a friend, or simply add a touch of whimsy to your home, this bat toy is the perfect choice.
This knitting pattern provides step-by-step instructions, along with helpful tips and tricks, to guide you through the process of making your own bat toy. You’ll learn basic knitting techniques, such as casting on, knitting in the round, and decreasing stitches. The pattern also includes suggestions for customization, so you can make your bat toy as unique as you want it to be.
So grab your knitting needles and yarn, and get ready to embark on a fun and rewarding knitting adventure. Whether you’re an experienced knitter or a beginner looking for a new challenge, this bat toy knitting pattern is sure to bring joy and satisfaction.
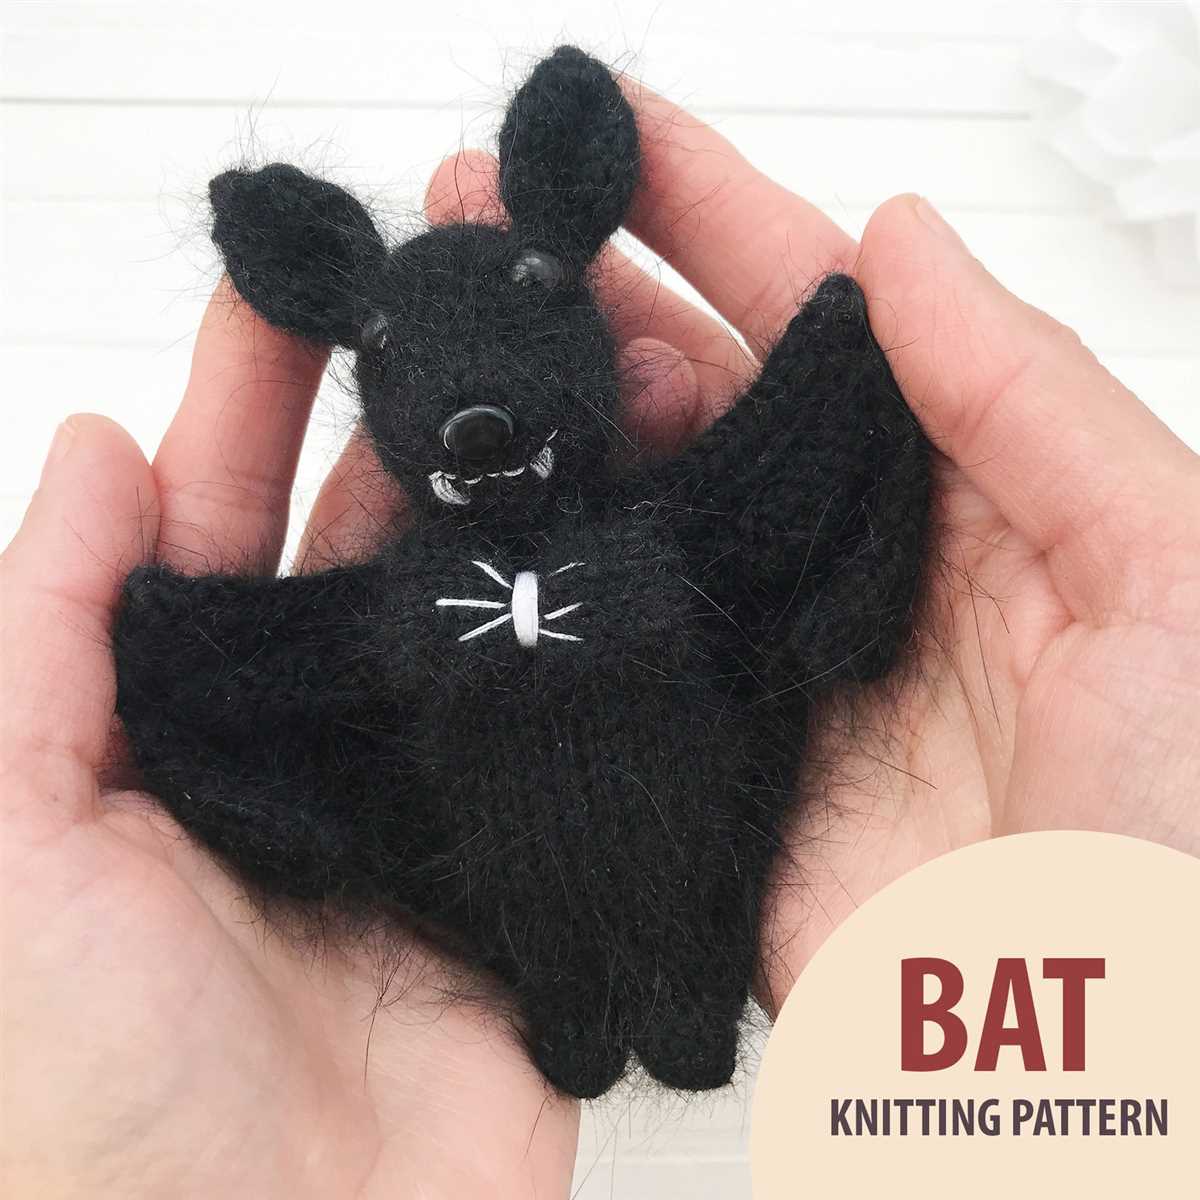
Bat Toy Knitting Pattern
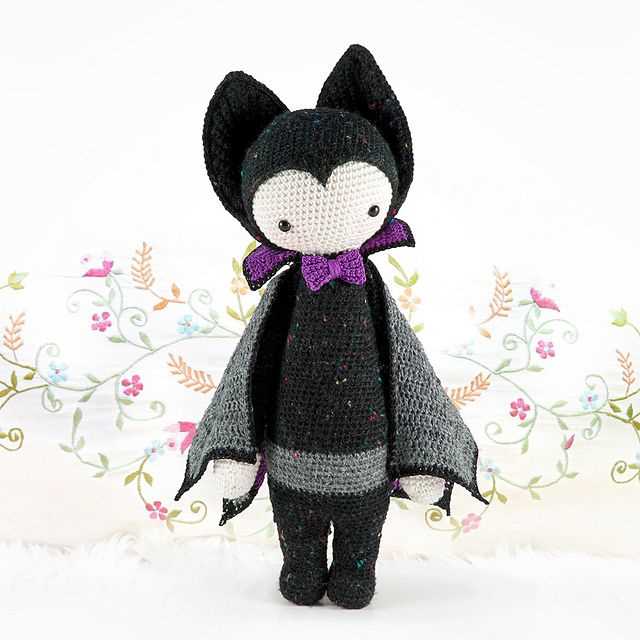
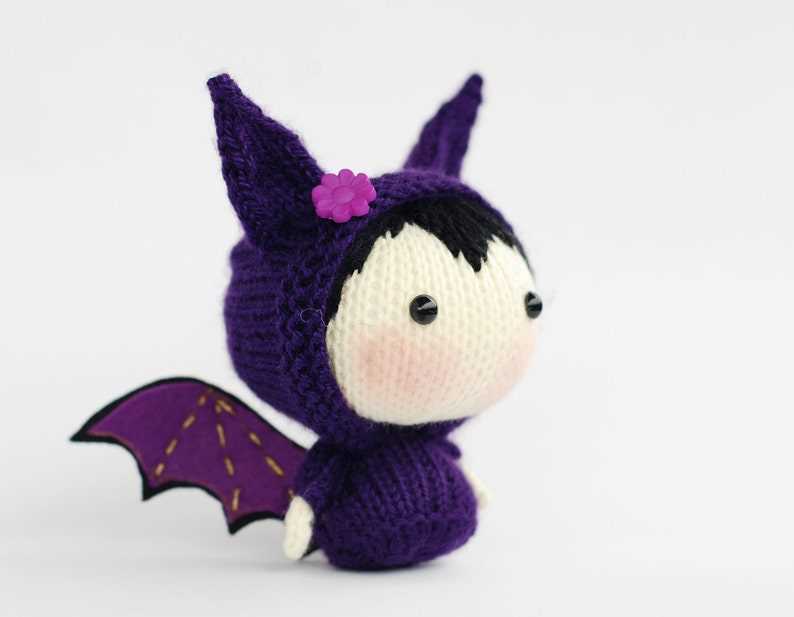
Looking to add a cute and spooky bat toy to your knitting collection? Look no further! With this bat toy knitting pattern, you can create your very own adorable bat toy that will surely become a favorite among both kids and adults.
This knitting pattern provides detailed instructions on how to knit your bat toy from start to finish. It includes the materials needed, such as yarn and knitting needles, as well as the gauge and sizing information to ensure that your bat toy turns out just right.
Materials needed:
- Medium-weight yarn in black
- Knitting needles in size US 7 (4.5mm)
- Tapestry needle
- Stuffing material
- Black thread
- 2 small black buttons for eyes
Instructions:
- Start by casting on 24 stitches.
- Knit in stockinette stitch for 8 rows.
- Next, decrease 1 stitch at the beginning and end of the next 2 rows to reduce the stitch count to 20.
- Continue knitting in stockinette stitch for 10 more rows.
- Decrease 1 stitch at the beginning and end of the next 2 rows to reduce the stitch count to 16.
- Knit in stockinette stitch for 8 more rows.
- Next, decrease 1 stitch at the beginning and end of the next 2 rows to reduce the stitch count to 12.
- Knit in stockinette stitch for 6 more rows.
- Decrease 1 stitch at the beginning and end of the next 2 rows to reduce the stitch count to 8.
- Knit in stockinette stitch for 4 more rows.
- Finally, decrease 1 stitch at the beginning and end of the next 2 rows to reduce the stitch count to 4.
- Bind off the remaining stitches and weave in any loose ends.
- Using the tapestry needle, sew a small seam along the bottom of the bat toy to create the body.
- Stuff the bat toy with the stuffing material until it reaches your desired level of firmness.
- Attach the black buttons for eyes using the black thread.
And there you have it – your very own bat toy knitted from scratch! This pattern is perfect for knitters of all levels, from beginners to experts, and is a great way to practice your knitting skills while creating a unique and spooky toy.
Why Knit a Bat Toy?
Knitting a bat toy can be a fun and creative project for knitters of all levels. Whether you are an experienced knitter looking for a new challenge or a beginner wanting to practice your knitting skills, a bat toy can be a great choice.
One reason to knit a bat toy is that it is a unique and unusual item that you can’t find in stores. It can be a great gift or a special addition to your own collection. Knitting allows you to customize the toy to your liking, choosing the colors and details that make it truly one-of-a-kind.
Knitting a bat toy is also a great way to practice different knitting techniques. From shaping the body and wings to adding details like eyes and teeth, you will have the opportunity to learn and improve your skills. The pattern will often include instructions for various stitches and techniques, making it an educational project as well as a fun one.
The small size of a bat toy makes it a relatively quick and portable project, perfect for knitting on-the-go or during your free time. Whether you prefer to knit in front of the TV, on your commute, or while waiting for appointments, a bat toy can be a portable and compact project that you can easily take with you wherever you go.
Overall, knitting a bat toy can be a rewarding and enjoyable experience. It allows you to express your creativity, learn new skills, and create a unique and special item. So why not give it a try and start knitting your very own bat toy?
Choosing the Right Yarn and Needles
When it comes to knitting toys, choosing the right yarn and needles is essential to ensure the final result is both soft and durable. The yarn should be able to withstand the wear and tear of playtime, while the needles must provide the right tension and stitch definition.
Yarn: Opt for a yarn that is both soft and sturdy. An acrylic or cotton blend yarn is a good choice, as it is easy to care for and can withstand frequent washing. Look for yarn with a medium weight, as it will give the toy a nice plushness. Avoid using yarns that shed too much or have a rough texture, as they may not be suitable for children.
Needles: The right needle size will depend on the yarn you choose and your personal knitting style. If you want a firmer fabric and tighter stitches, use smaller needles. If you prefer a looser fabric and larger stitches, go for larger needles. Circular needles are recommended for knitting toys, as they allow you to accommodate a larger number of stitches and make it easier to knit in the round.
It is also important to consider the safety of the toy when choosing needles. Avoid using needles with sharp points or rough edges that could potentially harm a child. Opt for smooth needles that are comfortable to hold and won’t snag the yarn.
Essential Knitting Techniques
Knitting is a popular craft that allows you to create warm and cozy items such as sweaters, scarves, and hats. To get started with knitting, it’s important to learn some essential techniques that will form the foundation of your knitting skills.
Casting On
Casting on is the first step in starting a knitting project. It involves creating the first row of stitches on your knitting needles. There are different methods for casting on, such as the long-tail cast-on, the cable cast-on, and the knit cast-on. Each method produces a slightly different edge, so it’s important to choose the one that suits your project best.
Knit Stitch
The knit stitch is the most basic stitch in knitting. It creates a smooth, V-shaped fabric and is used in many knitting patterns. To knit, insert the right-hand needle into the first stitch on the left-hand needle from front to back, wrap the yarn around the right-hand needle, and pull it through the stitch. Slip the stitch off the left-hand needle onto the right-hand needle, and you have completed a knit stitch.
Purl Stitch
The purl stitch is the reverse of the knit stitch and creates a bumpy, horizontal fabric. It is often used in combination with the knit stitch to create different textures in knitting. To purl, insert the right-hand needle into the first stitch on the left-hand needle from back to front, wrap the yarn around the right-hand needle, and pull it through the stitch. Slip the stitch off the left-hand needle onto the right-hand needle, and you have completed a purl stitch.
Increasing and Decreasing
Increasing and decreasing are techniques used to shape your knitting and create different patterns. There are several methods for increasing, such as knitting into the front and back of a stitch or making a yarn over. Decreasing, on the other hand, involves reducing the number of stitches in your knitting. Common methods of decreasing include knitting two stitches together or slipping a stitch and then knitting the next stitch.
Binding Off
Binding off, also known as casting off, is the final step in finishing your knitting project. It involves securing the stitches on your needles and creating a neat edge. To bind off, knit the first two stitches, then insert the left-hand needle into the first stitch on the right-hand needle and lift it over the second stitch and completely off the needle. Repeat this process until only one stitch remains, then cut the yarn and pull it through the last stitch to secure it.
These are just a few of the essential knitting techniques that every knitter should know. By mastering these techniques, you’ll be well on your way to creating beautiful and intricate knitted items.
Starting the Body
In order to start knitting the body of the bat toy, you will need to gather your materials and have your pattern ready. Make sure you have the recommended yarn and needle size, as well as any additional tools or accessories mentioned in the pattern. Once you have everything prepared, you can begin casting on stitches.
Follow the instructions in the pattern to cast on the required number of stitches. You may need to use a specific cast-on method, such as the long-tail cast-on, so make sure to read the instructions carefully. Once your stitches are cast on, you can place a stitch marker on your right needle to help you keep track of the beginning of the round or row.
To begin knitting the body, you will typically work in the round or in rows, depending on the pattern. If you are working in the round, you will need to join your stitches in a circle using either the magic loop method or by using double-pointed needles. If you are working in rows, you will need to turn your work at the end of each row.
As you knit the body, you will follow the pattern’s instructions for increases, decreases, and shaping. These techniques will help create the desired shape and structure for the bat toy. Pay close attention to the pattern’s stitch counts and any special instructions for shaping the body.
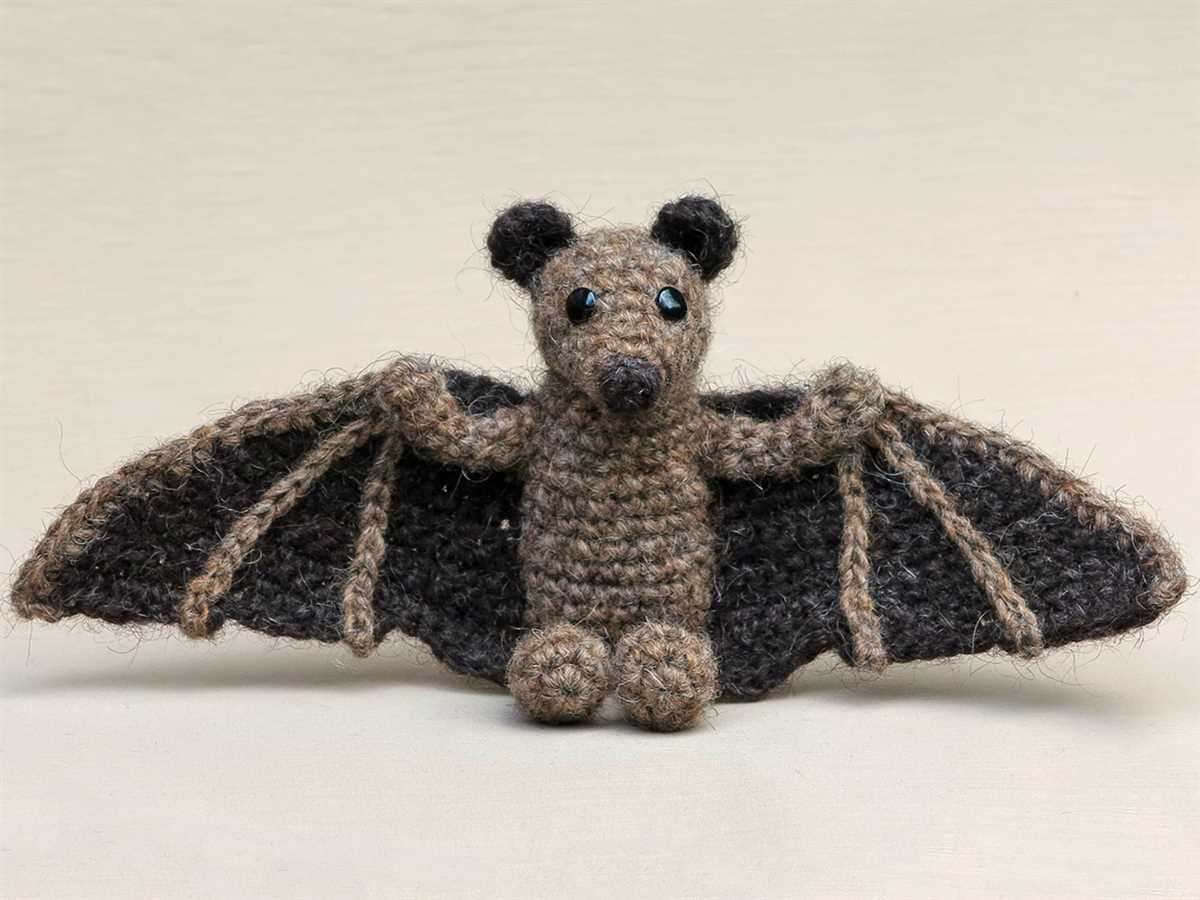
Continue knitting the body until you reach the desired length or until the pattern instructs you to stop. Make sure to keep track of your progress by counting your rows or using a row counter. Once the body is complete, you can move on to the next steps of the pattern, such as knitting the wings or adding the facial features.
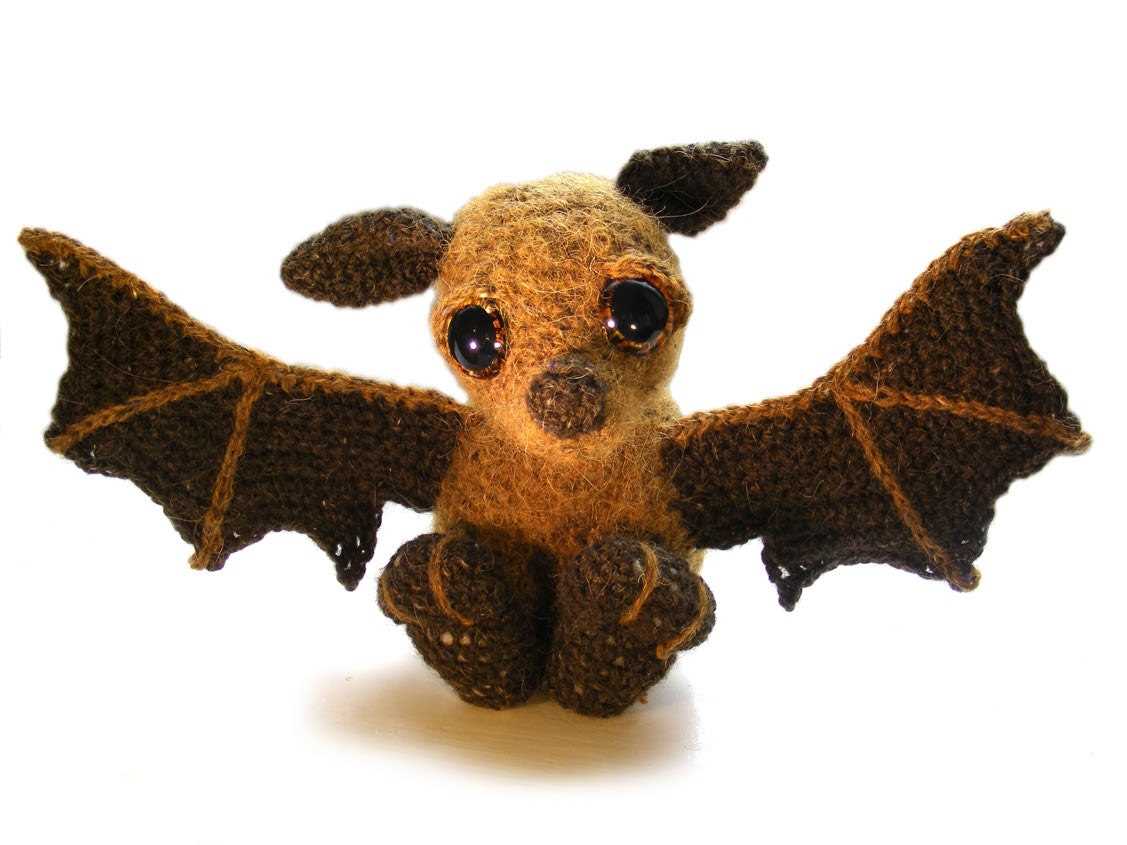
When knitting a bat toy, shaping the wings is an important step to achieve the desired look. The wings are one of the defining features of a bat, so it’s essential to make sure they are shaped correctly.
1. Increasing stitches:
To create the wing shape, you will need to increase stitches at certain intervals. This can be done by knitting into the front and back of a stitch or by making yarn overs. By increasing stitches gradually, you can create a gradual curve that resembles a bat’s wing. It’s important to follow the pattern instructions carefully to ensure the correct placement and number of increases.
You can also experiment with different increase techniques to achieve the desired effect. For example, you could use a make one left (m1L) or make one right (m1R) increase to create a more defined shape.
2. Decreasing stitches:
After shaping the wings with increased stitches, you will need to decrease stitches to create a tapered effect. Decreasing stitches can be achieved by knitting two stitches together or working slip, slip, knit (SSK) decreases. Again, it’s important to follow the pattern instructions to ensure the correct placement and number of decreases.
The decrease stitches should be placed in a way that mimics the natural shape of a bat’s wing. This can be achieved by decreasing evenly and gradually along the wing edges. Pay attention to the direction of the decreases, as this will affect the overall shape of the wing.
By carefully shaping the wings through increasing and decreasing stitches, you can create a realistic and authentic bat toy. The shaping process may require some trial and error to achieve the desired result, but with practice, you’ll be able to create beautifully shaped wings for your knitted bat toy.
Adding the Ears and Face
Once you have completed knitting the main body of the bat toy, it’s time to add the ears and face to give your bat some character. To do this, you will need some contrasting yarn in the color of your choice.
Start by knitting two small triangles for the ears. You can use the same type of yarn that you used for the main body, or you can choose a different color to make the ears stand out. To knit the triangles, cast on three stitches and then knit two rows in garter stitch. On the third row, decrease one stitch at each end by knitting two stitches together. Repeat this decrease on every other row until there is one stitch left. Cut the yarn, leaving a long tail, and thread it through the last stitch to secure.
Face:
- For the face, you will need some black yarn or embroidery floss and a tapestry needle.
- Start by embroidering the eyes. Use small straight stitches to create two oval shapes for the eyes. You can position them near the top of the bat’s body or slightly below the ears, depending on the desired look.
- Next, use the black yarn or floss to create the mouth. You can embroider a simple smile or get creative and give your bat a mischievous grin. Remember to leave enough space between the eyes and the mouth.
Once you have finished adding the ears and face, take a moment to admire your adorable bat toy. The ears and face will bring your bat to life and make it even more enjoyable to play with or display as a cute decoration.
Creating the Tail
Once you have completed the body and wings of your knitted bat toy, it’s time to move on to creating the tail. The tail adds an extra element of realism to your bat toy and completes its overall look. Here are the steps to follow in order to create the tail:
- Select the yarn: Choose a yarn color for the tail that complements the body and wings of the bat toy. You may choose to use the same yarn as the body or opt for a contrasting color.
- Cut the yarn: Measure and cut a length of yarn that is double the desired length of the tail. This will ensure that you have enough yarn to work with.
- Attach the yarn: Take one end of the yarn and secure it in place at the base of the bat toy’s body, just above where the wings are attached. You can use a tapestry needle to weave the yarn through the stitches, ensuring that it is firmly attached.
- Divide the yarn: Split the length of yarn into several smaller strands, depending on the thickness you desire for the tail. You can use a comb or your fingers to separate the strands evenly.
- Create the tail strands: Starting from the base of the bat toy’s body, use a crochet hook or your fingers to loop each strand of yarn through the stitches. Pull each strand tightly to create a secure knot. Continue this process until you have created the desired number of tail strands.
- Trim the tail: Once all the tail strands are in place, you can trim them to your desired length. You may choose to have a long, flowing tail or a shorter, more compact one.
Once you have completed these steps, your knitted bat toy will have a beautiful tail that adds the perfect finishing touch. Feel free to experiment with different yarn colors and tail lengths to create a bat toy that is unique to you.
Finishing Touches: Eyes and Nose
Adding the eyes and nose to your knitted bat toy is the final step to bring your creation to life. The eyes will give your bat a cute and playful look, while the nose adds a touch of detail and realism.
To create the eyes, you can use small black buttons or black beads. Sew the eyes onto the bat’s face, positioning them evenly and making sure they are securely attached. Alternatively, you can embroider the eyes using black yarn or thread. Use a small, sharp needle to carefully stitch the eyes onto the face, creating the desired shape and size.
For the nose, you can create a small triangle shape using black felt or fabric. Cut out the triangle and position it in the center of the bat’s face. Use a needle and thread to sew the nose onto the knitted fabric, making sure it is firmly attached. Alternatively, you can embroider the nose using black yarn or thread, stitching it onto the face in a triangular shape.
Remember to always use child-safe materials when creating toys, ensuring that the eyes and nose are securely attached to prevent any choking hazards. Taking the time to add these finishing touches will give your knitted bat toy that extra charm and character.
Assembling the Bat Toy
Once you have completed knitting all the pieces for the bat toy, it’s time to assemble them together to bring the toy to life. Follow these steps to assemble your bat toy:
1. Sew the body pieces:
- Take two body pieces and place them with the right sides facing each other.
- Using a tapestry needle and the same yarn used for knitting, sew the pieces together along the edges, leaving the bottom open for stuffing.
- Make sure to securely sew the pieces, so there are no gaps.
- Repeat the process for the remaining body pieces.
2. Stuff the body:
- Using polyester fiberfill or your preferred stuffing material, fill the body of the bat toy through the opening at the bottom.
- Continue adding stuffing until the body is firm and has the desired shape.
- Make sure not to overstuff, as it might distort the shape of the toy.
- Once satisfied with the stuffing, securely sew the bottom opening to close it.
3. Attach the wings:
- Take the knitted wings and position them on either side of the body.
- Using a tapestry needle and the same yarn used for knitting, sew the wings to the body.
- Make sure to sew the wings securely, as they will be subject to some pulling and tugging during play.
4. Embroider the face:
- Using black yarn and a tapestry needle, embroider the eyes and mouth of the bat toy.
- You can use French knots for the eyes and a simple backstitch for the mouth.
- You can also add any additional details or decorations to the face, such as eyebrows or fangs.
5. Finishing touches:
- Trim any excess yarn or loose ends, and make sure all the seams are securely sewn.
- You can optionally attach a small loop of yarn at the top of the bat toy to hang it.
- Give the toy a final inspection to ensure it is safe and ready for play.
Congratulations! You have successfully assembled your bat toy. Now it’s ready to be enjoyed or gifted to someone who will cherish it.
Decorating Options
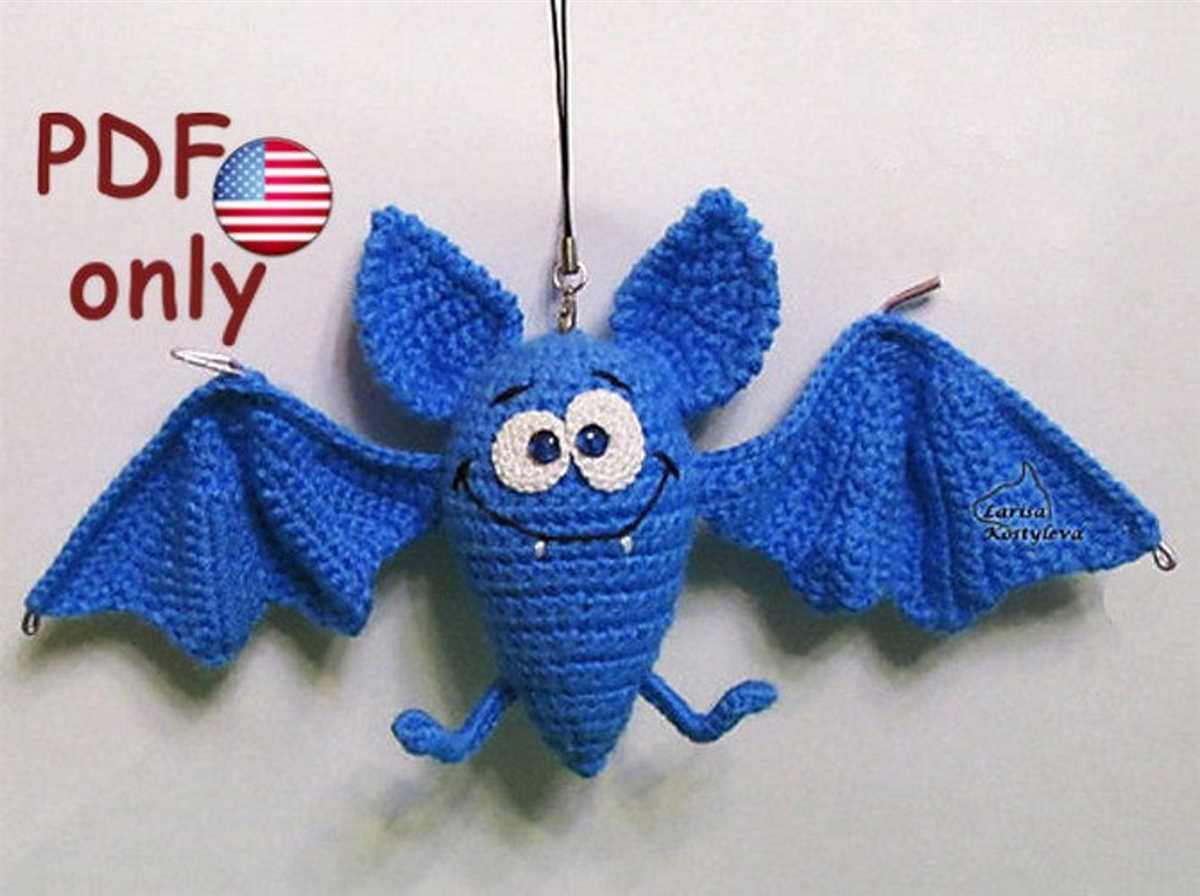
When it comes to decorating your knitted bat toy, there are plenty of options to choose from to make it uniquely yours. Whether you want to add some spooky flair for Halloween or create a cute and cuddly companion, these ideas will surely inspire your creativity.
Felt Details: One way to add some personality to your knitted bat toy is by adding felt details. Cut out small shapes from colored felt such as eyes, fangs, or even small bows and attach them to the body with fabric glue or by sewing them on. This will give your bat a more defined and playful look.
Embroidery: Another way to personalize your bat toy is by using embroidery. You can create intricate designs on the wings or body, such as stitches that resemble veins or different patterns using different colored yarn. This will give your bat a more detailed and textured appearance.
- Beads and Sequins: If you want to add some sparkle to your bat toy, consider adding beads or sequins. You can attach them to the body or wings using thread or glue, creating a shiny and eye-catching effect.
- Ribbon: Another fun and easy way to accessorize your bat toy is by adding a ribbon around its neck or attaching small bows to its ears. This will give your bat a cute and festive look, perfect for any occasion.
- Pom-poms: For an extra touch of whimsy and fun, you can attach small pom-poms to the wings or the ends of the ears. This will give your bat toy a playful and fluffy appearance.
No matter what decorating option you choose, make sure it aligns with your vision for the finished product. Whether you want a spooky Halloween decoration or a cuddly companion for a child, the options are endless when it comes to making your knitted bat toy uniquely yours.
Tips and Tricks for a Perfect Bat Toy
Creating a bat toy using the knitting pattern can be a fun and rewarding experience. However, to ensure the best results and create a toy that your child will love, here are some tips and tricks to keep in mind:
1. Use the right materials: Make sure you use the recommended yarn and needle size mentioned in the knitting pattern. This will help you achieve the desired size and shape for your bat toy.
2. Gauge swatch: Before starting the actual project, knit a gauge swatch to determine how many stitches and rows you’ll need to obtain the correct gauge. This step will help you avoid any sizing issues later on.
3. Follow the pattern: Pay close attention to the knitting pattern instructions, especially when it comes to shaping and assembling the different parts of the bat toy. Skipping or misinterpreting the instructions can lead to an imperfect finished product.
4. Add embellishments: Feel free to personalize your bat toy by adding any extra details or embellishments. You can use buttons for eyes, embroidery floss for mouth and nose, or even sew on tiny felt wings. Just remember to always consider the age appropriateness of any additional elements.
5. Blocking: Once you have finished knitting all the pieces, block them according to the yarn’s instructions. This step will help even out the stitches and give your bat toy a polished look.
6. Seam carefully: Take your time when seaming the different parts of the bat toy together. Use a tapestry needle and yarn in a matching color to create invisible seams. Neat and secure seams will give your bat toy a more professional finish.
7. Safety considerations: If the bat toy is intended for a young child, make sure to secure all parts tightly and avoid using small embellishments that can be a choking hazard. Also, consider using safety eyes or embroidering the eyes instead.
With these tips and tricks in mind, you’ll be able to create a perfect bat toy that your child will cherish for years to come. Enjoy the process and let your creativity soar!