
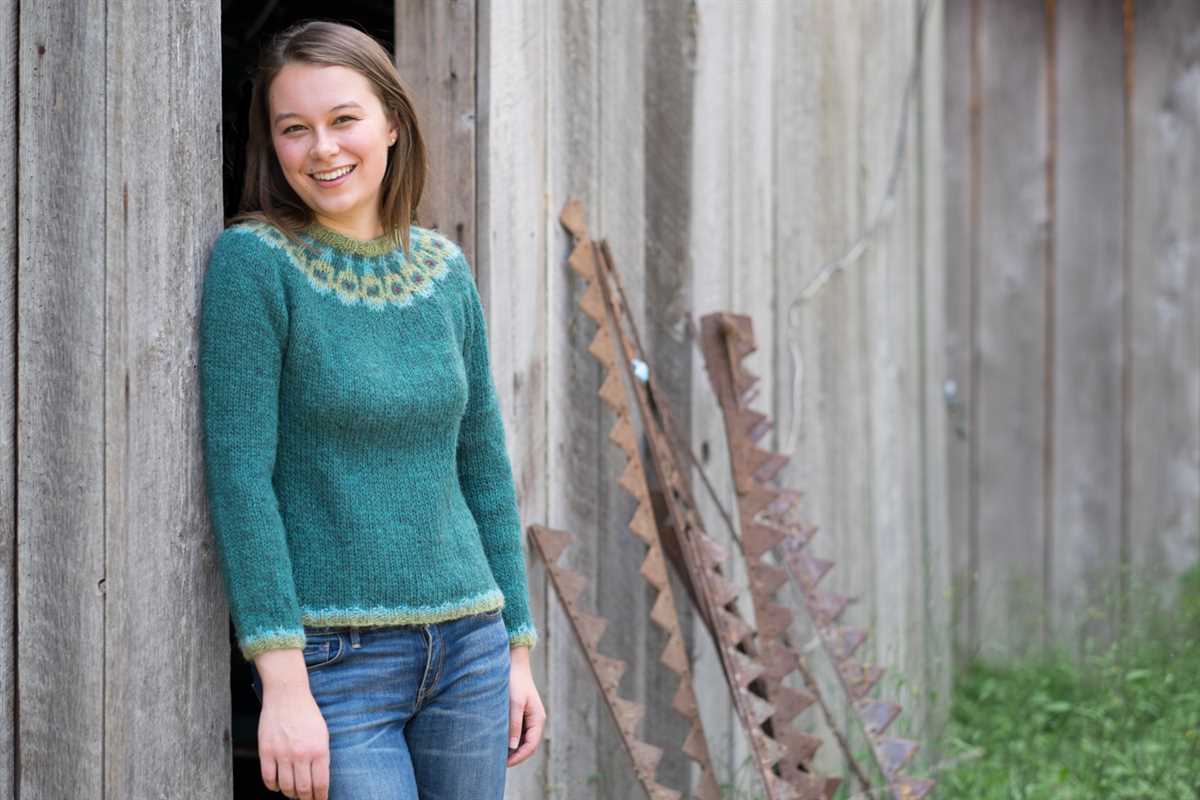
If you’re looking for a fun and trendy knitting project, look no further than the balloon sweater. This unique and eye-catching design features an oversized fit and voluminous sleeves that resemble balloons. The balloon sweater is not only fashionable, but also cozy and comfortable, making it the perfect garment for chilly days.
The balloon sweater knitting pattern is suitable for knitters of all skill levels. Whether you’re a beginner or an experienced knitter, you can easily create your own balloon sweater with this pattern. The pattern includes detailed instructions and helpful tips to guide you through every step of the process.
To create a balloon sweater, you’ll need a chunky weight yarn and circular knitting needles. The pattern provides guidance on selecting the right yarn and needle size to achieve the desired fit and drape. You’ll also need basic knitting skills, such as knitting, purling, and decreasing. If you’re new to knitting, this project can be a great opportunity to develop your skills and try new techniques.
Balloon Sweater Knitting Pattern
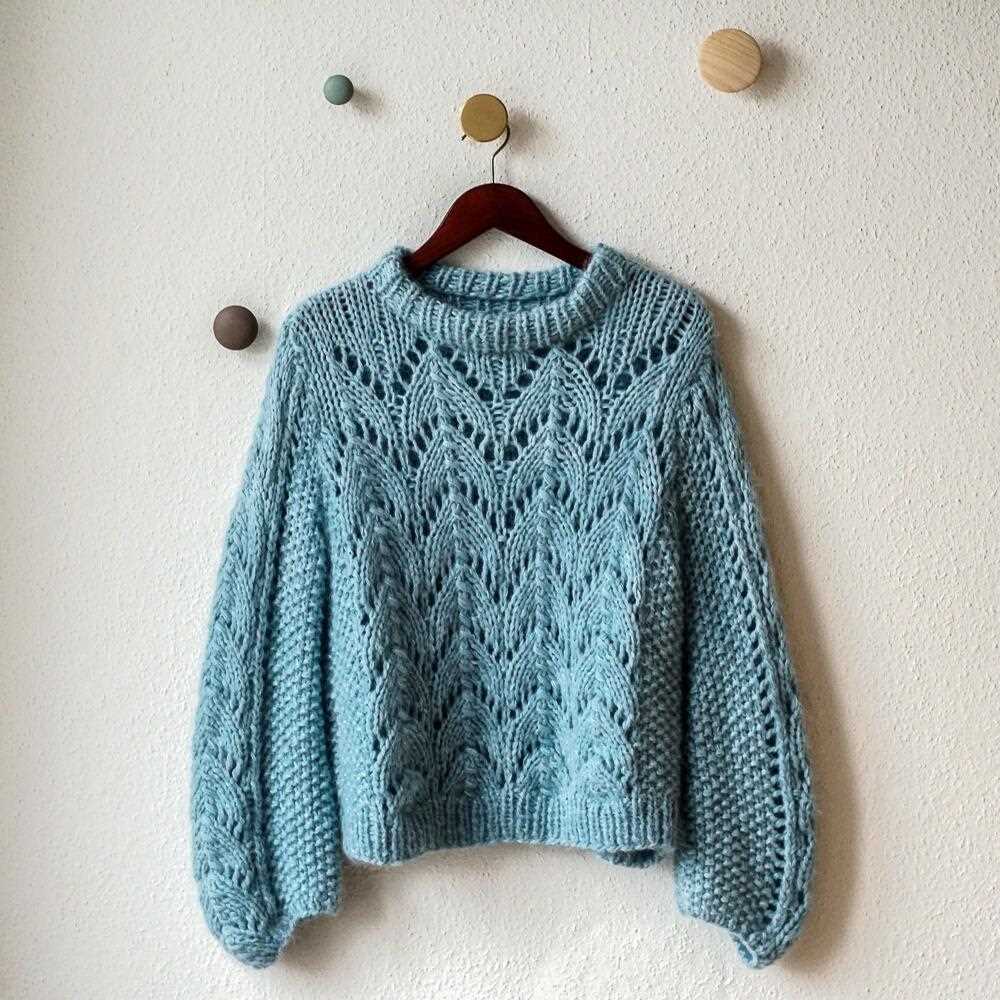
Looking for a stylish and unique knitting project? Why not try your hand at knitting a balloon sweater? This trendy sweater pattern is perfect for those looking to add a touch of whimsy to their wardrobe. With its oversized, balloon-like shape, this sweater is both comfortable and fashionable.
To knit the balloon sweater, you will need a chunky or super bulky yarn and a pair of large knitting needles. The pattern is relatively simple, making it a great project for knitters of all skill levels. The sweater is knit in the round from the bottom up, with a ribbed cuff at the hem and sleeves. The body is then shaped to create the balloon effect, with decreases at strategic points to create the desired shape.
Materials:
- Chunky or super bulky yarn
- Size US 15 (10 mm) knitting needles
- Tapestry needle
- Stitch markers
Instructions:
- Cast on the desired number of stitches, taking into account the desired ease.
- Work in a rib stitch for the cuff. You can choose between a 1×1 rib (knit 1, purl 1) or a 2×2 rib (knit 2, purl 2).
- Continue working in the rib stitch for the desired length.
- Switch to stockinette stitch and begin shaping the body. To create the balloon effect, make decreases evenly spaced across each round, gradually reducing the number of stitches.
- Continue knitting until the desired length is reached.
- Switch back to the rib stitch for the hem and work for the desired length.
- Bind off and weave in any loose ends.
This balloon sweater knitting pattern allows for customization and creativity. You can experiment with different yarns, colors, and stitch patterns to create your own unique design. Whether you’re knitting for yourself or as a gift, the balloon sweater is sure to become a favorite in your wardrobe.
Choosing the Right Yarn

When knitting a balloon sweater, it is important to choose the right yarn to achieve the desired look and fit. The yarn you choose will determine the drape, warmth, and texture of the finished garment.
Fiber Content: One of the first things to consider when selecting yarn for a balloon sweater is the fiber content. Natural fibers such as wool, alpaca, and cotton are popular choices, as they provide warmth, breathability, and durability. Synthetic fibers like acrylic and nylon can also be used, offering affordability and easy care. Consider the season when you plan to wear the sweater and choose the fiber content accordingly.
Weight: Another important factor to consider is the weight of the yarn. Balloon sweaters typically look best with bulky or chunky weight yarns, as they create a fuller, more voluminous effect. These thicker yarns also knit up faster, making the project quicker to complete. However, if you prefer a lighter and more delicate look, you can choose a lighter weight yarn, such as a worsted or sport weight.
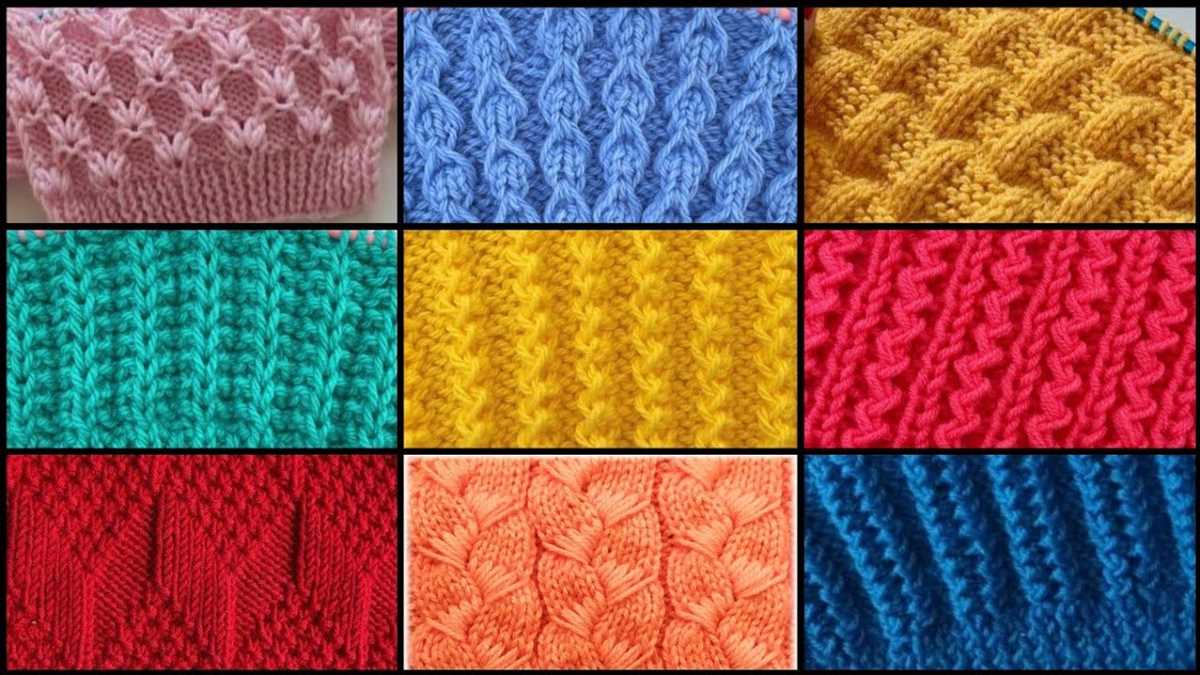
Texture: The texture of the yarn will also contribute to the overall look of the balloon sweater. Smooth and solid-colored yarns will give a more polished and streamlined appearance, while textured and variegated yarns can add visual interest and dimension. Consider the stitch pattern you plan to use and how it will interact with the yarn’s texture.
Color: Lastly, consider the color of the yarn. Balloon sweaters can be made in a variety of colors, from neutral tones to vibrant hues. Consider your personal style and the occasions you plan to wear the sweater. Neutral or monochromatic colors can be versatile and timeless, while bold and bright colors can make a statement and add a pop of color to your wardrobe.
By considering the fiber content, weight, texture, and color of the yarn, you can choose the right yarn to create a beautiful and well-fitting balloon sweater.
Required Knitting Tools
When starting a new knitting project, it’s important to have the right tools on hand. Below is a list of the essential knitting tools you will need to successfully create a balloon sweater.
1. Knitting Needles
The most important tool for knitting is, of course, the knitting needles. For the balloon sweater pattern, you will need a set of circular knitting needles in a size that corresponds to the gauge of your chosen yarn. The length of the needles depends on the size of the garment you are making. Make sure to check the pattern for the recommended needle size and length before starting your project.
2. Tapestry Needle
A tapestry needle, also known as a yarn needle or blunt needle, is essential for finishing your knitting project. It is used to weave in loose yarn ends and sew seams together. A tapestry needle with a large eye and a blunt tip is recommended, as it makes it easier to work with bulky yarn and prevents snagging or splitting the yarn.
3. Stitch Markers
Stitch markers are useful tools that help you keep track of your stitches and pattern repeats. They are particularly handy when working on complex patterns or when shaping garments. You can use either locking stitch markers or simple split ring markers. Markers come in different colors and styles, so choose the ones that work best for you.
4. Row Counter
A row counter is a handy tool for keeping track of the number of rows you have knitted. It can be a physical counter that attaches to your knitting needles or a digital counter that you can use on your device. Using a row counter will help you stay organized and ensure that you don’t lose track of where you are in the pattern.
5. Scissors
A good pair of scissors is essential for any knitting project. You will need them to cut yarn and trim any excess ends. Look for scissors with sharp blades and comfortable handles. Keep them close by during your knitting sessions so that you can easily reach them whenever needed.
6. Measuring Tape
A measuring tape is useful for checking the gauge of your knitting and for taking accurate measurements of your work. Make sure to have a flexible measuring tape that is long enough to measure different parts of your garment. It’s also useful for checking the size and fit as you progress with your sweater.
With these essential knitting tools in hand, you’ll be well-equipped to knit your own balloon sweater and tackle any other knitting project that comes your way.
Getting Started: Casting On
Before you can begin knitting your balloon sweater, you need to cast on your stitches. Casting on is the process of creating the foundation row of stitches on your knitting needles. There are several methods for casting on, but for this pattern we’ll be using the long tail cast on method.
To start, you’ll need a long tail of yarn. The length of the tail will depend on how many stitches you need to cast on, so it’s always a good idea to err on the side of caution and leave a generous tail.
Step 1: Make a slip knot by creating a loop with the yarn, then pulling the tail through the loop. Slide the slip knot onto one of your knitting needles and tighten it, making sure it’s not too tight or too loose.
Step 2: Hold the knitting needle with the slip knot in your right hand and the other knitting needle in your left hand. With your left hand, drape the tail of the yarn over your thumb and hold it against the needle.
Step 3: With your right hand, bring the working yarn (the yarn attached to the ball) over your index finger and hold it against the needle.
Step 4: Use your right hand to bring the needle over the tail of the yarn and under the working yarn. Then, with your left hand, use your thumb to bring the yarn over the needle.
Step 5: Repeat steps 3 and 4 until you have cast on the desired number of stitches. The stitches should be snug but not too tight.
Once you have completed the cast on, you are ready to start knitting the first row of your balloon sweater.
Knitting the Body
When knitting the body of the balloon sweater, there are several important steps and considerations to keep in mind. The body is the main part of the sweater, and it will determine the overall fit and shape of the garment.
Firstly, it is essential to choose the right size and gauge for your sweater. The pattern will typically provide instructions on how to achieve the correct gauge using the recommended yarn and needle size. Make sure to swatch and measure your gauge accurately before starting the body, as this will affect the final fit of the sweater.
Once you have determined the correct gauge, you can begin knitting the body. This usually involves knitting in the round, either using circular needles or double-pointed needles, depending on your preference. It is important to keep track of your stitches and row count, as the pattern may include shaping or stitch pattern changes.
During the knitting process, you may encounter shaping instructions such as increases or decreases. These are essential for creating the desired fit and silhouette of the sweater. Follow the pattern instructions carefully to ensure that you are shaping the body correctly and achieving the desired measurements.
Another crucial aspect of knitting the body is maintaining even tension throughout your work. This will ensure that the stitches are consistent and the fabric has a smooth appearance. Pay attention to your knitting tension and make any necessary adjustments as you go along.
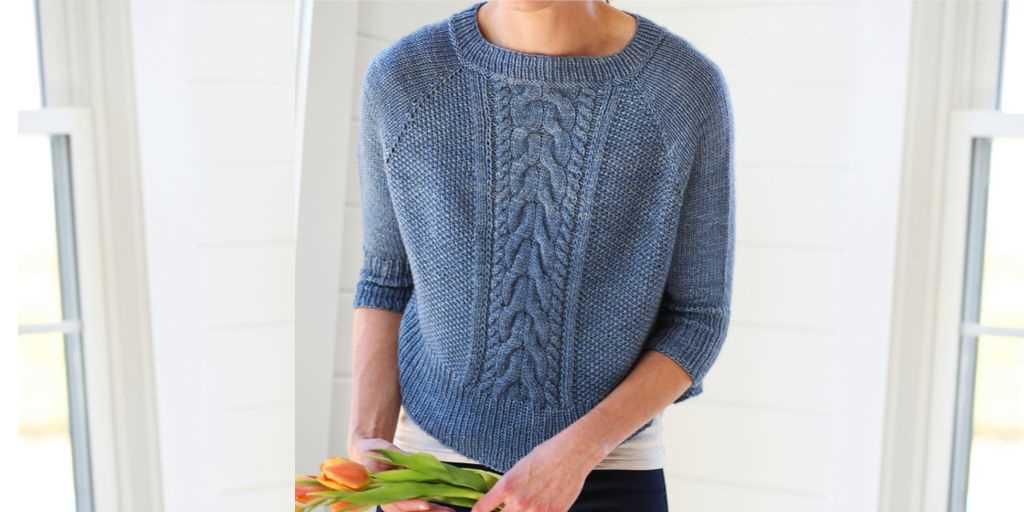
Shaping the Balloon Sleeves
The Balloon Sleeve
The balloon sleeve is a unique and eye-catching feature of the balloon sweater. It adds volume and drama to the overall look of the sweater, making it a statement piece. The shaping of the balloon sleeve is achieved through specific knitting techniques and the use of increases and decreases.
Increasing for the Balloon Sleeve
To create the balloon effect, you will need to increase the number of stitches gradually as you knit the sleeve. This can be done by working increases evenly spaced throughout each round or row. One common method is to use yarn overs to create new stitches. This creates an open and airy look, enhancing the balloon shape.
It is important to carefully plan and calculate the number of increases needed to achieve the desired fullness of the balloon sleeve. This will involve taking measurements, considering the gauge of your knitting, and following the pattern instructions provided.
Decreasing for the Balloon Sleeve
Once the desired width of the balloon sleeve is reached, it is time to start shaping the sleeve towards the cuff. This is done by gradually decreasing the number of stitches. Decreases can be worked in various ways, such as through knit 2 together (k2tog) or slip, slip, knit (ssk) stitches.
The decrease rate will depend on the desired tapering of the sleeve. It is important to follow the pattern instructions and the shaping guidelines provided to achieve a balanced and proportionate look.
To enhance the shaping and provide structure to the balloon sleeve, it is common to introduce ribbing or other stitch patterns towards the cuff. This helps the sleeve to hug the arm more closely, creating a flattering and comfortable fit.
In conclusion, shaping the balloon sleeves of a balloon sweater involves careful planning, increases, and decreases to achieve the desired fullness and tapering. Following the pattern instructions and taking proper measurements are key to ensuring a well-shaped and stylish final result.
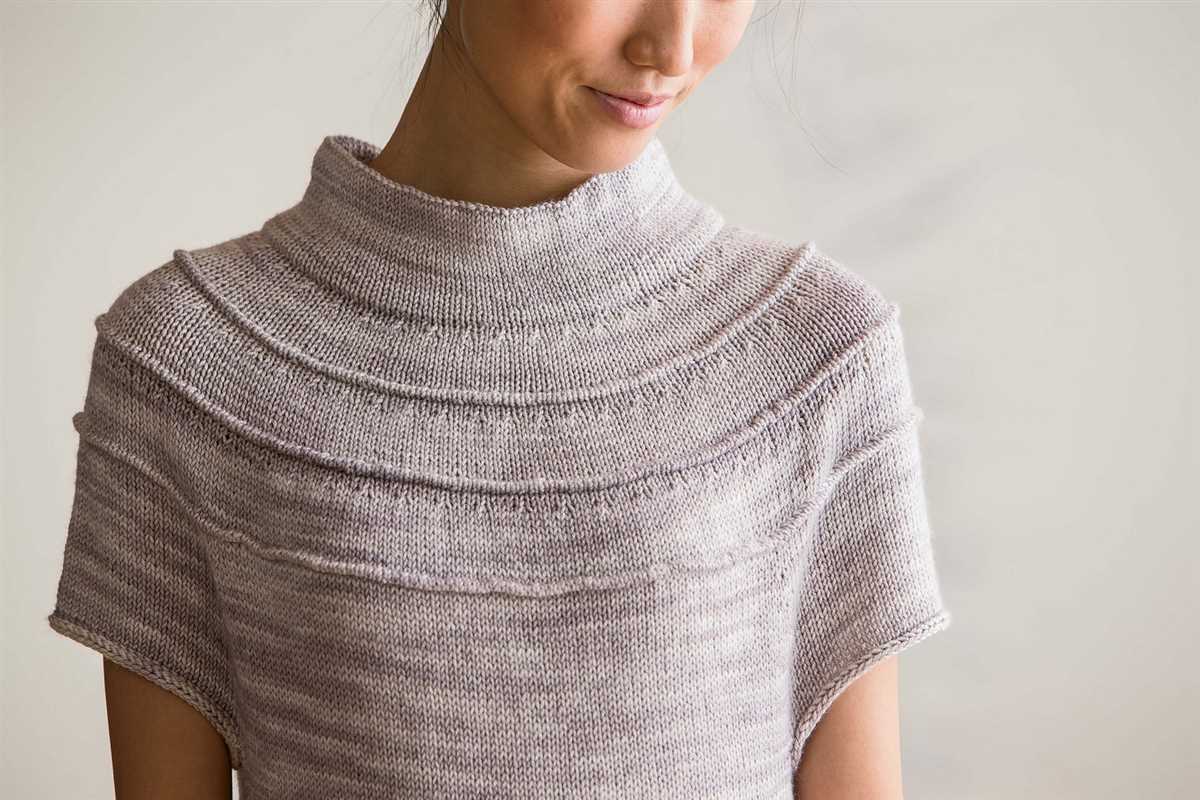
Creating the Neckline
The neckline is an important detail in the balloon sweater knitting pattern. It not only adds a finishing touch to the sweater but also affects the overall fit and comfort. There are several techniques you can use to create different types of necklines, depending on the style you prefer. Let’s explore some options.
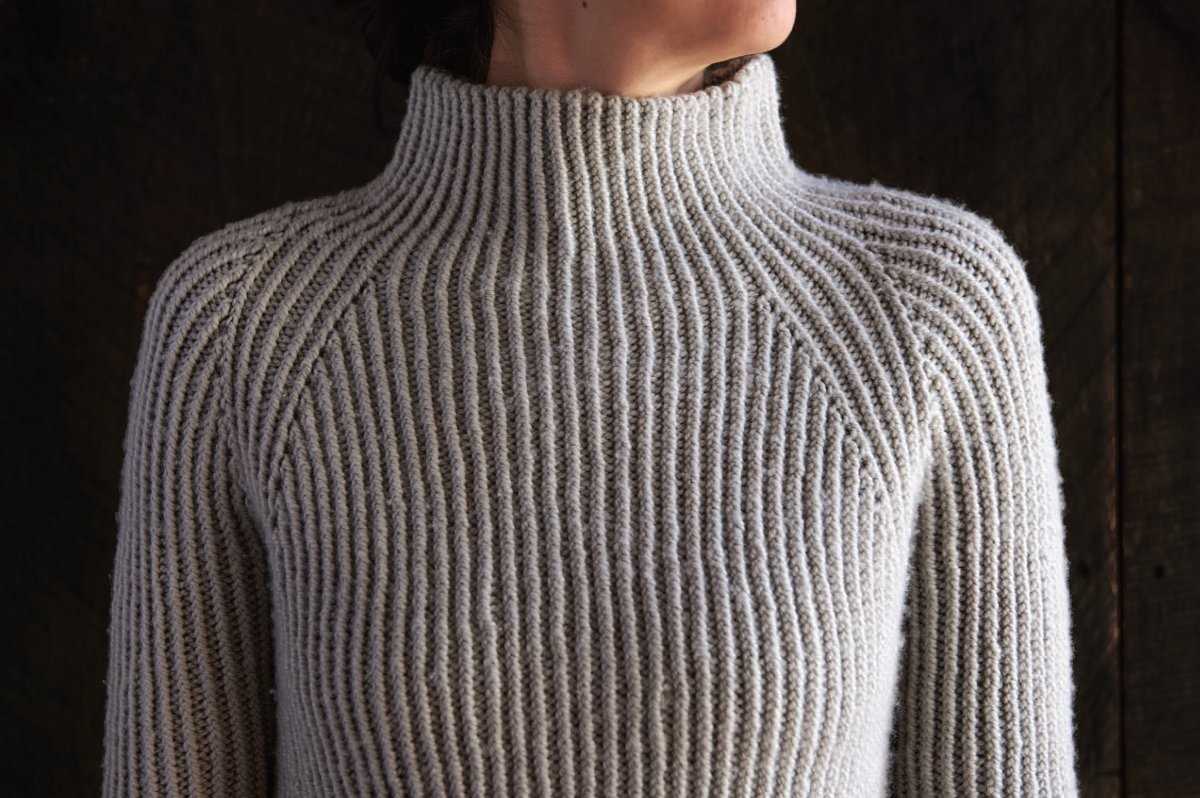
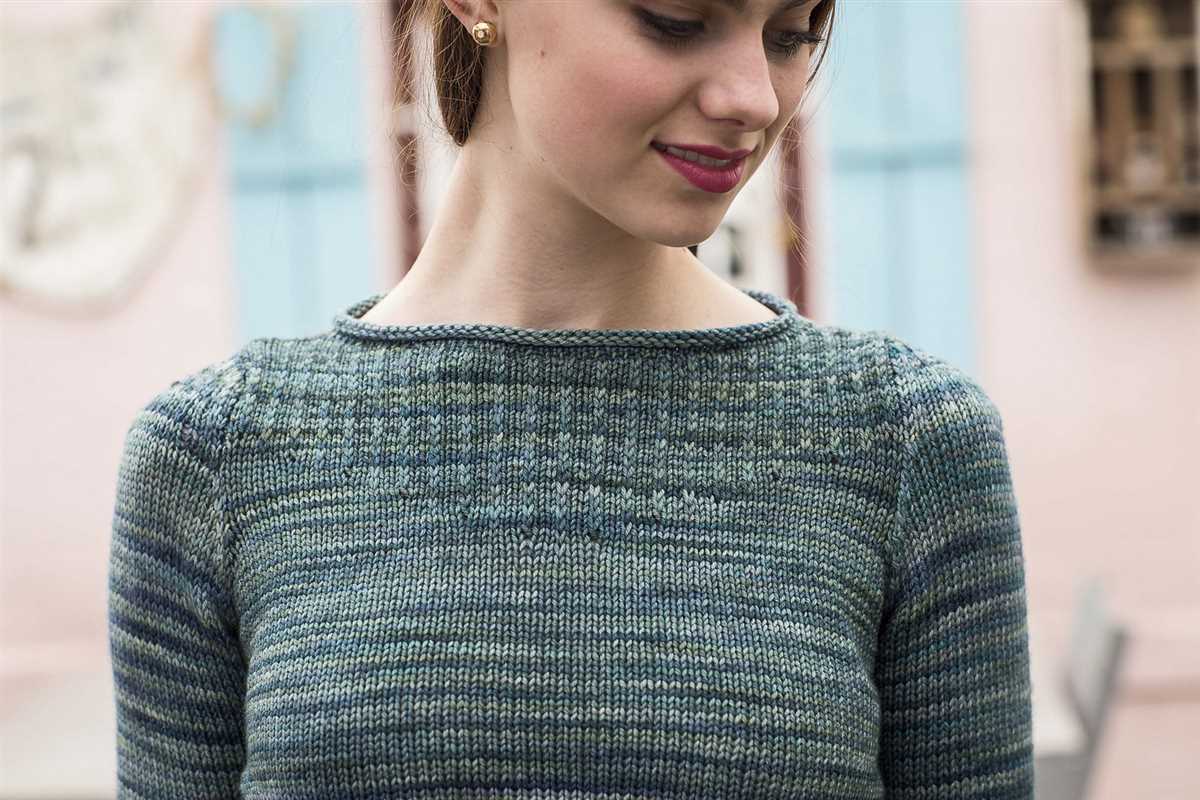
1. Ribbed Neckline
A ribbed neckline is a classic choice for sweaters. It is created by alternating knit and purl stitches in a specific pattern. This creates a stretchy and snug neckline that sits close to the neck. To create a ribbed neckline, you can start with a smaller needle size and gradually increase the needle size as you work your way up. This helps to create a neat and defined ribbing pattern.
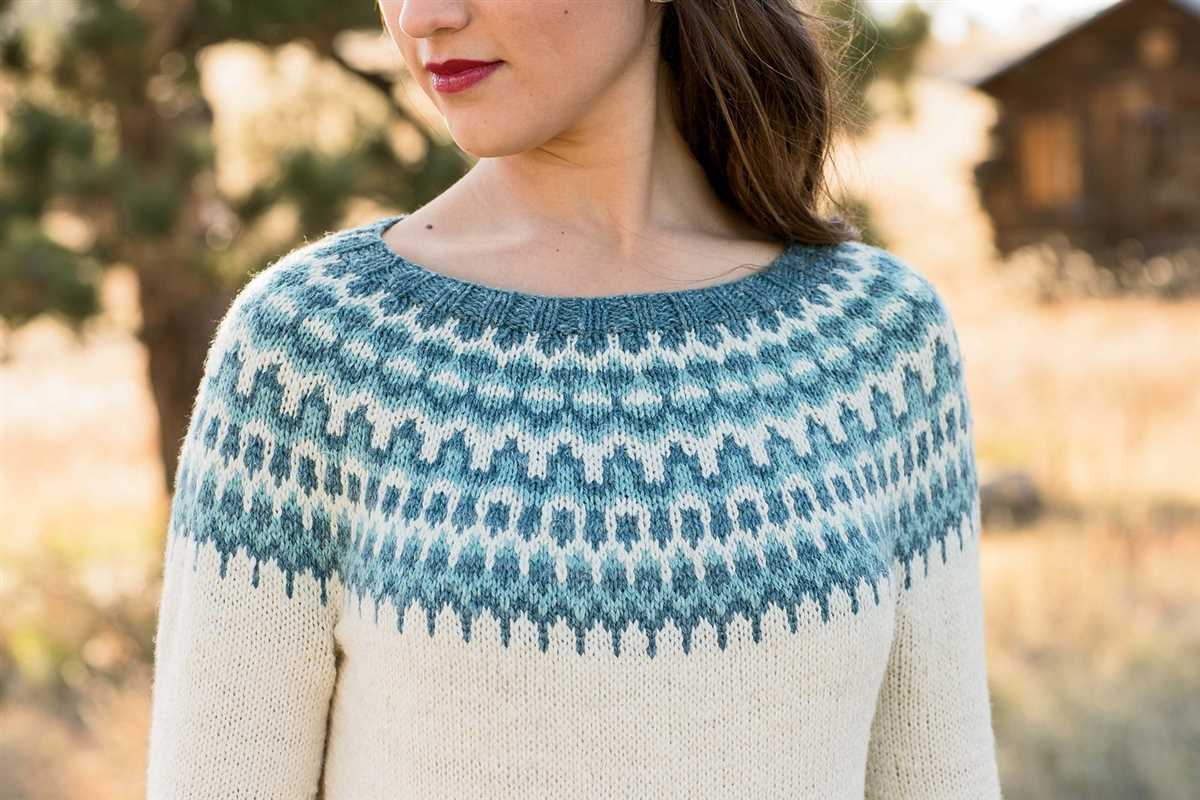
2. Boat Neckline
A boat neckline is a wider neckline that sits slightly off the shoulders. It creates a flattering and feminine look. To create a boat neckline, you can start by casting on fewer stitches than the desired width of the neckline. Then, you can gradually increase the number of stitches as you work your way up. This creates a gentle curve that forms the boat neckline.
3. Cowl Neckline
A cowl neckline is a popular choice for winter sweaters. It adds warmth and style to the garment. To create a cowl neckline, you can work additional rows in a ribbed or textured pattern after reaching the desired length of the sweater. This extra fabric can then be folded down to create the cozy cowl neckline.
Remember to consider the style and functionality of your sweater when choosing a neckline. Experiment with different techniques and designs to create a neckline that complements your balloon sweater perfectly.
Adding Ribbing to the Hem
The hem of a balloon sweater is an important detail that adds structure and shape to the garment. One way to enhance the hem is by adding ribbing, which creates a stretchy and snug fit. Here is a step-by-step guide on how to add ribbing to the hem of your balloon sweater.
1. Choose the Right Ribbing Pattern
There are various ribbing patterns you can choose from, such as 1×1 ribbing or 2×2 ribbing. Consider the overall design of your sweater and the level of stretchiness you desire. The most common ribbing pattern is the 1×1 ribbing, which consists of alternating knit and purl stitches.
2. Measure and Calculate
Measure the circumference of your sweater’s hem to determine the number of stitches you need for the ribbing. Multiply the desired ribbing width (e.g., 2 inches) by the number of stitches per inch in your chosen ribbing pattern. This will give you the total number of stitches needed for the ribbing.
3. Start the Ribbing
Using a smaller size needle than what you used for the main body of the sweater, cast on the required number of stitches for the ribbing. Join the round in a circle, making sure not to twist the stitches. Begin working the ribbing pattern, following the instructions for your chosen pattern. Continue knitting in the ribbing pattern for the desired length.
4. Bind Off
To bind off the ribbing, work the stitches as they appear in the ribbing pattern until you reach the end of the round. Cut the yarn, leaving a tail long enough to weave in. Thread the tail through the last stitch and pull tight to secure. Weave in any loose ends to give your sweater a polished finish.
Adding ribbing to the hem of your balloon sweater can elevate its style and provide a comfortable and flattering fit. Experiment with different ribbing patterns and widths to achieve the desired look. With a bit of patience and practice, you’ll be able to create a beautifully finished sweater that you can be proud of.
Finishing Touches: Blocking and Seaming
After completing the knitting portion of your balloon sweater, there are a few finishing touches to ensure that the final product looks polished and professional. The two main steps in this process are blocking and seaming.
Blocking:
Blocking is an essential step in knitting that helps to even out the stitches, improve drape, and ensure that the finished garment maintains its shape. To block your balloon sweater, you will need to gently wet the finished piece, either by soaking or misting it with water. Lay the sweater out and use pins or blocking wires to stretch it to the desired measurements. Allow the sweater to dry completely before removing the pins or wires.
By blocking your balloon sweater, you can fix any uneven stitches, relax the fabric, and achieve a more professional finish. It is especially important for this particular pattern, as the oversized nature of the sweater relies on the blocked shape to create the balloon effect.
Seaming:
Once the sweater is blocked and dry, the next step is to seam any remaining openings, such as the underarm or side seams. You can use the mattress stitch, which creates an invisible seam, to join the edges of the fabric together. Start by aligning the edges of the pieces to be seamed and use a tapestry needle and matching yarn to sew them together. Take care to make your stitches even and secure to ensure a neat and sturdy seam.
Seaming is an important step in giving your balloon sweater a professional finish and ensuring that it holds up well over time. By carefully joining the seams, you can create a cohesive and polished look that will enhance the overall appearance of the sweater.
Customizing Your Balloon Sweater
Are you looking to add a personal touch to your balloon sweater? Customizing your sweater can help make it truly unique and tailored to your style. Here are a few ideas to get you started on your customization journey.
Choose the Perfect Yarn
One of the easiest ways to customize your balloon sweater is by selecting the perfect yarn. Consider the weight, texture, and color of the yarn to match your style. Opting for a cozy, chunky yarn can give your sweater a more relaxed and casual look, while a finer, silkier yarn can create a dressier and more elegant feel. Don’t be afraid to experiment with different yarns to achieve the desired drape and aesthetic.
Add Embellishments
To add some flair and personality to your balloon sweater, consider incorporating embellishments. This can include anything from buttons, sequins, beads, or even embroidery. Adding these small details can instantly elevate the look of your sweater and make it truly one-of-a-kind. Be mindful of the overall design and placement of the embellishments to ensure they enhance the garment rather than overwhelm it.
Experiment with Length and Fit
Customizing the length and fit of your balloon sweater can make a significant difference in how it looks and feels. You can lengthen or shorten the body or sleeves to create a more tailored or oversized silhouette. Play around with different proportions to find the most flattering fit for your body type. Remember, this is your sweater, so feel free to adjust the pattern to suit your preferences and desired style.
Consider Color Blocking
If you’re feeling bold and adventurous, consider color blocking your balloon sweater. This technique involves using different colors for different sections of the sweater, creating visual interest and a unique design. You can experiment with contrasting colors or opt for a more subtle look with similar shades. Color blocking allows you to showcase your creativity and create a sweater that stands out from the crowd.
Remember, knitting is a form of self-expression, and customizing your balloon sweater is a wonderful way to infuse your personality and style into your work. Be fearless in your choices and trust your instincts. With a little creativity, you can create a balloon sweater that is truly your own.
Tips for a Perfect Fit

If you want your balloon sweater to fit perfectly, there are a few key tips to keep in mind. First and foremost, make sure you have accurate measurements of your body before starting the project. This will ensure that the sweater is the right size and will be comfortable to wear.
Another important tip is to swatch before you begin. Swatching allows you to check your tension and make any necessary adjustments to your knitting. By swatching, you can determine if you need to go up or down a needle size to achieve the correct gauge for the pattern.
Choose the right yarn for your balloon sweater. Consider the weight and fiber content of the yarn called for in the pattern, and choose a similar yarn that will give you the desired drape and elasticity. A yarn with too much drape might result in a shapeless sweater, while a yarn with too much elasticity might make the sweater too tight.
Keep in mind the desired ease when selecting your size. Balloon sweaters are meant to be loose-fitting, but how much ease you prefer is a matter of personal preference. If you like a more oversized look, choose a size with more ease, and if you prefer a closer fit, choose a size with less ease.
When knitting the sweater, pay attention to the shaping. Balloon sweaters often have unique shaping details, such as increases and decreases, to create the signature balloon silhouette. Make sure to follow the pattern instructions carefully to achieve the intended look of the sweater.
Finally, don’t be afraid to make modifications to the pattern to better suit your body and style. You can adjust the length of the sweater, customize the neckline, or add any other design elements that you prefer. After all, knitting is a creative and personal craft, so make your balloon sweater truly your own.
Frequently Asked Questions
Here are some frequently asked questions about the balloon sweater knitting pattern:
1. How long does it take to knit the balloon sweater?
The time it takes to knit the balloon sweater varies depending on your knitting experience and the amount of time you can dedicate to the project. On average, it can take anywhere from a few days to a few weeks to complete.
2. What skill level is required to knit the balloon sweater?
The balloon sweater is suitable for intermediate knitters who have some experience with knitting techniques such as knitting in the round, increasing, and decreasing stitches. However, with the detailed instructions provided in the pattern, even beginners can give it a try!
3. Can I modify the size of the sweater?
Yes, the balloon sweater pattern includes instructions for three different sizes: small, medium, and large. However, if you want to modify the pattern further, you can do so by adjusting the number of stitches and rows to achieve your desired fit.
4. What type of yarn should I use for the balloon sweater?

You can use any bulky weight yarn for the balloon sweater. However, it is important to check the gauge mentioned in the pattern to ensure that your finished sweater will have the correct measurements.
5. Can I sell the finished balloon sweaters?
Yes, you can sell the finished balloon sweaters that you knit using this pattern. However, please do not distribute or sell the pattern itself as it is copyrighted.
6. Where can I find help if I get stuck while knitting the balloon sweater?
If you encounter any difficulties while knitting the balloon sweater, you can always seek help from the knitting community. Online forums, knitting groups, and video tutorials can be great resources for getting assistance and finding solutions to any knitting problems you may come across.
7. Can I share my finished balloon sweater on social media?
Absolutely! We encourage you to share your finished balloon sweater on social media platforms to inspire and encourage others to try the pattern. Don’t forget to use our hashtag #balloonsweaterknit along with your post!
Conclusion
The balloon sweater knitting pattern is a fun and trendy project that allows you to create a cozy and stylish sweater. With its unique balloon sleeves and simple construction, it is a great pattern for knitters of various skill levels. By following the instructions and using your creativity, you can make a one-of-a-kind sweater that will keep you warm and fashionable. Get your needles ready and start knitting!
Q&A:
What is a balloon sweater knitting pattern?
A balloon sweater knitting pattern refers to a specific style of sweater that creates a loose, oversized shape resembling a balloon. The pattern typically includes instructions on how to knit the sweater with extra volume in the body, usually achieved through different stitch patterns or increases in the number of stitches.
Are balloon sweaters suitable for beginners?
While it depends on the specific pattern and the beginner’s level of knitting skills, balloon sweaters can be more intermediate or advanced projects. They often involve more complex techniques such as different stitch patterns, shaping, and maintaining the right tension throughout the body. However, there are simpler balloon sweater patterns available that could be suitable for beginners who are comfortable with basic knitting skills.
Can a balloon sweater pattern be adjusted for different sizes?
Yes, most balloon sweater patterns can be adjusted for different sizes. The pattern will generally include instructions for multiple sizes or guidance on how to modify the pattern to fit different measurements. It’s important to consider the desired fit and the gauge of your knitting to ensure the finished sweater will be the right size. Consulting with the pattern instructions and possibly seeking guidance from a more experienced knitter can help with making size adjustments.
What materials are needed for knitting a balloon sweater?
The materials needed for knitting a balloon sweater typically include yarn, knitting needles (usually circular or double-pointed depending on the pattern), stitch markers, a tapestry needle for weaving in ends, and possibly a cable needle or other specialized tools depending on the pattern’s requirements. The specific type and weight of yarn, as well as the needle sizes, will vary depending on the pattern and desired results.
Where can I find balloon sweater knitting patterns?
Balloon sweater knitting patterns can be found in various places. They are available online on knitting pattern websites, in knitting books or magazines, and sometimes on social media platforms or knitting blogs. You can search for specific balloon sweater patterns by using keywords such as “balloon sweater knitting pattern” on search engines or by exploring knitting communities and forums that often share pattern recommendations.
What is a balloon sweater?
A balloon sweater is a style of sweater characterized by its voluminous, loose-fitting shape. It typically has a wide body and sleeves, creating a balloon-like effect. This type of sweater is often oversized and cozy, making it popular for casual and comfortable wear. It can be knitted using different stitch patterns and yarns to achieve various textures and designs. Balloon sweaters are versatile and can be paired with different bottoms for a trendy and fashionable look.