
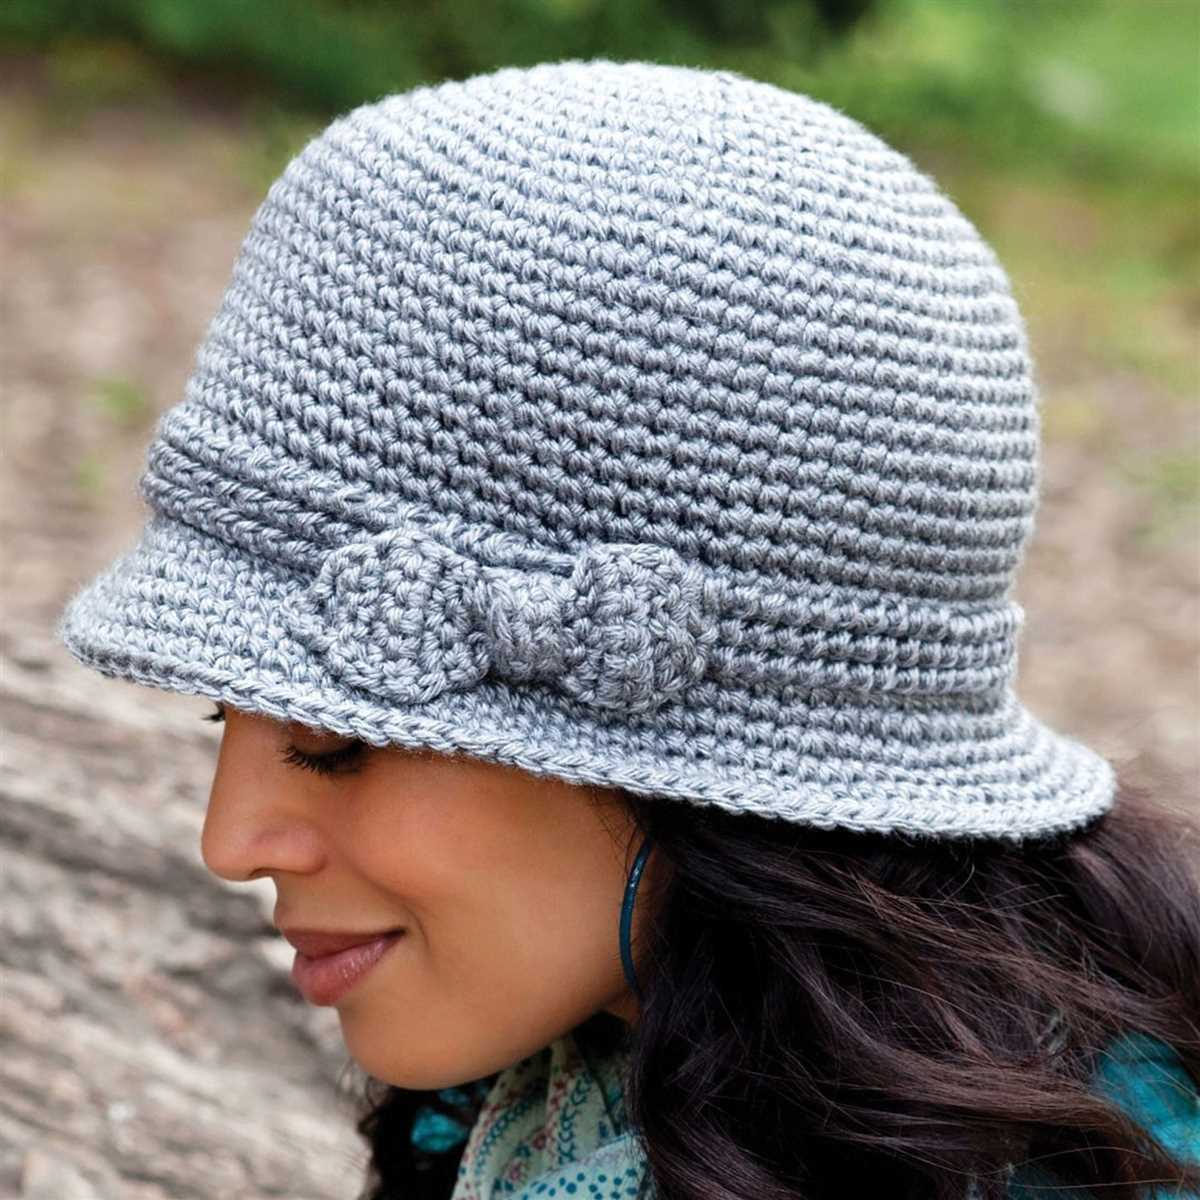
Knitting is a wonderful hobby that allows for creativity and self-expression, and one of the most popular items to knit is a hat. A knitted hat not only keeps you warm during the cold months, but it also serves as a stylish accessory that can complement any outfit. If you’re looking for a new knitting project, we’ve got you covered with a knitted hat pattern that comes in 4 different styles.
Whether you’re a beginner or an experienced knitter, there’s a hat style in this pattern for you. Each style offers a unique design and fit, allowing you to customize your hat to suit your personal style and preferences. From classic beanies to slouchy hats and even pompom beanies, this pattern has it all.
Not only does this knitted hat pattern provide you with a variety of styles to choose from, but it also includes detailed instructions and step-by-step tutorials to ensure that even beginners can successfully complete their project. With clear and concise directions, you’ll be able to create a beautiful and functional hat in no time.
Choosing the right yarn
When it comes to knitting a hat, choosing the right yarn is essential to ensure a successful and comfortable outcome. The yarn you select will determine not only the overall look of the hat but also its warmth, durability, and ease of care.
Fiber Content:
One of the first factors to consider when choosing yarn is the fiber content. Different fibers have different qualities that can greatly affect the final product. For instance, wool is known for its warmth and elasticity, making it an excellent choice for hats that need to provide insulation. On the other hand, cotton is lightweight and breathable, making it more suitable for hats worn in warmer climates.
Weight and Gauge:
The weight of the yarn you choose will also impact the final look and feel of the hat. Yarn can be classified into different weights, such as fingering, sport, worsted, or bulky. Thinner yarns will create a more delicate and lightweight hat, while thicker yarns will result in a chunkier and warmer hat. Additionally, it is important to consider the gauge of the yarn, which refers to the number of stitches and rows per inch. Matching the recommended gauge in the knitting pattern will ensure that your hat turns out the correct size.
Color and Texture:
Lastly, the color and texture of the yarn can add an extra touch of personality and style to your knitted hat. Solid colors create a classic and versatile look, while variegated or self-striping yarns can add visual interest and depth to the design. Additionally, textured yarns with bobbles, loops, or metallic threads can create unique and eye-catching effects. Consider the style and intended recipient of the hat when choosing the color and texture of the yarn.
Getting started with basic stitches

In order to create a knitted hat pattern, it is important to start with the basic stitches. These stitches form the foundation of any knitting project and are essential in creating the different patterns and designs. Whether you are a beginner or an experienced knitter, mastering the basic stitches is key to successfully completing your project.
One of the most commonly used stitches in knitting is the knit stitch. This stitch is achieved by inserting the right needle into the first stitch on the left needle, then wrapping the yarn around the right needle and pulling it through the stitch. This creates a new stitch on the right needle while the old stitch is dropped off the left needle. The knit stitch creates a smooth and tightly woven fabric.
Knit Stitch
Another important stitch to learn is the purl stitch. The purl stitch is the opposite of the knit stitch, creating a bumpy texture on the fabric. To do the purl stitch, insert the right needle into the first stitch on the left needle from right to left, then wrap the yarn around the right needle and pull it through the stitch. The purl stitch is commonly used in combination with the knit stitch to create different patterns and textures.
- Knit Stitch
- Purl Stitch
- Stockinette Stitch
Once you have mastered the knit and purl stitches, you can move on to more advanced stitches and patterns. One popular stitch is the stockinette stitch, which is created by alternating rows of knit and purl stitches. This stitch creates a smooth fabric on one side and a bumpy texture on the other side. It is commonly used in creating hats, scarves, and sweaters.
With these basic stitches, you can create a variety of patterns and designs in your knitted hat. Experiment with different combinations of knit and purl stitches to create ribbing, cables, or other textured patterns. Remember to always follow the instructions of your chosen knitting pattern and practice your stitches to achieve the desired result in your finished hat.
Adding texture with different stitch patterns
When it comes to knitting, using different stitch patterns can add depth and texture to your finished project. Whether you’re an experienced knitter looking for a new challenge or a beginner hoping to experiment, incorporating different stitch patterns into your hat design can create stunning results.
One popular stitch pattern is the seed stitch, which creates a bumpy texture by alternating knit and purl stitches within the same row. This simple yet effective technique can add subtle visual interest to your hat. Another option is the cable stitch, which involves crossing stitches over each other to create a twisted effect. This can be a more intricate stitch pattern, but the result is a beautifully textured hat that stands out.
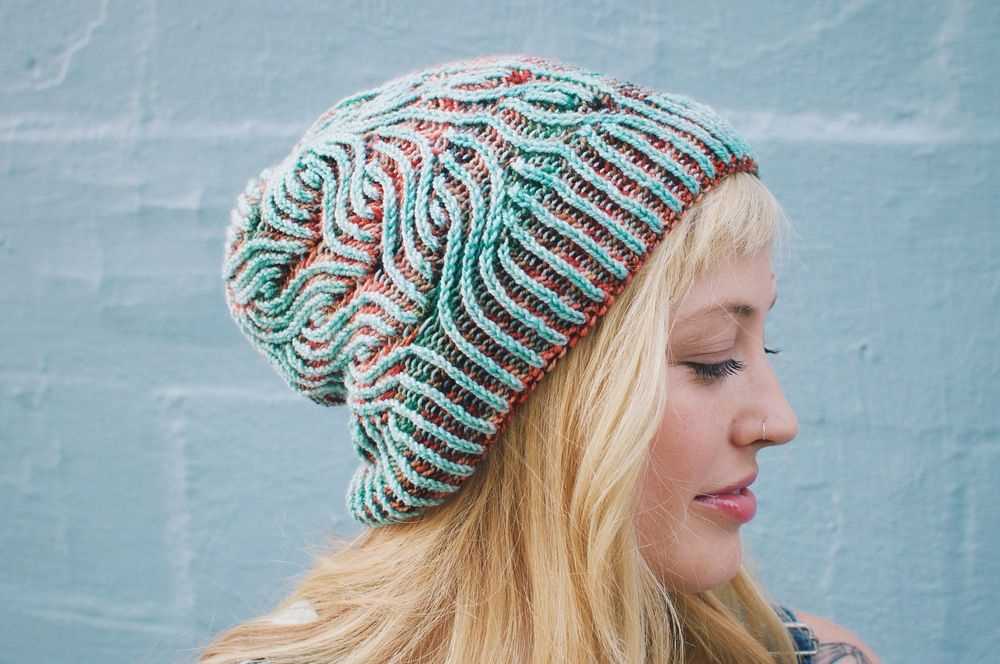
If you’re looking for a more decorative stitch pattern, consider the lace stitch. This delicate design involves yarn overs and decreases to create an open and airy fabric. This can be a great option for a lightweight and feminine hat. Alternatively, the brioche stitch can add a unique, ribbed texture to your hat. This stitch pattern involves a combination of knit and purl stitches worked in a specific way to create a distinctive look.
By incorporating different stitch patterns into your knitted hat, you can elevate your design from plain and simple to visually stunning. Experiment with different stitches and combinations to find the perfect pattern for your hat. Whether you choose a bumpy seed stitch, an intricate cable pattern, a delicate lace stitch, or a ribbed brioche design, adding texture to your project will create a finished hat that is both stylish and unique.
Creating a Ribbed Brim
In order to create a ribbed brim for your knitted hat, you will need to use a combination of knit and purl stitches. The ribbed brim provides a stretchy and snug fit for the hat, making it comfortable for the wearer.
Materials:
- Knitting needles
- Yarn
Instructions:
- Start by casting on the desired number of stitches for your hat. Make sure to choose a multiple of the ribbing pattern you want to create (e.g., if you want a 2×2 ribbing, cast on a multiple of 4 stitches).
- Begin the ribbing pattern by knitting the first stitch.
- Purl the next stitch.
- Continue alternating between knitting and purling stitches until you reach the end of the row.
- Repeat the knitting and purling pattern for each row until you have reached the desired length for the brim. This will depend on the style and fit you want for your hat.
- Once the ribbed brim is complete, you can continue knitting the rest of the hat using your preferred pattern or stitch.
- Finish off the hat by binding off all the stitches and weaving in any loose ends.
By following these steps, you will be able to create a ribbed brim for your knitted hat. This brim will not only add a stylish touch to your hat but also provide a comfortable and secure fit for the wearer. Experiment with different ribbing patterns, such as 1×1 or 2×2, to achieve the desired look for your hat.
Working with circular needles for seamless hats
When it comes to knitting hats, using circular needles can provide a seamless finish that is both comfortable and stylish. Circular needles, also known as circular knitting needles, are a versatile tool that allows you to work in the round without the need for seams. They consist of two needle tips connected by a flexible cable, and come in various lengths to accommodate different project sizes.
One of the major benefits of working with circular needles for hat knitting is that you can avoid the hassle of sewing or seaming your finished project. With circular needles, you can knit from the brim to the crown in one continuous piece, resulting in a seamless hat. This not only saves time but also creates a more polished and professional look.
When choosing circular needles for a hat project, it’s important to consider the size and length of the needles. The size of the needles should match the gauge and yarn weight specified in the pattern you are using. The length of the circular needles should be appropriate for the circumference of the hat you are knitting. For smaller hats, a shorter needle length may be more suitable, while larger hats may require longer needles.
Working with circular needles for seamless hats also allows for a more even distribution of stitches, making it easier to maintain consistent tension throughout your project. The cable between the two needle tips holds the stitches securely and prevents them from sliding off, reducing the risk of dropped stitches or unraveling.
Overall, using circular needles for hat knitting is a versatile and efficient method. It eliminates the need for seams, provides a seamless finish, and allows for more control and consistency in your knitting. Whether you’re a beginner or an experienced knitter, circular needles are a valuable tool to have in your knitting arsenal.
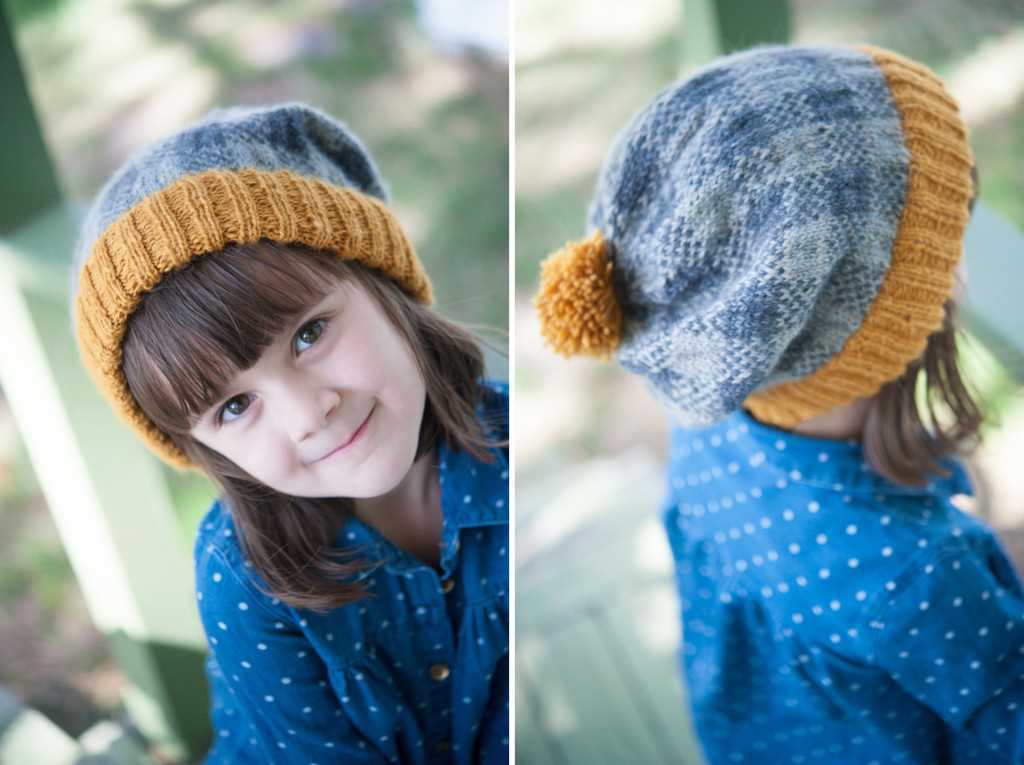
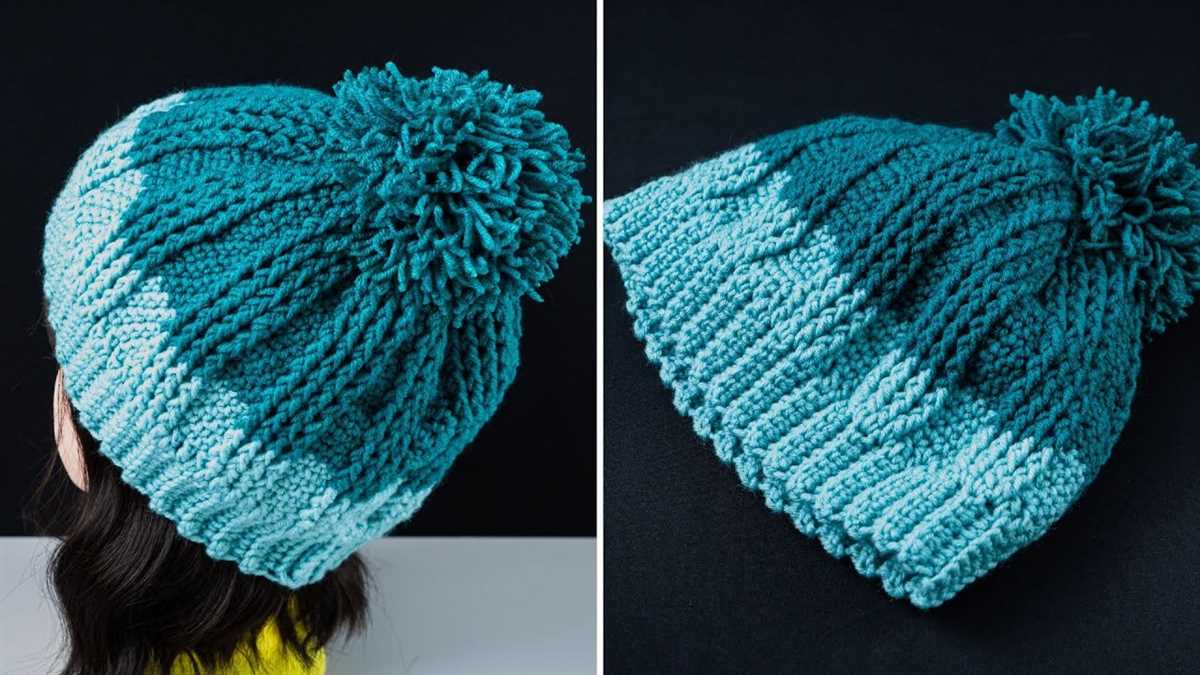
Adding a pom-pom for extra flair
When it comes to knitted hats, adding a pom-pom is a fun and stylish way to elevate the overall look. Whether you’re making a simple beanie or a more intricate pattern, a pom-pom can be the perfect finishing touch.
A pom-pom is a small ball of yarn that is attached to the top of a hat, typically made by using a pom-pom maker or by hand. It adds an element of playfulness and whimsy to your hat, making it stand out from the crowd.
There are several ways you can incorporate a pom-pom into your knitted hat. One option is to match the yarn of the pom-pom to the main color of the hat for a cohesive look. Alternatively, you can choose a contrasting color to add a pop of color and create visual interest.
If you’re feeling adventurous, you can even experiment with different sizes and shapes of pom-poms. A larger pom-pom can make a bold statement, while a smaller one adds a delicate touch. You can also try making pom-poms in various shapes, such as hearts or stars, for a unique and personalized touch.
When attaching the pom-pom to your hat, make sure to sew it securely to prevent it from coming loose. Additionally, consider the weight of the pom-pom and how it may affect the overall fit and feel of the hat.
- To attach the pom-pom, thread a needle with the same yarn used to make the pom-pom.
- Insert the needle through the center of the pom-pom and then through the top of the hat.
- Repeat this process several times, ensuring that the pom-pom is securely attached.
- Knot the yarn on the inside of the hat to secure it in place.
By adding a pom-pom to your knitted hat, you can take your creation to the next level. Whether you’re knitting for yourself or as a gift for someone else, this small addition will add an extra touch of flair and personality to your finished piece.
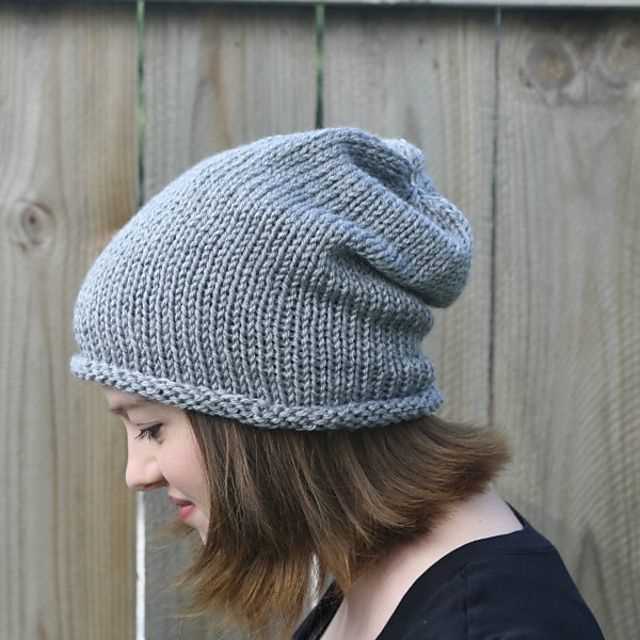
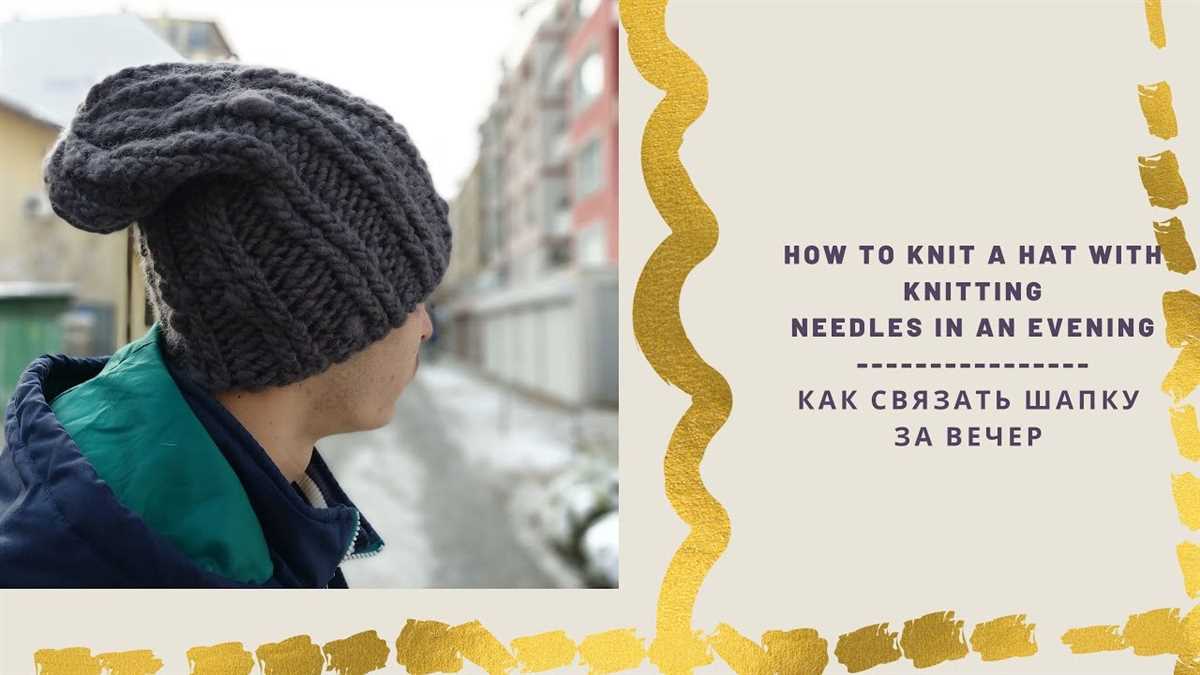
Creating a Slouchy Hat
When it comes to knitting hats, one popular style that many knitters love to create is the slouchy hat. A slouchy hat is a stylish and versatile accessory that adds a touch of casual elegance to any outfit. Whether you’re a beginner knitter or an experienced one, making a slouchy hat is a great way to challenge your skills and create a unique accessory that you can wear or give as a gift.
Before you start knitting a slouchy hat, it’s important to choose the right yarn and needle size. Generally, a slouchy hat is knit with a lightweight yarn such as DK or worsted weight, and the needle size can vary depending on the desired drape and gauge. Knitting with a larger needle size can create a looser and more slouchy effect, while using a smaller needle size will result in a tighter and more fitted hat.
One popular pattern for a slouchy hat is a simple rib stitch design. The rib stitch creates a stretchy and textured fabric that is perfect for a slouchy hat. To create the rib stitch, you can alternate between knitting and purling stitches in a specific pattern. This pattern not only adds visual interest but also enhances the elasticity of the hat, allowing it to fit comfortably on different head sizes.
Another popular style for a slouchy hat is a lace stitch design. Lace patterns add an intricate and delicate look to the hat, making it a fashionable accessory for any occasion. Knitting a lace slouchy hat requires some intermediate knitting skills, as it involves creating yarn overs and knitting two stitches together to create the lace motifs. However, with some practice and patience, you can achieve stunning results.
Once you have chosen your yarn, needle size, and stitch pattern, it’s time to start knitting your slouchy hat. Begin by casting on the required number of stitches and following the pattern instructions. Pay attention to the length and width measurements provided in the pattern to ensure that your hat will fit as desired. As you knit, periodically try on the hat to check the fit and adjust accordingly.
When you have reached the desired length, it’s time to finish off your slouchy hat. Depending on the pattern, you may need to bind off the stitches, sew the top of the hat together, or add a decorative pom-pom or tassel. Once you have completed these final steps, you can proudly wear or gift your handmade slouchy hat and enjoy the warmth and style it provides.
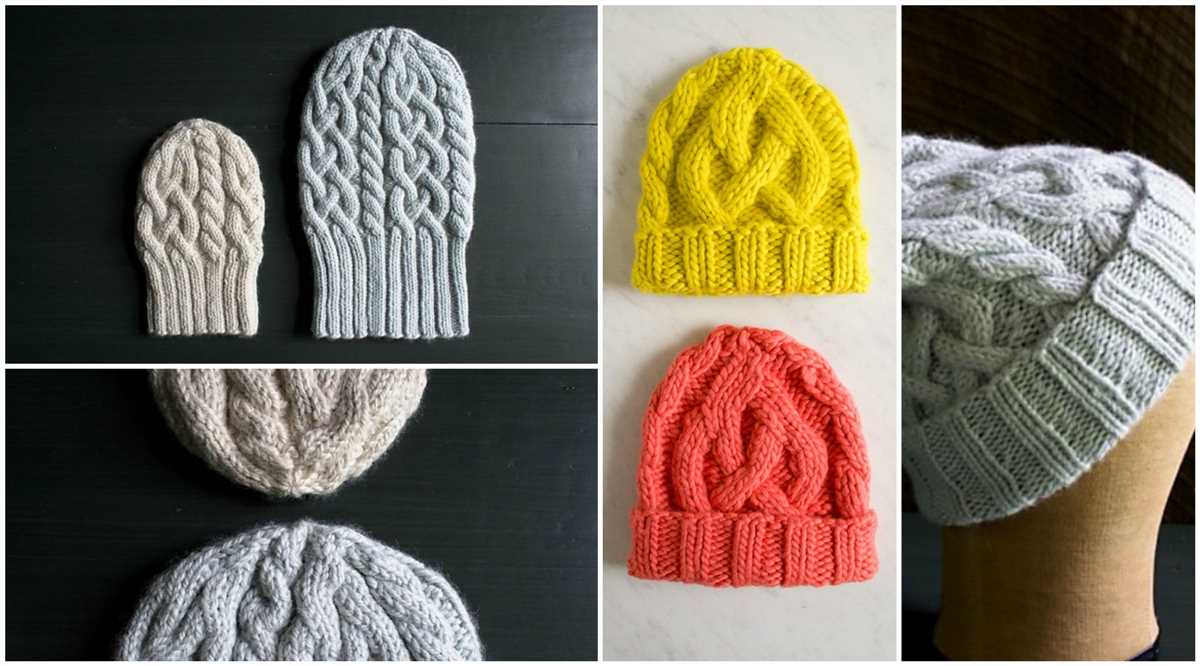
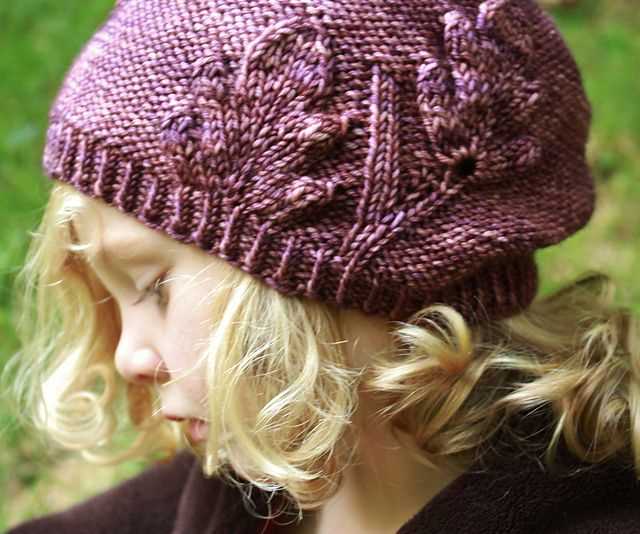
Designing a cabled hat
When it comes to designing a cabled hat, there are endless possibilities for creating unique and stylish patterns. Cables are a popular knitting technique that involves crossing stitches to create intricate designs and textures. By incorporating cables into your hat design, you can add visual interest and dimension to your project.
One approach to designing a cabled hat is to start with a basic hat pattern and then incorporate cables into specific sections. For example, you could add a cable panel on the front or sides of the hat, or create a cable pattern that runs along the brim. Experimenting with different cable patterns and placements can result in an eye-catching and one-of-a-kind design.
Choosing the right yarn for your cabled hat
When designing a cabled hat, it’s important to choose a yarn that will showcase the cable stitches and provide the desired level of warmth and comfort. A worsted weight yarn, such as wool or a wool blend, is often a good choice as it offers both warmth and stitch definition. Avoid using overly thick or bulky yarns, as they can make the cable stitches appear less defined. Additionally, selecting a yarn with a subtle sheen can enhance the beauty and texture of the cables.
Creating your own cable pattern
Creating your own cable pattern for a hat allows you to unleash your creativity and design a truly unique piece. Start by sketching out your desired cable design on graph paper, taking into consideration the number of stitches and rows needed for the pattern. Experiment with different cable crosses and twists to achieve the desired effect.
To ensure a well-fitting hat, it’s important to take into account the repeat of your cable pattern and how it will fit into the overall stitch count. Make sure to adjust the number of stitches in the cable panel to ensure it aligns properly with the rest of the hat.
Overall, designing a cabled hat opens up a world of possibilities for creativity and personalization. With some experimentation and attention to detail, you can create a hat that is as unique as you are.
Adding color with fair isle knitting
Fair Isle knitting is a technique that allows you to add multiple colors to your knitting project. It is a traditional style that originated in the Fair Isle, Scotland. The technique involves using two or more colors in each row, creating intricate and colorful patterns.
To start knitting in Fair Isle, you will need to choose your colors. The key to a successful Fair Isle project is selecting colors that complement each other and create a pleasing contrast. You can use a color wheel or consult a color theory guide to help you choose colors that work well together.
Once you have chosen your colors, you can start knitting in Fair Isle. The technique involves carrying the unused color along the wrong side of your work while working with the main color. This creates a float on the back of your work that secures the unused color until it is needed again.
In Fair Isle knitting, it is important to keep your tension even to create a consistent fabric. You should also avoid carrying the unused color for too many stitches to prevent long floats that could catch on fingers or snag on objects. It is recommended to twist the colors every few stitches to create a neat and snug fabric.
Fair Isle knitting allows you to create beautiful and intricate patterns on your knitted hats. You can experiment with different color combinations and patterns to create unique designs. Whether you prefer traditional Fair Isle motifs or want to incorporate modern elements, the technique offers endless possibilities for adding color to your knitting projects.
Finishing touches: blocking and weaving in ends
Once you have completed knitting your hat using the provided pattern, it is important to give it the finishing touches to make it look polished and professional. Two essential steps in this process are blocking and weaving in ends.
Blocking: Blocking is a technique used to shape and size your knitted item. It involves manipulating the fibers while wet and then allowing them to dry in the desired shape. To block your knitted hat, you will need to soak it in lukewarm water with a gentle detergent. Gently squeeze out the excess water, making sure not to wring or twist the hat. Lay a towel flat and place the hat on it, reshaping it to the desired size and proportions. Pin the hat in place using rustproof pins. Leave it to dry completely before removing the pins. Blocking not only ensures your hat fits well but also helps to enhance the stitch definition and overall appearance.
Weaving in ends: Weaving in ends is the process of securing the loose yarn ends from your knitting. It is essential to prevent unravelling and to give your hat a clean and neat finish. Start by threading the loose end onto a tapestry needle. On the wrong side of the knitted fabric, weave the needle through several stitches, following the natural path of the yarn. Repeat this process with the other end, weaving it in the opposite direction. Make sure to take care not to pull the fabric too tight or leave loose ends. Once both ends are securely woven in, trim any excess yarn close to the fabric, ensuring it is hidden and won’t poke out.
By taking the time to block your knitted hat and weave in ends properly, you can elevate the final look and quality of your project. These finishing touches provide your hat with a professional finish and ensure it will last and look great for years to come.
Variations for different head sizes
To accommodate different head sizes, the knitted hat pattern comes with variations for small, medium, large, and extra-large sizes. This ensures that everyone can find the perfect fit.
Here is a breakdown of the sizes and their corresponding measurements:
| Size | Head Circumference (inches) |
|---|---|
| Small | 20-21 |
| Medium | 22-23 |
| Large | 24-25 |
| Extra-Large | 26-27 |
Note: These measurements are just a guideline. It’s always best to measure the recipient’s head size for a more accurate fit.
The pattern includes instructions on how to adjust the hat size by either adding or subtracting stitches. This allows you to easily customize the hat to fit any head size.
Whether you have a small child or a big-headed adult in mind, the variations offered in this knitted hat pattern ensure that you can create a hat that fits perfectly. Happy knitting!