
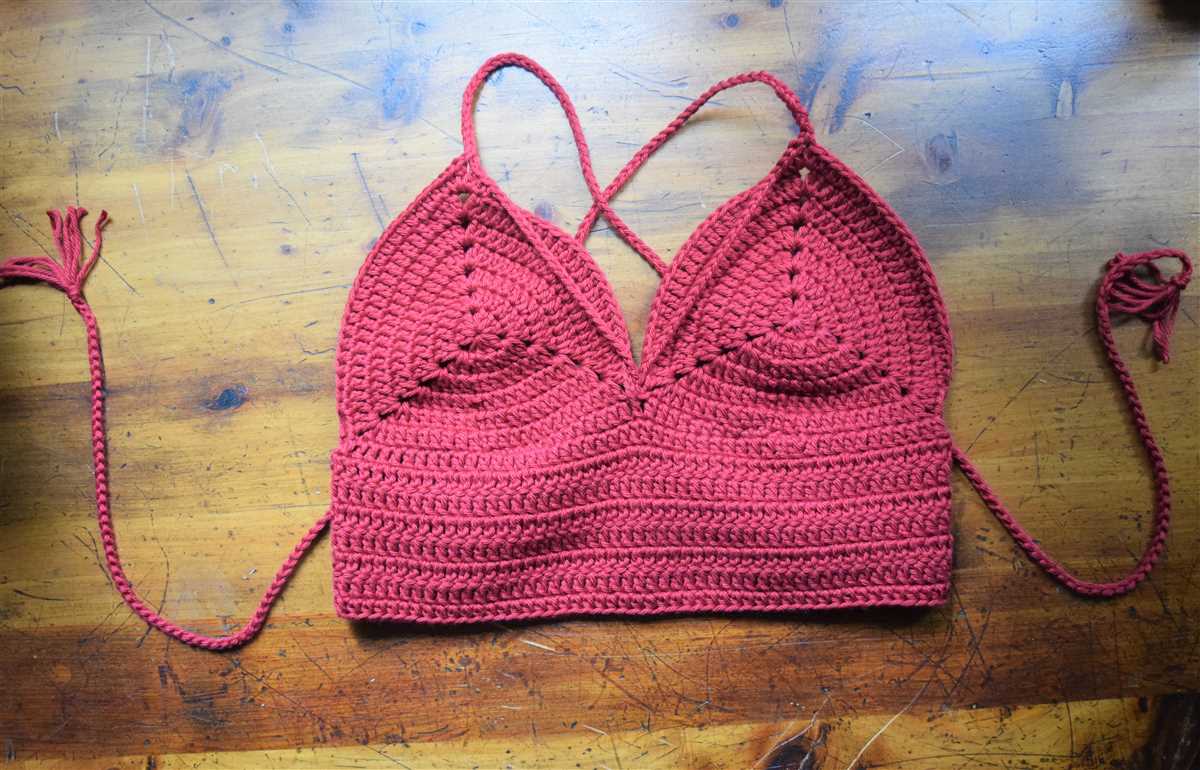
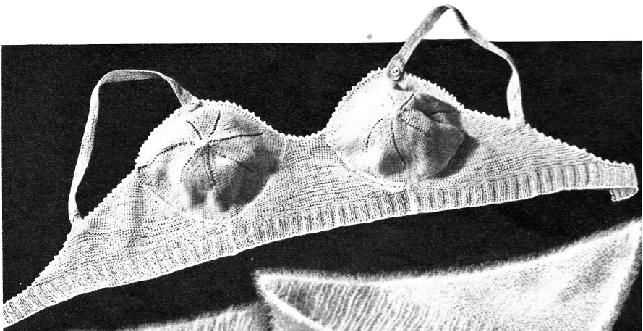
Looking for a new knitting project that is both fashionable and practical? Why not try knitting a bralette? Bralettes have become a popular item in recent years, offering comfort and style without the underwire of a traditional bra. With a range of knitting patterns available, you can create a bralette that suits your style and body perfectly.
Knitting a bralette allows you to customize the fit and design to your liking. You can choose the type of yarn, the color, and the stitch pattern to create a bralette that reflects your personal style. Plus, knitting allows for a snug yet stretchy fabric, ensuring a comfortable fit without sacrificing support.
Knitting a bralette is also a fun way to explore different knitting techniques and stitches. From simple garter stitch to intricate lace patterns, the options are endless. You can challenge yourself by trying new techniques, such as ribbing or cabling, to give your bralette an extra special touch.
Not only will knitting a bralette give you a unique and stylish garment, but it also allows you to enjoy the process of creating something with your own hands. The sense of accomplishment that comes from finishing a knitting project is unmatched, and knitting a bralette is no exception. So grab your knitting needles and start crafting your very own bralette today!
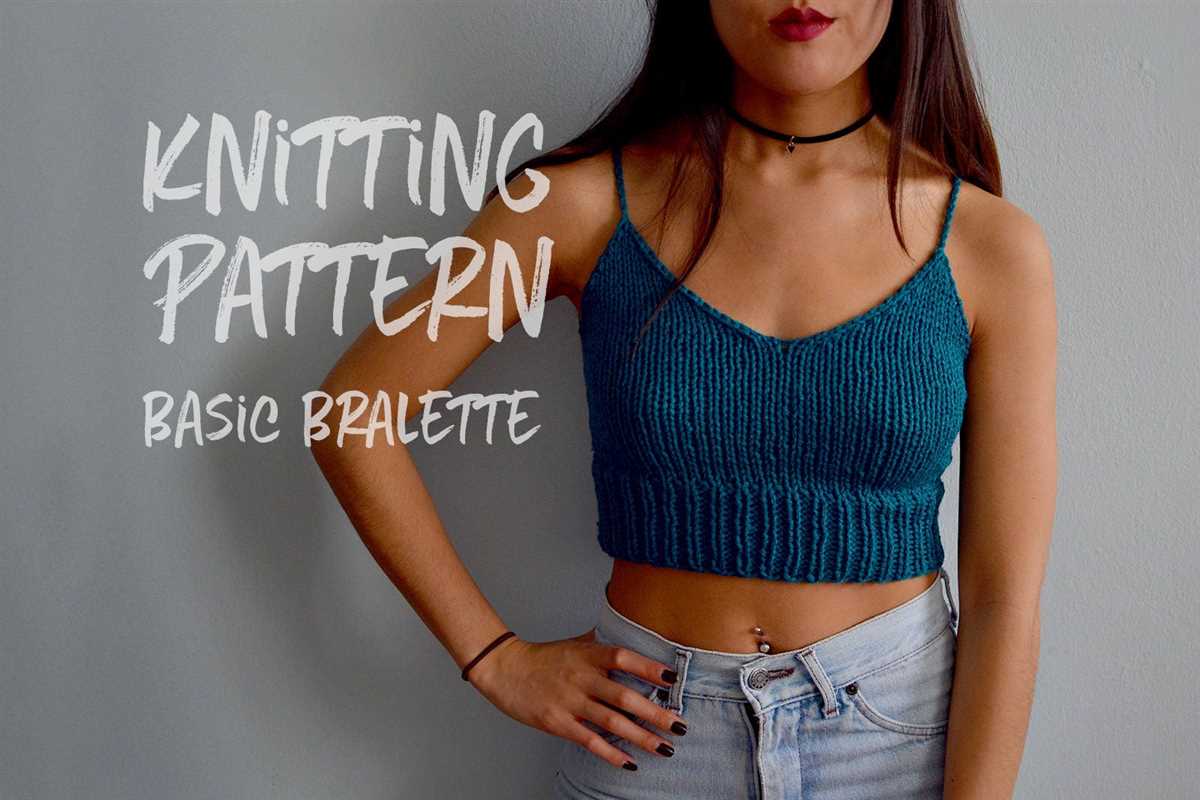
Knitting Pattern Bralette
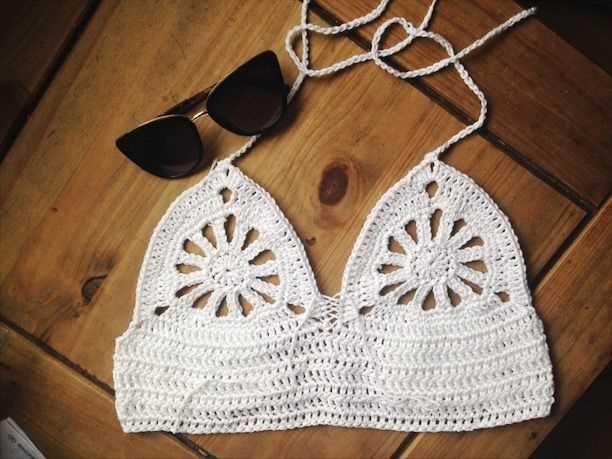
A bralette is a comfortable and versatile alternative to a bra that can be worn on its own or as a layering piece. With its soft and stretchy fabric, it provides gentle support and is perfect for lounging or casual wear. If you enjoy knitting and want to create your own bralette, here is a knitting pattern that you can follow:
Materials Needed:
- Size 5 (3.75 mm) knitting needles
- DK weight yarn in a color of your choice
- Elastic band for the underbust measurement
- Tapestry needle
- Scissors
Pattern:
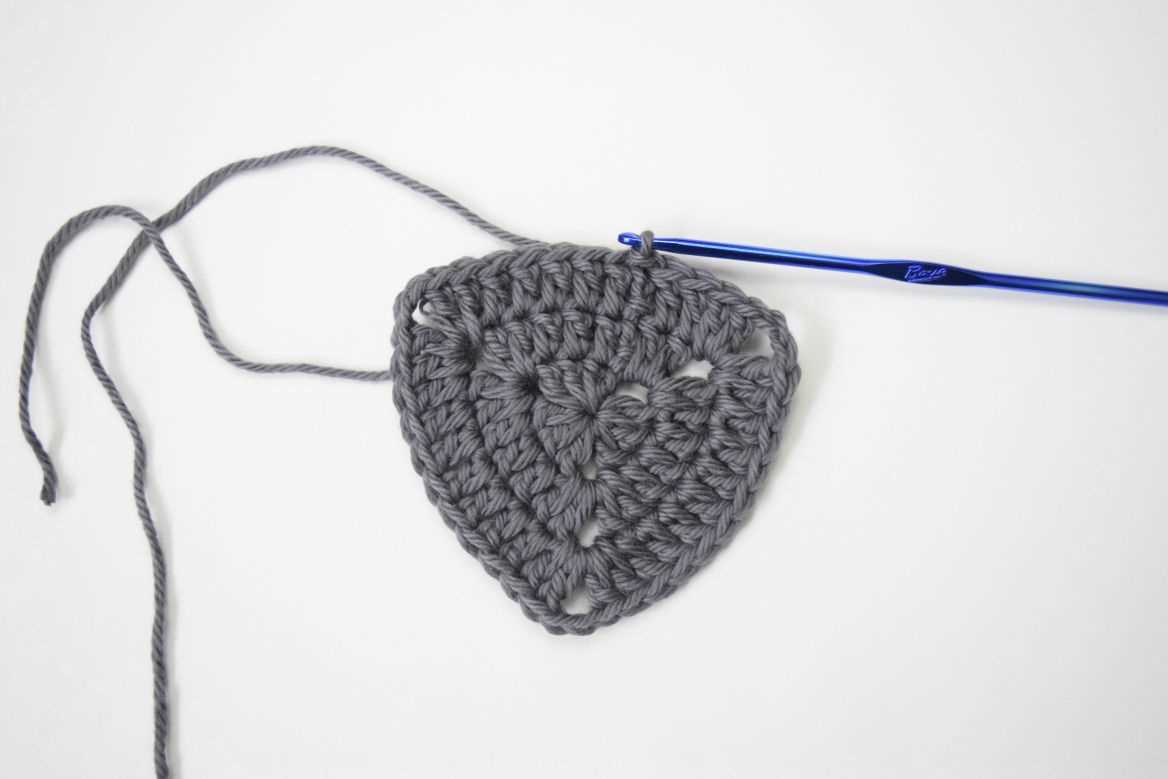
- Cast on 80 stitches using the long-tail cast-on method.
- Work in a 2×2 rib stitch pattern (knit 2 stitches, purl 2 stitches) for 1 inch.
- Switch to stockinette stitch (knit one row, purl one row) and continue working in stockinette stitch until the piece measures 3 inches from the cast-on edge.
- Decrease row: knit 8 stitches, k2tog (knit two stitches together), repeat until the end of the row.
- Next row: purl all stitches.
- Repeat these two rows until there are 20 stitches remaining.
- Bind off all stitches.
- Using the tapestry needle, sew the sides of the bralette together.
- Choose the elastic band that matches your underbust measurement. Sew the elastic band to the bottom edge of the bralette, ensuring it is snug but not too tight.
- Weave in any loose ends and trim off excess yarn.
By following this knitting pattern, you can create your own comfortable and stylish bralette that fits perfectly. Experiment with different yarn colors and embellishments to personalize your bralette and make it truly unique. Happy knitting!
What is a Bralette?
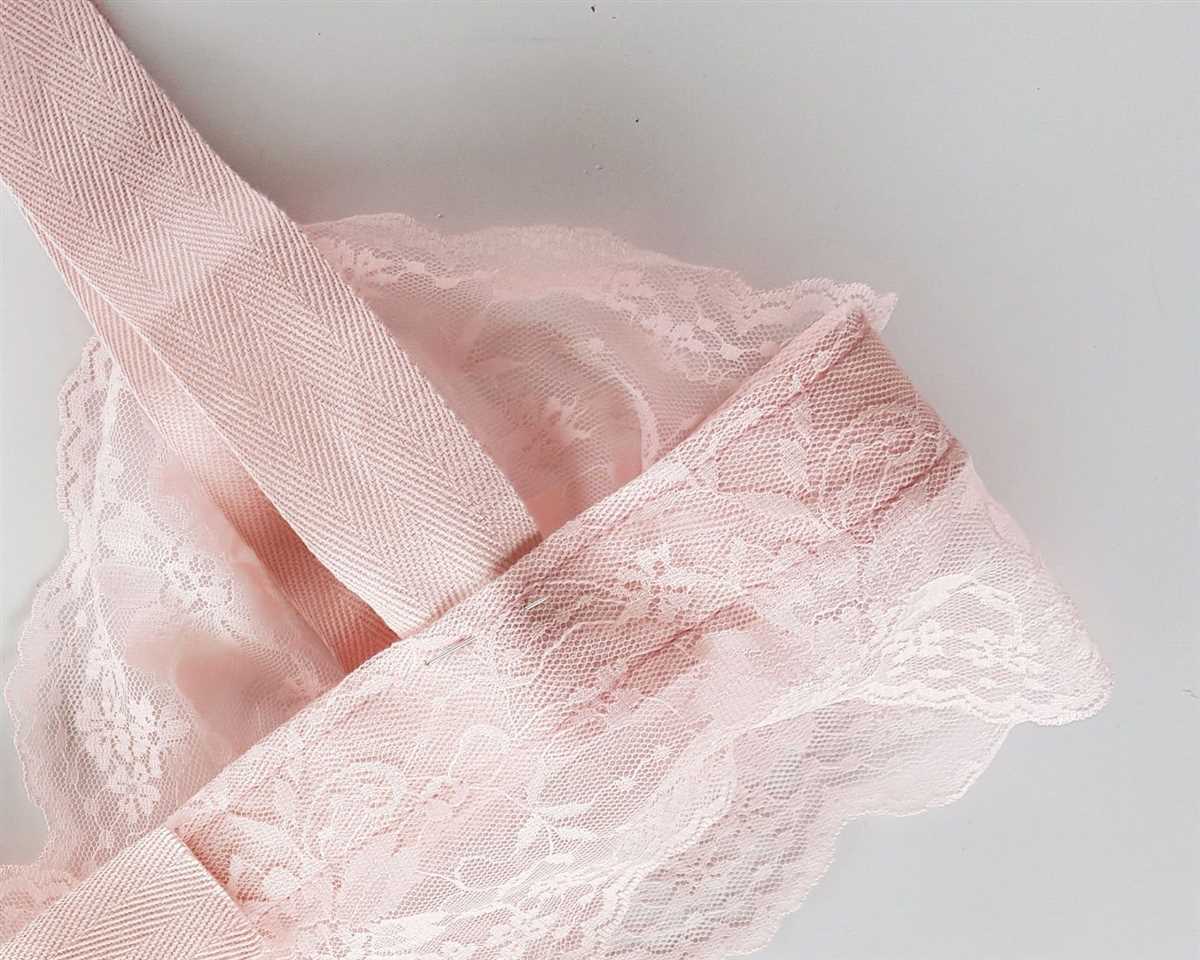
A bralette is a type of bra that is typically unlined, unpadded, and wire-free. It is designed to provide minimal support and coverage, making it a comfortable and stylish alternative to traditional bras. Bralettes are often made of soft, stretchy fabric that conforms to the shape of the breasts, providing a natural and relaxed fit.
Unlike traditional bras that are primarily functional and designed to lift and shape the breasts, bralettes are more focused on fashion and comfort. They are typically worn as loungewear or as part of a trendy outfit, peeking out from underneath low-cut tops or sheer fabrics. Bralettes come in a variety of styles, including cropped, longline, strappy, and lace, allowing for a range of looks and personal preferences.
- Unlined and Unpadded: Bralettes are typically made without the added padding or lining found in traditional bras. This allows for a more natural look and feel, making them especially suitable for smaller cup sizes.
- Wire-Free: Unlike underwire bras that have a rigid wire underneath the cups for support, bralettes do not have any wires. This eliminates any potential discomfort or digging into the skin, making bralettes a popular choice for those seeking a more relaxed and comfortable fit.
- Minimal Support: Bralettes are designed to provide minimal support compared to traditional bras. They are not intended for high-impact activities or for those with larger bust sizes. However, they can offer enough support for everyday wear and lighter activities.
- Fashionable and Versatile: Bralettes have gained popularity in recent years due to their fashionable and versatile design. They can be worn as standalone tops or layered underneath clothing, adding a touch of style and femininity to any outfit.
Overall, a bralette is a comfortable and trendy alternative to traditional bras. Its lightweight and unrestrictive design make it an appealing choice for those looking for a more natural and relaxed undergarment option.
Why Knit Your Own Bralette?
If you’re a fan of knitted clothing and enjoy customizing your own wardrobe, knitting your own bralette is a great project to take on. Not only does it allow you to create a unique and personalized piece, but it also offers several other benefits.
Perfect Fit: One of the main advantages of knitting your own bralette is the ability to achieve a perfect fit. Store-bought bralettes often come in limited sizes and may not cater to your specific body shape. By knitting your own, you can customize the size and adjust the pattern to ensure a comfortable and flattering fit.
Unique Design: Another advantage of knitting your own bralette is the opportunity to create a one-of-a-kind design. You can choose from a wide range of knitting patterns and experiment with different stitches, colors, and embellishments to match your personal style. Whether you prefer a simple and minimalist design or a more intricate and decorative bralette, the possibilities are endless.
Quality Materials: When you knit your own bralette, you have control over the materials used. You can select high-quality yarns that feel soft and luxurious against your skin, ensuring optimal comfort and durability. Additionally, you can choose yarns with specific properties, such as moisture-wicking or temperature-regulating, to enhance the functionality of your bralette.
Sustainable Fashion: Knitting your own bralette is also a sustainable choice. By using your own skills and materials, you reduce your reliance on mass-produced, fast-fashion items that contribute to environmental waste. Knitting allows you to create timeless and long-lasting pieces that can be worn for years to come, reducing the need for frequent replacements.
Therapeutic Hobby: Lastly, knitting your own bralette can be a therapeutic and enjoyable hobby. Knitting has been shown to have a calming effect and can serve as a form of mindfulness practice. It allows you to slow down, focus on the present moment, and engage in a creative activity that brings joy and satisfaction.
Getting Started: Supplies Needed
Before you begin knitting your bralette, it’s important to gather all the necessary supplies. Having everything prepared and within reach will ensure a smooth and enjoyable knitting experience. Here is a list of the essential supplies you will need:
- Yarn: Choose a soft and comfortable yarn that is suitable for delicate garments. Opt for a lightweight yarn in a color of your choice.
- Knitting Needles: Select the appropriate needle size based on the recommended gauge in the pattern. Circular or double-pointed needles may be required depending on the pattern instructions.
- Stitch Markers: These small rings or clips will help you keep track of your stitches and pattern repeats. They can be essential in complex lace or cable designs.
- Tape Measure: An accurate tape measure will come in handy when checking your gauge or measuring your body for size references.
- Scissors: You will need a pair of sharp scissors to cut the yarn at the end of your project or when making any necessary adjustments.
- Tapestry Needle: This needle with a large eye is used for weaving in loose ends and sewing up any seams or finishing touches.
- Pattern: Make sure to have a printed or digital copy of the knitting pattern for your bralette. This will be your guide throughout the project.
Once you have gathered all these supplies, you will be ready to start knitting your bralette. Take your time to familiarize yourself with the pattern instructions and any specific techniques that may be required. Happy knitting!
Choosing the Right Yarn
When it comes to knitting pattern bralettes, choosing the right yarn can make all the difference in the final product. The yarn you select will not only affect the look and feel of the bralette, but also its durability, stretch, and overall fit.
Fiber Content: The first thing to consider when choosing yarn for a bralette is the fiber content. Opt for natural fibers like cotton or bamboo, as they are breathable and comfortable to wear against the skin. These fibers also have good moisture-wicking properties, making them ideal for undergarments. Synthetic fibers like acrylic or nylon can also be used, but may not provide the same level of comfort.
Weight: The weight of the yarn will also impact the final result. For a bralette, a lighter weight yarn is typically preferred to create a delicate and feminine look. Lace weight or fingering weight yarns are popular choices, as they provide a light and airy feel. However, if you prefer a more substantial bralette, you can opt for a heavier weight yarn like sport or DK weight.
Stretch: Another important factor to consider is the stretch of the yarn. A bralette needs to have some stretch to ensure a proper fit and ease of movement. Look for yarns with a good amount of elasticity, such as yarns that contain spandex or have a high percentage of wool. This will help the bralette retain its shape and provide a comfortable fit.
Color and Texture: Lastly, consider the color and texture of the yarn. The color should complement your skin tone and personal style. Texture can add visual interest to the bralette, so consider yarns with interesting textures like boucle or slub yarns. However, keep in mind that textured yarns may not be as smooth against the skin.
By carefully considering these factors and selecting the right yarn for your knitting pattern bralette, you can ensure that the final product is both comfortable and stylish. Take the time to explore different options and experiment with different yarns to find the perfect match for your bralette project.
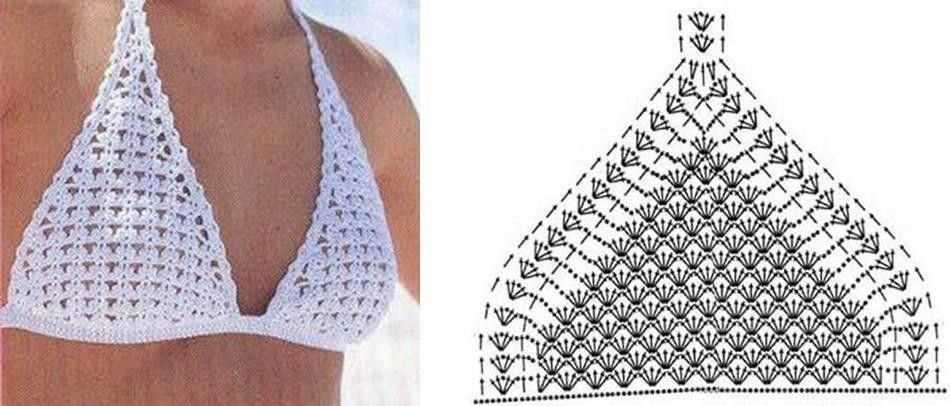
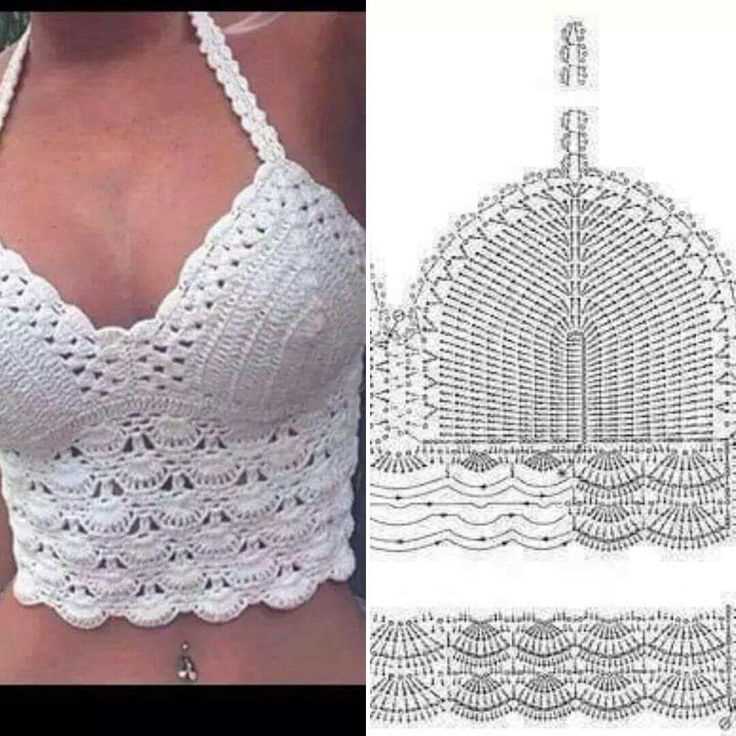
Picking the Perfect Pattern
If you’re in the market for a new knitting project, a knitted bralette may be just what you’re looking for. Bralettes are stylish, comfortable, and fun to make. But with so many knitting patterns to choose from, how do you pick the perfect one?
Consider your skill level: When choosing a knitting pattern for a bralette, it’s essential to consider your skill level. If you’re a beginner, look for patterns that are labeled as “easy” or “beginner-friendly.” These patterns will typically have simpler stitches and construction techniques, making them more accessible for those just starting.
Choose the right style: Bralettes come in various styles, including crop tops, bra tops, and sports bras. Consider your personal style and how you plan to wear the bralette when choosing a pattern. If you’re looking for something versatile that can be worn as both an undergarment and a standalone top, a crop top style may be a good choice. If you’re more into sports or athletic wear, a bra top or sports bra style may be more suitable.
Look for customization options: Some knitting patterns for bralettes may offer customization options, allowing you to adjust the fit or add embellishments. Look for patterns that include instructions on how to customize the bralette to fit your body shape and size. This way, you can create a bralette that not only looks great but also fits you perfectly.
Consider the yarn: The type of yarn you choose can significantly impact the final look and feel of your bralette. Consider the yarn weight and fiber content recommended in the pattern. For a softer and more comfortable bralette, opt for a yarn made from natural fibers like cotton or bamboo. If you prefer a more structured bralette, a yarn with some synthetic fibers, like nylon or polyester, may be a better choice.
Read reviews and feedback: Before diving into a knitting project, it’s always a good idea to read reviews or feedback from others who have made the same pattern. Look for patterns with positive reviews, detailed explanations, and clear instructions. This way, you can ensure that you’re choosing a pattern that is well-written and easy to follow.
Take your time: Picking the perfect knitting pattern for a bralette requires patience and time. Don’t rush the decision-making process. Take your time to explore different patterns, read reviews, and consider all the factors mentioned above. With a little bit of research and careful consideration, you’ll find the perfect bralette pattern that you’ll enjoy knitting and be proud to wear.
Understanding Knitting Gauge
When it comes to knitting, gauge is an important factor that determines the size and fit of your finished project. It refers to the number of stitches and rows per inch in your knitting. Understanding and achieving the correct gauge is crucial in creating a garment or accessory that matches the intended measurements.
What is knitting gauge?
Knitting gauge is the measure of how many stitches and rows are produced in a given area of knitting. It is typically measured over a 4-inch square, using a specific needle size and yarn. The gauge is influenced by several factors, such as yarn weight, needle size, and individual tension. A tighter tension will result in fewer stitches and rows per inch, while a looser tension will produce more stitches and rows per inch.
Why is knitting gauge important?
Knitting gauge is important because it helps you achieve the desired size and fit of your knitted item. If your gauge is too tight, your finished project will be smaller than expected. Conversely, if your gauge is too loose, your finished project will be larger. This can significantly affect the fit and proportions, especially for garments.
How to measure knitting gauge?
To measure knitting gauge, you will need a ruler or a gauge swatch tool. Begin by knitting a swatch using the specified yarn and needle size. Make sure your swatch is at least 4 inches square. Lay your swatch on a flat surface and place the gauge tool over it. Count the number of stitches and rows within the designated area of the tool. This will give you an accurate measurement of your gauge.
Tips for achieving the correct knitting gauge:
- Use the recommended yarn and needle size mentioned in the knitting pattern.
- Swatch before starting your project to ensure that your gauge matches the pattern.
- Adjust your needle size if necessary to achieve the correct gauge.
- Be mindful of your tension while knitting to ensure consistent stitch size.
By understanding and mastering knitting gauge, you can create beautiful knitted items that fit perfectly and showcase your skills as a knitter.
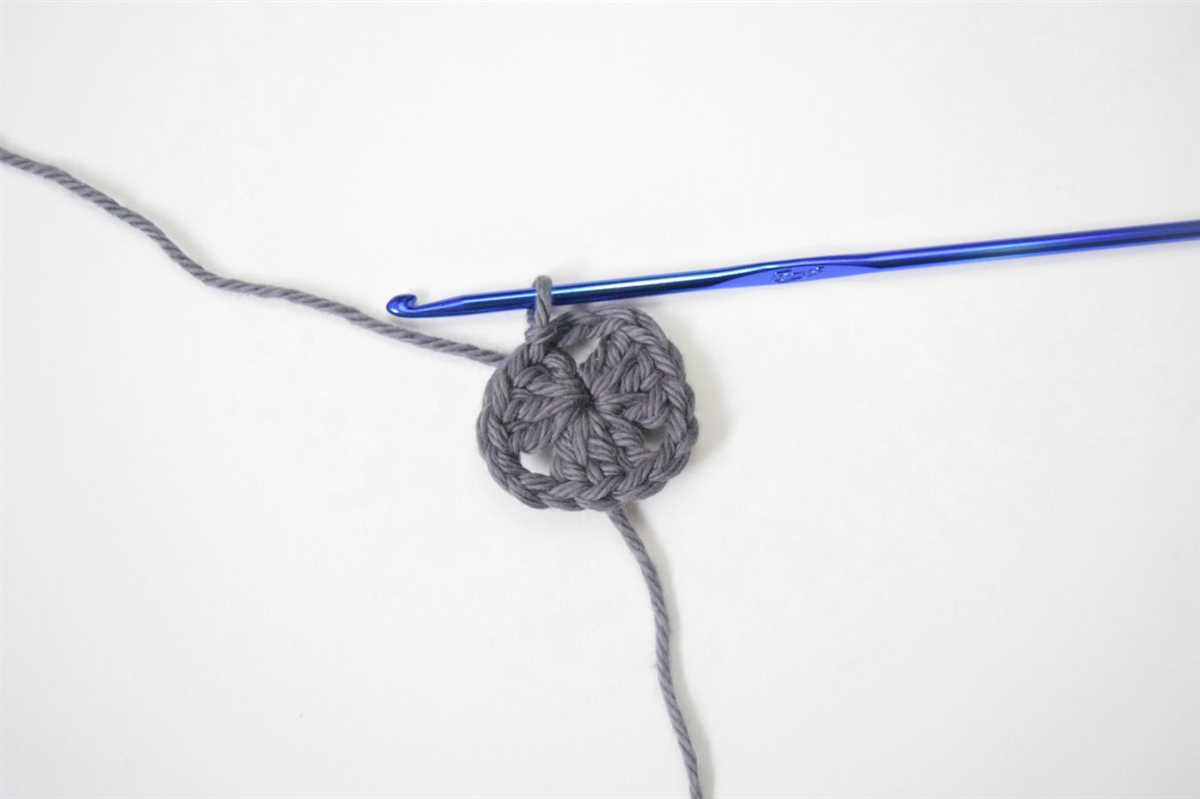
Casting On: Starting Your Bralette

When beginning your knitting project for a bralette, the first step is to cast on your stitches. This creates the foundation for your bralette and determines its size. There are various methods for casting on, but we will be using the long-tail cast-on method for this pattern.
To start, you will need your chosen yarn and a pair of knitting needles in the appropriate size for your gauge. The long-tail cast-on method requires you to estimate the amount of yarn needed for your desired number of stitches. Measure out a length of yarn approximately four times the width of your final piece, and make a slipknot at this point.
With the slipknot on your right-hand needle, hold both needles in your right hand and let the slipknot hang down. Insert the tip of your left-hand needle into the loop of the slipknot and hold it in place with your thumb. Use your right hand to bring the yarn over your left thumb and then under the left-hand needle, creating a loop of yarn around the needle.
Slide the tip of your right-hand needle through the loop on your left thumb, from front to back. Use your right thumb to guide the yarn behind the right needle and back over to the front, creating another loop. Transfer this loop onto your left-hand needle, pulling it snugly to create your first stitch.
Continue this process, inserting your right-hand needle through the loop on your left thumb, wrapping the yarn around, and transferring the loop onto your left-hand needle. Repeat until you have cast on the desired number of stitches for your bralette. Remember to keep your tension even as you work, ensuring that the stitches are not too loose or too tight.
Basic Knitting Stitches for Bralettes
If you’re interested in knitting your own bralette, it’s important to familiarize yourself with some basic knitting stitches. These stitches will form the foundation of your bralette and determine its overall construction and design. Here are a few key stitches to get you started:
1. Stockinette Stitch: The stockinette stitch is a classic knitting stitch that creates a smooth and even fabric. It is formed by knitting one row and purling the next row, creating a pattern of alternating knit and purl stitches. This stitch is commonly used for bralettes as it produces a soft and stretchy fabric that molds to the body.
2. Ribbing: Ribbing is often used at the bottom band and the edges of the bralette to add texture and elasticity. It is created by alternating knit and purl stitches in the same row. Common ribbing patterns include 1×1 ribbing (alternating one knit stitch and one purl stitch) and 2×2 ribbing (alternating two knit stitches and two purl stitches).
3. Lace Stitch: Lace stitches are commonly used to add delicate and intricate patterns to bralettes. There are numerous lace stitch patterns to choose from, such as eyelet stitches, chevron stitches, and leaf stitches. These stitches create an open and airy fabric, perfect for achieving a romantic and feminine look.
4. Garter Stitch: The garter stitch is created by knitting every row. It produces a bumpy and textured fabric that is great for adding dimension to your bralette. Garter stitch can be used for the entire bralette or as an accent in specific sections.
5. Seed Stitch: The seed stitch is formed by alternating knit and purl stitches within the same row. It creates a textured and nubby fabric that is visually appealing and adds interest to your bralette. Seed stitch can be used as an all-over pattern or as a border or trim detail.
By mastering these basic knitting stitches, you’ll have the skills needed to create a unique and stylish bralette that’s perfectly tailored to your preferences. Experiment with different stitch combinations and patterns to create a bralette that reflects your personal style and fits you beautifully.
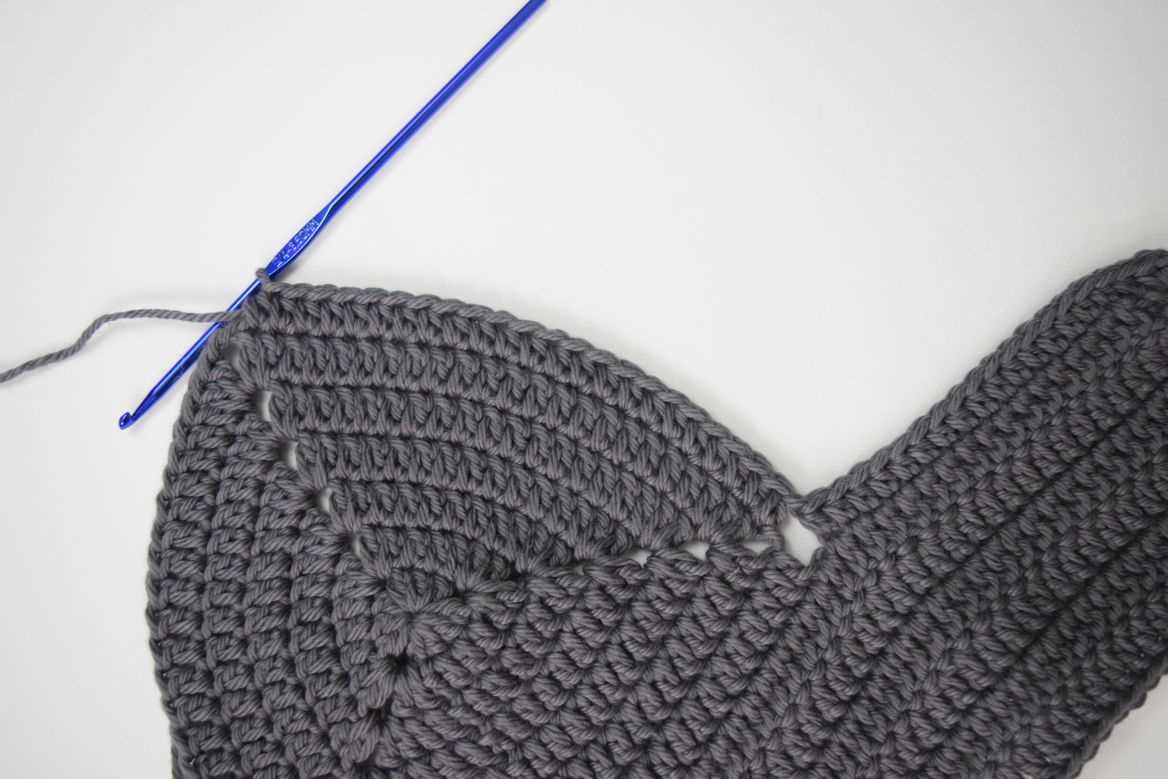
Shaping and Increases
When knitting a bralette, shaping and increases are crucial for achieving a comfortable and flattering fit. Here are a few key techniques to consider:
Decreases:
Decreases are used to eliminate stitches and create shaping in the fabric. The most common decrease is the knit-two-together (k2tog) decrease, where you knit two stitches together as one. This decrease is often used at the sides of the bralette to create a tapered effect and provide a better fit around the body.
Another commonly used decrease is the slip-slip-knit (ssk) decrease, where you slip two stitches individually as if to knit, then insert the left needle into the front loops of those slipped stitches and knit them together. This decrease creates a left-leaning effect and is often used in shaping the neckline or armholes of the bralette.
Increases:
Increases are used to add stitches and create shaping in the fabric. One common increase is the yarn-over (yo) increase, where you simply wrap the yarn around the right-hand needle before knitting the next stitch. This creates a small hole in the fabric, which can be used for decorative purposes or to create an eyelet pattern.
Another commonly used increase is the make-one (M1) increase, where you create a new stitch by picking up the horizontal bar between stitches and knitting into it. This increase is often used to add stitches in the middle of a row or to shape the bust area of the bralette for a better fit.
By utilizing decreases and increases strategically throughout the knitting pattern, you can shape your bralette to fit your body perfectly. Experiment with different techniques and placements to achieve the desired look and feel.
Finishing Touches: Bind Off and Weaving in Ends
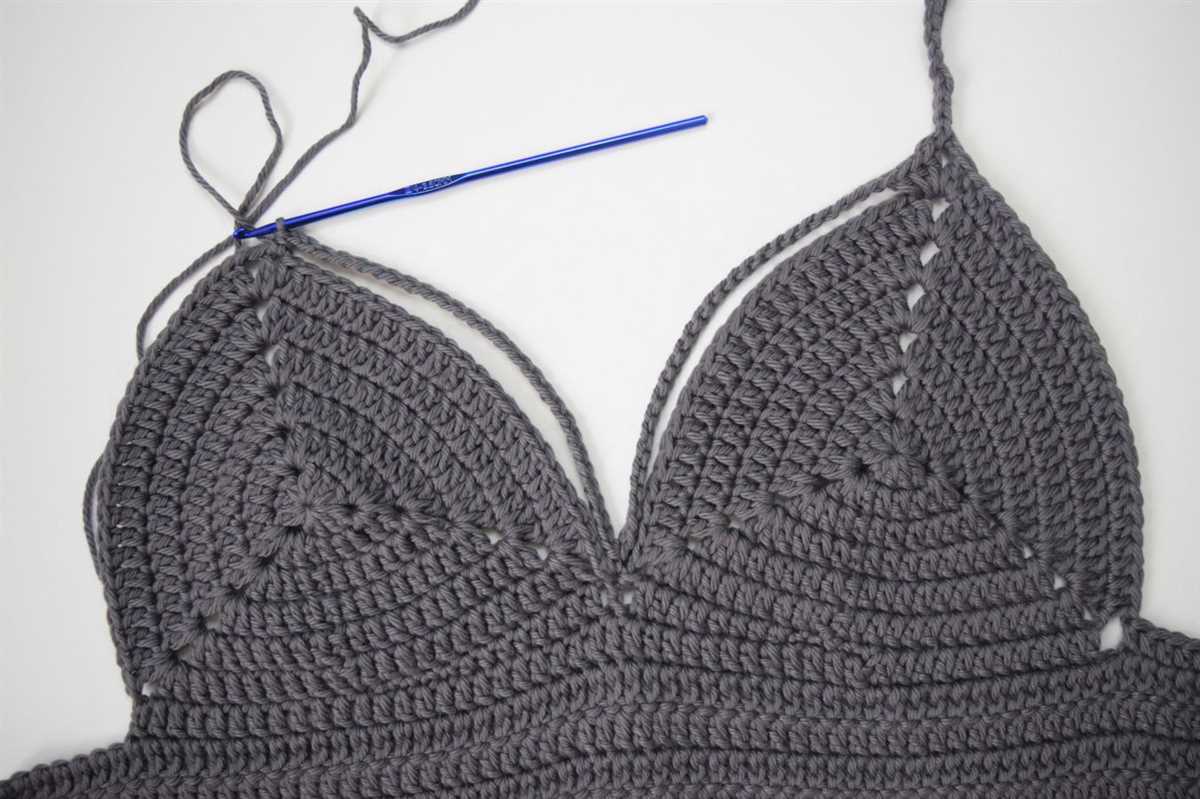
Once you have completed knitting your bralette following the pattern instructions, it’s time to give it the finishing touches by binding off and weaving in the ends. The bind off technique is used to secure the stitches and create a neat edge for your garment.
To bind off, start by knitting the first two stitches as usual. Then, using your left-hand needle, lift the first stitch over the second stitch and off the right-hand needle. Repeat this process for the remaining stitches until you have one stitch left on your right-hand needle. Cut the yarn, leaving a tail of about 6 inches, and pull it through the last stitch to secure it.
Next, it’s time to weave in the ends to ensure that your bralette doesn’t unravel. Thread the tail of yarn onto a tapestry needle and insert it into the wrong side of the fabric, following the direction of the stitches. Weave the needle in and out of the stitches for a few inches, making sure to keep the yarn hidden and secure. Trim any excess yarn once you are satisfied with the weaving.
An alternative method for achieving a clean edge is to use a stretchy bind off technique, such as the tubular bind off or the elastic bind off. These techniques provide extra stretch and flexibility to the edge of your bralette, which is especially important if it needs to accommodate different body shapes and sizes. Consult your knitting pattern or search for specific instructions on how to perform these bind off techniques.
By binding off and weaving in the ends, you are adding the final touches to your knitted bralette, ensuring that it is both secure and aesthetically pleasing. Take your time to carefully execute these steps, as they contribute to the overall quality and durability of your finished garment.
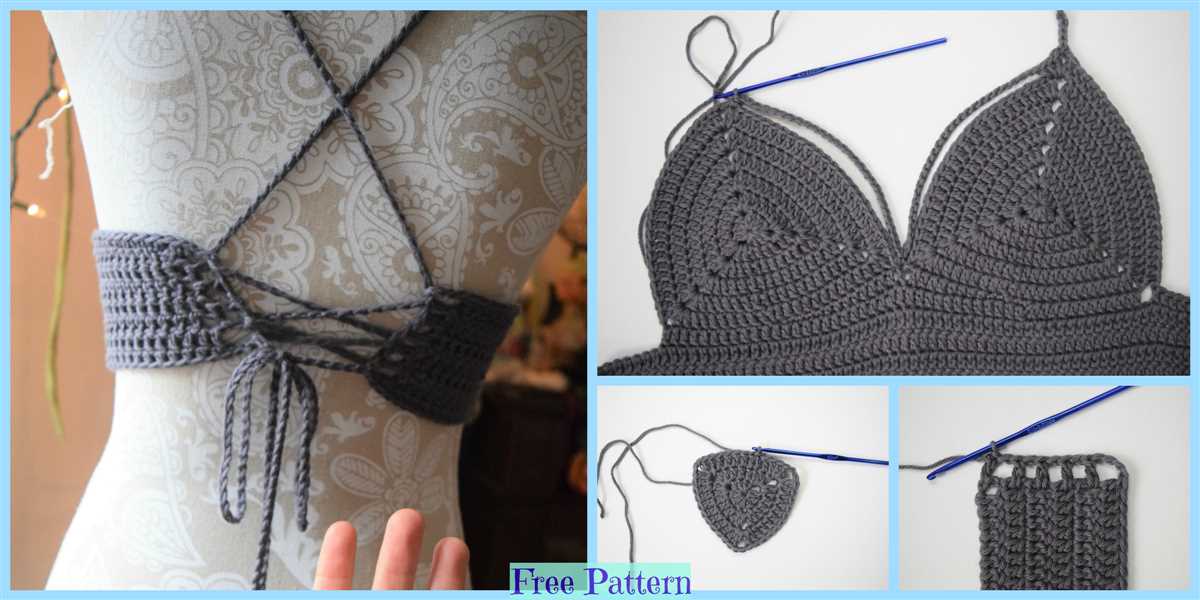
Adding Adjustable Straps
One of the key features of a bralette is its adjustable straps, which allow for a customized fit. Adding adjustable straps to your knitting pattern bralette is a relatively simple process that can greatly enhance the comfort and usability of the garment.
To add adjustable straps, you will need to incorporate the necessary components into your knitting pattern. This typically involves knitting a separate strap piece and attaching it to the body of the bralette. The strap can then be threaded through a set of adjustable sliders and buckles, which will allow the wearer to easily adjust the length of the straps.
When knitting the strap piece, it is important to consider both the desired length and width of the straps. Longer straps will provide more flexibility in terms of fit, while wider straps can provide additional support and distribute the weight more evenly. It is also important to choose a sturdy yarn that will be able to withstand the tension and adjusting of the straps.
Once the strap piece is complete, you can attach it to the body of the bralette using a simple sewing technique. It is important to sew the straps securely to ensure that they will not come undone during wear. Additionally, you may choose to reinforce the attachment points with a few extra stitches for added durability.
Overall, adding adjustable straps to your knitting pattern bralette can greatly enhance the functionality and fit of the garment. By following these steps, you can create a bralette that is both stylish and comfortable, allowing the wearer to customize the fit to their liking.
Styling Your Knitted Bralette
Once you’ve finished knitting your beautiful bralette, it’s time to style and wear it with confidence. Here are some tips and ideas to help you make the most of your knitted creation:
1. Layer it: Your bralette doesn’t have to be worn as a standalone piece. Layer it with other garments like high-waisted skirts, jeans, or shorts. You can also pair it with a flowing kimono or cardigan for a bohemian look.
2. Play with textures: Experiment with different textures to create contrast. Combine your knitted bralette with a silky or lacey skirt, or wear it under a sheer blouse for a touch of femininity.
3. Try different color schemes: Have fun with colors and choose a palette that complements your skin tone and personal style. Consider creating a monochromatic look with a matching skirt or pants, or opt for bold contrasting colors for a more vibrant outfit.
4. Accessorize: Enhance your bralette with accessories to add a personal touch. Layer delicate necklaces or wear statement earrings to draw attention to your upper body. Add a wide-brimmed hat or a stylish belt to take your outfit to the next level.
5. Dress it up or down: Your knitted bralette can be versatile enough to wear for different occasions. Dress it up for a night out by pairing it with a sleek blazer and heels, or dress it down with denim shorts and sandals for a casual day look.
With these styling tips in mind, you’ll be able to show off your knitted bralette confidently and make a fashion statement that is uniquely yours. Get creative and have fun experimenting with different looks!