
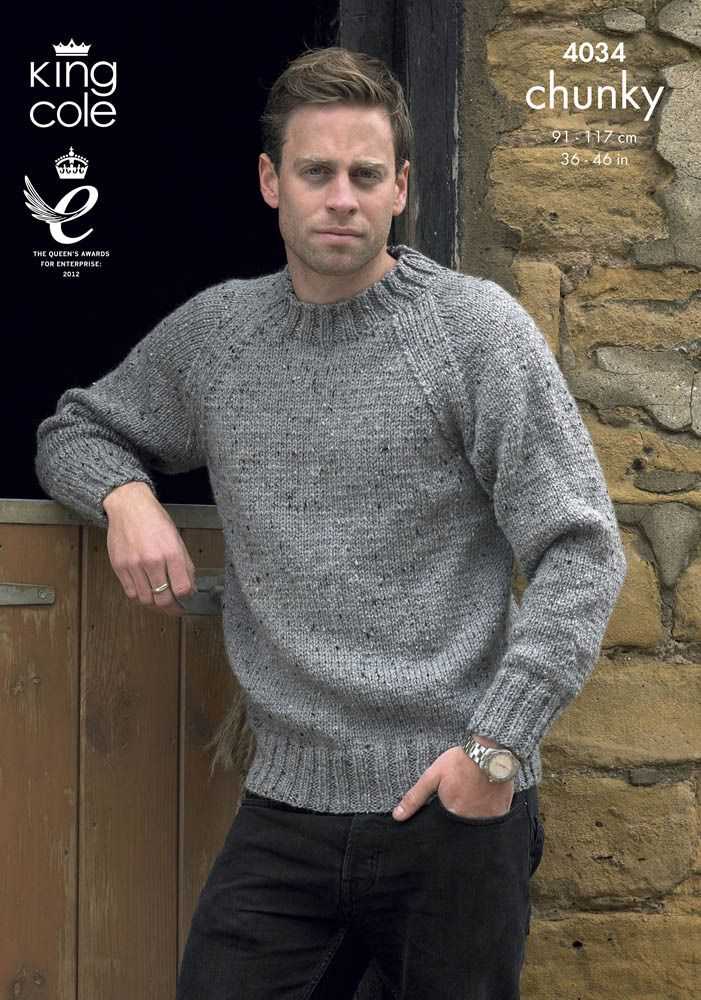
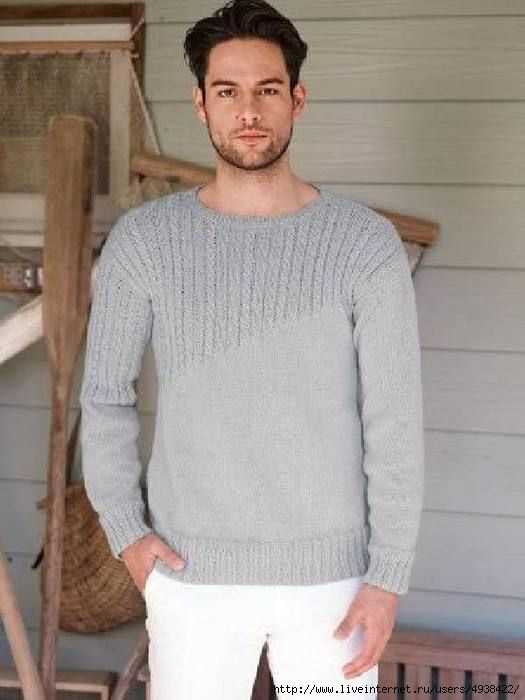
Knitting is a hugely popular hobby that allows people to create beautiful and functional garments. Sweaters are one of the most common items to be knitted, and there are countless patterns available for all skill levels. If you’re looking for an easy knitting project that is perfect for beginners, we have just the pattern for you – an easy knit men’s sweater pattern.
This pattern is designed with simplicity in mind, making it ideal for anyone new to knitting. It features basic stitches and minimal shaping, allowing you to focus on mastering the techniques without feeling overwhelmed. The result is a comfortable and stylish sweater that any man would be proud to wear.
With this easy knit men’s sweater pattern, you can choose from a range of sizes to ensure the perfect fit. The pattern includes detailed instructions, along with helpful tips and tricks to guide you through each step. Even if you’re a complete beginner, you’ll be able to create a beautiful sweater that will impress your friends and family.
Easy Knit Men’s Sweater Pattern
Are you looking for an easy and stylish sweater pattern to knit for the special man in your life? Look no further! This easy knit men’s sweater pattern is perfect for beginners or experienced knitters looking for a quick and satisfying project.
Materials
- Size 8 (5mm) knitting needles
- Worsted weight yarn (approximately 1000-1200 yards)
- Tapestry needle
- Scissors
Pattern
- Size: This pattern is written for a men’s size medium, but can easily be adjusted to fit different sizes. Just make sure to check your gauge before starting.
- Cast on: Using your size 8 knitting needles, cast on 120 stitches.
- Ribbing: Knit 2, purl 2 ribbing for 2 inches.
- Body: Continue knitting in stockinette stitch (knit on right side, purl on wrong side) until the sweater measures approximately 16 inches from the cast on edge.
- Armhole shaping: Bind off 6 stitches at the beginning of the next 2 rows.
- Continue knitting in stockinette stitch until the body measures approximately 24 inches from the cast on edge.
- Shoulder shaping: Bind off 18 stitches at the beginning of the next 2 rows.
- Neck shaping: Knit across the remaining stitches and place on a holder.
- Front: With a new ball of yarn, rejoin the yarn to the remaining stitches on the holder.
- Follow the same armhole shaping, body, and shoulder shaping instructions as for the back of the sweater.
- Finishing: Sew the shoulder seams together using a tapestry needle. Attach the sleeves by sewing them into the armholes. Weave in any loose ends and trim excess yarn.
This easy knit men’s sweater pattern is a great way to create a handmade gift that will be cherished for years to come. Whether you’re making it for a birthday, holiday, or just because, this sweater is sure to impress. Happy knitting!
Materials Needed for the Sweater Pattern
When embarking on the journey of knitting a men’s sweater, it’s essential to have all the necessary materials at hand. Here is a comprehensive list of what you’ll need:
- Yarn: Choose a quality yarn that suits the pattern and the recipient. Opt for a yarn with a smooth texture and good stitch definition, such as a worsted weight yarn in a color of your choice.
- Knitting Needles: Make sure you have a pair of appropriate knitting needles for the chosen yarn. The pattern will specify the recommended needle size, so check the gauge and adjust accordingly.
- Tape Measure: Accurate measurements are crucial for the perfect fit. A soft flexible measuring tape will come in handy for measuring the recipient’s chest, arm length, and other necessary dimensions.
- Stitch Markers: These small plastic or metal rings will help you keep track of your stitches and any special pattern instructions. They can be inserted into the knitting to mark specific stitches or sections.
- Scissors: A good pair of sharp scissors is essential for cutting the yarn and weaving in the ends when the sweater is complete.
- Yarn Needle: A yarn needle with a large eye will be needed for weaving in the loose ends of yarn and sewing up any seams.
- Stitch Holders or Waste Yarn: These tools will help you temporarily hold stitches in place while you work on other sections of the sweater. They can also be used for casting on or knitting certain sections separately.
- Pattern Instructions: Last but not least, you will need the actual sweater pattern instructions. Ensure you have a printout or a digital copy of the pattern and familiarize yourself with the different sections and sizes available.
With all these materials at your disposal, you’ll be well-equipped to start knitting a cozy and stylish sweater for the special man in your life. Happy knitting!
Choosing the Right Yarn for Your Sweater
Selecting the right yarn for your sweater project is essential to achieving the desired look and ensuring the longevity of your garment. With the wide range of yarn options available, it can be overwhelming to decide which one is best for your needs. However, by considering a few key factors, you can find the perfect yarn for your easy knit men’s sweater pattern.
1. Fiber Content
One of the first things to consider when choosing yarn for your sweater is the fiber content. Different fibers have different properties that can affect the overall look, feel, and performance of your garment. Some popular fiber options for sweaters include wool, cotton, acrylic, and blends. Wool is known for its warmth and durability, while cotton is lightweight and breathable. Acrylic is often used for its affordability and low-maintenance care. Select a yarn with a fiber content that aligns with your desired characteristics for your sweater.
2. Weight and Gauge
The weight of the yarn and the gauge required for your sweater pattern are important considerations. The weight of the yarn refers to its thickness, which can range from lace-weight to super bulky. Your pattern will typically specify the recommended gauge, which is the number of stitches and rows per inch. It is crucial to choose a yarn that matches the recommended gauge to ensure the correct fit and appearance of your finished sweater.
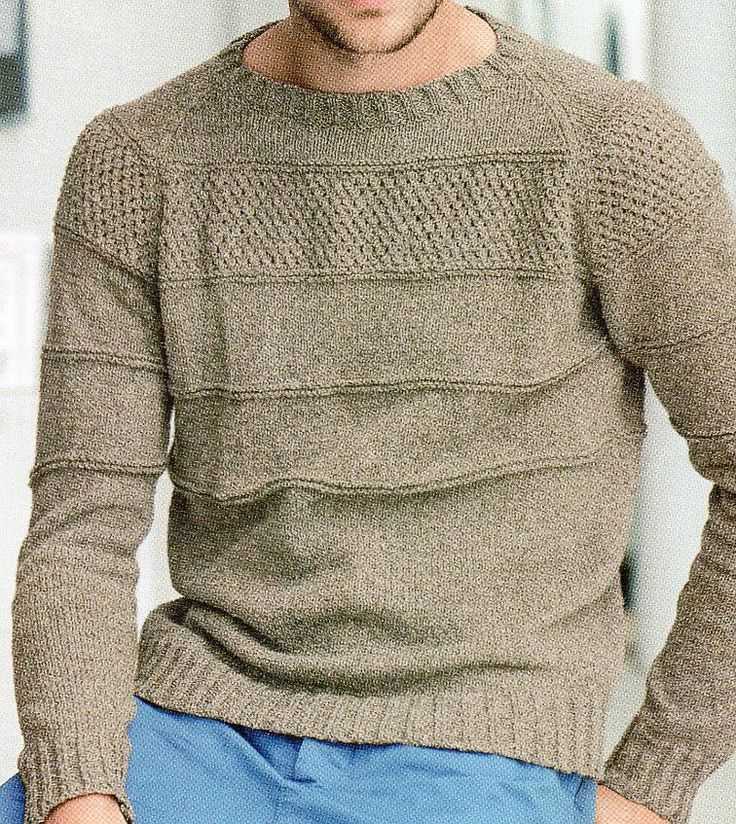
3. Color and Texture
The color and texture of the yarn can greatly impact the overall look of your sweater. Consider whether you want a solid color or variegated yarn, and whether you prefer a smooth or textured finish. Keep in mind that complex stitch patterns or cables may be more visible with a solid-colored yarn, while variegated yarns can add visual interest to simpler designs. Texture can also play a role in the warmth and drape of your sweater. Take into account how the yarn feels and looks when knitted up and consider if it complements the style of your sweater.
By carefully considering the fiber content, weight and gauge, as well as the color and texture of the yarn, you can choose the perfect yarn for your easy knit men’s sweater pattern. Experiment with different options and don’t be afraid to ask for recommendations or advice from fellow knitters or yarn shop experts. With the right yarn, you can create a beautiful and comfortable sweater that you’ll enjoy wearing for years to come.
Selecting the Appropriate Knitting Needles
When it comes to knitting, selecting the right needles is crucial for achieving the desired results. The type and size of the needles can greatly affect the outcome of your project, and it’s important to choose ones that are suitable for the yarn and pattern you’re working with.
Material: Knitting needles are available in various materials, each with its own characteristics. Common options include metal, wood, and plastic. Metal needles are durable and slide smoothly, making them a popular choice for many knitters. Wood needles offer a warm and natural feel, and they can help control tension. Plastic needles are lightweight and affordable, but they may not be as durable as other materials.
Size: The size of the needles determines the gauge or tension of your knitting. The pattern you’re using will usually specify the recommended needle size, which is important to follow to ensure the correct fit and appearance of your finished project. Needles are typically labeled with both the US and metric sizes, so you can easily find the right size for your project.
Type: There are different types of knitting needles to choose from, such as straight needles, circular needles, and double-pointed needles. Straight needles are the most traditional and are used for flat knitting, while circular needles can be used for both flat and circular knitting. Double-pointed needles are used for knitting in the round, such as when making socks or sleeves. Consider the type of project you’re working on and choose the appropriate needle type accordingly.
Other Considerations: In addition to material, size, and type, there are a few other factors to consider when selecting knitting needles. Grip is important, as you want a needle that feels comfortable in your hands and allows for easy manipulation of the yarn. Additionally, some knitters prefer needles with pointed tips for intricate stitch work, while others prefer blunt tips for speed and ease of use.
In conclusion, selecting the appropriate knitting needles requires considering factors such as material, size, type, grip, and tip shape. By choosing the right needles for your project, you’ll be well on your way to creating a beautiful and well-executed knit garment.
Understanding Knitting Abbreviations and Terms
Knitting patterns are filled with abbreviations and terms that can be confusing for beginners. However, once you understand these abbreviations and terms, you’ll be able to follow patterns with ease and create beautiful knitwear. Here are some common knitting abbreviations and terms to help you get started:
1. CO (Cast On)
Cast on refers to the process of adding stitches to your knitting needle at the beginning of a project. The CO abbreviation is used to indicate the number of stitches that need to be cast on.
2. K (Knit)
Knit stitch is the basic stitch in knitting. The K abbreviation is used to indicate that you need to knit the stitch on your needle. This is usually done by inserting the needle into the stitch from left to right, wrapping the yarn around the needle, and pulling it through the stitch.
3. P (Purl)
Purl stitch is another basic stitch in knitting. The P abbreviation is used to indicate that you need to purl the stitch on your needle. This is done by inserting the needle into the stitch from right to left, wrapping the yarn around the needle, and pulling it through the stitch.
4. RS (Right Side)
The right side of your knitting refers to the side that will be facing out when the project is finished. The RS abbreviation is used to indicate that you need to work a specific stitch or pattern on the right side of your work.
5. WS (Wrong Side)
The wrong side of your knitting refers to the side that will be facing in when the project is finished. The WS abbreviation is used to indicate that you need to work a specific stitch or pattern on the wrong side of your work.
- CO – Cast On
- K – Knit
- P – Purl
- RS – Right Side
- WS – Wrong Side
These are just a few of the many knitting abbreviations and terms you may come across in patterns. It’s important to consult the pattern’s key or legend for any abbreviations or terms that are unfamiliar to you. With practice, you’ll become more comfortable with these abbreviations and terms, making it easier to follow knitting patterns and create stunning knitwear.
Taking Body Measurements for Perfect Fit
When knitting a sweater, one of the most important steps is taking accurate body measurements. This ensures that the finished garment will fit perfectly and be comfortable to wear. Whether you are knitting for yourself or someone else, it’s essential to follow proper measuring techniques to achieve the desired fit.
Here are some key areas to measure when knitting a men’s sweater:
- Chest: Measure the fullest part of the chest, usually at nipple level. It’s important to keep the tape measure parallel to the ground for an accurate measurement.
- Waist: Measure the narrowest part of the waist, typically around the belly button. This measurement helps determine the overall width of the sweater.
- Hip: Measure the fullest part of the hips, usually around the buttocks. This measurement ensures the sweater has enough room for a comfortable fit.
- Arm Length: Measure from the shoulder down to the wrist bone. This measurement determines the length of the sleeves.
- Shoulder Width: Measure from one shoulder’s outer edge to the other. This measurement helps ensure the sweater fits well across the shoulders.
- Neck Circumference: Measure around the base of the neck. This measurement is essential for determining the neckline of the sweater.
It’s important to note that knitting patterns often provide specific measurements based on the desired ease, which is the amount of extra room in the garment for a comfortable fit. Consider the ease recommended in the pattern and adjust your measurements accordingly.
By taking accurate body measurements and following the recommended ease for the pattern, you can knit a sweater that fits perfectly and is sure to be a favorite wardrobe staple.
Casting On Stitches for the Sweater
Before you can start knitting your easy men’s sweater, you need to cast on the required number of stitches. Casting on is the process of creating the foundation row of stitches that will be used to build the rest of the sweater. There are several methods you can use to cast on, but the long tail cast on method is commonly used for sweaters.
To begin the long tail cast on, you will need to estimate the amount of yarn you will need for each stitch. Start by making a slip knot at the end of your yarn, leaving a long tail of about 6 inches. Hold the slip knot in your left hand, with the tail of the yarn over your thumb and the working yarn over your index finger. Insert the needle between the two strands of the slip knot, from front to back, and catch the working yarn with the needle tip.
To create the first stitch, pull the needle and working yarn through the slip knot. This will create a loop on the needle. Repeat this process for each stitch, making sure to keep the tension consistent. The number of stitches you cast on will depend on the size of the sweater and the stitch pattern you are using.
Once you have cast on all the stitches, you can begin working the first row of your sweater. Remember to follow the pattern instructions carefully and maintain an even tension as you knit. With these steps, you’ll be well on your way to completing your easy knit men’s sweater!
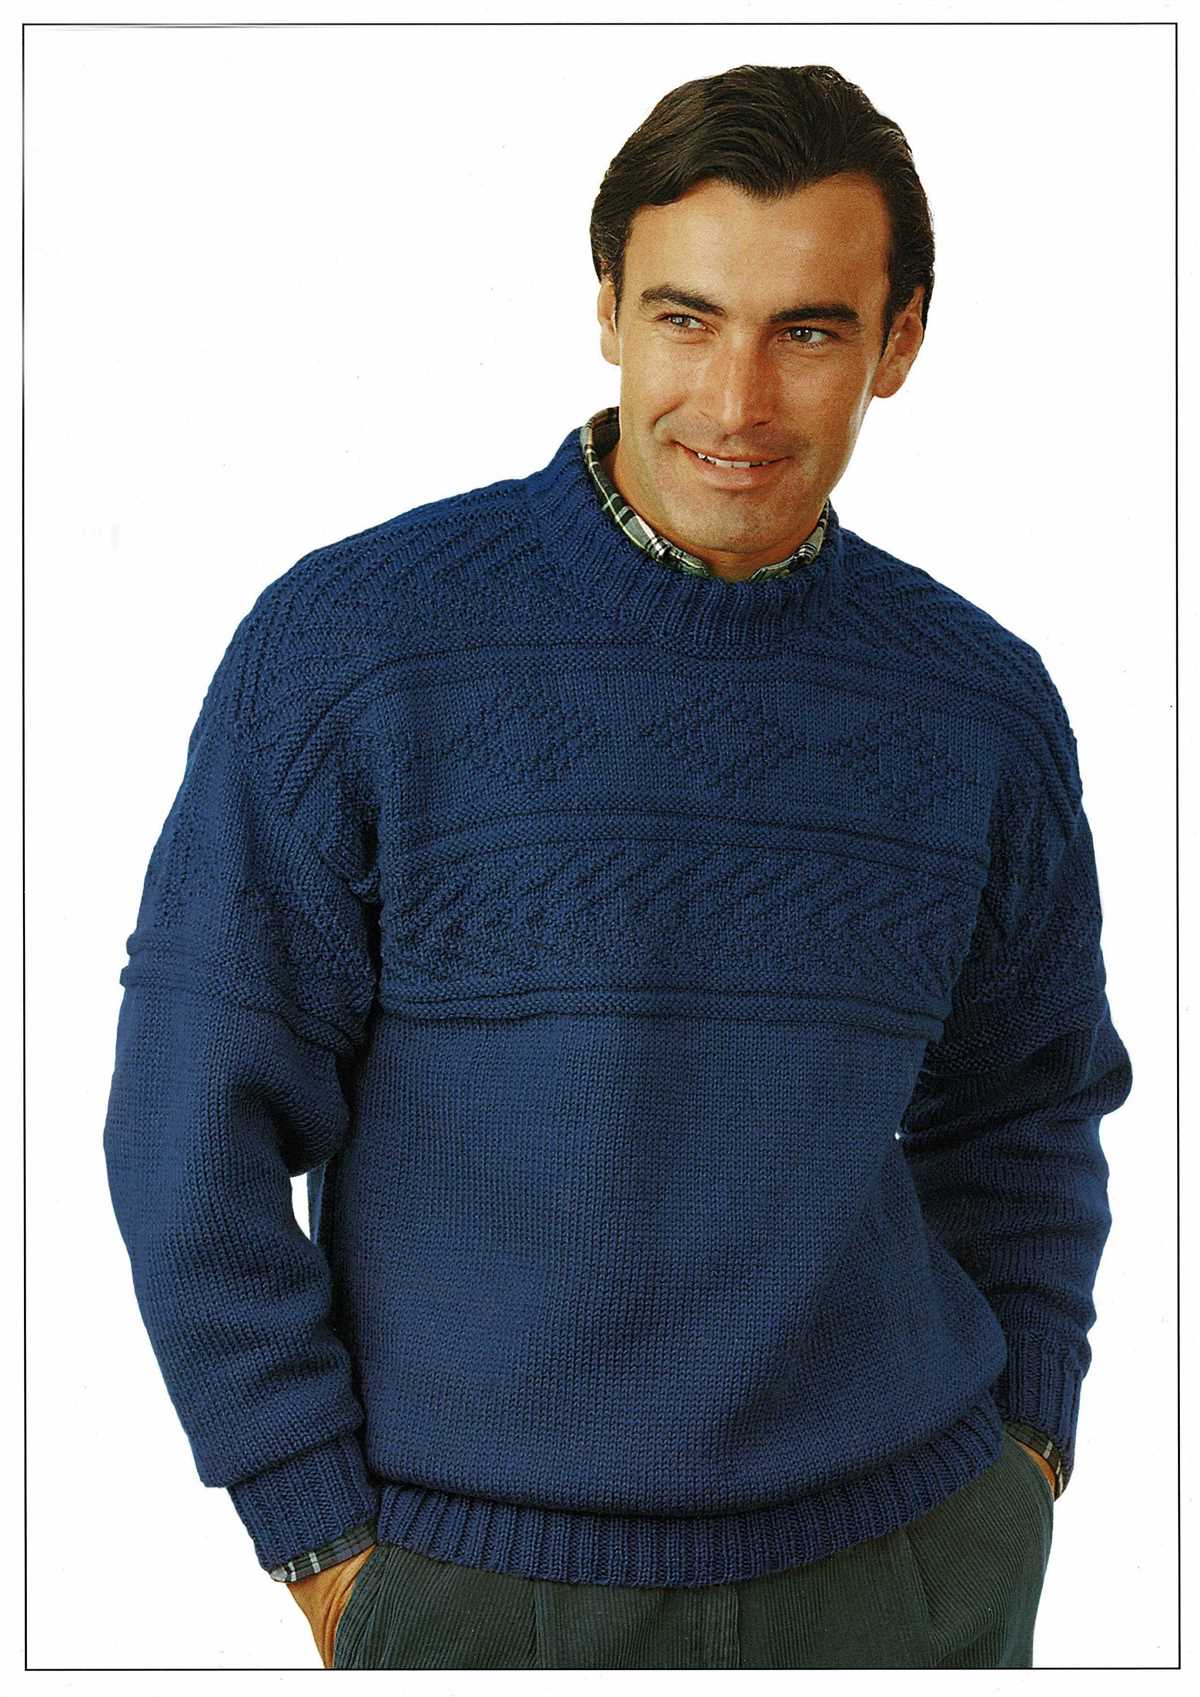
Working the Ribbing for the Sweater
The ribbing of a sweater is an essential element that adds both style and structure to the garment. In this pattern, the ribbing is worked at the hem, cuffs, and neckline. It is typically worked in a combination of knit and purl stitches, creating a stretchy and textured fabric.
To begin working the ribbing, you will first need to cast on the required number of stitches. This pattern recommends using a long-tail cast-on method, which creates a firm and neat edge. Alternatively, you can use your preferred cast-on method that gives you the desired tension and appearance.
Once you have cast on the stitches, you will then begin working the ribbing pattern. This pattern uses a 1×1 ribbing, which means alternating between knitting one stitch and purling one stitch across the row. This creates a classic ribbed texture that is often used in sweaters.
To work the ribbing, follow these steps:
- Row 1: *Knit 1, purl 1; repeat from * to the end of the row.
- Row 2: *Purl 1, knit 1; repeat from * to the end of the row.
- Repeat Rows 1 and 2 until the ribbing measures the desired length.
Once you have finished working the ribbing, you can continue with the main body of the sweater according to the pattern instructions. The ribbing adds a professional and polished touch to the sweater, ensuring a snug and comfortable fit.
Knitting the Body of the Sweater
Once you have finished knitting the sleeves, it’s time to move on to the body of the sweater. This is where you will knit the front and back panels that will eventually be sewn together.
To begin, you will need to join the yarn at the underarm of one of the sleeves. This can be done by making a slip knot and placing it on your knitting needle. Then, pick up stitches along the side of the sleeve and continue to work your way around the entire circumference of the sweater.
For the body of the sweater, you will typically work in a stockinette stitch pattern, which means you knit one row and purl the next. This creates a smooth, even fabric that is perfect for a men’s sweater. You will continue to work in this pattern until the body reaches the desired length.
Keep in mind that you may need to make adjustments to the pattern to ensure the sweater fits properly. This can include adding or subtracting stitches, as well as increasing or decreasing the length of the body. It’s always a good idea to try the sweater on as you go to ensure it fits the way you want it to.
Once you have completed the body of the sweater, you can bind off all the stitches and weave in any loose ends. At this point, you will be ready to move on to knitting the collar and finishing touches of the sweater.
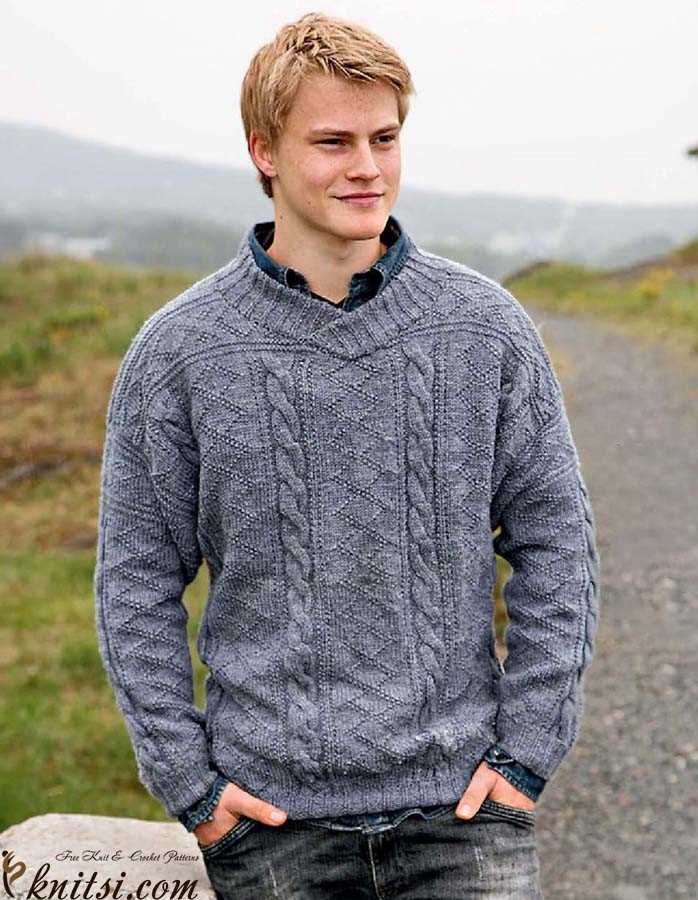
Creating the Neckline and the Sleeves
One of the key elements of an easy knit men’s sweater pattern is creating the neckline. The neckline not only determines the overall style and fit of the sweater, but it is also one of the most visible parts of the garment. There are several ways to create the neckline, depending on the desired look and level of difficulty. For a classic crewneck style, simply knit a few rows in a rib stitch pattern and then continue with the main stitch pattern of the sweater. If you prefer a V-neck style, you can use decreases to shape the neckline, gradually creating a V shape. This can be done by decreasing a few stitches at the center front every few rows until the desired depth of the V is reached.
When it comes to creating the sleeves of the easy knit men’s sweater pattern, there are also a few different options to consider. One common approach is to start with a provisional cast on at the underarm area and then knit the body of the sweater in the round. Once the body is complete, you can then pick up the provisional stitches and continue knitting in the round to create the sleeves. Another option is to knit the sleeves separately, using either double-pointed needles or circular needles. This gives you more flexibility in terms of shaping and allows you to try on the sweater as you go to ensure the sleeves fit properly.
- For a classic look, you can knit the sleeves in a simple stockinette stitch or rib stitch pattern.
- For a more textured look, you can try using a different stitch pattern for the sleeves, such as a cable or seed stitch.
- When it comes to sizing the sleeves, it’s important to take accurate measurements of the wearer’s arm length and circumference. This will ensure that the sleeves are neither too tight nor too loose.
Overall, creating the neckline and sleeves of an easy knit men’s sweater pattern requires attention to detail and careful planning. By selecting the right stitch pattern and taking accurate measurements, you can create a sweater that fits well and looks stylish. Whether you prefer a classic crewneck or a trendy V-neck, there are plenty of options to choose from to customize your sweater to your liking.
Finishing Off the Sweater
Once you have completed knitting the body and sleeves of your men’s sweater, it’s time to finish off the garment. This final step involves blocking, seaming, and adding any necessary finishing touches to give your sweater a polished look.
Blocking
Before you start seaming, it’s important to block your sweater. Blocking helps to even out stitches, relax the fabric, and give the garment its final shape. To block your sweater, you’ll need a large flat surface, such as a blocking mat or towels, and some rust-proof pins.
To block your sweater, lay it flat on the blocking surface and gently stretch it to the desired measurements. Use the rust-proof pins to secure the edges and any specific areas that need shaping. Leave your sweater to dry completely before moving on to the next step.
Seaming
Once your sweater is blocked and dry, it’s time to seam the pieces together. Using a tapestry needle and the yarn you used for knitting, start by seaming the shoulders. Match the stitches of the front and back shoulder edges, and use a mattress stitch to sew them together. Repeat the process for the sleeves, attaching them to the armholes.
Next, seam the sides of the sweater. Lay the sweater flat with the right side facing you and match the stitches along the side edges. Use the same mattress stitch to sew the sides together, making sure to maintain an even tension throughout. Finally, seam any remaining gaps or edges, such as the collar or cuffs, to complete the sweater.
Finishing Touches
With the seaming complete, take a moment to add any finishing touches to your sweater. This could include weaving in any loose ends, trimming excess yarn, or adding buttons or other embellishments. Try on the sweater to make sure it fits perfectly and make any necessary adjustments before giving it a final press with a steam iron.
Now that your men’s sweater is finished, you can proudly wear or gift your handmade creation. The satisfaction of knitting a sweater from start to finish is truly rewarding, and you can enjoy the warmth and comfort it provides for many seasons to come.
Tips and Tricks for a Professional Finish
When knitting a men’s sweater, attention to detail and a professional finish can make all the difference. Here are some tips and tricks to help you achieve a polished look:
1. Block your sweater
Blocking your knitted garment is an essential step to shape and stretch the fabric, creating a professional finish. Follow the blocking instructions provided with your yarn, and use pins and measuring tapes to ensure that your sweater dries in the desired shape.
2. Pay attention to seams
Seaming is an important part of assembling your sweater. Make sure to join pieces together neatly and evenly, using the appropriate seaming technique for your pattern. Take your time, and consider blocking your seams to give them a smoother appearance.
3. Use the right finishing techniques
Finishing touches can greatly enhance the overall look of your sweater. Use a crochet hook to tidy up any loose ends or stitches. Consider adding ribbed cuffs or a ribbed hem for a more polished and professional look.
4. Choose the right buttons
Buttons can be the perfect final touch to your men’s sweater. Select buttons that complement the color and style of your sweater, as well as those that are appropriate for the size and weight of the garment. Sew them on securely and evenly for a professional finish.
5. Take the time to properly care for your sweater
To maintain the professional appearance of your knitted sweater, follow the care instructions provided with your yarn. Avoid machine washing or drying if not recommended, and instead, hand wash and lay flat to dry to prevent stretching or distortion of the fabric.
By implementing these tips and tricks, you can achieve a professional finish for your easy knit men’s sweater, resulting in a garment that looks as if it was made by a skilled knitter.
Q&A:
Can you recommend an easy knit men’s sweater pattern?
Yes, I can recommend the “Basic Men’s Pullover Sweater” pattern. It is a simple and beginner-friendly pattern that is perfect for someone who is new to knitting. It includes detailed instructions and has different sizing options.
What skill level is required for the easy knit men’s sweater pattern?
The easy knit men’s sweater pattern is suitable for beginners. It uses basic knitting stitches and techniques, such as knit and purl stitches, and does not involve any complex shaping or advanced techniques.
What materials do I need for the easy knit men’s sweater pattern?
For the easy knit men’s sweater pattern, you will typically need a worsted weight yarn, knitting needles in the recommended size (usually US 8 or 9), stitch markers, and a tapestry needle for seaming. The specific material requirements may vary depending on the pattern you choose.
Where can I find the easy knit men’s sweater pattern?
You can find the easy knit men’s sweater pattern on various knitting websites, online marketplaces, or in knitting books and magazines. You can also try searching for specific patterns on knitting pattern databases or join online knitting communities where members often share their favorite patterns.