
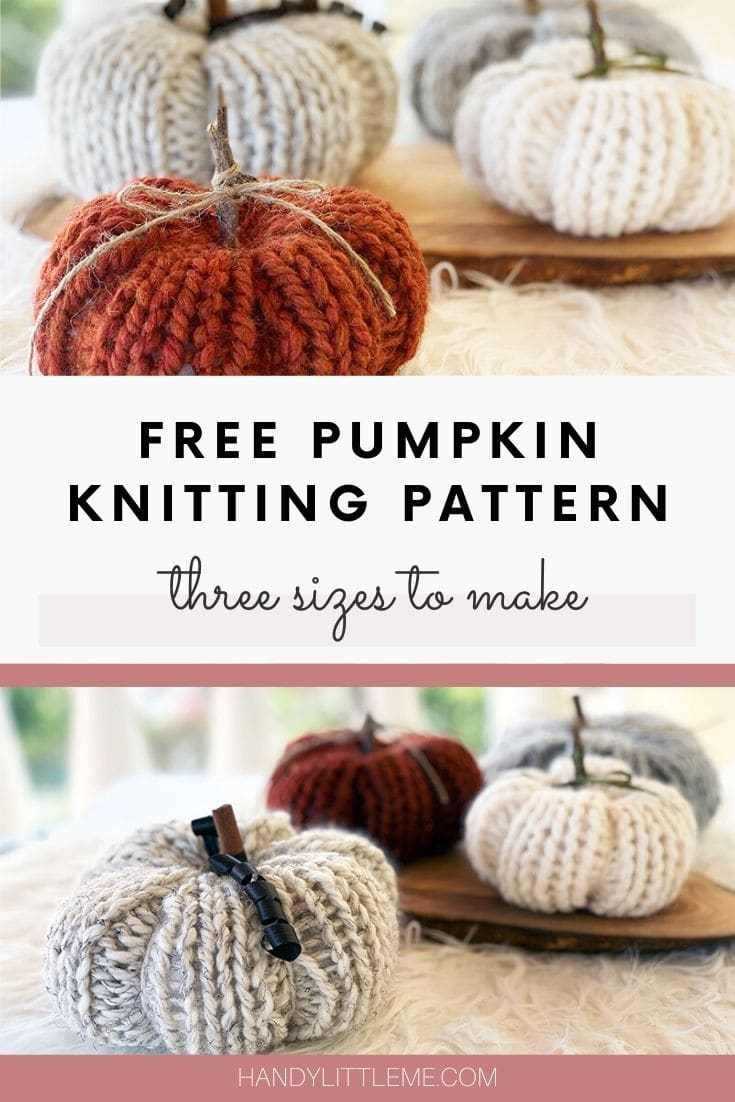
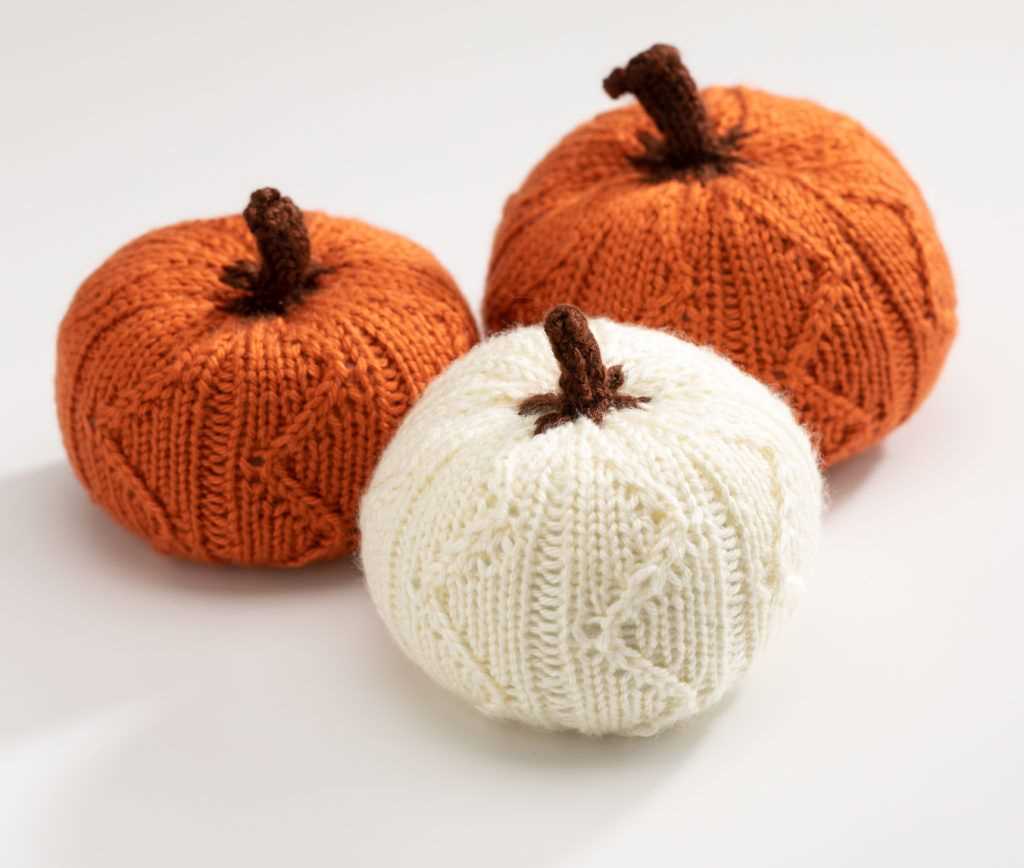
Looking for a fun and festive project to spruce up your home decor this fall? Knitting a pumpkin is a great way to add a cozy touch to any room. Whether you’re an experienced knitter or just starting out, this free pattern is perfect for all skill levels.
This pumpkin pattern is quick and easy to make, using basic knitting techniques. With just a few supplies and a little bit of time, you’ll have a cute and cuddly pumpkin to display in no time. Plus, it’s a great way to use up any leftover yarn you have lying around.
Not only is knitting a pumpkin a fun craft project, but it also makes a great gift idea. Imagine giving a personalized pumpkin to a friend or loved one for Halloween or Thanksgiving. It’s a thoughtful and unique present that will be cherished for years to come.
Knit a Pumpkin Free Pattern
If you love knitting and want to add a festive touch to your home decor, why not try knitting a pumpkin? This free pattern will guide you through the process of creating your very own knitted pumpkins, perfect for autumn or Halloween decoration. With just a few basic stitches and some colorful yarn, you can create adorable pumpkins that will bring warmth and charm to any space.
To knit a pumpkin, you will need some orange yarn, stuffing, a pair of knitting needles, a tapestry needle, and scissors. Start by casting on your desired number of stitches, depending on the size of the pumpkin you want to create. Then, begin knitting in the round, using the stockinette stitch, until your pumpkin reaches the desired height.
Materials Needed:
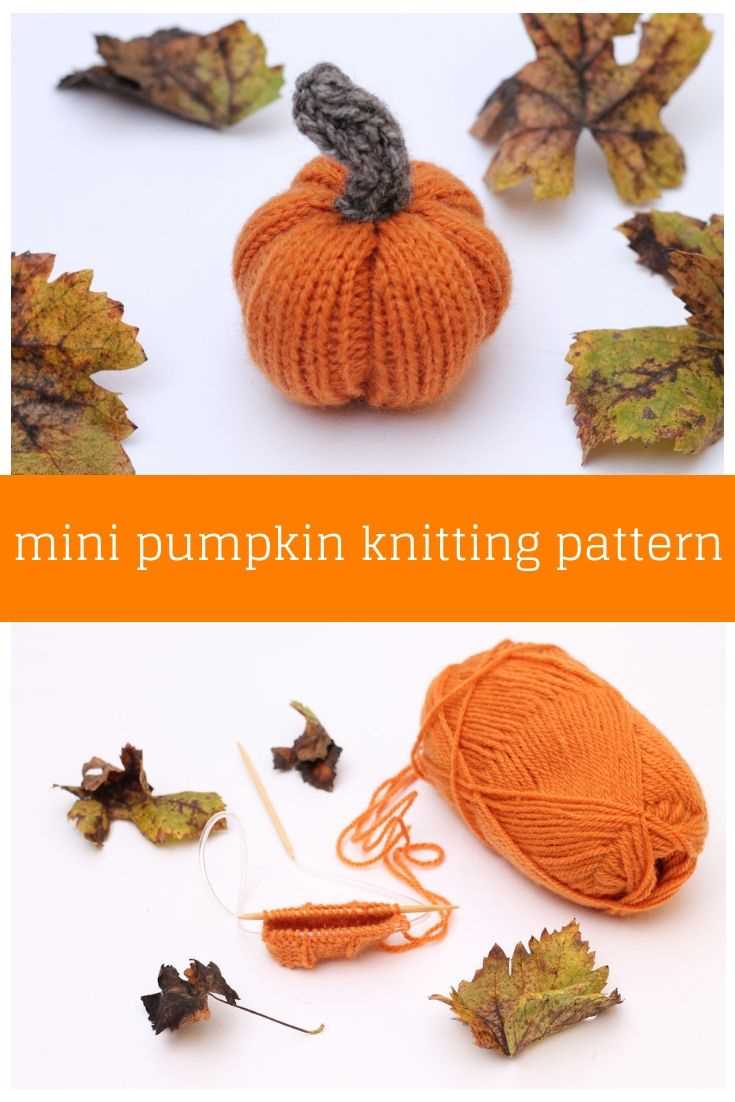
- Orange yarn
- Pair of knitting needles
- Tapestry needle
- Scissors
- Stuffing
Once you’ve reached the desired height, it’s time to shape your pumpkin. Start decreasing stitches evenly around the pumpkin to create a tapered top. Continue decreasing until you have just a few stitches left, then cut the yarn, leaving a long tail. Thread the tail through the tapestry needle and slide it through the remaining stitches, gathering them tightly to close the top.
Next, using a contrasting color of yarn, create the pumpkin’s ridges by stitching vertically from the top to the bottom of the pumpkin. Insert the needle through the center and bring it out at the desired length for the first ridge. Repeat this process evenly around the pumpkin, creating several ridges. Finally, stuff the pumpkin with stuffing, making sure to fill it evenly and firmly.
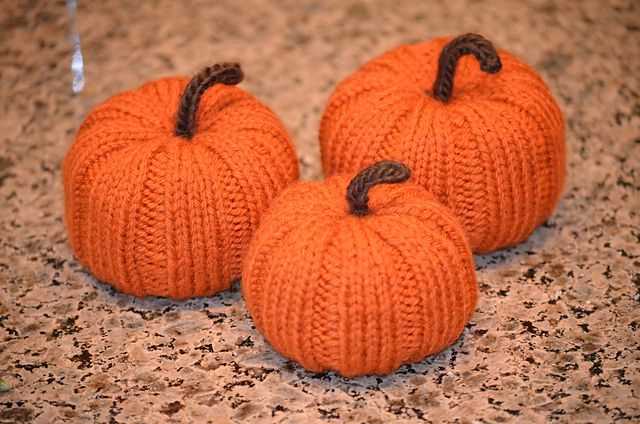
Your knitted pumpkin is now complete! Repeat these steps to create additional pumpkins in different sizes and colors, and display them together for a whimsical fall centerpiece or Halloween decoration. Whether you’re an experienced knitter or just starting out, this free pattern is a fun and festive project that will add a touch of handmade charm to your home.
What You’ll Need
In order to knit a pumpkin using this free pattern, you will need the following materials:
- Yarn: You will need a medium weight yarn in orange color. Make sure to choose a soft and cozy yarn that will give your pumpkin a nice texture.
- Knitting Needles: You will need a pair of knitting needles in the appropriate size for your yarn. Check the label on your yarn for the recommended needle size.
- Stitch Markers: It’s helpful to have some stitch markers to keep track of your progress and mark any important points in the pattern.
- Tapestry Needle: You will need a tapestry needle with a large eye for weaving in ends and attaching any additional embellishments.
- Stuffing: To give your pumpkin a nice round shape, you will need some stuffing. You can use polyester fiberfill or any other type of stuffing material you prefer.
- Scissors: You will need a pair of scissors to cut the yarn and trim any excess ends.
Once you have gathered all these materials, you will be ready to start knitting your pumpkin using the provided free pattern. Make sure to read the pattern instructions carefully and have fun knitting!
Choosing the Right Yarn
When knitting a pumpkin, it is important to choose the right yarn to achieve the desired result. The type and weight of yarn you choose can greatly affect the final appearance and texture of your pumpkin.
Type of Yarn: There are several types of yarn that can be used for knitting a pumpkin. Acrylic yarn is a popular choice as it is widely available, affordable, and comes in a variety of colors. Cotton yarn is another option, which can give a more natural look to your pumpkin. Additionally, wool yarn can be used for added warmth and texture.
- Weight of Yarn: The weight of the yarn refers to its thickness. For knitting a pumpkin, a medium or worsted weight yarn is usually recommended. This weight of yarn allows for a good balance between creating a sturdy structure and achieving the desired shape and size.
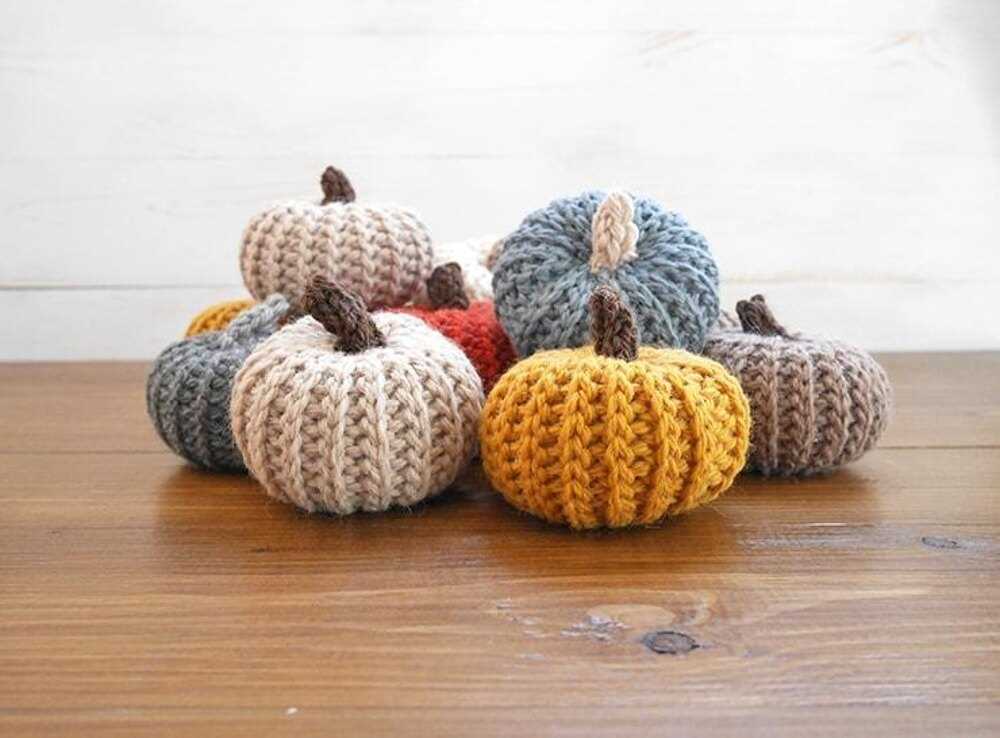
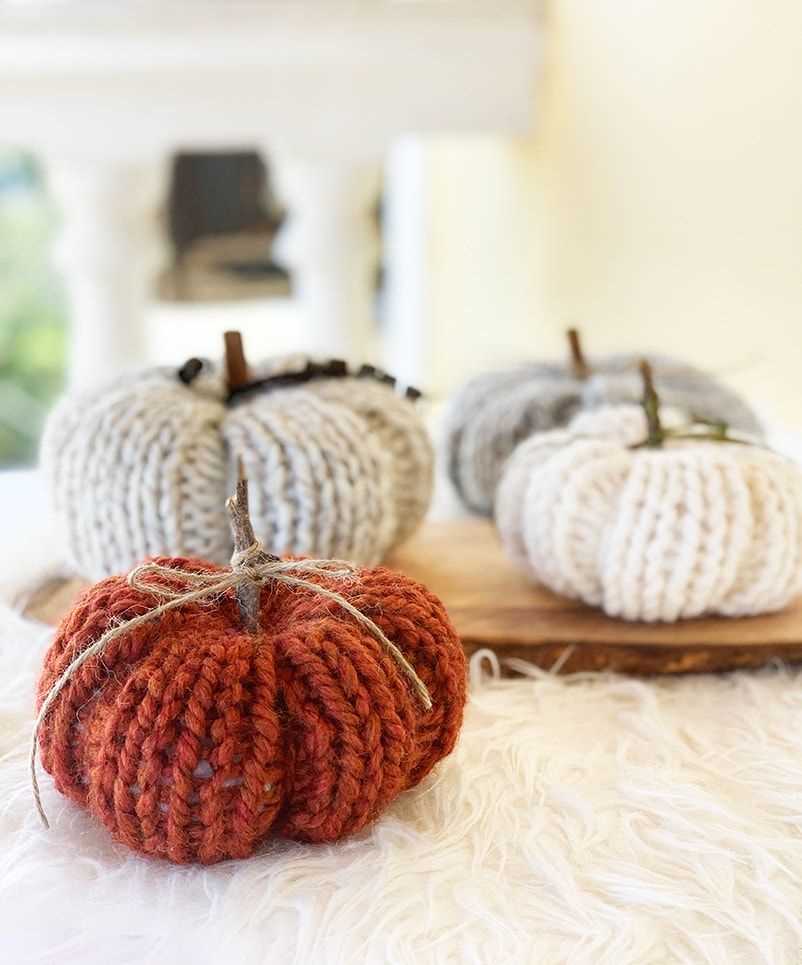
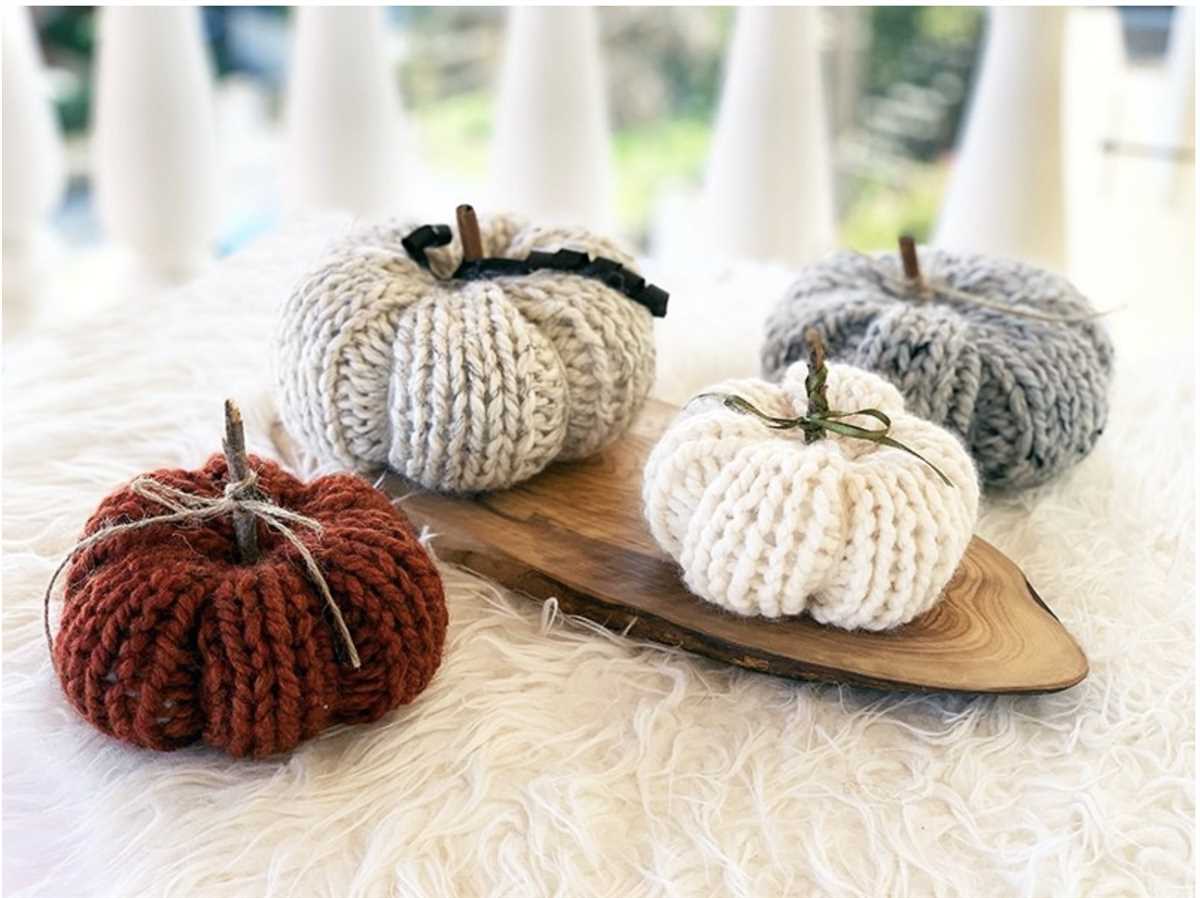
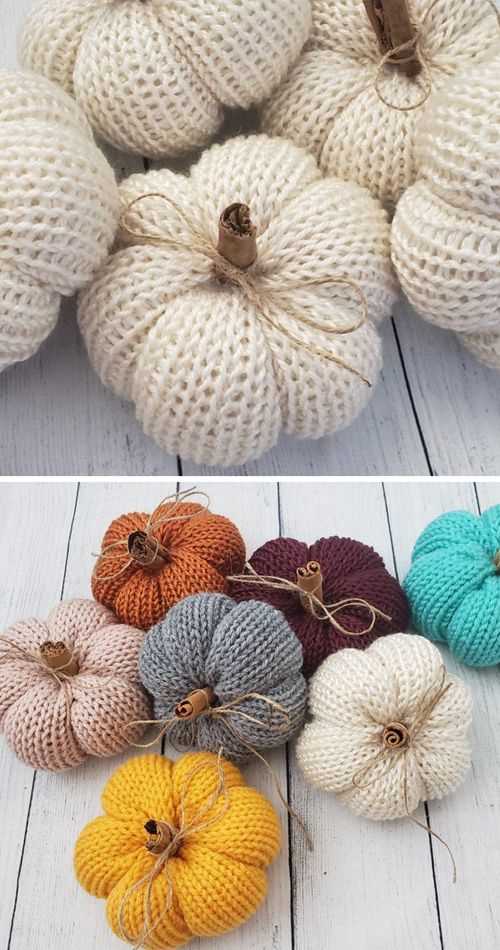
- Color: The color of the yarn is another important consideration. While traditional pumpkins are orange, you can choose any color that you prefer. Some knitters opt for a more realistic look and choose yarn in shades of orange and green, while others may choose to get creative and use different colors to match their own unique style.
- Texture: The texture of the yarn can also play a role in the final appearance of your pumpkin. Smooth yarn will give a clean and polished look, while textured yarn can add depth and interest to your pumpkin.
In conclusion, when knitting a pumpkin, consider the type, weight, color, and texture of the yarn to achieve the desired result. Take your time to explore different yarn options and experiment with different combinations to create a pumpkin that is uniquely yours.
Getting Started
To knit a pumpkin using a free pattern, you will need a few basic knitting supplies and materials. Make sure you have sufficient amounts of yarn, preferably in orange color, as well as a pair of knitting needles in the appropriate size for your chosen yarn. You will also need a tapestry needle for finishing and a pair of scissors to cut the yarn. Additionally, you may want to have some stuffing or fiberfill to stuff the pumpkin.
Before you start knitting, take the time to read through the pattern carefully and familiarize yourself with the instructions. Make note of any special stitches or techniques that may be required, and gather any additional materials mentioned in the pattern, such as stitch markers or a crochet hook. It is always helpful to have these tools on hand before you begin.
Gathering Materials
- Yarn: Choose an orange yarn in a thickness suitable for your needles.
- Needles: Ensure you have the right size knitting needles for your selected yarn.
- Tapestry Needle: This will be used for finishing the pumpkin.
- Scissors: You will need a pair of scissors to cut the yarn.
- Stuffing or Fiberfill: This will be used to stuff the pumpkin and give it shape.
- Optional: Stitch markers or a crochet hook for any additional techniques.
Gathering all your materials before you start will save you time and frustration during the knitting process. Once you have everything you need, you can begin knitting your pumpkin and enjoy the process of creating a cozy autumn decoration.
Knitting the Body
When knitting a pumpkin, the first step is to start with the body. The body is typically worked in the round, using circular needles or double-pointed needles. This allows for seamless construction and a smooth finish.
To begin, cast on the required number of stitches onto your needles. This number will depend on the size of the pumpkin you are knitting and the thickness of your yarn. A common starting point is around 40 stitches, but you can adjust this to achieve your desired size.
Once you have cast on, join the round by knitting the first stitch of the cast on together with the last stitch, being careful not to twist the stitches. This creates a continuous loop of stitches, forming the base of the pumpkin.
Now you can start working the body of the pumpkin. Depending on the pattern you are following, this may involve knitting every stitch in every round, or it may involve a combination of knit and purl stitches to create different textures or patterns. Follow the pattern instructions carefully to ensure that you achieve the desired outcome.
As you work the body, you may need to periodically stuff the pumpkin with polyester fiberfill or another stuffing material to give it shape and volume. Remember to stuff firmly, but not so much that the stitches become distorted or stretched.
Continue knitting in the round until the body of the pumpkin reaches the desired height. This will again depend on the pattern or your personal preference. Some pumpkins have shorter bodies, while others have taller bodies.
Once you have reached the desired height, it’s time to finish off the body and move on to the next section of the pumpkin. This may involve binding off the stitches or transitioning to a different stitch pattern. Follow the pattern instructions to complete this step.
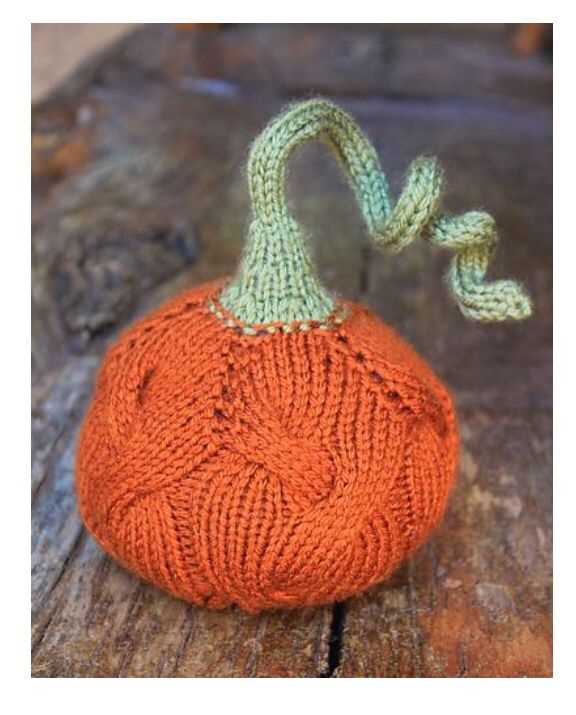
Creating the Curves
When knitting a pumpkin, one of the most important steps is creating the curves that give it its distinct shape. These curves give the pumpkin a lifelike appearance and make it look more realistic. To create the curves, there are a few techniques that can be used.
Increasing: One way to create curves is by increasing stitches. This can be done by knitting into the front and back of a stitch, or by making yarn overs. By increasing stitches in specific areas, such as the bottom of the pumpkin, it can create a rounded shape. To make the curves more pronounced, the increases can be done more frequently.
Decreasing: Another technique for creating curves is decreasing stitches. This can be done by knitting two stitches together or by slipping stitches. By decreasing stitches in specific areas, such as the top of the pumpkin, it can create a narrower shape. Like with increasing, decreasing can be done more frequently to make the curves more pronounced.
Creating the curves takes time and practice, but with the right techniques, it is possible to knit a pumpkin with realistic-looking curves. By using a combination of increasing and decreasing stitches in strategic areas, the pumpkin can take on a lifelike shape that resembles a real pumpkin.
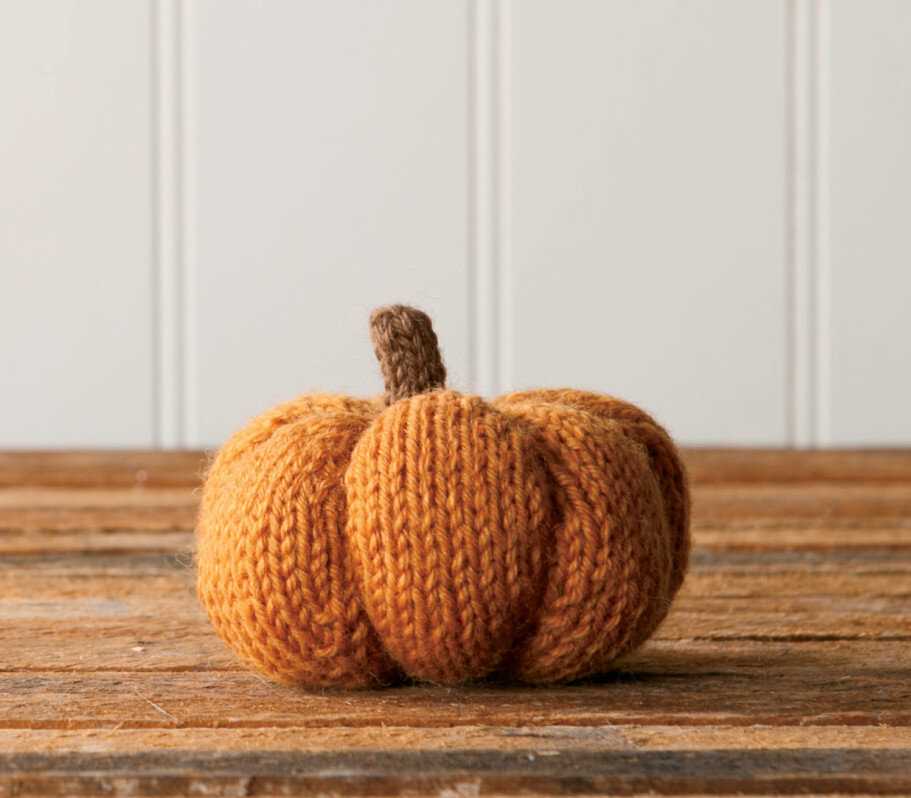
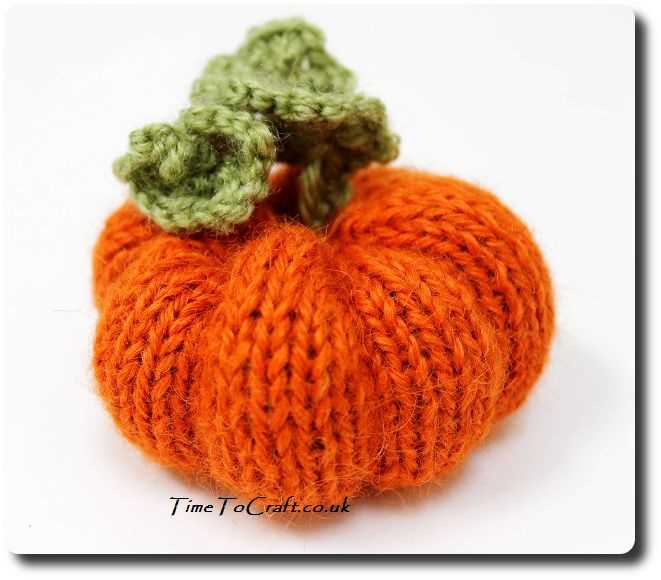
Adding the Stem
After completing the main body of your knitted pumpkin, it’s time to add the stem. The stem gives the pumpkin its distinctive look and adds an extra element of realism to your project. Follow these steps to add the stem:
Materials:

- Green or brown yarn
- Double-pointed knitting needles
- Tapestry needle
Instructions:
- Choose a suitable color of yarn for the stem, such as green or brown. You can use a different shade from the main body of the pumpkin to create contrast.
- Thread the yarn onto a tapestry needle and secure it to the top center of the pumpkin. Make sure it is firmly attached so that the stem will not come loose later on.
- Using double-pointed knitting needles, begin knitting a small tube for the stem. Start with a few stitches and increase gradually to create a tapered shape. This will give the stem a natural appearance.
- Continue knitting until the stem reaches your desired length. Make sure to leave a long tail of yarn to sew the stem to the pumpkin later on.
- Once the stem is the desired length, bind off the stitches and cut the yarn, leaving another long tail.
- Take the tapestry needle and thread it with one of the long tails. Sew the stem to the top of the pumpkin, making sure it is secure and centered. Use a whipstitch or any other suitable stitch to attach the stem firmly.
- Weave in any remaining yarn tails and trim them neatly.
- For added realism, you can twist and shape the stem a bit to give it a more organic look. Be gentle so as not to unravel the stitches.
With the stem added, your knitted pumpkin is now complete! You can proudly display it as a seasonal decoration or give it as a gift to a fellow knitting enthusiast. Enjoy the festive atmosphere created by your handmade pumpkin!
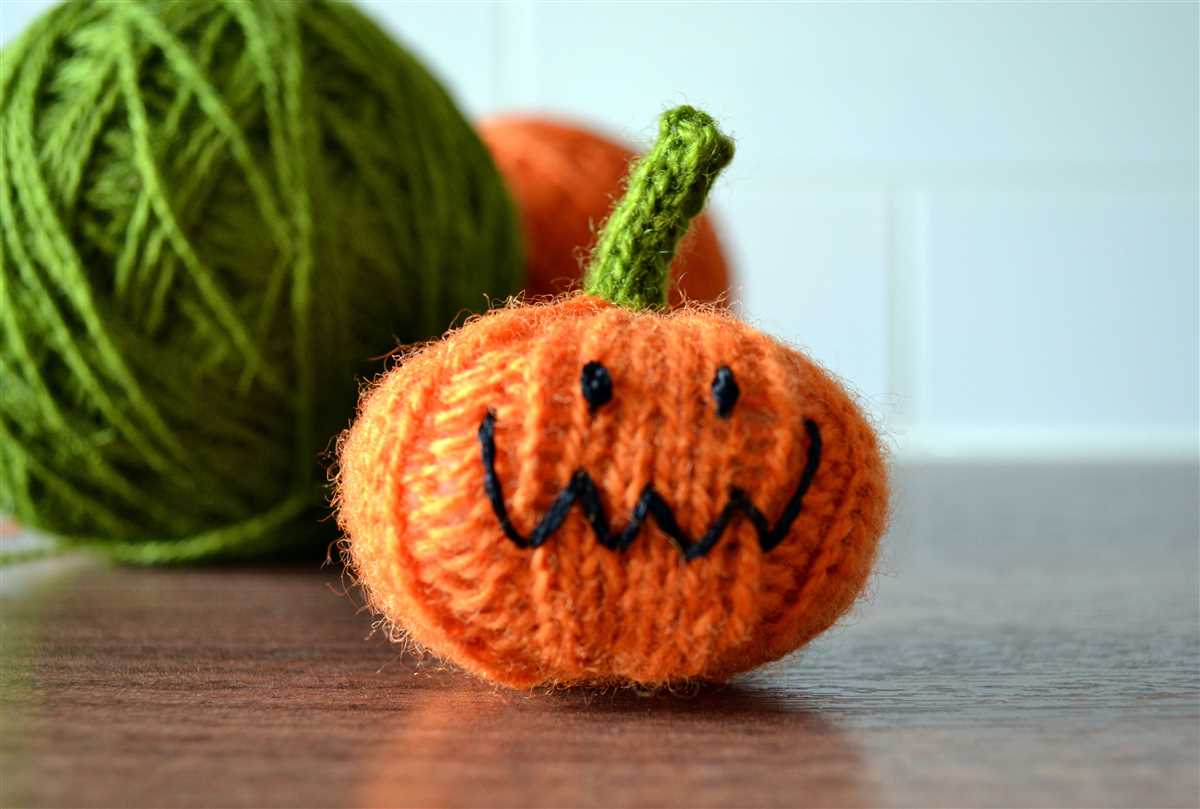
Finishing Touches: Facial Features
When it comes to adding the final details to your knitted pumpkin, the facial features are what truly bring it to life. Whether you prefer a traditional jack-o’-lantern with a toothy grin or a more whimsical expression, there are several ways to add facial features to your knitted pumpkin.
Embroidery: One of the simplest ways to add facial features to your knitted pumpkin is through embroidery. You can use a contrasting color of yarn or embroidery floss to stitch on eyes, a nose, and a mouth. Depending on your skill level, you can experiment with different stitches to create different effects. French knots can be used for eyes, while straight stitches can create a simple smile.
Buttons and Beads: Another option for adding facial features to your knitted pumpkin is by using buttons or beads. You can use small black buttons for eyes and a larger button for a nose. If you prefer a more whimsical look, you can use colorful buttons or beads to create a fun and unique expression. Make sure to stitch them securely to the pumpkin so they don’t come loose during use.
Embroidered Appliques: If you want to add some extra texture to your knitted pumpkin, consider using embroidered appliques. You can find pre-made appliques in the shape of eyes, noses, and mouths at craft stores or online. Simply stitch them onto the pumpkin using a needle and thread. This method allows you to quickly and easily add detailed facial features to your pumpkin.
Paint: For those who are comfortable with painting, a fun and creative option is to use acrylic or fabric paint to add facial features to your knitted pumpkin. You can use a small brush to carefully paint on eyes, a nose, and a mouth. This method allows for more intricate designs and the ability to add unique details, such as rosy cheeks or freckles.
Felt Cutouts: Finally, if you’re looking for a more playful and tactile option, consider using felt cutouts to add facial features to your knitted pumpkin. You can cut out shapes for eyes, a nose, and a mouth from colored felt and then stitch or glue them onto the pumpkin. This method allows for endless creativity and customization, as you can experiment with different shapes and colors.
Whichever method you choose, adding facial features to your knitted pumpkin will give it personality and charm. Whether you go for a classic look or get creative with your design, these finishing touches will make your pumpkin stand out and bring a smile to your face.
Blocking and Shaping
Blocking is an important step in the knitting process that helps to shape and define your finished project. Whether you’re knitting a pumpkin or any other item, blocking can make a big difference in the overall look and fit.
What is blocking?
Blocking involves wetting your knitted piece and then carefully stretching and shaping it to the desired dimensions. This process helps to even out stitches, open up lace patterns, and set the stitches in place. It can also help to relax the fibers, making the finished item softer and more comfortable to wear. Blocking is especially important for items like the knitted pumpkin, as it helps to create the round shape and smooth out any unevenness in the stitches.
How to block a knitted pumpkin?
To block your knitted pumpkin, start by filling a basin or sink with cool water and adding a small amount of mild detergent. Gently soak your pumpkin in the water, making sure it is completely submerged. Let it soak for about 15-20 minutes, then carefully remove it from the water and gently squeeze out the excess moisture. Lay the pumpkin on a clean towel and roll it up, pressing down to remove more moisture.
Next, unroll the towel and carefully shape the pumpkin into a round, plump shape. You can use your hands to gently stretch and shape the pumpkin, making sure the sides are evenly distributed. If desired, you can stuff the pumpkin with plastic bags or other soft material to help it hold its shape while drying.
Optional: If you want to add a stem to your pumpkin, you can shape a piece of wire into a stem shape and attach it to the top of the pumpkin before blocking.
Lay the shaped pumpkin on a clean, dry towel or blocking mat and let it air dry completely. Depending on the size and thickness of your pumpkin, this may take a few days. Once dry, remove any stuffing or wire stem, and your knitted pumpkin is ready to be displayed or used as a festive decoration!
Decorating Options
When it comes to decorating your knit pumpkin, the options are endless. Whether you want to keep it simple and classic or get creative and unique, there are plenty of ways to make your pumpkin stand out. Here are a few ideas to get you started:
1. Embellishments
Add some extra flair to your knit pumpkin by attaching embellishments such as ribbons, sequins, buttons, or beads. You can choose colors that complement your pumpkin or go for a contrasting look. Get creative with the placement and arrangement of these embellishments to create a truly eye-catching decoration.
2. Paint or Dye
If you want to add some color to your knit pumpkin, consider painting or dyeing it. You can use acrylic or fabric paint to create different patterns or designs on the surface of your pumpkin. Alternatively, you can use fabric dye to give your pumpkin a more subtle and textured look. Experiment with different colors and techniques to achieve the desired effect.
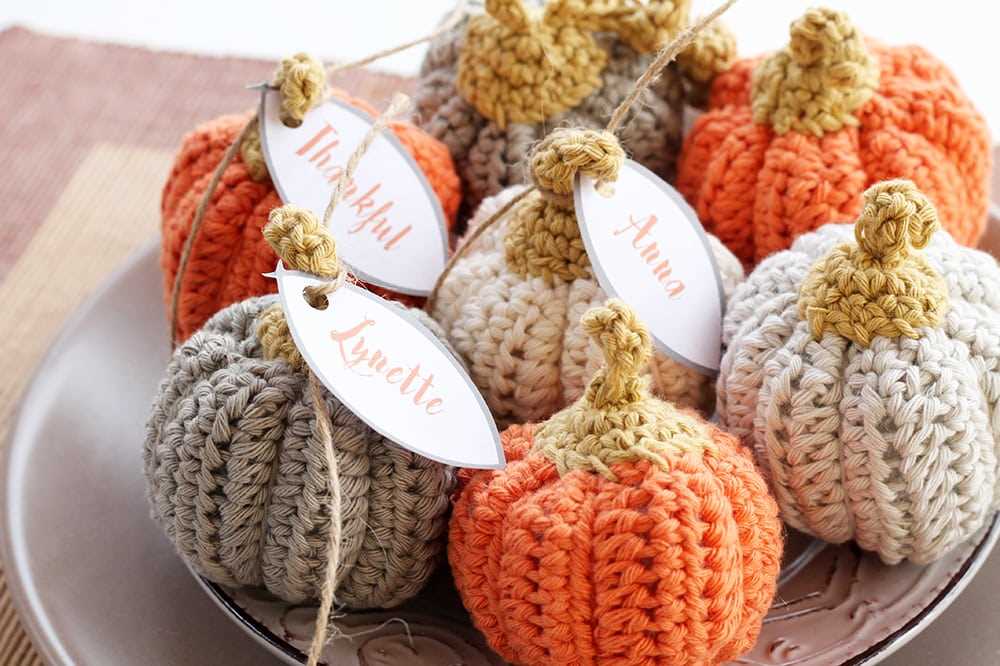
3. Personalize with Names or Initials
Add a personal touch to your knit pumpkin by incorporating names or initials into the design. You can use embroidery or appliqué techniques to create custom monograms or spell out names. This is a great way to create unique and meaningful decorations for yourself or as gifts for others.
4. Fabric or Paper Collage
Create a one-of-a-kind design by using fabric or paper collage to decorate your knit pumpkin. Cut out various shapes, patterns, or images from fabric or paper and adhere them to the surface of the pumpkin using glue or fabric adhesive. This technique allows you to showcase your favorite fabrics or images in a creative way.
5. LED Lights
For an extra magical touch, consider adding LED lights to your knit pumpkin. You can insert small battery-operated LED lights inside the pumpkin to create a warm and glowing effect. This is a great option for creating a cozy and inviting atmosphere during the fall season or for Halloween.
Remember, the most important thing is to have fun and let your creativity shine when decorating your knit pumpkin. Don’t be afraid to try new techniques or mix and match different ideas to create a truly unique and personal decoration.
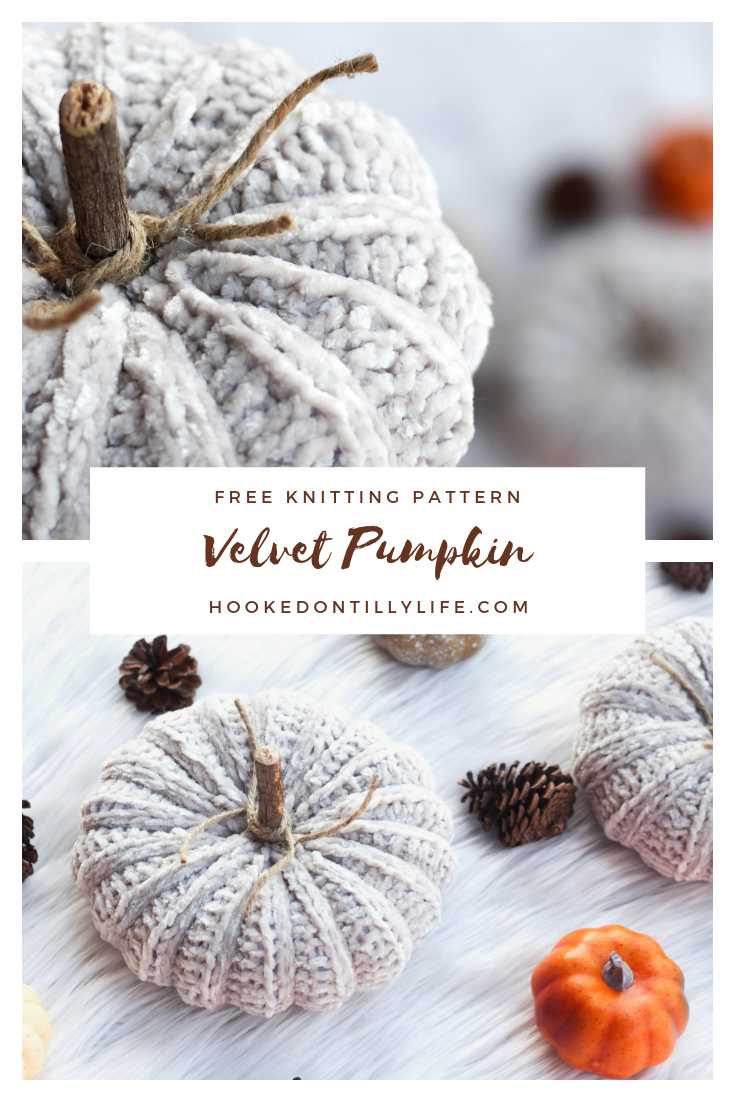
Alternative Sizes and Colors
If you’re looking to knit a pumpkin but want to create a larger or smaller version than the original pattern, it’s easy to adjust the size. Simply change the gauge by using a different weight of yarn or adjusting your needle size. For example, to make a larger pumpkin, use a bulky or super bulky weight yarn and larger needles. To make a smaller pumpkin, use a lighter weight yarn and smaller needles. Remember to check your gauge before starting to ensure your pumpkin turns out the size you desire.
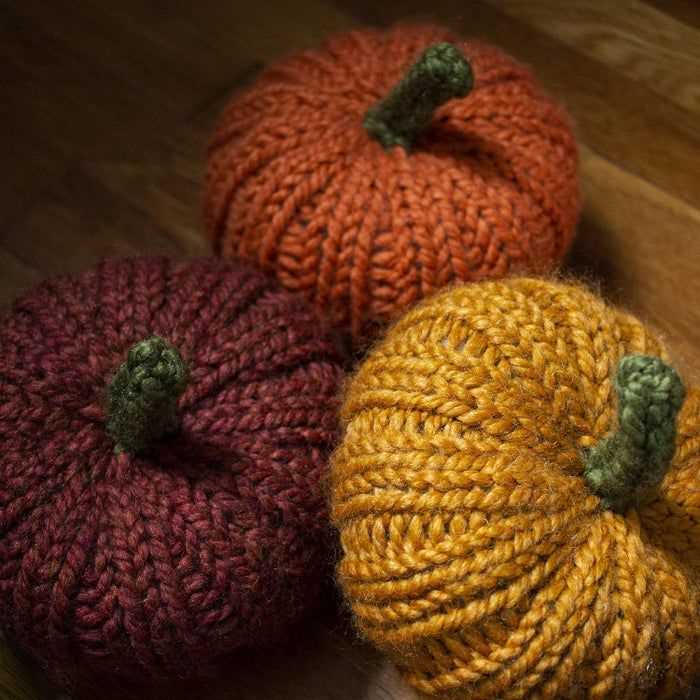
Not only can you customize the size of your knitted pumpkin, but you can also experiment with different colors. While the traditional orange pumpkin is a classic choice, you can add a unique touch to your Halloween or fall decor by making pumpkins in different colors. Consider using yarns in shades of white, yellow, green, or even purple to create a variety of pumpkins that will stand out. You can also use multiple colors in one pumpkin by knitting stripes or color blocks. Get creative and have fun playing with different color combinations!
Customizing Size:
- Use a different weight of yarn to adjust the size of your pumpkin.
- Change your needle size to achieve the desired gauge for a larger or smaller pumpkin.
- Check your gauge before starting to ensure your pumpkin turns out the size you want.
Experimenting with Colors:
- Try using yarns in shades of white, yellow, green, or purple to create pumpkins in different colors.
- Knit stripes or color blocks to incorporate multiple colors in one pumpkin.
- Get creative and have fun playing with different color combinations to make unique and eye-catching pumpkins.
Tips and Tricks for Knitting Pumpkins
Knitting pumpkins can be a fun and festive way to add a touch of autumn to your home decor. Whether you’re a beginner or an experienced knitter, here are some tips and tricks to help you create the perfect knitted pumpkin.
Choose the Right Yarn and Needle Size
When knitting pumpkins, it’s important to select the right yarn and needle size for your desired outcome. Chunky or bulky yarn is a popular choice as it creates a thick and plump pumpkin. Pair it with larger size needles to achieve the desired texture and gauge. However, if you prefer a more delicate and dainty pumpkin, opt for a thinner yarn and smaller needles.
- Choose yarn in warm autumn colors such as orange, brown, or yellow to capture the essence of fall.
- Experiment with different textures like variegated or speckled yarn to add visual interest to your pumpkins.
Use the Right Stitch Patterns
There are a variety of stitch patterns you can use to give your knitted pumpkins a unique texture. One popular option is the seed stitch, which creates a bumpy and textured surface. Another option is the garter stitch, which produces a more subtle texture. You can also try using a combination of different stitch patterns to create a striped or ribbed effect.
- Consider using a technique such as i-cord for the pumpkin stem to add a realistic touch.
- Experiment with different stitch patterns to create pumpkins with varying textures and designs.
Stuffing and Shaping
The stuffing and shaping process is crucial for achieving the perfect knitted pumpkin. Once your knitting is complete, stuff the pumpkin firmly with fiberfill or another stuffing material. Pay attention to shaping the pumpkin by adding increases and decreases strategically to create a round and plump shape.
- For a more realistic look, consider adding a small amount of weighted beads or pellets to the bottom of the pumpkin to give it some stability.
- You can also experiment with different sizes and shapes to create a variety of pumpkins.
Knitting pumpkins can be a fun and rewarding project. By following these tips and tricks, you’ll be able to create beautiful and festive pumpkins to decorate your home for the autumn season.
Where to Find More Patterns
If you enjoyed knitting the pumpkin pattern and want to explore more knitting projects, there are plenty of resources available to find more patterns. Here are some places where you can look:
- Online knitting communities: Joining online knitting communities and forums is a great way to connect with other knitters and find new patterns. Websites like Ravelry, Knitting Paradise, and LoveKnitting have extensive pattern libraries and active communities where you can ask for recommendations.
- Knitting magazines and books: There are many knitting magazines and books that feature a variety of knitting patterns. Subscribing to a knitting magazine or browsing through knitting books at your local library or bookstore can provide you with endless inspiration.
- Knitting blogs and websites: Many knitting enthusiasts share their patterns and projects on personal blogs and websites. Exploring knitting blogs and websites can lead you to unique and creative patterns that you won’t find elsewhere. Some popular knitting blogs include Tin Can Knits, Purl Soho, and Yarnspirations.
- YouTube tutorials: YouTube is a treasure trove of knitting tutorials and patterns. Many knitters and designers create video tutorials where they share their patterns and demonstrate how to knit them. Searching for specific knitting patterns on YouTube can provide you with step-by-step guidance.
With so many resources available, you’ll never run out of knitting patterns to try. Whether you’re a beginner or an experienced knitter, exploring different patterns and techniques can help you develop your skills and create beautiful projects.