
If you love knitting and want to stay warm and stylish this winter, then a sweater vest is the perfect project for you. Sweater vests are timeless pieces that can be layered over shirts and dresses or worn on their own. Not only are they practical for keeping warm, but they also add a touch of vintage charm to any outfit.
Whether you are a beginner or an experienced knitter, there are a variety of sweater vest knitting patterns available for free online. These patterns range in difficulty and style, so you can find the perfect one to suit your skill level and personal taste. From classic cable knits to modern color-block designs, there is something for everyone.
With the right yarn and knitting needles, you can create a beautiful sweater vest that will become a staple in your winter wardrobe. Not only will it keep you cozy, but it is also a great way to showcase your knitting skills and creativity. So why not give it a try? Explore the world of sweater vest knitting patterns and start your next knitting project today.
Basic knitting techniques
Knitting is a versatile craft that allows you to create beautiful and cozy garments. Whether you’re a beginner or an experienced knitter, it’s important to understand the basic knitting techniques that form the foundation of all knitting projects. By mastering these techniques, you’ll be able to knit a variety of patterns, including sweater vests.
Casting on: Casting on is the first step in any knitting project. It involves creating the initial stitches on the needle. There are several methods for casting on, including the long-tail cast on, the knitted cast on, and the cable cast on. Each method creates a different edge, so it’s important to choose the one that best suits your project.
Knit stitch: The knit stitch is the most basic stitch in knitting. It creates a smooth and flat fabric. To knit a stitch, insert the right needle into the front of the first stitch on the left needle, wrap the yarn around the right needle, and pull it through the stitch, sliding the stitch off the left needle. Repeat this process for each stitch until you reach the end of the row.
*Continue with additional techniques, such as purl stitch, ribbing, decreasing and increasing, and finishing techniques.
Choosing the right yarn
When it comes to knitting a sweater vest, choosing the right yarn is essential for achieving the desired result. The type and quality of yarn can greatly impact the overall look and feel of the finished garment.
Fiber content: The first consideration when selecting yarn for a sweater vest is the fiber content. Different fibers have distinct characteristics that can affect the drape, warmth, and durability of the vest. Popular options for sweater vests include wool, cotton, and acrylic. Wool provides excellent warmth and elasticity, while cotton offers breathability and a soft feel. Acrylic yarns are often chosen for their affordability and easy care.
Weight: Another factor to consider is the weight of the yarn. The weight determines the thickness and heaviness of the fabric. Fingering or sport weight yarns are ideal for lightweight and delicate sweater vests, while worsted or bulky weight yarns are better suited for cozy and warm vests. It’s important to check the pattern requirements for the recommended yarn weight to ensure the vest turns out as intended.
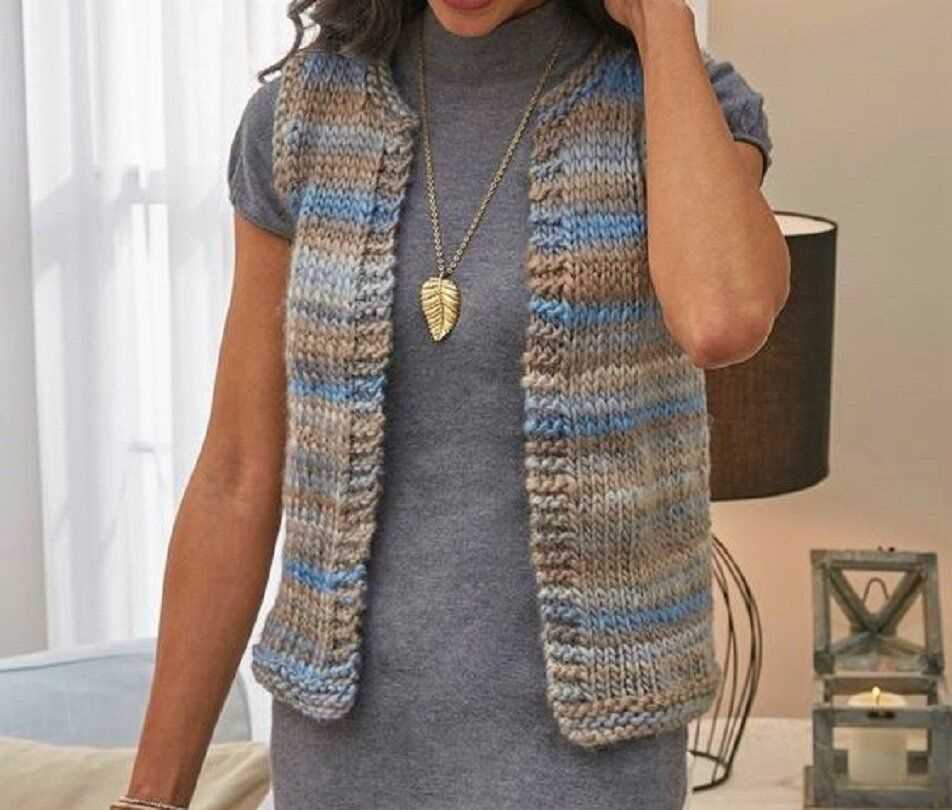
Texture and color: The texture and color of the yarn can also make a significant difference in the appearance of the sweater vest. Smooth and solid-colored yarns create a more polished and classic look, while variegated or textured yarns can add visual interest and dimension to the garment. Consider the style and design of the vest pattern when choosing the texture and color of the yarn to ensure they complement each other.
Budget: Lastly, it’s important to consider your budget when selecting yarn for a sweater vest. Yarn prices can vary greatly depending on the fiber content and brand. Take the time to compare prices and consider the overall value and longevity of the yarn. Investing in higher quality yarn may result in a sweater vest that lasts longer and looks better in the long run.
In conclusion, choosing the right yarn for a sweater vest involves considering the fiber content, weight, texture and color, and budget. By carefully selecting the yarn that aligns with your preferences and the requirements of the pattern, you can ensure a successful knitting project and a sweater vest that meets your expectations.
Selecting the perfect needles
When it comes to knitting a sweater vest, selecting the right needles is crucial to ensure that the final product turns out just as you envisioned. There are several factors to consider when choosing your needles, including the type of yarn you will be using and the desired gauge for your project.
Type of needles: There are various types of knitting needles available, including straight needles, circular needles, and double-pointed needles. Straight needles are commonly used for flat knitting, while circular needles are preferred for projects that require knitting in the round. Double-pointed needles are typically used for smaller projects or when working on small areas such as sleeves or collars.
Material: Knitting needles come in various materials, such as bamboo, wood, metal, and plastic. Each material has its advantages and disadvantages. Bamboo and wood needles are known for their lightweight and smooth finish, making them great for slippery yarns. Metal needles, on the other hand, are durable and provide excellent stitch definition. Plastic needles are often the most affordable option but may not be as durable as other materials.
Size and gauge: The size of your needles will depend on the gauge you want to achieve with your sweater vest. The gauge refers to the number of stitches and rows per inch. To ensure that your sweater vest fits properly, it is important to follow the recommended gauge in the knitting pattern. Using larger needles will result in a looser and drapier fabric, while smaller needles will create a tighter and denser fabric.
By considering these factors and experimenting with different needle sizes and materials, you can find the perfect needles for your sweater vest knitting project. Remember to always swatch and measure your gauge before starting your project to achieve the desired fit and result.
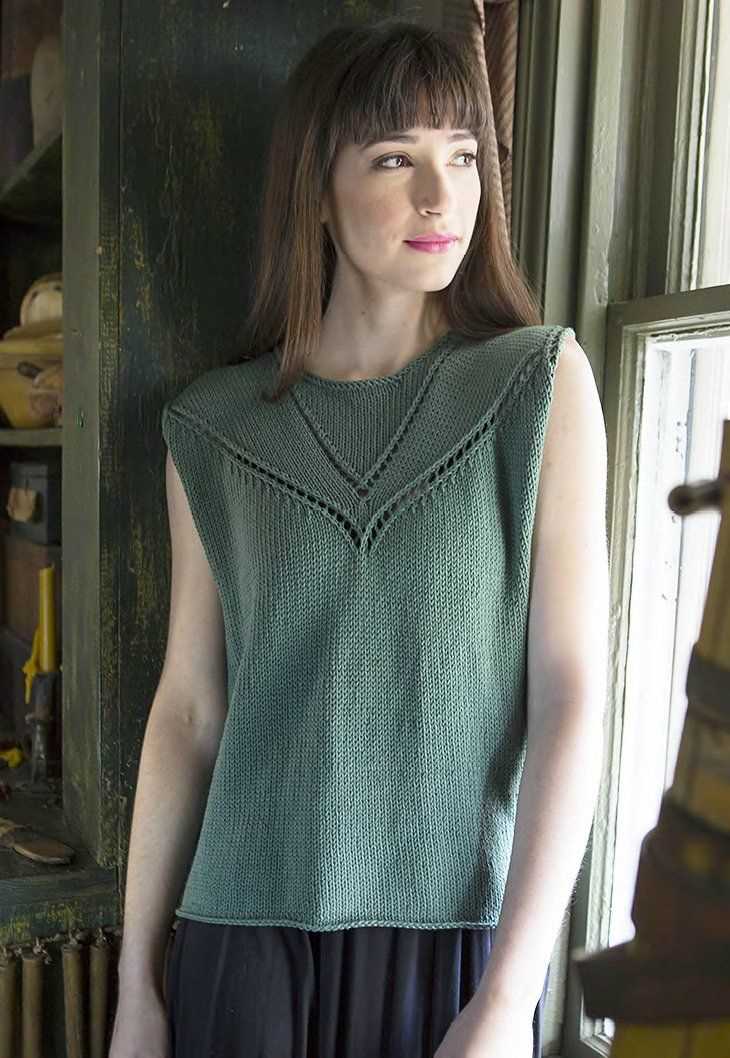
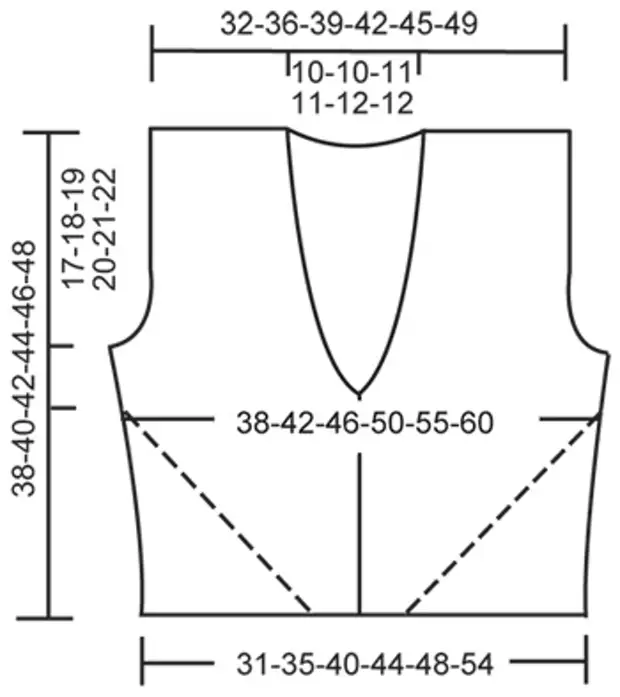
Parts of a Sweater Vest
A sweater vest is a versatile and stylish garment that can be worn in various ways. It is made up of several key elements that work together to create the final product. Understanding the different parts of a sweater vest can help you appreciate the intricacy of its construction and also aid in the knitting process.
1. Front and Back Panels
The front and back panels form the main body of the sweater vest. Typically, these panels are knitted separately and then stitched together at the shoulders and sides. The front panel usually has a lower neckline compared to the back panel, allowing for a comfortable and flattering fit.
2. Armholes and Shoulder Seams
The armholes are openings on the sides of the sweater vest that allow for freedom of movement. They are carefully shaped and positioned during the knitting process to ensure a proper fit. The shoulder seams, on the other hand, connect the front and back panels at the top, creating a seamless transition from the body to the shoulders.
3. Neckline
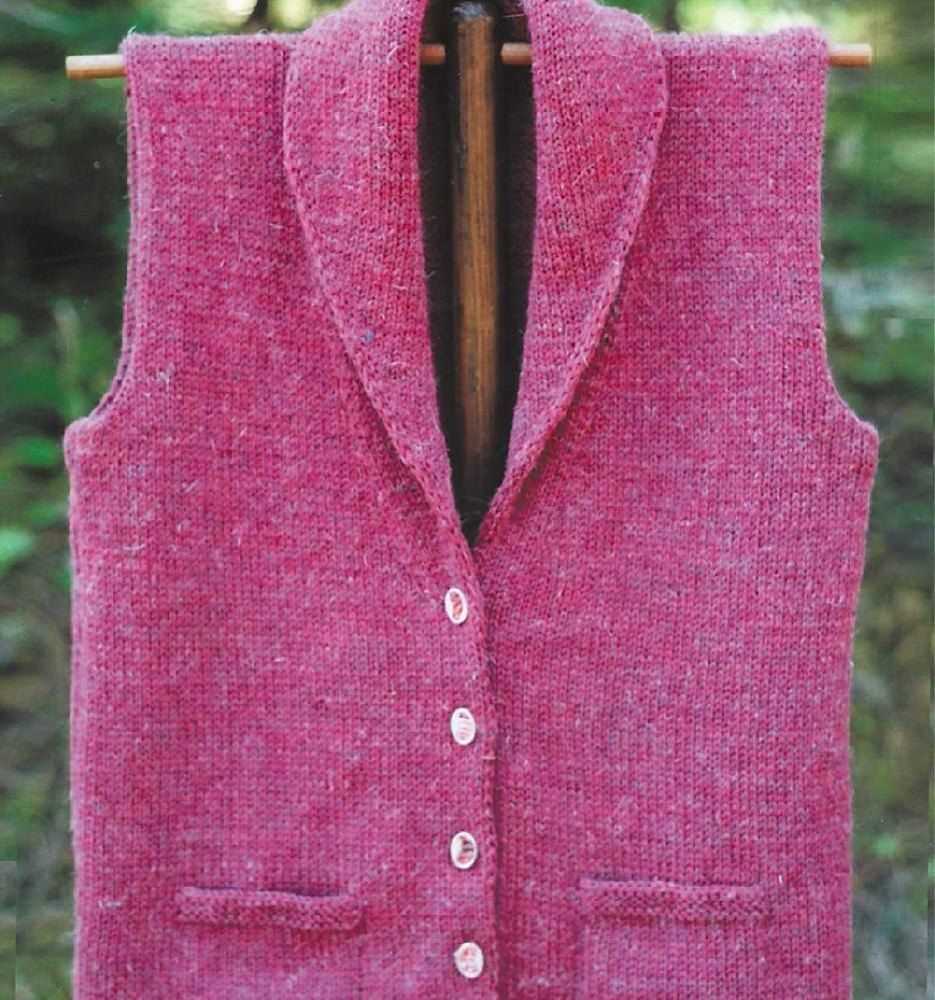
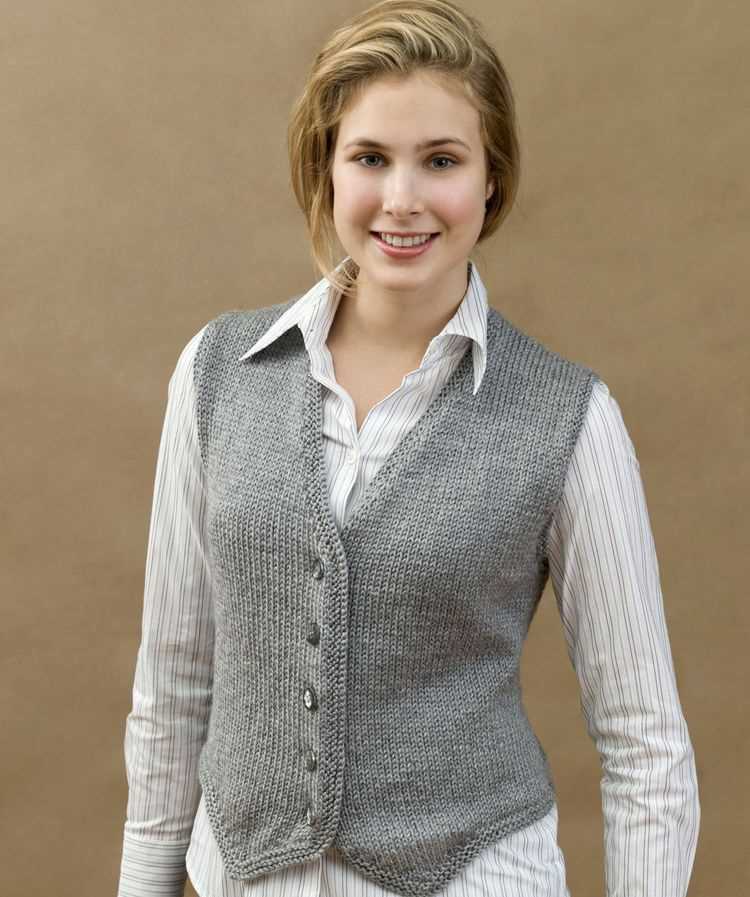
The neckline of a sweater vest can vary depending on the desired style. It can be a simple crewneck, a V-neck, or even a turtleneck. The neckline is an important design element that can greatly impact the overall look and feel of the sweater vest. It is usually finished with ribbing or a decorative edging to add a polished touch.
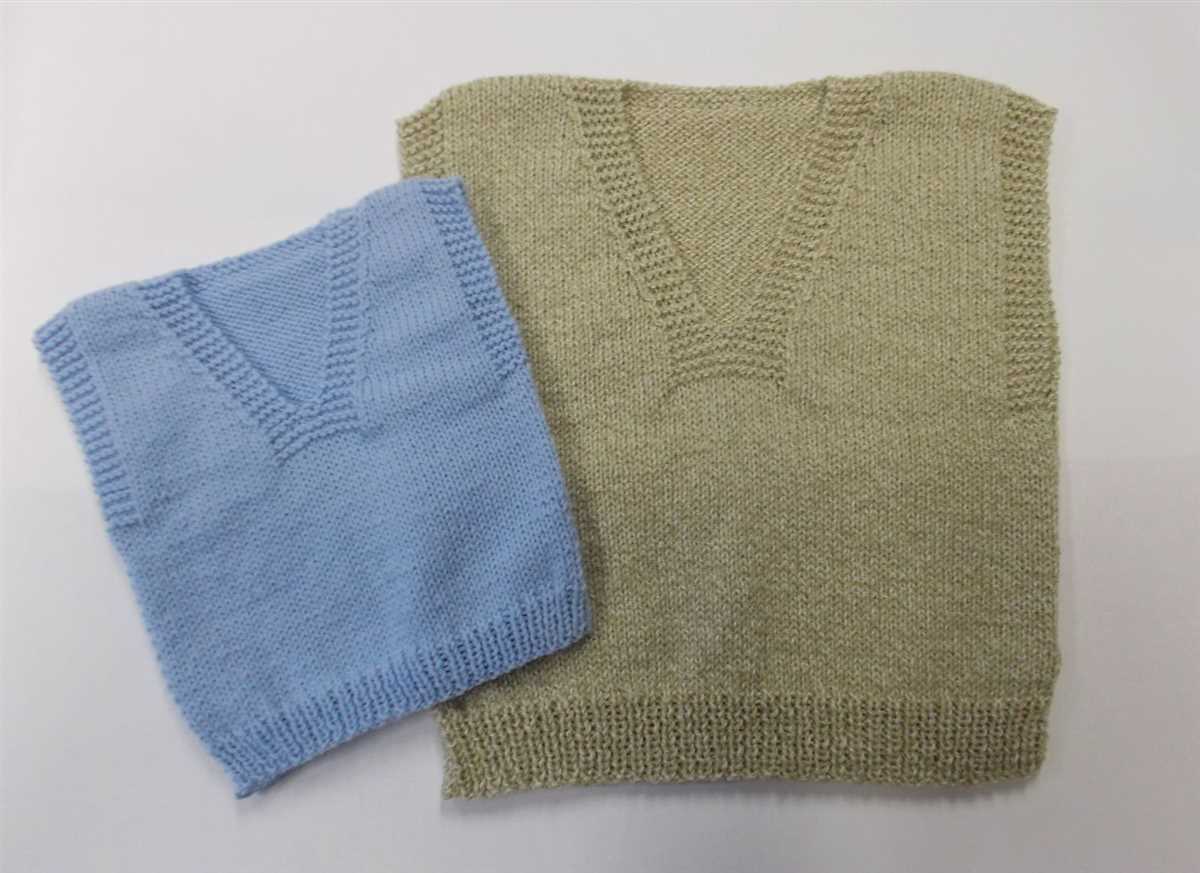
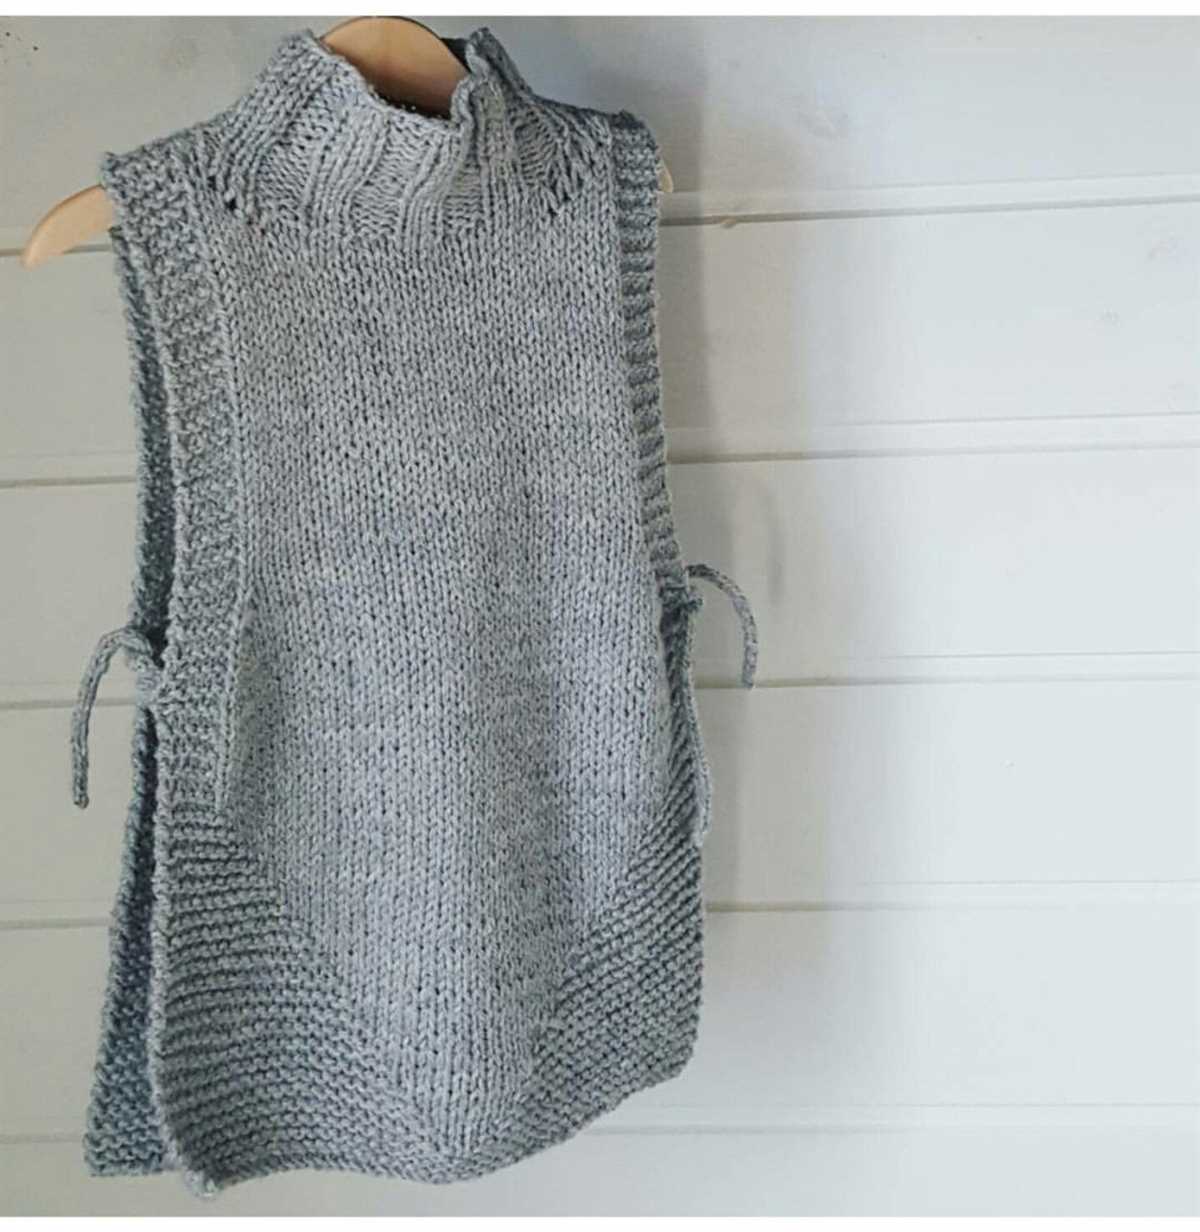
4. Hem and Ribbing
The hem of a sweater vest is the bottom edge, which helps provide structure and prevent stretching. It is often finished with ribbing, which is a knitted pattern that creates elasticity and helps the garment retain its shape. The ribbing can also be used for the armholes and neckline to create a cohesive look.
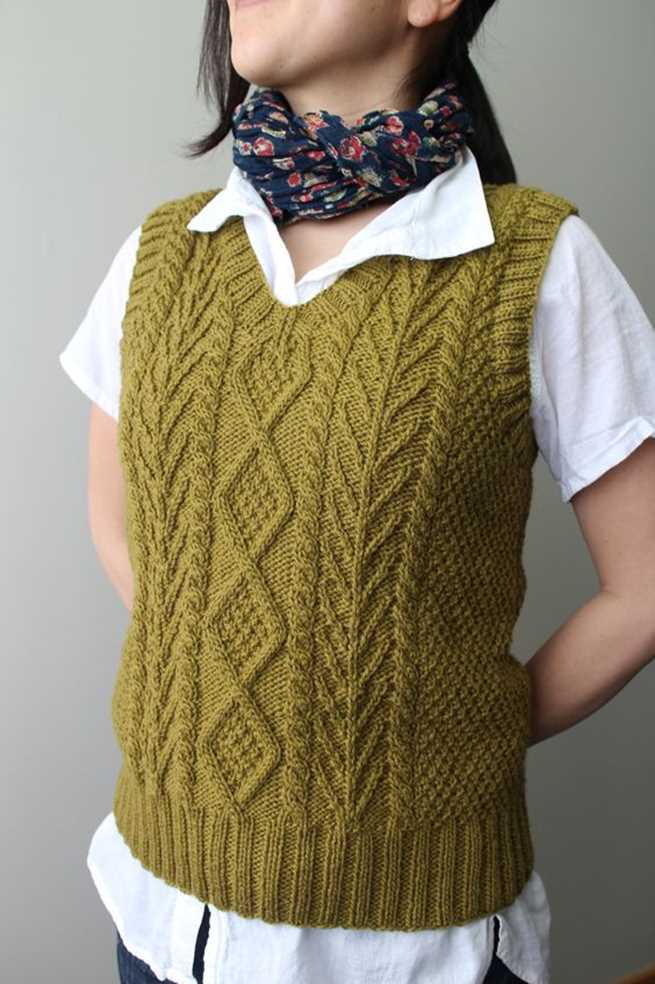
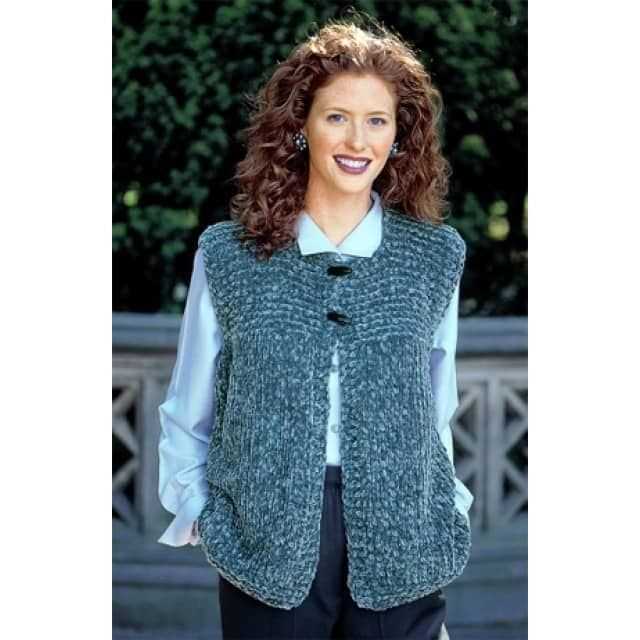
5. Decorative Details
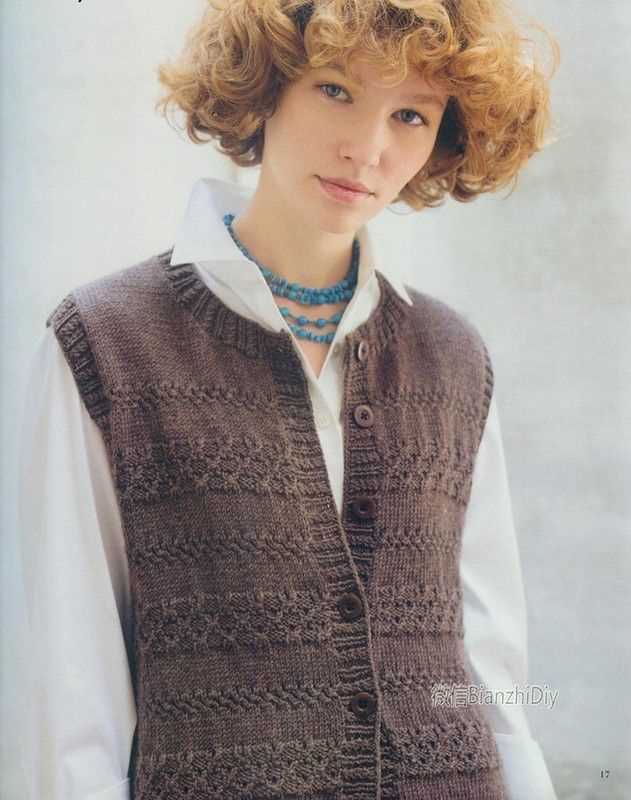
A sweater vest can be enhanced with various decorative details, such as cables, lace patterns, or colorwork. These details add visual interest and can make the sweater vest stand out. Knitting patterns often provide instructions for incorporating these decorative elements, allowing knitters to customize their creations.
Overall, a sweater vest is a combination of carefully crafted parts that come together to create a functional and fashionable garment. By understanding the different components and techniques involved, knitters can create beautiful sweater vests that showcase their skills and personal style.
Knitting a simple stockinette stitch
Knitting a stockinette stitch is a basic knitting technique that is commonly used in many knitting patterns, including sweater vests. It creates a smooth, even fabric that is perfect for garments like sweaters and vests.
To knit a stockinette stitch, you will need to know how to knit and purl. The pattern will usually specify which stitches to use, but the basic idea is to knit all the stitches on one row and purl all the stitches on the next row. This creates the characteristic V-shaped pattern on one side of the fabric and a ridged pattern on the other side.
When knitting a stockinette stitch, it’s important to keep an even tension on your yarn so that the fabric doesn’t become too tight or loose. You can achieve this by making sure your tension is consistent and not pulling the yarn too tightly or too loosely as you work.
A stockinette stitch is a versatile stitch that can be used for a variety of projects, including sweater vests. It can be worked in any weight of yarn and can create a range of different fabric textures. By experimenting with different yarns and needle sizes, you can achieve different effects with your stockinette stitch.
Overall, knitting a stockinette stitch is a fundamental technique that every knitter should know. Whether you’re knitting a sweater vest or another project, mastering the stockinette stitch will give you the skills you need to create beautiful, professional-looking garments.
Adding Ribbing for a Professional Touch
When knitting a sweater vest, one way to give your project a more polished and professional look is by adding ribbing to certain areas. Ribbing is a technique that creates stretchy, flexible, and textured fabric, making it perfect for cuffs, necklines, and waistbands.
1. Cuffs: To create ribbed cuffs, start by knitting the desired length of the cuff in the main stitch pattern of your choice. Then, switch to a smaller needle size and work a few rows of ribbing, alternating between knit and purl stitches. This will create a snug fit that holds its shape and provides a cohesive look with the rest of the sweater vest.
2. Neckline: The neckline is a prominent feature of any sweater vest, and adding ribbing can give it a more finished appearance. Depending on the style you prefer, you can opt for a simple ribbed trim or experiment with different ribbing patterns, such as a mock turtleneck or a rolled collar. Just like with the cuffs, using a smaller needle size for the ribbing will help it maintain its shape.
3. Waistband: Lastly, if your sweater vest has a waistband, incorporating ribbing can help prevent it from stretching out over time. This is especially important if you plan on wearing the sweater vest with jeans or trousers. Knitting a ribbed waistband that is slightly tighter than the main body of the vest will ensure that it stays in place and maintains its structure even with regular wear.
By adding ribbing to these key areas of your sweater vest, you can elevate the overall look and give it a more professional touch. Don’t be afraid to experiment with different ribbing patterns and needle sizes to achieve the desired effect!
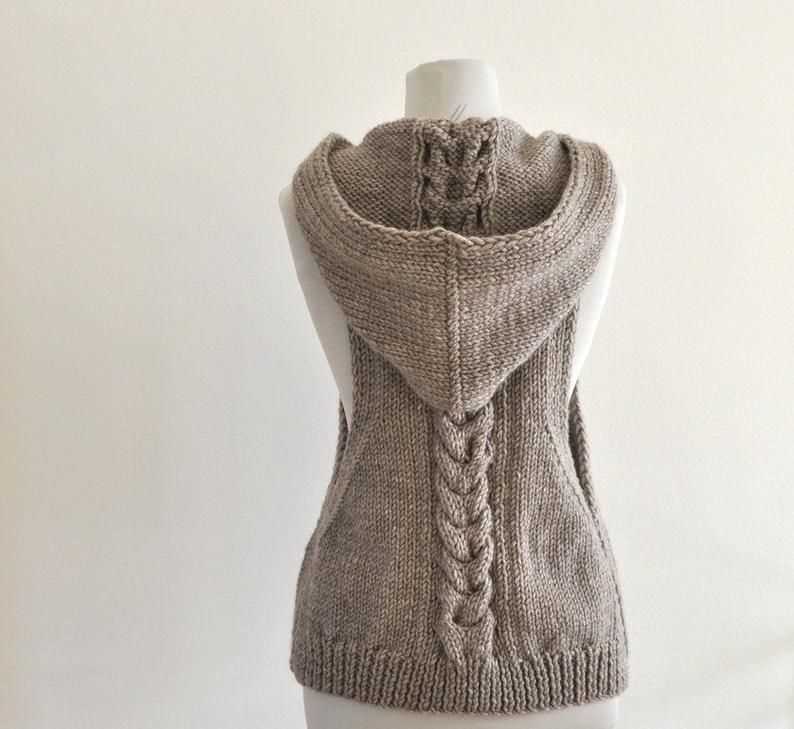
Creating Attractive Cable Patterns
The art of knitting cable patterns has been around for centuries, and it continues to be a popular technique for adding texture and visual interest to sweaters, scarves, and other knitted garments. Whether you’re a beginner or an experienced knitter, learning to create attractive cable patterns can take your knitting skills to the next level.
Choose the Right Yarn: When selecting yarn for your cable knitting project, it’s important to choose a yarn that has good stitch definition and is not too slippery. Yarns with a bit of stretch and bounce, such as wool or wool-blend yarns, work well for creating crisp and well-defined cable patterns.
Start with Simple Cable Patterns: If you’re new to cable knitting, it’s a good idea to start with simple cable patterns. Basic cables, such as a 2-stitch or 4-stitch cable, are a great way to practice the technique and get comfortable with manipulating the stitches. As you gain confidence, you can move on to more intricate cable patterns.
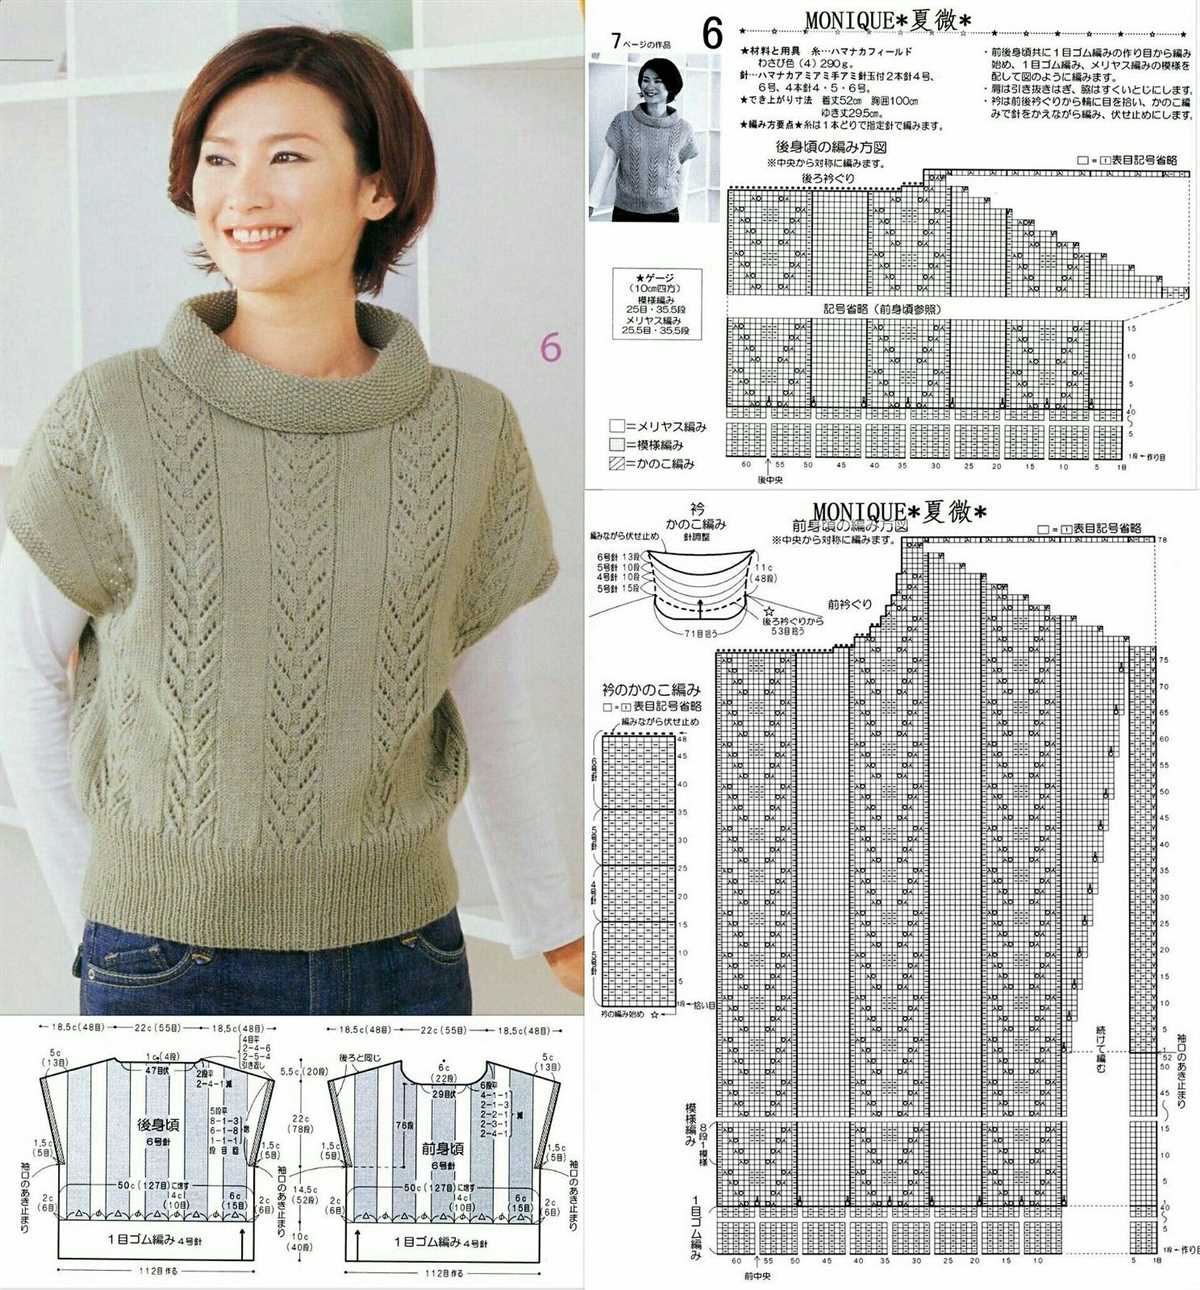
Use Cable Charts: Cable charts are visual representations of how the stitches in a cable pattern are arranged. They are a helpful tool for understanding the structure of a cable pattern and keeping track of your progress. By following a cable chart, you can easily see which stitches should be crossed and in which direction.
Experiment with Different Cable Crossings: One of the exciting aspects of cable knitting is the endless variety of cable crossings you can create. Experiment with different cable crossings to create unique and interesting cable patterns. You can try crossing stitches to the left or right, crossing multiple stitches at once, or combining different types of cable crossings in a single pattern.
Add Texture with Other Stitch Patterns: To make your cable patterns even more eye-catching, consider incorporating other stitch patterns into your design. For example, you can combine cables with a seed stitch or ribbing pattern to add texture and contrast. Be sure to swatch and test different stitch combinations to see how they work together before starting your project.
Finishing touches: Once you’ve completed your cable pattern, don’t forget the importance of blocking to enhance the overall look of your knitted garment. Blocking can help even out your stitches, open up the cable pattern, and give your project a polished and professional finish.
With a little practice and creativity, you can create attractive cable patterns that will impress and inspire. Whether you’re knitting a cozy sweater vest or a trendy scarf, cable knitting adds a timeless and elegant touch to your projects.
Introducing colorwork designs
If you are looking to add some excitement to your knitting projects, why not try your hand at colorwork designs? Colorwork involves using multiple colors in your knitting to create stunning patterns and designs. It can be intimidating for beginners, but with a little practice, anyone can master this technique.
What is colorwork?
Colorwork is a technique in knitting where you work with two or more colors of yarn at the same time to create patterns and designs. There are several different methods for working with multiple colors, including stranded colorwork, intarsia, and slip stitch colorwork. Each method produces unique and beautiful results.
How to get started
To get started with colorwork, you’ll first need to choose a pattern that incorporates colorwork designs. There are plenty of patterns available online for free, including sweater vests, hats, scarves, and more. Once you have the pattern, you’ll need to select your colors. Consider choosing colors that complement each other or create a bold contrast.
Tips for success
- Start with a simple pattern: If you are new to colorwork, it’s best to start with a simple pattern that uses just two colors. As you gain confidence and skill, you can move on to more complex designs.
- Practice tension: Maintaining an even tension while working with multiple colors is crucial for achieving a professional-looking result. Take your time and practice until you find a tension that works for you.
- Use a colorwork chart: Many colorwork patterns use charts to help you visualize the design. It’s important to learn how to read these charts and understand the symbols and colors used.
- Experiment with different techniques: There are several different colorwork techniques to choose from, so don’t be afraid to experiment and find the one that you enjoy the most. You may find that you prefer stranded colorwork over intarsia or vice versa.
Conclusion
Colorwork knitting can be a fun and rewarding technique to master. Whether you choose to knit a cozy sweater vest or a colorful hat, colorwork designs can add a touch of personality and style to your knitting projects. So grab some yarn, choose your colors, and get ready to create beautiful patterns with colorwork.
Finishing techniques for a polished look
When it comes to knitting a sweater vest, the finishing techniques can make all the difference in achieving a polished look. Whether you’re a beginner knitter or more experienced, taking the time to finish your project with attention to detail will elevate the overall appearance and give your sweater vest a professional finish.
Seamless knitting: One of the key techniques for achieving a polished look is seamless knitting. By avoiding visible seams, your sweater vest will have a more seamless and cohesive appearance. This can be achieved by using techniques such as knitting in the round or utilizing seamless construction methods. Seamless knitting not only enhances the aesthetic appeal but also provides a comfortable fit for the wearer.
Blocking: Blocking is an essential step in achieving a polished finish for your sweater vest. This process involves shaping and stretching the knitted fabric to its desired dimensions and allowing it to dry in that shape. Blocking helps to even out stitches, improve the drape of the fabric, and give the sweater vest a more professional and finished look. It can also help to smooth out any uneven tension or curling edges.
Finishing touches: Adding finishing touches, such as decorative edging, buttons, or a collar, can further enhance the polished look of your sweater vest. A neat and well-executed edging can give a clean and refined look to the garment. Choosing the right buttons and sewing them on securely adds an extra touch of sophistication. Similarly, a well-finished collar frames the neckline beautifully and adds a polished touch to the overall design.
Attention to detail: Lastly, paying attention to smaller details can make a significant difference in the overall appearance of your sweater vest. This includes techniques such as weaving in loose ends neatly, ensuring consistent tension throughout the project, and making sure that all seams are well-executed. Taking the time to perfect these details will give your sweater vest a polished look that reflects the time and effort you put into knitting it.
Tips and Tricks for Successful Sweater Vest Knitting
Knitting a sweater vest can be a fun and rewarding project. With the use of free knitting patterns, you can create a stylish and cozy vest to add to your wardrobe. However, it’s important to keep some tips and tricks in mind to ensure successful and enjoyable knitting experience. Here are some helpful tips to consider:
1. Choose the right yarn: When selecting yarn for your sweater vest, make sure to choose a quality yarn that is suitable for the project. Pay attention to the fiber content, weight, and gauge requirements mentioned in the pattern. This will help ensure that your finished vest has the desired drape and structure.
2. Gauge swatch: Always start your sweater vest project by knitting a gauge swatch. This helps you determine if your tension matches the gauge mentioned in the pattern. If your gauge doesn’t match, you may need to adjust your needle size to achieve the correct measurements. Taking the time to make a gauge swatch will prevent any unwelcome surprises in the size and fit of your finished vest.
- 3. Keep track of your progress: To avoid confusion and mistakes, it’s helpful to keep track of your progress as you knit. Use stitch markers to mark important sections such as armholes or neckline shaping. Additionally, consider using a row counter or keeping a written record of the pattern rows you have completed.
- 4. Take breaks: Knitting a sweater vest can be a time-consuming project. It’s important to take regular breaks to avoid strain and fatigue in your hands and wrists. Stretching exercises and hand massages can also help prevent injury or discomfort.
- 5. Finishing touches: Once you have finished knitting your sweater vest, take the time to carefully sew in any loose ends and block your garment. Blocking helps even out the stitches and gives the vest a professional finish. Follow the blocking instructions provided with your yarn to achieve the best results.
By following these tips and tricks, you can ensure a successful and enjoyable knitting experience while creating a beautiful sweater vest. Happy knitting!