
Winter is the perfect time to cozy up with a warm hat that not only keeps you toasty, but also adds a touch of style to your ensemble. Knitting your own winter hat allows you to customize the design, colors, and fit to your liking. In this article, we will be exploring a simple yet stylish knitting pattern for a mens winter hat.
One of the great things about knitting is that it is a craft that can be enjoyed by both beginners and experienced knitters. This mens winter hat knitting pattern is suitable for knitters of any skill level. Whether you are a beginner looking to expand your knitting skills or an experienced knitter looking for a quick and satisfying project, this pattern is perfect for you.
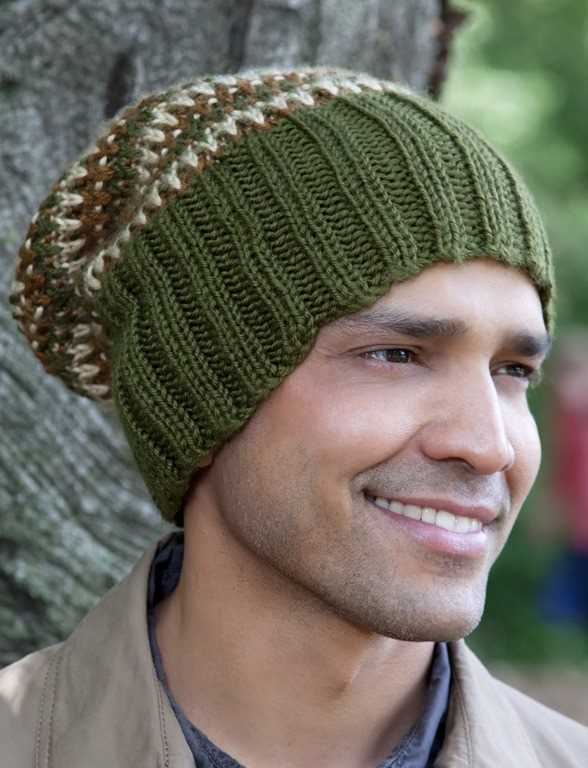
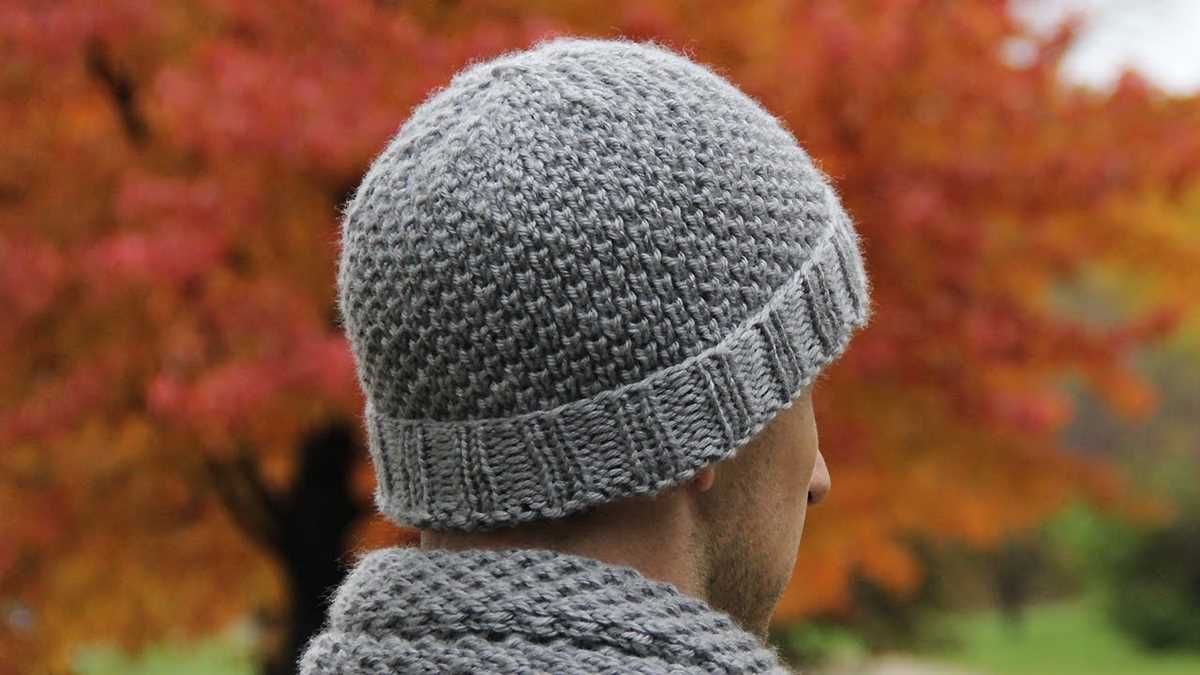
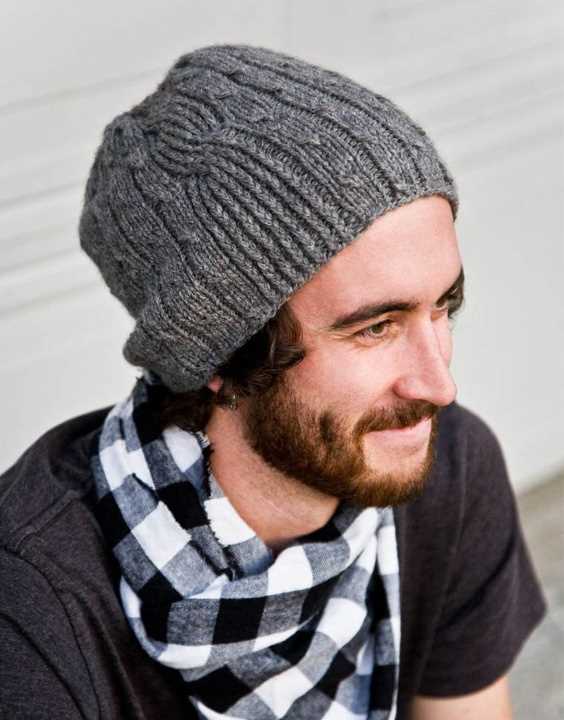
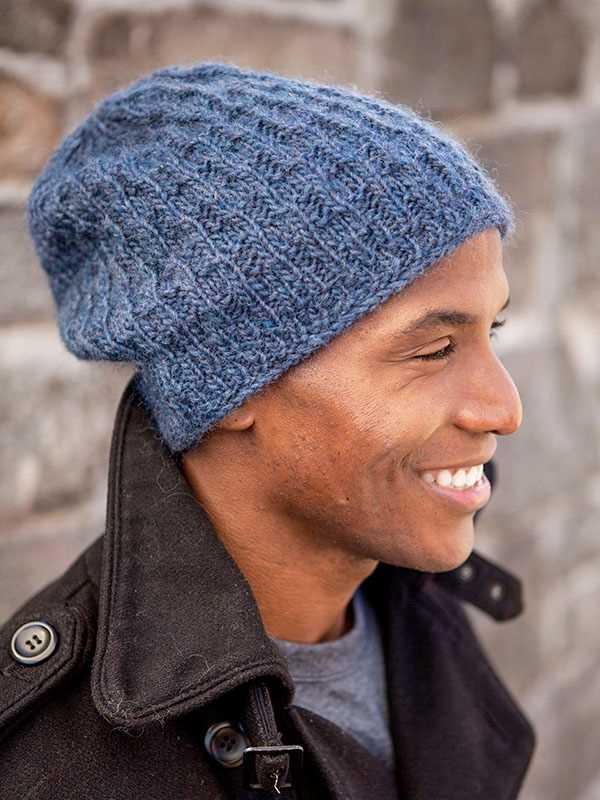
The pattern features a classic ribbed brim that provides a snug fit and added warmth. The body of the hat is worked in a simple stockinette stitch, creating a smooth and sleek surface. The pattern also includes instructions for shaping the crown of the hat, ensuring a comfortable and stylish fit.
With this mens winter hat knitting pattern, you have the freedom to choose your own yarn and color combination. Whether you prefer a bold and vibrant look or a more subtle and neutral palette, the possibilities are endless. So grab your knitting needles, choose your favorite yarn, and get ready to create a stylish and cozy winter accessory.
Mens Winter Hat Knitting Pattern
If you’re looking for a cozy and stylish accessory to keep warm during the winter months, look no further than a men’s winter hat. Knitting your own hat allows you to customize the design, colors, and fit to your liking. With a few basic knitting skills, you can create a hat that is both fashionable and functional.
To start knitting your men’s winter hat, you will need the following supplies: knitting needles, yarn, a tape measure, and a yarn needle for weaving in ends. Choose a yarn that is warm and durable, such as wool or acrylic blend, to ensure your hat will keep you warm and hold its shape.
Pattern
- Cast on the desired number of stitches, depending on the size of the hat you want to make.
- Work in a rib stitch pattern, such as k2, p2, for the brim of the hat. This will give the hat a nice stretch and help it stay in place.
- Continue knitting in the desired stitch pattern for the body of the hat. You can choose from simple stockinette stitch, a textured stitch pattern, or even incorporate cables for added interest.
- Work the hat until it reaches the desired length. You can try it on as you go to ensure a perfect fit.
- Decrease stitches gradually at the crown of the hat to shape it. You can use a simple knit 2 together (k2tog) or slip, slip, knit (ssk) decrease to create a smooth and even crown.
- Once you have decreased enough stitches, cut the yarn leaving a long tail. Thread the tail through the yarn needle, slide it through the remaining stitches, and pull tight to close the top of the hat.
- Finally, weave in any loose ends and block the hat to give it a polished finish.
With this basic pattern, you can get creative and add your personal touch to your men’s winter hat. Experiment with different stitch patterns, add stripes or colorwork, or even incorporate a pom-pom for extra flair. Stay warm and stylish all winter long with a handmade men’s winter hat!
Selecting the Right Yarn for Your Winter Hat
When it comes to knitting a winter hat, choosing the right yarn is essential. You want a yarn that not only provides warmth but also holds its shape and is comfortable to wear. Here are some factors to consider when selecting the perfect yarn for your winter hat:
Fiber Content: The fiber content of the yarn will determine its warmth and durability. Wool is a popular choice for winter hats as it is natural, warm, and has excellent insulating properties. Other options to consider include alpaca, mohair, and cashmere, which offer luxurious softness and warmth. If you prefer a vegan option, there are also synthetic yarns such as acrylic and nylon that can provide warmth and durability.
- Weight: The weight of the yarn will affect the thickness and warmth of your hat. Bulky or chunky yarns are thicker and will create a warmer hat, while lighter weight yarns such as fingering or sport weight will result in a lighter, more breathable hat. Consider the climate and temperature in your area when choosing the weight of your yarn.
- Texture: The texture of the yarn can add visual interest to your hat. Smooth yarns will create a clean and classic look, while yarns with texture, such as boucle or tweed, can add depth and dimension to your design. Consider the style and look you want to achieve when selecting the texture of your yarn.
- Color: The color of the yarn is a personal preference, but it can also affect the overall look of your hat. Darker colors, such as black or navy, can add a sleek and sophisticated touch to your hat, while vibrant colors or variegated yarns can make a bold statement. Consider your personal style and the outfit you plan to wear your hat with when choosing the color.
Remember, knitting a winter hat is not just about functionality but also about expressing your personal style. By considering the fiber content, weight, texture, and color of the yarn, you can select the perfect yarn that will not only keep you warm but also make a fashion statement.
Picking the Perfect Needles for Your Knitting Project
When it comes to knitting, choosing the right needles can make all the difference in the outcome of your project. The type and size of needles you use can affect the stitch definition, drape, and overall appearance of your knitted pieces. To ensure success, it’s important to consider a few factors when picking the perfect needles for your knitting project.
Firstly, you need to consider the material of the needles. There are various options available, including metal, wood, bamboo, and plastic. Each material has its own advantages and disadvantages. Metal needles are often smooth, lightweight, and durable, making them a popular choice for many knitters. Wood and bamboo needles offer a warm and natural feel, and tend to be quieter when knitting. Plastic needles are lightweight and affordable, but may not be as durable as other materials.
Next, you’ll want to consider the size of the needles.

- Gauge: The size of needles you choose should correspond to the gauge specified in your knitting pattern. The gauge determines the number of stitches and rows per inch, and using the wrong needle size can result in a finished piece that is either too small or too large.
- Yarn weight: The weight of the yarn you’re using also plays a role in needle selection. Thicker yarns generally require larger needles, while finer yarns work best with smaller needles. Check the yarn label for recommended needle sizes.
- Desired fabric: Consider the type of fabric you want to create. Thinner needles produce tighter stitches and a denser fabric, while larger needles create looser stitches and a more open fabric.
Lastly, consider the length and style of the needles. Needle length can vary, with options such as straight, circular, and double-pointed needles. Straight needles are typically used for flat knitting projects, while circular needles can be used for both flat and in-the-round knitting. Double-pointed needles are often used for small, circular projects such as socks or mittens. Choose the style that is most comfortable and suitable for your project.
By carefully considering the material, size, and style of your needles, you can ensure that your knitting projects turn out beautifully. Experimenting with different needles can also lead to new and exciting possibilities in your knitting journey. Happy knitting!
Understanding the Basic Knitting Stitches You’ll Need
When it comes to knitting, there are a few basic stitches that you’ll need to know in order to create any project. Whether you’re a beginner or an experienced knitter, these stitches will form the foundation of your knitting repertoire. Understanding these stitches will allow you to follow patterns and create your own designs with confidence.
1. Knit Stitch
The knit stitch, also known as the garter stitch, is the most basic stitch in knitting. It is created by inserting the needle into the stitch from left to right, wrapping the yarn around the needle, and pulling it through the stitch. This stitch creates a series of V-shaped loops on the right side of the fabric.
2. Purl Stitch
The purl stitch is the opposite of the knit stitch. It is created by inserting the needle into the stitch from right to left, wrapping the yarn around the needle, and pulling it through the stitch. This stitch creates a series of bumps or horizontal lines on the right side of the fabric.
3. Stockinette Stitch
The stockinette stitch is created by alternating rows of knit and purl stitches. This stitch creates a smooth and flat fabric, with the knit stitches forming the right side of the fabric and the purl stitches forming the wrong side. It is commonly used for sweaters, scarves, and other garments.
4. Ribbing
Ribbing is a pattern created by alternating knit and purl stitches in a specific order, such as K1, P1 or K2, P2. This stitch pattern is commonly used for cuffs, collars, and hems, as it creates a stretchy and textured fabric.
5. Seed Stitch
The seed stitch is created by alternating knit and purl stitches within the same row. This stitch pattern creates a textured fabric with small bumps or seed-like clusters. It is often used for borders, edgings, and decorative details.
By mastering these basic knitting stitches, you’ll be able to knit a wide variety of projects and expand your knitting skills. So grab your needles and yarn, and start practicing these stitches to create beautiful knitted items.
Starting Your Men’s Winter Hat Knitting Project
When it comes to staying warm during the colder months, a knitted hat is a fashion staple that every man needs in his wardrobe. Not only does it provide insulation and protect the head and ears from the cold, but it also adds a stylish touch to any outfit. If you’re ready to embark on a knitting project and create a customized hat for yourself or a loved one, follow these steps to get started.
Gather Your Materials: Before diving into your knitting project, make sure you have all the necessary materials on hand. This includes knitting needles, yarn in your desired color and weight, a knitting pattern suitable for a men’s winter hat, and any additional tools or embellishments you may want to add, such as pom-poms or buttons.
Choose the Right Pattern:
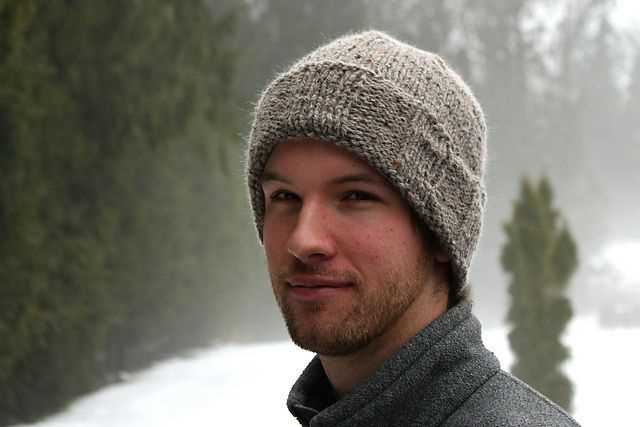
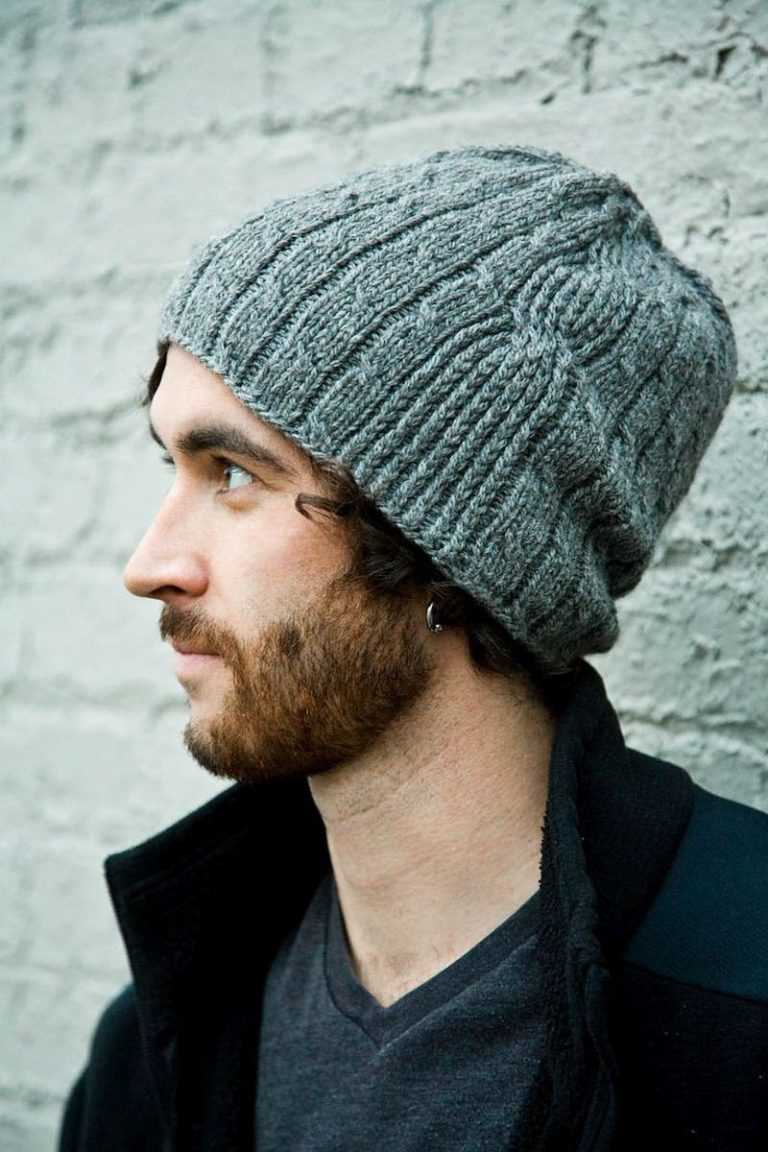
When selecting a knitting pattern for your men’s winter hat, consider factors such as the level of difficulty, style, and the type of stitch used. If you’re a beginner, opt for a pattern that is labeled as “easy” or “beginner-friendly.” More experienced knitters can challenge themselves with intricate cable or colorwork patterns. Additionally, choose a style that complements the wearer’s preferences, whether it be a beanie, slouchy hat, or a classic watch cap.
Consider the Yarn: Selecting the right yarn is crucial for achieving the desired warmth and durability of your men’s winter hat. Look for yarns that are labeled as “chunky” or “worsted weight” for a thicker and more insulating hat. Wool and wool-blend yarns are excellent choices as they provide natural warmth and have good stitch definition. However, if you or the recipient have wool sensitivities, consider alternative options such as acrylic or cotton blends that offer softness and warmth without the itchiness.
- Get to Know the Basic Stitches:
Before starting your men’s winter hat knitting project, it’s essential to familiarize yourself with the basic stitches. These include the knit stitch, purl stitch, and ribbing stitch. Practice these stitches on a swatch before diving into your hat project to ensure you have a good understanding of how to create different patterns and textures.
Start Knitting: With your materials prepared and your chosen pattern in hand, it’s time to start knitting your men’s winter hat. Follow the instructions carefully, ensuring you keep a consistent tension throughout the project. Take breaks when needed, and don’t hesitate to ask for help or consult online tutorials if you encounter any difficulties.
With dedication and practice, you’ll soon have a cozy, handmade men’s winter hat that’s perfect for braving the cold weather in style. Enjoy the process and the satisfaction of creating a functional and fashionable accessory with your own two hands.
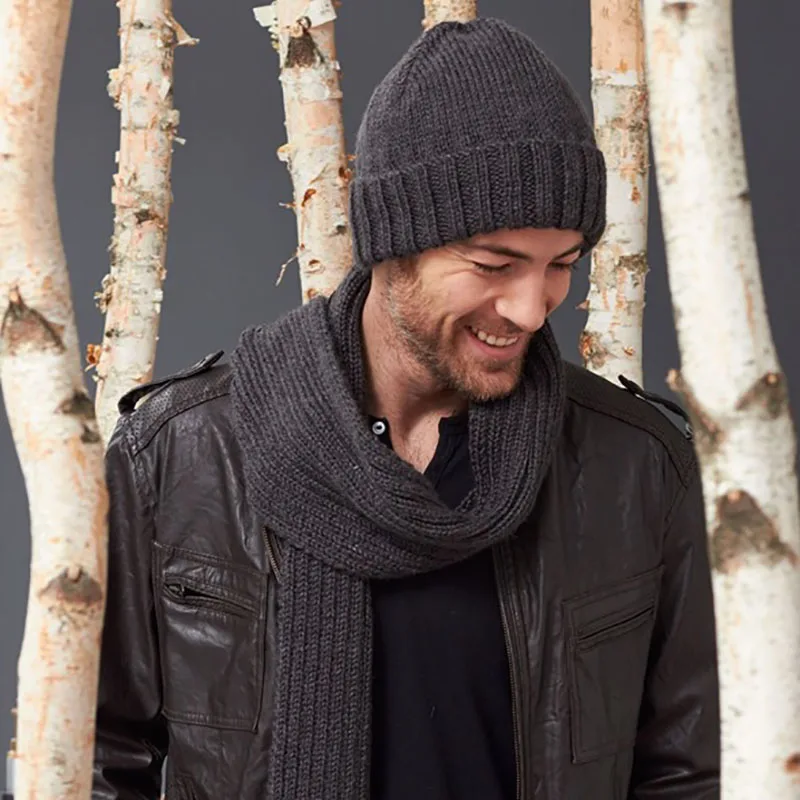
Creating the Ribbing for Your Hat
When knitting a winter hat, the ribbing is an important detail that adds elasticity and helps the hat to stay in place on your head. To create the ribbing, you will need to follow a specific stitch pattern.
To begin, cast on the required number of stitches for your hat. Typically, for a ribbed hat, you will cast on a multiple of a certain number, such as 4 or 6. This allows for the ribbing to be evenly spaced and creates a nice stretchy fabric.
Once you have cast on the stitches, you will begin the ribbing pattern. This is usually a combination of knit and purl stitches. For example, a common ribbing pattern is “k2, p2” which means you will knit two stitches, then purl two stitches, and repeat this pattern until the end of the row. This creates a ribbed effect where the knit stitches stand out and the purl stitches recede.
Continue working the ribbing pattern for the desired length. The length of the ribbing will depend on the style of the hat and personal preference. Some hats may have a short ribbing of only 1-2 inches, while others may have a longer ribbing of 3-4 inches.
Once the ribbing is complete, you will transition to the main body of the hat using the desired stitch pattern or design. The ribbing provides a nice transition and helps to keep the hat snug and in place, making it an essential element of any winter hat.
Working on the Body of Your Hat
After completing the ribbing, it’s time to start working on the body of your hat. This is where you can get creative with your stitches and patterns. You can choose to continue with the same stitch pattern as the ribbing, or switch to a different one for some variation. It’s also a good idea to measure the length of your ribbing and decide how long you want your hat to be.
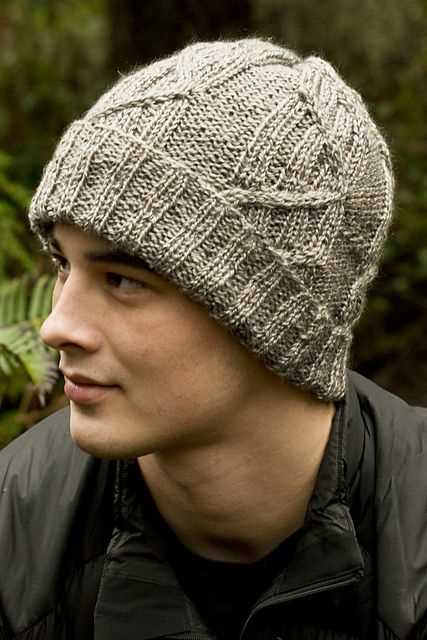
If you want a plain, simple hat, you can continue knitting in stockinette stitch, which is knitting all the stitches in the round. This will give you a smooth, even fabric. Alternatively, you can choose to add some texture to your hat by incorporating a stitch pattern like cables, seed stitch, or moss stitch. These stitches will add visual interest and make your hat stand out.
When knitting the body of your hat, it’s important to keep track of your progress and measure regularly to ensure that your hat is the desired length. You can use a measuring tape or simply try it on, stretching it slightly to see how it fits. It’s also a good idea to periodically try it on to check the fit and make any necessary adjustments.
Remember to keep your tension consistent to ensure that your stitches are even. If you find that your knitting is too tight or too loose, you can adjust your needle size accordingly. Take your time and enjoy the process of knitting your hat. It’s a great way to stay warm and stylish during the winter months!
As you approach the end of the body section, you may want to consider adding a decorative border, such as a few rows of ribbing or a contrasting color. This can add an extra touch of style to your hat and make it more unique. Once you have finished knitting the body of your hat, you can move on to the decreases for the crown.
Adding Texture and Design to Your Winter Hat
When knitting your winter hat, you have the opportunity to add texture and design elements that will make your hat stand out and provide extra warmth. By incorporating different stitches and patterns, you can create a unique and visually appealing hat that will not only keep you cozy but also showcase your knitting skills.
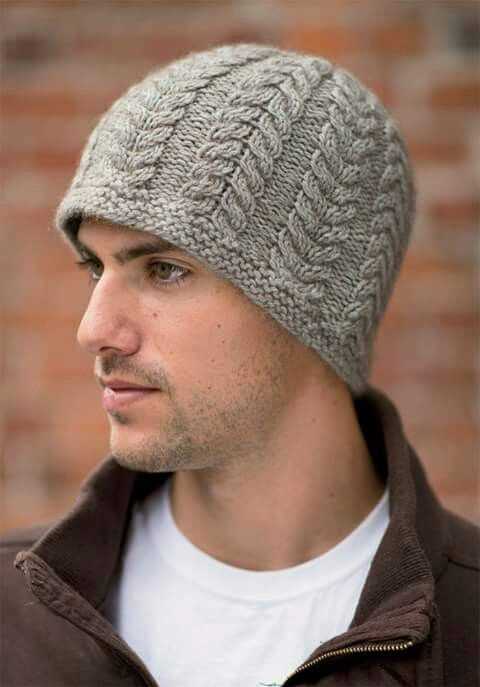
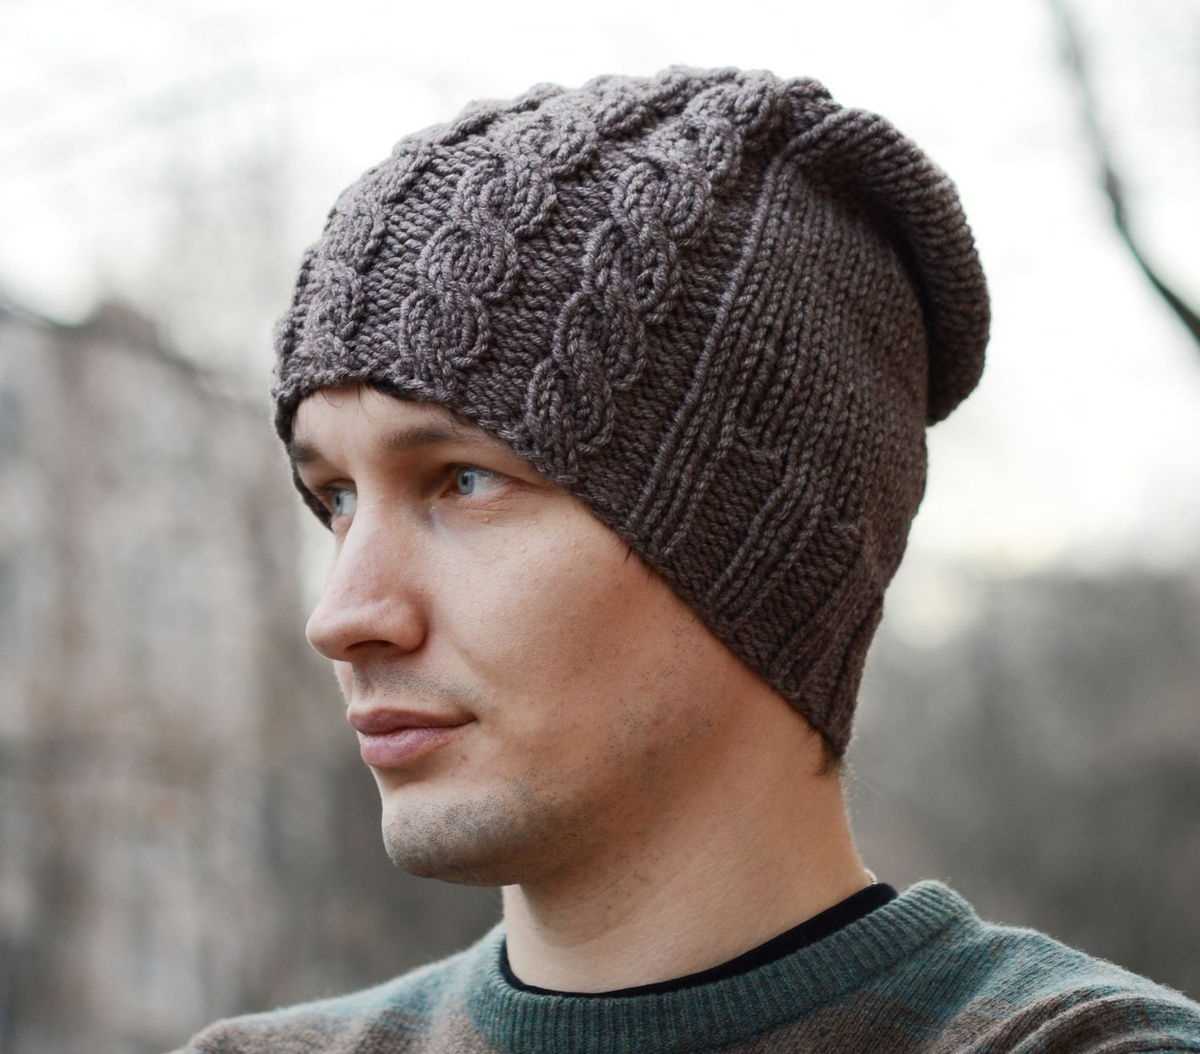
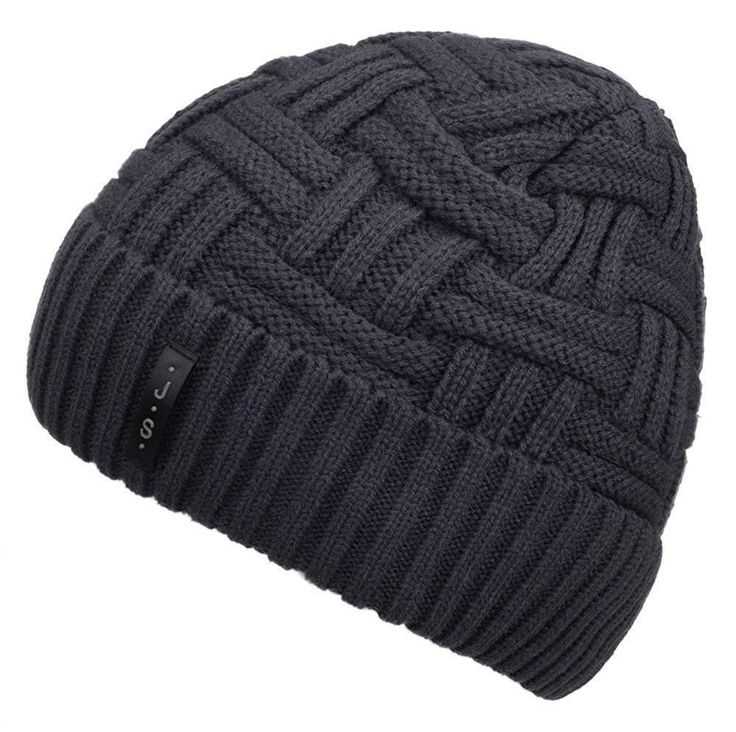
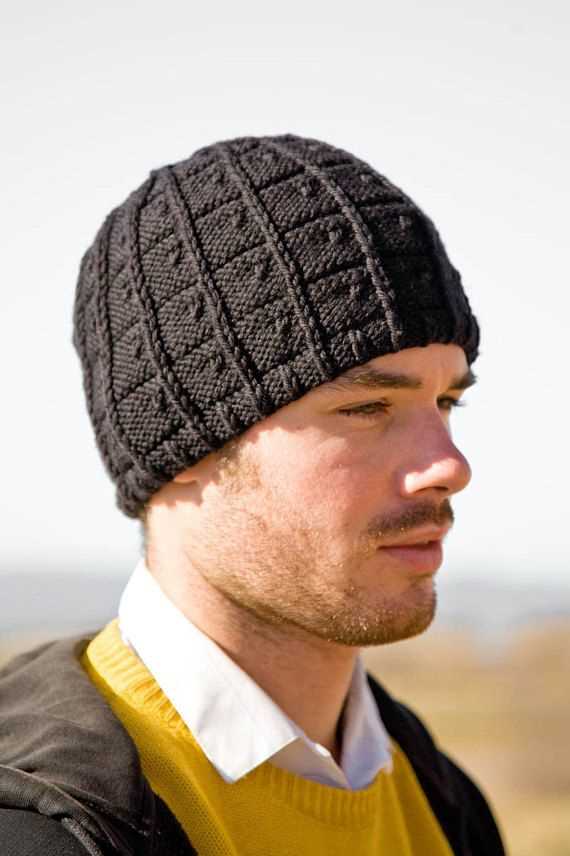
One way to add texture to your winter hat is by using cables. Cables are created by crossing stitches over each other, giving your hat a beautiful braided or woven effect. You can choose to incorporate simple or intricate cable patterns depending on your skill level and personal style. The addition of cables not only adds visual interest but also provides extra warmth by creating air pockets within the fabric of the hat.
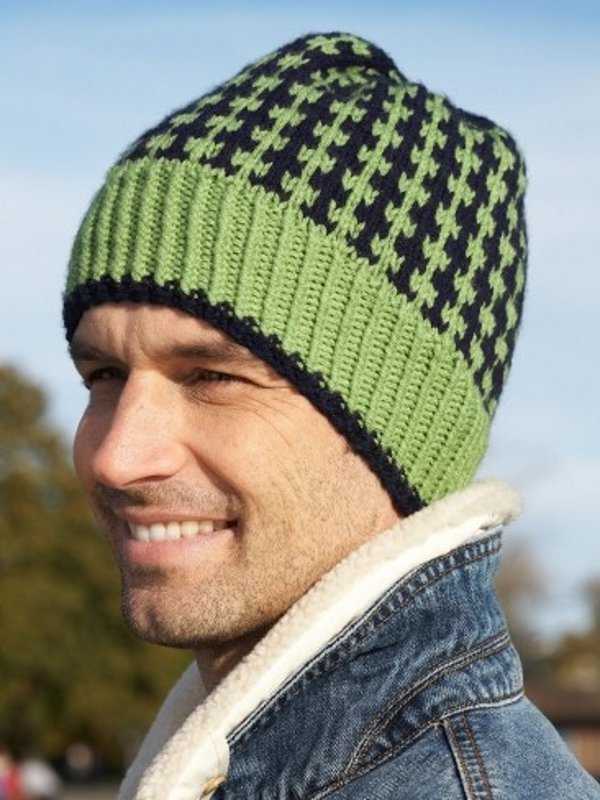
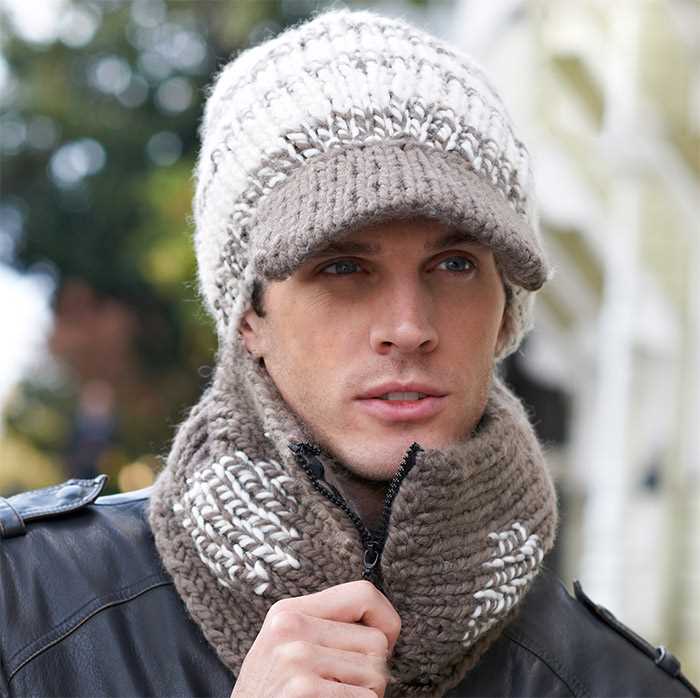
Another way to add design to your winter hat is by using colorwork. Colorwork involves knitting with multiple colors to create a pattern or design. Fair Isle and intarsia are two popular colorwork techniques that can be used to create stunning geometric or pictorial designs on your hat. By carefully selecting contrasting or complementary colors, you can create a hat that is truly unique and eye-catching.
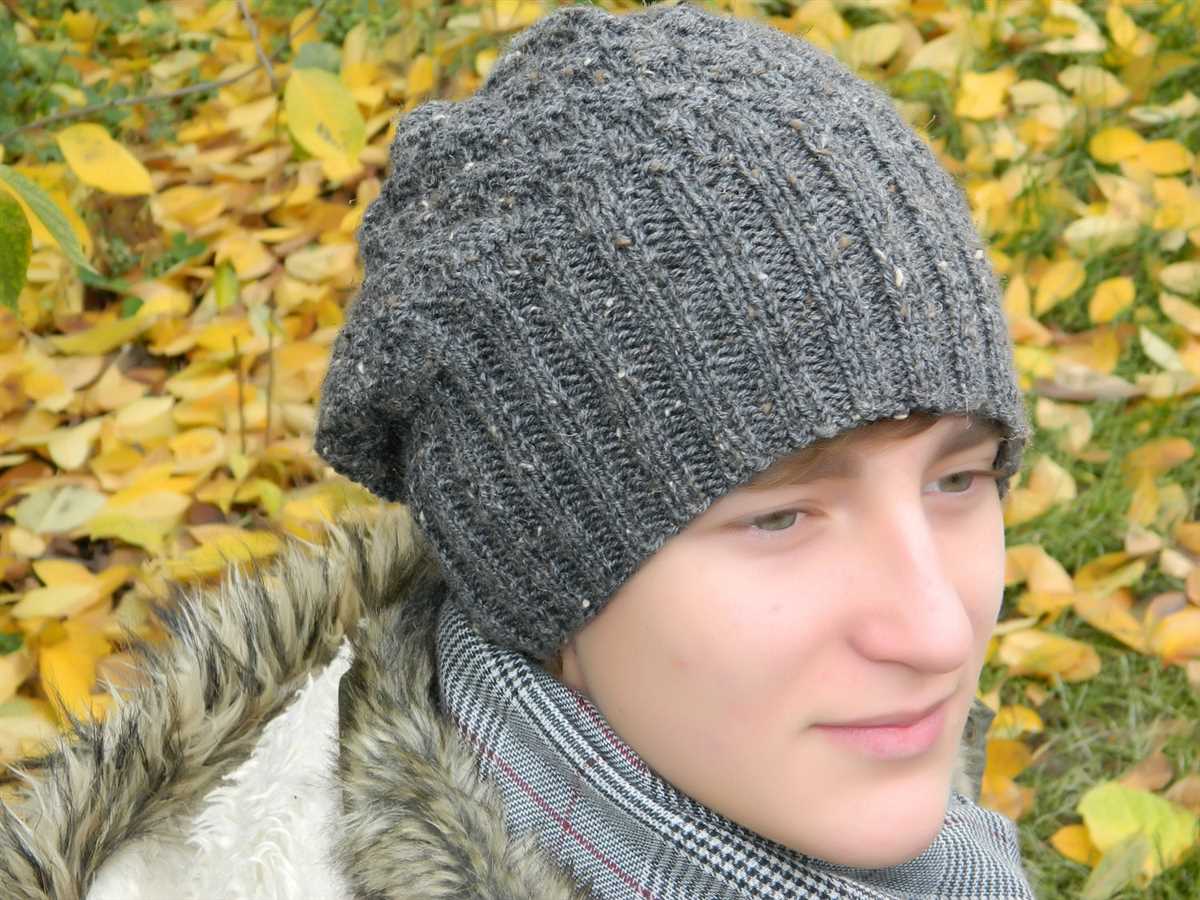
- Textured Stitch Patterns: In addition to cables and colorwork, there are many textured stitch patterns that can be used to add visual interest to your winter hat. For example, you can incorporate ribbing, seed stitch, or moss stitch to create a textured surface. These stitch patterns not only add dimension to the hat but also provide extra insulation.
- Embellishments: To further enhance the design of your winter hat, you can consider adding embellishments such as buttons, pom-poms, or tassels. These small details can make a big difference and add a touch of personality to your hat.
When designing your winter hat, it is important to consider the overall look and feel you want to achieve. Experiment with different stitch patterns, colors, and embellishments to create a winter hat that reflects your personal style and keeps you warm throughout the cold months.
Shaping the Crown of Your Mens Knit Hat
Once you’ve finished knitting the body of your mens winter hat, it’s time to move on to shaping the crown. This is the part of the hat that will fit snugly on top of the wearer’s head, providing warmth and style. Shaping the crown involves decreasing the number of stitches in order to create a dome-like shape.
To begin shaping the crown, you will need to follow a specific pattern of decreases. This pattern will depend on the style of hat you are knitting and the number of stitches you have on your needles. Common decrease methods include knit two together (k2tog), slip slip knit (ssk), and knit two together through back loops (k2tog tbl).
One common method for shaping the crown is to work a series of decrease rounds. For example, you might start by knitting two stitches together every six stitches, then every five stitches, then every four stitches, and so on. This gradual decrease in stitches will create a smooth, rounded shape for the top of the hat.
- Count the number of stitches you have on your needles
- Determine the decrease pattern you will follow
- Knit the first round of decreases according to your pattern
- Continue working decrease rounds until you have reached the desired number of stitches
Once you have completed the decrease rounds, you will be left with a small number of stitches. To finish off the crown, you can either cut the yarn and thread it through the remaining stitches, pulling tight to close the top, or you can gather the stitches on a spare needle and sew them together. Whichever method you choose, be sure to weave in any loose ends to keep your hat looking neat and tidy.
Now that you know how to shape the crown of your mens knit hat, you can confidently tackle any pattern and create a stylish and cozy accessory for the winter season.
Finishing Touches: Binding off Your Hat
After knitting your mens winter hat following the pattern and reaching the desired length, it is time to bind off. Binding off, also known as casting off, is the process of finishing the edge of your knitted project to secure the stitches and prevent them from unraveling.
To bind off your hat, start by knitting two stitches. Then, using your left-hand needle, insert it into the first stitch on your right-hand needle and lift it over the second stitch and off the needle. This leaves one stitch remaining on your right-hand needle. Continue this process of knitting one stitch and then lifting the previous stitch over until you have only one stitch left on your right-hand needle.
Pro Tip: To ensure a neat and stretchy edge, make sure not to bind off too tightly. If needed, you can use a larger needle size or adjust your tension to achieve the desired result.
Once you have bound off the last stitch, cut the yarn, leaving a tail of about 6 inches. Thread the tail through the last stitch and pull it tight to secure. You can then weave in the loose ends using a yarn needle to hide them within the stitches of the hat.
Finishing Touch: To add a professional look to your mens winter hat, consider adding a pom-pom on top. You can make a pom-pom using a pom-pom maker or by wrapping yarn around your fingers and tying it in the middle. Attach the pom-pom securely to the top of the hat using the tail left from binding off.
Now that you have completed binding off your hat and added any desired finishing touches, your mens winter hat is ready to be worn and enjoyed during the cold winter months. Stay warm and stylish!
Blocking Your Knit Hat for the Perfect Fit
When it comes to knitting a winter hat, the right fit is essential for both comfort and style. Blocking your knit hat can help achieve the perfect fit by shaping it to your head size and ensuring that it retains its shape over time. Here are a few steps to follow when blocking your knit hat:
1. Measure your head size: Before blocking your hat, it’s important to know your head circumference. Use a flexible measuring tape to measure around your head, just above your ears. Record this measurement for reference.
2. Prepare your materials: To block your knit hat, you will need a blocking board or surface, rust-proof pins or blocking wires, water, and a towel. Fill a basin or sink with lukewarm water and soak your hat for 15-20 minutes to relax the fibers.
3. Shape the hat: Gently press out excess water from your hat, being careful not to wring or twist it. Lay the hat flat on your blocking board or surface. Start shaping the hat by stretching it in the desired direction to achieve the perfect fit. Use rust-proof pins or blocking wires to secure the hat in place. Pay special attention to the brim and any decorative details.
4. Allow it to dry: Once you have shaped your hat, leave it to air dry completely. This may take a day or two, depending on the thickness of the yarn and the humidity level of the room. Avoid placing the hat in direct sunlight or near a heat source, as this could cause the fibers to become brittle.
5. Try it on: Once your hat is fully dry, gently remove the pins or blocking wires. Try on the hat to see if it fits perfectly. If it feels too tight or loose, make any necessary adjustments by re-blocking the hat. Remember to measure your head size again if significant changes were made.
6. Maintain the shape: To ensure that your hat retains its shape, store it in a dry, well-ventilated area when not in use. Avoid storing it in a compressed or folded state, as this could distort the shape. If your hat becomes misshapen over time, simply repeat the blocking process to restore its original form.
By taking the time to properly block your knit hat, you can achieve the perfect fit and enjoy a comfortable and stylish accessory throughout the winter season.
Adding Embellishments to Your Finished Hat
Once you have completed knitting your winter hat, you may want to add some embellishments to give it a unique and personalized touch. There are various ways you can add embellishments to your finished hat, depending on your style and creativity.
1. Pom-poms: One of the easiest and most popular ways to adorn your hat is by adding a pom-pom. You can create pom-poms using yarn in coordinating or contrasting colors. Simply wrap the yarn around a pom-pom maker or your fingers, tie it tightly in the middle, and then cut the loops to create a fluffy pom-pom. Sew or attach it securely to the top of your hat.
2. Cables and braids: If you want to add some texture and visual interest to your hat, you can incorporate cables or braids. These techniques involve crossing stitches over each other to create intricate patterns. You can either follow a specific cable or braid pattern, or create your own unique design. This will require some advanced knitting skills, but the end result will be well worth it.
3. Embroidery: Another way to embellish your hat is by adding embroidery. You can use contrasting yarn or embroidery floss to embroider various designs, such as flowers, stars, or initials. You can also experiment with different stitches like the satin stitch, backstitch, or French knots to create different effects and textures.
4. Buttons and beads: If you want to add some sparkle and flair to your hat, consider attaching buttons or beads. You can sew them onto the brim or the body of the hat in a decorative pattern. Make sure to choose buttons or beads that complement the color and style of your hat.
5. Appliqués: If you have some extra yarn or fabric scraps, you can create appliqués to sew onto your hat. You can make shapes like flowers, animals, or geometric designs, and then sew them onto your hat using small stitches. This is a great way to use up leftover yarn and add a personalized touch to your hat.
Remember, when adding embellishments to your hat, make sure to securely attach them so they don’t come off during wear. Also, consider the practicality of the embellishments, as some may cause the hat to become less comfortable or affect its functionality. Have fun exploring different embellishment options and make your winter hat truly unique!
Caring for Your Knit Hat to Keep It Looking Great
Now that you have finished knitting your winter hat, it’s important to take proper care of it to ensure its longevity and keep it looking great. Follow these simple tips to maintain the quality of your knit hat:
- Hand wash your hat. To keep your knit hat in great condition, it’s best to hand wash it instead of machine washing. Fill a sink or basin with cool water and add a small amount of gentle detergent. Gently swirl the hat in the water for a few minutes, making sure not to agitate or wring it. Rinse it thoroughly with cool water and gently squeeze out the excess water. Lay it flat on a clean towel to dry.
- Avoid using harsh chemicals. Avoid using bleach, fabric softeners, harsh detergents, or any other chemicals that can damage the fibers of your hat. Stick to mild and gentle detergents specifically designed for delicate fabrics.
- Store your hat properly. When you’re not wearing your hat, make sure to store it in a clean and dry place. Avoid folding or crushing it, as this can cause it to lose its shape. You can also place it in a breathable bag or a drawer lined with tissue paper to protect it from dust and moisture.
- Handle with care. While wearing your hat, try to avoid pulling or stretching it excessively. Be mindful of any rough surfaces that can catch and snag the yarn. Treat your hat gently to prevent any damage.
In conclusion, by following these simple care instructions, you can keep your knit hat in excellent condition and extend its lifespan. With proper care, your hat will continue to keep you warm and stylish throughout the winter season and beyond.