
If you’re looking for a quick and easy knitting project, look no further than this quick scarf knitting pattern. Knitting a warm and cozy scarf doesn’t have to take weeks or months – with this pattern, you’ll have a finished scarf in no time.
This pattern is perfect for beginners who want to practice their knitting skills and create a functional and stylish accessory. With just a few simple stitches and techniques, you’ll be able to knit up a scarf that you can proudly wear or gift to someone special.
One of the best things about this quick scarf knitting pattern is that it’s highly customizable. You can choose your favorite color of yarn, experiment with different stitch patterns, or add embellishments such as fringe or tassels. The possibilities are endless, and you can truly make this scarf your own.
How to Knit a Quick Scarf: A Step-by-Step Guide
Looking to knit a warm and cozy scarf in a short amount of time? Follow this step-by-step guide to create a quick and stylish scarf that you can wear or gift.
Materials You’ll Need:
- Super bulky yarn
- Size 15 knitting needles
- Tapestry needle
- Scissors
Step 1: Cast On
Begin by casting on the desired number of stitches onto your knitting needles. For a standard scarf, you’ll want to cast on around 20-30 stitches, depending on your preferred width.
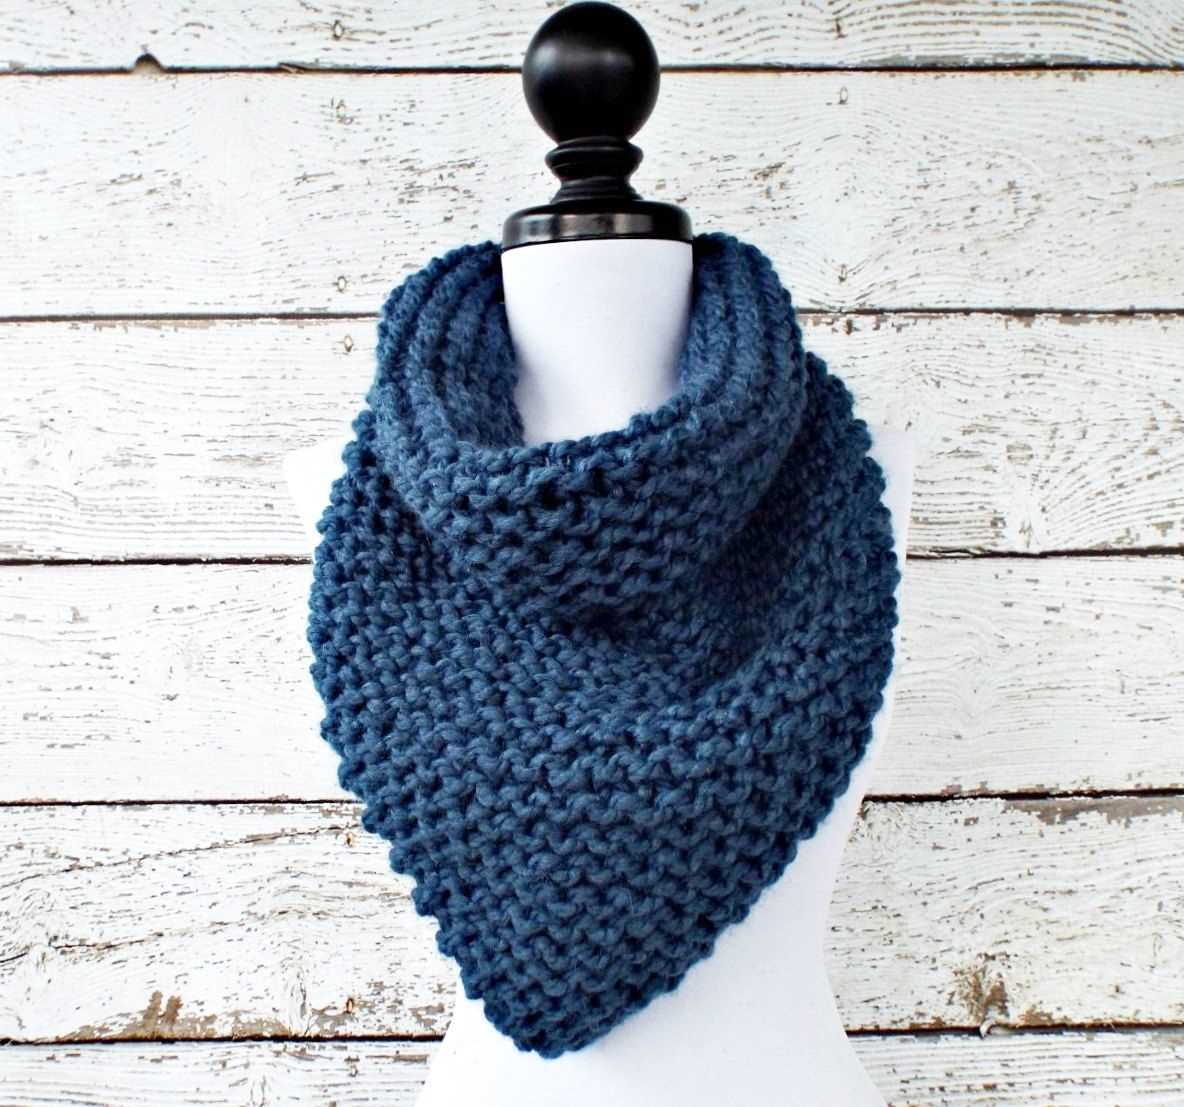
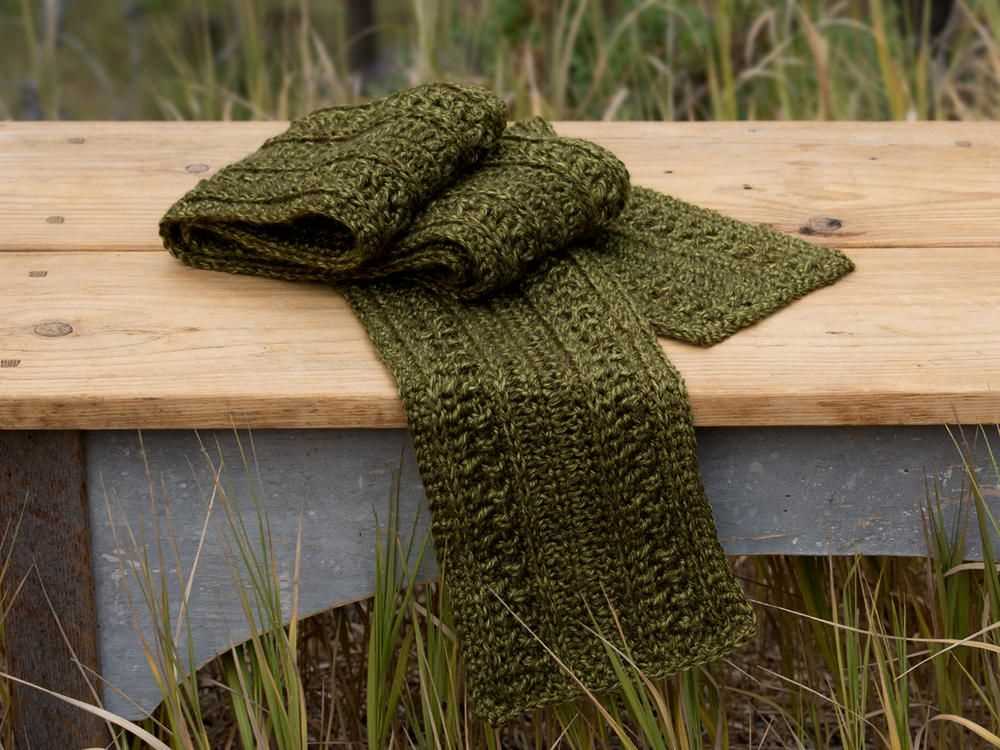
Step 2: Knit in Garter Stitch
Once your stitches are cast on, begin knitting every row in garter stitch. To do this, simply knit every stitch on every row. This creates a beautiful texture and keeps the scarf reversible.
Step 3: Continue Knitting
Continue knitting in garter stitch until the scarf reaches your desired length. You can make a shorter scarf for a cowl-neck style or a longer scarf for wrapping around multiple times.
Step 4: Bind Off
When you’re ready to finish your scarf, bind off your stitches. To bind off, knit the first two stitches, then using your left-hand needle, lift the first stitch over the second stitch and off the needle. Continue this process until you have one stitch remaining, then cut your yarn and pull it through the last stitch to secure.
Step 5: Weave in Ends
Using your tapestry needle, weave in any loose ends of yarn to tidy up your scarf. Make sure to secure the ends so they don’t unravel over time.
With just a few simple steps, you can knit a quick scarf that will keep you warm and stylish during the colder months. Grab your materials, follow this guide, and get ready to show off your new creation!
Choose the Right Yarn and Needles
When it comes to knitting a quick scarf, choosing the right yarn and needles is essential. The type of yarn you choose will greatly impact the finished product. You want a yarn that is soft and cozy, yet durable enough to withstand frequent wear. Consider using a yarn made from natural fibers like wool or alpaca, as they are both warm and breathable.
Additionally, the thickness of the yarn, or its weight, will determine how quickly the scarf knits up. If you’re looking for a fast project, opt for a bulky or super bulky yarn. These yarns have thicker strands, meaning fewer stitches are needed to create a wide scarf. Conversely, if you prefer a lightweight and delicate scarf, choose a fine or sport weight yarn.
Needles
The type and size of needles you use will also affect the speed and appearance of your scarf. For a quicker knit, select larger knitting needles. The larger the needle size, the larger your stitches will be, resulting in faster progress. Circular needles are ideal for knitting scarves, as they allow you to easily hold a large amount of stitches and distribute the weight of the project.
Consider the material of the needles as well. Metal or plastic needles have a smooth surface that allows the yarn to glide easily, making knitting faster. However, wooden or bamboo needles have a warmer feel and can be more comfortable to hold for longer knitting sessions.
Cast On Stitches
When starting a knitting project, the first step is to cast on stitches. This is the process of creating the foundation row of stitches that will form the base of the project. There are several methods of casting on, each with their own advantages and uses.
- Long Tail Cast on: This is one of the most common methods of casting on stitches. It creates a neat and elastic edge, making it suitable for many different types of projects. To do a long tail cast on, you will need to estimate the length of yarn needed for each stitch and create a “tail” of yarn that is long enough to cast on all the required stitches.
- Knitted Cast on: This method is similar to the long tail cast on, but it creates a slightly bulkier edge. It is a good choice for projects that require a sturdy edge, such as blankets or scarves. To do a knitted cast on, you will need to create a slipknot and then use the working needle to knit stitches onto the right needle.
- Cable cast on: The cable cast on method is ideal for projects that require a firm and stable edge, such as sweaters or cardigans. It creates a dense and somewhat inflexible edge. To do a cable cast on, you will need to create an initial loop on the needle and then use the working needle to knit stitches into that loop.
These are just a few examples of the many methods of casting on stitches. The choice of casting on method will depend on the project you are working on and the desired outcome. Experiment with different methods to find the one that works best for you and your project.
Knit the Foundation Row
Before you start knitting your quick scarf, you will need to cast on the required number of stitches to create the foundation row. The number of stitches you cast on will depend on the width or thickness of the scarf you want to achieve. The pattern you are using should specify the number of stitches needed, so make sure to check the instructions before you begin.
To cast on, hold the knitting needle in your dominant hand and make a slipknot with the yarn. Insert the needle into the slipknot from front to back, then pull the yarn through to create a new stitch. Repeat this process until you have cast on the required number of stitches. Make sure to keep your stitches loose enough to easily insert the needle, but not so loose that they become too sloppy.
Tip: It can be helpful to use markers or different color yarn to mark the edges of your scarf, especially if the pattern requires certain stitches or stitch patterns on the edges. This will help you keep track of where your scarf begins and ends, and make it easier to identify any mistakes or deviations from the pattern.
Example: For a simple garter stitch scarf, you may need to cast on 20 stitches. Start by making a slipknot and inserting the needle into the slipknot. Pull the yarn through to create a new stitch. Repeat this process until you have 20 stitches on your needle. Once you have cast on your desired number of stitches, you are ready to begin knitting the first row of your quick scarf.
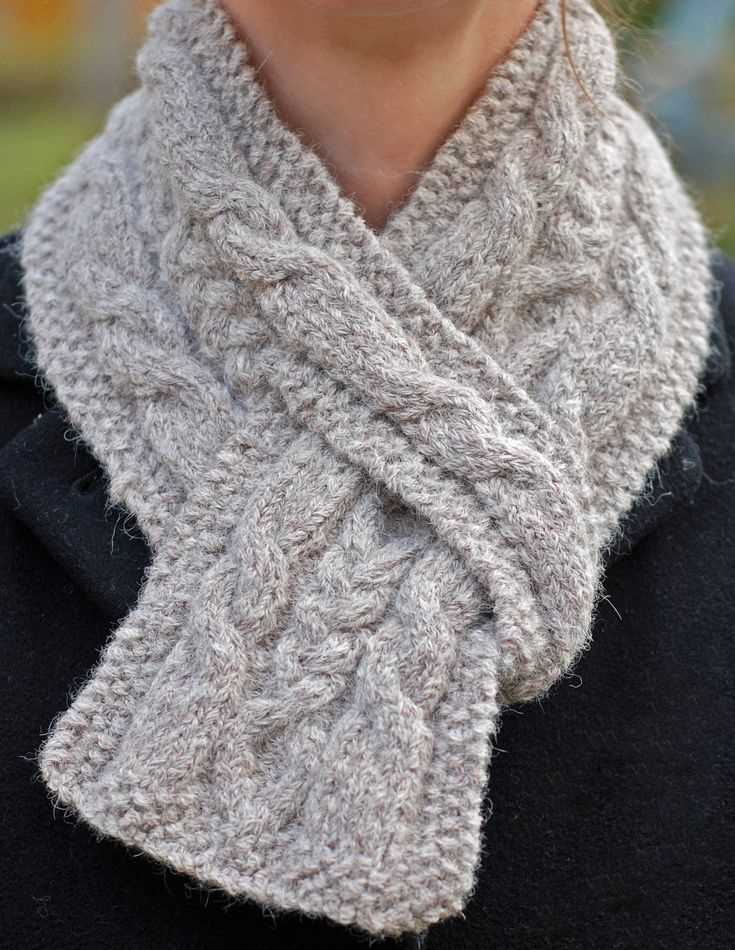
Start the Main Pattern
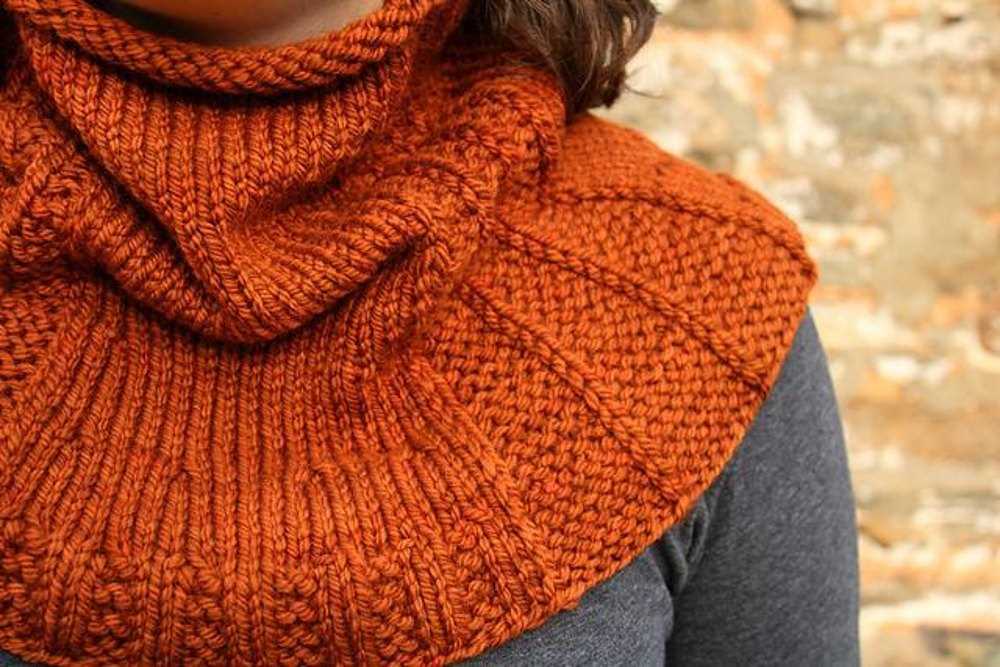
Once you have finished the ribbing section, it’s time to start the main pattern of the scarf. This pattern will give your scarf a beautiful textured look. To begin, take your size 10 knitting needles and the main color yarn.
Row 1: Knit all stitches across the row. This row will set the foundation for the pattern.
Row 2: Purl all stitches across the row. This row will create a nice contrast with the knitted stitches of the previous row.
Row 3: *Knit 2 stitches, purl 2 stitches* – repeat this * to * pattern across the row. This creates a lovely ribbed texture.
Row 4: *Purl 2 stitches, knit 2 stitches* – repeat this * to * pattern across the row. This row will continue the ribbed texture.
Continue repeating rows 3 and 4 until you have reached your desired length for the scarf. This pattern creates a reversible fabric, so both sides of the scarf will have the same textured look.
Remember to always keep track of your row count to ensure a consistent pattern throughout the project. Happy knitting!
Knit the Body of the Scarf
Now that you have cast on your stitches, it’s time to start knitting the body of the scarf. This is the main part of the scarf where you will be repeating the pattern until you reach your desired length.
Begin by knitting the first row. Insert your right needle into the first stitch on your left needle, from left to right, and wrap the yarn around the right needle. Pull the right needle through the stitch, bringing the new stitch onto the right needle. Repeat this process for each stitch on the left needle until you have knitted all the stitches.
Continue knitting each row in the same manner until the body of the scarf reaches your desired length. Remember to keep count of your rows to ensure that both ends of the scarf are the same length.
If you want to add some variety to your scarf, you can consider incorporating different stitch patterns. This can be as simple as adding a few rows of ribbing or experimenting with different types of knit and purl combinations.
As you knit, make sure to periodically check the length of the scarf by laying it flat and measuring it. This will help you avoid making it too short or too long. Once you are satisfied with the length, it’s time to move on to binding off.
Create a Pattern Variation
If you’re looking to add some uniqueness to your scarf knitting project, why not try creating a pattern variation? By making a few simple changes to the original pattern, you can create a completely new and customized design. Here are a few ideas to get you started:
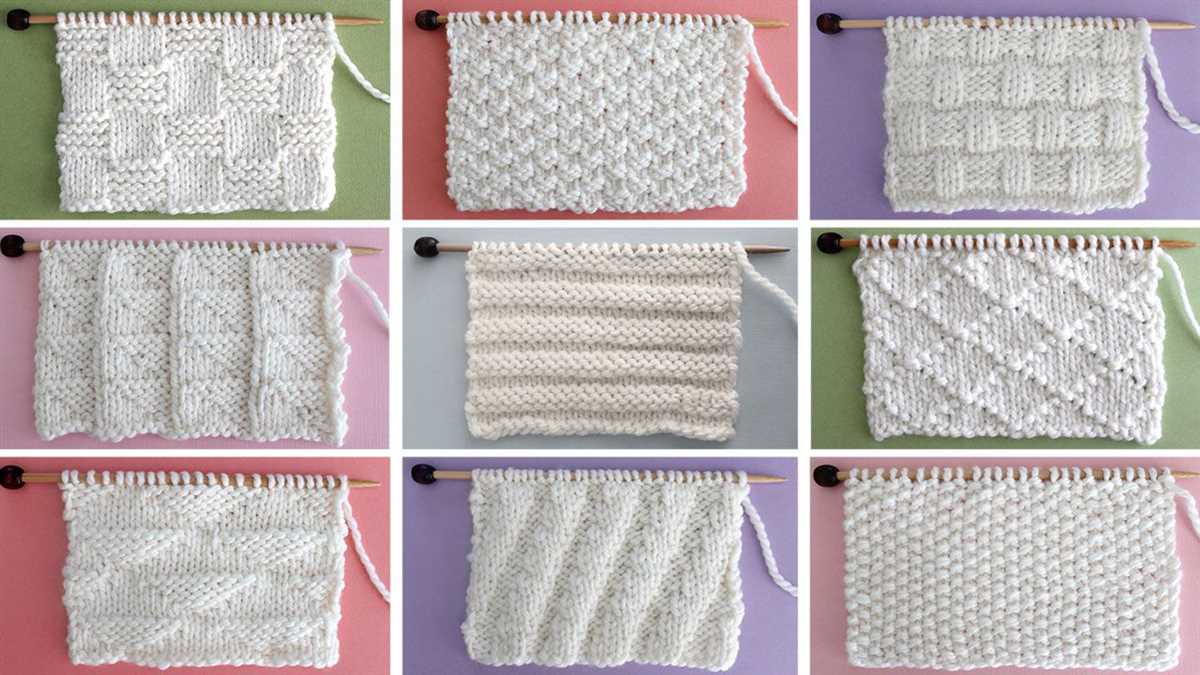
1. Change the Stitch
One way to create a pattern variation is to change the stitch used in the original pattern. For example, if the original pattern uses a basic knit stitch, you could try using a seed stitch or a rib stitch to create a different texture. Experimenting with different stitches can give your scarf a whole new look.
2. Add a Pop of Color
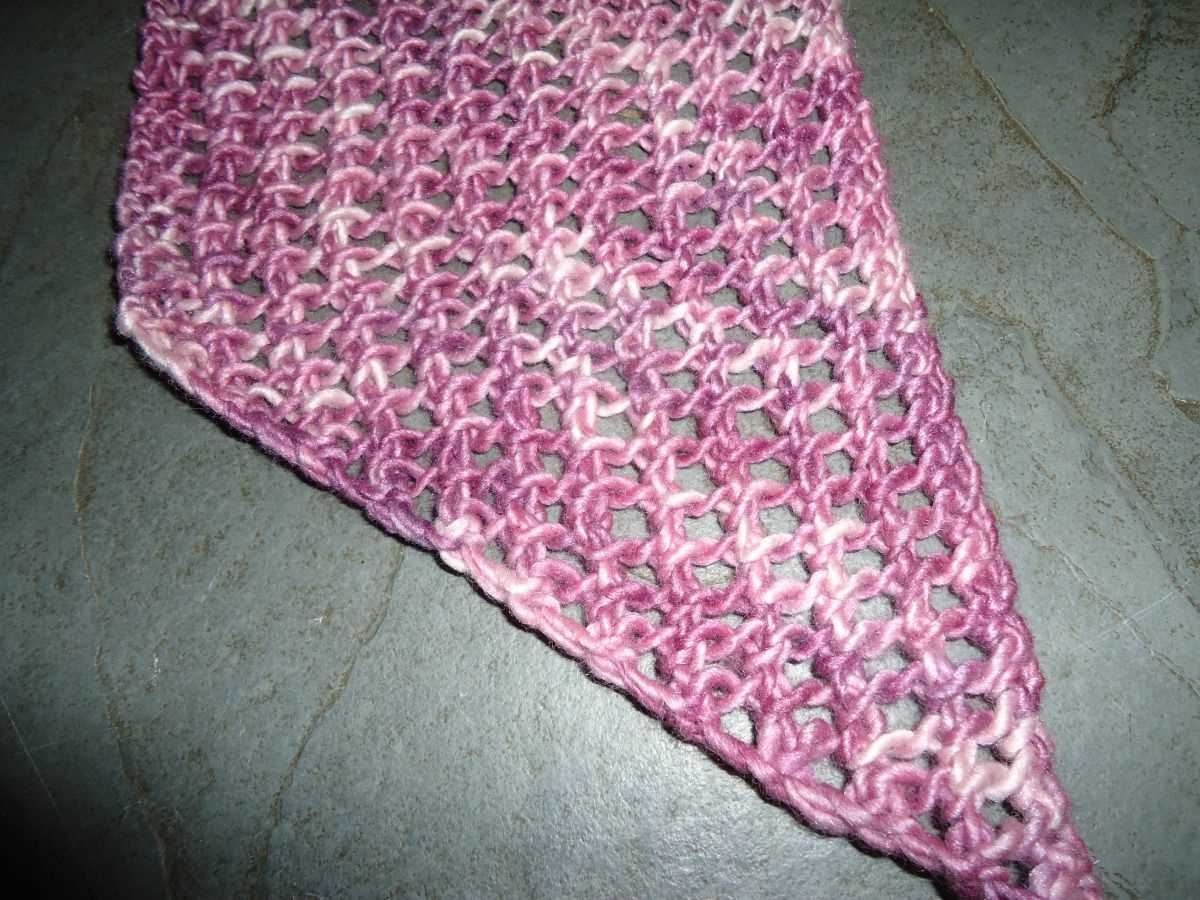
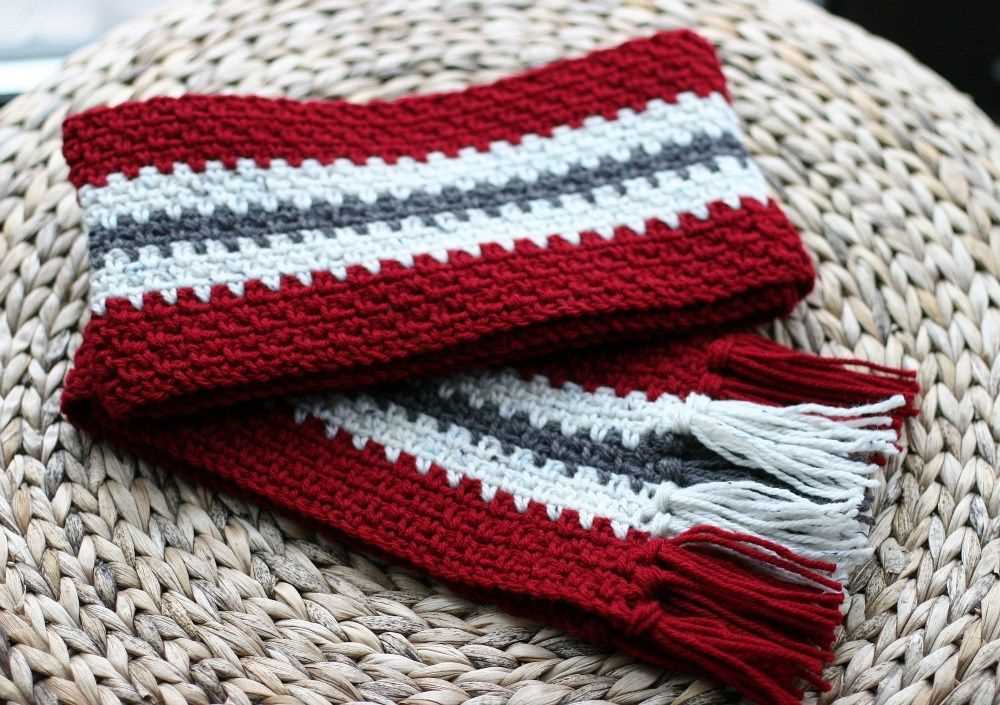
Another option for creating a pattern variation is to incorporate color into your scarf. You can do this by adding stripes or color blocks using different colored yarns. Alternatively, you could use a variegated yarn that already has multiple colors in it. Adding color can make your scarf more visually interesting and unique.
3. Change the Length or Width
If you prefer a longer or wider scarf, you can modify the original pattern to meet your desired dimensions. Simply add or subtract stitches to change the width, or repeat rows to make the scarf longer. Adjusting the size of the scarf can create a whole new look and make it more suited to your personal style.
4. Try a Different Yarn
The type of yarn you use can also greatly impact the overall look of your scarf. Try experimenting with different weights or textures of yarn to create a pattern variation. For example, using a bulky yarn can give your scarf a cozy and chunky look, while using a silk yarn can create a more elegant and delicate appearance.
By following these tips and using your creativity, you can create a pattern variation that adds a unique touch to your scarf knitting project. Don’t be afraid to experiment and customize the pattern to suit your personal style and preferences!
Incorporate Color Changes

The beauty of knitting is that you can easily incorporate color changes to create unique and eye-catching patterns in your scarf. Whether you want to add stripes, blocks of color, or even intricate colorwork designs, there are several techniques you can use to introduce different colors into your project.
1. Stripes: One of the simplest ways to incorporate color changes is by knitting stripes. You can alternate between two or more colors, knitting a certain number of rows or rounds in each color before switching. This creates a bold and graphic effect, especially when using high-contrast colors.
2. Intarsia: If you want to create large blocks of color or intricate motifs, intarsia is the technique for you. With intarsia, you use separate balls or bobbins of yarn for each section of color, twisting the yarns at the color change to prevent holes. This technique is perfect for creating images or patterns within your scarf.
3. Fair Isle: Fair Isle knitting is a traditional technique that involves working with two colors in each row or round to create intricate and colorful patterns. In Fair Isle, you carry both colors across the back of the work, weaving the unused color behind the stitches. This technique requires a bit of practice to maintain an even tension, but the results are well worth it.
4. Duplicate Stitch: If you prefer to keep your scarf simple but still want to add a pop of color, you can use duplicate stitch to add colorwork after you have finished knitting. Duplicate stitch involves embroidering over the existing stitches with a contrasting color, following a chart or your own design. This technique allows you to add detailed motifs and designs to your scarf without the hassle of knitting with multiple colors.
Experiment with these color-changing techniques to add depth and interest to your quick scarf knitting pattern. Play with different color combinations and patterns to create a scarf that is uniquely yours.
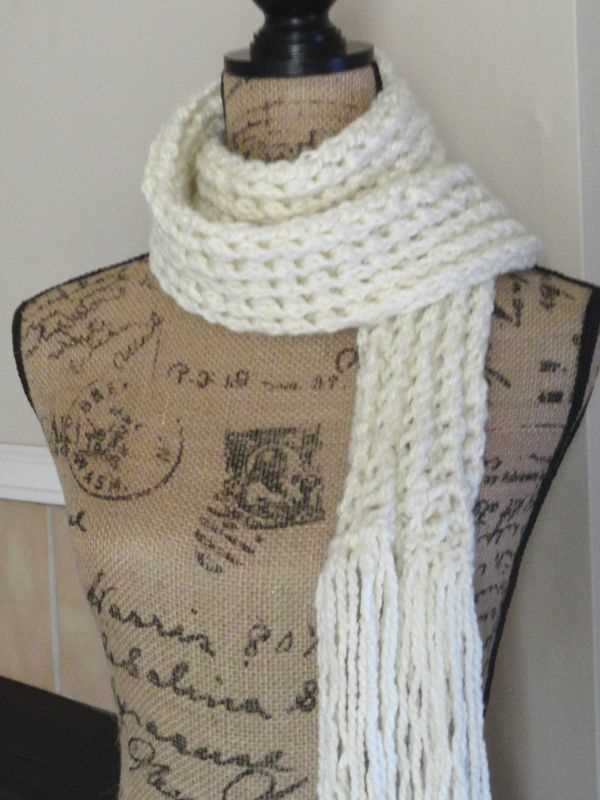
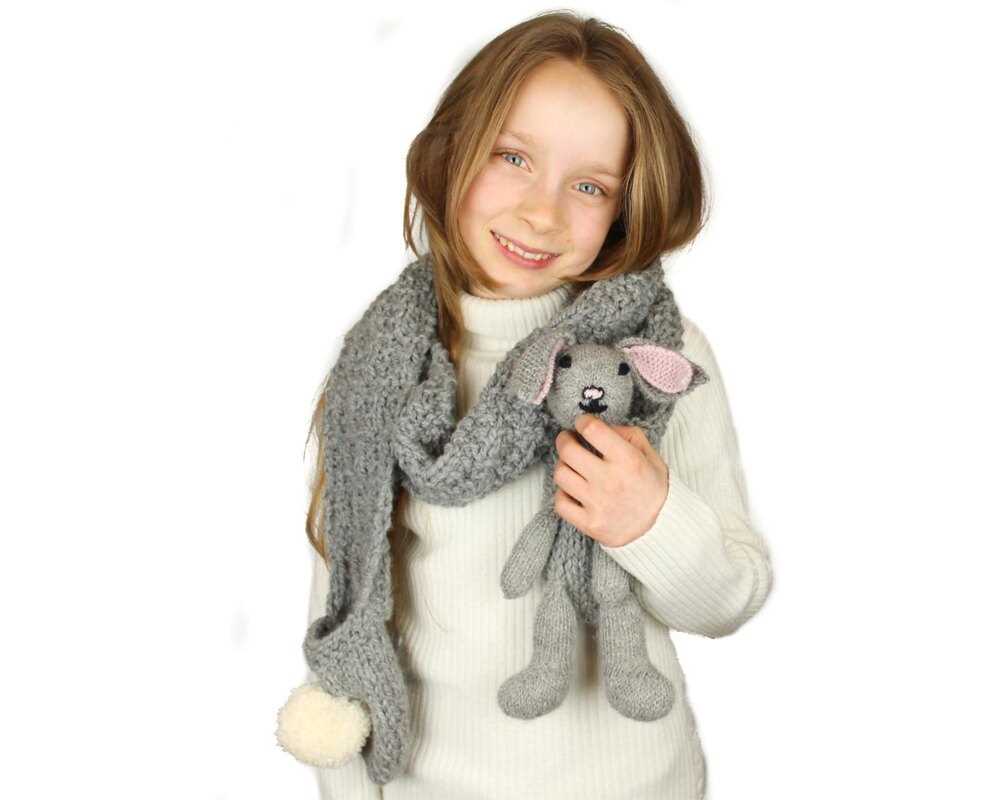
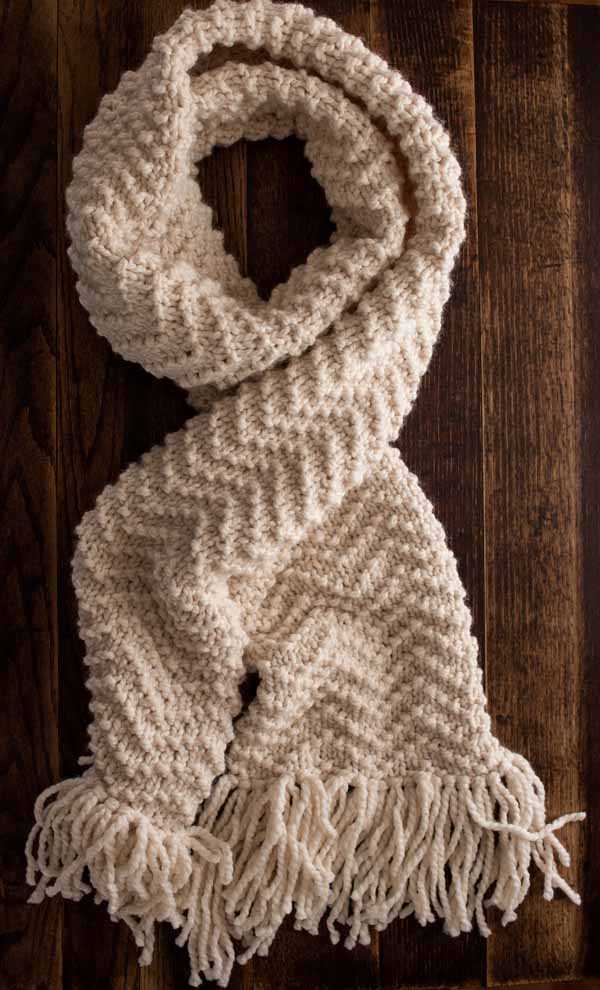
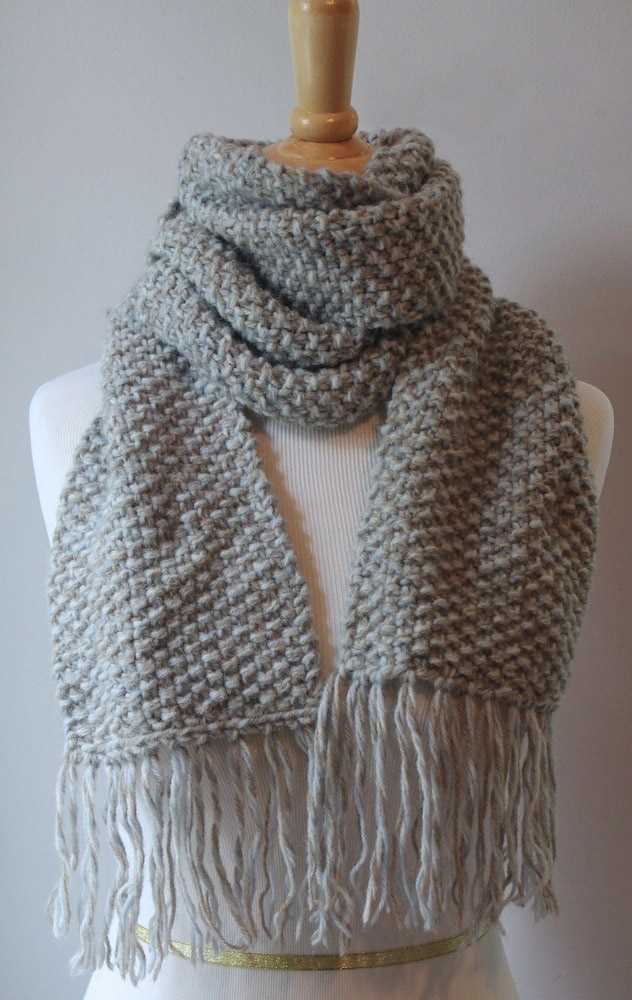
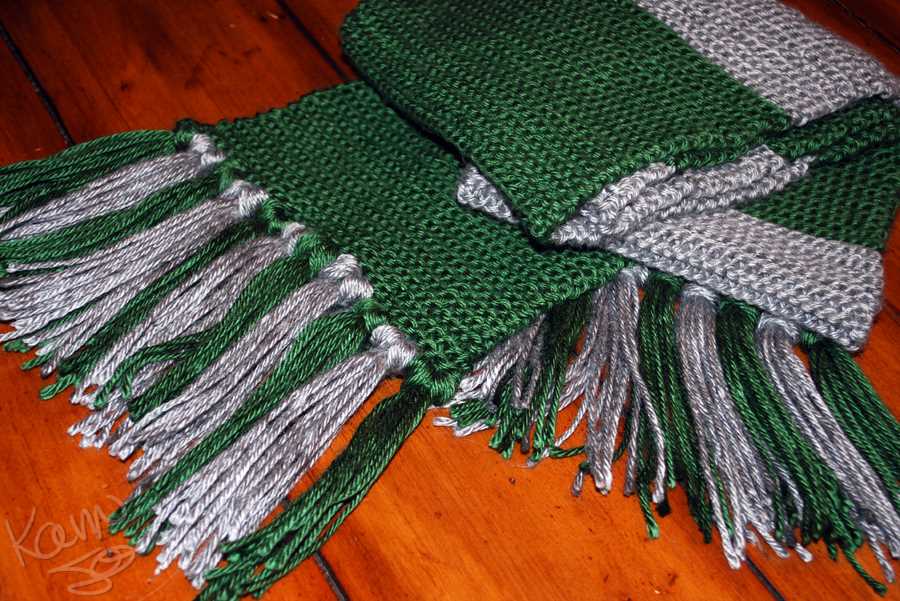
Add Fringe or Tassels
One way to add a stylish touch to your knitted scarf is by adding fringe or tassels. Fringe can be a fun and decorative addition to your scarf, while tassels can add a touch of elegance. Both are easy to make and can be customized to match your personal style or the overall look you want to achieve with your scarf.
To add fringe to your scarf, start by cutting several pieces of yarn to the desired length. The length of the fringe can vary depending on your preference and the length of your scarf, but a good rule of thumb is to cut the pieces twice as long as you want the finished fringe to be. Once you have your pieces of yarn cut, fold them in half and then insert the folded end through a stitch at the end of your scarf. Pull the loose ends through the folded end to create a loop, and then pull the loose ends through the loop to secure the fringe. Repeat this process along the end of your scarf until you have the desired amount of fringe.
If you prefer tassels, you can easily make them by wrapping yarn around a piece of cardboard or your fingers several times. Slide the wrapped yarn off the cardboard or your fingers and tie a piece of yarn around the top, leaving a loop at the top for attaching to your scarf. Cut through the loops at the opposite end of the tassel and trim the ends to even them out. Finally, attach the tassels to the ends of your scarf by threading the loop through a stitch and pulling the loose ends through the loop to secure.
Both fringe and tassels are great ways to add texture and visual interest to your scarf, and they can be easily customized to match your style or the overall look you want to achieve. Whether you choose fringe or tassels, these finishing touches will elevate your scarf from a basic accessory to a fashionable statement piece.
Knit the Final Rows

Now that you have reached the final rows of your quick scarf knitting pattern, you can begin to see your project coming together. These last rows will bring your scarf to its desired length, so you will want to pay close attention to ensure accuracy and consistency in your knitting.
Before you begin knitting the final rows, take a moment to assess your progress and make any necessary adjustments. Check that your tension remains even throughout the scarf and that there are no dropped stitches or other errors. If you notice any mistakes, now is the time to fix them before continuing.
As you work on the final rows of your scarf, you may find it helpful to use stitch markers to keep track of pattern repeats or any sections that require special attention. This can help prevent confusion or mistakes, especially if you are working with a more complex stitch pattern.
Remember to continue following the instructions provided in your knitting pattern. Pay attention to any specific decreases, increases, or stitch combinations that are required to complete the scarf. These final rows will often incorporate finishing touches, such as borders or edgings, so be sure to follow the pattern closely to achieve the desired outcome.
Once you have successfully completed the final rows, you can bind off your stitches to finish your scarf. This will secure the edges and prevent the knitting from unraveling. Follow the binding off instructions provided in your pattern, making sure to keep an even tension as you work.
After binding off, take a moment to admire your finished project. Your quick scarf knitting pattern has now come to life, and you can proudly wear or gift your completed scarf. Enjoy the warmth and comfort it will provide during the colder months, knowing that it was created with your own two hands.
Bind Off Stitches
In knitting, binding off is the process of finishing a piece by securing the stitches on the needles and creating a neat edge. It is an essential technique that is used at the end of a project, such as when making a scarf. By binding off, you prevent the stitches from unraveling and give your finished piece a polished look.
To bind off stitches, you will need to work with two stitches at a time. Begin by knitting the first two stitches together, inserting your right needle into both stitches as if to knit. Then, slip the resulting stitch back onto the left needle. Repeat this process, knitting the next stitch and slipping it back onto the left needle until you have only one stitch left on your right needle.
Once you have one stitch left on your right needle, cut the yarn, leaving a tail of about 6 inches. Take the tail and pull it through the last stitch, creating a loop. Gently tighten the loop to secure the bind off. You can then weave in the loose ends of yarn using a yarn needle to ensure that they are hidden and secure.
Binding off stitches is a simple but important technique in knitting. It provides a clean and finished edge to your projects, such as a quick scarf. Practice this technique to improve your knitting skills and give your projects a professional touch.
Block and Finish the Scarf
Once you have finished knitting your scarf, it is important to block it to give it a professional and polished look. Blocking helps to even out the stitches and also allows the fibers of the yarn to relax and settle into place. This will ensure that your scarf hangs nicely and has a beautiful drape.
Before blocking, make sure to weave in any loose ends and trim off any excess yarn. This will give your scarf a cleaner finish. You can use a tapestry needle to weave in the ends by threading the yarn through the stitches on the wrong side of the fabric.
Blocking:
To block your scarf, you will need to gently wet it. Fill a basin or sink with lukewarm water and add a small amount of mild detergent. Submerge the scarf in the water and gently squeeze it to remove any air bubbles. Let it soak for about 15 minutes.
After soaking, carefully remove the scarf from the water and gently squeeze out the excess moisture. Lay a clean towel flat on a table or the floor and place the scarf on top of it. Roll up the towel with the scarf inside and press down gently to remove more moisture.
Next, lay the scarf flat on a blocking mat or on top of clean towels, shaping it into the desired dimensions. Use rust-proof pins, such as T-pins, to secure the edges and corners of the scarf in place. Stretch it slightly if you want to open up the stitches and create a lacy look.
Leave the scarf to dry completely. This may take several hours or even overnight, depending on the thickness of the yarn and the humidity in the room. Once it is dry, remove the pins and admire your beautifully blocked scarf.
Finishing:
After blocking, you can add any finishing touches to your scarf, such as adding fringe or tassels. Measure and cut lengths of yarn for the fringe or tassels, and attach them to the edges of the scarf by folding them in half and pulling the folded end through the fabric with a crochet hook or tapestry needle.
If you prefer a cleaner look, you can also leave your scarf without any embellishments. Simply trim any uneven edges or loose threads, and your scarf is ready to be worn or gifted.
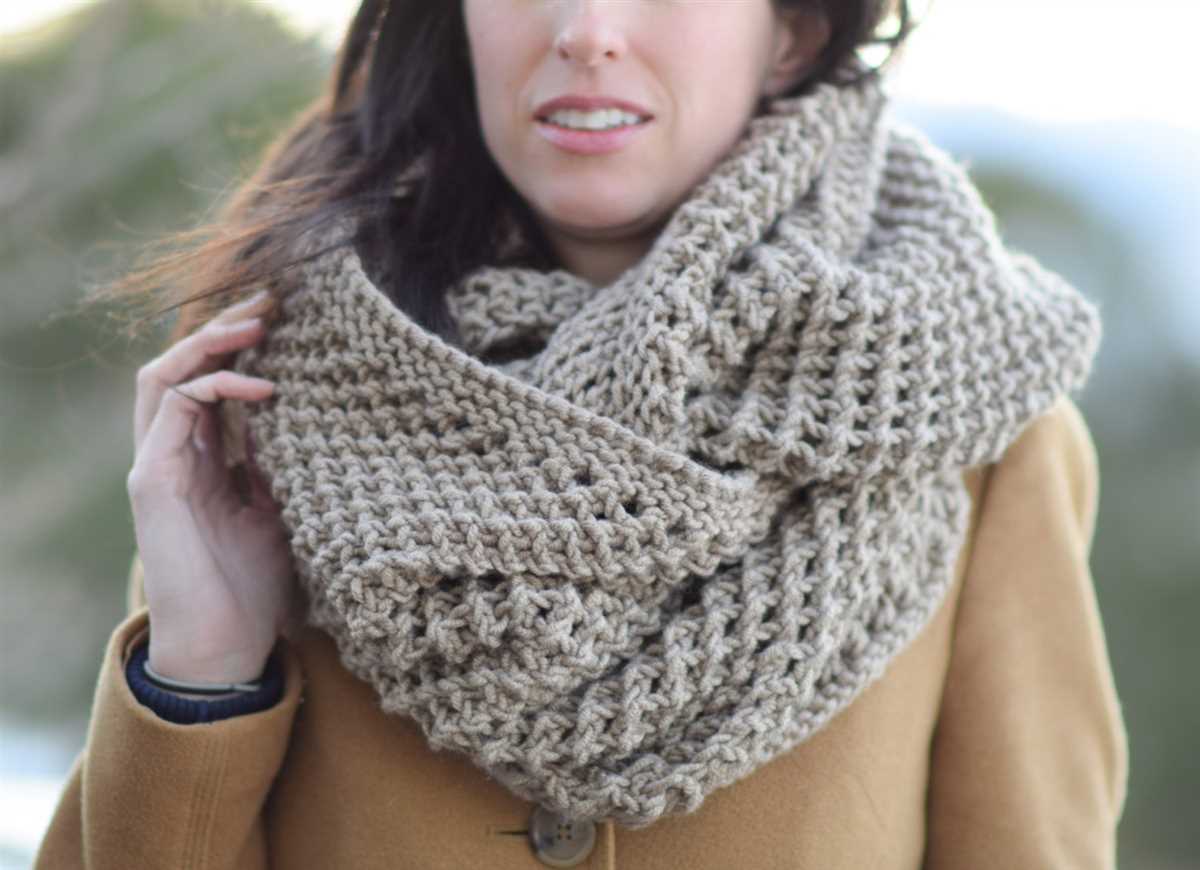
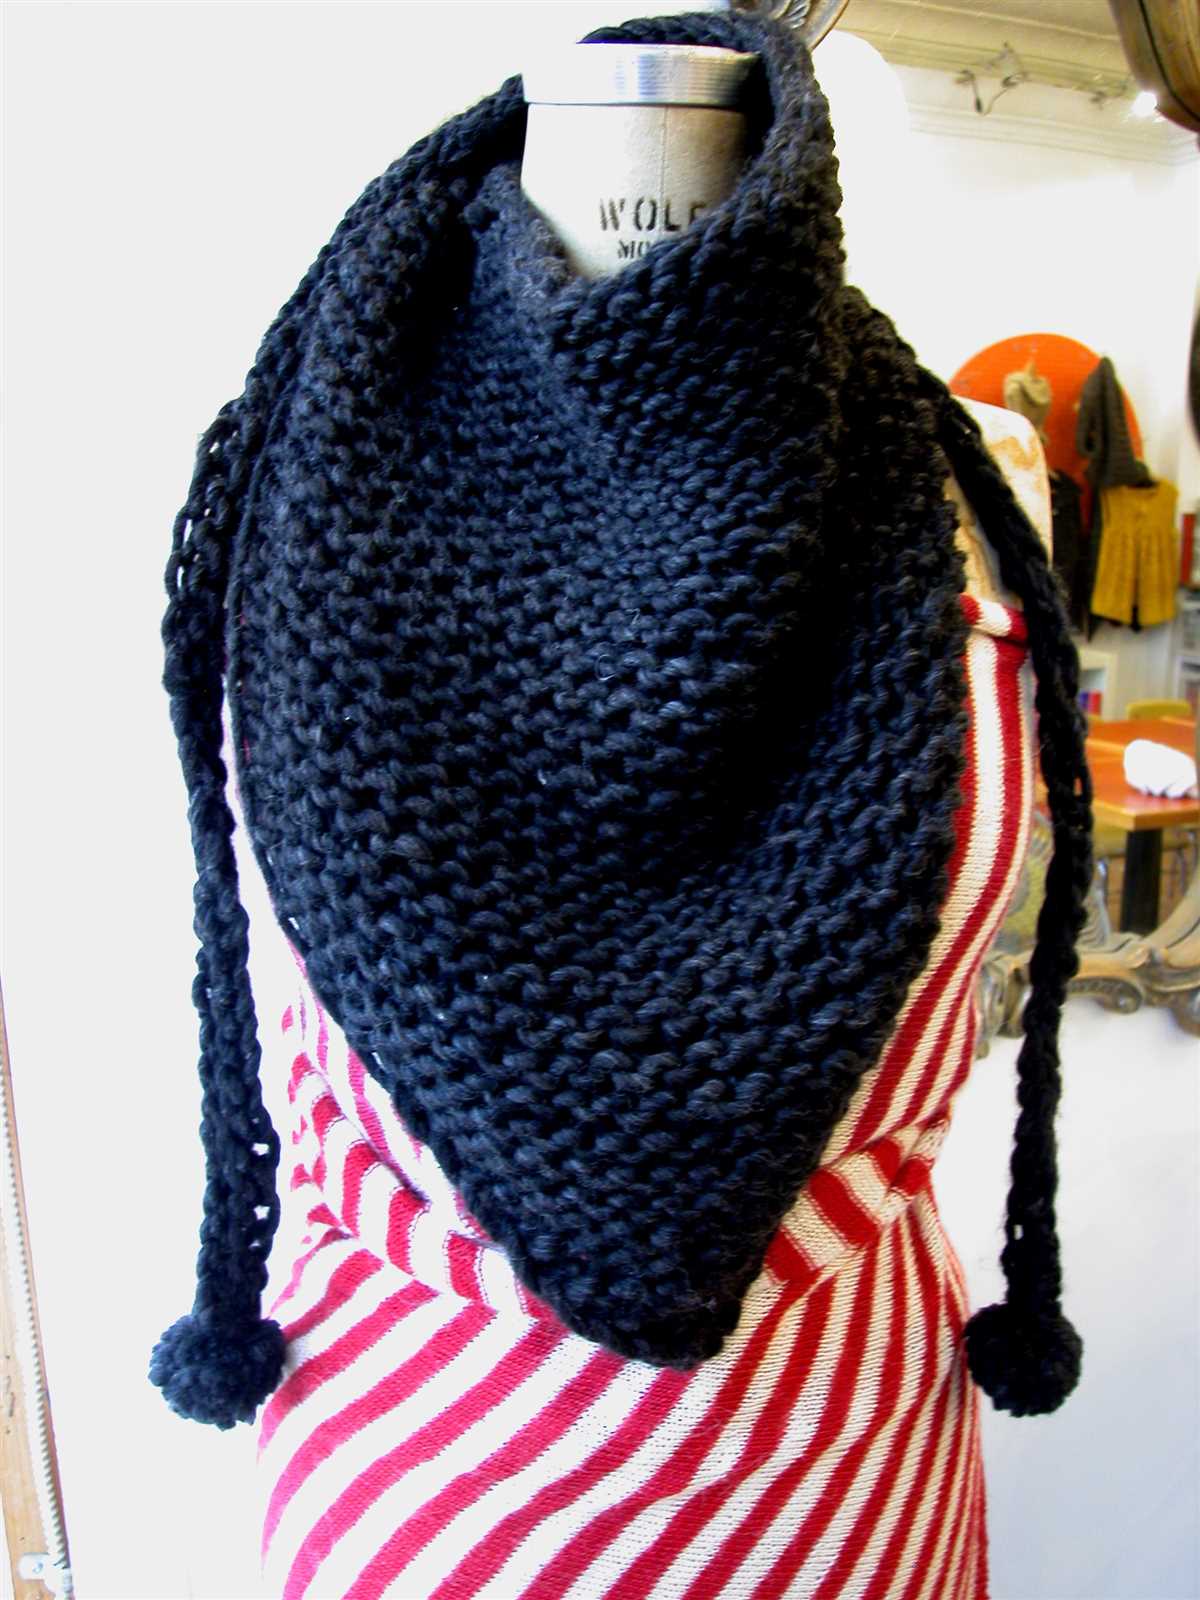
Style and Wear the Finished Scarf
Once you’ve completed knitting your quick scarf, it’s time to style and wear it! There are numerous ways to wear a scarf, depending on your personal style and the weather. Here are a few ideas to get you started:
- Classic Loop: Simply wrap the scarf around your neck and let both ends hang loose at the front.
- Double Loop: Wrap the scarf around your neck twice, creating a cozy and stylish look.
- Side Knot: Tie a loose knot on one end of the scarf and let it hang to the side.
- Shoulder Wrap: Drape the scarf over your shoulders like a shawl for an elegant touch.
When it comes to styling the scarf, remember to consider the color and pattern of the scarf, as well as the rest of your outfit. A bold, patterned scarf can add a pop of color to a neutral outfit, while a neutral-colored scarf can complement a vibrant ensemble. Don’t be afraid to experiment with different ways of tying and draping the scarf to achieve the desired look.
The finished scarf is not only a fashionable accessory but also a practical item to keep you warm during colder seasons. It can be paired with a coat, sweater, or even a simple t-shirt, depending on the weather. Whether you’re running errands or going out for a night on the town, the quick scarf you knitted will surely add a stylish touch to your outfit.
So, grab your knitting needles, choose your favorite yarn, and start knitting your very own quick scarf. With this simple pattern and the endless styling options, you’ll have a cozy and fashionable accessory in no time!
Q&A:
What is a quick scarf knitting pattern?
A quick scarf knitting pattern is a set of instructions that allows you to create a scarf using knitting needles and yarn in a relatively short amount of time. These patterns are designed to be easy and fast to knit, making them perfect for beginners or anyone looking for a quick and satisfying knitting project.
What materials do I need for a quick scarf knitting pattern?
To knit a quick scarf, you will need a pair of knitting needles and yarn. The size of the needles will depend on the desired thickness of the scarf, and the type of yarn will depend on your preference. It is recommended to use a chunky or bulky weight yarn for a faster knitting experience.
Are there different types of quick scarf knitting patterns?
Yes, there are various types of quick scarf knitting patterns available. Some patterns may involve using simple stitches, while others may incorporate more complex stitch patterns or techniques. There are also patterns available for different scarf lengths and widths, allowing you to customize your project to suit your preferences.
Can I knit a quick scarf pattern if I am a beginner?
Absolutely! Quick scarf knitting patterns are often recommended for beginners as they are typically straightforward and easy to follow. With a bit of practice, even someone who is new to knitting can create a beautiful scarf in no time. Just make sure to choose a pattern that matches your skill level and take your time to understand the instructions before starting.
How long does it typically take to knit a scarf using a quick scarf knitting pattern?
The time it takes to knit a scarf using a quick scarf knitting pattern can vary depending on your knitting speed and the complexity of the pattern. However, as these patterns are specifically designed to be quick, it is possible to complete a scarf in just a few hours or over a couple of days. This makes them perfect for last-minute gifts or when you’re in need of a new accessory in a hurry.
What is a quick scarf knitting pattern?
A quick scarf knitting pattern is a set of instructions or directions that guide you on how to knit a scarf in a short amount of time. It usually includes the type of yarn to use, the size of knitting needles, and the specific stitches and techniques to create the desired design. Quick scarf knitting patterns are great for beginners or for those who want to complete a project quickly.