
Knitting is not only a relaxing and creative hobby, but it also allows you to create unique and personalized gifts for your loved ones. If you have a wedding coming up or know someone who is getting married, why not surprise them with a handmade gift? Our free knitting pattern for bride and groom dolls is perfect for that.
These adorable dolls are not only a great addition to any wedding décor, but they also make for a thoughtful and sentimental keepsake. The pattern includes instructions for both the bride and groom dolls, allowing you to customize them to match the couple’s outfits and wedding theme.
Whether you are an experienced knitter or just starting out, this pattern is suitable for all skill levels. The dolls are knitted in the round using basic stitches, and the pattern includes step-by-step instructions and helpful tips to guide you through the process. So grab your knitting needles and start creating a unique gift that will be cherished for years to come.
Free Knitting Pattern for Bride and Groom Dolls
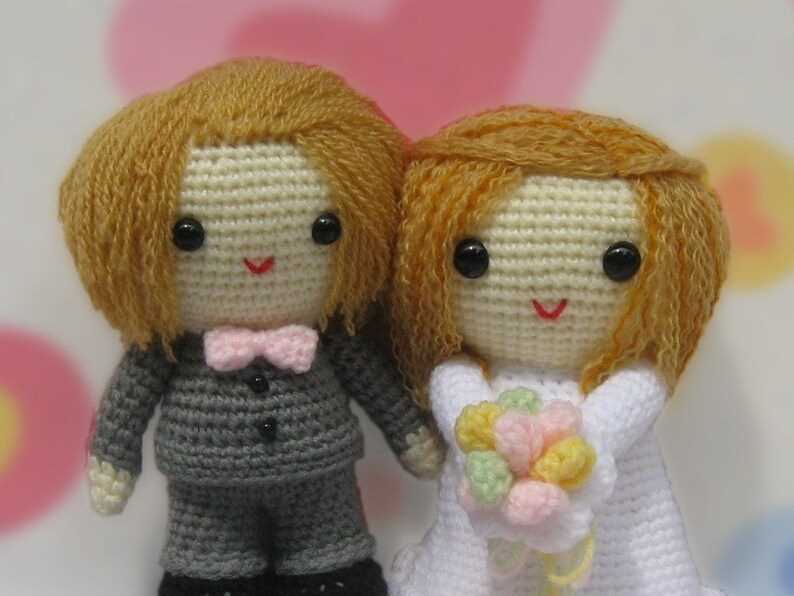
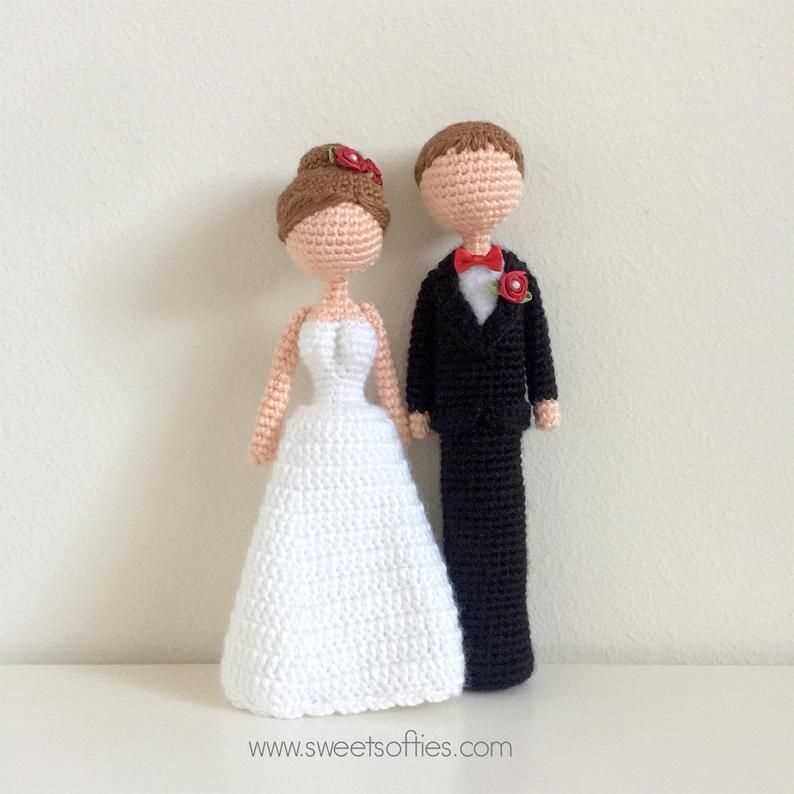
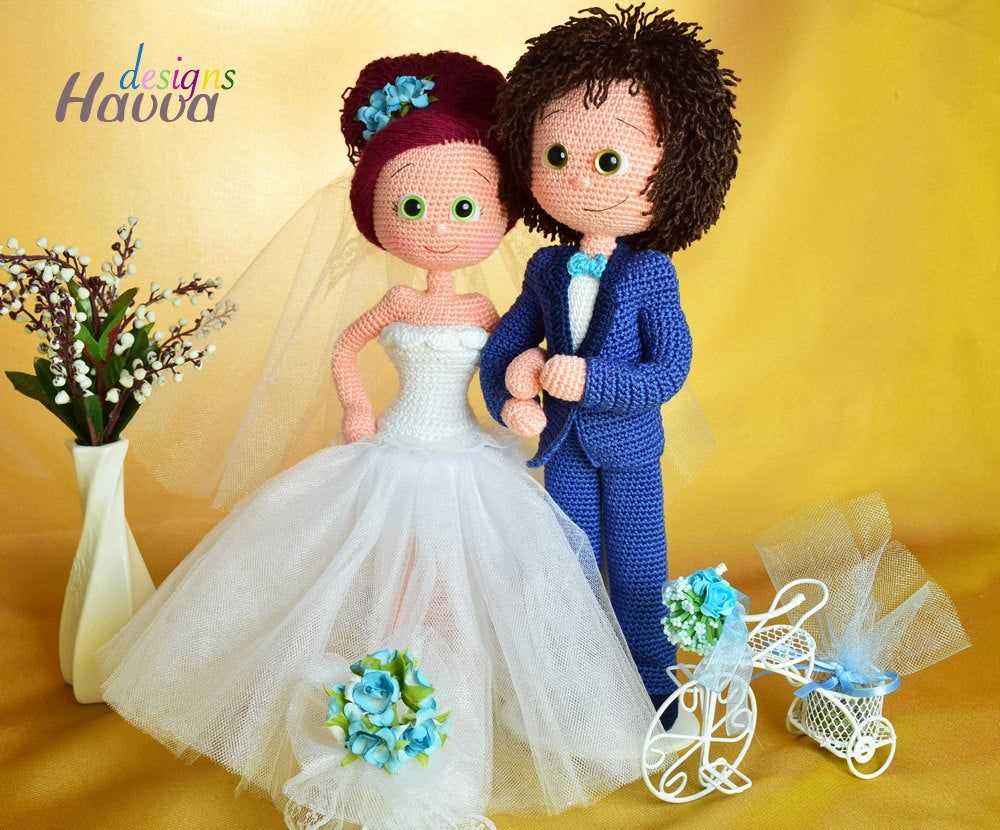
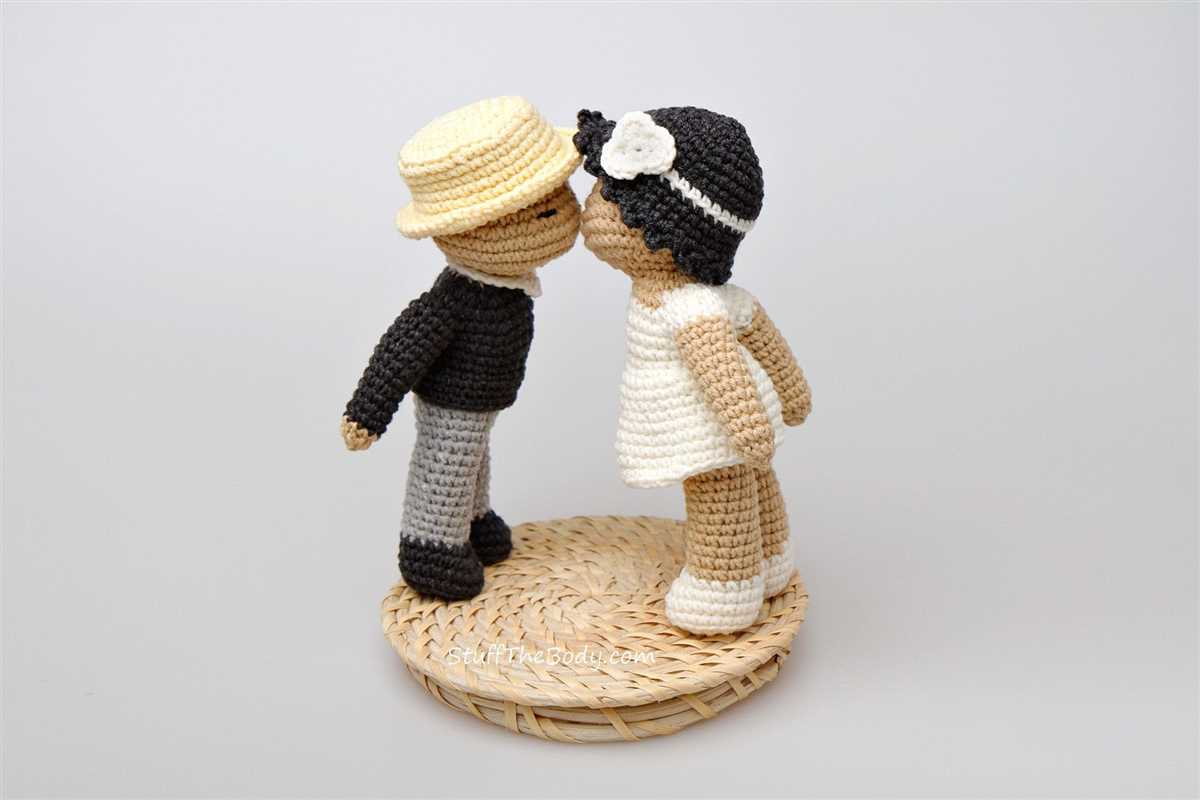
Do you enjoy knitting and want to create something special for a wedding or as a memorable gift? Look no further than this free knitting pattern for bride and groom dolls. These adorable dolls are the perfect touch for a wedding celebration or as a keepsake for the happy couple.
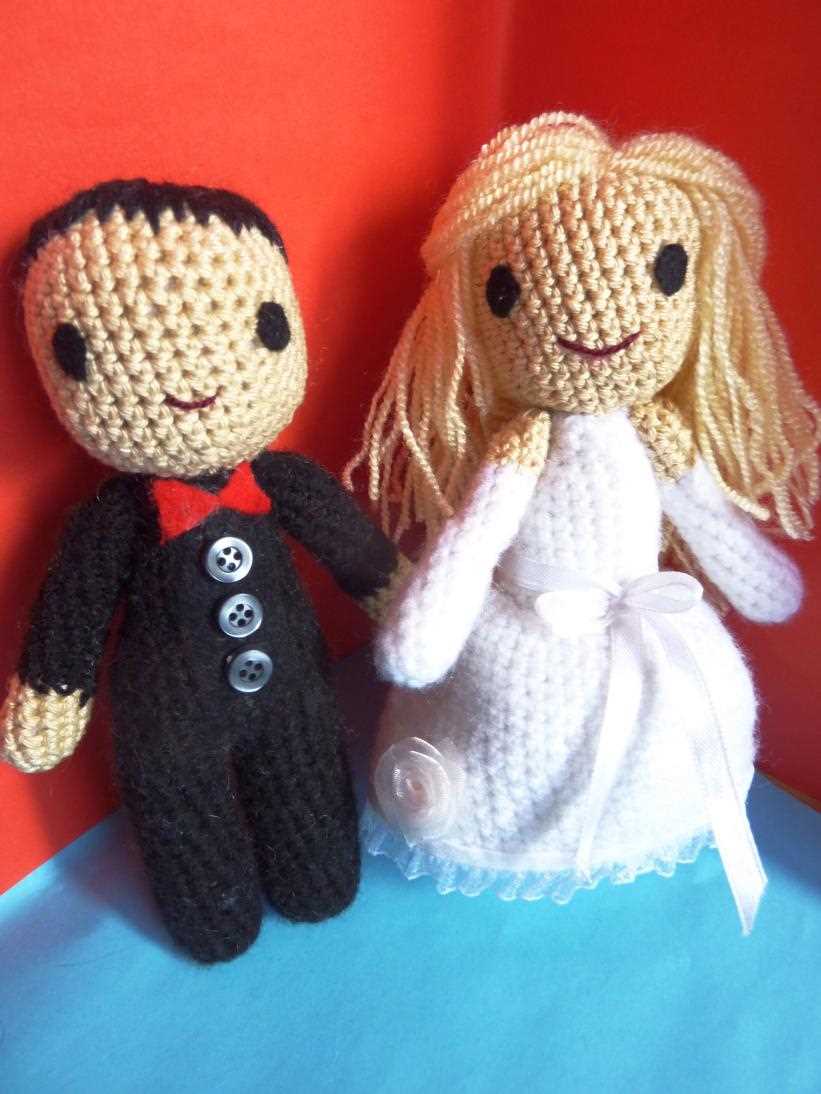
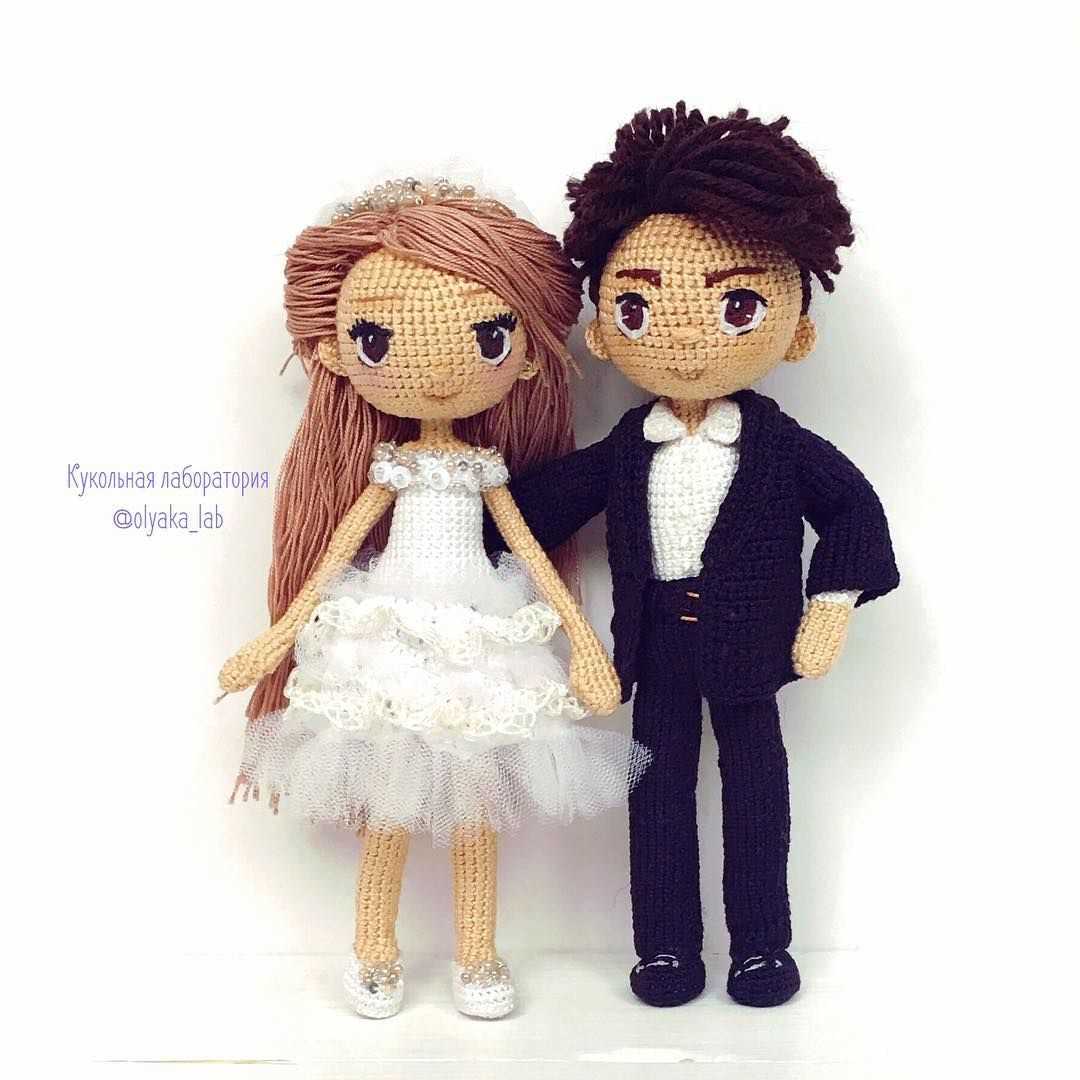
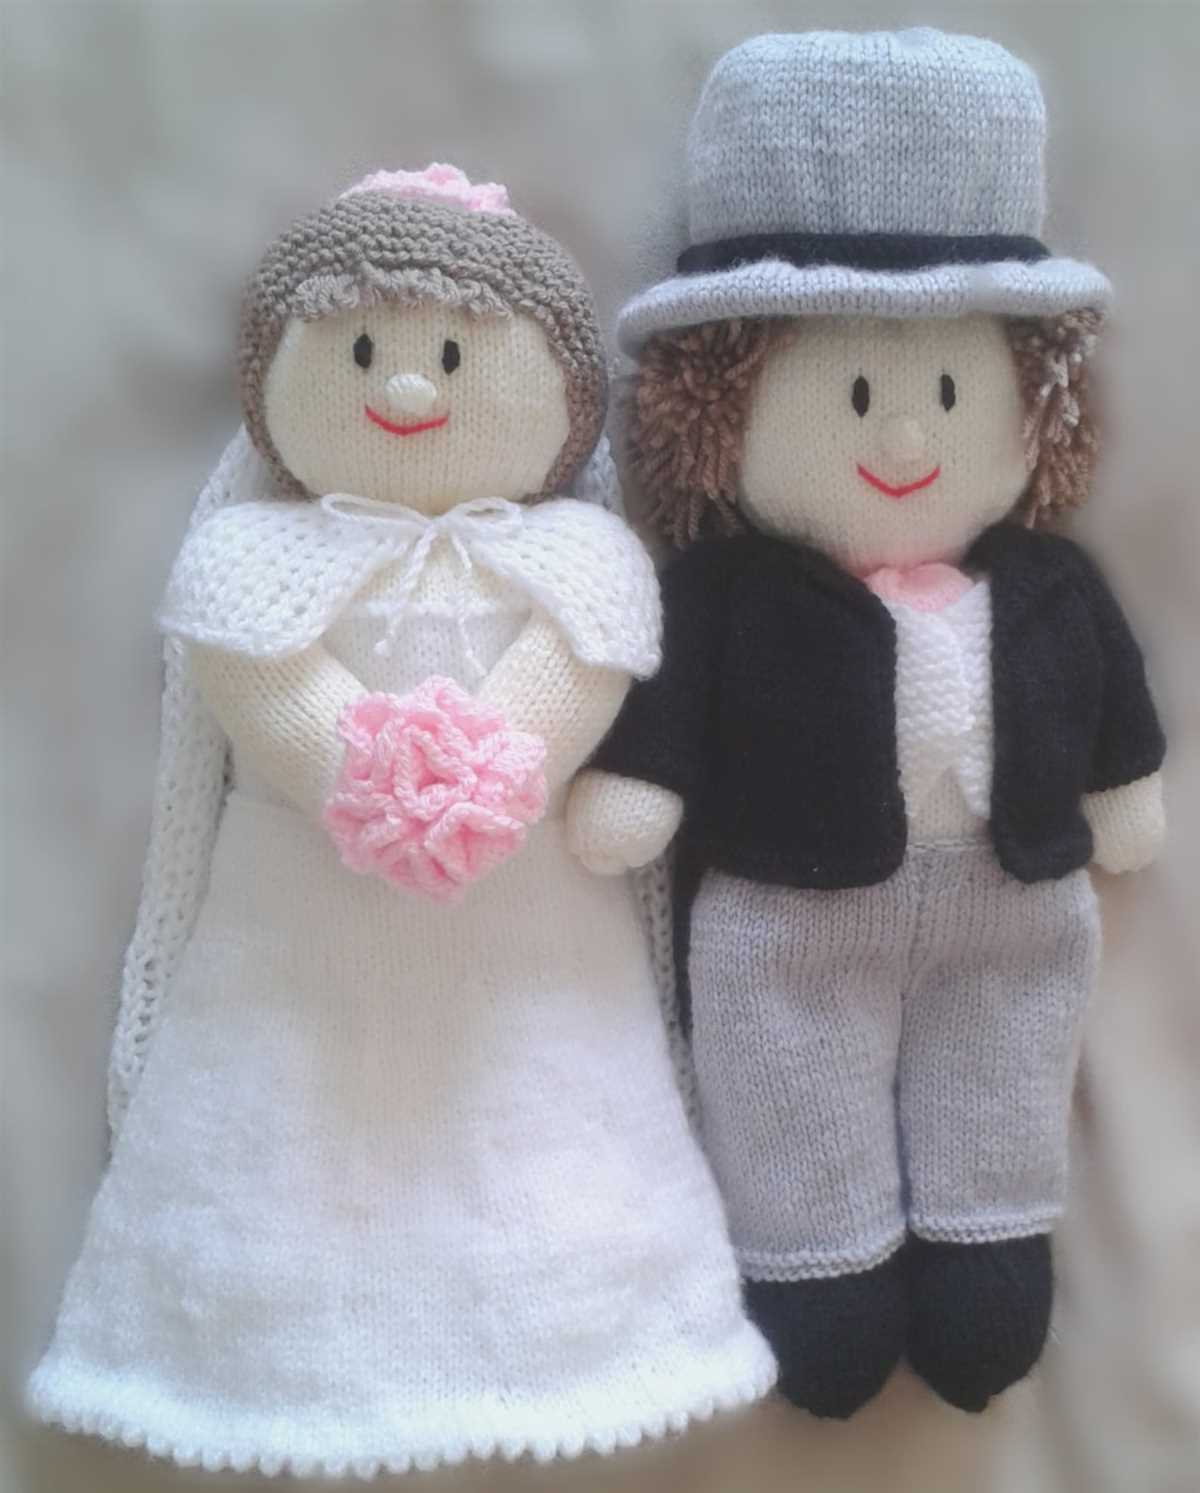
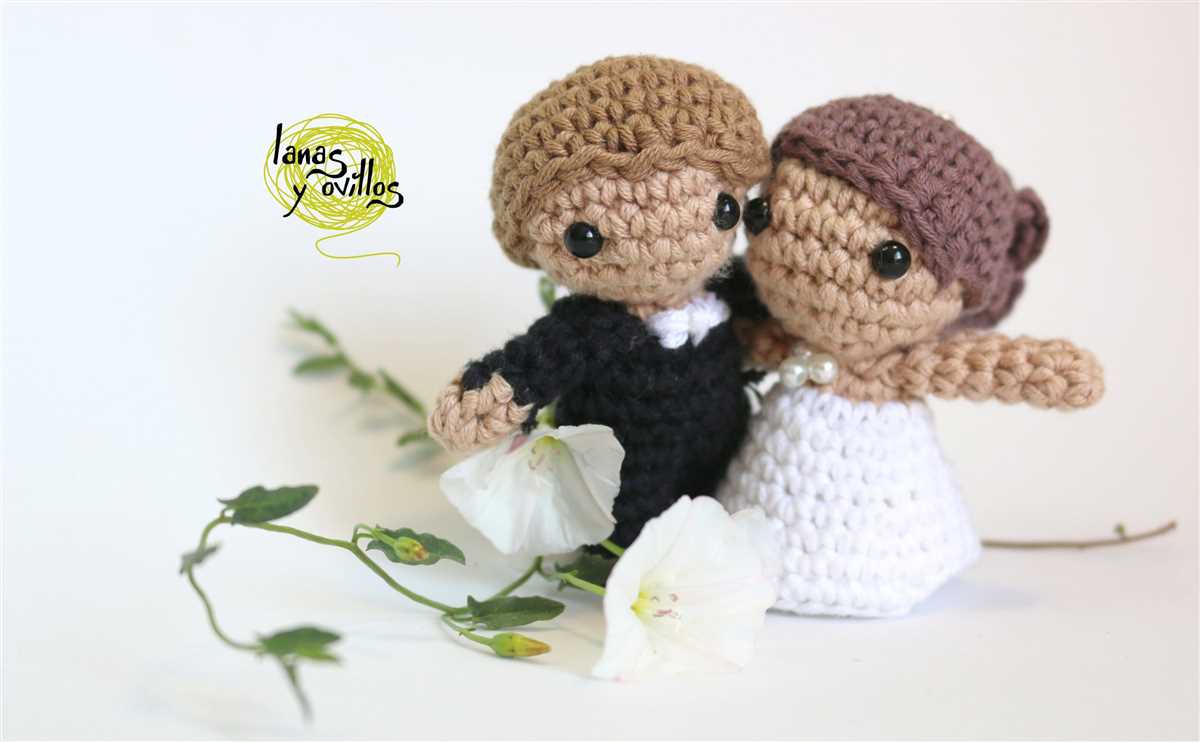
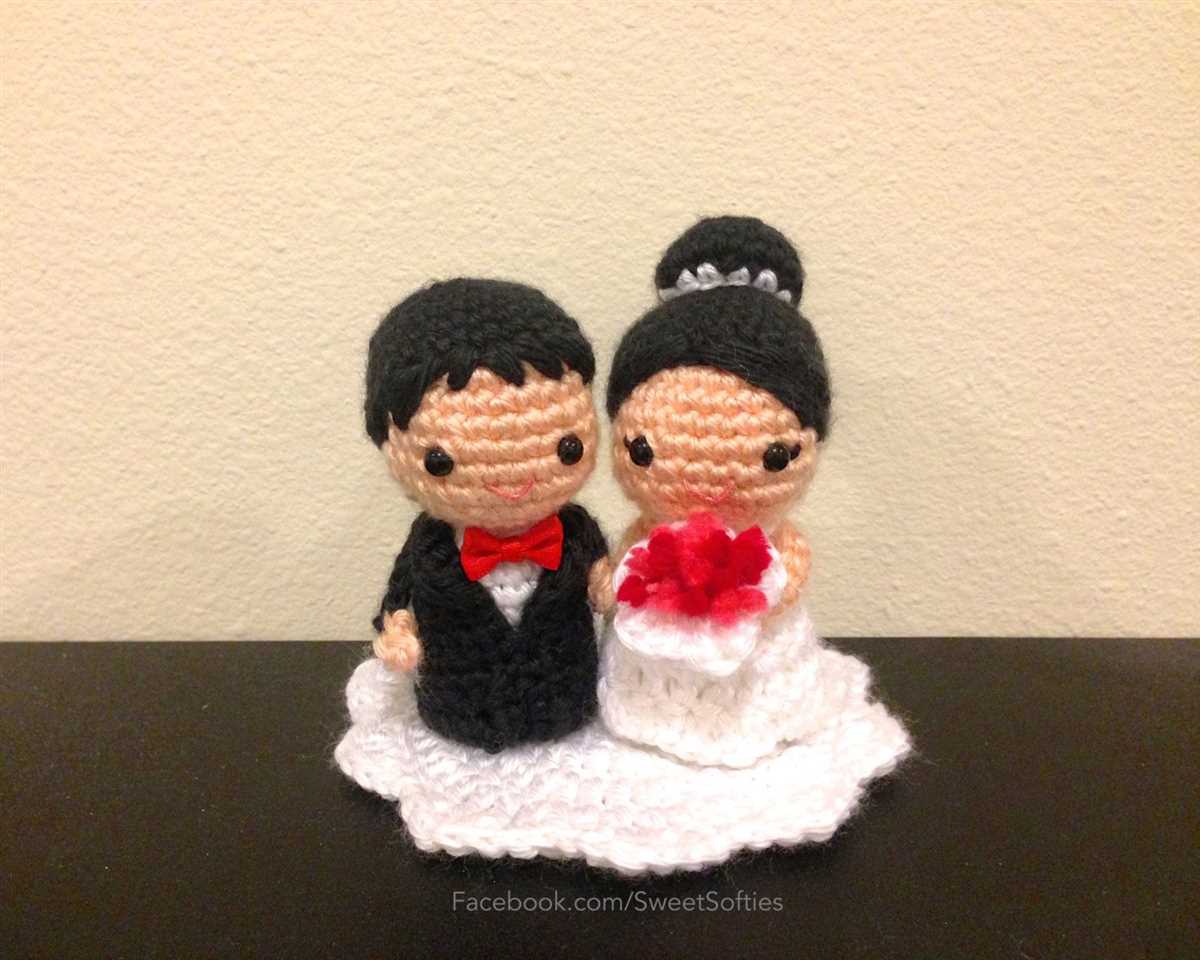
With this knitting pattern, you can create a beautiful bride and groom set of dolls that will be cherished for years to come. The bride doll features a stunning wedding gown, complete with lace detailing and a veil. The groom doll is dressed in a dapper tuxedo, complete with a bow tie and pocket square. These dolls are the ideal wedding decoration or gift and are sure to bring a smile to anyone’s face.
Materials Needed:
- Yarn in white and black
- Knitting needles
- Tapestry needle
- Stuffing
- Scissors
Instructions:
- Begin with the bride doll. Knit the body using white yarn and a set of knitting needles.
- Next, knit the dress separately and sew it onto the body. Add lace detailing and a veil.
- For the groom doll, knit the body using black yarn and a set of knitting needles.
- Knit a tuxedo separately and sew it onto the body. Add a bow tie and pocket square for extra detail.
- Once both dolls are complete, stuff them with filling to give them shape and dimension.
- Finally, use a tapestry needle to weave in any loose ends and create a finished look.
These bride and groom dolls can be customized to match the wedding couple’s attire and style. You can also add additional details such as flowers or accessories to make them even more special. Whether you’re a knitting enthusiast or just starting out, this free knitting pattern is a great project to try. Create your own bride and groom dolls and add a personal touch to any wedding celebration or gift.
When choosing materials for your bride and groom dolls, it’s important to consider both the aesthetic and practical aspects. You’ll want to select yarn that is suitable for knitting, with a good amount of stretch and durability. Opt for a fine or medium weight yarn in the colors that best match your vision for the dolls.
Yarn:
For the bride doll, a soft white or cream-colored yarn will give her a classic and elegant look. Consider using a yarn with some shimmer or sparkle to mimic the shine of a wedding gown. For the groom, a black or gray yarn will create a refined and dashing appearance. You can also choose to add different colored yarns for specific details, such as the bride’s bouquet or the groom’s tie.
Needles:
For this pattern, you’ll need knitting needles that are appropriate for the yarn you chose. Check the label on your yarn for the recommended needle size, and ensure that you have two sets of needles: one for knitting the body and one for any smaller details. Circular needles are often preferred for knitting the body, as they allow for easier handling of the stitches. Straight needles can be used for smaller parts like the arms and legs.
Additional Materials:
- Stuffing: You’ll need a soft and pliable stuffing material to give your dolls a three-dimensional shape. Polyester fiberfill is commonly used for this purpose and can be found at most craft stores.
- Embroidery thread: To add facial features and other details to your dolls, you’ll need embroidery thread in colors that complement their yarn. Black, brown, and pink threads are commonly used for eyes, hair, and blush.
- Needle and thread: A sharp needle and strong thread will be needed for sewing the various parts of your dolls together. Choose a thread color that matches or blends well with the yarn color.
- Scissors: A pair of sharp scissors will be essential for cutting yarn, thread, and any excess fabric.
By carefully selecting your materials, you can create beautiful bride and groom dolls that will make a unique and cherished keepsake. Take your time to choose high-quality materials that will withstand the test of time and properly showcase your knitting skills. Happy crafting!
Basic Knitting Techniques

Knitting is a popular craft that involves creating fabric by interlocking loops of yarn with knitting needles. This technique is used to create various items, including clothing, accessories, and even toys. Before starting any knitting project, it’s important to familiarize yourself with some basic knitting techniques.
One of the first things you need to learn is how to cast on. This is the process of creating the first row of stitches on your knitting needle. There are different methods for casting on, including the long-tail cast on and the knitted cast on. It’s important to choose the method that works best for your project and personal preferences.
Once you have cast on, you can move on to the next step, which is knitting the stitches. Knitting involves inserting the right needle into the front of the first stitch on the left needle, pulling the yarn through the stitch, and sliding the stitch off the left needle. This process is repeated for each stitch until you reach the end of the row.
An important technique to learn is how to purl. Purling is the opposite of knitting and creates a different texture in the fabric. To purl, you insert the right needle into the front of the first stitch on the left needle, but from right to left. Then, wrap the yarn counterclockwise around the right needle and pull it through the stitch. Slide the stitch off the left needle, and repeat for each stitch until the end of the row.
Learning how to increase and decrease stitches is crucial for shaping your knitting project. There are several methods for increasing stitches, such as yarn overs, make one stitches, and knitting into the front and back of a stitch. Decreasing stitches is done by knitting or purling two stitches together, or by slipping a stitch and passing the slipped stitch over the next stitch.
These are just a few of the basic knitting techniques you need to know to get started with your knitting project. With practice, you’ll be able to create intricate patterns and designs, and even customize patterns to suit your own style.
Knitting the Bride Doll
When it comes to creating a special keepsake for a wedding, knitting a bride doll is a thoughtful and unique option. This free knitting pattern allows you to craft a beautiful doll that captures the essence of a blushing bride.
Gathering the materials: Before diving into the knitting process, gather all the necessary materials. You will need yarn in the desired color for the bride’s dress, hair, and accessories, knitting needles in the appropriate size, stuffing material, and any additional embellishments you want to include.
Starting with the basics: Begin by casting on the required number of stitches to create the doll’s body. Knit the body using the specified stitch pattern, making sure to follow the pattern instructions closely. As you progress, shape the body by increasing and decreasing stitches as needed to create the desired shape. Remember to leave an opening at the bottom for stuffing.
Note: The pattern may include instructions for knitting the doll’s head and limbs separately and attaching them later. Follow the pattern carefully to ensure the best results.
Making the Bride’s Dress
When making the bride’s dress for the knitted bride and groom dolls, there are several key elements to consider. The dress should be elegant and beautiful, reflecting the bride’s special day. To achieve this, start by selecting a fine yarn in a white or ivory color. This will give the dress a traditional bridal look.
Pattern: The dress can be created using a simple knitting pattern. Begin by knitting the bodice, starting from the top and working your way down. Use a ribbing stitch for the bodice to give it a snug and fitted look. Next, transition into a lace pattern for the skirt of the dress. This will add a delicate and feminine touch.
Tip: If you’re feeling adventurous, you can also incorporate some beadwork or sequins into the lace pattern to add a bit of sparkle to the dress.
- Neckline and Sleeves: The neckline of the dress can be either a scoop neck or a sweetheart neckline, depending on your preference. Additionally, consider knitting short lace sleeves or cap sleeves to complete the look.
- Embellishments: To make the dress truly special, you can add some decorative embellishments such as ribbon, bows, or even small fabric flowers. Sew these onto the dress in strategic places, such as the waistline or the neckline, to enhance its overall appearance.
- Finishing Touches: Once the dress is complete, it’s time to put the final finishing touches. Make sure to weave in any loose ends of yarn and block the dress to ensure it retains its shape.
By following these steps and adding your own personal touches, you can create a stunning wedding dress for your knitted bride doll. The dress will be a beautiful representation of the bride’s special day and will bring even more joy to the knitted bride and groom dolls.
Adding Details to the Bride Doll
When creating a bride doll for your knitting project, it’s all about the details. Adding the right finishing touches can really make your doll come to life. Here are some key areas to focus on when adding details to your bride doll:
Wedding Dress
The wedding dress is the centerpiece of the bride doll, so it’s important to give it special attention. Choose a pattern that reflects the style of dress you want to create, whether it’s a traditional ball gown or a sleek and modern design. Use delicate yarn in white or ivory to give the dress an elegant look. Consider adding lace, beads, or sequins to add extra sparkle and texture.
Hair and Veil
The bride’s hair and veil are another important aspect of her appearance. You can use yarn in a color that matches the bride’s hair color or create a separate wig using a different yarn. Style the hair into an updo or leave it long and flowing, depending on the desired look. For the veil, use a lightweight yarn and create a delicate lace pattern to give it an ethereal effect. Attach the veil securely to the doll’s head using invisible thread or glue.
Bouquet
No bride doll is complete without a beautiful bouquet. Knit a small bouquet using yarn in various colors to mimic different flowers. Use a combination of knitting and crochet techniques to create different textures and shapes. Attach the bouquet to the bride doll’s hand using a small piece of invisible thread or a clear elastic band. Consider adding small beads or ribbons to the bouquet for extra detail.
Accessories
Don’t forget to add accessories to complete the bride doll’s look. This can include jewelry such as earrings, a necklace, or a bracelet. Use small beads or sequins to create the jewelry and attach them securely to the doll. You can also add a small tiara or headpiece, using wire and beads to create a glamorous effect. Don’t be afraid to get creative and add personalized touches to make the bride doll unique.
By paying attention to these key details, you can create a stunning bride doll that is sure to impress. Whether you are making it as a gift or for your own enjoyment, the result will be a beautiful representation of a bride ready to say “I do!”
Knitting the Groom Doll
If you’re looking to create a charming wedding keepsake or a unique gift for a bridal shower, knitting a groom doll is a fun and creative project. With just a few supplies and some basic knitting skills, you can bring this adorable doll to life.
Materials:
- Yarn in desired colors for the doll’s hair, skin tone, and outfit
- Knitting needles in appropriate size for the yarn
- Fiberfill stuffing
- Darning needle
- Scissors
Pattern:
- Begin by knitting the body of the doll using the skin tone yarn. Cast on the required number of stitches and work in stockinette stitch until the body reaches the desired length.
- Once the body is complete, set it aside and start knitting the limbs and head. Use the same skin tone yarn and follow the pattern instructions for each individual piece.
- Next, it’s time to knit the groom doll’s hair. Choose a yarn color that matches the groom’s hair color and follow the pattern instructions to create the desired hairstyle.
- After all the individual pieces are complete, it’s time to assemble the doll. Use the darning needle to sew the limbs and head onto the body, making sure to leave an opening for stuffing.
- Stuff the doll with fiberfill until it reaches the desired firmness. Make sure to evenly distribute the stuffing throughout the doll.
- Once the doll is stuffed, sew up the opening and secure any loose ends. You can also add any additional details, such as facial features or clothing, using embroidery or small accessories.
And there you have it – a charming groom doll that can be cherished for years to come. Whether you’re gifting it to a bride-to-be or keeping it as a memento of your own wedding, this knitted doll is sure to bring joy and happiness. Happy knitting!
When making the groom’s suit for the bride and groom dolls, attention to detail is key. Begin by selecting a suitable fabric for the suit, such as a lightweight wool or a satin blend. Cut out the pattern pieces using the provided template, making sure to transfer any markings onto the fabric.
Start by constructing the jacket. Sew the shoulder seams and the side seams together, ensuring a neat finish. Attach the sleeves to the armholes, easing in any excess fabric as needed. Sew the collar onto the neckline, making sure it sits smoothly. Finally, add any additional details, such as pockets or buttons, to complete the jacket.
Step-by-Step Guide:
- Choose a suitable fabric for the groom’s suit, such as lightweight wool or a satin blend.
- Cut out the pattern pieces using the provided template and transfer any markings onto the fabric.
- Sew the shoulder seams and side seams of the jacket together.
- Attach the sleeves to the armholes, easing in any excess fabric as necessary.
- Sew the collar onto the neckline, ensuring it sits smoothly.
- Add any additional details, such as pockets or buttons, to complete the jacket.
Once the jacket is complete, move on to making the trousers for the groom. Cut out the trouser pieces using the template and transfer any markings onto the fabric. Sew the front and back seams together, ensuring a neat finish. Attach the waistband, making sure it fits securely around the waist.
Finish by constructing any additional accessories for the groom’s suit, such as a bowtie or a cummerbund. Use the provided instructions and template to create these items, making sure to choose fabric that complements the suit. Once all the pieces are complete, carefully dress the groom doll in his suit, ensuring a perfect fit. Now the bride and groom dolls are ready for their special day!
Adding Details to the Groom Doll
When creating the groom doll for your bride and groom set, it’s important to pay attention to the details to ensure a realistic and charming finished product. Adding small touches can make a big difference in the overall appearance and character of the doll.
To start, consider using different colors of yarn to create the groom’s hair and facial features. Use a dark color for the hair, such as black or brown, and carefully stitch it onto the doll’s head. You can make the hair as short or long as you’d like, depending on the style you’re aiming for. Don’t forget to shape the hair by cutting it and giving it some texture.
When it comes to the groom’s face, you can use embroidery techniques to add eyes, eyebrows, and a mouth. Use a light-colored thread to create the eyes, making them small and evenly spaced. The eyebrows can be created using short, straight stitches, and the mouth can be made with a simple backstitch. Take your time to ensure that the facial features are symmetrical and convey the desired expression.
Another important detail to consider is the groom’s attire. You can create a miniature suit using different colors of yarn to represent the jacket, pants, and shirt. Use a thin yarn to stitch on buttons, a collar, and pocket details. To make the suit jacket look more realistic, you can even add lapels by folding the yarn and stitching it in place. For a finishing touch, consider adding a bowtie or a necktie, using a contrasting color of yarn or a small piece of ribbon.
By paying attention to these details, you can create a groom doll that complements the bride doll and enhances the overall beauty of your knitted bride and groom set. Don’t be afraid to get creative with different techniques and materials to make your groom doll unique and special.
Assembling the Bride and Groom Dolls
Once you have knitted all the necessary pieces for the bride and groom dolls, it is time to assemble them. Follow these steps to bring your dolls to life:
1. Attach the head: Begin by attaching the head to the body. You can use a small amount of stuffing to give the head a more rounded shape. Sew the head to the body using a whip stitch, making sure it is centered and secure.
2. Add the arms: Position the arms in the desired position and attach them to the body. Fold the end of each arm piece and sew it to the sides of the body using a whip stitch. This will create the appearance of bent arms.
3. Dress the dolls: Put the bride’s dress on her by sliding it over her head and pulling it down to her feet. For the groom, attach the trousers by sewing up the back seam and then slide them over his legs. If desired, you can also add a shirt or jacket to the groom.
4. Embellish the dolls: Use embroidery thread to add details to the dolls’ faces and hair. You can embroider eyes, a nose, and mouth using small, straight stitches. For the hair, use a thicker embroidery thread or yarn to sew on individual strands or create a hairstyle.
5. Finish off: Once you are satisfied with the dolls’ appearance, tie off any loose ends and trim any excess thread. You can also give the dolls a final steam or press to smooth out any wrinkles in the knitted fabric.
With these simple steps, you can assemble the bride and groom dolls and showcase your knitting skills. These dolls make a charming addition to any wedding-themed decorations or as a gift for a special couple. Enjoy the process of creating these adorable knitted dolls!
Personalizing Your Dolls
When it comes to creating your own bride and groom dolls, personalization is key. Making these dolls unique to the couple they represent adds a special touch to the gift or decoration. Here are some ideas on how to personalize your dolls:
1. Choose colors that match the couple
One way to personalize your dolls is by selecting colors that match the couple’s wedding theme or their personal preferences. You can use the traditional white for the bride’s dress or opt for a different color that the couple loves. For the groom, you can choose a suit color that matches his attire. By selecting the right colors, you can make the dolls resemble the couple even more.
2. Customize the hairstyles

Another way to add a personal touch to your dolls is by customizing their hairstyles. You can create different hairstyles based on the couple’s actual hair or choose a style that they always wanted to try. Adding details like curls, braids, or a specific haircut can make the dolls look more like the couple and reflect their individuality.
3. Include small accessories
Adding small accessories to the dolls is another way to personalize them. You can include tiny replicas of the couple’s wedding bands or add accessories that match their hobbies or interests. For example, if the couple loves hiking, you can create miniature backpacks or hiking boots for the dolls. These little details will make the dolls truly unique and meaningful.
4. Embroider initials or names
A unique way to personalize your dolls is by embroidering the couple’s initials or names on their clothes. You can use a small embroidery hoop and colored thread to add this special touch. It’s a subtle detail that will make the dolls even more personalized and cherished by the couple.
Remember, the goal is to make these dolls special to the couple they represent, so feel free to get creative and think about what would make the dolls uniquely theirs. Whether it’s through colors, hairstyles, accessories, or embroidery, personalization will elevate your creation and make it a cherished keepsake.
Finishing Touches
After completing the main knitting pattern for the bride and groom dolls, it’s time to add the finishing touches. These final details will bring the dolls to life and make them truly special. Here are some suggestions for adding those extra touches:
1. Facial Features: Use embroidery floss or yarn to embroider the eyes, nose, and mouth of the dolls. You can create different expressions by changing the shape and size of the features. Remember to secure the floss or yarn with small stitches to ensure they stay in place.
2. Hair: Give the bride doll a beautiful hairstyle by knitting or crocheting a wig. You can use a contrasting color of yarn to create highlights or add accessories like a veil or flowers. For the groom, you can use embroidery floss or yarn to create a neat hairdo or give him a bald head, depending on your preference.
3. Clothing and Accessories: Dress up the dolls in their wedding attire. Knit or crochet a wedding gown for the bride, complete with lace or beaded details. For the groom, create a suit or tuxedo using a different color of yarn. Don’t forget to add accessories like a veil, bowtie, or bouquet to complete their outfits.
4. Shoes: Knit or crochet shoes for the dolls using a lighter-weight yarn. You can create simple slip-on shoes or try your hand at more intricate designs like sandals or heels. Adding buttons or beads as embellishments can give the shoes an extra touch of elegance.
5. Embellishments: Add small details like buttons, ribbons, or bows to further personalize the dolls. You can sew on buttons as eyes or use ribbons to create a bowtie for the groom. These little touches can make a big difference in the overall look of the dolls.
6. Assembly: Once all the finishing touches are complete, it’s time to assemble the dolls. Use yarn and a tapestry needle to sew the various pieces together, ensuring that all the seams are secure. Pay attention to the placement of the arms, legs, and head to achieve the desired pose and proportions.
With these finishing touches, your bride and groom dolls will be ready for their big day. Whether you’re making them as a gift or for your own collection, these personalized details will make them truly special and unique. Have fun adding your own creative touches to bring your dolls to life!
Showcasing Your Finished Dolls
Now that you have completed your beautiful bride and groom dolls, it’s time to showcase your hard work and creativity. Here are a few suggestions on how to display your finished dolls:
1. Display Shelf: Find a small display shelf or cabinet to showcase your dolls. Arrange them side by side for a charming couple display.
2. Wedding Keepsake Box: If you have a special box or container used to store wedding mementos, consider placing your dolls inside as a unique keepsake.
3. Table Centerpiece: Use your dolls as a centerpiece for a wedding or anniversary celebration. Place them on a table surrounded by fresh flowers and candles for an elegant touch.
4. Gift for the Bride and Groom: If the dolls were created as a gift, present them to the bride and groom on their wedding day or during their anniversary celebration. They will be thrilled to receive such a personalized and heartfelt gift.
Remember, the possibilities are endless when it comes to showcasing your finished dolls. Get creative and let your imagination run wild! Whether it’s for personal enjoyment or as a special gift, your bride and groom dolls are sure to bring joy and happiness to all who see them.