
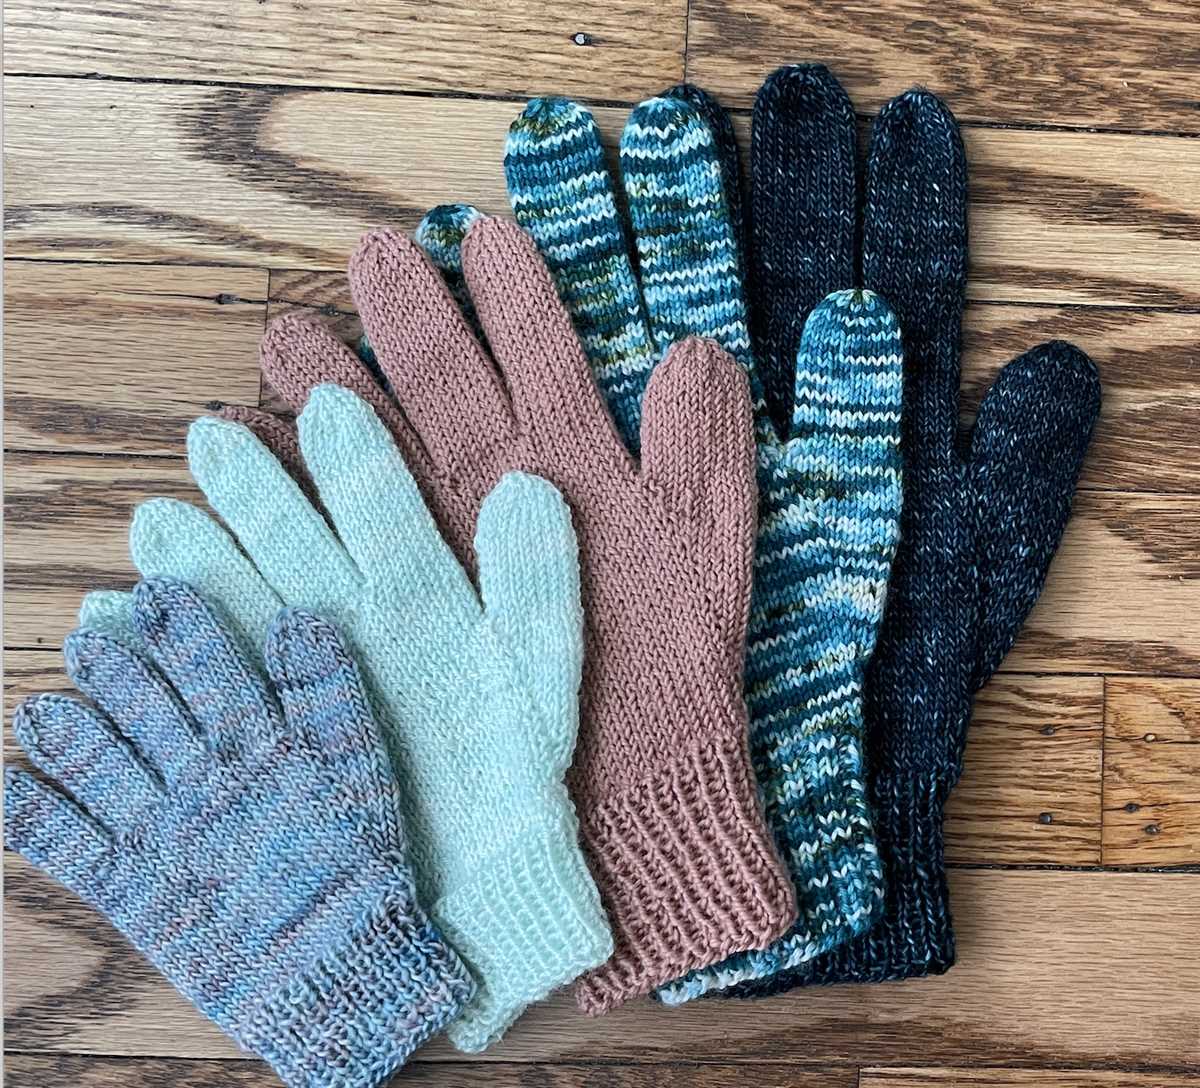
Fingerless gloves are a perfect accessory to keep your hands warm and cozy during the colder months. They are not only functional, but they can also add a touch of style to any outfit. If you are a knitting enthusiast looking for a new project, why not try knitting your own fingerless gloves? In this article, we will provide you with a simple fingerless glove pattern that you can easily follow.
Knitting your own fingerless gloves gives you the freedom to choose the yarn color and texture that best suits your style. Plus, the satisfaction of wearing something you made with your own hands is truly rewarding. This pattern is suitable for knitters who have some basic knitting skills, such as casting on, knitting, purling, and binding off.
To start knitting your fingerless gloves, you will need a set of double-pointed needles and a ball of yarn. The pattern involves knitting in the round, so double-pointed needles are essential. The gauge is not crucial for this project, but you can adjust the size by changing the needle size or the number of stitches cast on.
Follow the simple steps outlined in this fingerless glove pattern, and soon you will have a stylish and functional pair of gloves to keep your hands warm in style. Whether you’re a beginner knitter or an experienced one, don’t be afraid to give it a try. Knitting fingerless gloves is a fun and rewarding project that you can enjoy all year round.
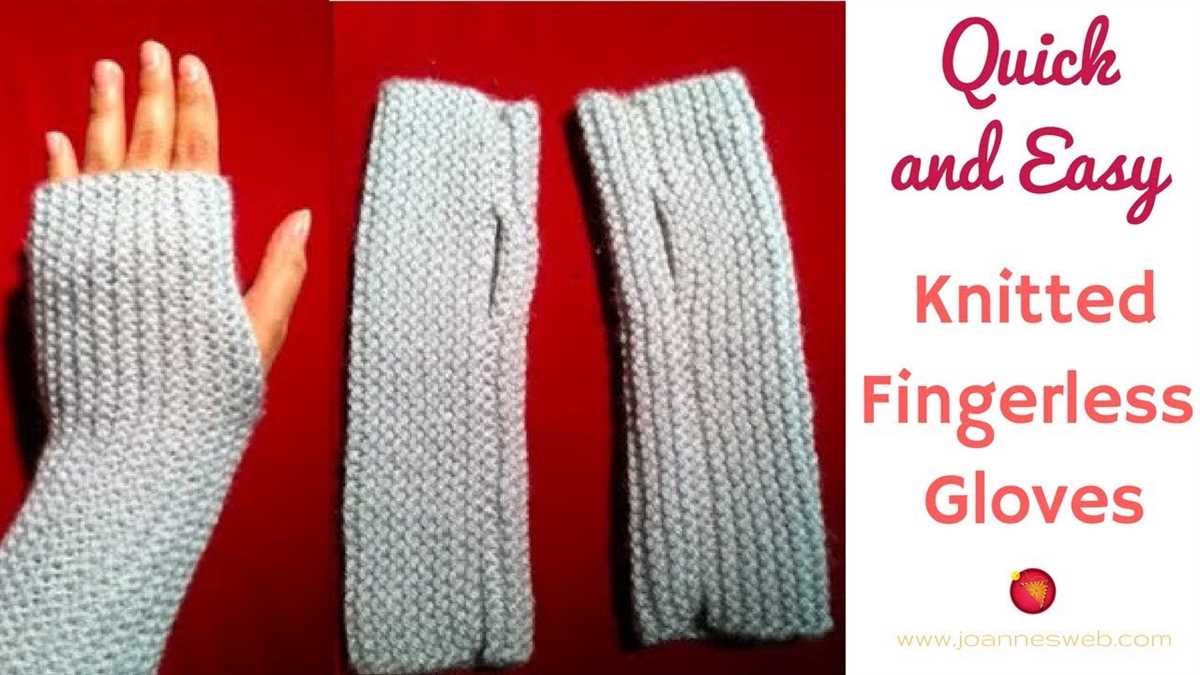
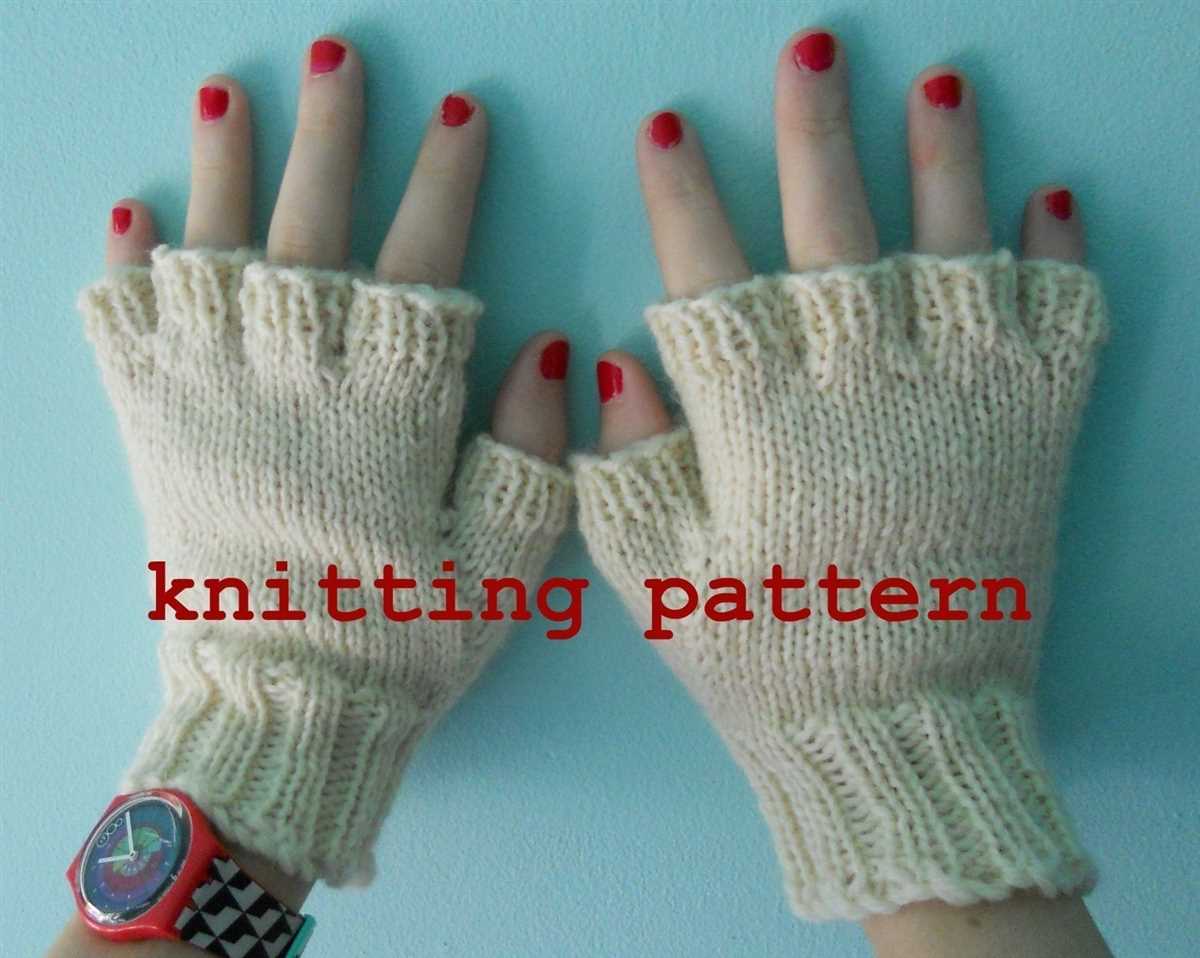
Fingerless Glove Pattern to Knit
Fingerless gloves are a versatile and stylish accessory that keeps your hands warm while still allowing you to use your fingers freely. Whether you are a beginner or an experienced knitter, knitting your own fingerless gloves can be a fun and satisfying project. With a fingerless glove pattern, you can create a custom-fit pair of gloves that perfectly suits your style and comfort.
To start knitting your fingerless gloves, you will need to gather your materials. This includes yarn in your desired color and weight, knitting needles, stitch markers, a tapestry needle, and scissors. Once you have all your materials ready, you can begin following the fingerless glove pattern.
One popular fingerless glove pattern is the basic rib stitch pattern. This pattern creates a stretchy fabric that fits snugly around your hands. To knit the rib stitch pattern, you will need to cast on the desired number of stitches, then alternate between knitting and purling stitches in a specific pattern. This creates the ribbed texture.
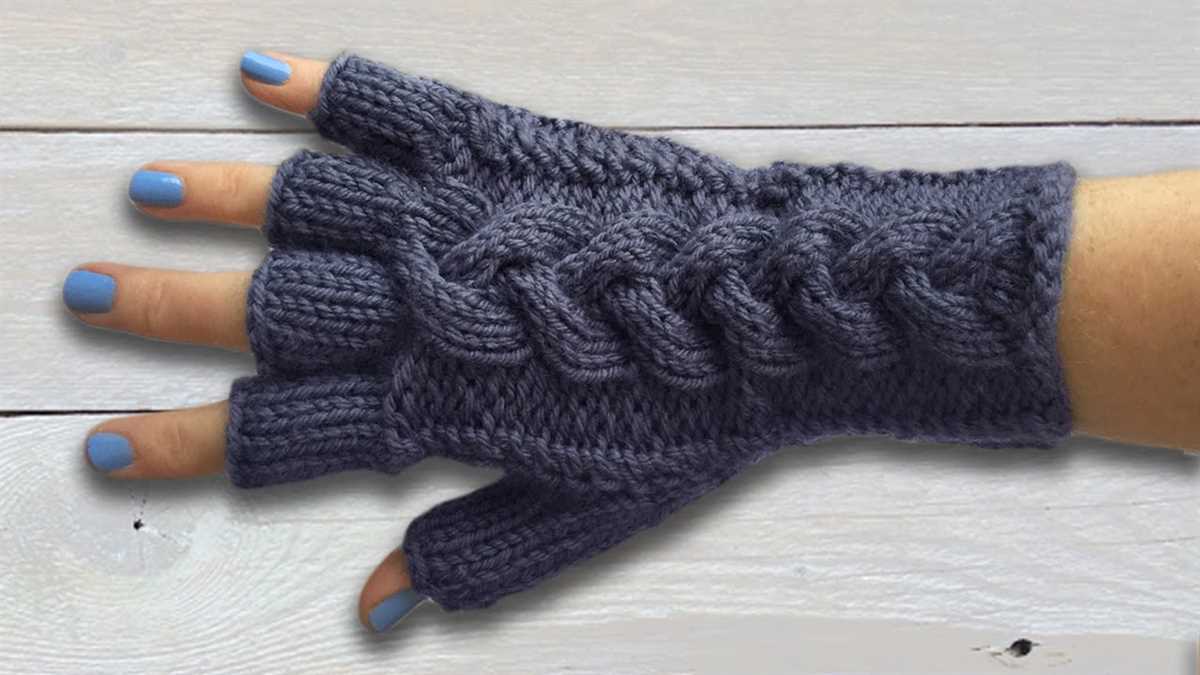
As you continue knitting the fingerless gloves, you can customize the length and width to fit your preferences. You can also add additional design elements, such as cables or lace, to make your gloves unique. Once you have finished knitting the gloves, you will need to sew the ends together and weave in any loose yarn tails.
Fingerless gloves are not only practical but also a fashionable accessory for both men and women. They can be worn in various seasons and are perfect for activities such as typing, texting, or driving. With a fingerless glove pattern, you can knit a pair of gloves that not only keep your hands warm but also showcase your knitting skills and personal style.
What Are Fingerless Gloves?
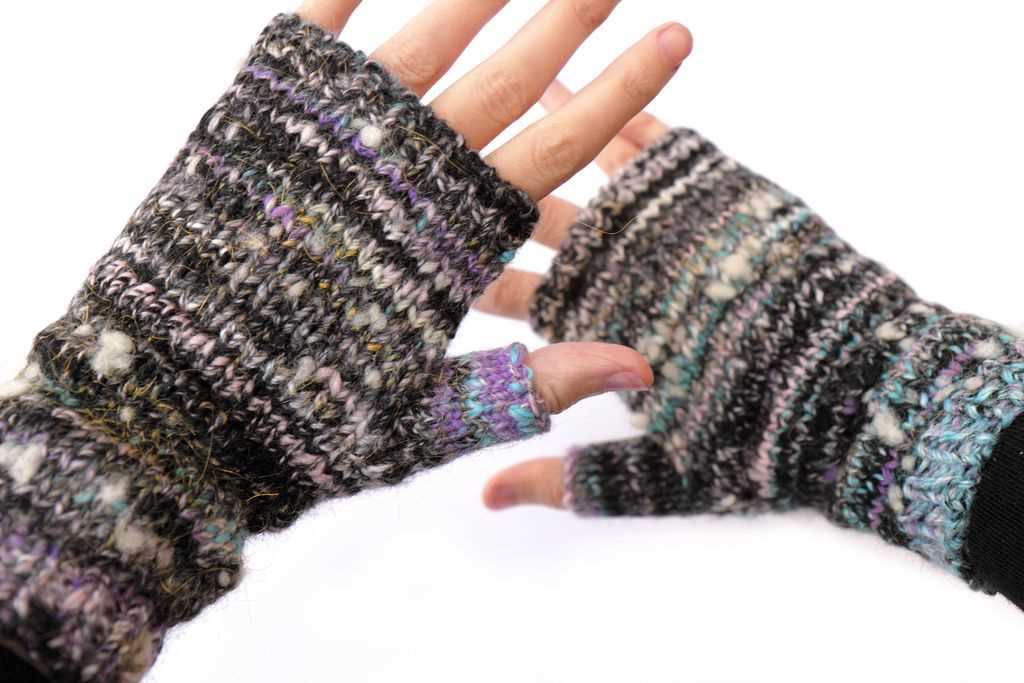
Fingerless gloves, also known as fingerless mittens or wrist warmers, are a type of accessory that cover the hand and wrist without covering the fingers. They are designed to keep the hands and wrists warm while allowing the fingers to remain free for tasks that require dexterity, such as texting, typing, or playing musical instruments.
These gloves are typically made from knitted or crocheted fabric, although they can also be found in other materials such as leather or fleece. The fingerless design allows for greater mobility and flexibility compared to traditional gloves, making them a popular choice for those who need to keep their hands warm while still being able to perform delicate tasks.
Knitting your own fingerless gloves can be a fun and rewarding project. There are many fingerless glove patterns available, ranging from simple designs for beginners to more complex patterns for experienced knitters. Knitting your own gloves allows you to customize the size, color, and style to suit your preferences.
In addition to being practical, fingerless gloves can also be a stylish fashion accessory. They come in a variety of designs, including solid colors, striped patterns, or intricate lace stitches. Fingerless gloves can be worn on their own or layered with other gloves or mittens for extra warmth.
- Fingerless gloves are a versatile accessory that combine warmth and dexterity.
- They are designed to cover the hand and wrist without covering the fingers.
- Fingerless gloves can be knitted or crocheted, and are also available in other materials such as leather or fleece.
- Knitting your own fingerless gloves allows for customization and creativity.
- Fingerless gloves can be a practical choice for various activities, such as texting, typing, or playing musical instruments.
- They can also be a fashionable accessory, with a wide range of designs and styles available.
Why Knit Fingerless Gloves?
Fingerless gloves are a popular accessory for both fashion and functionality. They offer the best of both worlds by providing warmth and style while allowing for dexterity and freedom of movement. Many knitters choose to make fingerless gloves because they are versatile and practical.
Warmth and Comfort: Fingerless gloves are ideal for those who need to keep their hands warm but still need to use their fingers for tasks like typing, texting, or knitting. The gloves cover the hand and wrist, providing insulation to keep the fingers warm while leaving the fingertips exposed for easy manipulation.
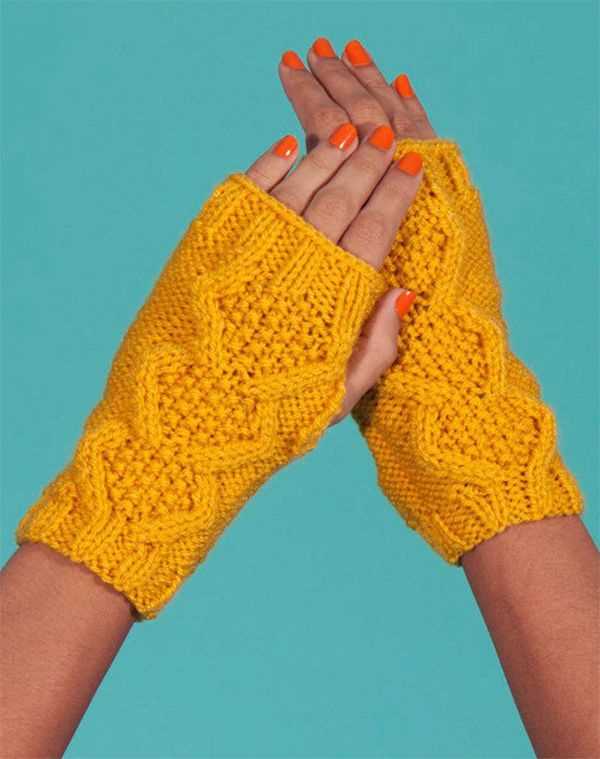
Style and Fashion: Fingerless gloves come in a variety of styles and designs, making them a fashionable accessory to complement any outfit. From simple and understated to intricate and lacey, there is a fingerless glove pattern to suit every taste and style. Knitters can experiment with different yarns and stitch patterns to create unique and personalized gloves.
Easy to Make: Knitting fingerless gloves is a beginner-friendly project that allows knitters to practice basic knitting techniques like knitting in the round, ribbing, and decreasing. With a simple pattern and a few hours of knitting, you can have a pair of fingerless gloves ready to wear or give as a gift.
Perfect for All Seasons: Fingerless gloves are not only a winter accessory but can be worn year-round. They are great for chilly spring and fall evenings when the weather is not cold enough for full gloves but still requires a bit of warmth. In the summer, fingerless gloves can provide protection from the sun while keeping the hands cool.
Functional and Versatile: Fingerless gloves are not limited to specific activities or occasions. They are suitable for various activities, including working on the computer, texting, driving, cycling, gardening, or simply adding an extra layer of warmth during outdoor activities.
Overall, knitting fingerless gloves is a practical and enjoyable project for knitters of all skill levels. Whether you want to keep your hands warm while maintaining dexterity or add a stylish accessory to your wardrobe, fingerless gloves are a versatile choice.
Choosing the Right Yarn and Needles
When it comes to knitting fingerless gloves, choosing the right yarn and needles is important for achieving the desired look and fit. The yarn you choose will determine the warmth, breathability, and durability of the gloves, while the needles you use will affect the stitch definition and overall size of the finished product. Here are some factors to consider when selecting yarn and needles for your fingerless gloves:
Type of Yarn
The type of yarn you choose for your fingerless gloves will depend on your personal preferences and the purpose of the gloves. If you’re looking for warmth and insulation, opt for a yarn with a high wool content such as merino or alpaca. These natural fibers have excellent insulating properties and will keep your hands cozy in cold weather. Alternatively, if you’re knitting gloves for warmer seasons, consider using a cotton or bamboo yarn for their breathability and lightness.
Yarn Weight
The weight of the yarn will also determine the thickness and overall feel of the gloves. For a snug and warm fit, choose a worsted or bulky weight yarn. These thicker yarns will create a denser fabric, providing more insulation and protection. However, if you prefer a more lightweight and flexible glove, opt for a sport or DK weight yarn. These thinner yarns will have a looser drape and allow for more movement.
Needle Size

The needle size you choose will depend on the yarn weight and desired gauge for your fingerless gloves. Generally, larger needle sizes are used for thicker yarns and smaller needle sizes for thinner yarns. Always refer to the pattern or gauge instructions to ensure you’re using the correct needle size to achieve the desired stitch count and fabric tension. It’s also worth considering circular needles for fingerless gloves, as they can provide a more comfortable and ergonomic knitting experience.
By carefully selecting the right yarn and needles, you can create fingerless gloves that are not only beautiful, but also functional and comfortable to wear. Experiment with different yarn types, weights, and needle sizes to find the perfect combination that suits your needs and style.
Getting Started: Casting On
Before you can begin knitting your fingerless gloves, you need to cast on your stitches. Casting on is the process of creating the foundation row of stitches that will be used to start your project. There are several different methods for casting on, but for this fingerless glove pattern, we will be using the long-tail cast on method.
To begin, you will need to estimate the amount of yarn you will need for your cast on. A good rule of thumb is to measure out a length of yarn that is approximately three times the width of the finished glove. This will give you enough yarn to work with and create a neat edge.
Once you have your yarn measured, make a slip knot at the end of the yarn. This is done by creating a loop with the yarn and pulling the end through the loop. Place the slip knot on your knitting needle and hold the needle in your right hand.
With your left hand, hold the tail end of the yarn and the working end of the yarn (the side connected to the ball of yarn). Place your thumb and index finger between the two strands of yarn to create a “V” shape. This will be the foundation for your stitches.
To cast on, insert the tip of the right knitting needle into the “V” shape from left to right. With your right hand, wrap the working end of the yarn around the tip of the right needle, moving from back to front.
Using your right needle, bring the loop of yarn through the “V” shape, creating a new stitch on your right needle. Slide this new stitch to the left needle, and repeat the process until you have the desired number of stitches for your fingerless gloves.
Once you have finished casting on, you are ready to begin knitting the rest of your fingerless gloves. The casting on process can be a bit tricky at first, but with practice, it will become easier. Don’t be afraid to take your time and go slowly to ensure that your stitches are even and neat.
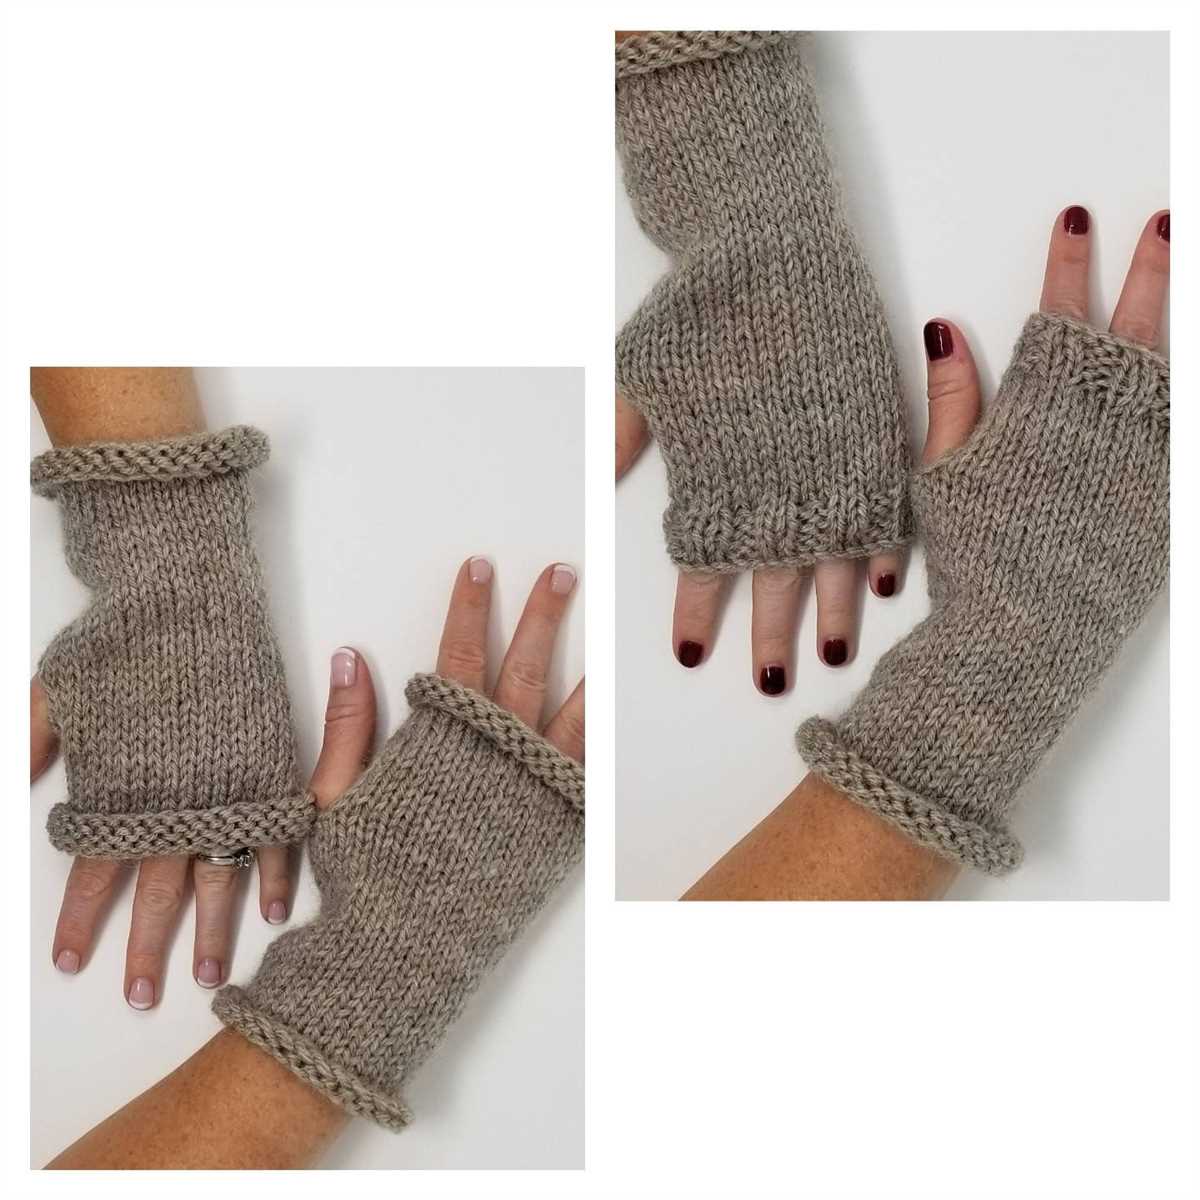
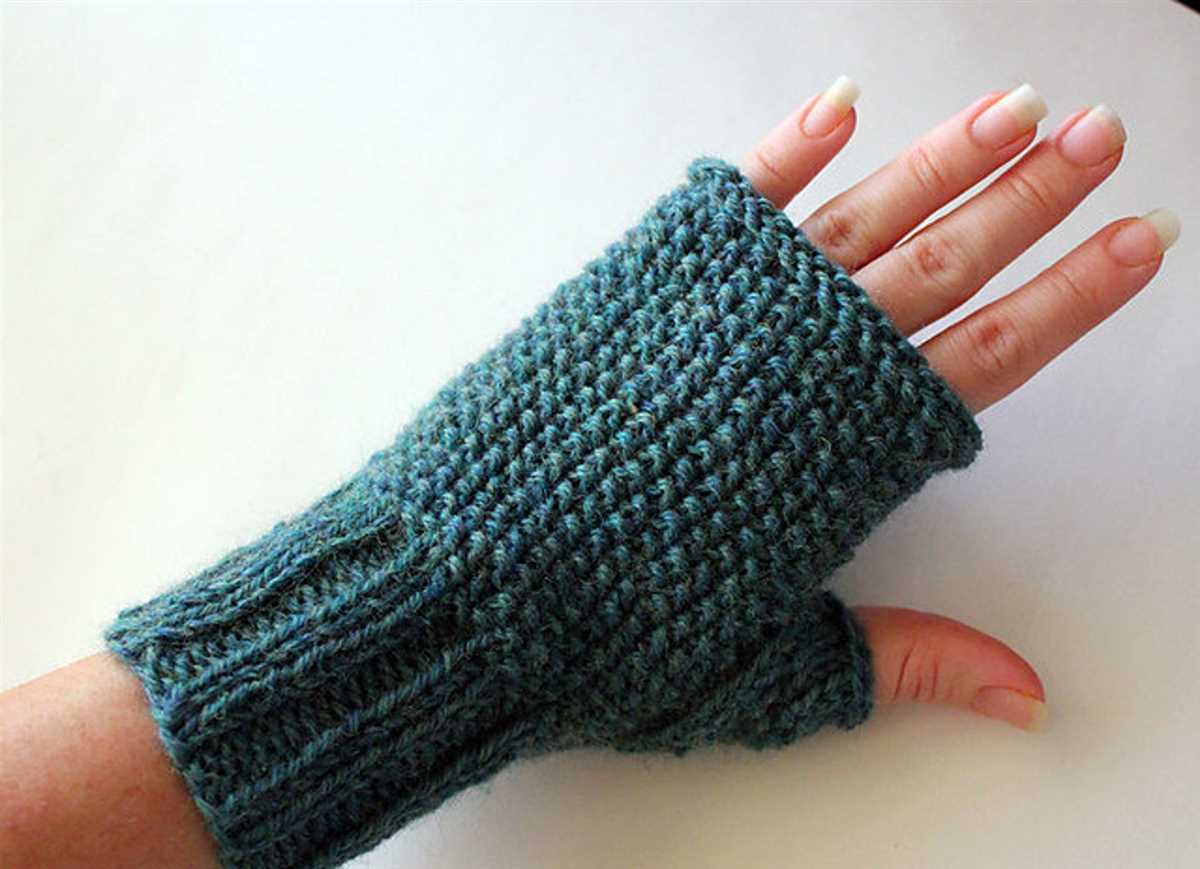
Knitting the Cuff
The cuff is an important part of fingerless gloves, as it provides a snug fit and helps keep the gloves in place on your wrists. When knitting the cuff, it is important to choose a stretchy stitch pattern that will allow for easy on and off. One common stitch pattern used for cuffs is ribbing, which alternates knit and purl stitches. This creates a fabric that stretches and hugs the wrist comfortably.
To begin knitting the cuff, you will need to cast on the required number of stitches. The number of stitches will depend on the size of your hand and the desired fit of the gloves. It is a good idea to make a gauge swatch before starting the project to ensure the cuff will fit properly. Once you have cast on the stitches, you will start knitting the ribbing pattern.
When knitting the cuff, you will alternate between knitting and purling stitches. This is typically done by knitting the first stitch, then purling the next stitch, and repeating this pattern across the row. The number of knit and purl stitches in each row will depend on the desired width of the cuff and the stitch pattern you choose. It is important to maintain the ribbing pattern throughout the cuff to ensure a consistent and stretchy fabric.
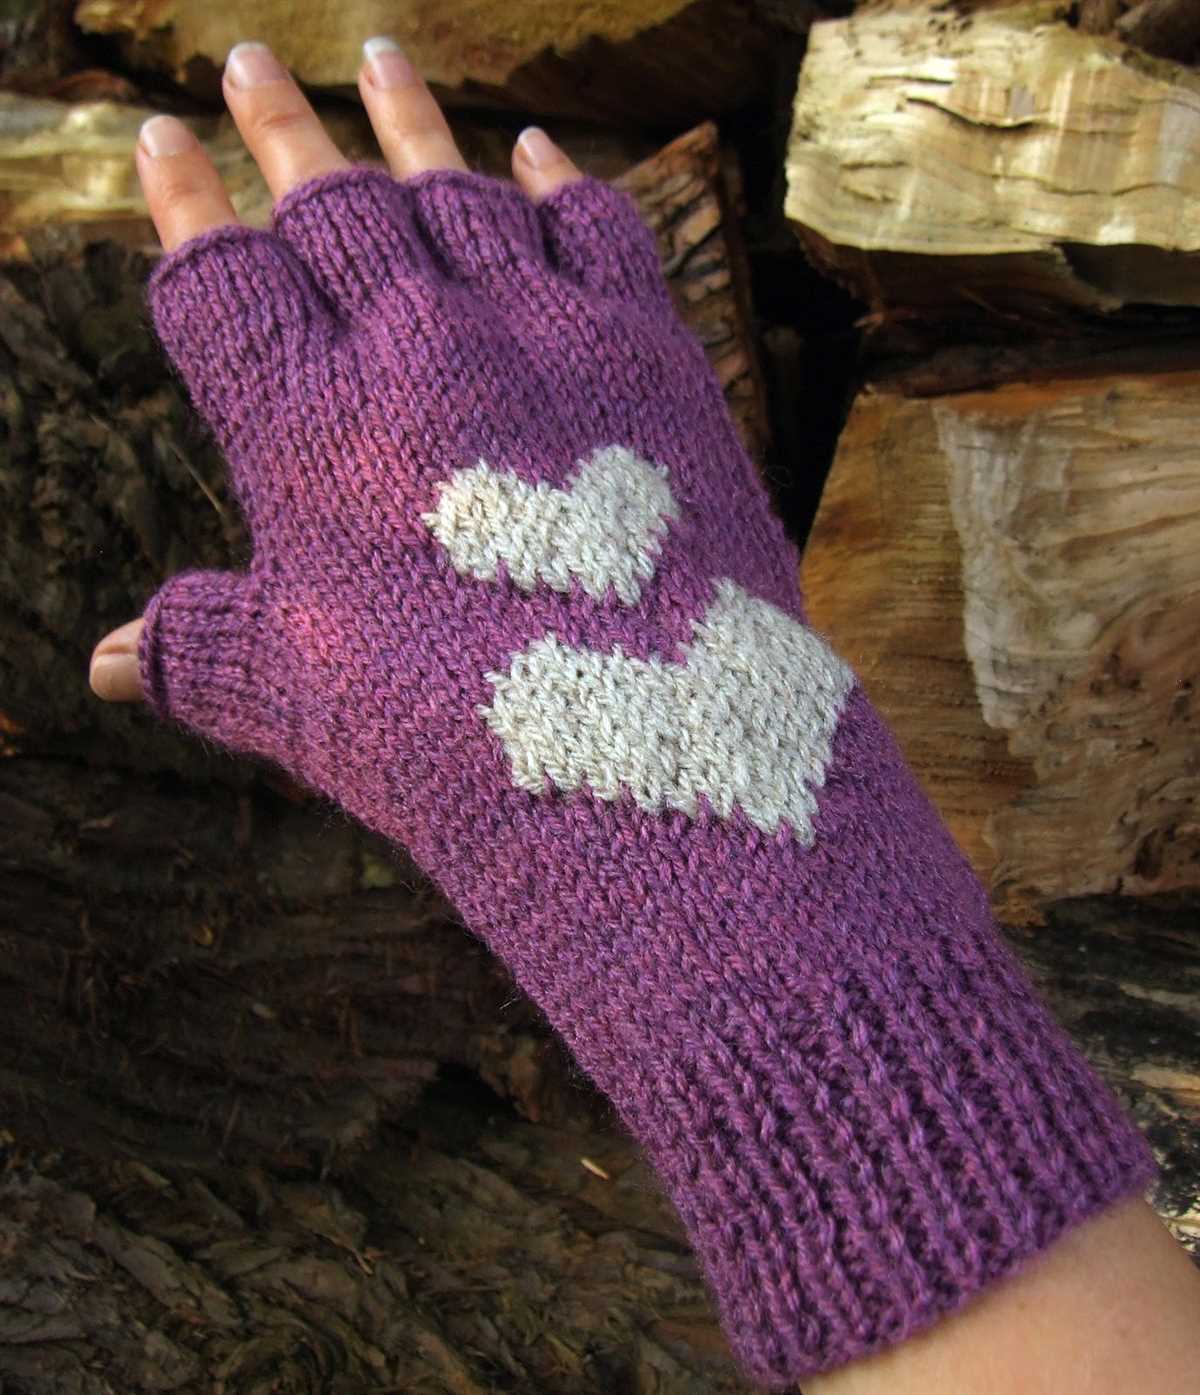
You may choose to knit the cuff in a solid color, or you can incorporate colorwork or other decorative stitches to add interest and personalize your fingerless gloves. Once you have completed the cuff, you can move on to knitting the hand and thumb sections of the gloves. The cuff sets the foundation for the rest of the glove and provides a comfortable and stylish starting point for your project.
Creating the Thumb Opening
To create the thumb opening for your fingerless gloves, you will need to work a few rows of stitches that will later be used as the opening for your thumb. Here is a simple method to create the opening:
1. Marking the Thumb Placement
First, you will need to determine where you want the thumb opening to be on your glove. You can either measure the width of your thumb or use a stitch marker to mark the spot on the glove where you want the opening to start. Make sure the marker is secure so that it won’t shift while you’re knitting.
2. Binding off Stitches
Next, you will begin to create the thumb opening by binding off a specific number of stitches. You can use the pattern instructions to determine how many stitches to bind off, or you can estimate based on the size of your thumb. To bind off, simply knit the first two stitches and then pass the first stitch over the second stitch and off the needle. Repeat this process until you have bound off the desired number of stitches.
3. Rejoining the Yarn
After binding off the stitches for the thumb opening, you will need to rejoin the yarn to continue knitting the rest of the glove. To do this, leave a long tail of yarn and then slip the needle through the next stitch on the left-hand needle. Wrap the yarn around the needle as if to knit, and then pull the new loop through the stitch. Continue knitting the remaining stitches as instructed in the pattern.
Repeat these steps for the other fingerless glove to create a symmetrical opening for both thumbs. Once you have completed the thumb openings, you can continue knitting the rest of the glove according to the pattern instructions.
Knitting the Hand Section
Once you have finished knitting the cuff, it’s time to start working on the hand section of the fingerless glove. This is where the gloves will really start to take shape and fit your hand snugly.
To begin, you will need to continue working in the round with your chosen stitch pattern. This could be a simple ribbing pattern, a textured pattern, or even a lace pattern. The choice is yours! Just make sure to keep in mind the desired fit and stretch of the gloves.
You will also need to regularly measure your work to ensure that you are knitting to the correct length. Measure from the edge of the cuff to the base of your fingers to determine how long the hand section needs to be. This will vary depending on the size of your hand and how long you want the gloves to be.
As you continue knitting, you will also want to pay attention to any shaping that may be required. This could include increasing or decreasing stitches to accommodate for the natural curves of the hand. Be sure to follow the pattern instructions carefully, as they will guide you through any necessary shaping.
Once you have reached the desired length and completed any shaping, you can then move on to binding off the hand section. This will create a clean edge and help to finalize the fit of the gloves. You can then weave in any loose ends and block your gloves to give them a polished look.
With the hand section complete, you are one step closer to having a pair of cozy fingerless gloves. The next step will be knitting the thumb section, which will add even more comfort and functionality to your gloves. Stay tuned for the next installment!
Shaping the Thumb
The thumb is an essential part of fingerless gloves as it allows for better flexibility and dexterity while keeping the hands warm. When knitting fingerless gloves, it is important to shape the thumb to ensure a comfortable fit and ease of movement.
There are several ways to shape the thumb depending on the pattern and personal preference. One common method is to use increases and decreases to create a thumb gusset. This is achieved by adding stitches on either side of a designated central stitch, typically marked with a stitch marker.
To shape the thumb gusset, knitters can use different types of increases such as knit front and back (kfb), make one left (m1L), or make one right (m1R). These increases are worked on the right side of the glove to gradually add stitches and create the desired thumb width.
Once the thumb gusset reaches the desired width, the knitter can then place the thumb stitches on waste yarn or stitch holders to be worked later. This allows for the rest of the hand to be completed without the thumb in the way.
When the hand portion of the glove is finished, the thumb stitches can be returned to the needles, and the thumb can be knit in the desired length using the same stitch pattern as the rest of the glove. Some patterns may include additional shaping techniques for the thumb, such as decreases or ribbing, to create a snug fit around the thumb.
Overall, shaping the thumb in fingerless gloves is an important step that adds functionality and comfort to the finished garment. By carefully following a pattern’s instructions or customizing the thumb shaping to fit individual needs, knitters can create fingerless gloves that are both stylish and practical.
Adding Ribbing to the Top
When knitting fingerless gloves, adding ribbing to the top can give the gloves a more finished and polished look. Ribbing is a pattern of alternating knit and purl stitches that creates a stretchy and comfortable fabric. It also helps to keep the gloves in place on the wrist.
To add ribbing to the top of fingerless gloves, you can use a smaller needle size than the one used for the main body of the gloves. This will create a tighter stitch pattern and provide the desired elasticity. Typically, a needle size one or two sizes smaller than the main needle is recommended.
Start by knitting a few rows of ribbing before proceeding with the main pattern of the gloves. This can be done by knitting one stitch, then purling one stitch, and repeating this pattern across the row. Continue this pattern for the desired length of ribbing, usually about 1 inch or 2.5 centimeters.
After completing the ribbing, switch to the main needle size and continue with the fingerless glove pattern. The ribbing at the top will create a nice contrast and add a professional touch to the finished gloves. It also helps to prevent the gloves from stretching out and keeps them snug on the wrists.
Remember to bind off loosely to maintain the stretchiness of the ribbing. This can be done by using a larger needle or by using a stretchy bind-off method, such as the suspended bind-off or the tubular bind-off.
Finishing the Fingerless Gloves
After completing the knitting portion of the fingerless gloves, it’s time to finish them off to give them a polished look and ensure they stay in place on your hands. Here are the steps to finishing your fingerless gloves:
1. Bind off
To begin the finishing process, you’ll need to bind off your stitches. This is done by knitting two stitches, then passing the first stitch over the second stitch and off the needle. Continue this process until you have one stitch left on your needle. Cut the yarn, leaving a long tail, and pull it through the last stitch to secure it.
2. Weave in ends
Next, you’ll need to weave in the loose ends of yarn from the bind off and any other areas where you made color changes or added new yarn. Thread the loose end onto a yarn needle and weave it in and out of the knitted stitches, taking care to go in the same direction as the stitches to prevent unraveling. Once the end is woven in, trim any excess yarn.
3. Blocking
Blocking can help to even out your stitches and give your fingerless gloves a more professional appearance. Fill a basin or sink with lukewarm water and add a small amount of gentle soap. Submerge your gloves and gently squeeze them to work the soapy water through the fibers. Rinse the gloves in cool water to remove the soap, then gently squeeze out the excess water. Lay the gloves flat on a clean towel and shape them to the desired size and shape. Allow them to air dry completely.
4. Final touches
Once your fingerless gloves are dry, you can add any final touches, such as buttons or decorative stitching. If you choose to add buttons, use a needle and thread to attach them securely to the desired locations. For decorative stitching, thread a yarn needle with a contrasting color of yarn and stitch through the knitted fabric in a design of your choice. Be creative and have fun adding your personal touch!
Now that you’ve finished your fingerless gloves, you’re ready to show them off and enjoy their warmth and style. Whether you’re keeping them for yourself or giving them as a gift, these gloves are sure to be a cozy and fashionable accessory.
Using Your Fingerless Gloves
Fingerless gloves are not only fashionable, but they also serve a practical purpose. Here are some suggestions on how to make the most out of your fingerless gloves:
- Keep your hands warm: Fingerless gloves are designed to keep your hands warm while still allowing your fingers to be free for tasks that require dexterity. Whether you’re typing on a keyboard, texting on your phone, or working with small delicate objects, your hands will stay cozy and comfortable.
- Add a touch of style: Fingerless gloves come in a variety of colors and patterns, allowing you to express your personal style. You can match them with your outfit or use them as a statement accessory to add a pop of color or texture to your look.
- Protect your hands: Fingerless gloves provide a barrier between your skin and the environment. They can protect your hands from cold weather, wind, and sun exposure while still allowing you to have a good grip on objects.
- Use them for outdoor activities: Fingerless gloves are great for outdoor activities like hiking, biking, or running. They provide warmth to your hands while allowing your fingers to have the freedom to grip onto objects or perform tasks.
- Wear them while working: If you work in a cold office or have a job that requires manual dexterity, fingerless gloves can be a practical accessory. They can help keep your hands warm while allowing you to type, write, or perform other tasks without hindrance.
With all these benefits, fingerless gloves are a versatile accessory that can be used in various situations. Whether you’re looking for warmth, style, or functionality, fingerless gloves are a great choice.