
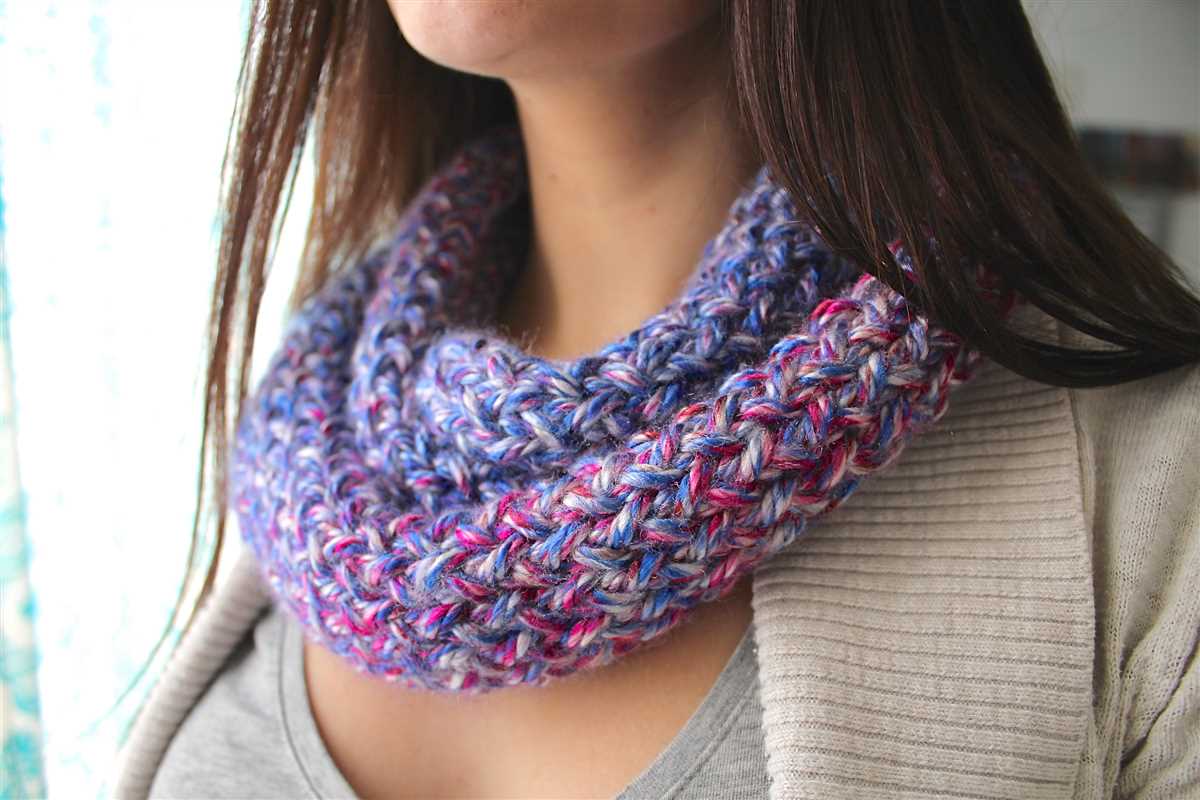
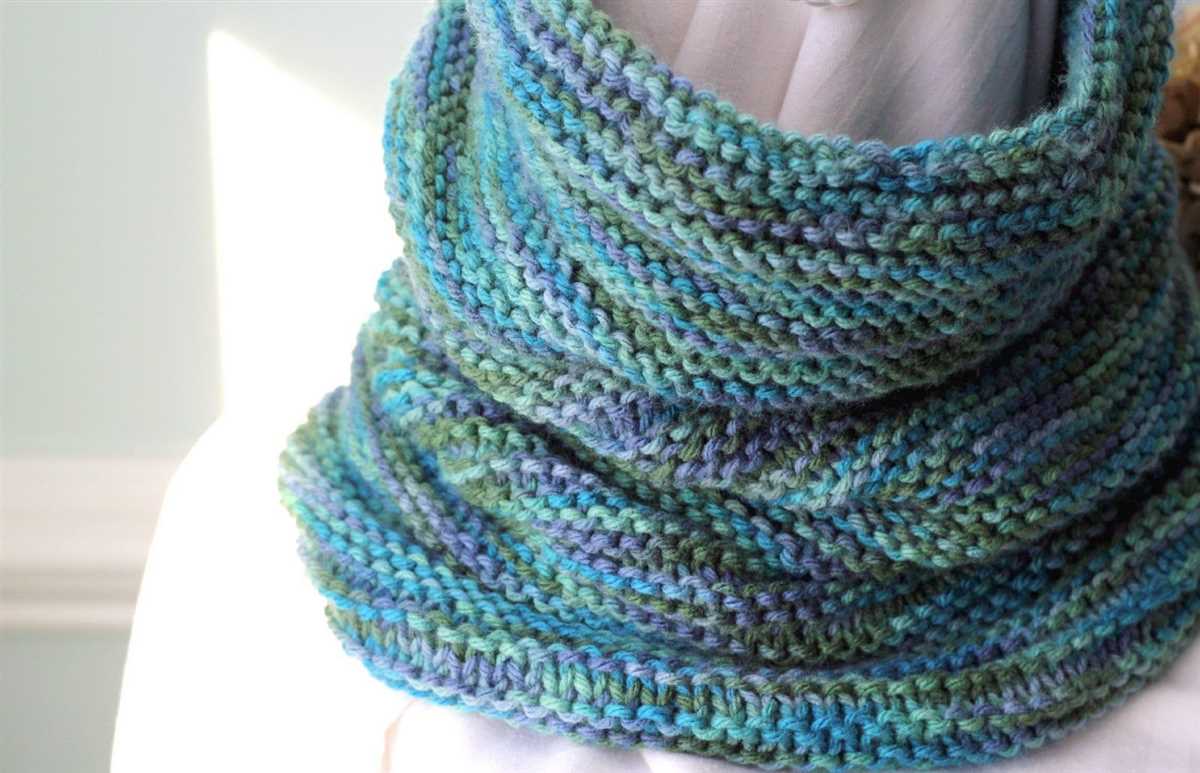
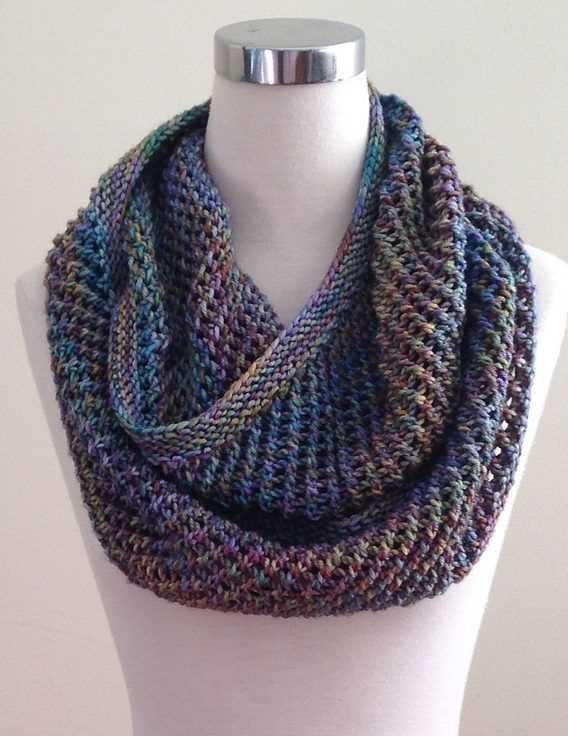
If you’re a beginner knitter looking for a fun and easy project, this beginner knitting cowl pattern is perfect for you. Cowls are a great accessory to have in your wardrobe – they’re stylish, versatile, and keep you cozy and warm during the colder months. Plus, they’re quick and easy to knit, making them a perfect project for beginners.
This pattern is ideal for those who are new to knitting or looking to brush up on their skills. It involves basic knitting techniques, such as casting on, knitting and purling stitches, and binding off. With just a few simple steps, you’ll have a beautiful cowl that you can wear with pride or give as a handmade gift.
To knit this cowl, you’ll need a pair of knitting needles and a skein of bulky yarn. The pattern uses a simple rib stitch, which creates a textured and stretchy fabric. You can choose any color or yarn type that you prefer, allowing you to customize the cowl to your personal style.
Whether you’re new to knitting or just looking for a quick and satisfying project, this beginner knitting cowl pattern is a great choice. You’ll be amazed at how quickly you can create a beautiful and functional accessory that you’ll love wearing for years to come. So grab your knitting needles and get started on your own cozy cowl today!
What is a cowl?
A cowl is a type of neck accessory that is worn around the neck to provide warmth and style. It is usually made from a soft and cozy material, such as wool or acrylic, and is designed to cover and protect the neck from cold weather.
Cowls are similar to scarves, but they are typically shorter and wider, and they do not have loose ends. Instead, a cowl is a continuous loop of fabric that can be worn in a variety of ways, such as wrapped around the neck once or multiple times, or even pulled up over the head as a hood.
Types of cowls
- Infinity cowl: This type of cowl is a continuous loop with no visible seams or ends. It can be worn long, or wrapped around the neck multiple times for extra warmth.
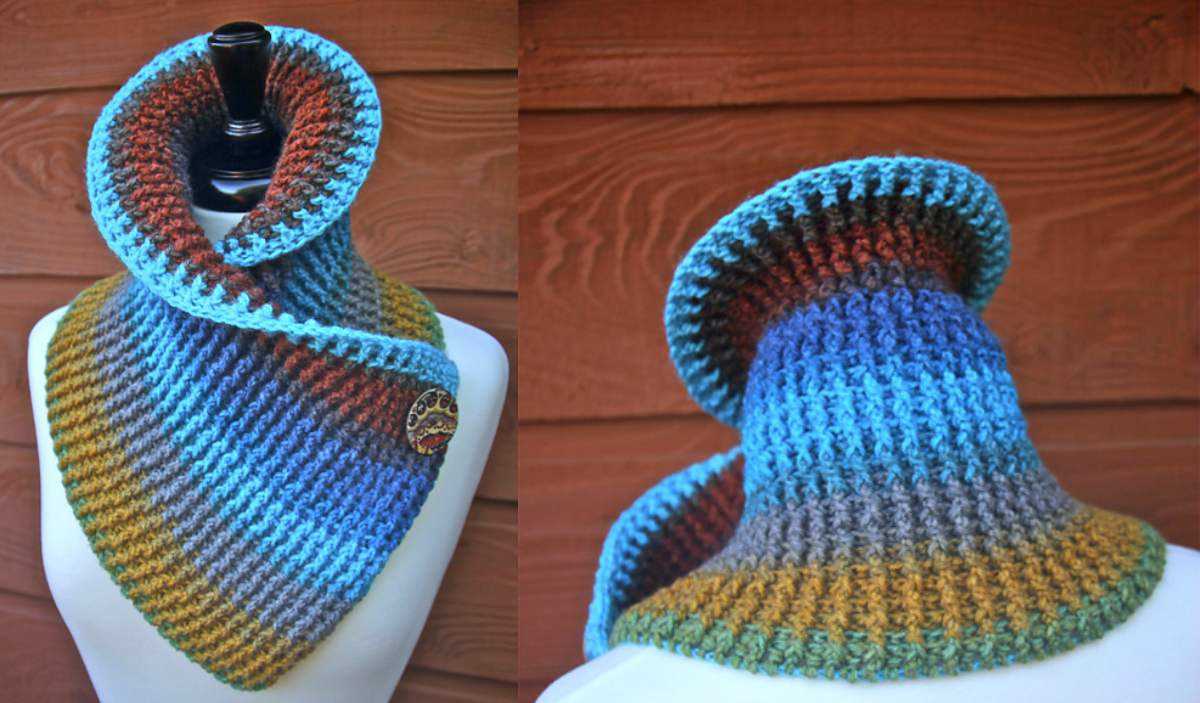
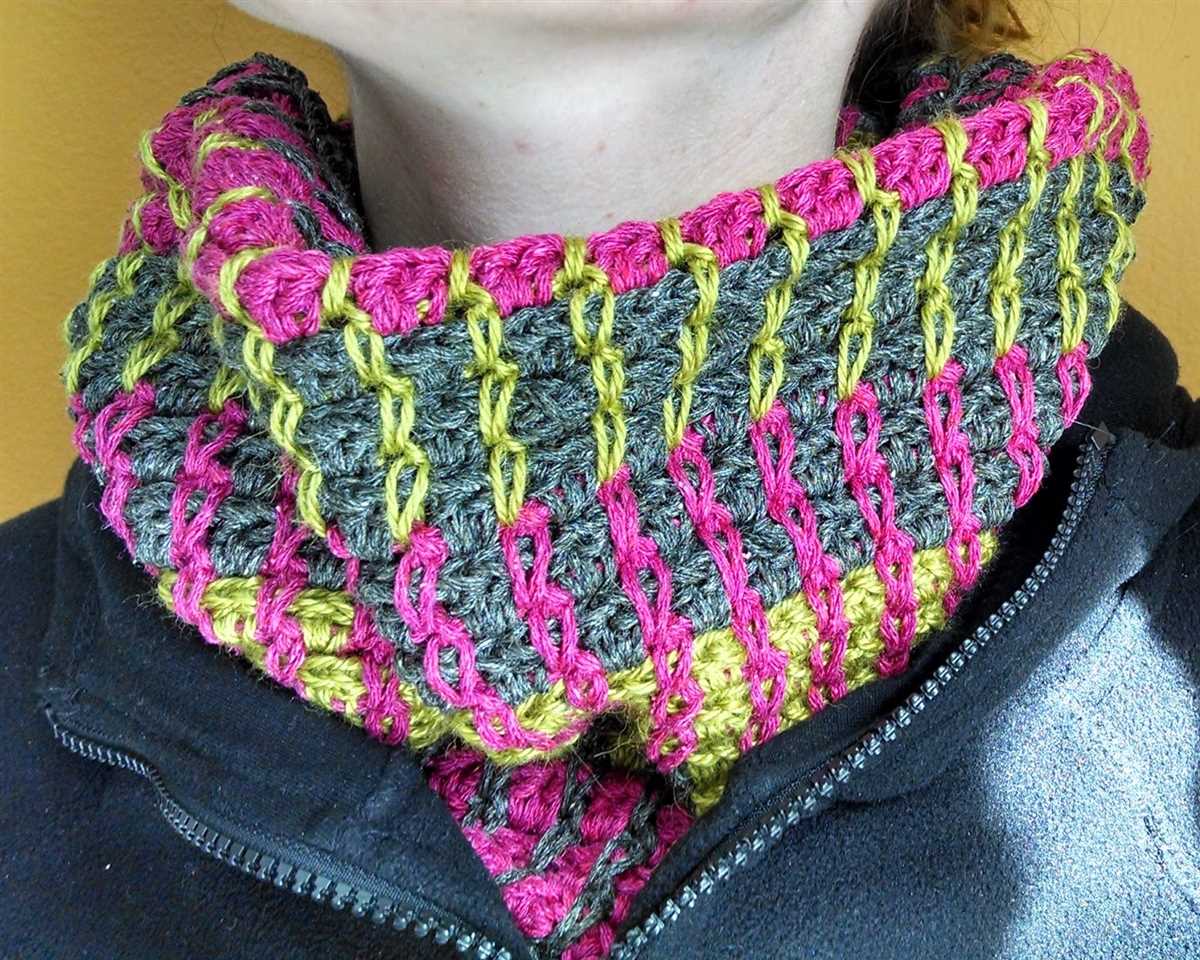
- Button-up cowl: This cowl features buttons or other closures along one edge, allowing it to be fastened securely around the neck. It provides a cozy and customizable fit.
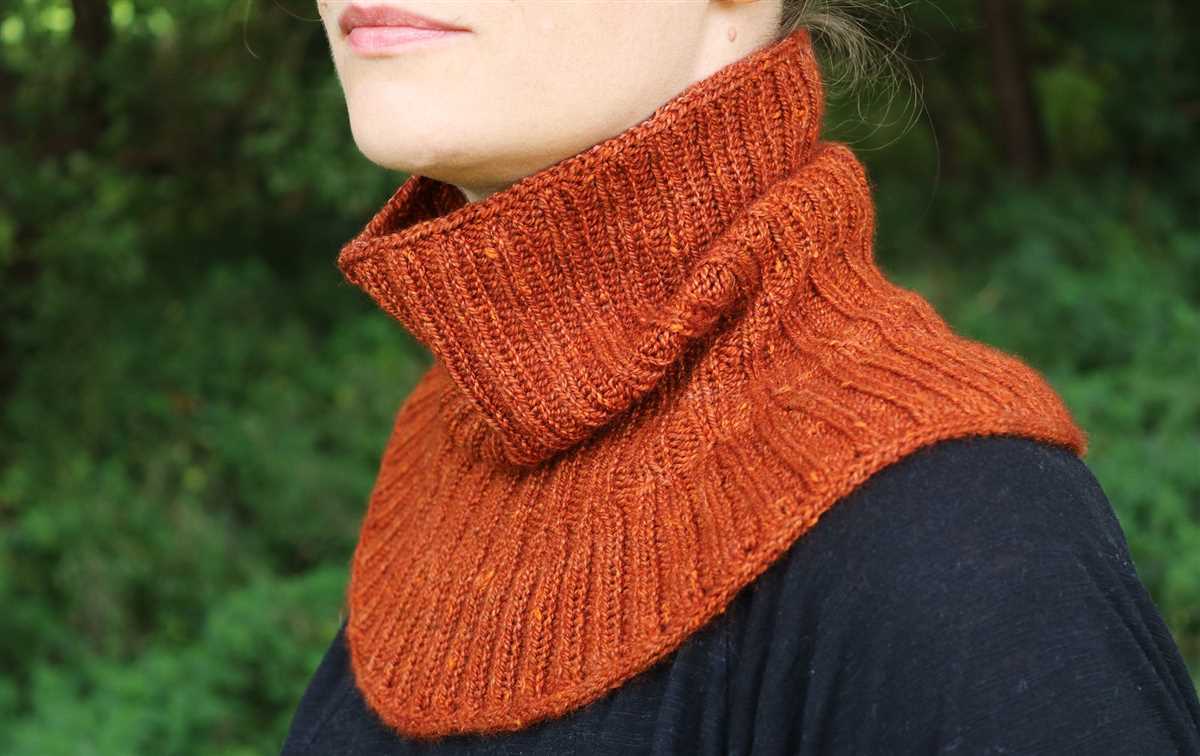
- Turtleneck cowl: This cowl is designed to resemble a turtleneck sweater, with a higher neckline that can be folded over for added warmth. It is perfect for colder climates.
Why knit a cowl?
Knitting a cowl can be a fun and rewarding project for beginners. It is a relatively quick and easy project that allows you to practice basic knitting stitches and techniques.
Additionally, cowls are versatile accessories that can be worn with a variety of outfits and provide warmth during colder months. They also make great gifts for friends and family, as they can be personalized with different colors, patterns, and textures to suit individual preferences.
Choosing the Right Yarn and Knitting Needles
When it comes to knitting a cowl, choosing the right yarn and knitting needles is essential for a successful project. The yarn you choose will determine the look and feel of your cowl, while the needles will affect the gauge and size of the finished piece.
Yarn: When selecting yarn for a cowl, consider the weight, fiber content, and texture. The weight of the yarn will determine the thickness and drape of the cowl. Bulky or chunky yarns will create a cozy and warm cowl, while lighter weight yarns will result in a more delicate and lightweight cowl. The fiber content of the yarn can also impact the cowl’s warmth and comfort. Natural fibers, such as wool or alpaca, provide excellent insulation, while synthetic fibers may offer more durability and easy care. Lastly, consider the texture of the yarn, as this can add visual interest and dimension to the cowl.
Knitting Needles: The size of your knitting needles will determine the gauge or tension of your knitting. Most patterns will provide a recommended needle size, but you can also create a gauge swatch to ensure that your stitches per inch match the pattern. The needle material, such as wood, metal, or plastic, can also impact your knitting experience. Some knitters prefer the warm feel of wooden needles, while others prefer the smooth glide of metal needles. It’s a personal preference, so feel free to experiment and find what works best for you.
In conclusion, choosing the right yarn and knitting needles is crucial for a successful cowl knitting project. Consider the weight, fiber content, and texture of the yarn to achieve the desired look and feel. Pay attention to the needle size to ensure the correct gauge, and experiment with different needle materials to find your preferred knitting experience. With the right materials, you’ll be well on your way to knitting a beautiful cowl.
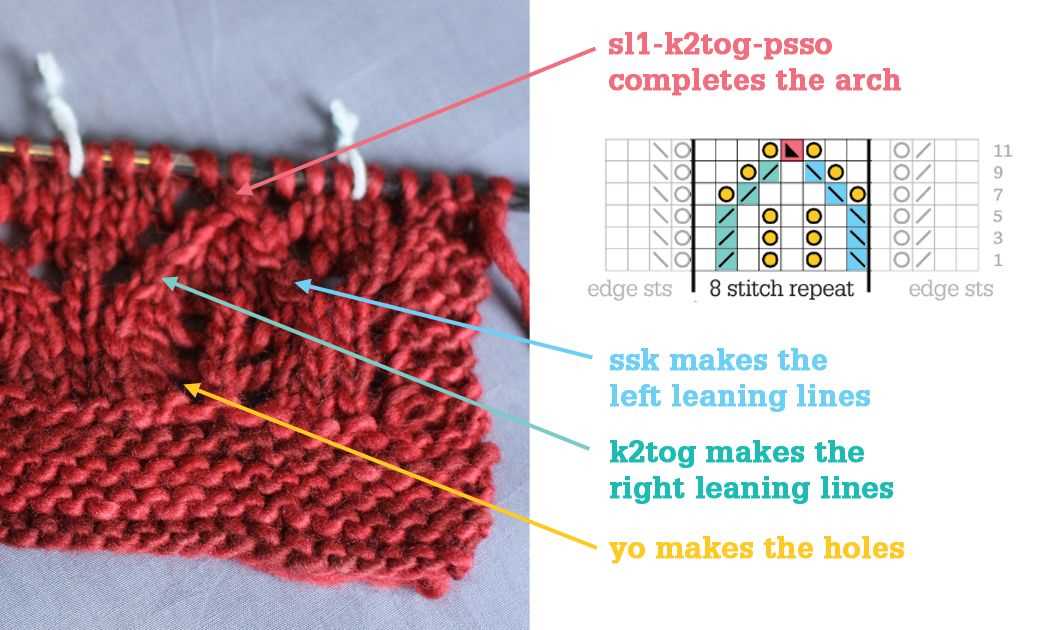
Understanding knitting abbreviations and symbols
In the world of knitting, understanding abbreviations and symbols is essential for following patterns and creating beautiful knitwear. Knitting patterns often use abbreviations to represent common knitting techniques or stitches. These abbreviations can be a shorthand way of conveying information about the pattern, saving space and making the pattern easier to read.
When you first start knitting, all of the abbreviations and symbols can seem overwhelming. However, with a little practice and guidance, deciphering knitting patterns becomes easier. It’s important to become familiar with the most common knitting abbreviations and symbols to understand instructions and create your project successfully.
Some common knitting abbreviations include:
- K: knit
- P: purl
- YO: yarn over
- PM: place marker
- K2tog: knit two stitches together
- P2tog: purl two stitches together
- SSK: slip, slip, knit
In addition to abbreviations, knitting patterns often use symbols to represent different stitches or techniques. These symbols are usually placed in a chart format, allowing knitters to visually see how the stitches should be worked. Common knitting symbols include:
| Symbol | Description |
|---|---|
| K | Knit stitch |
| P | Purl stitch |
| YO | Yarn over |
| SSK | Slip, slip, knit |
| K2tog | Knit two stitches together |
| P2tog | Purl two stitches together |
By familiarizing yourself with knitting abbreviations and symbols, you’ll be able to read patterns with ease and confidently create beautiful knitwear. Don’t be intimidated by the abbreviations and symbols – with practice, they will become second nature and open up a world of knitting possibilities.
Getting started: casting on stitches
Casting on stitches is the first step in starting your knitting project. It is the process of creating the foundation row of stitches on your knitting needle. There are several methods for casting on, but for this beginner cowl pattern, we will be using the long-tail cast on method.
Long-tail cast on: To begin, start by leaving a long tail of yarn, approximately three times the width of your desired finished cowl. Make a slipknot at the end of the tail and place it on your knitting needle. Hold the needle with the slipknot in your right hand and the yarn tail in your left hand.
- With your right thumb and index finger, make a backwards loop with the yarn tail over your left thumb and index finger.
- Insert your needle from left to right through the loop on your left thumb, then bring the needle under the loop on your left index finger.
- With your right thumb, bring the yarn tail over the top of the needle.
- Slide the loop off your thumb and tighten the stitch by pulling the yarn tail gently.
Repeat steps 1-4 until you have cast on the desired number of stitches for your cowl. Remember to keep the stitches loose enough to easily slide on the needle, but not too loose that they become too floppy.
Once you have successfully cast on all your stitches, you are ready to start knitting your cowl. Follow the next steps of the pattern to continue creating your beautiful beginner cowl.
Knitting the first few rows
The first few rows of knitting a cowl are crucial for setting the foundation of the project. These rows will determine the width and length of the cowl, as well as the overall tension and texture of the stitches. It is important to take your time and pay attention to each stitch as you knit.
Step 1: Before you begin, make sure you have the correct size needles and yarn for your project. Refer to the pattern for the recommended sizes.
Step 2: Start by casting on the required number of stitches, as specified in the pattern. This will typically be a multiple of a certain number, depending on the stitch pattern you are using. Use the method of casting on that you are comfortable with, such as the long-tail cast-on or the knitted cast-on.
Step 3: Once you have cast on the stitches, turn your work and begin knitting the first row. Follow the pattern instructions for the specific stitch pattern you are using. It may involve knitting all stitches, or a combination of knits and purls.
Step 4: Continue knitting the second and subsequent rows, following the pattern instructions. Pay attention to any changes in stitch pattern or shaping instructions as you progress. It is helpful to place stitch markers at the beginning and end of each repeat, if applicable, to keep track of your progress.
Step 5: After you have completed the first few rows, take a moment to assess the tension and overall appearance of your work. If necessary, adjust your tension by knitting more tightly or loosely. Remember that tension can change with each new project, so it is important to find the right balance for your specific knitting style.
Knitting the first few rows of a cowl requires concentration and attention to detail. By following the pattern instructions and continuously assessing your work, you can ensure a successful start to your knitting project.
Creating a pattern: knit and purl stitches
When creating a knitting pattern, it is essential to understand and incorporate different stitches to achieve the desired design. Two basic stitches that every beginner should learn are the knit and purl stitches. These stitches form the foundation of knitting and are the building blocks of various patterns.
Knit Stitch: The knit stitch is the most basic and commonly used stitch in knitting. It creates a smooth fabric with a “v” shape on the right side. To knit, insert the right-hand needle into the front of the stitch on the left-hand needle, wrap the yarn around the right-hand needle, and pull it through the stitch. The resulting loop is then transferred onto the right-hand needle. Repeat this process for each stitch until the row is complete.
Purl Stitch: The purl stitch is the reverse of the knit stitch and creates a textured fabric with bumps or ridges on the right side. To purl, insert the right-hand needle from right to left into the front of the stitch on the left-hand needle, bring the yarn in front of the needles, and wrap it around the right-hand needle. Pull the yarn through the stitch, transferring the loop onto the right-hand needle. Repeat this process for each stitch until the row is complete.
By combining these two stitches in various patterns and sequences, you can create an endless array of designs. For example, alternating rows of knit and purl stitches create a simple ribbing pattern, while more complex patterns can be achieved by incorporating increases, decreases, and different stitch combinations.
It’s important to note that when following a knitting pattern, the stitch abbreviations will often indicate whether to knit or purl a stitch. For example, “K” stands for knit, while “P” stands for purl. The pattern will also specify the number of stitches to knit or purl in a row and any additional instructions for shaping or pattern repeats.
Mastering the knit and purl stitches is the first step towards becoming a skilled knitter and opens up a world of possibilities for creating beautiful and intricate designs. With practice and patience, you’ll soon be able to tackle more complex patterns and impress yourself and others with your knitting skills.
Adding texture with different stitch patterns
When knitting a cowl, one of the easiest ways to add interest and texture to your project is by using different stitch patterns. By combining simple stitches in various ways, you can create a unique and visually appealing design.
One popular stitch pattern for cowls is the seed stitch. With its alternating knit and purl stitches, the seed stitch creates a bumpy texture that adds depth to the fabric. This stitch pattern works well with solid-colored yarns and is a great option for beginners.
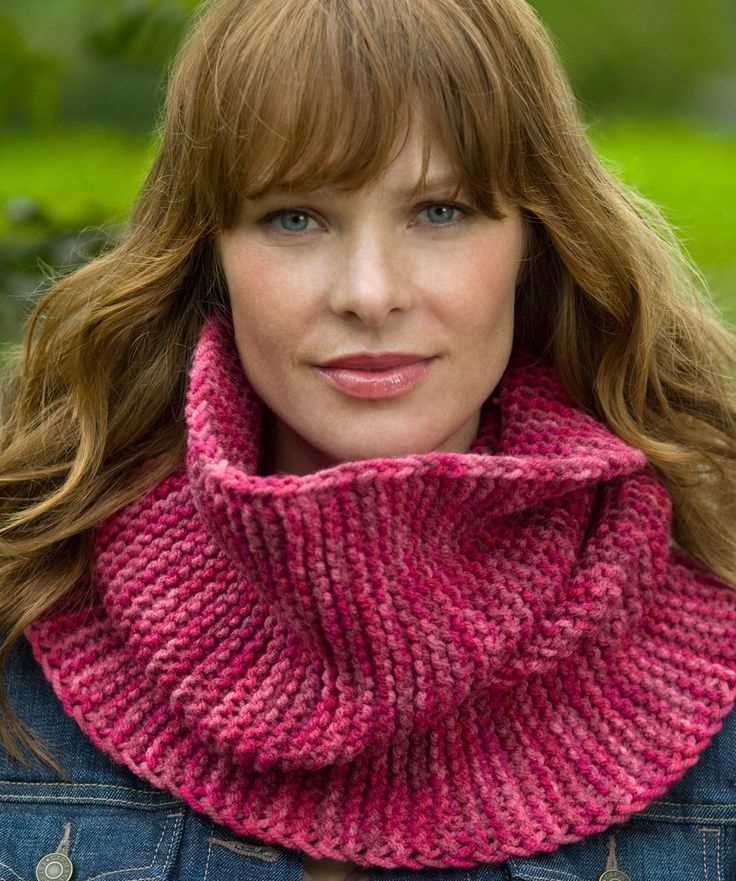
Another stitch pattern to consider is the rib stitch. This pattern involves alternating between knit and purl stitches in the same row, creating vertical lines. The rib stitch is often used to create stretchy and snug fabric, making it ideal for cowls that need to be comfortable to wear.
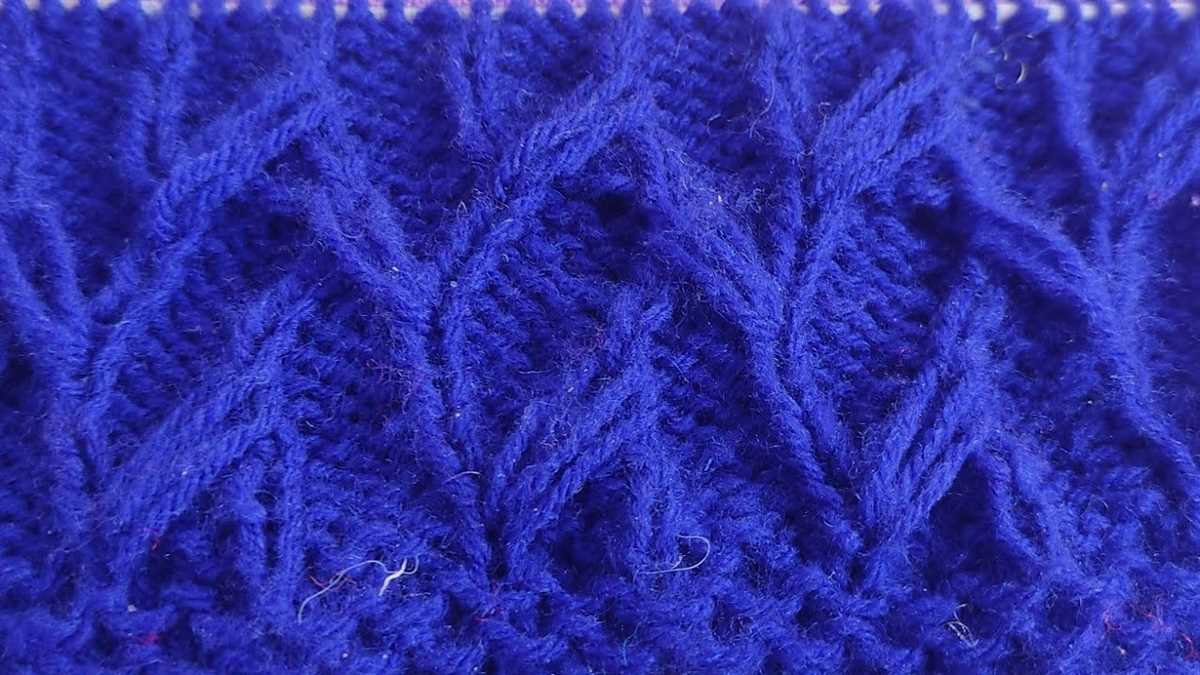
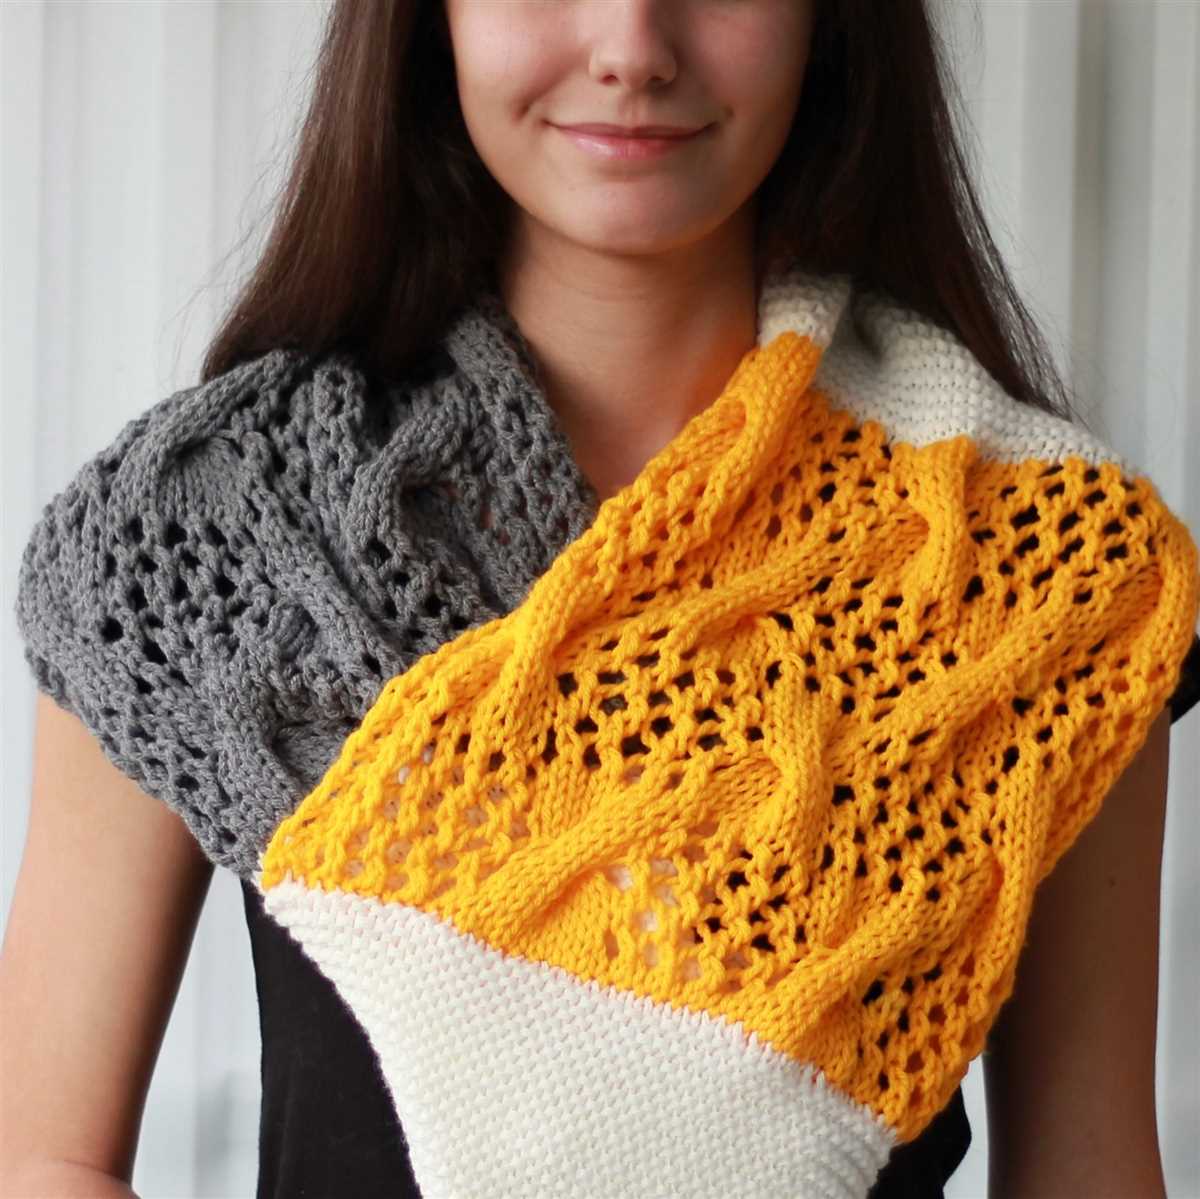
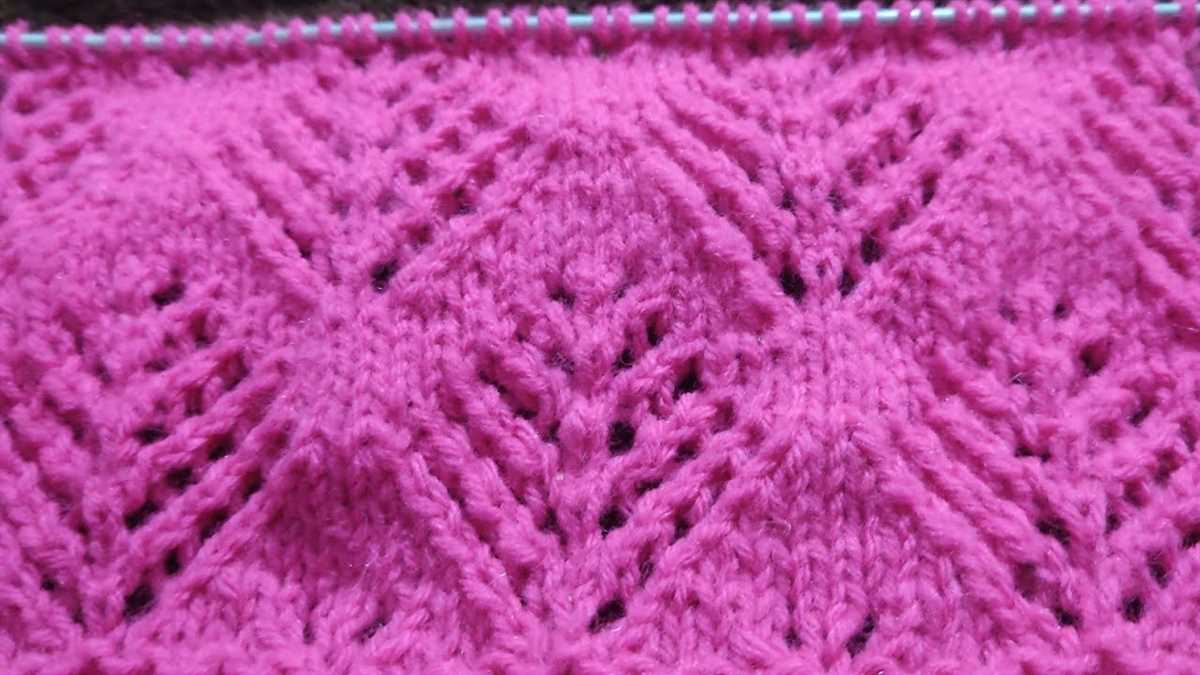
If you’re feeling more adventurous, you can try out cables or lace stitches. Cables are created by crossing stitches over each other, resulting in a twisted appearance. This stitch pattern adds a sophisticated and intricate look to your cowl. Lace stitches, on the other hand, create delicate and openwork patterns through yarn overs and decreases. They are perfect for creating a lightweight and airy cowl.
When choosing which stitch pattern to use, consider the thickness and drape of your yarn. Some stitch patterns may be better suited for thinner yarns, while others work well with bulkier yarns. Experimenting with different stitch patterns is part of the fun of knitting and allows you to create a cowl that is truly unique to you.
Here are some stitch patterns commonly used in cowls:
- Seed stitch
- Rib stitch
- Cables
- Lace stitches
Shaping the cowl: increasing and decreasing stitches
When working on a beginner knitting cowl pattern, it’s important to understand how to shape the cowl by increasing and decreasing stitches. By adding or subtracting stitches, you can create different shapes and sizes for your cowl.
Increasing stitches: To increase stitches, you can use techniques such as yarn overs or knitting into the front and back of a stitch. Yarn overs create an eyelet or decorative hole in your knitting, while knitting into the front and back of a stitch increases the stitch count without leaving a hole. The method you choose will depend on the desired look and effect of your cowl. Be sure to check the pattern instructions for the specific increase method recommended.
Decreasing stitches: To decrease stitches, common techniques include knit two stitches together (K2tog) or slip slip knit (SSK). K2tog involves knitting two stitches together as if they were one, while SSK twists two stitches before knitting them together. These decreases create a slanting effect in your knitting and can be used to shape the edges or create decorative details in your cowl. Again, refer to the pattern instructions for the specific decrease method suggested.
Remember to always keep track of your stitch count and follow the pattern instructions carefully when shaping your cowl. Increasing and decreasing stitches correctly will ensure that your cowl turns out the way you envisioned and fits comfortably around your neck.
Finishing touches: binding off and weaving in ends
Now that you have completed knitting your cowl, it’s time to finish it off with some final touches. The first step is to bind off your stitches, which will create a neat edge and prevent the stitches from unraveling. To bind off, knit the first 2 stitches of the row as usual, then use your left needle to lift the first stitch over the second stitch and off the right needle. Continue knitting one stitch and binding off the previous stitch until you have only one stitch left on your right needle. Cut the yarn, leaving a tail of about 6 inches, and pull the tail through the last stitch to secure it.
Once you have bound off all the stitches, you will need to weave in the ends of your yarn to hide them and ensure that your cowl looks neat and professional. To do this, thread a tapestry needle with one of the yarn tails and insert it into the nearby stitches on the wrong side of the cowl. Weave the needle in and out of the stitches, making sure to pull the yarn tight so that it is secure. Repeat this process with the other yarn tail, weaving it in a different direction to ensure that both ends are well concealed.
For an extra secure finish, you can also secure the ends with a knot. Simply tie a small knot using the two yarn tails, making sure to leave a slight loop for stretch. Trim any excess yarn, being careful not to cut the knot itself. This will give your cowl added durability and prevent the ends from coming loose with wear.
Blocking your finished cowl

Blocking is an essential final step in finishing your knitted cowl. It helps to even out the stitches, improve the drape, and give your cowl a polished look. Here’s a step-by-step guide on how to block your finished cowl:
- Soak your cowl: Fill a sink or basin with lukewarm water and a small amount of gentle wool wash. Place your cowl in the water and gently press it down to submerge it completely. Let it soak for about 15-20 minutes to allow the fibers to absorb the water.
- Drain and squeeze: Carefully remove your cowl from the water and gently squeeze out the excess water. Avoid wringing or twisting the fabric, as this can cause it to stretch or lose its shape.
- Lay it flat: Lay a clean, absorbent towel on a flat surface and place your cowl on top of it. Gently shape the cowl to the desired dimensions, pulling on the fabric if needed to even out any uneven stitches or edges.
- Pin it down: Use rust-proof T-pins or blocking wires to pin the edges of your cowl to the towel, ensuring that it stays in shape while drying. Make sure to place the pins evenly and avoid stretching the fabric too much.
- Let it dry: Leave your cowl undisturbed and let it air dry completely. This can take anywhere from a few hours to a day or two, depending on the thickness of the yarn and the humidity in the air.
- Remove the pins: Once your cowl is dry, carefully remove the pins or blocking wires. Your cowl should now have a lovely, finished look with evenly distributed stitches and a beautiful drape.
Blocking is an important process that can make a significant difference in the appearance of your finished cowl. By following these steps, you’ll be able to achieve a professional-looking result and enjoy your cozy creation even more.
Additional tips and ideas for customizing your cowl
Once you’ve mastered the basic knitting techniques for the beginner cowl pattern, you can start to explore different ways to customize and personalize your cowl. Here are some additional tips and ideas to help you create a unique and stylish accessory:
- Use different stitch patterns: Experiment with different stitch patterns to add texture and interest to your cowl. You can try ribbing, cables, lace, or even colorwork to make your cowl stand out.
- Play with different yarns: Try using different types of yarns to give your cowl a different look and feel. You can choose from different weights, fibers, and textures to achieve the desired effect.
- Add embellishments: Consider adding embellishments like buttons, beads, or pompoms to your cowl. This can add a touch of personality and make your cowl truly unique.
- Experiment with colors: Don’t be afraid to play with colors and create a colorful cowl. You can use a single color, multiple colors, or even gradient yarns to achieve different color effects.
- Adjust the length and width: Customize the dimensions of your cowl to suit your preferences. You can make it longer or shorter, wider or narrower, depending on the look you want to achieve. Just make sure to adjust the number of cast-on stitches accordingly.
- Add a button or a closure: If you prefer, you can add a button or a closure to your cowl to make it easier to wear and secure in place.
Summary
Knitting a cowl is a great project for beginners, and it offers endless possibilities for customization. By following a basic pattern and incorporating these additional tips, you can create a cowl that is uniquely yours. Have fun exploring different stitch patterns, yarns, colors, and embellishments to make your cowl a true reflection of your personal style.