
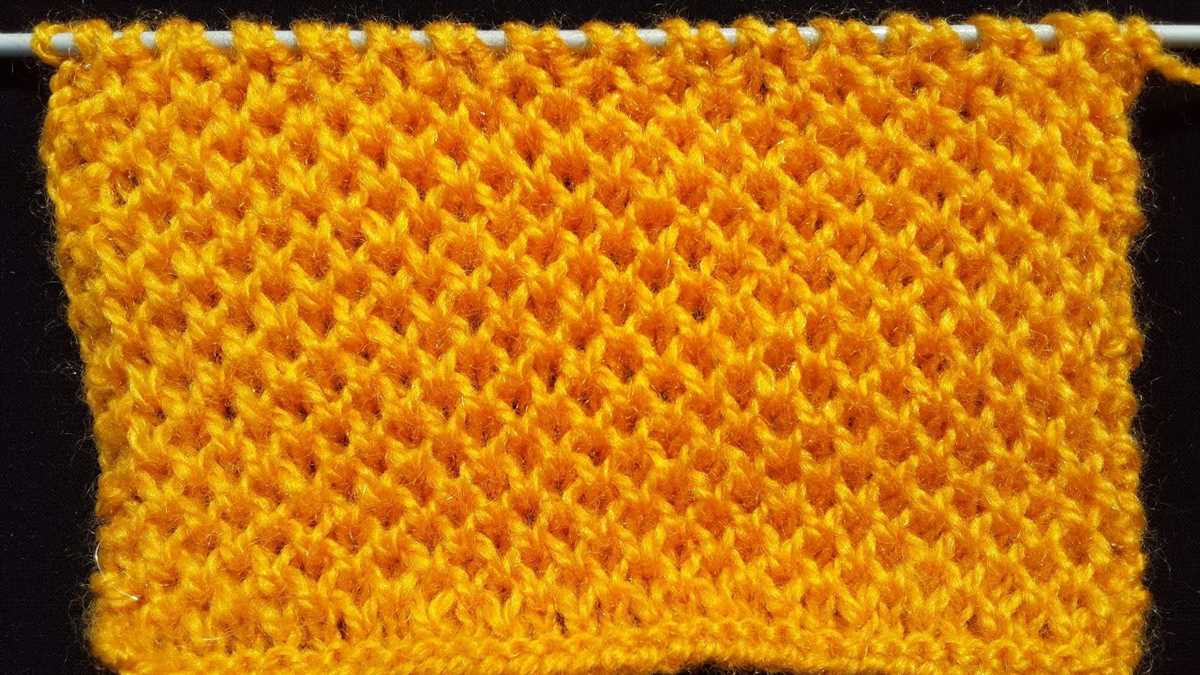
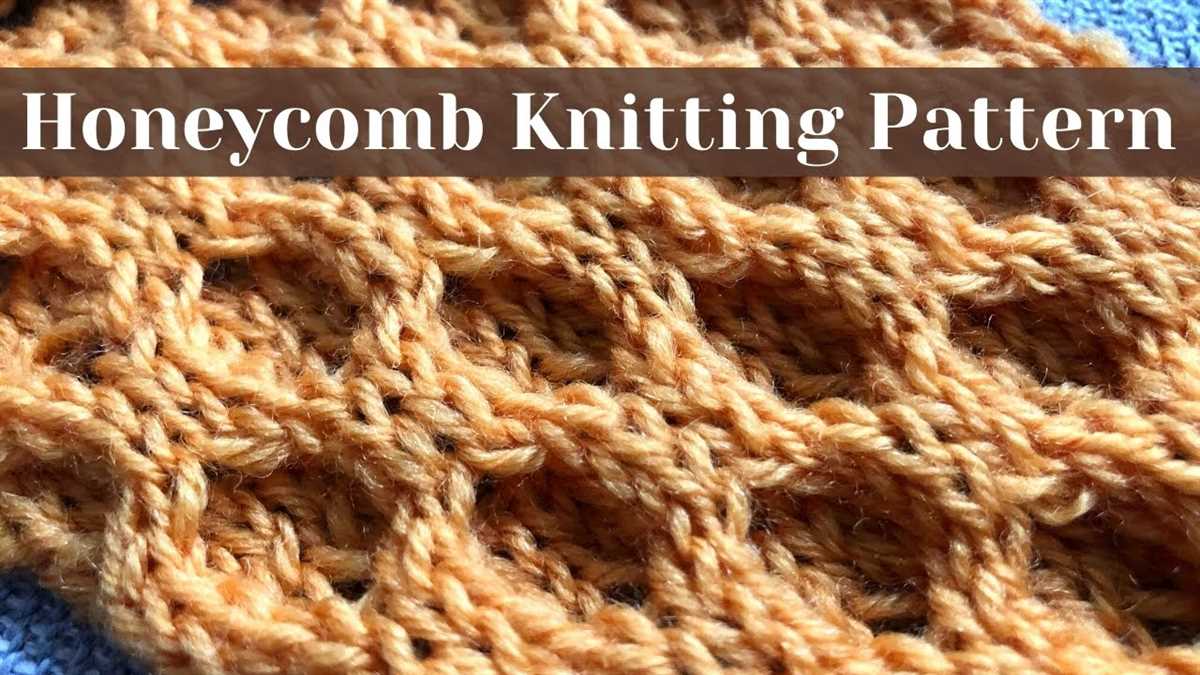
If you’re an avid knitter, you’re probably always on the lookout for new and interesting knitting patterns to try. One popular pattern that is both visually appealing and fun to create is the honeycomb cable knitting pattern. This pattern creates a beautiful textured design that resembles a honeycomb, and it’s perfect for adding depth and visual interest to your knitted projects.
The honeycomb cable pattern is created by crossing stitches over each other, creating a twisted cable-like effect. The resulting design looks intricate and complex, but it’s actually quite simple to knit once you understand the basic techniques. With a little practice, you’ll be able to create beautiful honeycomb cables in no time.
This pattern is especially popular for knitting scarves, hats, and sweaters, as it adds a touch of elegance and sophistication to any garment. You can also incorporate honeycomb cables into smaller projects like socks or mittens for a unique and eye-catching design. Whether you’re a beginner or an experienced knitter, the honeycomb cable pattern is a versatile and timeless design that you’ll love to incorporate into your knitting repertoire.
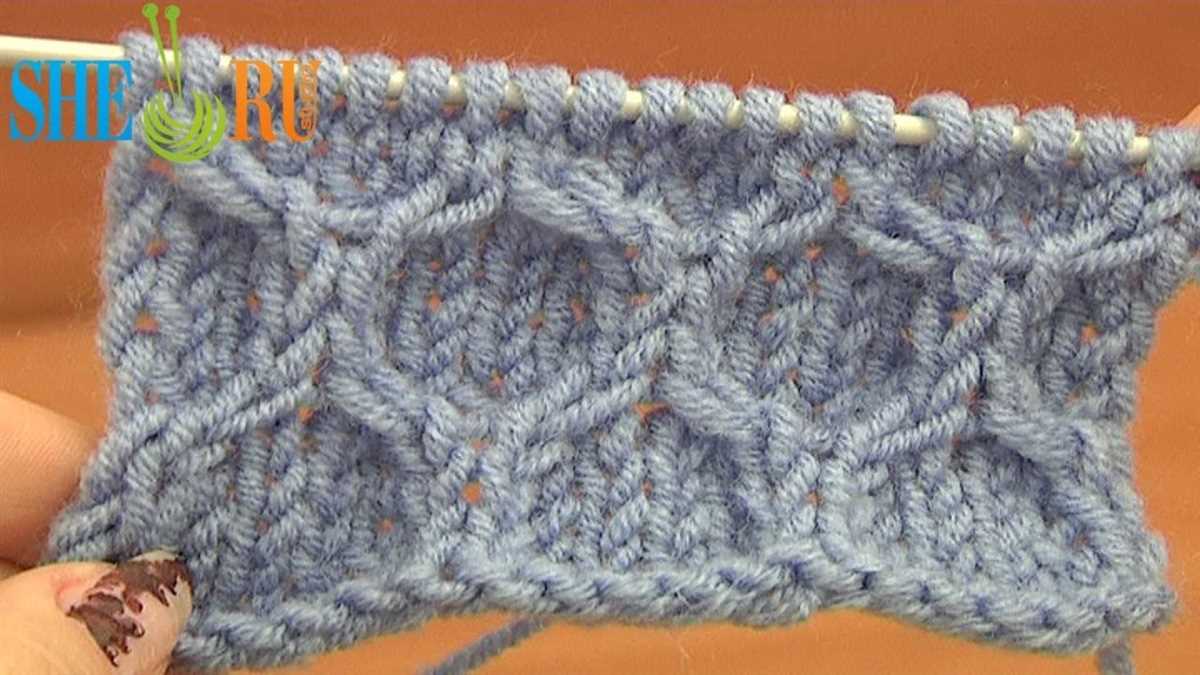
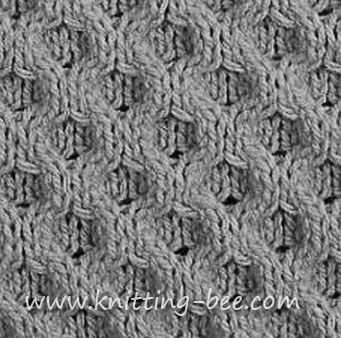
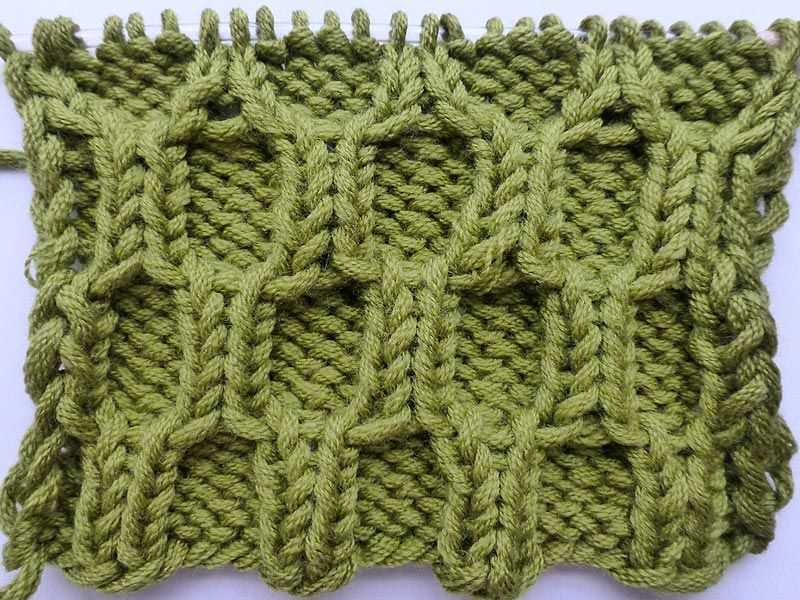
Honeycomb Cable Knitting Pattern

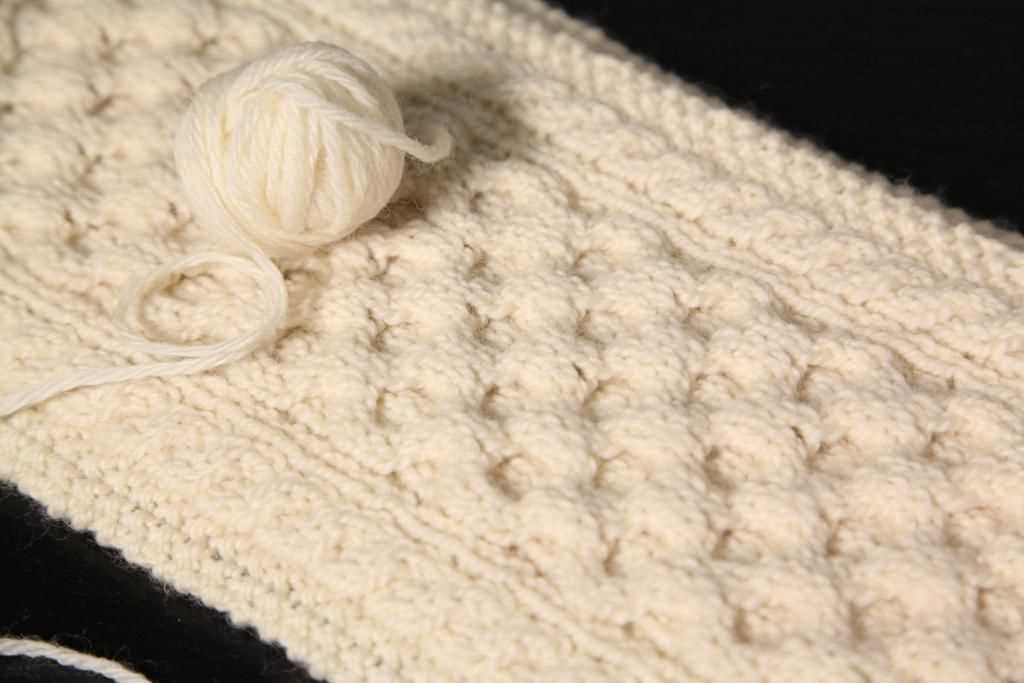
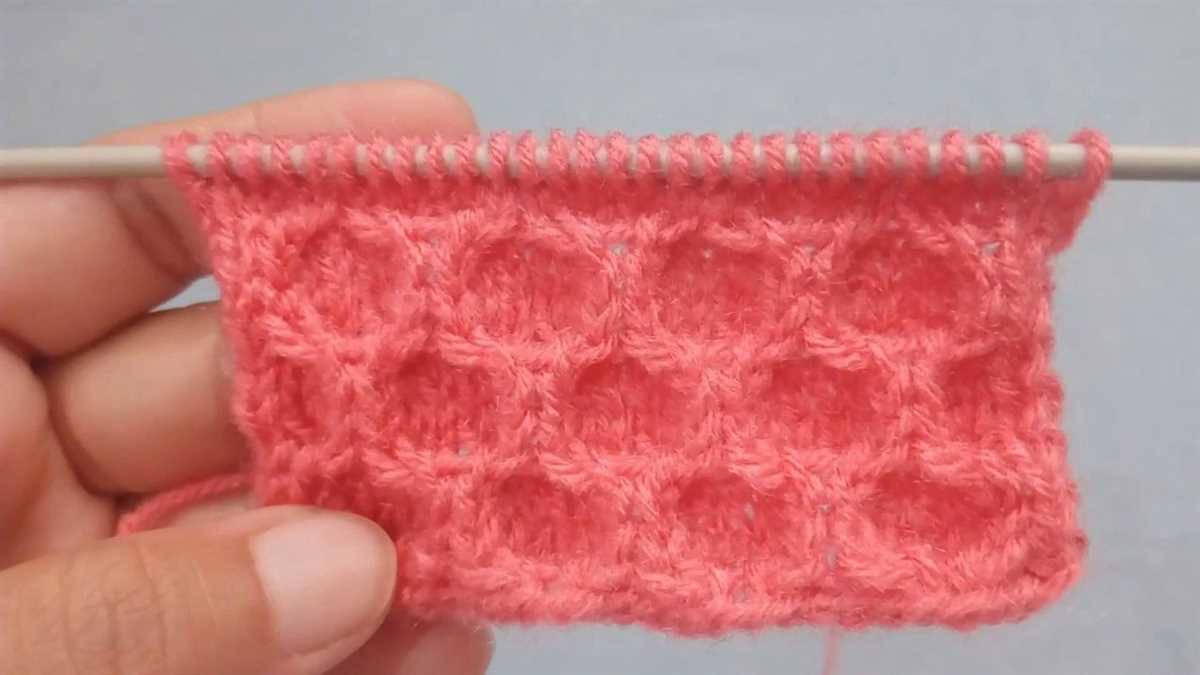
The honeycomb cable knitting pattern is a classic and timeless design that adds texture and dimension to any knitted project. This intricate pattern creates a beautiful honeycomb-like structure, reminiscent of the natural beauty of honeycomb cells. Whether you are knitting a cozy sweater, a warm hat, or a stylish scarf, the honeycomb cable pattern is sure to enhance the overall appeal of your finished piece.
To create the honeycomb cable pattern, you will need to have a good understanding of basic cable knitting techniques. The pattern typically involves crossing stitches over each other to create the honeycomb effect. This can be achieved by using a cable needle or by knitting stitches out of order. The result is a visually appealing pattern with a raised texture that stands out.
How to Knit the Honeycomb Cable Pattern:
- Start by casting on a multiple of stitches that is divisible by the number of stitches required for the honeycomb pattern repeat. This will ensure that the pattern is consistent and symmetrical.
- Follow the specific honeycomb cable pattern instructions, which will outline the number of rows and stitches required for each row.
- Use a cable needle or your preferred technique to cross stitches over each other at designated points in the pattern.
- Continue knitting each row according to the pattern until the desired length is reached.
- Finish off by binding off the stitches and weaving in any loose ends.
Once you have mastered the honeycomb cable knitting pattern, you can experiment with different variations and incorporate it into various knitting projects. This versatile pattern can be used to create anything from cozy blankets and scarves to intricate sweaters and cardigans. With its unique texture and visual appeal, the honeycomb cable pattern is a favorite among knitters and adds a touch of elegance to any project.
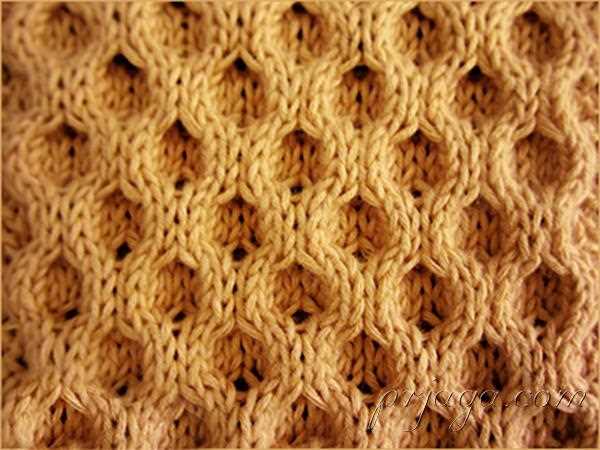
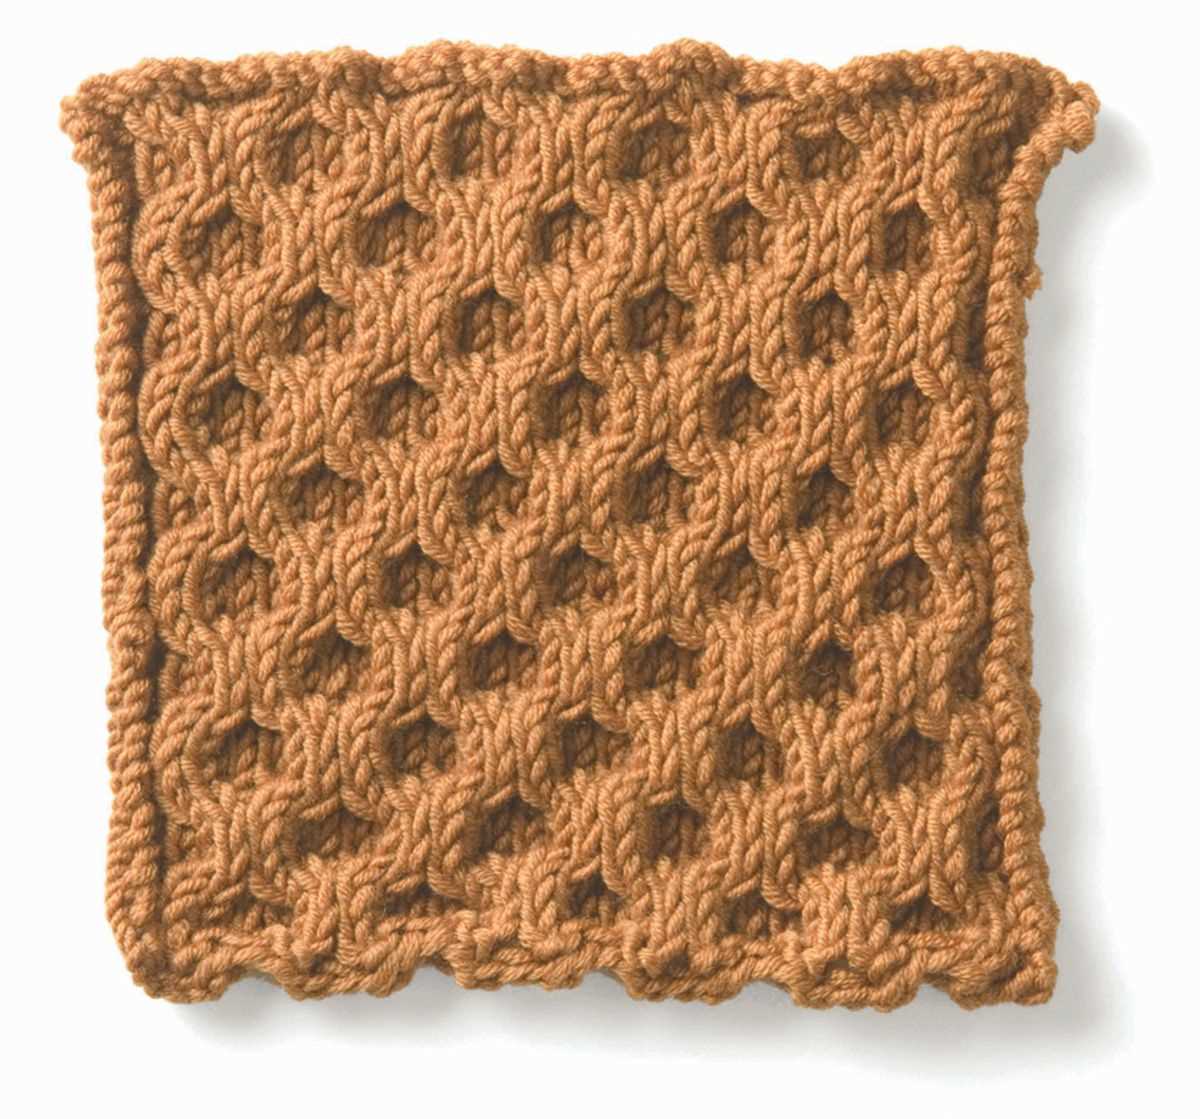
What is Honeycomb Cable Knitting?
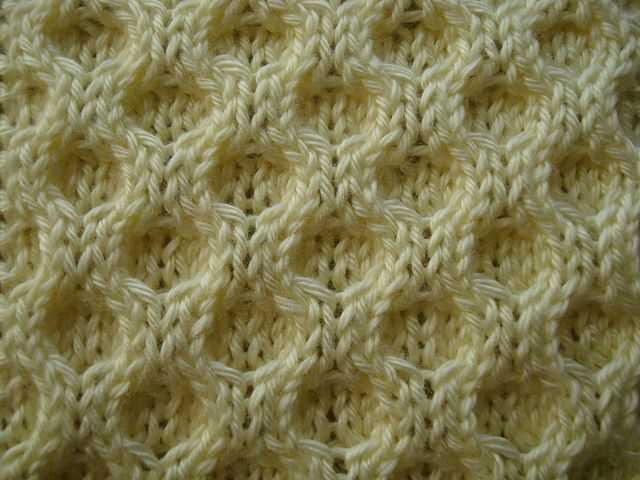
Cable knitting is a technique that creates raised patterns on knitted fabric by crossing and twisting groups of stitches. Honeycomb cable knitting is a specific type of cable pattern that resembles the cells of a beehive, hence the name. It utilizes cables that cross over each other in a way that creates a textured honeycomb-like design.
When knitting honeycomb cable patterns, you will typically work with multiple cables that are arranged in a grid-like fashion. The cables intersect and twist around each other, forming the distinctive honeycomb shape. This creates an intricate, three-dimensional pattern that adds visual interest to any knitting project.
Honeycomb cables can be used in a variety of knitting projects, such as sweaters, scarves, hats, and blankets. They add both warmth and texture to the finished piece, making it not only functional but also visually appealing. The pattern can be adjusted to create different sizes of honeycomb cells, allowing for customization and versatility in your knitting projects.
To knit a honeycomb cable pattern, you will need to be familiar with basic cable knitting techniques, such as working with cable needles and crossing stitches. The pattern may require you to follow a specific chart or set of instructions to create the honeycomb design accurately. With practice and patience, you can master the art of honeycomb cable knitting and create beautiful, intricate designs that will impress both yourself and others.
Materials You’ll Need
Before you start knitting the beautiful honeycomb cable pattern, make sure you have all the necessary materials. Here is a list of items you’ll need:
- Yarn: Choose a yarn of your preference, preferably a medium to heavy weight yarn that will give your project a nice drape and definition when the cables are knitted.
- Knitting Needles: You will need a pair of knitting needles that are suitable for the weight of your yarn. Check the label of your yarn to find out the recommended needle size. If you’re unsure, start with a medium-sized needle and adjust as necessary to achieve the desired gauge.
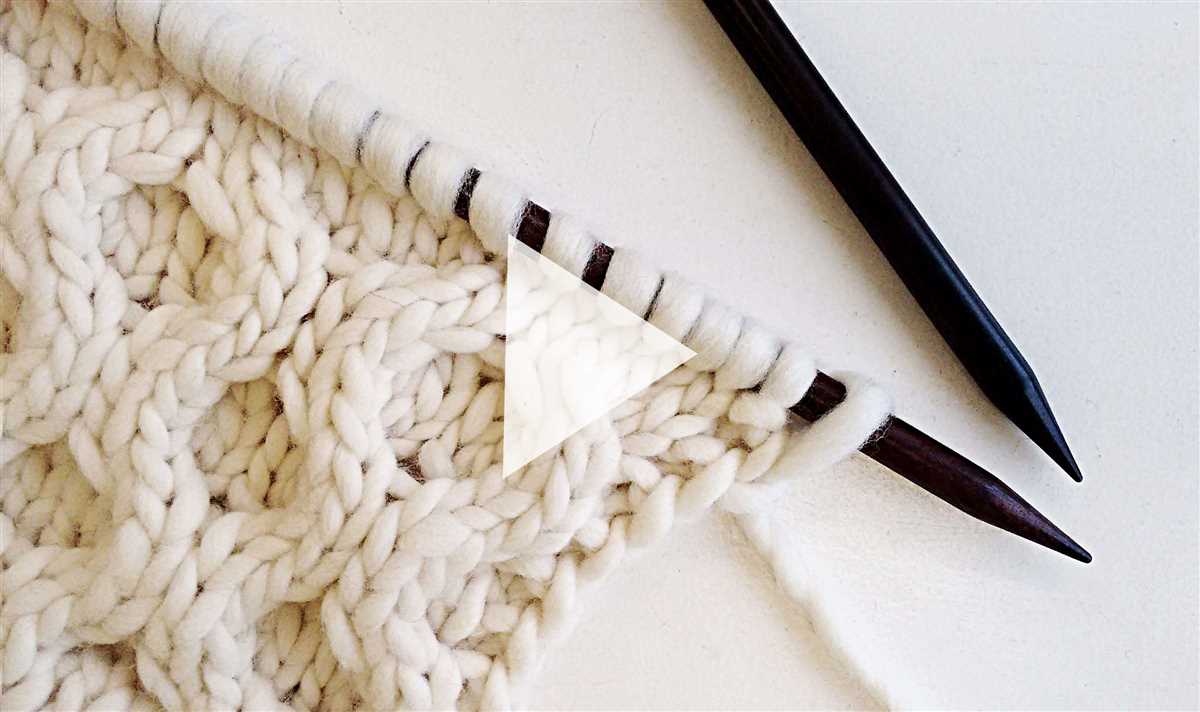
- Cable Needle: A cable needle is an essential tool for working the honeycomb cable pattern. It is a short, double-pointed needle or a shaped needle with a dip in the middle to hold the stitches temporarily while you work the cable twist.
- Tapestry Needle: A tapestry needle or a yarn needle will be needed for weaving in the loose ends of your project. It is also useful for seaming or joining different pieces together.
- Scissors: A good pair of scissors is necessary for cutting the yarn when needed. Make sure they are sharp and ready for use.
- Stitch Markers: Stitch markers are helpful for keeping track of your stitches and pattern repeats. Use removable stitch markers that can easily be moved as you progress in your knitting.
- Measuring Tape: A measuring tape or a ruler is essential for checking your gauge and measuring your finished project.
Gather all these materials before you begin, and you’ll be ready to create a stunning honeycomb cable knitting pattern.
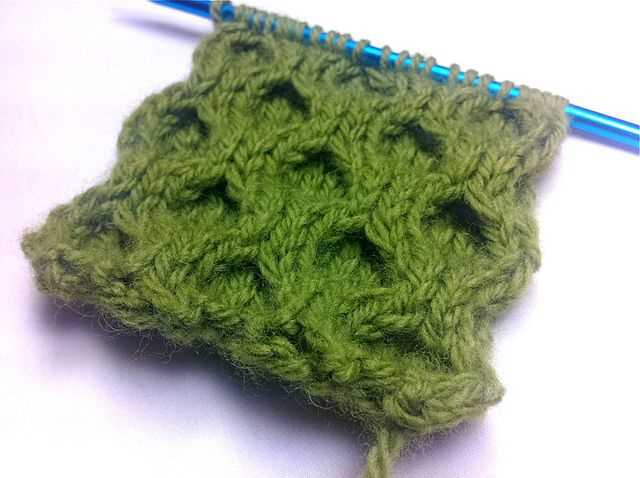
Step-by-Step Instructions for the Honeycomb Cable Knitting Pattern

Knitting a honeycomb cable pattern can add a beautiful texture and dimension to your knitting projects. This intricate pattern creates a series of interlocking hexagon shapes that resemble honeycombs. Follow these step-by-step instructions to learn how to knit the honeycomb cable pattern.
Materials Needed:
- A pair of knitting needles (size will depend on your desired gauge)
- Yarn (preferably a worsted weight or chunky weight yarn)
- Cable needle
- Stitch markers (optional)
- Cast on: Start by casting on a multiple of 12 stitches. The honeycomb cable pattern requires a multiple of 12 stitches to create the hexagon shapes.
- Setup Rows: Knit a few rows in a basic stitch pattern of your choice (such as garter stitch or stockinette stitch) to create a border for your honeycomb cables.
- Set up the Cable Panel: On the right-side row, arrange the stitches for the honeycomb cable panel. This will typically involve placing a specific number of stitches on either side of the cable panel, with the cable panel stitches in the center. Use stitch markers if desired to separate the cable panel stitches.
- Start the Honeycomb Cable Pattern: Begin the honeycomb cable pattern by working the first row as follows: knit the stitches on the right side of the cable panel, slip the next 6 stitches onto the cable needle and hold it in the front of your work, knit the next 6 stitches from the left side of the cable panel, and then knit the stitches from the cable needle.
- Repeat the Cable Pattern: Continue working the honeycomb cable pattern by repeating the following steps: knit the stitches on the right side of the cable panel, slip the next 6 stitches onto the cable needle and hold it in the front of your work, knit the next 6 stitches from the left side of the cable panel, and then knit the stitches from the cable needle.
- Continue Knitting the Pattern: Repeat the cable pattern until you have reached the desired length for your knitting project. Remember to keep track of your rows if you are knitting a specific pattern or design.
- Finish the Honeycomb Cables: Once you have finished knitting the honeycomb cable pattern, complete a few more rows in your chosen stitch pattern to create a border that matches the beginning of your work.
- Bind off: Finally, bind off your stitches to secure your knitting. Weave in any loose ends and block your project if needed to help shape the cables and create a professional finish.
With these step-by-step instructions, you can confidently knit the honeycomb cable pattern and add a stunning texture to your knitting projects.
Tips and Tricks for Perfect Honeycomb Cables
If you’re looking to add some texture and depth to your knitting projects, honeycomb cable patterns are a great choice. With their intricate and beautiful design, honeycomb cables can transform any garment or accessory into a work of art. However, working with cables can be a bit challenging, especially if you’re new to cable knitting. To help you create flawless honeycomb cables, here are some tips and tricks to keep in mind.
1. Use a cable needle:

When working with honeycomb cables, it’s essential to use a cable needle. This tool allows you to hold stitches out of the way while you work on the cable pattern. Choose a cable needle that is the same size or slightly smaller than your knitting needles to ensure a snug fit. Additionally, using a cable needle with a pointy end will make it easier to manipulate the stitches.
2. Understand the cable chart:
Before you start knitting, take the time to familiarize yourself with the honeycomb cable chart. The chart will show you how the cable pattern is formed and guide you through the different rows. Pay attention to the symbols and instructions provided in the chart. It’s also helpful to highlight or circle any repeats to make it easier to follow the pattern.
3. Separate your stitches:
When it comes to honeycomb cables, it’s important to keep your stitches organized. Separate the cable stitches from the rest of your work by placing them on a separate needle or cable holder. This will prevent your cables from getting tangled and make it easier to work the cable pattern.
4. Tension is key:
Tension plays a crucial role in achieving well-defined honeycomb cables. Make sure to maintain an even tension throughout your knitting, neither too loose nor too tight. If your stitches are too loose, your cables may appear sloppy and undefined. On the other hand, if your stitches are too tight, it will be challenging to work the cables and they may not stand out as much.
5. Block your work:
Once you’ve completed your honeycomb cable project, don’t forget to block it. Blocking helps to even out the stitches, enhance the cable definition, and give your project a polished look. Wet blocking is often recommended for cables as it allows the stitches to relax and settle into their intended shape.
By following these tips and tricks, you’ll be well on your way to creating perfect honeycomb cables. With practice and patience, you’ll be able to incorporate this stunning cable pattern into all of your knitting projects.
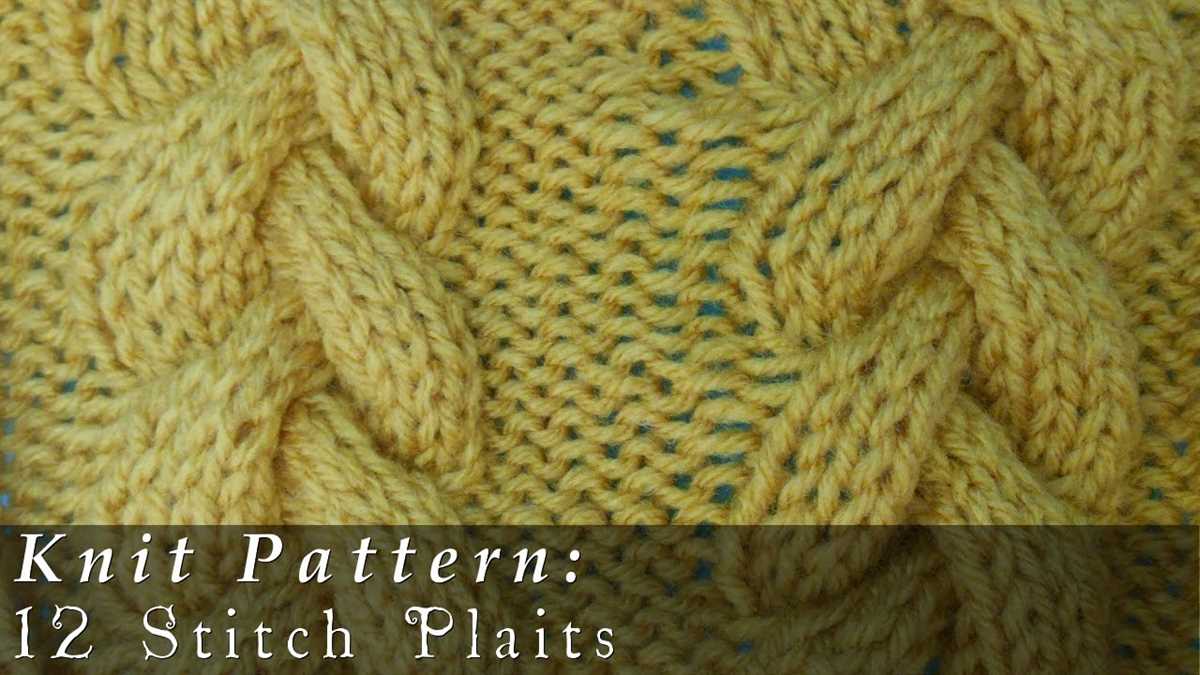
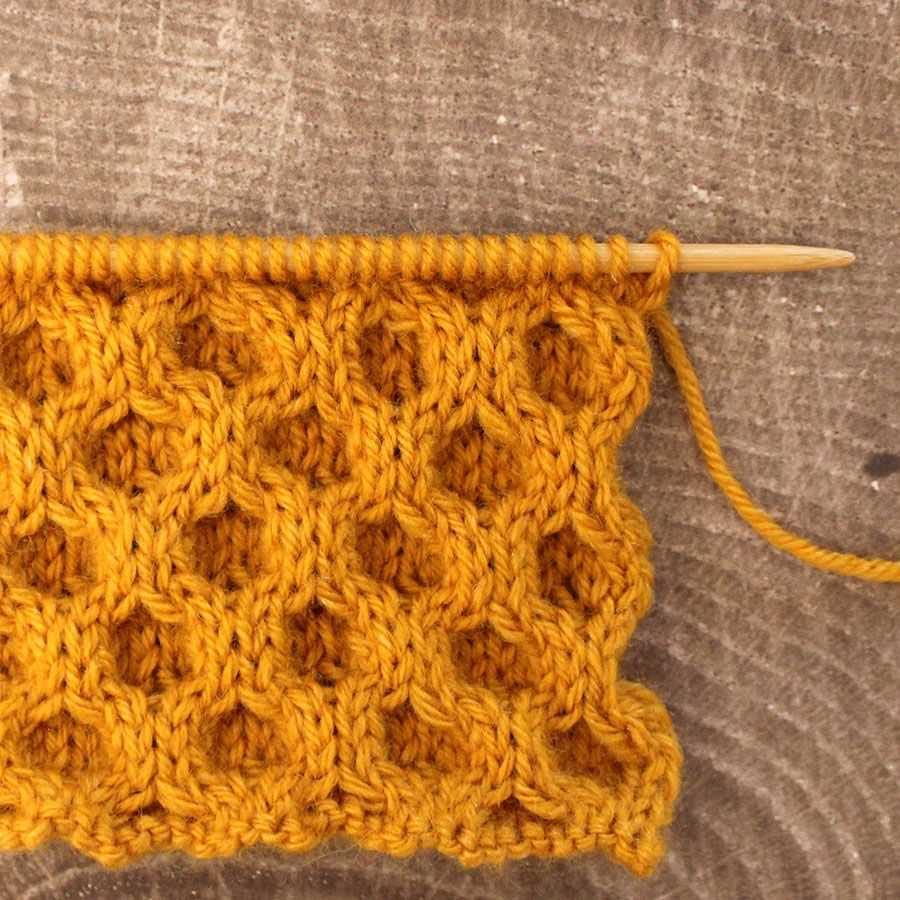
Variations on Honeycomb Cable Knitting
The honeycomb cable knitting pattern is a classic design that adds texture and dimension to any knitting project. While the traditional honeycomb cable is beautiful on its own, there are several variations you can try to add even more interest to your knitting.
1. Double Honeycomb Cable
The double honeycomb cable is an advanced variation that creates a more intricate look. Instead of working with just one cable, this pattern incorporates two honeycomb cables side by side, resulting in a denser, more complex design. It requires careful attention to the stitch count and a little more patience, but the end result is worth the effort.
2. Honeycomb Twist Cable
If you’re looking for a variation that adds a twist to the honeycomb cable, the honeycomb twist cable is an excellent choice. This pattern features the traditional honeycomb design with an additional twist worked into the cables. The twisted cables create a more dynamic look and add an extra touch of sophistication to your knitting.
3. Honeycomb Lace Cable
If you prefer a lighter and more delicate look, the honeycomb lace cable is a perfect option. This variation combines the honeycomb cable pattern with an openwork lace design, creating a beautiful contrast between the solid cables and the airy lace. The honeycomb lace cable is ideal for lightweight garments and accessories, adding a touch of elegance to any project.
4. Honeycomb Bobble Cable
To add a fun and playful element to your knitting, try incorporating bobbles into the honeycomb cable pattern. The honeycomb bobble cable features small, raised bobbles worked into the cables at regular intervals. The bobbles create an interesting texture and add a whimsical touch to your knitting project.
These are just a few variations on the honeycomb cable knitting pattern. Feel free to experiment and customize these designs to suit your own style and preferences. Whether you choose to stick with the traditional honeycomb cable or try one of these variations, your knitting project is sure to turn heads with its intricate and unique texture.
Projects and Ideas for Using Honeycomb Cables
Knitting with honeycomb cables is a versatile and visually stunning technique that adds texture and depth to any project. The intricate pattern creates a honeycomb-like design that is perfect for cozy, winter garments and accessories. Here are some projects and ideas for using honeycomb cables in your knitting.
1. Sweaters and Cardigans
A honeycomb cable sweater or cardigan is a classic and timeless addition to any wardrobe. The textured pattern adds interest and dimension to the design, making it a standout piece. Choose a neutral color for a more traditional look or experiment with bold and vibrant shades for a modern twist.
2. Scarves and Cowls
A honeycomb cable scarf or cowl is a great way to showcase this intricate knitting pattern. The cables create a thick and cozy fabric, making it perfect for keeping warm during the colder months. Pair it with a matching hat for a coordinated winter set.
3. Blankets and Throws
Create a stunning honeycomb cable blanket or throw to add a touch of elegance to your living space. The textured pattern adds visual interest and makes the blanket feel extra cozy. Choose a soft and warm yarn for the ultimate comfort.
4. Hats and Mittens
Add a touch of texture to your winter accessories with honeycomb cable hats and mittens. The intricate pattern adds visual interest and makes these items stand out from the crowd. Choose a yarn that is warm and cozy to keep you comfortable during the chilly weather.
5. Baby Clothing
Honeycomb cables can also be used to create adorable baby clothing, such as sweaters, dresses, and rompers. The textured pattern adds a unique touch to these tiny garments, making them extra special. Choose soft and gentle yarns that are suitable for delicate baby skin.
Overall, honeycomb cables are a versatile and gorgeous knitting technique that can be used in a variety of projects. Whether you’re knitting a cozy sweater, a warm scarf, or an adorable baby outfit, honeycomb cables are sure to add a touch of beauty and sophistication.
Common Mistakes to Avoid
When working on a honeycomb cable knitting pattern, it’s important to pay attention to detail to ensure the best results. Here are some common mistakes to avoid:
1. Skipping or adding stitches
One of the most common mistakes in cable knitting is skipping or adding stitches accidentally. This can throw off the pattern and result in an uneven finished piece. Take the time to count your stitches regularly to ensure you’re following the pattern correctly.
2. Misreading the chart
Honeycomb cable patterns often come with a chart to visually represent the pattern. It’s essential to read the chart correctly to avoid mistakes. Take the time to familiarize yourself with the symbols and directions before starting your project.
3. Not using a cable needle
Cables require the use of a cable needle to hold stitches in the correct order while you work on other stitches. Failure to use a cable needle can lead to twisted or dropped stitches, resulting in an uneven cable pattern. Make sure to always use a cable needle when instructed.
4. Tension issues
The tension of your knitting can greatly affect the appearance of your honeycomb cable pattern. If your tension is too tight or too loose, the pattern may not stand out as intended. Practice maintaining an even tension throughout your work to achieve the desired results.
5. Lack of blocking
Blocking is an essential step in finishing a knitted project. It helps to even out stitches, open up the cable pattern, and give the finished piece a polished look. Skipping the blocking step can result in a less defined and less professional-looking honeycomb cable pattern.
By being mindful of these common mistakes and taking care in your knitting, you can create beautiful honeycomb cable patterns with confidence and precision.
Additional Resources for Honeycomb Cable Knitting
If you’re looking to expand your knitting skills and try out the honeycomb cable pattern, there are plenty of resources available to help you along the way. Whether you’re a beginner or an experienced knitter, these resources can provide inspiration, guidance, and helpful tips for creating beautiful honeycomb cable designs.
1. Knitting Books and Patterns
One of the best ways to learn and master new knitting techniques is through knitting books and patterns. There are several books available that specifically focus on cable knitting, including honeycomb cable patterns. These books often provide step-by-step instructions, charts, and detailed explanations of different cable techniques. They can be a valuable resource for knitters of all skill levels.
2. Online Tutorials
If you prefer visual learning, online tutorials can be a great resource for learning how to knit honeycomb cables. Many knitting bloggers and knitting websites offer video tutorials that walk you through the process step-by-step. These tutorials often include helpful tips and tricks for achieving the perfect honeycomb cable pattern.
3. Knitting Communities
Joining knitting communities, whether in person or online, can provide you with a supportive network of fellow knitters who can offer guidance and inspiration. Websites, forums, and social media platforms dedicated to knitting often have specific groups or discussions focused on cable knitting. These communities can be a great place to ask questions, share your progress, and get feedback on your honeycomb cable knitting projects.
4. Knitting Workshops and Classes
If you prefer hands-on learning, attending knitting workshops or classes can be a beneficial way to learn and refine your honeycomb cable knitting skills. Local yarn shops, community centers, and knitting guilds often offer classes and workshops taught by experienced knitters. These classes allow you to learn from an instructor, ask questions, and practice your skills in a supportive environment.
With these additional resources, you’ll have the tools and support you need to confidently tackle honeycomb cable knitting and create stunning cable designs.
Frequently Asked Questions
Here are some frequently asked questions about the honeycomb cable knitting pattern:
1. How do I create the honeycomb cable pattern?
To create the honeycomb cable pattern, you will need to use a combination of knits and purls to create the textured honeycomb effect. Follow the specific instructions for the honeycomb cable pattern you are using, as different patterns may have varying instructions.
2. Can I use the honeycomb cable pattern for different projects?
Yes, you can use the honeycomb cable pattern for various projects such as scarves, hats, sweaters, and blankets. It adds a beautiful texture and visual interest to any knitting project.
3. What is the difficulty level of the honeycomb cable pattern?
The difficulty level of the honeycomb cable pattern can vary depending on your knitting skills and experience. It is generally considered an intermediate-level knitting pattern due to the complexity of the cable stitches involved. However, with practice and patience, beginners can also master this pattern.
4. Can I modify the honeycomb cable pattern?
Yes, you can modify the honeycomb cable pattern to suit your preferences. You can adjust the number of stitches or rows, experiment with different yarn weights and needle sizes, or even incorporate other stitch patterns alongside the honeycomb cable for a unique design.
5. Are there any tips for knitting the honeycomb cable pattern?
Here are some tips for knitting the honeycomb cable pattern:
- Use cable needles or stitch markers to help keep track of the cable stitches.
- Practice the cable technique before starting the pattern to ensure you are comfortable with it.
- Read and understand the pattern instructions carefully before starting.
- Count your stitches regularly to avoid any mistakes.
- Take your time and enjoy the process of creating the intricate honeycomb cable pattern.
Summary
The honeycomb cable knitting pattern is a beautiful and versatile pattern that adds a textured honeycomb effect to any knitting project. While it may be considered an intermediate-level pattern, beginners can also achieve great results with practice and patience. You can modify the pattern to suit your preferences and use it for various projects. Follow the tips provided to make your knitting experience smoother and more enjoyable. Get creative and have fun with the intricate honeycomb cable pattern!