
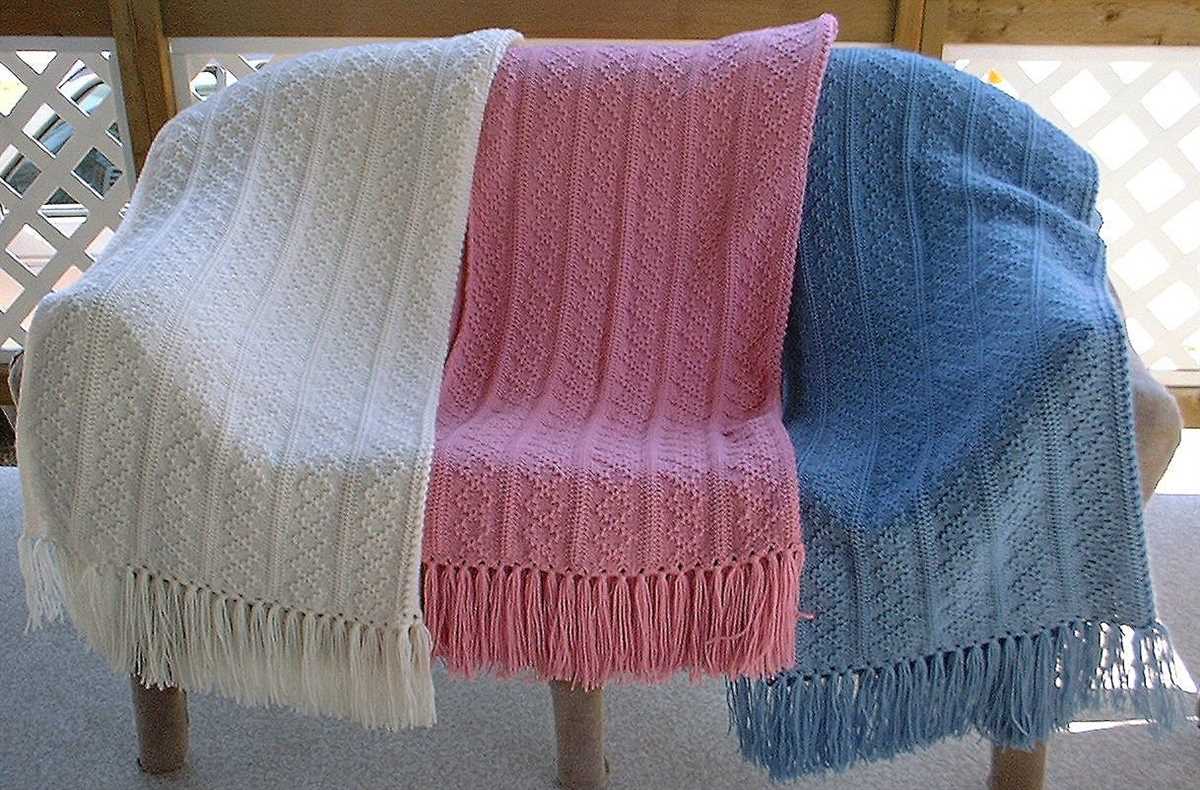
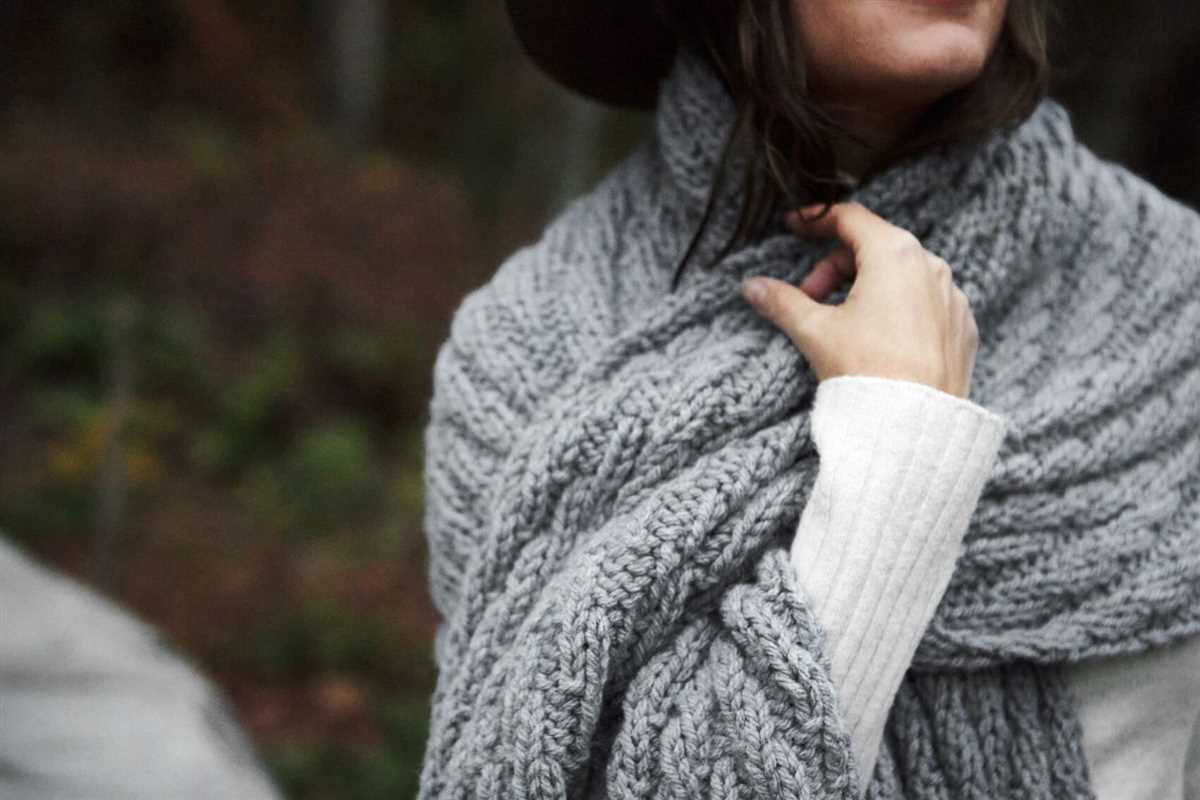
A blanket scarf is a cozy and versatile accessory that can be worn in various ways. It is a popular choice for those chilly autumn and winter months when you want to stay warm and stylish. Making your own blanket scarf is not only a great way to showcase your knitting skills, but also allows you to customize the size and pattern to suit your personal style.
In this article, we will provide you with a step-by-step knitting pattern for a classic blanket scarf. Whether you are a beginner or an experienced knitter, this pattern is suitable for all skill levels. It features a simple yet elegant design that will complement any outfit.
To start knitting your blanket scarf, you will need to gather the necessary materials. This includes chunky yarn in your preferred color(s), knitting needles (size 10mm or 11mm), and a pair of scissors. You may also want to use some stitch markers to keep track of your progress, although they are not essential.
Once you have all your materials, you can begin casting on your stitches. The number of stitches you cast on will depend on your desired scarf width. We recommend casting on around 40-50 stitches for a standard-sized blanket scarf. For a thicker or longer scarf, you may want to cast on more stitches.
After casting on, you will then move on to the main pattern. This pattern utilizes a simple combination of garter stitch and ribbing to create a textured and cozy fabric. Follow the instructions provided to achieve the desired pattern repeat. Once you have completed the desired length, you will finish off your work by binding off the stitches, cutting the yarn, and weaving in any loose ends.
Blanket Scarf Knitting Pattern
A blanket scarf is a stylish and versatile accessory that can be worn in various ways. Whether you want to wrap it around your neck, drape it over your shoulders, or use it as a cozy blanket, a blanket scarf is a must-have item for the colder months. One great thing about a blanket scarf is that you can easily knit it yourself with a simple pattern.
To create your own blanket scarf, you will need a chunky yarn and large knitting needles. Choose a yarn that is soft and warm to ensure that the finished scarf is comfortable to wear. The size of your knitting needles will depend on the thickness of your yarn, but typically, needles in the size range of US 10-15 (6-10 mm) will work well.
Instructions:
- Cast on an even number of stitches to the desired width of your scarf. For example, you can cast on 40 stitches for a narrower scarf or 60 stitches for a wider scarf.
- Row 1: Knit each stitch across.
- Row 2: Purl each stitch across.
- Repeat rows 1 and 2 until your scarf reaches the desired length. You can make it as short or as long as you like, depending on your preference.
- Bind off all stitches and weave in any loose ends.
Optional:
If you want to add some texture or design to your blanket scarf, you can experiment with different stitch patterns. For example, you can incorporate a simple ribbed pattern by alternating knit stitches and purl stitches in each row. Or you can try a seed stitch pattern, which involves alternating knit and purl stitches in a checkerboard-like pattern.
Once your blanket scarf is finished, you can wear it in a variety of ways. You can fold it in half and wrap it around your neck for a cozy look, or you can drape it over your shoulders like a shawl. The large size of the scarf allows for plenty of styling options, so feel free to get creative and experiment with different ways to wear it.
Choosing the Right Yarn and Needles
When knitting a blanket scarf, it’s important to choose the right yarn and needles to ensure a successful and cozy finished product. The yarn you select should be thick and warm, as the purpose of a blanket scarf is to provide warmth and comfort. Look for yarns labeled as “bulky” or “super bulky” for the best results. These types of yarns will create a dense and chunky fabric that will keep you warm in colder weather.
Additionally, consider the fiber content of the yarn. Natural fibers like wool or alpaca are excellent choices for a blanket scarf as they have excellent insulation properties. They will trap heat and keep you warm, even in chilly temperatures. If you prefer vegan or animal-friendly options, there are also synthetic yarns available that mimic the look and feel of natural fibers. These can be a great alternative for those with specific preferences or allergies.
When it comes to selecting needles for your blanket scarf, choose a size that complements the thickness of your yarn. For bulky or super bulky yarns, larger-sized needles, such as US size 13 or 15, will help create a looser and more open fabric. This will give your scarf a cozy and drapey look. However, if you prefer a tighter and denser fabric, you can opt for smaller-sized needles.
It’s also important to consider the length of your needles. Since a blanket scarf is typically larger than a regular scarf, longer needles, such as circular needles or long straight needles, can be more convenient to work with and accommodate the growing number of stitches as you progress in your project. Circular needles also offer the flexibility of knitting in the round, which can be useful for creating a seamless or tube-like scarf.
In conclusion, choosing the right yarn and needles is key to knitting a beautiful and functional blanket scarf. Consider the thickness and fiber content of the yarn to ensure warmth and comfort, and select needles that complement the yarn’s thickness and accommodate the size of your project. With the right materials, you’ll be able to create a cozy and stylish accessory to keep you warm all winter long.
Getting Started: Cast On and Knit Stitch

Before you can start knitting your blanket scarf, you’ll need to cast on your stitches. Casting on is the process of creating the foundation row of stitches on your knitting needle. There are several ways to cast on, but one common method is the long-tail cast on. To do this, you’ll need a long tail of yarn, about four times the width of your finished scarf. Loop the tail around your thumb and hold it in place with your other fingers. Insert the needle into the loop on your thumb, bring the yarn over the needle, and then bring the needle through the loop, creating a new stitch on the needle. Repeat this process until you have cast on the desired number of stitches.
Once you have cast on your stitches, you’ll be ready to start knitting the blanket scarf. The most basic stitch in knitting is the knit stitch. To knit a stitch, insert the right needle into the first stitch on the left needle from left to right. Wrap the yarn around the right needle counterclockwise and then pull the stitch through to the front of the right needle. Slide the stitch off the left needle and onto the right needle. Repeat this process for each stitch on the left needle until all the stitches have been transferred to the right needle. This completes one row of knitting.
To continue knitting subsequent rows, turn your work around so that the needle with the stitches becomes the left needle and the empty needle becomes the right needle. Insert the right needle into the first stitch on the left needle as before and repeat the knit stitch process. Continue knitting in this manner until your blanket scarf reaches the desired length.
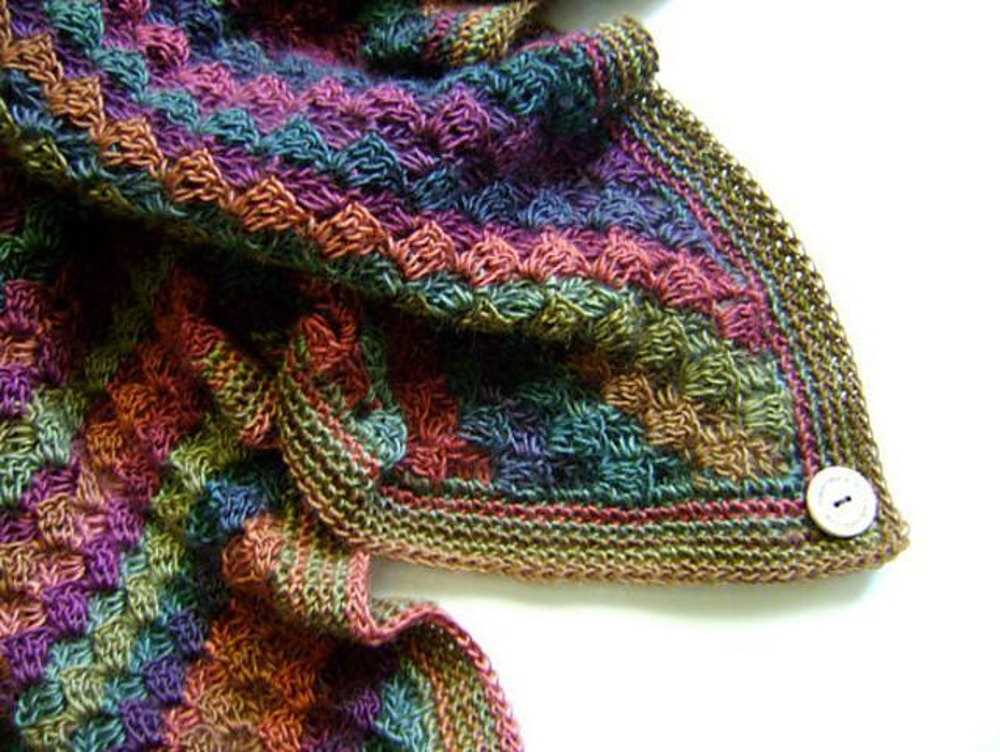
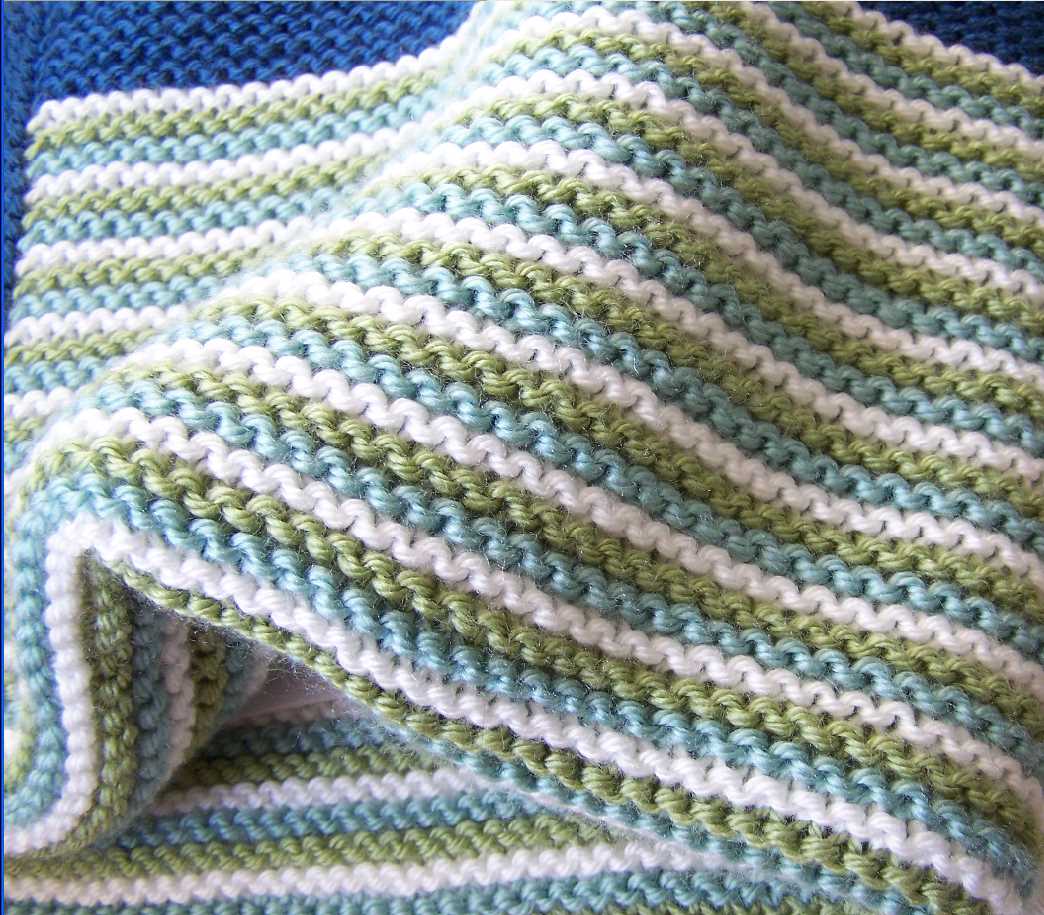
Adding Color and Pattern with Stripes
Stripes are a great way to add color and pattern to your blanket scarf knitting project. By incorporating stripes into your design, you can create a visually interesting and dynamic piece that stands out. Whether you choose to use bold, contrasting colors or more subtle, tonal variations, stripes can elevate your scarf to the next level.
Choosing Colors: When selecting colors for your stripes, consider the overall look and feel you want to achieve. Bold and vibrant colors can create a striking and eye-catching effect, while softer and more muted tones can result in a more subtle and sophisticated look. You can also experiment with different color combinations to create unique and personalized designs.
Working with Stripes: To incorporate stripes into your blanket scarf, you will need to decide on the width and sequence of your stripes. You can create thin, narrow stripes for a more delicate and intricate pattern, or opt for wider stripes for a bolder and more graphic design. Additionally, you can vary the number of rows you knit in each color to create different visual effects.
Enhancing the Pattern: In addition to incorporating stripes, you can also experiment with different stitch patterns to further enhance the visual interest of your blanket scarf. For example, you can use a rib stitch for your main body and then transition into a seed stitch or garter stitch for your stripes. This adds texture and dimension to your scarf while still maintaining the overall pattern.
Overall, adding color and pattern with stripes is a wonderful way to elevate your blanket scarf knitting project. Whether you choose bold or subtle colors, thin or wide stripes, or experiment with different stitch patterns, incorporating stripes allows you to create a unique and visually captivating scarf. Have fun experimenting and creating your own personalized design!
Creating Warmth with Ribbing Stitch
The ribbing stitch is a versatile and popular knitting technique that adds both style and warmth to any project. Whether you’re knitting a scarf, hat, or sweater, incorporating ribbing can create a stretchy and cozy fabric that hugs the body and traps warmth. This makes it a great choice for knitting a blanket scarf that will provide both comfort and style during cooler months.
One of the key features of the ribbing stitch is its ability to create a textured and elastic fabric. By alternating knit and purl stitches in a specific pattern, ribbing creates vertical rows of raised ridges and recessed valleys. This texture not only adds visual interest to a project but also helps the fabric to stretch and retain its shape. The elasticity of ribbing makes it an excellent choice for knitting garments and accessories that need to fit snugly and comfortably.
Another advantage of using the ribbing stitch in a blanket scarf is its ability to create warmth. The ridges and valleys of the ribbing pattern can help to trap air, which acts as insulation against the cold. By knitting a blanket scarf with ribbing stitch, you’ll be creating a thicker and more heat-trapping fabric, making it perfect for chilly days and outdoor activities. Plus, the stretchy nature of ribbing ensures that the scarf can wrap around the neck and shoulders snugly, sealing in warmth and providing extra protection from the cold.
There are various ways to incorporate ribbing into a blanket scarf knitting pattern. You can choose to create a traditional 1×1 ribbing, which alternates one knit stitch with one purl stitch. This creates a uniform texture and is great for beginners. Alternatively, you can experiment with different ribbing patterns such as 2×2 (two knit stitches followed by two purl stitches), 3×1 (three knit stitches followed by one purl stitch), or even more intricate combinations. These different ribbing patterns can add visual interest and complexity to your blanket scarf, making it a unique and eye-catching accessory.
In conclusion, the ribbing stitch is a fantastic technique for creating warmth in a blanket scarf. Its textured and elastic fabric provides both style and functionality, and it can be easily customized with different ribbing patterns. So, grab your knitting needles and get ready to create a cozy and fashionable blanket scarf that will keep you warm all winter long!
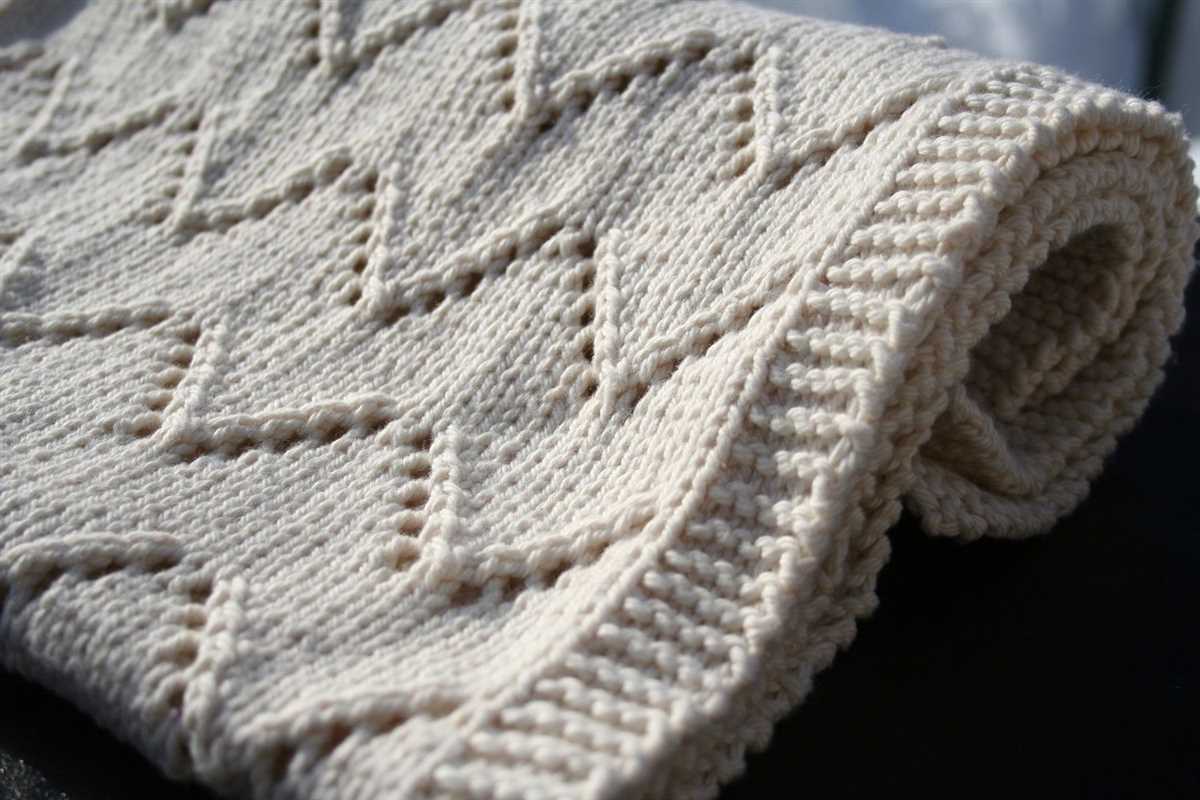
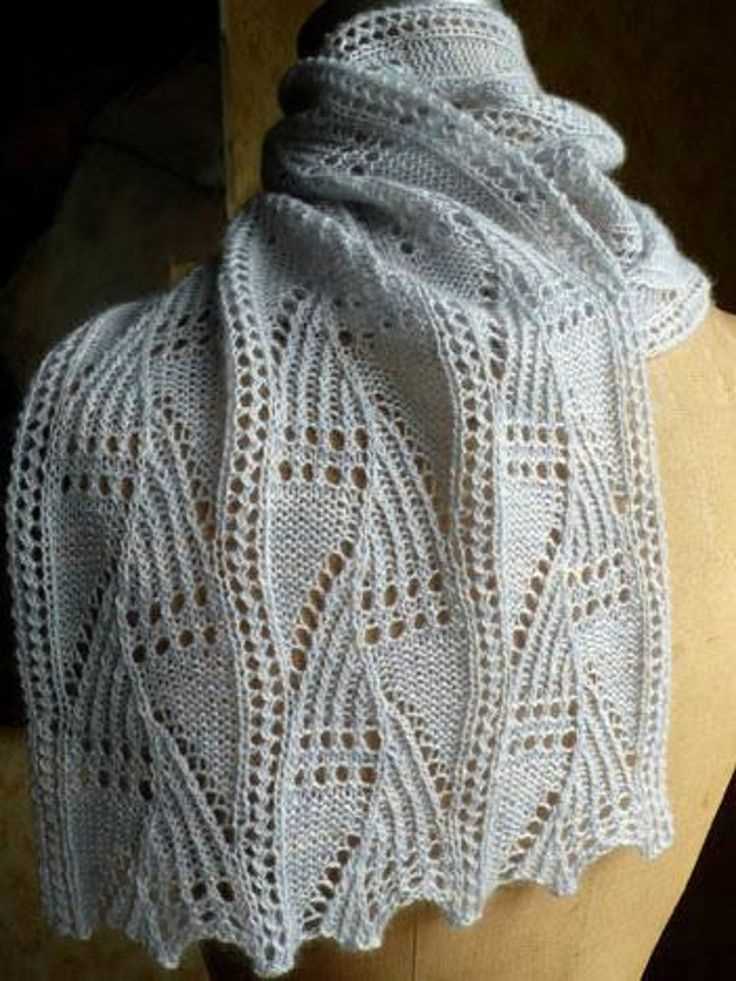
Incorporating Lace for a Feminine Touch
When knitting a blanket scarf, adding lace motifs can bring a feminine touch to the design. Lace patterns can take the form of delicate floral motifs, intricate geometric shapes, or even simple eyelet designs. Incorporating lace into the scarf can create a more airy and lightweight fabric, perfect for those looking for a lighter and more delicate accessory.
One way to incorporate lace into a blanket scarf is by using lace stitches in the body of the scarf. Knitting sections of the scarf with lace stitches adds visual interest and creates a beautiful drape. Lace patterns can be worked in columns, either centered or staggered, to create an elegant and sophisticated look.
Another option for incorporating lace into a blanket scarf is by adding a lace border. Knitting a lace border along one or more edges of the scarf can create a stunning and intricate detail. This can be achieved by knitting a lace pattern separately and then attaching it to the edge of the scarf, or by incorporating lace stitches directly into the final rows of the scarf.
A lace pattern can also be used to create a lace panel within the body of the scarf. This can be a single lace motif or a series of lace motifs repeated throughout the scarf. Knitting a lace panel can create a focal point within the design and add an element of interest and complexity.
Overall, incorporating lace into a blanket scarf can add a feminine touch and elevate the overall design. Whether it’s through lace stitches in the body of the scarf, a lace border, or a lace panel, the addition of lace can transform a simple scarf into a stunning and elegant accessory.
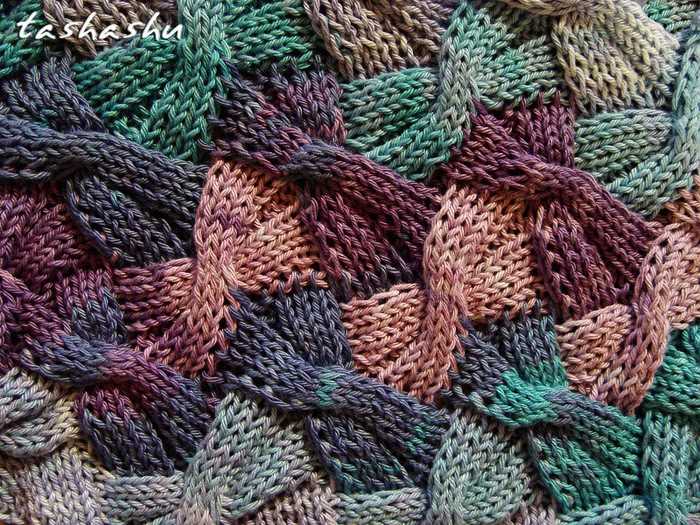
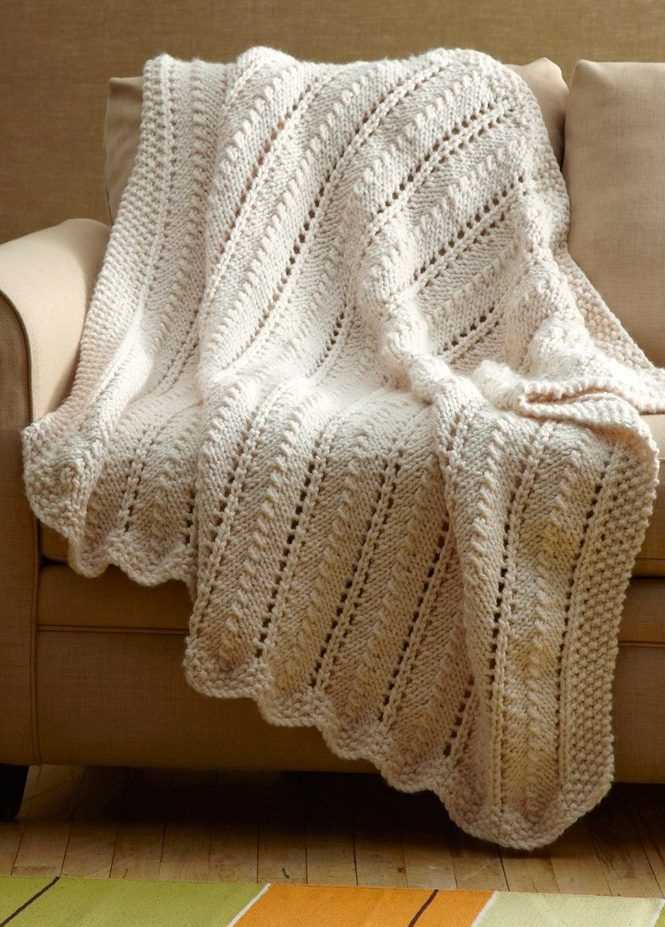
Experimenting with Cables and Twists
Cables and twists are popular techniques in knitting, especially when creating intricate patterns such as a blanket scarf. These techniques add depth and texture to the knitted fabric, making it visually appealing and cozy to wear.
One way to experiment with cables and twists is by playing with different sizes and variations. For example, you can create a chunky cable by using thicker yarn and larger needles. This will result in a bold and prominent cable design that adds a statement to your blanket scarf.
Another way to experiment is by combining different cable and twist patterns within the same project. You can mix cables of different widths, create a twisting pattern that intertwines with the cables, or even incorporate multiple types of cables in one piece. This allows you to create a unique and personalized design that showcases your knitting skills.
Using different stitch combinations can also create interesting effects when working with cables and twists. For instance, incorporating seed stitch or ribbing between cable panels can add contrast and create a visually striking look. Additionally, experimenting with different stitch counts and placements can result in unique cable and twist patterns that stand out.
- Key Phrases:
- Experimenting with cables and twists
- Intricate patterns
- Depth and texture
- Playing with different sizes and variations
- Chunky cable
- Mixing cables and twists
- Combining different cable and twist patterns
- Unique and personalized design
- Using different stitch combinations
- Seed stitch or ribbing
- Contrast and visually striking look
- Unique cable and twist patterns
Adding Fringe for a Bohemian Look
When it comes to accessorizing your blanket scarf, adding fringe is a great way to achieve a bohemian look. Fringe can add movement and texture to your scarf, giving it an effortlessly stylish and free-spirited vibe.
How to add fringe: To add fringe to your blanket scarf, you will need yarn in a matching or complementary color. Cut several lengths of yarn, each about twice the desired length of the fringe. Take one strand of yarn and fold it in half. Insert the folded end through a stitch at the edge of your scarf, creating a loop. Draw the loose ends of the yarn through this loop, creating a knot. Repeat this process along the edge of your scarf, spacing the knots evenly.
For a more intricate fringe, you can also braid the yarn before attaching it to the scarf. Simply divide the yarn into three strands and braid them together, securing the end with a knot. Attach the braided fringe to the scarf using the same method as before.
Styling tips: To achieve a bohemian look with your blanket scarf and fringe, consider pairing it with other boho-inspired accessories. Layer your scarf over a flowy dress or a loose-fitting top and jeans. Add some statement jewelry, such as long necklaces or oversized earrings, and complete the look with a pair of ankle boots or sandals.
Final thoughts: Adding fringe to your blanket scarf is a fun and easy way to give it a bohemian touch. Whether you opt for simple knots or intricate braids, fringe can elevate your scarf and create a trendy and boho look. Experiment with different colors and lengths of fringe to fully customize your scarf and make it a unique accessory in your wardrobe.
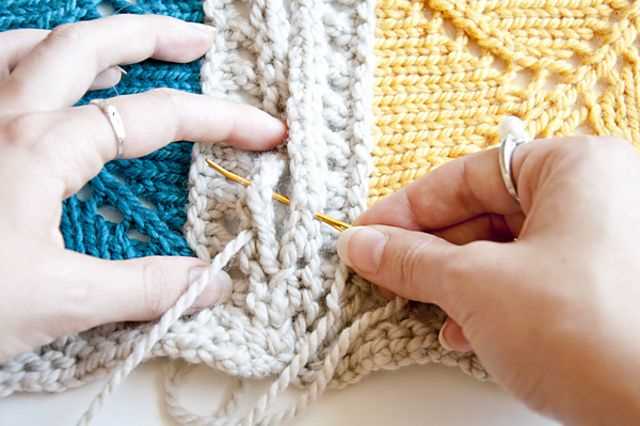
Finishing Off: Bind Off and Weaving in Ends
Once you have completed knitting your blanket scarf using the pattern, it’s time to finish off your project. The first step is to bind off, which creates a neat edge and prevents your stitches from unraveling. To bind off, knit the first two stitches as normal, then insert the tip of the left-hand needle into the first stitch on the right-hand needle. Lift this stitch over the second stitch and completely off the right-hand needle. Repeat this process until you have one stitch remaining, then cut the yarn and pull it through the last stitch to secure it. This completes the bind off.
After binding off, you will have a few loose ends of yarn where you changed colors or added new skeins. To prevent these ends from unraveling and to give your scarf a polished look, it’s important to weave them in. Take a tapestry needle and thread the loose end through the stitches on the wrong side of the scarf. Weave the yarn in and out of the stitches for a few inches, making sure to follow the direction of the knitting. Once you have woven in the end, trim any excess yarn. Repeat this process for all the loose ends, ensuring that they are securely woven in and trimmed.
With the bind off and weaving in of ends complete, your blanket scarf knitting project is finished! Give it a final steam block to relax the stitches and enhance the drape of the scarf. Lay your scarf flat on an ironing board or towel, lightly dampen it with a spray bottle, and then place a cloth over it. Gently press down with a warm iron, being careful not to apply too much pressure. Allow the scarf to dry completely before wearing or storing it. Now you can enjoy your cozy and stylish blanket scarf!
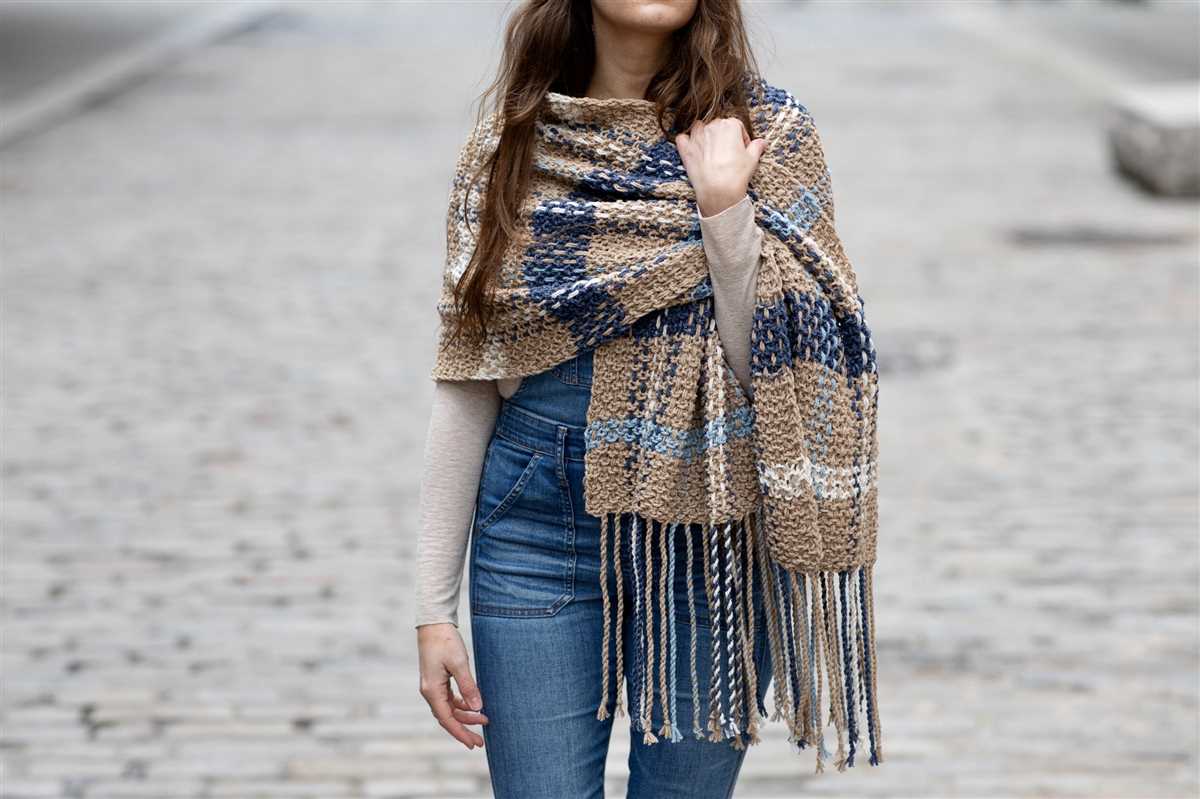
Tips for Styling and Wearing Your Blanket Scarf
Once you have finished knitting your beautiful blanket scarf, the next step is to style it and show it off with your outfits. Here are some tips on how to wear and style your blanket scarf:
1. Basic Wrap
The most common way to wear a blanket scarf is the basic wrap. Simply drape the scarf around your neck, with one end longer than the other. Take the longer end and wrap it around your neck, then tuck the end through the loop created by the scarf. This style offers warmth and comfort, while still looking stylish.
2. Belted Scarf
If you want to define your waist while wearing a chunky blanket scarf, try the belted scarf style. Drape the scarf over your shoulders with one end longer than the other. Take the longer end and wrap it around your waist, then secure it with a belt. This style adds a touch of sophistication to your outfit and is perfect for a casual or dressy look.
3. Shoulder Wrap
For a more elegant and luxurious look, try wearing your blanket scarf as a shoulder wrap. Simply fold the scarf in half diagonally to create a triangle shape. Place the middle point of the triangle on your shoulder and bring the ends around and tie them together at the front. This style adds an extra layer of warmth and can be paired with a dress or a blouse for a special occasion.
4. Layered Look
If you want to add more dimension to your outfit, try layering your blanket scarf over a jacket or coat. This style not only keeps you warm, but also adds a stylish and cozy touch. Simply wrap the scarf around your neck as desired and let the ends hang or tuck them into your coat. This is a great option for colder weather or when you want to add a pop of color to your outfit.
Remember, the beauty of the blanket scarf is its versatility. Experiment with different styles and find the one that suits your personal taste and complements your outfit. Whether you prefer a casual, bohemian look or a chic, tailored style, the blanket scarf will add warmth and sophistication to any outfit.
So go ahead and show off your knitting skills by wearing your handmade blanket scarf with confidence and style. You’ll not only stay cozy, but also make a fashion statement wherever you go!