
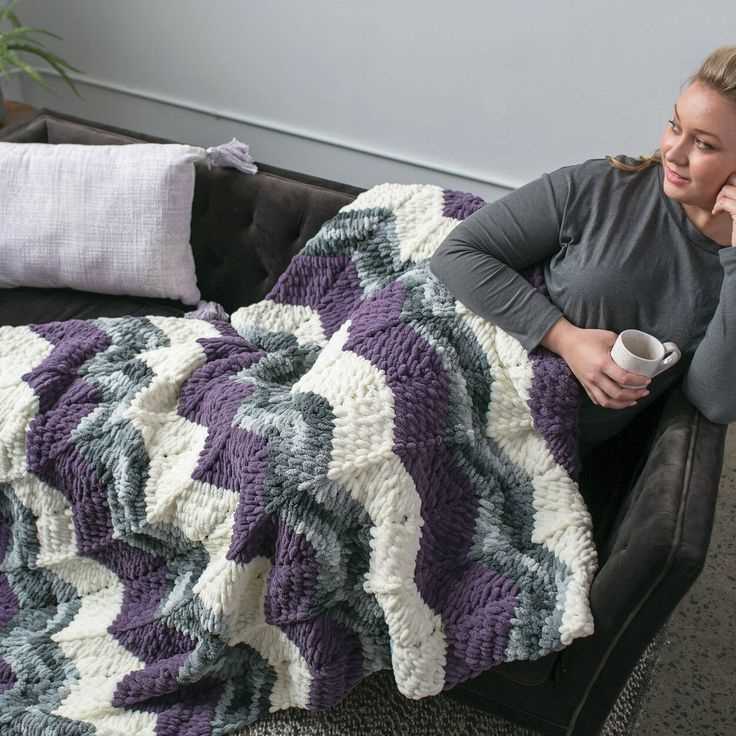
Blankets are a cozy essential for any home, and there’s nothing better than curling up under a handmade blanket that you’ve created yourself. If you’re looking for a fun and unique knitting project, then the loopy blanket knitting pattern might be just what you need.
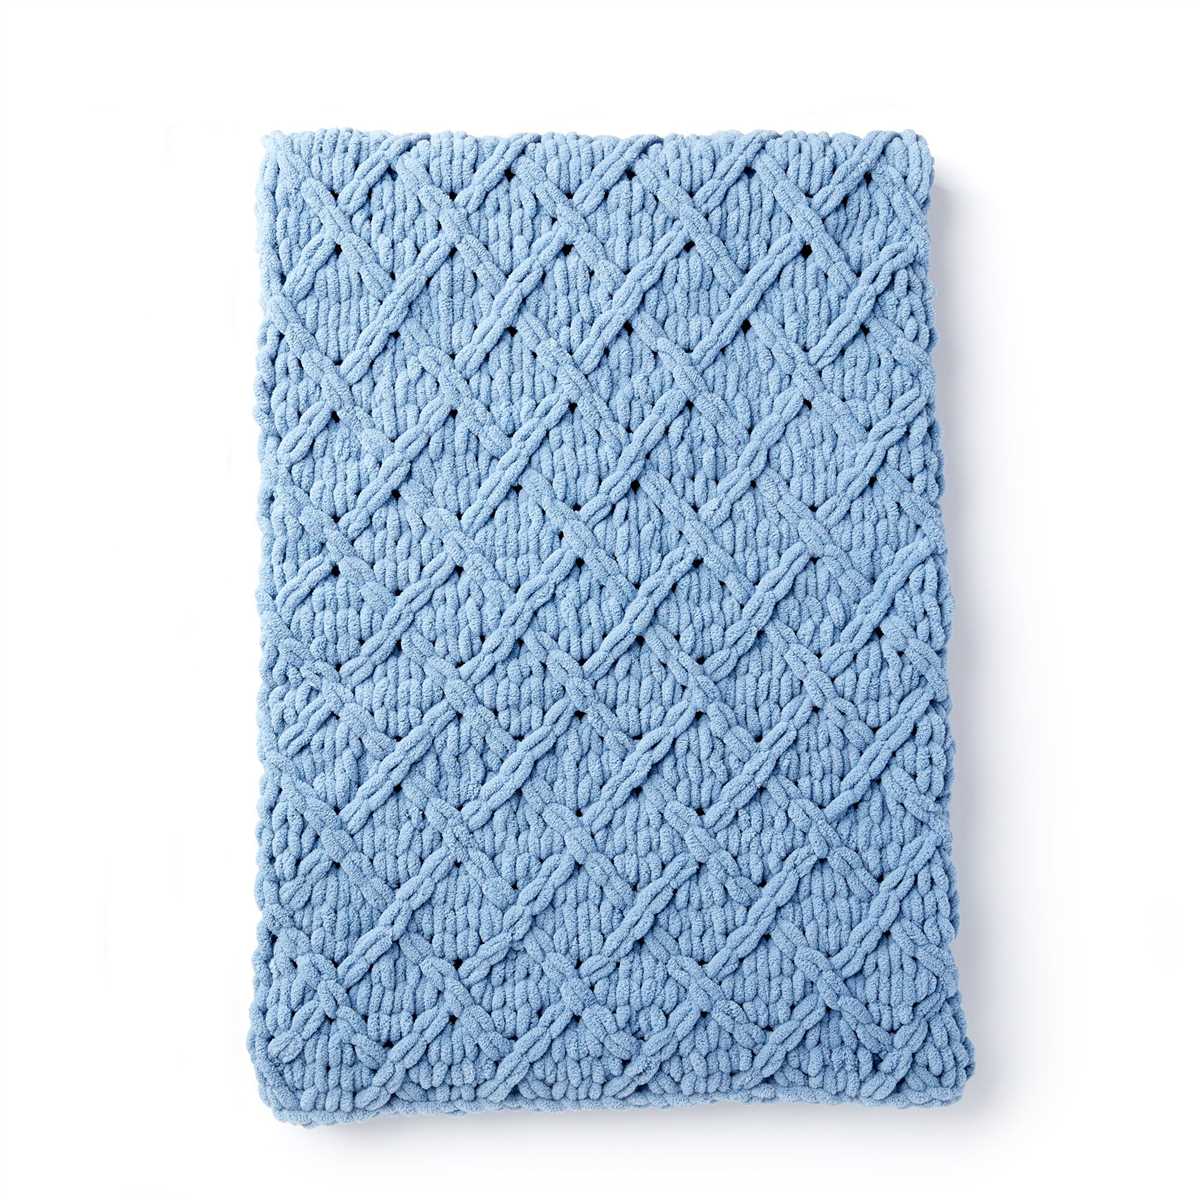
This pattern creates a beautifully textured blanket with loop stitches. The loop stitches give the blanket a three-dimensional look and a soft, plush feel. The finished blanket is perfect for adding some extra warmth and charm to your living room or bedroom.
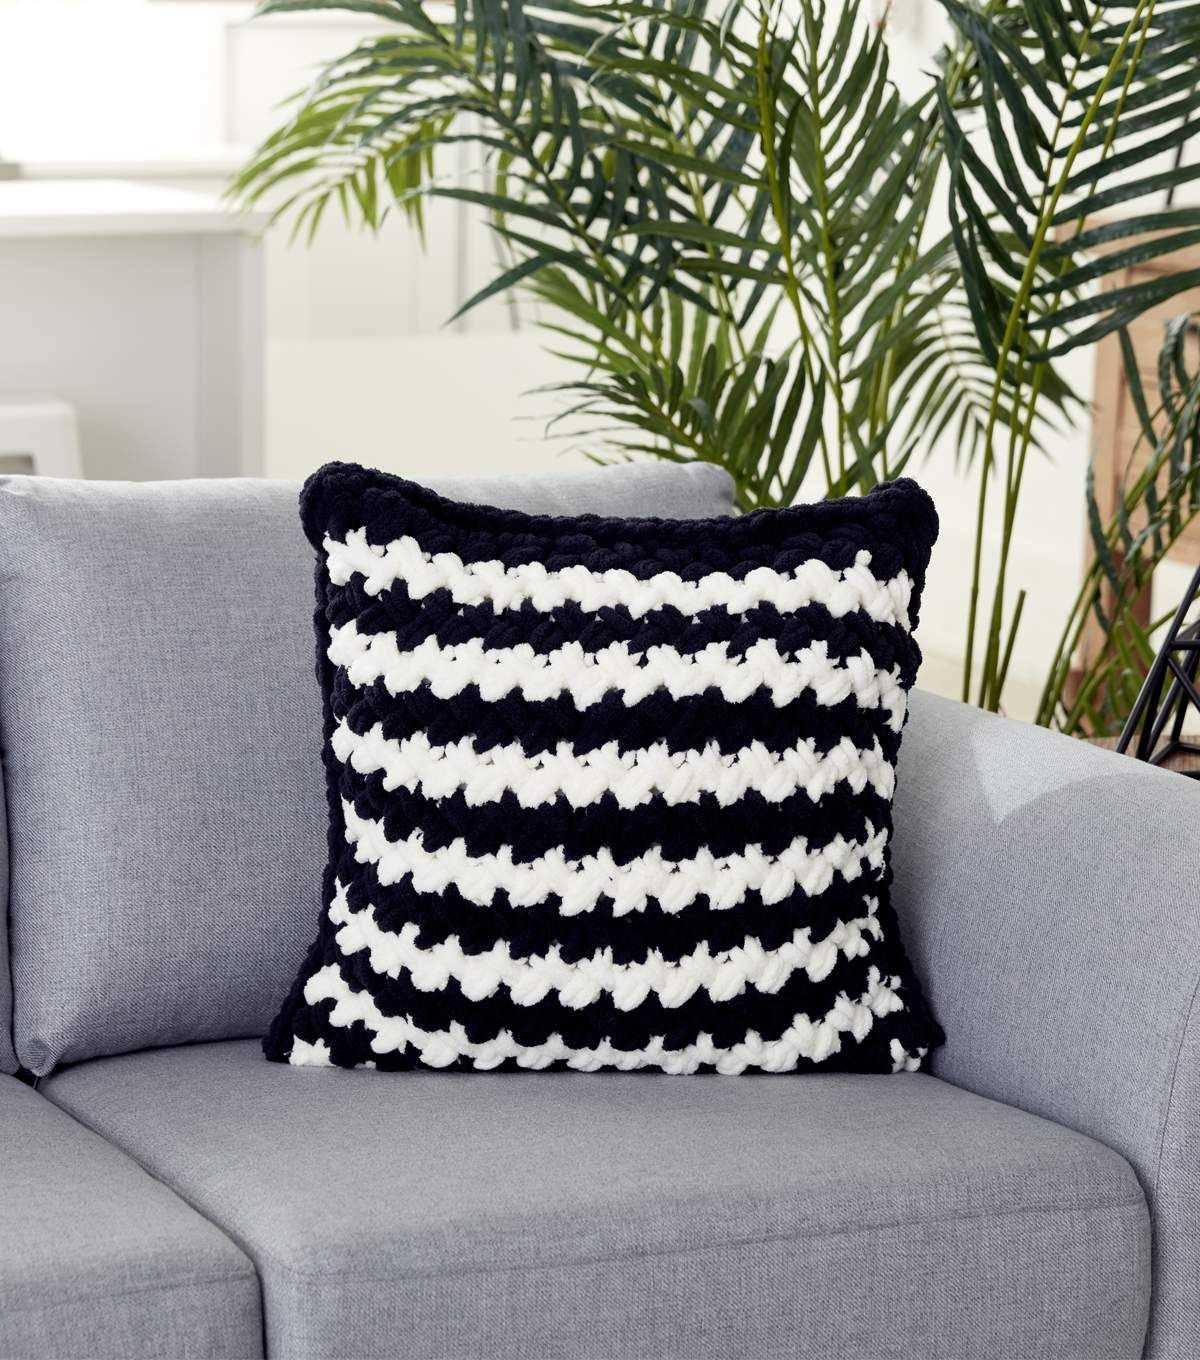
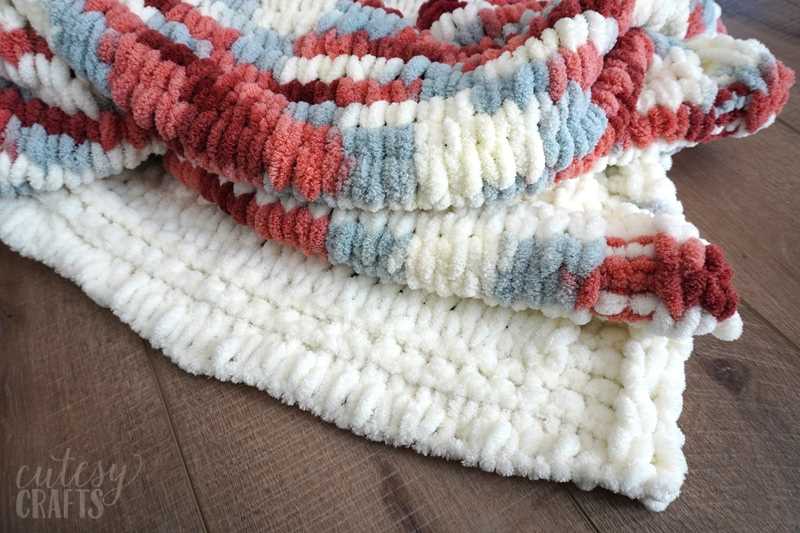
Whether you’re a beginner or an experienced knitter, this loopy blanket pattern is a great project to take on. It’s a simple and repetitive pattern that is easy to learn and follow along. Plus, with so many different yarn colors and textures to choose from, you can create a completely unique blanket that matches your personal style and decor.
So grab your knitting needles, pick out your favorite yarn, and get ready to create a beautiful loopy blanket that you’ll be proud to display in your home. This pattern is sure to become a favorite and will quickly become a staple in your knitting repertoire.
How to Knit a Loopy Blanket: Step-by-Step Guide
Making a loopy blanket is a fun and satisfying knitting project that can add a cozy touch to your home. Whether you’re a beginner or an experienced knitter, this step-by-step guide will help you create a beautiful loopy blanket.
Materials:
- Chunky yarn: Choose a soft and bulky yarn in a color of your choice.
- Knitting needles: Select knitting needles that are suitable for your chosen yarn.
- Tapestry needle: This will be used for finishing and weaving in ends.
- Scissors: You’ll need a pair of scissors to cut the yarn.
- Row counter or stitch markers: These tools will help you keep track of your stitches and rows.
Step 1: Cast on:
Start by casting on the desired number of stitches on your knitting needles. The number of stitches will depend on the size of the blanket you want to make. Make sure to leave a long tail of yarn for later use.
Step 2: Knit the first row:
In this step, you will knit the first row of your blanket. Simply insert the right needle into the first stitch on the left needle from left to right, wrapping the yarn around the needle. Pull the yarn through to create a new stitch. Repeat this process for the entire row.
Step 3: Create loops:
In this step, you will create the loops that give the blanket its unique texture. Starting from the first stitch of the second row, insert the right needle into the first stitch on the left needle from below. Wrap the yarn around the right needle, and pull it through the stitch to create a loop. Repeat this process for each stitch in the row.
Step 4: Continue knitting:
Continue knitting rows and creating loops until your blanket reaches the desired length. Make sure to keep track of your stitch count and row count if necessary.
Step 5: Bind off:
When you reach the end of your blanket, bind off the stitches to secure the loops. Knit the first two stitches, then insert the left needle into the first stitch on the right needle and lift it over the second stitch and off the needle. Repeat this process until you have one stitch left on the right needle. Cut the yarn, leaving a long tail, and pull it through the final stitch to secure it.
Step 6: Finish and weave in ends:
To finish your loopy blanket, use a tapestry needle to weave in any loose ends. Simply thread the needle and stitch through the loops on the back of your work to secure the yarn. Trim any excess yarn with scissors.
With these simple steps, you can create your own beautiful and cozy loopy blanket. Enjoy the process of knitting and snuggling up with your finished creation!
Choosing the Right Yarn and Needles for Your Loopy Blanket
When it comes to creating a cozy and beautiful loopy blanket, choosing the right yarn and needles is essential. The yarn you choose will determine the overall texture and appearance of your blanket, while the needles will affect the size and tension of your stitches.
Yarn
When selecting yarn for your loopy blanket, it’s important to consider both the material and thickness. For a soft and warm blanket, natural fibers like wool or alpaca are excellent choices. These fibers provide excellent insulation and a luxurious feel. Alternatively, if you prefer a lighter and more breathable blanket, consider using a cotton or bamboo yarn.
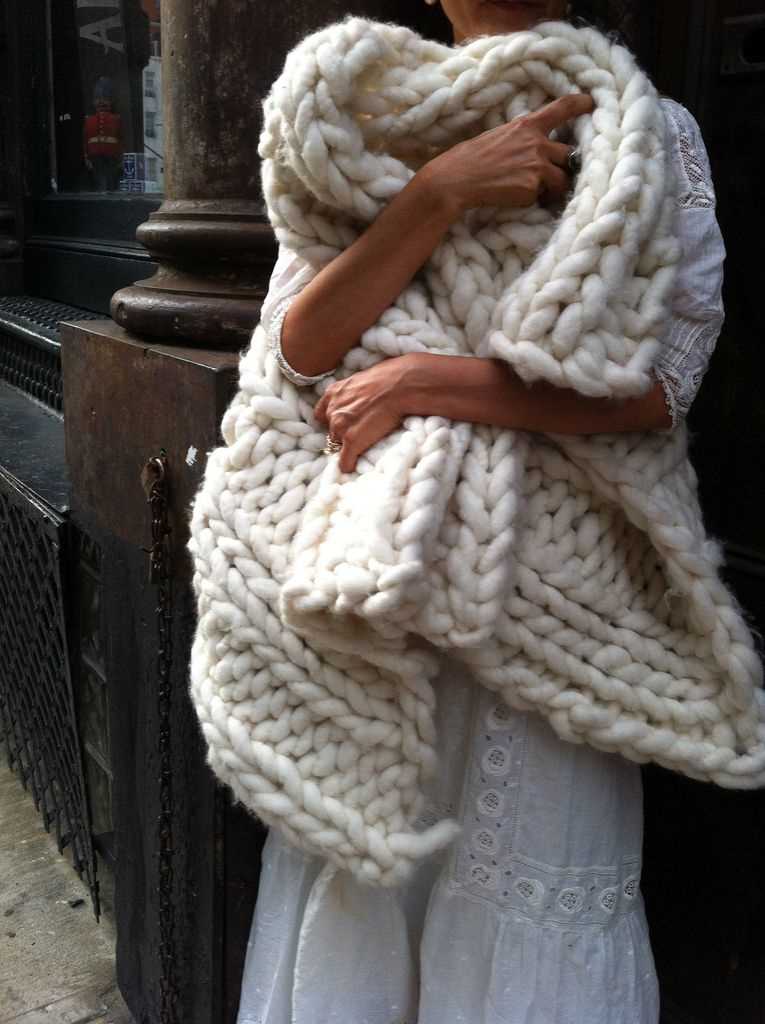
As for thickness, a thicker yarn will create larger and more pronounced loops, giving your blanket a chunky and cozy look. However, if you prefer a more delicate and intricate design, opt for a thinner yarn. Consider your personal style and the intended use of the blanket when making your yarn selection.
Needles
The size and type of needles you choose will greatly impact the final result of your loopy blanket. For a chunkier and more oversized look, use larger knitting needles. These will create looser stitches and larger loops. If you prefer a tighter and more compact appearance, opt for smaller needles.
It’s important to note that circular needles are often the best choice for knitting a blanket, as they allow you to comfortably accommodate a large number of stitches. Additionally, circular needles can make it easier to handle the weight of a larger project, ensuring your comfort throughout the knitting process.
Remember to always check the recommended needle size on your chosen yarn’s label to ensure the best results. By selecting the right yarn and needles for your loopy blanket, you’ll be on your way to creating a cozy and beautiful piece that you can cherish for years to come.
Basic Knitting Techniques: Cast On, Knit, and Purl
When starting a knitting project, it’s important to master a few basic techniques before diving into more complex patterns. Three fundamental techniques that every knitter should learn are cast on, knit, and purl.
Cast On: The cast on technique is the first step in starting a knitting project. It creates a foundation row of stitches on the knitting needle. There are several methods of casting on, including the long tail cast on and the knit cast on. The long tail cast on is a versatile method that creates a neat edge and allows for a stretchy foundation. The knit cast on is simpler and quicker, making it a great option for beginners.
Knit: The knit stitch is the most basic stitch in knitting. It creates a smooth fabric with rows of V-shaped stitches. To knit, insert the right-hand needle into the loop on the left-hand needle from left to right, wrap the yarn around the right-hand needle, and pull the loop through. Repeat this process for each stitch on the left-hand needle. Knitting can be done in two ways: English knitting, where the yarn is held in the right hand, and continental knitting, where the yarn is held in the left hand. Both methods produce the same result, so choose the one that feels more comfortable for you.
Purl: The purl stitch is the opposite of the knit stitch and creates a bumpy texture on the fabric. It is often used in combination with the knit stitch to create different patterns and designs. To purl, insert the right-hand needle into the loop on the left-hand needle from right to left, wrap the yarn around the right-hand needle, and pull the loop through. Repeat this process for each stitch on the left-hand needle. Like knitting, purling can be done in English or continental style.
These three basic knitting techniques lay the foundation for more advanced stitches and patterns. With practice, you’ll gain confidence in your knitting skills and be able to tackle more complex projects. Remember to start with small, simple projects to build your skills before moving on to more ambitious designs. Happy knitting!
Getting Started: Casting On for Your Loopy Blanket
Before you begin knitting your loopy blanket, you will need to cast on the stitches. Casting on is the process of creating the foundation row of stitches onto your knitting needle. In this pattern, you will be using a long-tail cast on method to ensure a neat and sturdy edge for your blanket.
To start, you will need your knitting needle and the yarn you have chosen for your project. Make a slip knot by creating a loop with the yarn, leaving a long tail. Slide the slip knot onto your knitting needle, and hold the needle with the slip knot in your right hand.
Step 1: To measure the amount of yarn you will need for your cast on, hold the needle with the slip knot in your right hand, and make a loose fist with your left hand. Wrap the yarn around your thumb and then over the back of your hand to your wrist. This will give you an estimate of the amount of yarn you need for each stitch.
Step 2: With your left hand, hold the tail end of the yarn against the palm of your hand, and use your thumb and forefinger to pinch the working end of the yarn. This is the end of the yarn connected to the ball.
- Hold the needle with the slip knot in your right hand, and position it below the thumb and forefinger of your left hand. The needle should be touching the palm of your hand.
- Using your right hand, bring the needle up and over the yarn held against your thumb, and then bring it under the yarn held against your forefinger. The needle should now be in a position to loop the yarn over and around its tip.
- Bring the needle over the yarn held against your thumb, and then under the yarn held against your forefinger. The yarn should now be looped around the needle.
- Repeat steps 3 and 4 until you have cast on the desired number of stitches for your loopy blanket. Make sure to keep an even tension on the yarn as you cast on to ensure that your stitches are not too tight or too loose.
Once you have cast on all the stitches, you are ready to start knitting the first row of your loopy blanket. Follow the instructions in the pattern to create the loops and continue knitting to complete your beautiful and cozy blanket.
The Knit Stitch: Creating the Foundation of Your Blanket
The knit stitch is the foundation of your loopy blanket and mastering this basic stitch is essential for creating a beautiful and cozy blanket. In this pattern, we will guide you through the steps of knitting the basic knit stitch and explain how it forms the basis of your blanket.
To begin, you will need to cast on the desired number of stitches for your blanket. This can vary depending on the size of the blanket you want to make. Once you have cast on, you are ready to start knitting.
Step 1: Inserting the needle
To knit a stitch, insert the right needle into the first stitch on the left needle from left to right. The right needle should go in front of the left needle.
Step 2: Wrapping the yarn
Hold the yarn in your right hand and bring it over the left needle from back to front, creating a yarn loop around the right needle.
Step 3: Pulling through

Using the right needle, pull the loop of yarn through the stitch on the left needle, bringing the right needle back to its original position and leaving the newly knitted stitch on the right needle.
Step 4: Sliding off the stitch
Slide the stitch from the left needle to the right needle, making sure to keep tension on the yarn to create a neat and even stitch.
Repeat these steps for each stitch across the row until you have completed the first row of knitting. Then, turn your work and repeat the process for each subsequent row.
The knit stitch forms the basis of your blanket and creates the smooth and textured look that makes it so cozy. Experiment with different yarns and needle sizes to achieve the desired thickness and texture for your loopy blanket. With practice, you will become more confident in your knitting skills and be able to create beautiful blankets to keep you warm and cozy.
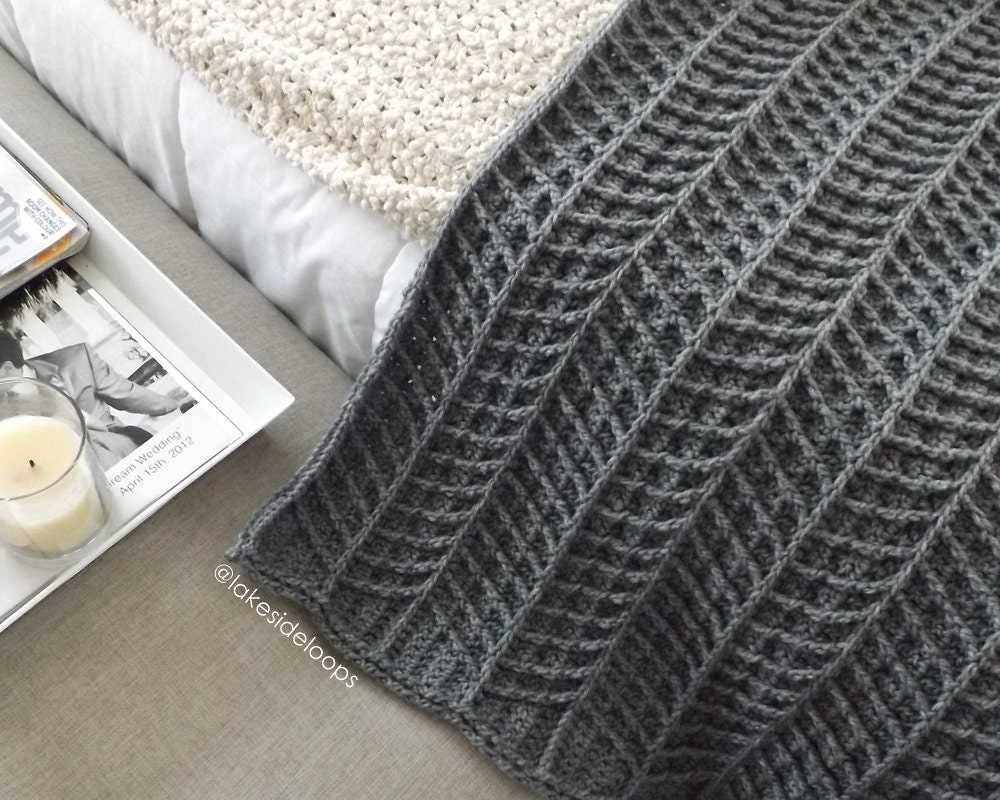
The Purl Stitch: Adding Texture to Your Loopy Blanket

The purl stitch is a fundamental knitting stitch that is commonly used to create texture and add visual interest to knitted projects. When incorporated into your loopy blanket pattern, the purl stitch can create a unique and eye-catching design.
The purl stitch is created by working the yarn in the opposite direction compared to the knit stitch. Instead of inserting the needle from front to back, you will insert it from back to front. This creates a loop on the front of the work, giving the stitch its distinctive appearance.
By alternating between knit and purl stitches in your loopy blanket pattern, you can create a variety of textured designs. For example, a simple rib stitch pattern alternating between knit and purl stitches can create a bumpy, ribbed texture. If you want a more intricate design, you can try incorporating different combinations of knit and purl stitches, such as seed stitch or moss stitch.
When using the purl stitch in your loopy blanket pattern, it’s important to consider the impact on the overall design. Purl stitches tend to create a visually recessed effect, making them great for creating patterns that stand out from the rest of the blanket. You can use purl stitches to create stripes, geometric shapes, or even intricate cable patterns.
In addition to adding texture and visual interest, the purl stitch can also affect the drape and feel of your loopy blanket. Purl stitches tend to create a denser fabric compared to knit stitches, which can result in a warmer and cozier blanket. Depending on the yarn and needle size you use, the purl stitch can also create a more pronounced texture, adding depth and dimension to your finished project.
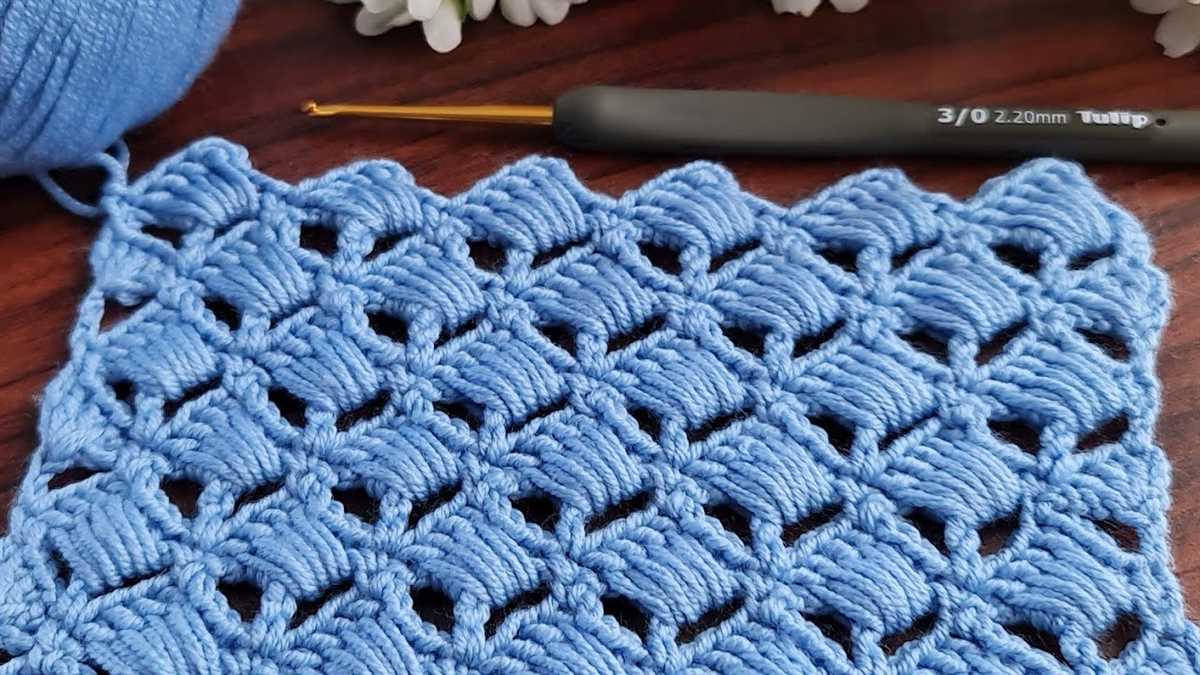
Creating the Loops: Introducing the Loop Stitch
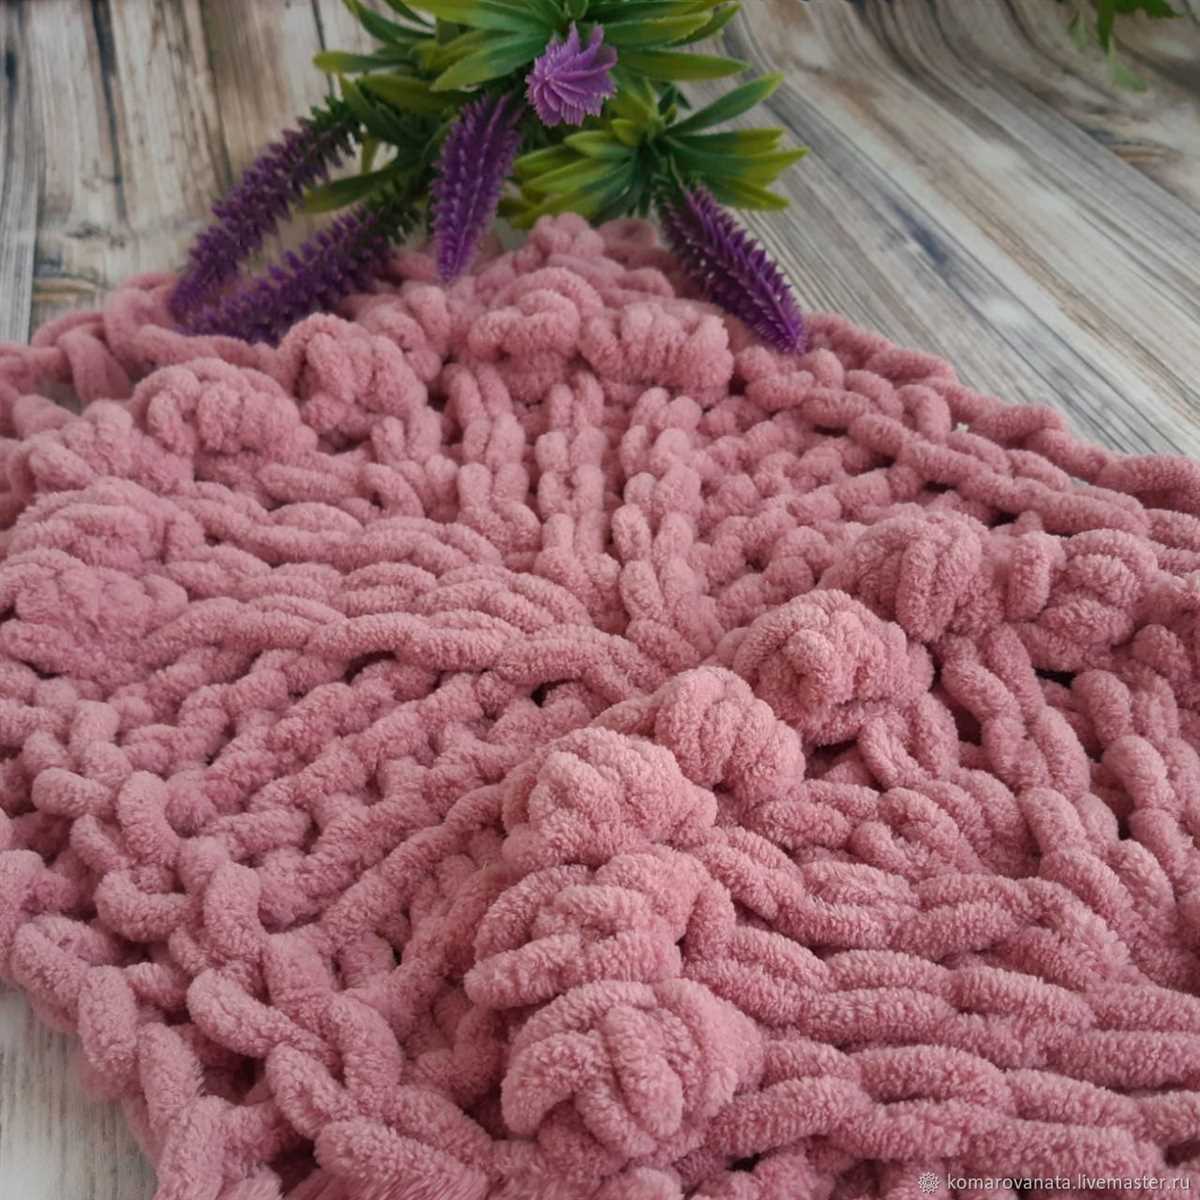
When it comes to knitting a loopy blanket, one of the key stitches you’ll need to master is the loop stitch. This stitch creates the signature loops that give the blanket its cozy and textured appearance. While it may look complicated, the loop stitch is actually quite simple to do once you get the hang of it. In this section, we’ll walk you through the steps of creating the loop stitch and offer some tips and tricks to help you along the way.
To start, you’ll need to have your knitting needles, yarn, and a basic knowledge of knitting stitches. Once you have your materials prepared, you can begin creating the loops. The loop stitch is typically worked on a base row of knit or purl stitches, depending on the desired effect. To create a loop stitch, you’ll insert your needle into the next stitch as if to knit or purl, but instead of pulling the yarn through to complete the stitch, you’ll hold the working yarn in front of the needle and bring it over the top of the needle, creating a loop. You then bring the working yarn back to the front of the work and continue to the next stitch.
Repeat this process across the row, creating loops in each stitch. When you reach the end of the row, you’ll turn your work and repeat the process on the next row, making sure to maintain the consistent loop pattern. As you work through the pattern, you’ll start to see the loops forming and the texture of the blanket taking shape.
Increasing and Decreasing Stitches: Shaping Your Blanket
When knitting a loopy blanket, it is important to know how to increase and decrease stitches in order to shape your blanket. Increasing stitches allows you to add width or length to your blanket, while decreasing stitches helps create curves and angles. These techniques are essential for creating a blanket with the desired shape and size.
To increase stitches, you can use the simple technique of yarn over (YO) or make one (M1). Yarn over involves wrapping the yarn around the needle to create an extra stitch. Make one involves picking up the loop between stitches and creating a new stitch. Both techniques are commonly used in knitting patterns and can be easily mastered with practice.
When it comes to decreasing stitches, there are several methods you can use. One common method is knitting or purling two stitches together (K2tog or P2tog), which combines two stitches into one. Another method is slip, slip, knit (SSK), which involves slipping two stitches individually and then knitting them together. These techniques are helpful for shaping your blanket and creating smooth edges and angles.
It is important to follow the pattern instructions carefully when increasing or decreasing stitches, as different patterns may require different techniques. Some patterns may also use more advanced methods, such as centered double decreases or double yarn overs, to create more complex shapes and textures in the blanket.
By understanding how to increase and decrease stitches, you can take control of the shape and size of your loopy blanket. Whether you want a rectangular blanket, a rounded shape, or any other design, these techniques will help you achieve the desired outcome. Experiment with different stitch patterns and shaping techniques to create a unique and beautiful blanket that is both stylish and cozy.
Increasing Stitches: Adding Width to Your Loopy Blanket
When knitting a loopy blanket, it is important to understand how to increase stitches in order to add width to your project. Increasing stitches allows you to make your blanket wider and create a cozy and snuggly masterpiece. Here are a few methods you can use to increase stitches in your loopy blanket:
-
Knit Front and Back (KFB): This is a common method used to increase stitches. To do the KFB increase, simply knit into the front and back of the same stitch. This creates an extra stitch and adds width to your blanket.
-
Make One (M1): The make one increase is another technique that can be used to add stitches. There are different variations of the M1 increase, such as M1L and M1R, which create a left-leaning or right-leaning increase respectively. These increases can be used strategically to create interesting patterns in your loopy blanket.
-
Cable Increase (C8F): If you want to add width to your loopy blanket while also incorporating a cable pattern, you can use the C8F increase. This involves cabling the previous 4 stitches to the front and then knitting the same 4 stitches through the back loop. This creates a cable twist and adds stitches to your project.
It is important to keep in mind the overall pattern and design of your loopy blanket when increasing stitches. You want to ensure that the increases are evenly distributed and do not disrupt the overall look of the blanket. By using these methods and incorporating them strategically, you can add width to your loopy blanket and create a beautiful and cozy finished product.
Decreasing Stitches: Narrowing Your Blanket
When knitting a loopy blanket, one of the techniques you may need to master is decreasing stitches. Decreasing stitches allows you to narrow your blanket and create a tapered effect. There are several methods for decreasing stitches, and choosing the right one for your project will depend on the desired outcome.
One common method for decreasing stitches is the knit two together (k2tog) stitch. This method involves knitting two stitches together as if they were one. To do this, insert your right needle into the next two stitches on the left needle, and then knit them together as you would knit a regular stitch. This will decrease the number of stitches on your needle by one.
Another method for decreasing stitches is the slip, slip, knit (ssk) stitch. This method creates a left slanting decrease and is often used to shape the edges of the blanket. To do this, slip the next two stitches, one at a time, from the left needle to the right needle as if to knit. Then insert the left needle into the front loops of the slipped stitches, and knit them together through the back loops.
- Decreasing stitches in a loopy blanket can be a bit more challenging than in a regular knitting project due to the nature of the loops. To decrease stitches in a loopy blanket, it can be helpful to first identify the loops that are being worked with. Then, use the chosen method of decreasing stitches to decrease the loops as desired.
- An alternative method for decreasing stitches in a loopy blanket is twisting the loops together. To do this, knit or purl the first loop as usual, and then insert the right needle into the second loop. Instead of knitting or purling the loop, twist it by turning it in the opposite direction as the first loop. Then, knit or purl the twisted loop together with the next loop as normal.
In conclusion, decreasing stitches is an important technique to master when creating a loopy blanket. By using methods such as k2tog, ssk, or twisting the loops together, you can effectively narrow your blanket and create a beautiful tapered effect. Experiment with different methods to find the one that works best for your project and enjoy the process of creating your own unique loopy blanket.
Finishing Touches: Binding Off and Blocking Your Loopy Blanket
After hours of knitting, your loopy blanket is finally taking shape. But before you can cuddle up with it, there are a few finishing touches you need to make. In this final step, we will guide you through binding off your stitches and blocking your blanket for the perfect finish.
Binding Off
To bind off your stitches, follow these simple steps:
- Knit the first 2 stitches as usual.
- Insert the left needle into the first stitch on the right needle and lift it over the second stitch and off the right needle.
- Knit the next stitch.
- Repeat steps 2 and 3 until you have one stitch left on the right needle.
- Cut the yarn, leaving a long tail, and pull it through the last stitch to secure it.
Binding off will give your blanket a neat and finished edge.
Blocking Your Blanket
Blocking is an important step to give your loopy blanket its final shape and texture. Follow these steps to block your blanket:
- Fill a sink or basin with lukewarm water and add a little bit of mild detergent.
- Submerge your blanket in the water, gently squeezing it to ensure it is fully soaked.
- Let the blanket sit in the water for about 15 minutes.
- Remove the blanket from the water and gently squeeze out the excess water. Do not wring or twist the blanket.
- Lay the blanket flat on a clean towel and press out any remaining water.
- Using rust-proof pins, secure the edges of the blanket to the desired measurements and shape on a blocking board or a clean, flat surface.
- Leave the blanket to dry completely, usually overnight.
- Once the blanket is dry, unpin it and give it a gentle shake to fluff up the loops.
Blocking will help even out any irregularities and enhance the overall appearance of your loopy blanket.
Congratulations on completing your loopy blanket! Now it’s ready to keep you warm and cozy during those chilly evenings. Remember, the binding off and blocking steps may vary depending on your knitting style and yarn choice, so always refer to the specific instructions provided with your pattern. Happy knitting!