
If you’re a knitting enthusiast, you know that circular needles are a versatile and efficient tool to create seamless hats. Unlike traditional straight needles, circular needles have a flexible cable that connects the two needle tips, allowing you to effortlessly knit in the round. This eliminates the need to seam or stitch pieces together, resulting in a professional-looking finished product.
One of the great advantages of knitting hats on circular needles is that they can be easily adjusted to fit any head size. With a wide variety of free knitted hat patterns available, you can create customized hats for adults, children, and even infants. From basic beanies to intricate designs, there’s a pattern out there to suit every skill level and personal style.
Whether you’re a beginner or an experienced knitter, finding free knitted hat patterns on circular needles can be a fantastic way to expand your knitting repertoire. With the popularity of knitting on the rise, many talented designers and knitting enthusiasts are generously sharing their patterns online for free. This means that you can find stunning and unique patterns without spending a dime, making it accessible for everyone to enjoy the art of knitting hats.
Free Knitted Hat Patterns on Circular Needles
Knitting hats on circular needles is a popular technique among knitters, as it allows for easy knitting in the round without the need for seams. There are many free knitted hat patterns available that utilize circular needles, allowing you to create beautiful and cozy hats for yourself or as gifts.
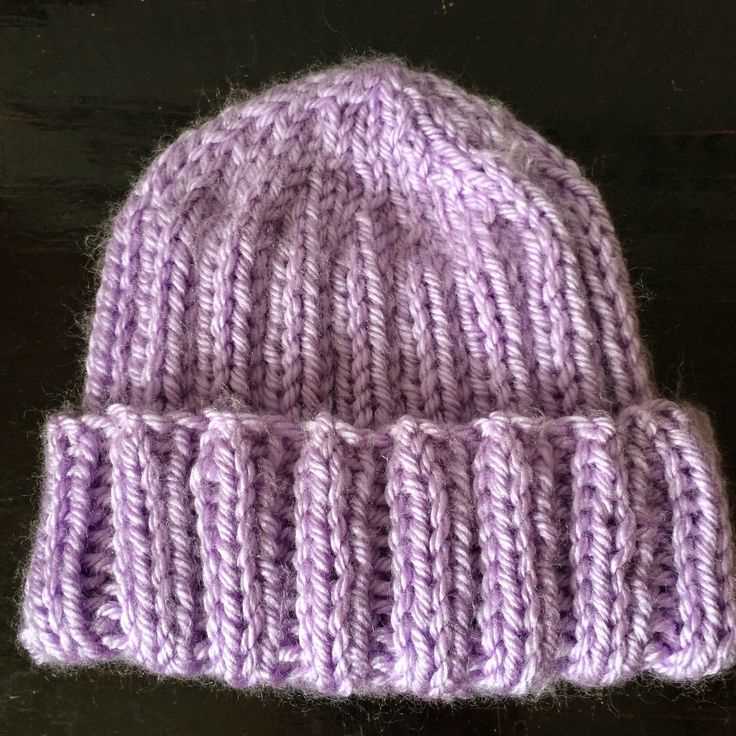
One such free knitted hat pattern is the “Classic Ribbed Hat”. This pattern features a simple ribbed design that is perfect for beginners. You can create this hat using circular needles and double-pointed needles for the crown shaping. The pattern provides instructions for different sizes, so you can make a hat that fits comfortably.
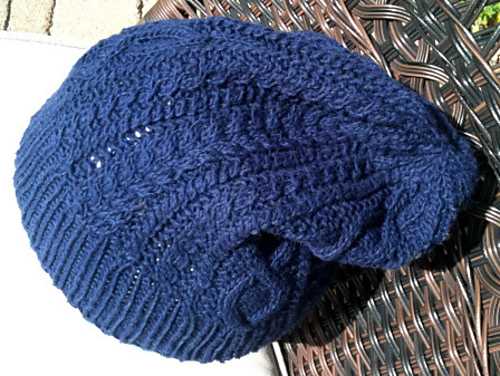
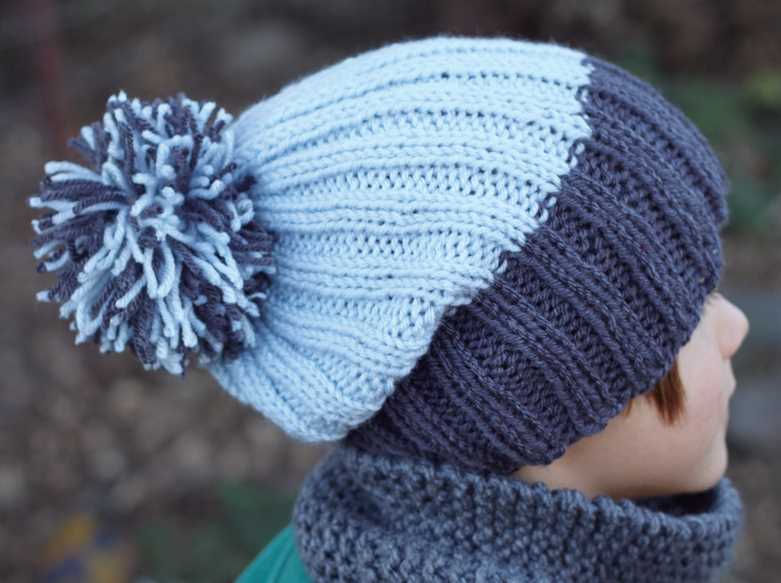
Another popular free knitted hat pattern on circular needles is the “Slouchy Beanie”. This pattern creates a relaxed and slouchy style hat that is both stylish and comfortable. With circular needles, you can easily knit in the round, creating a seamless hat. The pattern usually includes instructions for different sizes, allowing you to customize the fit.
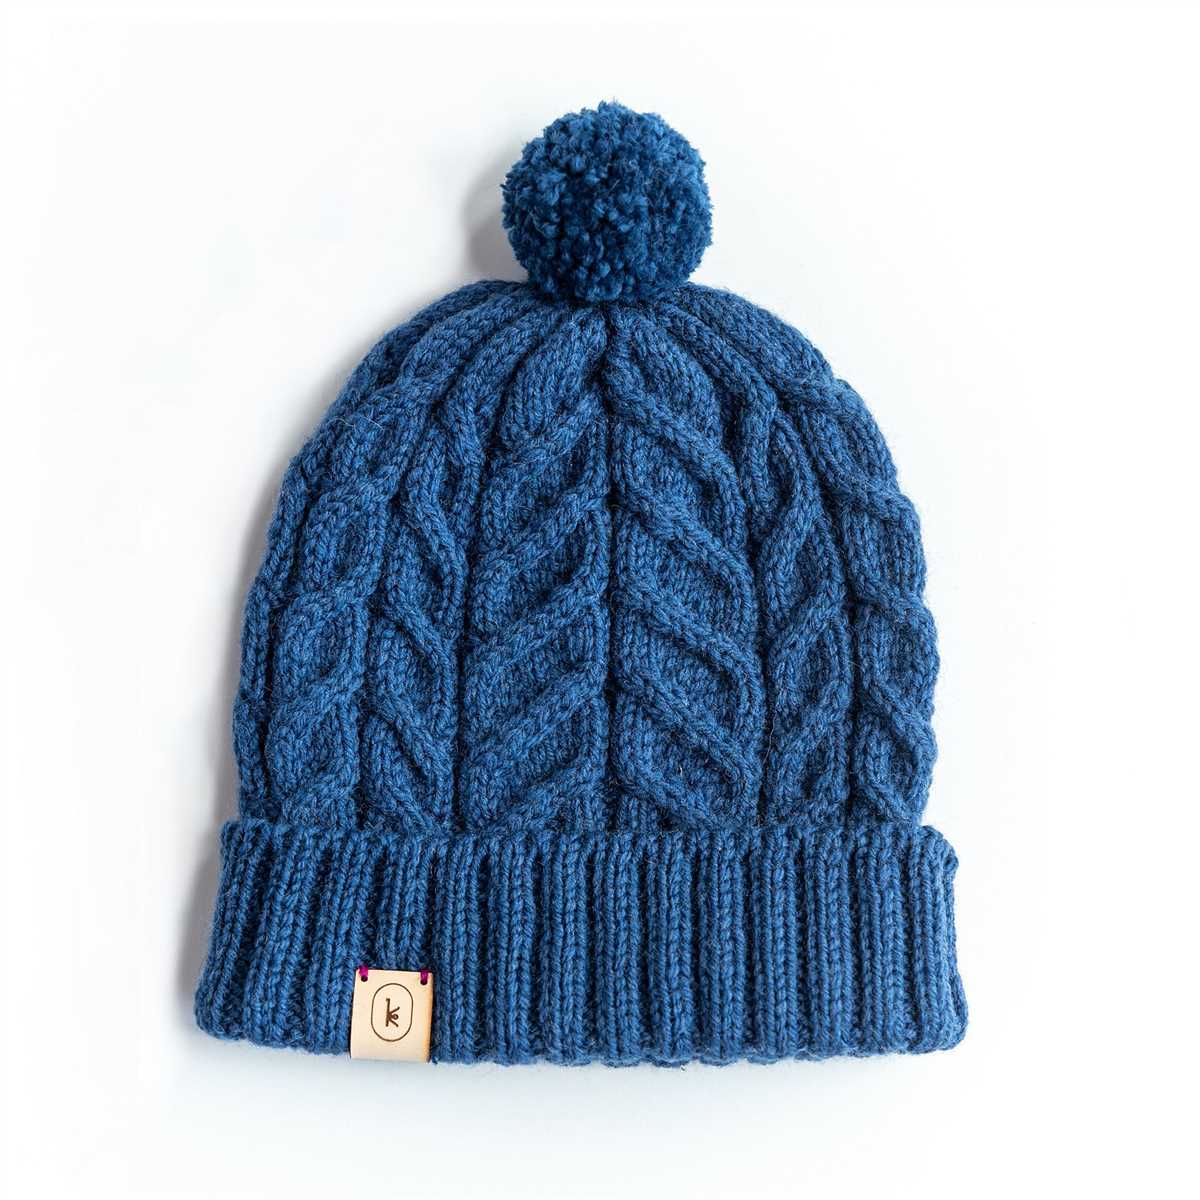
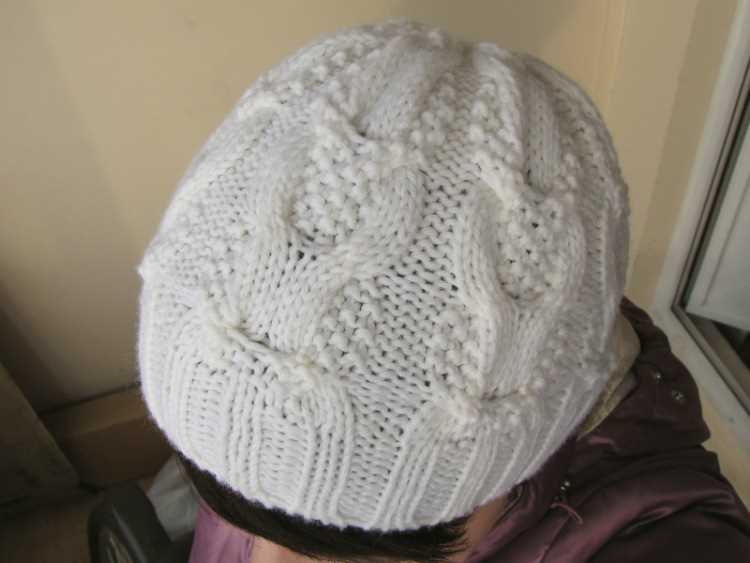
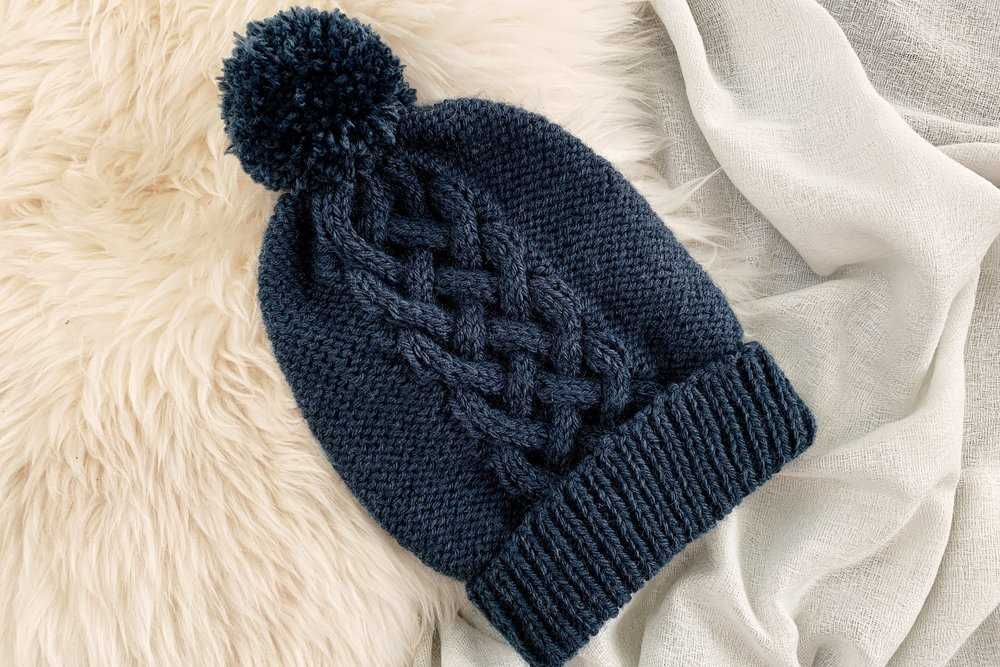
If you’re looking for a more intricate and detailed pattern, you can try the “Cable Knit Hat”. This pattern features a beautiful cable design that adds texture and visual interest to the hat. Using circular needles, you can easily knit the cables in the round, creating a seamless and professional-looking hat. The pattern usually includes instructions for different sizes and cable charts to guide you through the design.
In conclusion, there are many free knitted hat patterns available that utilize circular needles. Whether you’re a beginner or an experienced knitter, you can find a pattern that suits your skill level and style. So grab your circular needles and start knitting your next hat!
Why Choose Circular Needles?
When it comes to knitting hats, circular needles offer a number of advantages that make them a popular choice among knitters. Here are a few reasons why you might want to consider using circular needles for your next hat project:
- Versatility: With circular needles, you can knit both in the round and flat. This means that you can easily switch between different techniques and create various designs without having to invest in multiple sets of needles. Whether you prefer knitting hats in one piece or knitting them flat and seaming them later, circular needles can accommodate your needs.
- Comfort: Circular needles allow the weight of the knitting project to be distributed evenly across the needles, making it more comfortable to hold and manipulate compared to straight needles. Additionally, the flexible cable connecting the needles eliminates the need to constantly readjust the stitches, reducing hand and wrist strain.
- Portability: Circular needles are much more compact and easier to transport than straight needles. This makes them an ideal choice for knitting on the go or taking to knitting classes. Plus, there is no risk of losing a needle or having it slip out of your project!
- Seamless Results: When knitting a hat with circular needles, you can create a seamless finish without the need for a seam. This not only saves you time and effort but also provides a more polished and professional look to your finished hat. No one will be able to tell that the hat was not knit in one piece!
So, if you’re looking to knit a hat and want a versatile, comfortable, portable, and seamless knitting experience, circular needles are definitely worth considering. They offer a range of benefits that can enhance your knitting process and help you create beautiful hats with ease.
Getting Started: Selecting Yarn and Needles
When embarking on a knitting project, one of the first things to consider is the yarn. The type and weight of yarn you choose can greatly affect the final outcome of your knitted hat. For circular knitting projects, it is best to choose yarn that is specifically designed for use with circular needles. This type of yarn typically has a good amount of sponginess and stretch, which is important for creating a comfortable and well-fitting hat.
When selecting yarn for your project, pay attention to the recommended gauge and needle size on the yarn label. This information will help ensure that your hat turns out the right size and shape. If you deviate too much from the recommended gauge and needle size, you may end up with a hat that is too big or too small. It’s also a good idea to consider the fiber content of the yarn. Natural fibers like wool or alpaca can provide warmth and breathability, while synthetic fibers like acrylic can be more durable and easier to care for.
Needles are another important consideration when starting a knitting project. Circular needles are recommended for knitting hats in the round because they allow you to easily join the stitches and knit continuously without having to switch to double-pointed needles. When selecting circular needles, choose a length that is suitable for the circumference of your hat. A 16-inch circular needle is commonly used for adult-sized hats, while shorter needles may be used for smaller sizes or children’s hats.
It’s also important to consider the material of the needles. Metal needles can provide more glide, making them easier to work with, while bamboo or wooden needles can provide more grip, which can be helpful when working with slippery yarns. Experimenting with different needle materials can help you find your preferred knitting experience.
In summary, when getting started with a knitted hat project on circular needles, carefully consider the yarn and needles you will be using. Select yarn that is suitable for circular knitting, paying attention to gauge, needle size, and fiber content. Choose circular needles of the appropriate length and material for your project. Taking these factors into account will help set you up for success in creating a beautiful and well-fitting knitted hat.
Tips for Knitting with Circular Needles
Knitting with circular needles can be a bit intimidating if you’re used to using straight needles. However, once you get the hang of it, you may find that knitting with circular needles is actually quite enjoyable and versatile. Here are some tips to help you get started:
1. Choose the right length
When selecting circular needles, it’s important to choose the right length for your project. If you’re knitting a small hat, for example, you’ll want to use a shorter circular needle, such as a 16-inch length. For larger projects, like a sweater, a longer circular needle, such as a 32-inch or 40-inch length, may be more appropriate. Make sure to check your knitting pattern for any specific needle length recommendations.
2. Joining in the round
When starting a project in the round, you’ll need to join your work to form a circle. To do this, simply hold your circular needles parallel to each other, with the working yarn attached to the back needle. Knit the first stitch with the working yarn, being careful not to twist your stitches. Once you’ve joined your work, you can continue knitting in the round.
3. Managing your stitches
As you knit with circular needles, you’ll need to be conscious of how you manage your stitches. Make sure your work is not twisted when you join in the round, as this will result in a twisted project. When working in the round, you may find it helpful to use stitch markers to help you keep track of the beginning of each round.
4. Magic loop method
If you don’t have the appropriate circular needle length for your project, you can use the magic loop method to knit smaller circumferences. To do this, simply slide the stitches to the middle of the needle and pull out the excess cable from the other end. This allows you to work on one half of the stitches at a time, creating a “magic loop” effect.
5. Practice and experiment
Like any knitting technique, knitting with circular needles takes practice to master. Don’t be afraid to experiment with different needle sizes, yarns, and projects to find what works best for you. As you gain more experience, you may even discover new techniques and patterns that you enjoy. Above all, have fun with your knitting and enjoy the process!
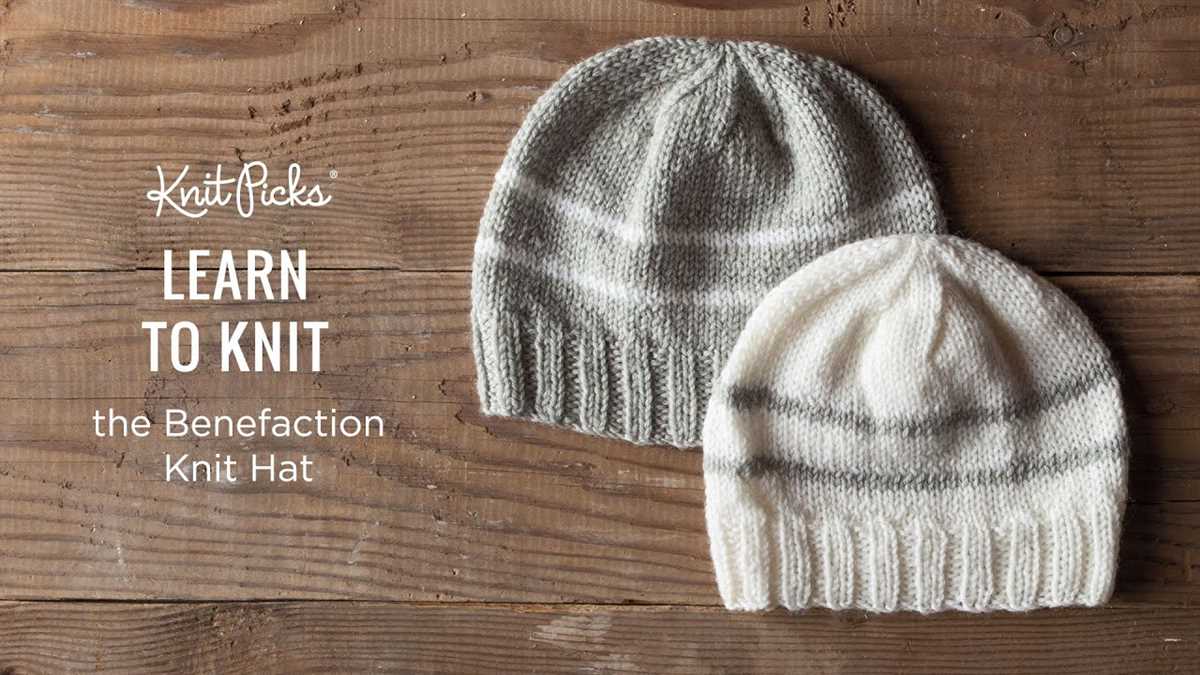
Basic Knitted Hat Pattern
If you’re looking for a simple and versatile hat pattern, this basic knitted hat pattern is a great option. With just a few materials and basic knitting skills, you can create a cozy and stylish hat for yourself or someone else.
Materials:
- Worsted weight yarn
- Size 8 circular needles
- Set of size 8 double-pointed needles
- Tapestry needle
- Stitch marker
Instructions:
- Using the circular needles, cast on 80 stitches.
- Place the stitch marker to mark the beginning of the round.
- Join the round in a circle, being careful not to twist the stitches.
- Knit in the round for approximately 2 inches.
- Switch to the double-pointed needles when the hat becomes too small for the circular needles.
- Continue knitting in the round until the hat measures approximately 7 inches from the cast on edge.
- Decrease stitches by dividing the stitches evenly onto 3 double-pointed needles.
- Knit 2 stitches together at the beginning of each needle.
- Repeat the decrease round every other round until only a few stitches remain.
- Using the tapestry needle, thread the remaining stitches onto the needle and pull tight to close the top of the hat.
- Weave in any loose ends and your basic knitted hat is complete!
This basic knitted hat pattern is a great starting point for beginners and can easily be customized with different yarns or stitch patterns. Whether you’re looking for a quick and easy project or want to experiment with new knitting techniques, this hat pattern is a versatile option. Happy knitting!
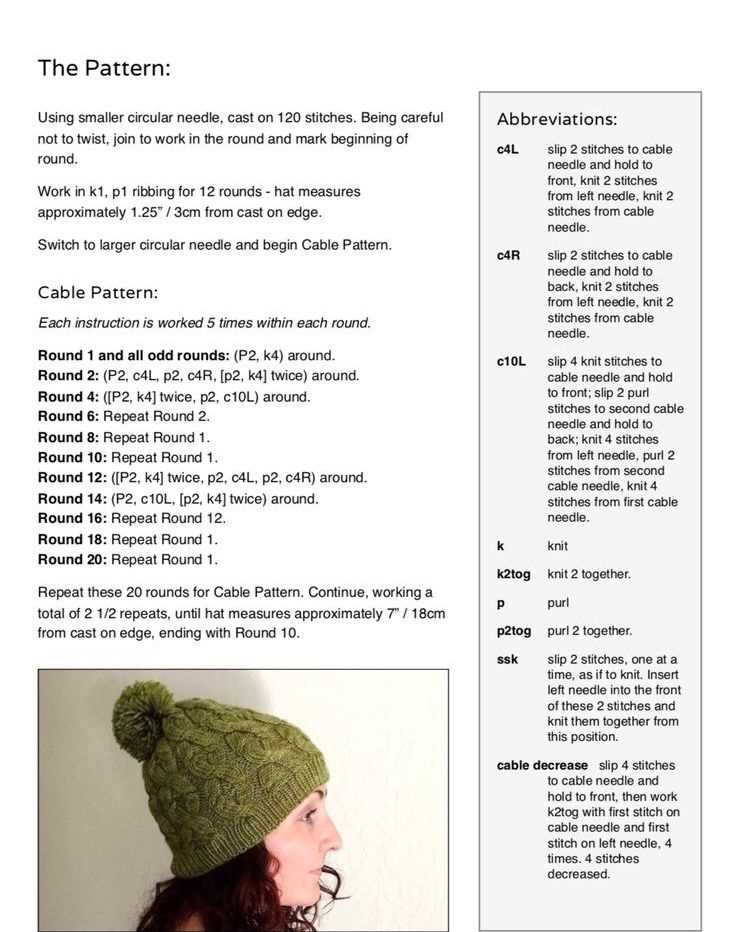
Classic Cabled Hat Pattern
Description:
This classic cabled hat pattern is perfect for knitters looking to create a timeless and stylish accessory. The pattern features intricate cable stitches that add texture and visual interest to the hat. It is knitted on circular needles, making it a great project for knitters who are comfortable with this technique.
Materials:
- Worsted weight yarn
- Circular knitting needles size 8 (5mm)
- Cable needle
- Tapestry needle
Instructions:
- Cast on 96 stitches using the long-tail cast on method.
- Join the round, being careful not to twist the stitches.
- Knit 2, purl 2 ribbing for 2 inches.
- Begin working the cable pattern:
- Repeat rows 1-6 of the cable pattern until the hat measures approximately 8 inches from the cast on edge.
- Begin the decrease rounds:
| Row 1: | Purl all stitches. |
| Row 2: | Knit all stitches. |
| Row 3: | Purl all stitches. |
| Row 4: | *C2F, C2B; repeat from * to end of round. |
| Row 5: | Purl all stitches. |
| Row 6: | Knit all stitches. |
- Round 1: *K2, k2tog; repeat from * to end of round.
- Round 2: Knit all stitches.
- Round 3: *K1, k2tog; repeat from * to end of round.
- Round 4: Knit all stitches.
- Round 5: *K2tog; repeat from * to end of round.
- Round 6: Knit all stitches.
Notes:
This pattern is suitable for intermediate knitters who have experience working with circular needles and cable stitches. The finished hat will fit an average adult head size.
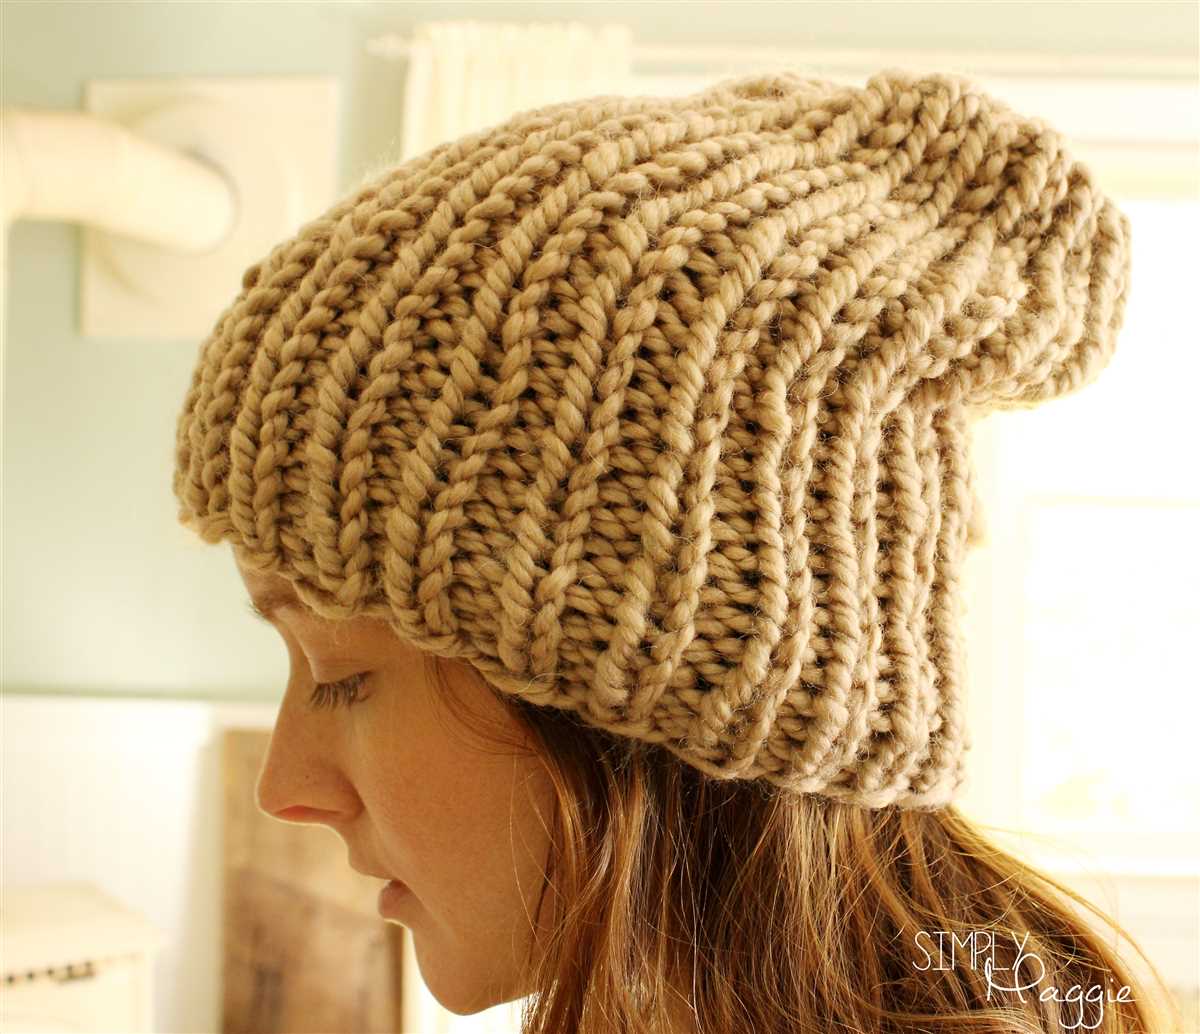
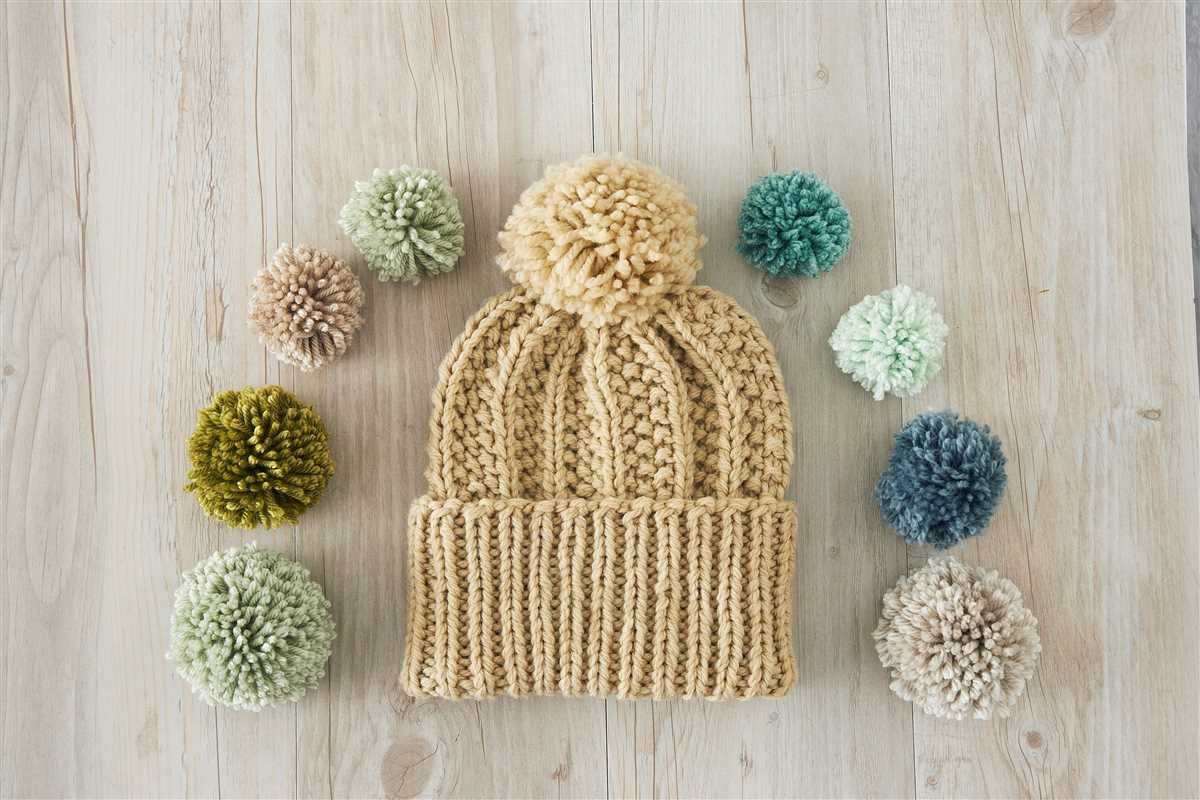
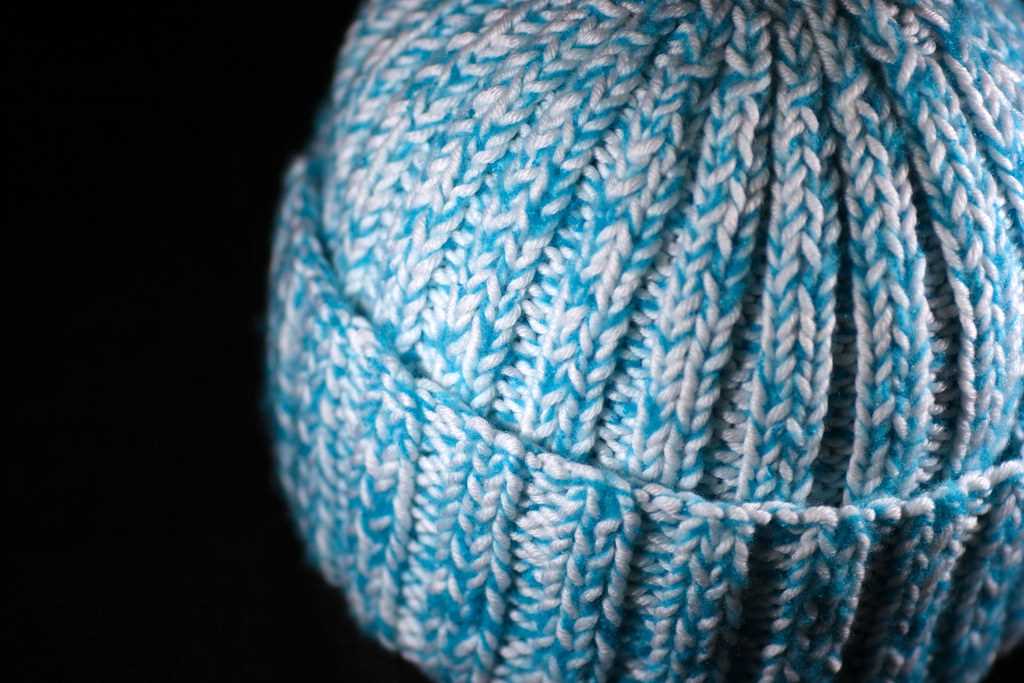
Chunky Ribbed Hat Pattern
Stay warm and stylish with this chunky ribbed hat pattern. This pattern is perfect for those chilly winter days when you need a hat that is both cozy and fashionable. The ribbed design adds a nice texture and ensures a snug fit. Plus, it’s knit with chunky yarn, so you’ll have a finished hat in no time!
To get started, gather your materials. You’ll need circular needles in a size suitable for chunky yarn, as well as a set of double-pointed needles for the crown shaping. Choose a chunky yarn in your favorite color, and don’t forget to grab a stitch marker to help keep track of your rounds.
To begin the pattern, cast on the required number of stitches using the circular needles. Make sure to join in the round, placing the stitch marker to mark the beginning of the round. Next, work the ribbed pattern, alternating knit and purl stitches, for the desired length of the hat. The ribbed pattern not only adds a stylish detail, but also creates a stretchy fabric that will ensure a comfortable fit.
Once you reach the desired length, it’s time to shape the crown. Switch to the double-pointed needles when necessary, following the pattern instructions for decreasing stitches. This will create a tapered top that will fit snugly on your head. Continue decreasing until you have only a few stitches left, then cinch the top closed and weave in any loose ends.
This chunky ribbed hat pattern is versatile and can be customized to fit your personal style. Add a pompom or a fun embellishment to the top, or knit it in multiple colors for a unique look. Whether you’re hitting the slopes or just running errands, this hat will keep you warm and fashionable all winter long!
Colorful Striped Hat Pattern
If you’re looking for a fun and vibrant hat pattern to add some color to your winter wardrobe, look no further than this colorful striped hat pattern. With its simple design and use of multiple colors, this hat is sure to stand out in a crowd.
To create this hat, you’ll need circular needles and a selection of yarn in different colors. Start by casting on your stitches using your desired color for the brim. You can choose to make the brim a solid color or use a contrasting color to make it pop.
Once you’ve completed the brim, it’s time to start knitting the body of the hat in stripes. You can choose as many colors as you like and alternate between them to create a bold and eye-catching pattern. Whether you want to use bright and vibrant colors or soft pastels, the choice is yours.
To create the stripes, simply knit each round in a new color, carrying the unused yarn up the inside of the hat. This will help prevent tangling and minimize the number of ends you’ll need to weave in when you’re finished.
Continue knitting in stripes until you’ve reached your desired length for the hat. You can choose to make it slouchy or snug, depending on your personal preference. Finally, bind off your stitches and weave in any remaining ends.
With its colorful and playful design, this striped hat is a great project for knitters of all skill levels. Whether you’re a beginner looking for a new challenge or an experienced knitter looking for a fun and quick project, this hat is sure to keep you warm and stylish all winter long. So grab your circular needles and get knitting!
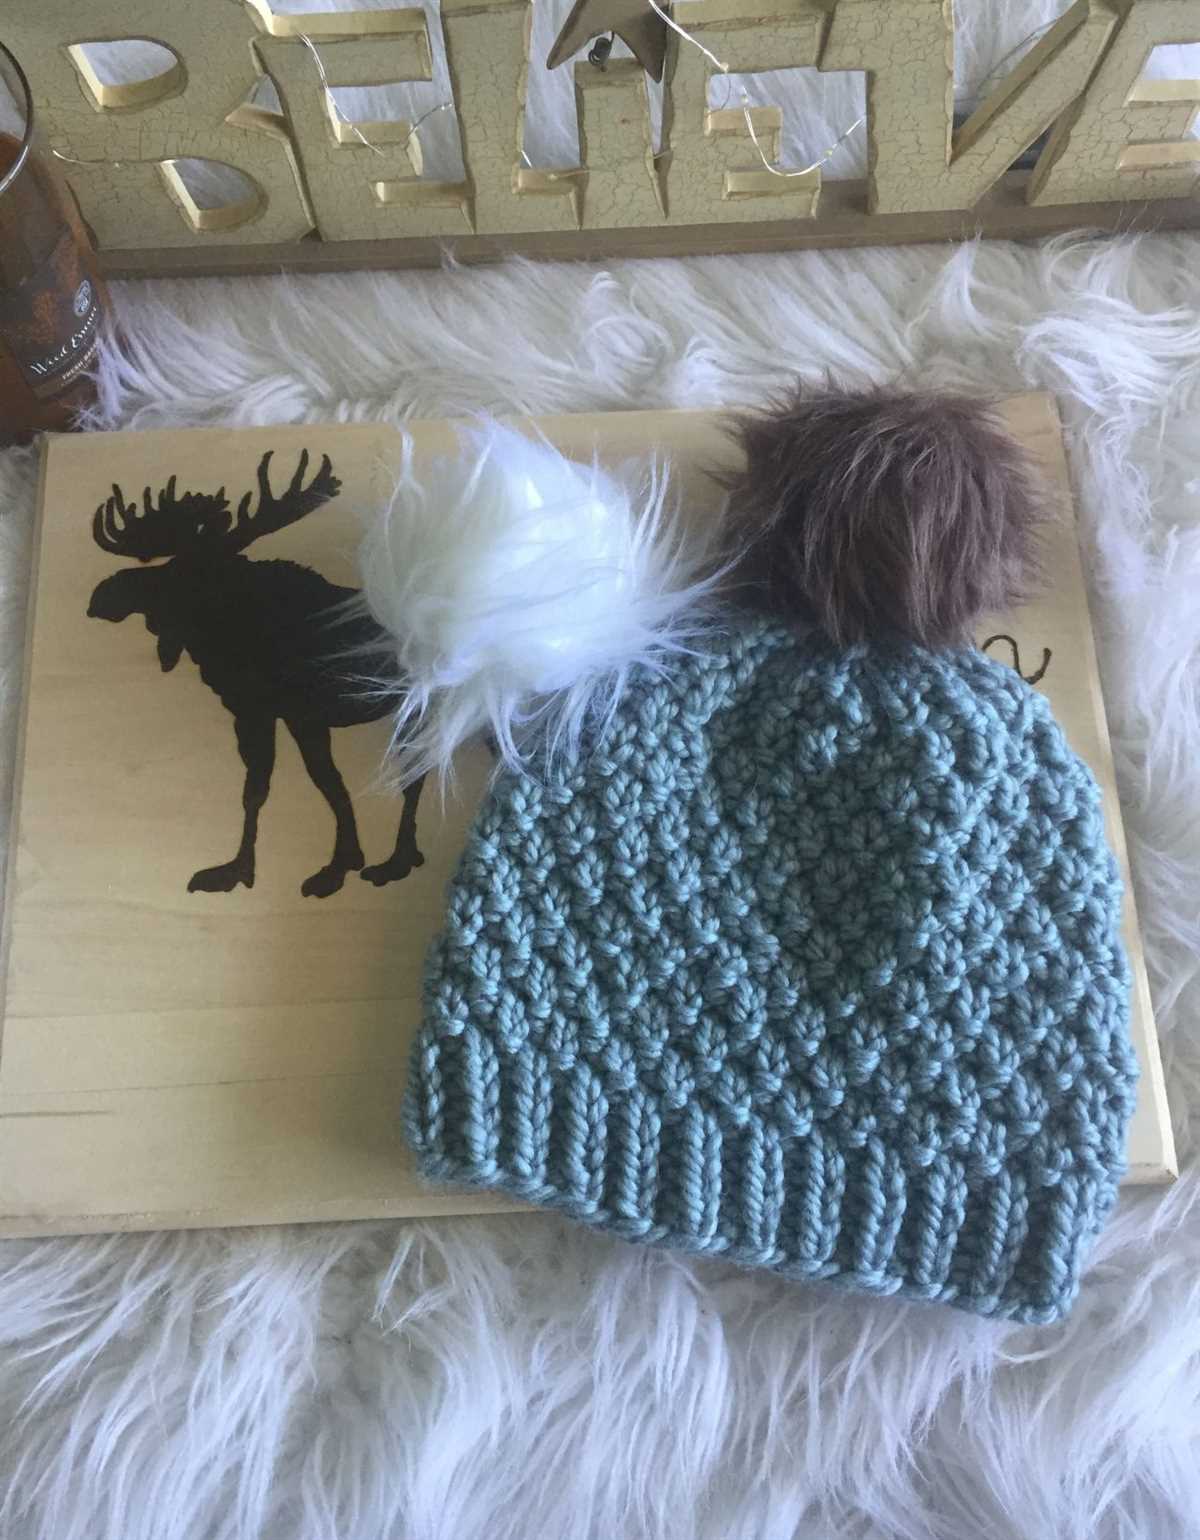
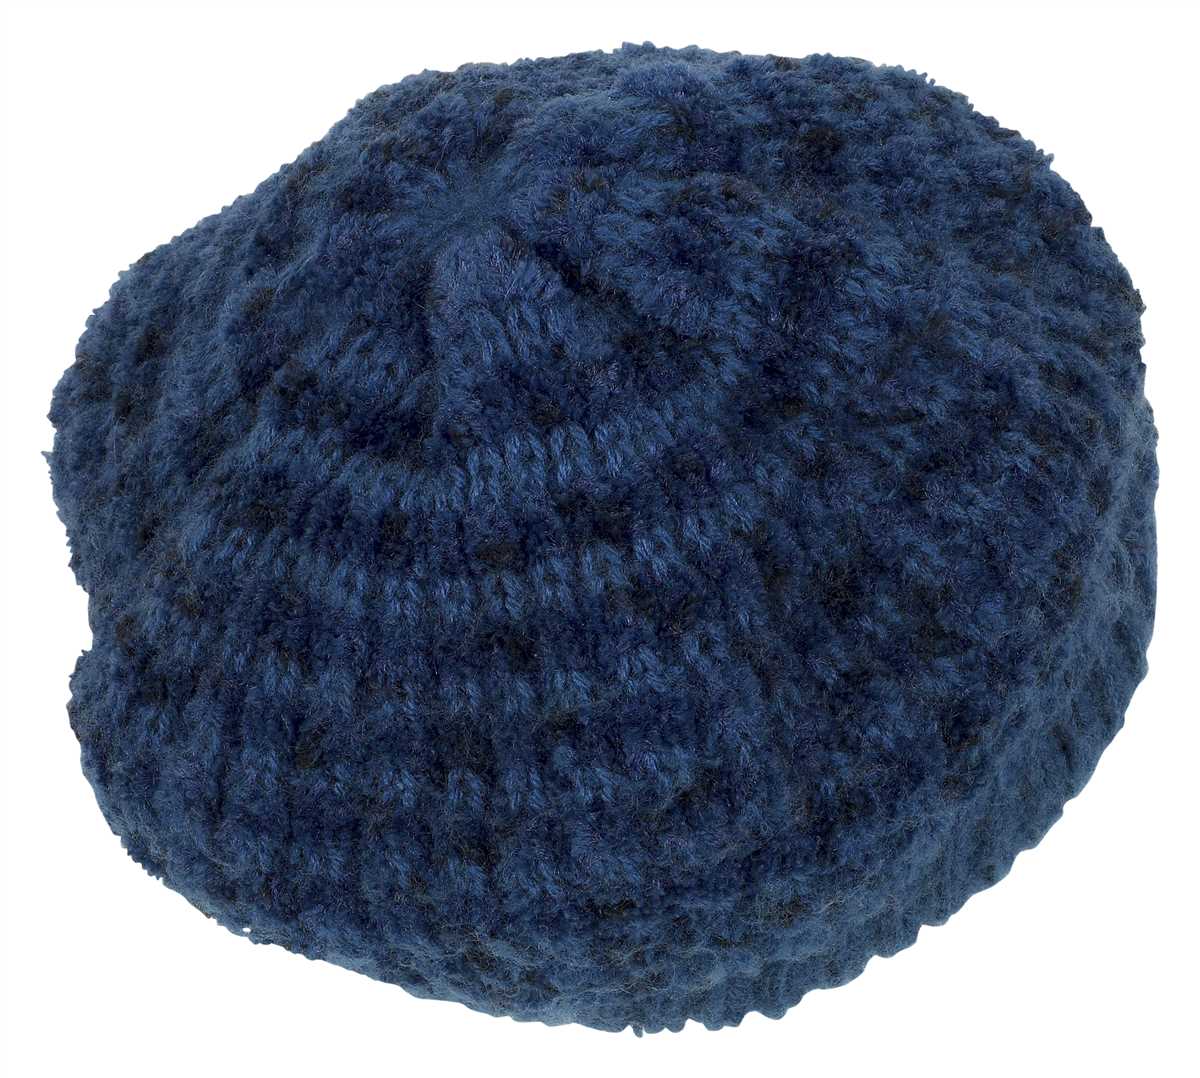
Textured Seed Stitch Hat Pattern
If you’re looking for a simple yet stylish hat pattern that will keep you warm in the colder months, the Textured Seed Stitch Hat Pattern is perfect for you. This pattern uses circular needles to create a seamless and cozy hat that features a beautiful seed stitch design. Whether you’re a beginner or an experienced knitter, this pattern is suitable for all skill levels.
To get started, you will need the following materials: circular knitting needles, a tapestry needle, and your choice of yarn. The pattern calls for a medium weight yarn, but you can experiment with different yarn weights to achieve different textures and styles. You will also need to know how to cast on stitches, knit, purl, and bind off.
The Textured Seed Stitch Hat Pattern begins with a ribbed brim that helps to create a snug fit. The brim is created using a combination of knit and purl stitches in a repeated pattern. Once you have completed the brim, you will move on to the body of the hat, which features the seed stitch pattern. The seed stitch is created by alternating knit and purl stitches, giving the hat a lovely textured appearance.
This pattern is perfect for making personalized gifts or adding to your own hat collection. You can customize the size of the hat by adjusting the number of stitches and the length of the brim. With its timeless design and cozy texture, the Textured Seed Stitch Hat is sure to become your go-to accessory for staying warm and stylish this winter.
Free Lace Stitch Hat Pattern
If you’re looking for a beautiful and intricate hat pattern, look no further than this free lace stitch hat pattern. Knitted on circular needles, this pattern is both stylish and cozy. The lace stitch design adds an elegant touch to any outfit, making it perfect for both casual and formal occasions.
Materials:
- Size 8 circular needles
- DK weight yarn
- Tapestry needle
Pattern:
Round 1: Cast on 100 stitches using the long tail cast on method.
Round 2-6: Knit all stitches.
Round 7: *Knit 2 together, yarn over. Repeat from * to end.
Round 8-12: Knit all stitches.
Round 13: *Yarn over, knit 2 stitches together. Repeat from * to end.
Repeat rounds 7-13 three more times, then repeat rounds 7-11 once more.
Decrease rounds:
- Knit 2 together across the round.
- Knit 2 together across the round.
Cut the yarn, leaving a long tail. Thread the tail through the tapestry needle and pass it through the remaining stitches. Pull tight to close the top of the hat.
To finish, weave in any loose ends and block the hat to shape. The lace stitch pattern will open up and the hat will stretch slightly to fit comfortably on your head. Enjoy your new lace stitch hat!
Slouchy Hat Pattern
Are you looking for a stylish and comfortable hat to keep you warm during the colder months? Look no further than this slouchy hat pattern! With its relaxed and slightly oversized fit, this hat is perfect for those who want a casual yet fashionable look.
This pattern is designed to be knit on circular needles, which make the process much easier and more efficient. Circular needles allow you to knit in the round, eliminating the need for seams and creating a seamless and smooth finish.
Materials:
- Medium-weight yarn
- Circular knitting needles in the appropriate size (usually around 16 inches)
- Double-pointed knitting needles for the crown shaping (optional, but recommended)
- Stitch markers
- Tapestry needle
Instructions:
- Cast on the desired number of stitches onto your circular knitting needles.
- Join the round, being careful not to twist the stitches.
- Knit in the round in the desired stitch pattern until the hat reaches your desired length, typically around 10-12 inches.
- Begin crown shaping by decreasing stitches evenly across each round. This can be done by knitting two stitches together, or using any other decrease method you prefer.
- Continue decreasing until you have a small enough number of stitches to comfortably fit onto your double-pointed needles (if using).
- Transfer the remaining stitches onto the double-pointed needles and continue decreasing until you have only a few stitches left.
- Cut the yarn, leaving a tail long enough to weave in later.
- Thread the tapestry needle with the yarn tail and slip the needle through the remaining stitches, removing them from the knitting needle.
- Pull tight to close the top of the hat and secure the yarn tail by weaving it in.
- Finish off any remaining loose ends and enjoy your new slouchy hat!
With this slouchy hat pattern, you can create a trendy and comfortable accessory that will keep you warm all winter long. Experiment with different yarn colors and stitch patterns to personalize your hat and make it truly unique.
Customizing Your Hat: Embellishments and Finishing Touches
Once you have finished knitting your hat on circular needles and completing the necessary decreases for shaping, it’s time to add some personal touches to make it unique. Embellishments and finishing touches can bring your hat to life and showcase your individual style. Here are some ideas to consider:
1. Pom Poms
Add a playful and whimsical touch to your hat with a pom pom. You can use a pom pom maker or make one by hand using yarn. Experiment with different sizes and colors to find the perfect pom pom for your hat.
2. Tassels
Add some movement and flair to your hat by attaching tassels to the crown or the ends of the earflaps. Tassels can be made using yarn or other decorative materials, such as ribbons or beads.
3. Buttons
Buttons can serve both a functional and decorative purpose. You can add a row of buttons along the brim or use them as a closure for earflaps. Choose buttons that complement the color and style of your hat.
4. Embroidery
Embroidery can add intricate designs and patterns to your hat. You can use embroidery thread or yarn to create flowers, animals, or any other design you fancy. Embroidery can be done directly onto the hat or on patches that are then sewn on.
5. Appliques
Appliques are decorative motifs or patches that can be sewn onto your hat. They can be made from fabric, felt, or yarn. Consider adding appliques in the shape of flowers, animals, or geometric designs to personalize your hat.
6. Ribbons or Braids

Add a feminine and delicate touch to your hat with ribbons or braids. You can weave ribbons through eyelets or attach a braid along the edge of the brim. Coordinate the colors of the ribbons or braids with the yarn used for the hat for a cohesive look.
In conclusion, customizing your knitted hat with embellishments and finishing touches allows you to make it truly your own. Whether you prefer a playful pom pom, intricate embroidery, or delicate ribbons, there are countless options to choose from. Get creative and have fun personalizing your hat to reflect your unique style and personality.