
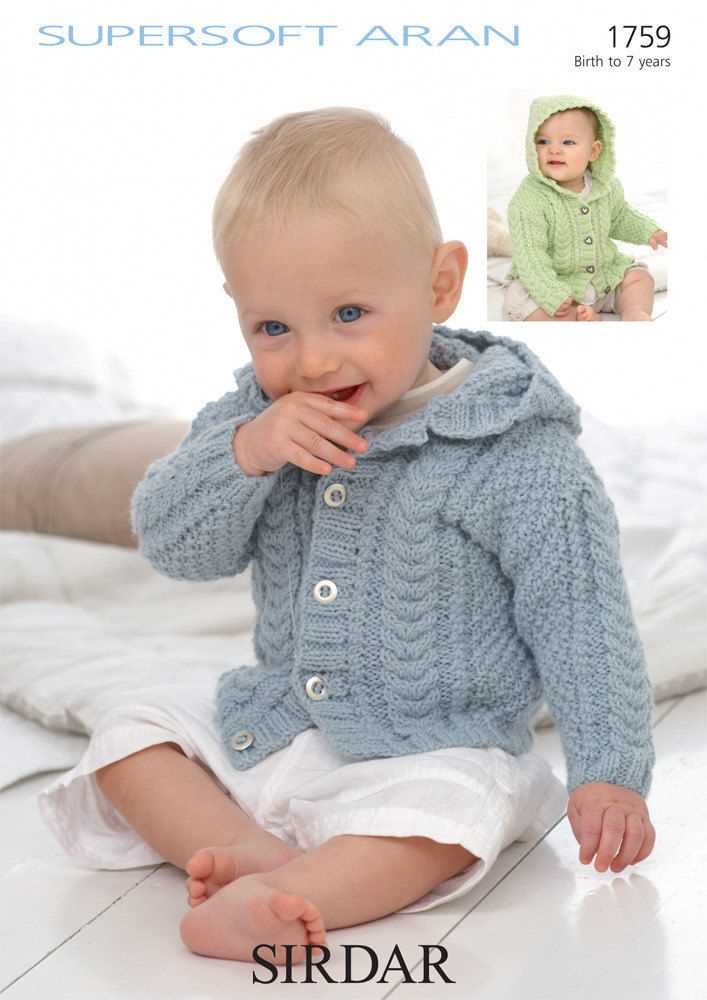
Knitting is a timeless craft that can be enjoyed by people of all ages. One popular project for knitters is making garments, such as a child’s hooded jacket. Knitting a jacket for a child not only allows you to customize it to their style and color preferences but also provides a warm and cozy outerwear option for cooler weather.
When it comes to knitting a child’s hooded jacket, there are numerous patterns available, each with its unique design and level of complexity. Whether you’re a beginner or an experienced knitter, there is a pattern that will suit your skill level and desired style.
Knitting a jacket for a child also allows you to create a personalized gift that can be cherished for years to come. You can choose soft and warm yarn that will be gentle on a child’s sensitive skin and select buttons or zippers that are easy for little fingers to manipulate.
In this article, we will explore different child’s hooded jacket knitting patterns, including options for various sizes and skill levels. We will also provide tips and techniques to help you successfully complete your project and create a beautiful and functional garment for a child.
Child’s Hooded Jacket Knitting Pattern
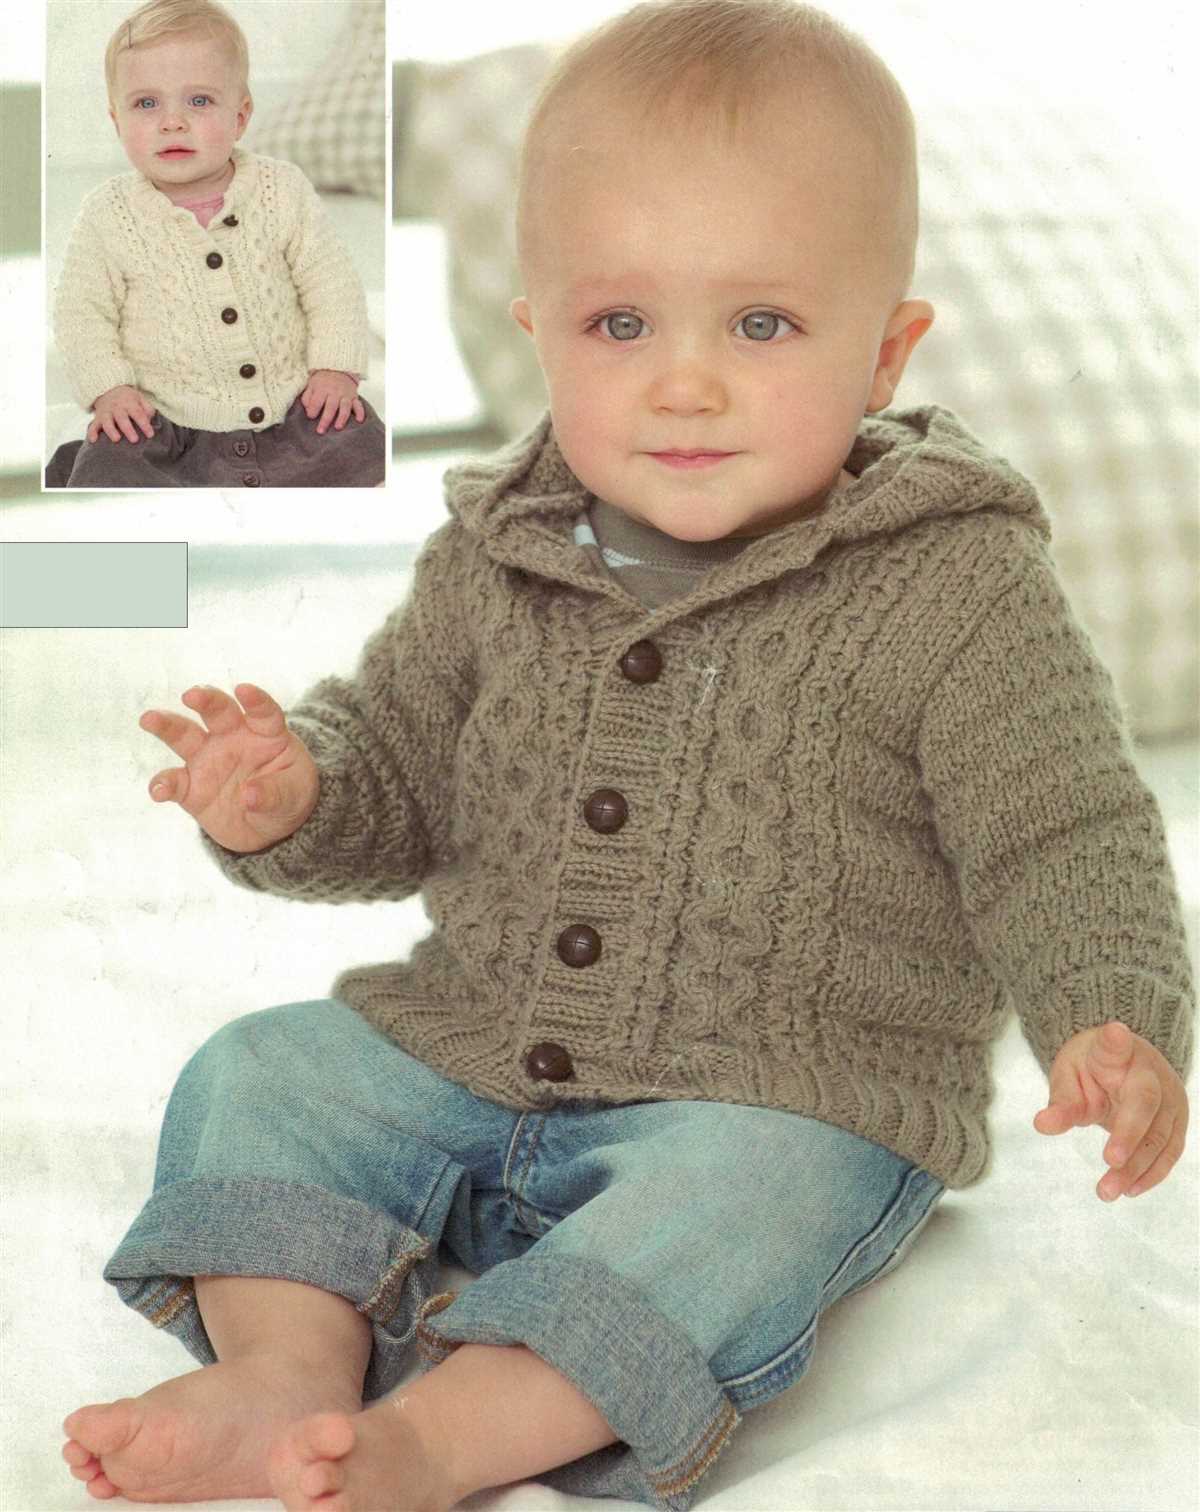
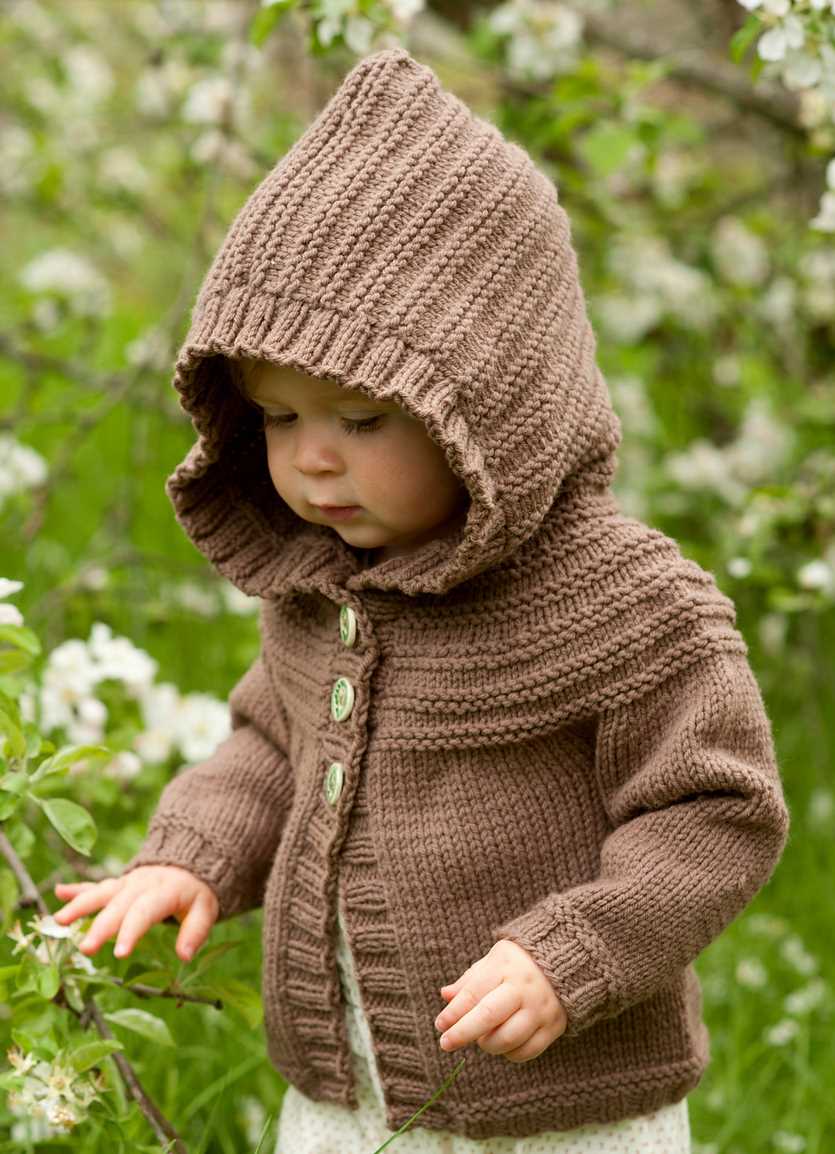
If you’re looking for a fun and cozy knitting project for your little one, look no further than this Child’s Hooded Jacket knitting pattern. This pattern is perfect for beginners and experienced knitters alike. With its simple yet stylish design, your child will love wearing this jacket all year round.
Materials Needed:
- Worsted weight yarn
- Circular knitting needles
- Double-pointed knitting needles
- Stitch markers
- Yarn needle
- Buttons
Pattern Instructions:
- Start by casting on the required number of stitches, following the size chart provided in the pattern.
- Work in a rib stitch pattern for the collar and cuffs.
- Switch to stockinette stitch for the body of the jacket.
- When you reach the desired length, separate the sleeves and body by placing stitch markers.
- Knit the sleeves in the round, decreasing stitches as necessary to shape the armholes.
- Continue knitting the body until you reach the bottom hem.
- Finish off the edges with a rib stitch pattern.
- Add buttonholes and sew on buttons for closure.
- Weave in any loose ends and give the jacket a good blocking to ensure it maintains its shape.
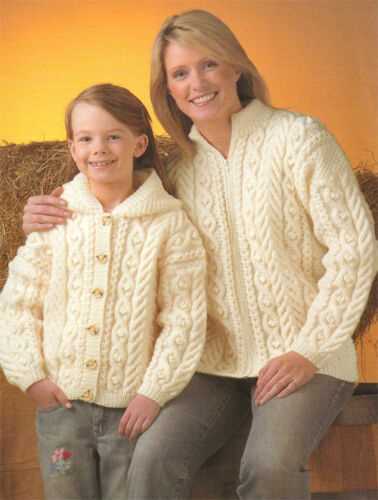
This child’s hooded jacket knitting pattern is a versatile and customizable project. You can experiment with different colors, yarn types, and stitch patterns to create a unique jacket for your little one. Whether you’re knitting for a baby, toddler, or older child, this pattern can be easily adjusted to the desired size. Happy knitting!
Overview of child’s hooded jacket knitting pattern
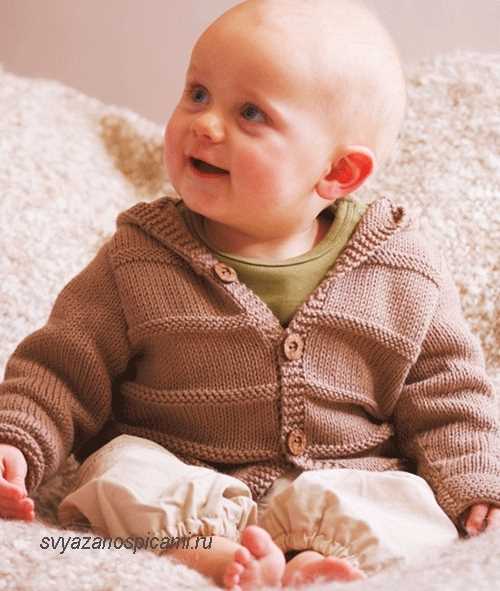
Knitting a child’s hooded jacket is a great project for those who enjoy knitting and want to create a warm and cozy garment for a little one. This pattern provides a detailed guide on how to create a comfortable and stylish jacket that will keep your child warm during the colder months.
The pattern begins with instructions on selecting the right yarn and knitting needles for the project. It then outlines the necessary gauge to ensure that the jacket fits properly. Additionally, the pattern provides guidance on how to measure the child to determine the appropriate size to knit.
The construction of the jacket is broken down into several sections:
- The body: The pattern provides detailed instructions on how to knit the main body of the jacket, including shaping and decreases to create a flattering fit.
- The sleeves: Instructions are given on how to knit the sleeves separately and then attach them to the body of the jacket.
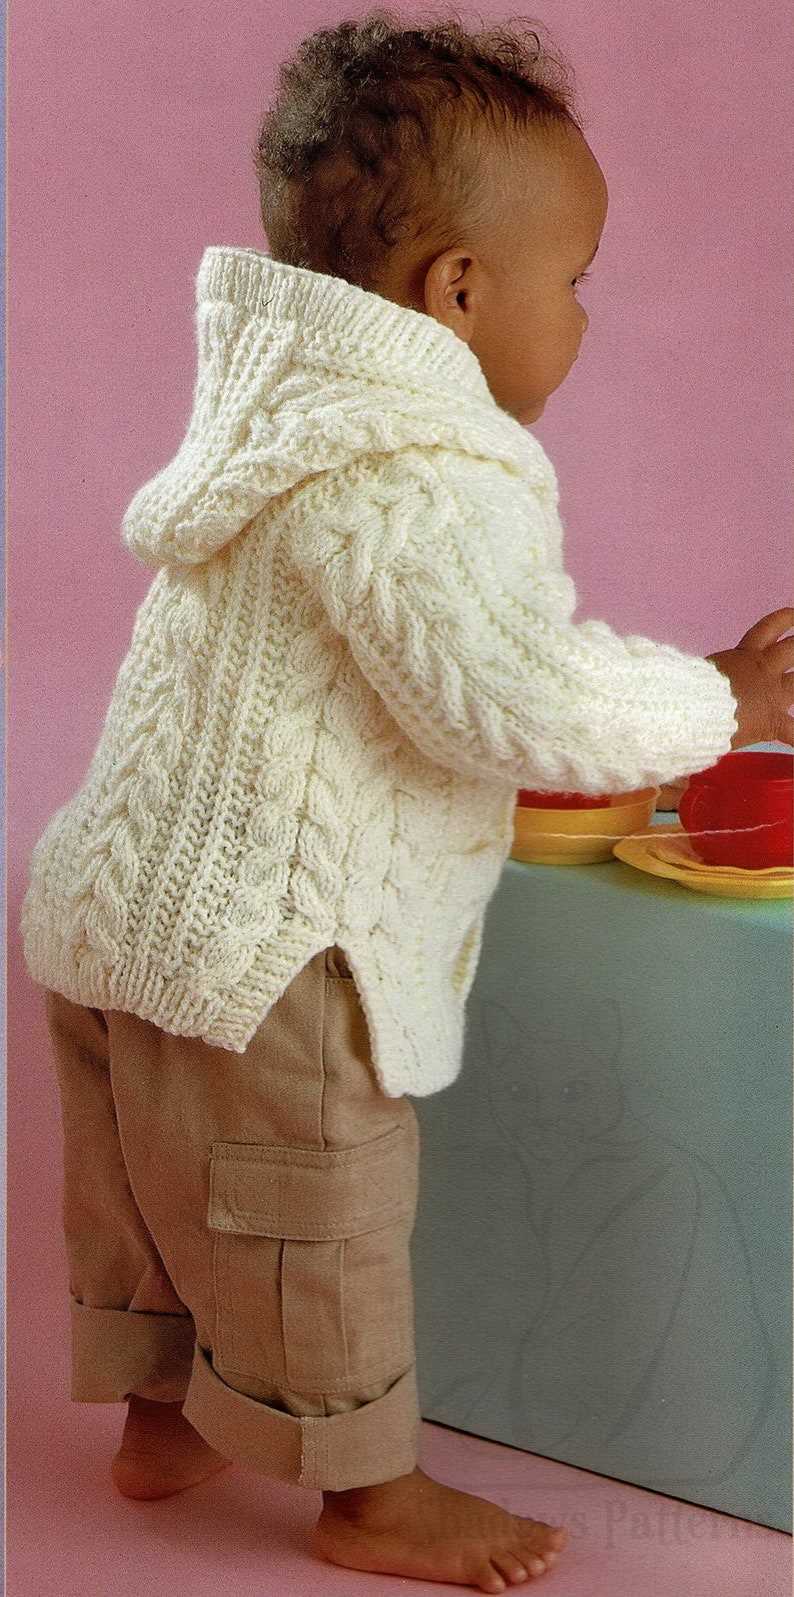
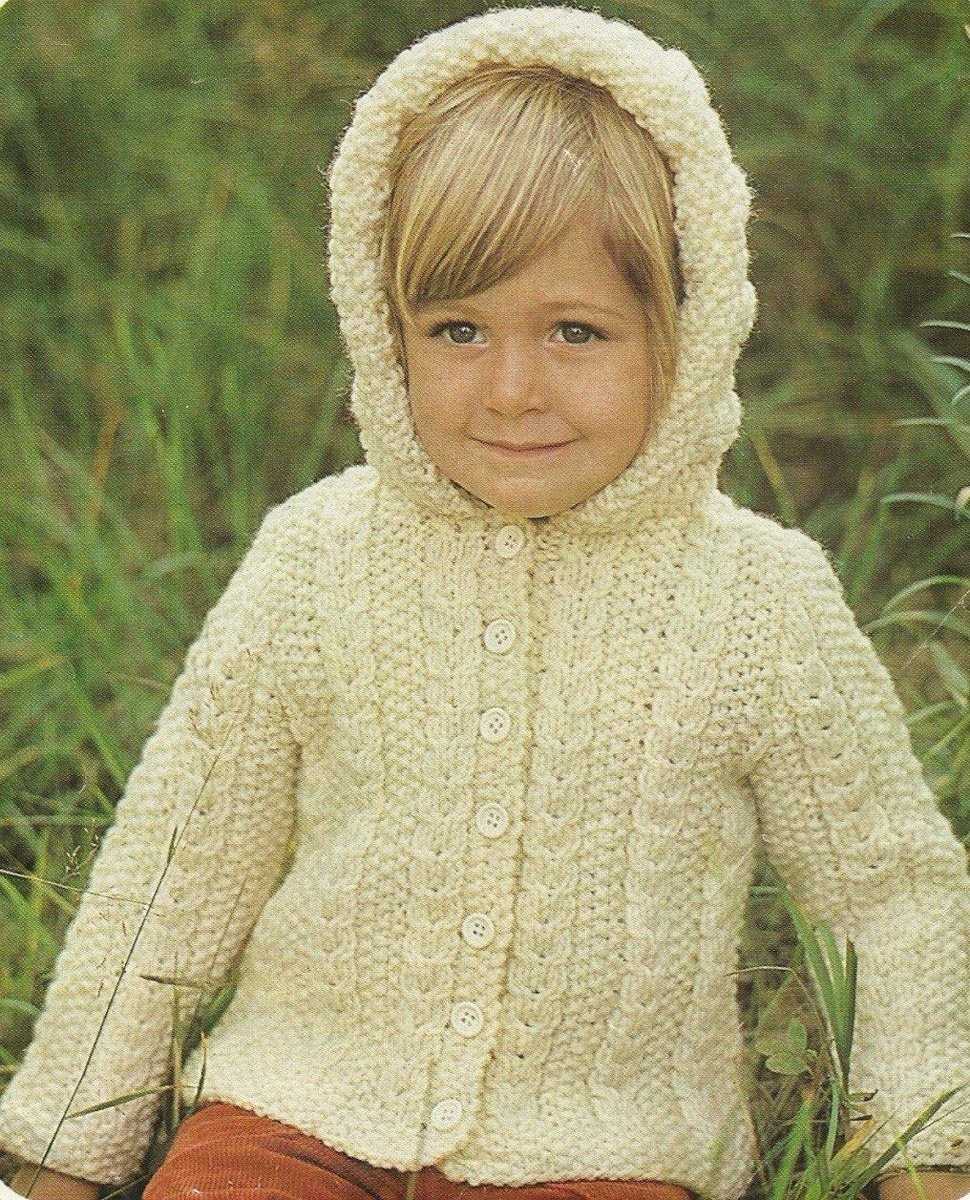
- The hood: The pattern includes step-by-step instructions on how to knit and attach the hood, ensuring that it is snug and comfortable.
- The finishing touches: The pattern concludes with directions on how to add any additional details, such as buttons or pockets, to complete the jacket.
Overall, this child’s hooded jacket knitting pattern provides knitters with a comprehensive guide to creating a beautiful and functional garment for a child. Whether you’re a beginner or an experienced knitter, this pattern has the instructions you need to successfully complete the project and create a cozy jacket that your child will love.
Materials needed for child’s hooded jacket knitting pattern
In order to knit a child’s hooded jacket, you will need several materials to complete the project. These materials include:
- Yarn: Choose a soft and durable yarn in the desired color for the jacket. It is important to select a yarn that is suitable for knitting garments and will provide warmth and comfort for the child.
- Knitting needles: Select the appropriate knitting needles according to the yarn weight and the gauge mentioned in the pattern. It is recommended to use circular knitting needles to accommodate the large number of stitches.
- Tapestry needle: A tapestry needle is essential for weaving in ends and sewing any seams in the jacket.
- Stitch markers: These are used to mark specific points in the pattern, such as the beginning of the round or any stitch repeats.
- Buttons or closures: Depending on the design of the jacket, you may need buttons or other closures to fasten the front of the jacket.
- Scissors: Have a pair of scissors handy for cutting yarn and trimming any excess.
Make sure to gather all the materials before starting the child’s hooded jacket knitting pattern to ensure a smooth and uninterrupted knitting process. Having everything on hand will allow you to focus on following the pattern instructions and creating a beautiful and cozy garment for a child.
Choosing the right yarn for child’s hooded jacket knitting pattern
When it comes to knitting a child’s hooded jacket, choosing the right yarn is essential for both the comfort and durability of the final product. With so many options available, it can be overwhelming to decide which yarn is the best fit for your project. However, considering a few key factors can help you make an informed decision.
Fiber content: The first thing to consider when selecting yarn for a child’s hooded jacket is the fiber content. Natural fibers such as cotton, wool, or bamboo are great choices as they are soft, breathable, and hypoallergenic. They provide warmth during colder months while allowing the child’s skin to breathe. It’s important to avoid synthetic fibers like acrylic, which can be itchy and uncomfortable.
Gauge requirements: Every knitting pattern has specific gauge requirements, and it’s crucial to choose yarn that matches these requirements. Pay attention to the recommended gauge and ensure that the yarn you select will produce the correct stitch and row count. This will ensure that the finished jacket has the right fit and proportions.
Durability: Children can be rough on their clothes, so it’s essential to choose yarn that is durable and can withstand frequent washing and wear. Look for yarns that have a good twist and are made to withstand regular use. Consider yarns that are machine washable, as this will make maintenance much easier for busy parents.
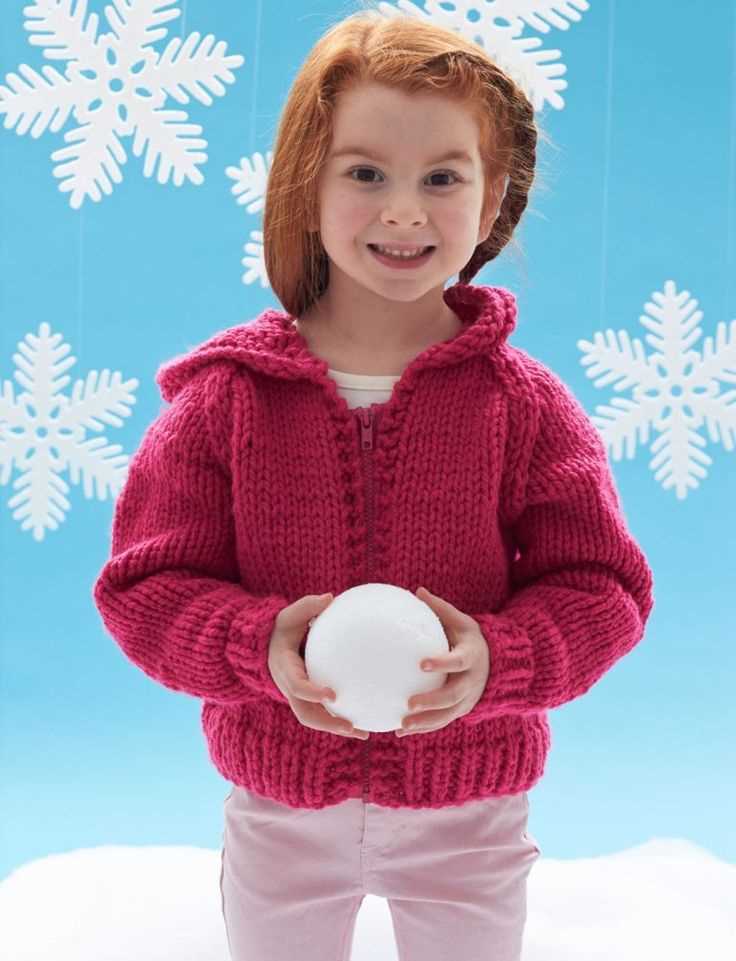
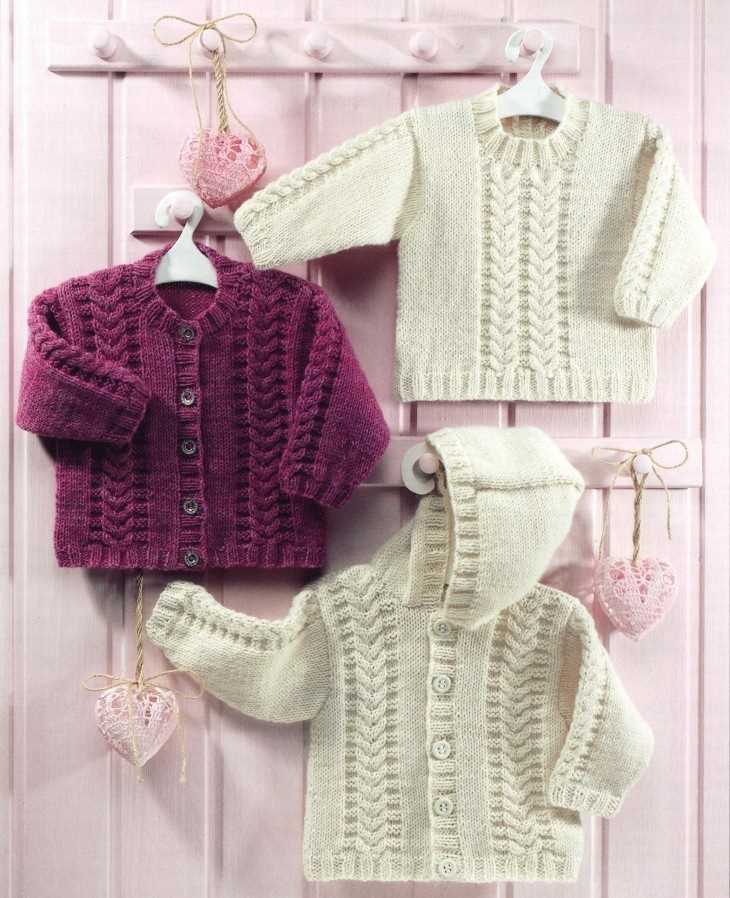
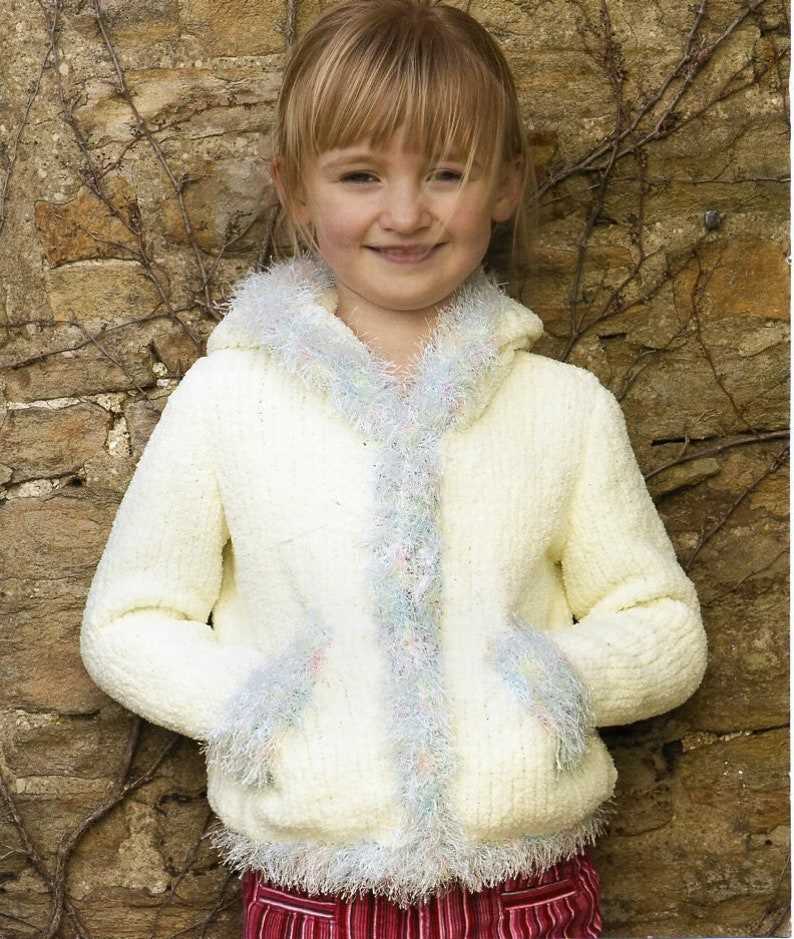
Color and texture: Lastly, don’t forget to consider the color and texture of the yarn. Children love bright and vibrant colors, so choosing yarn in fun and playful shades can make the finished jacket even more appealing. Additionally, selecting yarn with an interesting texture, such as a cable or tweed, can add visual interest and make the jacket stand out.
By considering the fiber content, gauge requirements, durability, and color and texture of the yarn, you can make an informed choice when selecting yarn for a child’s hooded jacket knitting pattern. Taking the time to choose the right yarn will ensure that the final product is not only beautiful but also comfortable and long-lasting.
Gauge and Measurements for Child’s Hooded Jacket Knitting Pattern
In order to successfully knit a child’s hooded jacket, it is important to ensure that you have the correct gauge and measurements. The gauge refers to the number of stitches and rows per inch, and it is crucial for achieving the correct size and fit of the jacket.
To determine the gauge, it is recommended to create a gauge swatch using the suggested yarn and needle size. The pattern will specify the gauge to aim for, such as 20 stitches and 24 rows per 4 inches. To create the swatch, cast on a sufficient number of stitches and work in the specified pattern for a few inches.
Once the swatch is complete, measure the number of stitches and rows within a 4-inch square. If the stitch and row count match the pattern’s gauge, then you can proceed with confidence. However, if the stitch count is too small, you will need to switch to larger needles. Conversely, if the stitch count is too large, you will need to switch to smaller needles.
In addition to gauge, it is essential to take accurate measurements of the child for whom the jacket is intended. Measuring the chest, length from shoulder to hem, sleeve length, and hood depth will ensure the proper fit. The pattern will provide guidance on the desired measurements based on the intended size.
By paying careful attention to gauge and measurements, you can confidently knit a child’s hooded jacket that is the perfect size and fit.
Abbreviations used in child’s hooded jacket knitting pattern
When working with knitting patterns, it is common to come across various abbreviations that may be unfamiliar or confusing. Understanding these abbreviations is essential to successfully complete your child’s hooded jacket. Here is a list of the most commonly used abbreviations in knitting patterns:
- K – Knit
- P – Purl
- YO – Yarn Over
- K2tog – Knit Two Together
- P2tog – Purl Two Together
- SSK – Slip Slip Knit
- PM – Place Marker
- SM – Slip Marker
- RS – Right Side
- WS – Wrong Side
- SL – Slip
- KFB – Knit Front and Back
- PFB – Purl Front and Back
- CO – Cast On
- BO – Bind Off
These abbreviations are used throughout the child’s hooded jacket knitting pattern to indicate specific stitches, techniques, or actions. It is important to refer back to this list whenever you encounter an abbreviation you are unsure of. By familiarizing yourself with these abbreviations, you will be able to follow the pattern instructions with ease and create a beautiful hooded jacket for your child.
Step-by-step instructions for child’s hooded jacket knitting pattern
In this tutorial, we will guide you through the process of knitting a child’s hooded jacket using a knitting pattern. This pattern is suitable for intermediate level knitters who are familiar with basic knitting techniques such as casting on, knitting, purling, increasing, and decreasing.
Before starting the project, you will need the following materials:
- A set of knitting needles in the recommended size for the yarn you will use.
- Approximately X yards of a medium-weight yarn in the desired color.
- A set of double-pointed needles in the same size as your main needles.
- A stitch holder or scrap yarn.
- A sewing needle.
- A pair of scissors.
Step 1: Gauge and sizing
Start by knitting a gauge swatch using your chosen yarn and needles. Follow the instructions on the yarn label to determine the recommended gauge. Measure the number of stitches and rows per inch and compare it to the gauge specified in the pattern. Adjust your needle size if necessary to match the gauge.
Next, determine the size of the jacket you will be knitting. The pattern should provide instructions for different sizes, so choose the one that corresponds to the measurements of the child you are knitting for. Take accurate measurements of the child’s chest circumference, arm length, and body length to ensure a proper fit.
Once you have determined the gauge and size, you are ready to begin knitting the child’s hooded jacket! Follow the remaining steps in the pattern, which will typically involve casting on the required number of stitches, working different stitch patterns for the body and hood, shaping the sleeves and pockets, and finishing with ribbing and binding off.
Remember to refer to the pattern for specific instructions on stitch patterns, shaping, and finishing techniques. Take your time and enjoy the process of creating a beautiful and cozy hooded jacket for a special child in your life.
Knitting the body of the child’s hooded jacket
When knitting the body of the child’s hooded jacket, you will start by casting on the required number of stitches, as specified in your pattern. This is usually done using a long-tail cast-on method to ensure a nice and neat edge. Make sure to keep the tension of your yarn consistent throughout this process.
Once you have cast on the desired number of stitches, you will begin knitting in your chosen stitch pattern. Depending on the pattern, this could be a simple stockinette stitch, a ribbed pattern, or even a cable pattern. Follow the instructions provided in your pattern for the specific stitch pattern and any necessary stitch counts or markers.
If your pattern includes shaping, such as increasing or decreasing stitches, this is typically done in specific sections of the body. Make sure to carefully read and follow the instructions for these shaping rows to ensure the correct fit of the jacket. Common areas for shaping include the armholes, waist, and neckline.
Continue knitting the body of the jacket according to the pattern instructions until you reach the desired length. This is usually measured from the cast-on edge to the underarms or to the bottom edge of any shaping. Remember to periodically check your gauge throughout the knitting process to ensure that your jacket will have the correct measurements.
Once you have completed the body of the jacket, you can set it aside and move on to knitting the sleeves. The body of the jacket should have the basic shape and structure before adding the sleeves. Keep the finished body piece somewhere safe, so you can easily reference it when needed.
Knitting the sleeves of the child’s hooded jacket
When knitting the sleeves of the child’s hooded jacket, it’s important to follow the pattern instructions carefully to ensure a proper fit. The sleeves play a crucial role in the overall structure and comfort of the jacket, so attention to detail is key.
First, you will need to cast on the required number of stitches for the size of the jacket you are making. The pattern will specify the exact number of stitches, usually based on the desired gauge. It’s essential to check your gauge before starting to ensure your sleeve will have the correct measurements.
Once the stitches are cast on, you can begin working the sleeve in the specified stitch pattern. The pattern may include various stitch types, such as ribbing, cables, or lace, to add texture and visual interest to the sleeve. Pay attention to any stitch pattern changes and follow the instructions carefully to achieve the desired result.
If the pattern requires shaping, such as increases or decreases, it’s crucial to execute these correctly to maintain the proper shape of the sleeve. Increases are usually made by knitting or purling into the front and back of a stitch, while decreases are done by knitting or purling stitches together. These shaping techniques will give the sleeve its desired taper and ensure a comfortable fit.
Once the main body of the sleeve is complete, the pattern will specify how to finish the cuff. This may involve a simple ribbing pattern or a more intricate border. Follow the instructions to knit the cuff to the desired length, usually using a smaller needle size to create a snugger fit.
After completing the first sleeve, repeat the steps to knit the second sleeve, ensuring that both sleeves are the same size and shape. Once both sleeves are finished, you can then proceed to join them to the body of the jacket as instructed in the pattern, creating a beautifully knitted child’s hooded jacket.
Knitting the hood of the child’s hooded jacket
When knitting the hood of a child’s hooded jacket, there are several important steps to follow to ensure a successful and well-fitting finished product.
Firstly, it is crucial to choose the right yarn and needles for the pattern. The pattern should specify the recommended yarn weight and needle size to achieve the desired gauge. Depending on the desired thickness and warmth of the hood, you may choose a thicker or thinner yarn. Additionally, consider the softness and comfort of the yarn, as it will be worn close to the child’s head.
Next, carefully read through the pattern instructions for the hood. This section may involve shaping and increases, so it is important to understand the terminology and techniques used. The pattern may indicate how many stitches to cast on or how to increase or decrease the stitches to shape the hood. Pay close attention to any specific stitch patterns or stitch counts provided in the instructions.
When knitting the hood, it is recommended to use circular needles to accommodate the number of stitches and give flexibility to work in the round. This will eliminate the need to seam the hood later on. The circular needles can be used to knit the hood from the bottom edge up to the top. Alternatively, you may choose to work flat and seam the hood afterward.
As you progress through the hood, take frequent measurements to ensure it matches the size specified in the pattern. This will help avoid any surprises in the final fit. Adjustments may need to be made if the hood is too small or too large. Additionally, keep track of your progress by marking rows or using stitch markers to indicate important sections or increases/decreases.
Once the hood is completed, it is important to block the piece to ensure it maintains its shape and size. Blocking involves wetting the knitted fabric and gently shaping it to the desired dimensions. This step may help even out any slight inconsistencies in tension and give the hood a professional finish.
In conclusion, knitting the hood of a child’s hooded jacket requires careful attention to the pattern instructions, choice of yarn and needles, and monitoring of the size and shape as you progress. By following these steps, you can create a beautifully knit hood that will be cozy and comfortable for the child to wear.
Putting it all together: seaming and finishing the child’s hooded jacket
Once you have completed all the necessary knitting pieces for the child’s hooded jacket, it’s time to put them together to create the final product. This involves seaming and finishing techniques to ensure that the jacket is sturdy and has a polished appearance.
To begin, you will need to block each of the individual pieces. Blocking involves gently wetting the knitted pieces and then shaping them to the correct measurements, allowing them to dry flat. This step is crucial for achieving an even, professional look for your jacket.
Next, you will need to seam the pieces together. This can be done using either a mattress stitch or a whip stitch, depending on your preference. The seam should be strong and invisible from the right side of the fabric, ensuring that the jacket looks seamless and professional.
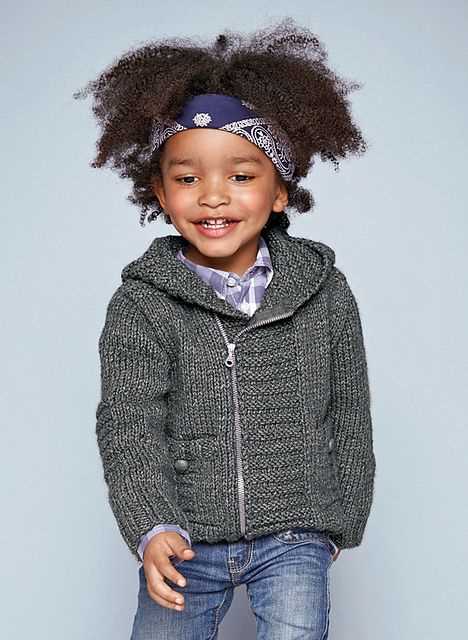
Once the seams are complete, you can move on to finishing touches. This may include adding a button band or zipper to the front of the jacket, sewing on pockets, or attaching a hood. Be sure to follow the pattern instructions carefully for these steps to ensure that your finishing details complement the overall design of the jacket.
Finally, give the jacket a thorough blocking one final time to ensure that all the pieces are aligned and the fabric has an even drape. This step will further enhance the overall appearance and fit of the child’s hooded jacket.
Tips and tricks for success with the child’s hooded jacket knitting pattern
If you are planning to knit a child’s hooded jacket, it’s important to have the right tools and techniques to ensure successful results. Here are some tips and tricks to help you along the way:
1. Choose the right yarn: The yarn you choose for your child’s hooded jacket is crucial. Opt for a soft and durable yarn that is suitable for children’s delicate skin. Look for yarns that can be machine washed and are easy to care for.
2. Gauge matters: Before you start knitting, make sure to check your gauge. Pay attention to the recommended gauge in the knitting pattern and make a swatch to ensure you are using the correct needle size and achieving the right tension. This step is crucial to ensure that your finished jacket will have the right fit.
3. Take accurate measurements: Take accurate measurements of the child’s chest, arm length, and height. This will help you choose the right size and make any necessary adjustments to the pattern. It’s important to make sure the jacket fits well and provides enough room for movement.
4. Use markers: When working on the hood or any other sections that require shaping, use stitch markers to keep track of your progress. This will help you stay organized and ensure that you are following the pattern correctly. Stitch markers can be very helpful in preventing mistakes and making the knitting process smoother.
5. Don’t be afraid of modifications: If you have specific preferences or if you want to customize the jacket to fit the child’s style, don’t be afraid to make modifications to the pattern. You can add different stitch patterns, change the length of the sleeves, or add extra pockets. Just make sure to take notes and adjust the pattern accordingly.
6. Check your work often: Regularly check your work to catch any mistakes or inconsistencies early on. Fixing mistakes as you go will save you time and frustration later. Use a row counter or make notes to keep track of the rows and repeats in your pattern.
7. Finishing touches matter: Pay attention to the finishing touches, such as weaving in ends neatly and blocking the finished jacket. These small details can make a big difference in the overall look and durability of the garment.
By following these tips and tricks, you can ensure a successful knitting experience and create a beautiful child’s hooded jacket that will be cherished for years to come.
Inspiration and variations for the child’s hooded jacket knitting pattern
Now that you have learned how to knit a child’s hooded jacket using the provided pattern, it’s time to explore some inspiration and variations to make each jacket unique and special. Whether you want to add your own personal touch or try different techniques, the possibilities are endless.
One way to customize the child’s hooded jacket is by changing the color scheme. Experiment with different hues of yarn to create a vibrant or muted look. Consider using variegated yarn for a lovely gradient effect. You can also incorporate color blocking by knitting the body, sleeves, and hood in different colors. This allows you to showcase your creativity and adds an extra pop to the jacket.
If you’re feeling adventurous, you can try adding textured stitches or patterns to the jacket. Consider knitting cables along the front panels or trying a lace pattern on the sleeves. These techniques add visual interest and depth to the garment. You can also experiment with different stitch patterns for the hood to create a unique look.
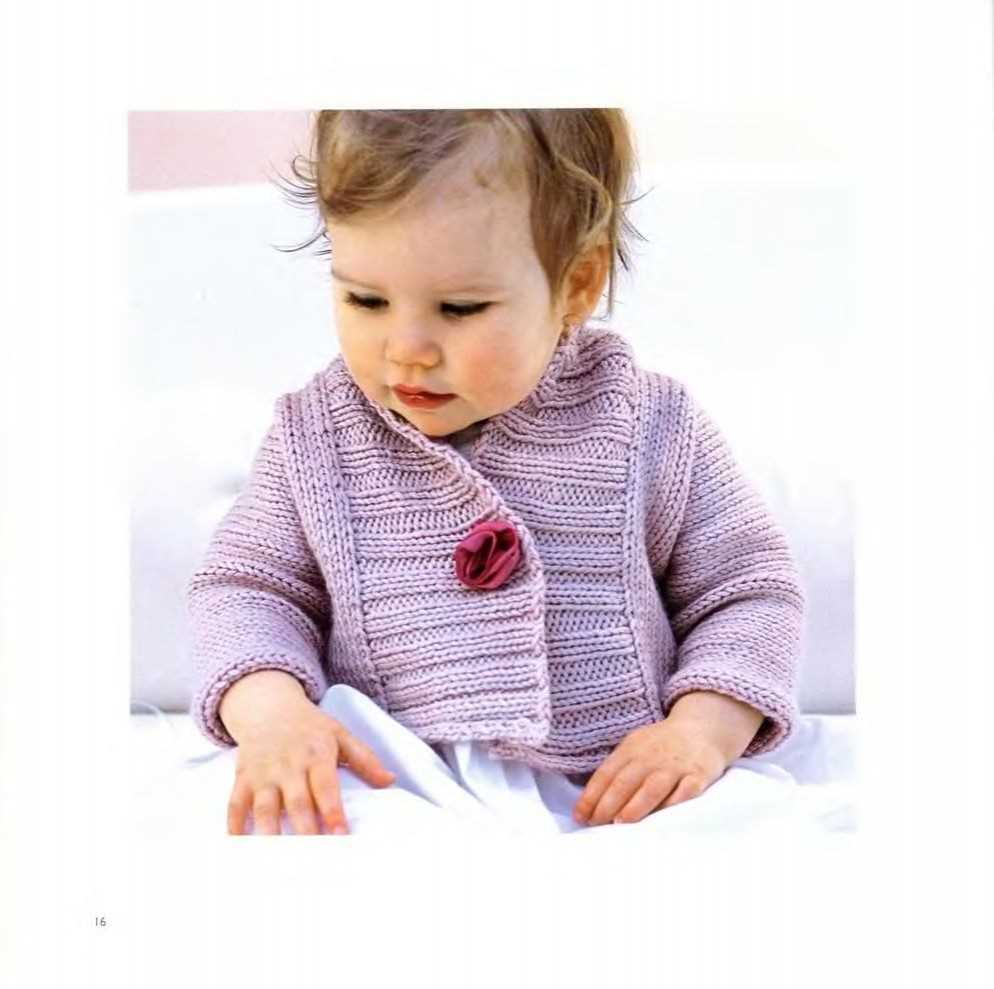
Another idea for customization is to add embellishments to the jacket. You can sew on buttons or add a zipper for closure. Consider attaching appliques, such as flowers, animals, or initials, to personalize the jacket even further. These small details can make a big difference in the overall look and feel of the garment.
If you want to make the jacket even cozier, consider adding a lining. You can sew a soft fabric lining to the inside of the jacket to provide extra warmth and comfort. This is especially useful if you live in a colder climate or if you want to create a more luxurious feel to the garment.
In conclusion, the child’s hooded jacket knitting pattern serves as a great base for creating a unique and personalized garment. By experimenting with different color schemes, stitch patterns, embellishments, and even adding a lining, you can create a jacket that reflects your style and creativity. Have fun exploring these inspiration and variations, and enjoy the process of knitting a special jacket for a beloved child.