
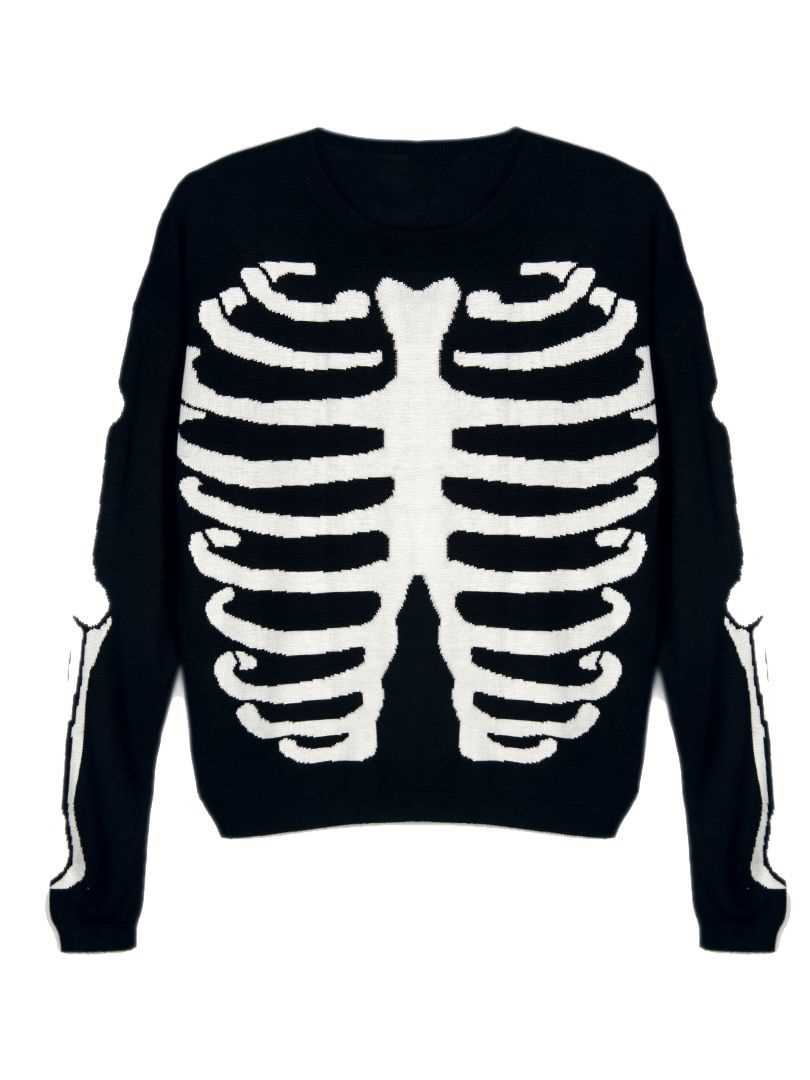
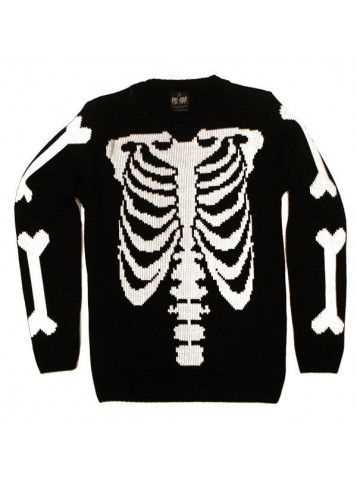
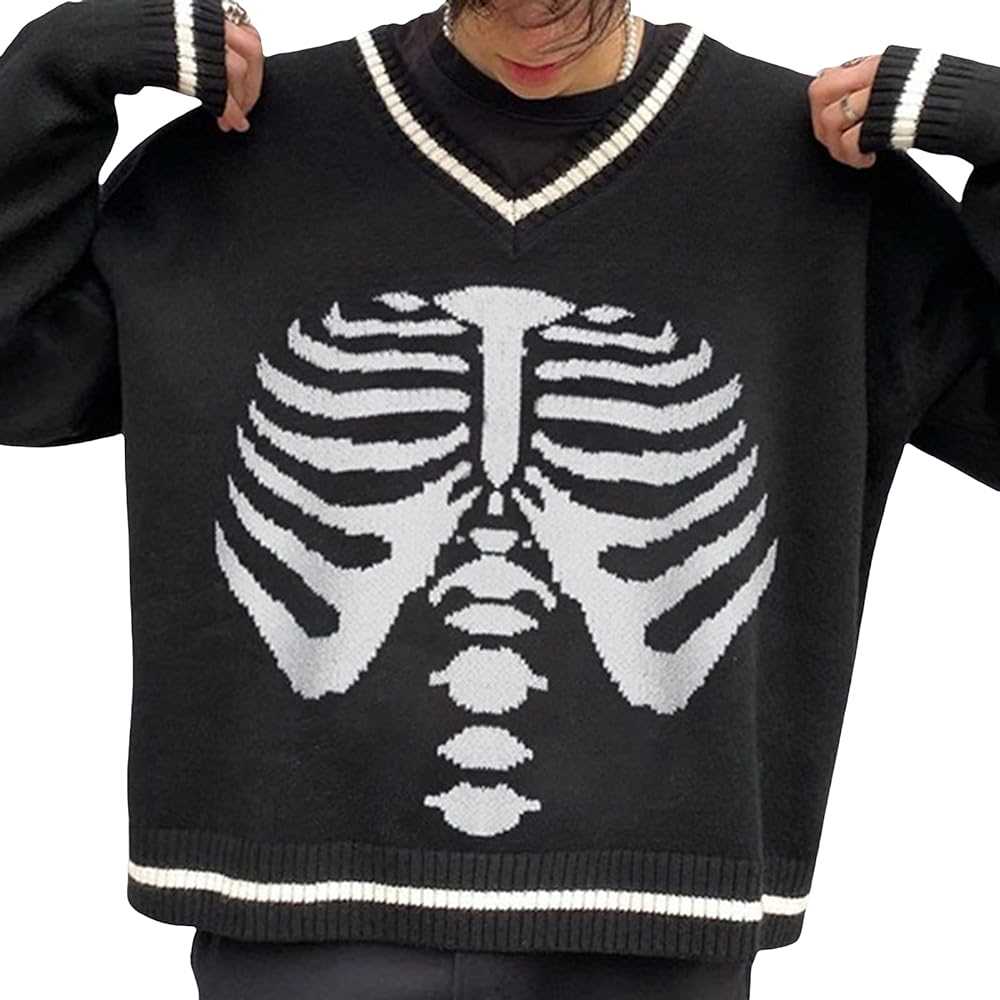
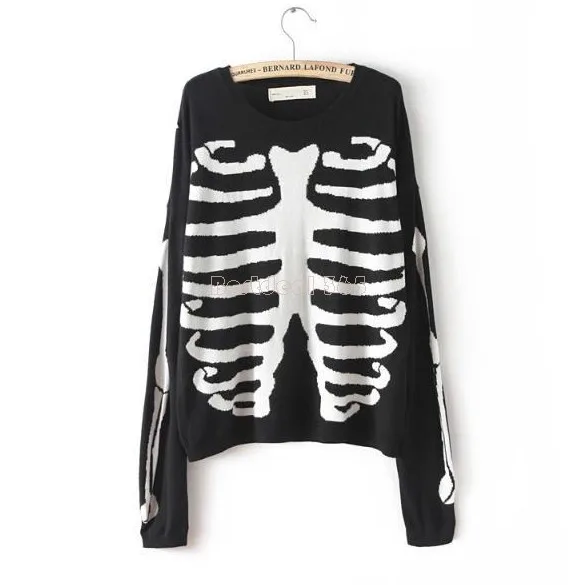
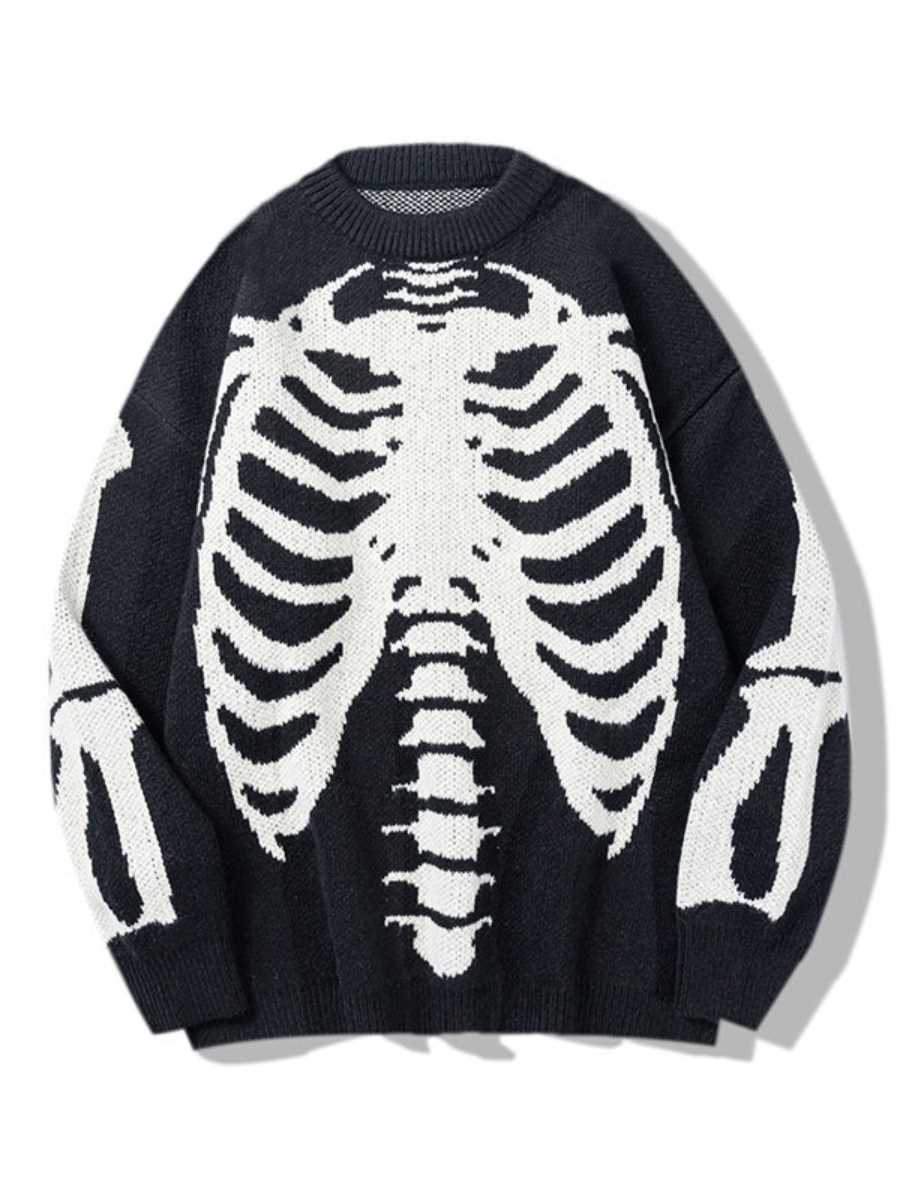
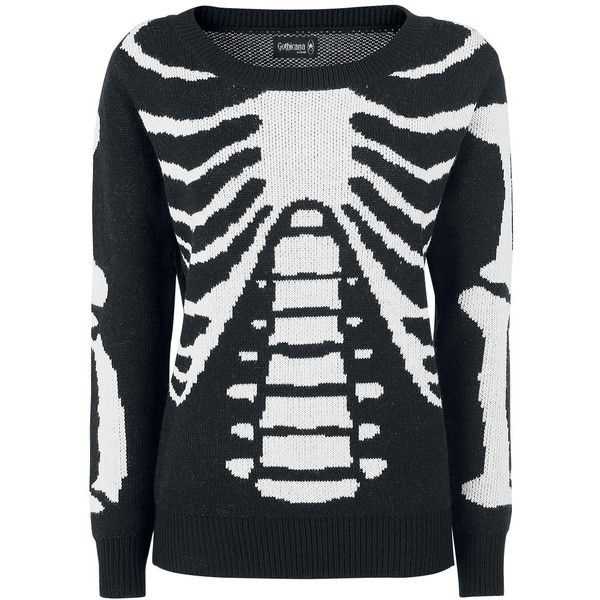
Halloween may be over, but that doesn’t mean you have to stop embracing the spooky season! If you’re a fan of all things creepy and love to stand out from the crowd, a skeleton knit sweater is the perfect clothing item for you. Not only is it a statement piece that will turn heads wherever you go, but it also allows you to showcase your knitting skills.
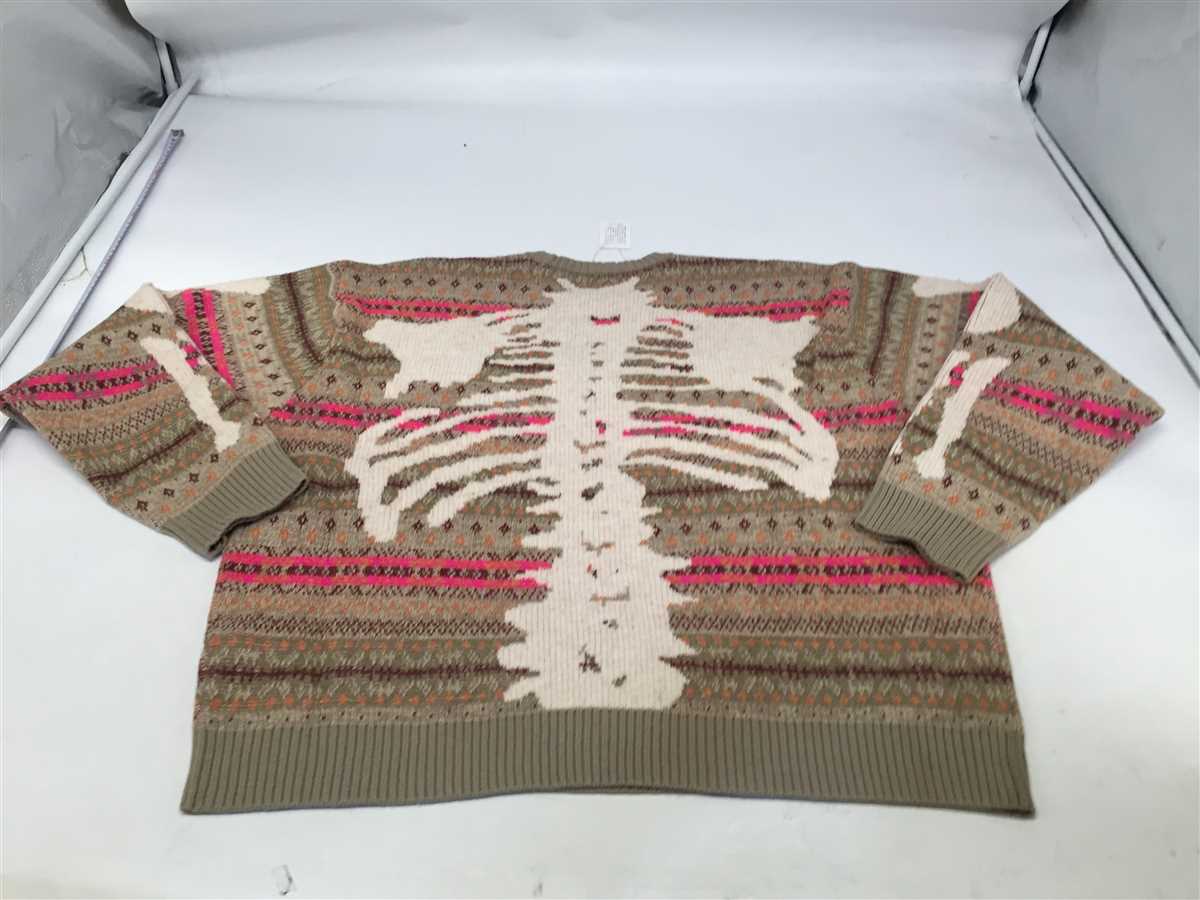
Knitting a skeleton pattern sweater is not only fun, but it also gives you the freedom to customize it to your liking. Whether you want a full skeleton design on the front and back or just a few bones scattered across the sweater, the choice is yours. You can even play around with different colors to give your skeleton a unique twist.
Don’t worry if you’re new to knitting, as this pattern is suitable for all skill levels. By following a simple chart and using basic knitting techniques, you’ll be able to create your very own skeleton knit sweater in no time. There are countless online resources and tutorials available to guide you through the process, making it an enjoyable and rewarding project.
Skeleton Knit Sweater Pattern
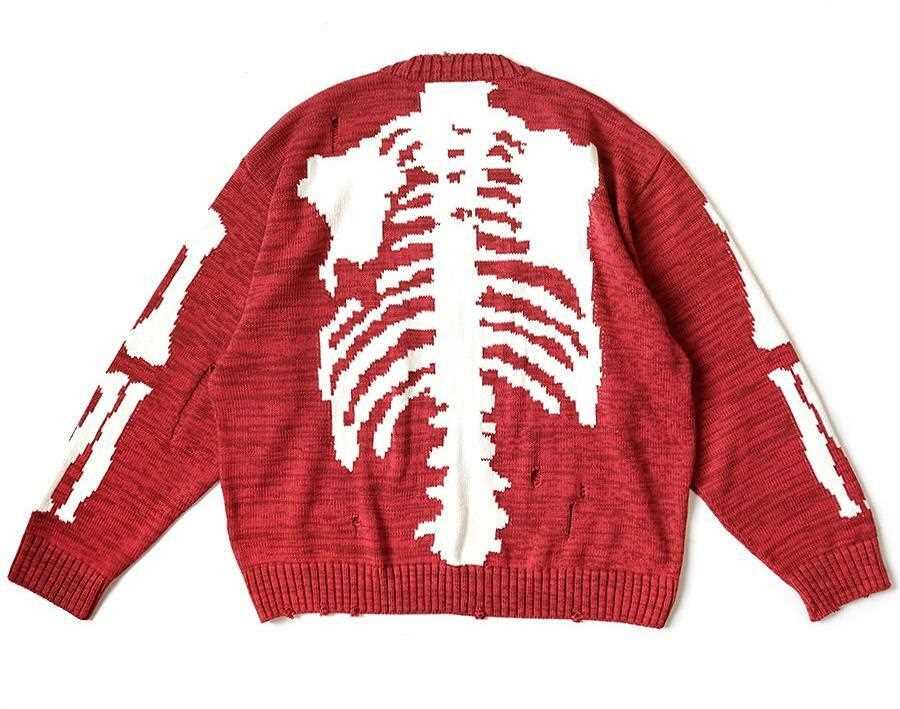
A skeleton knit sweater is a unique and eye-catching piece that can add a touch of edginess to your wardrobe. This pattern allows you to create your own skeleton design using basic knitting techniques.
To start, you will need a set of knitting needles and a skein of black yarn. Begin by casting on the desired number of stitches for your sweater size. Next, you will work in the rib stitch pattern for a few rows to create a stretchy and snug fitting sweater.
Once you have completed the rib stitch section, it’s time to start creating the skeleton design. This can be done using the intarsia technique, where separate balls of yarn are used for each different color. Use white yarn to create the skeleton bones, following a chart or your own design. You can make the bones as intricate or simple as you like, depending on your knitting skills and preferences.
After completing the skeleton design, continue knitting the rest of the sweater in black yarn. You can choose to add additional ribbing at the hem and cuffs, or leave them plain for a more minimalist look.
Once you have finished knitting the sweater, it’s time to sew in any loose ends and block the garment to give it a polished look. Then, you can proudly wear your skeleton knit sweater and show off your knitting skills and unique style.
Supplies Needed
When knitting a skeleton knit sweater, you will need a few key supplies to get started. Here is a list of the essentials:
1. Yarn
A chunky or worsted-weight yarn in the color of your choice is recommended for this project. The yarn should be soft and cozy, as it will be used to create a warm and comfortable sweater.
2. Knitting Needles
You will need a pair of knitting needles in the appropriate size for your chosen yarn. The size will depend on your desired gauge and the thickness of the yarn. It is important to use the correct needle size to ensure that your stitches are even and your sweater fits properly.
3. Stitch Markers
Stitch markers are essential for keeping track of important points in your knitting, such as the beginning of a round or the placement of a specific stitch pattern. They can be simple plastic rings or decorative charms, as long as they are easy to move and won’t snag on your yarn.
4. Yarn Needle
A yarn needle is necessary for weaving in loose ends and seaming your sweater. Look for a blunt needle with a large eye, as this will make it easier to work with your yarn.
5. Skeleton Knit Pattern
Finally, you will need a skeleton knit pattern to guide you through the process. You can find free patterns online or purchase a pattern book. Make sure to choose a pattern that matches your skill level and includes clear instructions for each step.
With these supplies on hand, you will be ready to start knitting your own skeleton knit sweater and create a unique and spooky piece of clothing.
Choosing the Right Yarn
When it comes to knitting a skeleton knit sweater, one of the most important decisions you’ll make is choosing the right yarn. The yarn you choose can greatly impact the final look and feel of your sweater, so it’s crucial to consider a few key factors before making your selection.
Fiber Content: The first thing to consider is the fiber content of the yarn. For a skeleton knit sweater, you’ll want a yarn that is lightweight and breathable, as this will help to keep you comfortable while wearing the sweater. Acrylic and cotton blends are popular choices for this type of project, as they are often affordable and easy to care for.
- Acrylic: Acrylic yarns are synthetic and have a smooth, soft texture. They are known for their durability and ability to hold up well over time. Acrylic yarns can be machine washed and dried, making them low-maintenance options.
- Cotton Blend: Cotton blend yarns are a great choice for those who prefer natural fibers. They offer breathability and comfort, and are often machine washable. Cotton blends can also be gentle on the skin, making them a good option for those with sensitive skin.
Weight: The weight of the yarn is another important factor to consider. For a skeleton knit sweater, you’ll want to choose a yarn that is light to medium weight. This will ensure that the final sweater is not too bulky or heavy. Look for yarns that are labeled as fingering, sport, or DK weight for the best results.
Selecting the Right Needle Size
When it comes to knitting a skeleton knit sweater, selecting the right needle size is crucial. The needle size you choose will determine the gauge of your sweater and ultimately the size and fit of the finished garment. It’s important to follow the recommended needle size in the pattern to ensure that your sweater turns out just right.
Different yarns and stitch patterns require different needle sizes. If you’re using a bulky or chunky yarn, you’ll likely need a larger needle size to achieve the desired gauge. On the other hand, if you’re using a fine or lace weight yarn, you’ll need a smaller needle size. The pattern will usually specify the recommended needle size based on the yarn weight and desired gauge.
One way to determine the right needle size is to make a gauge swatch. Cast on a few stitches and work a small section of the pattern, then measure the number of stitches and rows per inch. If your gauge is too tight, meaning you have more stitches per inch, you’ll need to switch to a larger needle size. If your gauge is too loose, meaning you have fewer stitches per inch, you’ll need to switch to a smaller needle size.
Keep in mind that everyone’s knitting tension is different, so you may need to adjust the needle size to achieve the gauge specified in the pattern. It’s always a good idea to make a gauge swatch before starting your project to ensure that your sweater will fit correctly. Don’t be afraid to experiment with different needle sizes until you find the one that works best for you and your chosen yarn.
Tips for Selecting the Right Needle Size:
- Follow the recommended needle size in the pattern
- Consider the yarn weight and stitch pattern
- Make a gauge swatch to check your tension
- Adjust the needle size to achieve the specified gauge
- Don’t be afraid to experiment with different sizes
Understanding the Pattern
When it comes to knitting a skeleton knit sweater, it is important to have a good understanding of the pattern before you start. This will help you follow the instructions more easily and ensure that your finished sweater looks just how you want it to.
First and foremost, make sure to read the entire pattern carefully before you begin. This will give you an overview of the project and help you familiarize yourself with the different sections and techniques involved. Look out for any special abbreviations or stitches that may be used throughout the pattern.
One useful technique when following a knitting pattern is to use stitch markers. These can help you keep track of where you are in the pattern and ensure that you don’t miss any important instructions. You can place a stitch marker after completing a certain number of rows or after a specific set of instructions.
The pattern may also include a chart or diagram to help you visualize the design. Pay close attention to the symbols used in the chart and refer to the key provided. This will help you understand how the different stitches and sections of the sweater come together.
Remember to also take note of the recommended yarn and needle size for the pattern. Using the correct materials will ensure that your sweater turns out the right size and has the desired drape or texture. It is always a good idea to make a gauge swatch before starting the project to ensure that your tension matches the pattern’s requirements.
In conclusion, understanding the pattern is crucial when knitting a skeleton knit sweater. Take the time to read through the instructions carefully, make use of stitch markers, and refer to any charts or diagrams provided. With a good understanding of the pattern, you will be able to confidently knit a sweater that is both stylish and spooky!
Casting On
Before you can start knitting your skeleton knit sweater, you’ll need to cast on your stitches. Cast on is the process of creating the first row of stitches on your knitting needles. It is essential to start your project with a strong and secure cast on so that your stitches don’t unravel.
There are different ways to cast on, but for this skeleton knit sweater pattern, we will be using the long-tail cast on method. This method is sturdy and creates a neat edge.
To cast on using the long-tail method, you will need to estimate the length of yarn needed for your stitches. Leave a tail that is about three times the width of your finished knitting piece. This tail will be used to create the first row of stitches.
Hold the end of the yarn, forming a triangle with the tail end and the working end. Place the triangle on your left hand, with the tail end over your thumb and the working end over your index finger. Insert your right hand needle under the yarn loop on your thumb, then over the yarn loop on your index finger. With your right hand needle, catch the yarn from the thumb loop, while simultaneously pulling the yarn from the index finger loop through the thumb loop. This creates your first cast on stitch.
Repeat this process for the desired number of stitches, making sure to tighten the yarn slightly after each stitch to prevent loose edges. Once you have cast on all your stitches, you are ready to begin knitting your skeleton knit sweater pattern!
Knitting the Body of the Sweater
Once you have finished knitting the neckline of your skeleton knit sweater pattern, you can begin working on the body. The body of the sweater will determine the length and fit, so it’s important to follow the pattern carefully and make any necessary adjustments along the way.
Start by casting on the required number of stitches for your size. It’s helpful to use stitch markers to mark the sides and center of the sweater. This will make it easier to keep track of your progress and ensure that your stitches are even.
Round 1: Begin by knitting the first stitch. Then, continue in your desired stitch pattern until you reach the marker at the side. Slip the marker, and then increase one stitch by knitting into the front and back of the next stitch. Continue in your stitch pattern until you reach the next marker at the center. Slip the marker, and then increase one stitch. Repeat this process for the second side marker.
Rounds 2-4: Continue knitting in your stitch pattern, making sure to increase one stitch before and after each side marker on every other round. This will create gentle shaping along the sides of the sweater.
Rounds 5-12: Knit every stitch in your desired stitch pattern, making sure to maintain the increases at the side markers.
Rounds 13-14: Switch to a smaller needle size and continue knitting in your stitch pattern for two more rounds. This will create a slightly tighter fabric and help maintain the shape of the sweater.
Rounds 15-18: Switch back to the larger needle size and knit every stitch in your desired stitch pattern. These rounds will help create a smooth transition from the body to the lower ribbing of the sweater.
Continue following the pattern instructions for the body of the sweater, adjusting the length as needed. Once you have reached the desired length, you can begin working on the lower ribbing or any other finishing details specified in the pattern.
Knitting the Sleeves

After completing the body of your skeleton knit sweater, it’s time to move on to the sleeves. The sleeves are an essential part of any sweater, as they provide warmth and comfort to the wearer. In this section, we will discuss how to knit the sleeves and provide tips and tricks to make the process easier.
Choosing the Right Needles
When knitting the sleeves, it’s important to choose the right needles for the job. Depending on the pattern and yarn you are using, you may need different sized needles for the sleeves compared to the body of the sweater. Be sure to check the pattern instructions for the recommended needle size for the sleeves. Using the correct needle size will ensure that your sleeves turn out the right size and have the correct gauge.
Following the Pattern
When knitting the sleeves, it is crucial to carefully follow the pattern instructions. Pay attention to the stitch count, decreases, and any shaping details specified in the pattern. Make sure to read the instructions thoroughly before starting and refer back to them as you go along. It can be helpful to use stitch markers to keep track of decreases or other important points in the pattern.
Working in the Round
Many sleeve patterns are knit in the round to avoid the need for seaming. This means that you will need to use double-pointed needles or a circular needle with a small circumference, such as a 16-inch or 24-inch cable length. If you are new to knitting in the round, there are plenty of online tutorials and resources available to help you master this technique.
Adding Personal Touches
While knitting the sleeves, you can also add personal touches to make your sweater unique. For example, you could incorporate a contrasting color or a different stitch pattern for the cuff or create an interesting texture by using a different stitch pattern for the entire sleeve. This is your opportunity to get creative and make the sweater truly your own.
With these tips and tricks in mind, you can confidently tackle knitting the sleeves of your skeleton knit sweater. Follow the pattern instructions, choose the right needles, and don’t be afraid to add your own personal touch. Happy knitting!
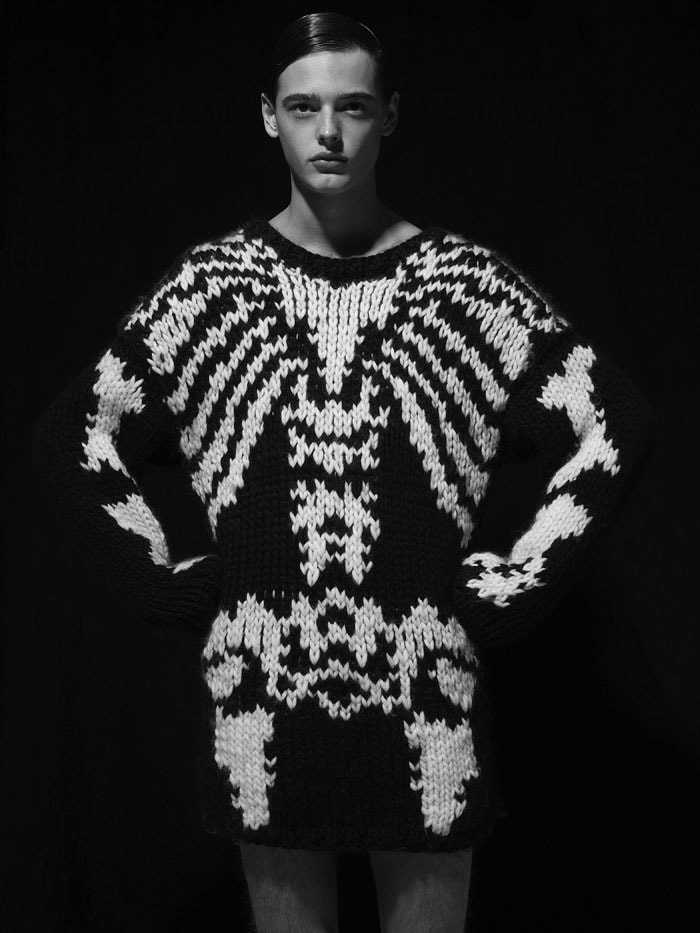
Adding the Skeleton Design
Once you have the basic knit sweater pattern completed, it’s time to add the skeleton design. This is what makes the sweater unique and eye-catching. The skeleton design can be added using a combination of different knitting techniques, such as intarsia and fair isle.
Intarsia knitting is a technique where different colored yarns are used to create a pattern or design. In the case of the skeleton design, you will need to have separate bobbins of yarn for each section of the skeleton, such as the ribs, the skull, and the limbs. By following a chart or pattern, you can then knit each section using the appropriate yarn color, making sure to twist the yarns at the back to avoid gaps.
Fair isle knitting is another technique that can be used to add the skeleton design. It involves knitting with multiple colors in a single row to create intricate patterns. For the skeleton design, you can use fair isle to create the smaller details, such as the bones in the hands and feet, or the vertebrae in the spine. By working with two colors at a time, you can create a more detailed and realistic skeleton design.
In addition to these techniques, you can also incorporate embroidery to add extra details and depth to the skeleton design. Using a contrasting color of yarn or embroidery floss, you can add stitches to create the outlines of the bones or add shading to make the skeleton design more realistic.
Remember to follow the pattern or chart carefully and take your time when adding the skeleton design. It may require some practice and patience, but the end result will be a unique and visually striking knit sweater that is sure to turn heads. Whether you choose to use intarsia knitting, fair isle knitting, or a combination of both, the skeleton design will be the focal point of your sweater and showcase your knitting skills.
Finishing Touches
After completing the main body of your skeleton knit sweater, it’s time to add the finishing touches that will really bring the design to life. These details will give your sweater that extra touch of personality and make it stand out from the crowd. Here are a few suggestions to consider:
Embroidered Details: One way to add some visual interest to your sweater is by embroidering additional details onto the fabric. You could add bones or other skeletal features to give the sweater an even more realistic look. Embroidery can be done using thread in a contrasting color, or you could even use a metallic thread for a touch of sparkle.
Button Eyes: If you’re looking to make your skeleton knit sweater a bit more playful, consider adding button eyes to the design. Large, round buttons in a contrasting color can be sewn onto the front of the sweater to create a whimsical effect. You could even experiment with different sizes or shapes of buttons to add even more personality.
Additional Ideas:
- Contrasting Collar: Use a different color yarn to create a contrasting collar on your sweater. This will draw attention to the neckline and add a nice pop of color to the overall design.
- Ribbed Cuffs: Add ribbed cuffs to the sleeves of your sweater to give it a more finished look. Ribbing is achieved by alternating knit and purl stitches and can add texture and structure to the garment.
- Pop of Color: Consider adding a small pop of color to your sweater by including a stripe or pattern using a different yarn color. This can add visual interest and make the design more unique.
- Personalized Label: Sewing a personalized label onto your finished sweater can add a special touch. You could use a fabric label with your name or initials, or even opt for a handmade embroidered label.
Remember, the finishing touches you add to your skeleton knit sweater are entirely up to you. Feel free to get creative and experiment with different ideas until you achieve the look you desire. Whether it’s through embroidery, button eyes, or other design elements, these finishing touches will help make your sweater truly one-of-a-kind.
Blocking the Sweater
Blocking is an essential step in finishing your knitted sweater. It involves gently washing the sweater to relax the fibers and then shaping it to the correct dimensions. This process helps to even out the stitches, open up the lacework, and give the garment its final shape. Here are the steps to follow when blocking your skeleton knit sweater pattern:
Step 1: Prepare the Sweater
Before blocking, ensure that your sweater is clean and free from any dirt or oils. Fill a basin or sink with lukewarm water and add a mild detergent suitable for delicate fabrics. Place the sweater in the water and gently squeeze it to ensure it is fully submerged. Allow it to soak for about 15 minutes to loosen any dirt or chemicals.
Step 2: Gently Squeeze Out Excess Water
After soaking, carefully lift the sweater out of the water and gently squeeze it to remove excess water. Do not twist or wring the sweater, as this can lead to stretching or distortion of the shape. Instead, gently press the sweater against the sides of the basin or sink to release the water.
Step 3: Shape the Sweater
Lay a clean towel flat on a clean surface, such as a table or the floor. Place the swe
ater on top of the towel and gently reshape it to the desired dimensions. Pay attention to the neckline, armholes, and any other areas that need shaping. Use your fingers to smooth out any wrinkles or unevenness in the fabric.
Step 4: Pin and Secure the Sweater
Once the sweater is in the desired shape, use rust-proof pins to secure it to the towel. Start with the shoulders, then move to the sides, and finally the sleeves. Gently stretch the fabric if necessary to achieve the correct measurements. It’s best to use blocking wires for maintaining straight edges in lacework or other patterns.
Step 5: Allow the Sweater to Dry
Leave the pinned sweater to dry completely. This can take anywhere from a few hours to a couple of days, depending on the thickness of the yarn and the humidity of the environment. Avoid placing the sweater in direct sunlight or near a direct source of heat, as this can cause the fibers to become brittle or fade.
Once the sweater is dry, unpin it and admire your beautiful, blocked garment. Blocking not only enhances the overall appearance of your knitted sweater but also ensures that it fits well and retains its shape over time. Don’t skip this important step in the knitting process!
Care Instructions
Proper care and maintenance of your skeleton knit sweater will ensure its longevity and keep it looking its best. Please follow the instructions below to care for your sweater:
Washing:
- Hand wash the sweater in cold water with a mild detergent.
- Gently squeeze out excess water from the sweater, being careful not to wring or twist it.
- Do not use bleach or harsh chemicals.
- Lay the sweater flat on a clean towel and reshape it to its original size. Avoid hanging it as this may stretch the fabric.
- Allow the sweater to air dry away from direct sunlight and heat sources.
Storage:
- Fold the sweater neatly and place it in a drawer or on a shelf.
- Avoid hanging it as this may cause the sweater to lose its shape.
- Keep the sweater away from direct sunlight and moisture to prevent color fading and fabric damage.
Following these care instructions will ensure that your skeleton knit sweater remains soft, cozy, and in good condition for years to come. With proper care, you’ll be able to enjoy wearing it while making a stylish statement.