
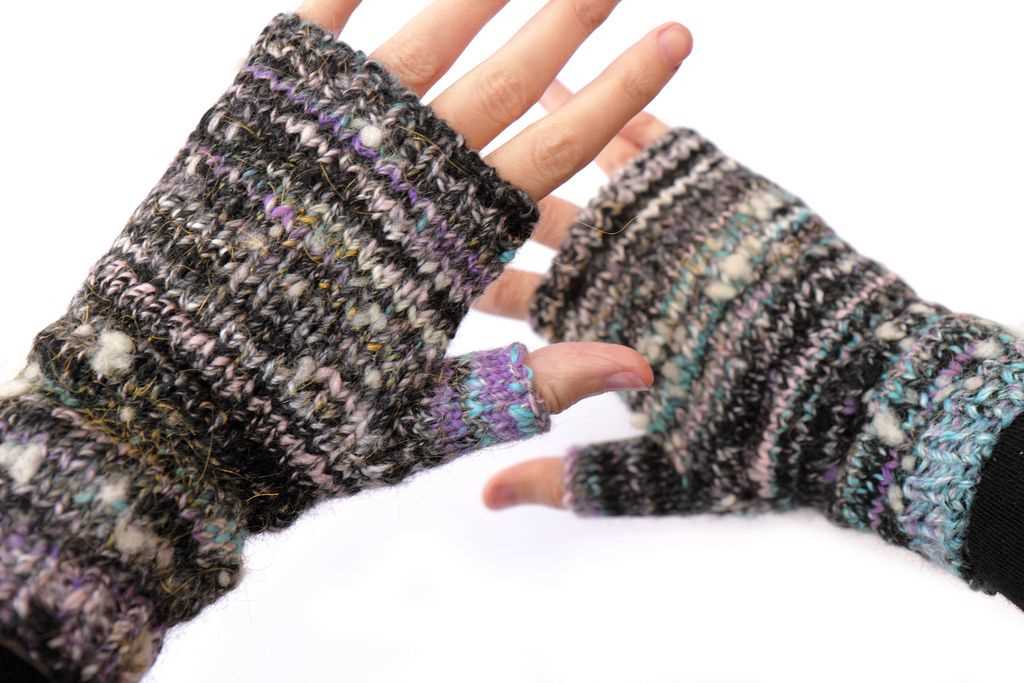
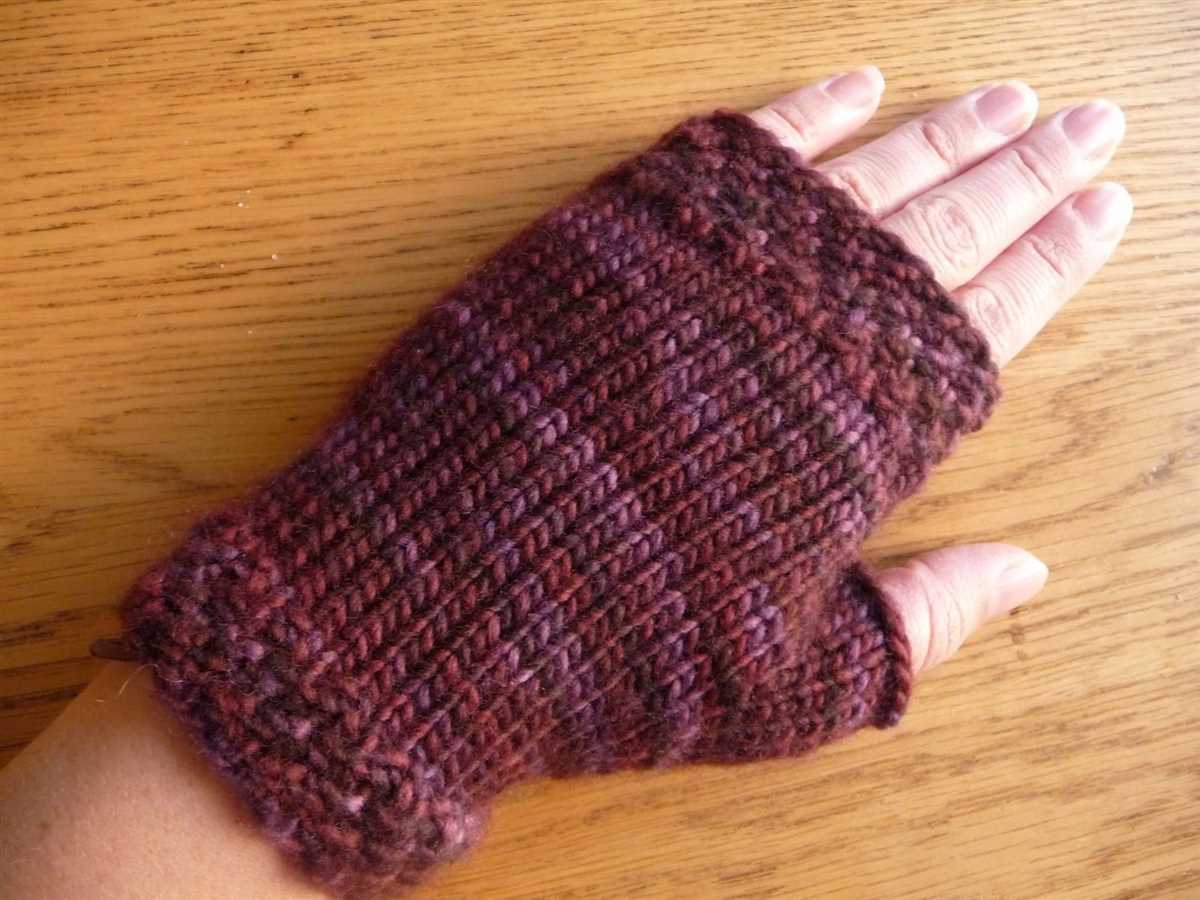
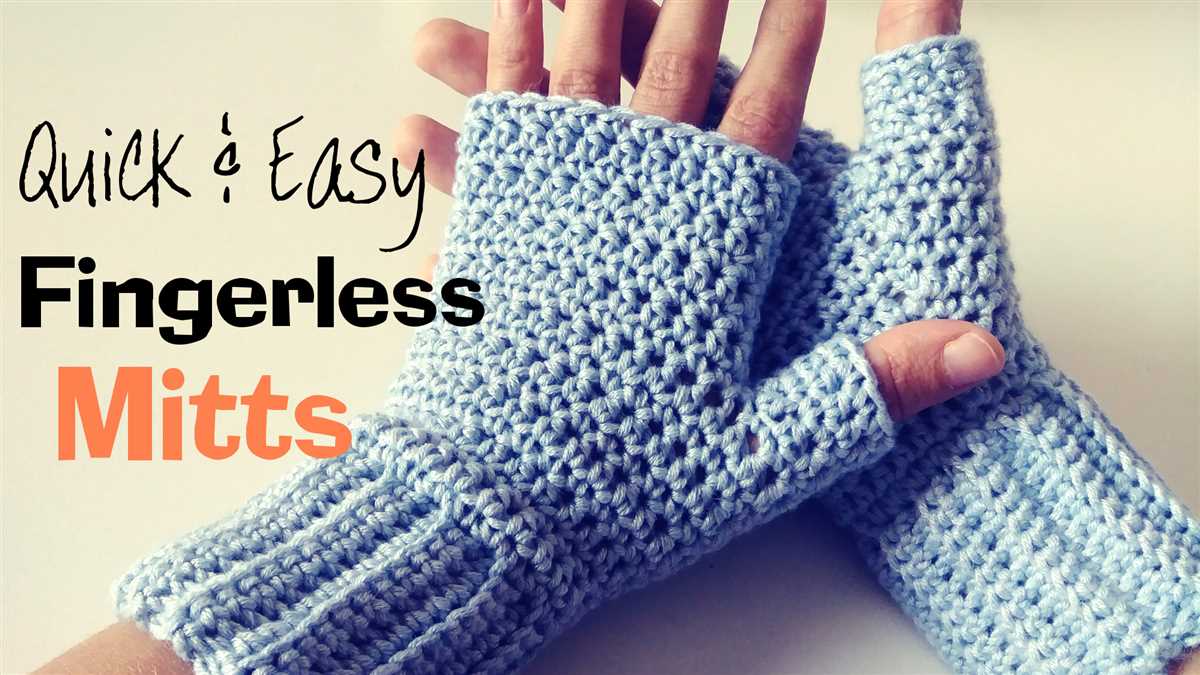
Looking for a quick and easy knitting project? Look no further! This fingerless mitts knitting pattern is perfect for beginners and experienced knitters alike.
Fingerless mitts, also known as wrist warmers, are a popular accessory that can be worn year-round. They keep your hands warm and cozy while still allowing you to use your fingers freely.
This pattern is free and comes with step-by-step instructions and a detailed video tutorial, making it easy to follow along and create your own pair of fingerless mitts in no time.
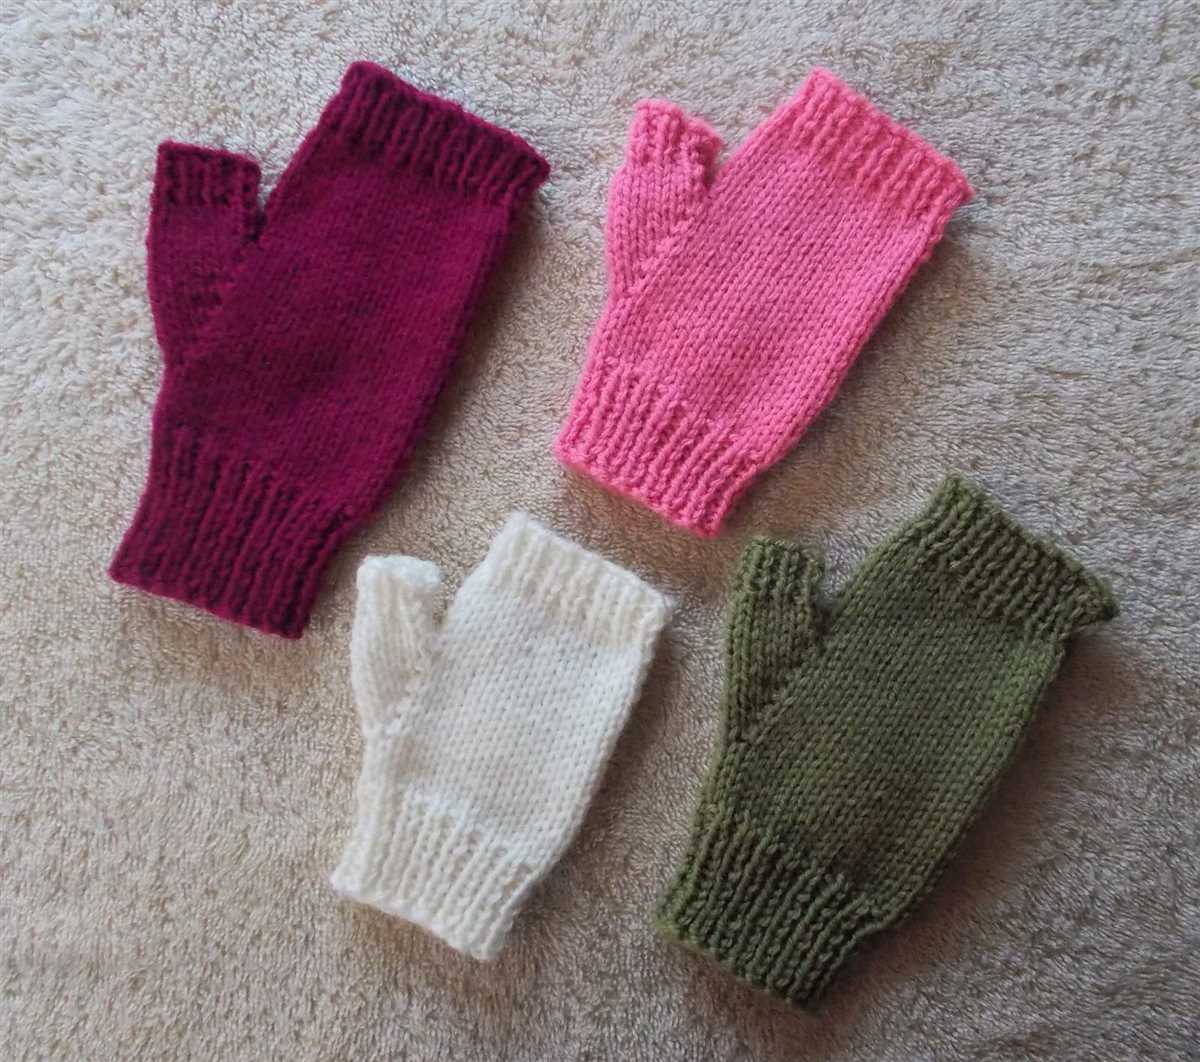
Whether you’re knitting for yourself or as a gift for a friend or family member, these fingerless mitts are sure to be a hit. The pattern can be easily customized to fit any hand size and can be made in a variety of colors and yarn weights.
So grab your knitting needles and get started on this fun and practical project today!
Materials Needed
To knit these easy fingerless mitts, you will need the following materials:
Yarn:
- About 200 yards of medium weight (worsted) yarn in your desired color. Choose a soft and warm yarn for maximum comfort.
Needles:
- Size 7 (4.5mm) double-pointed needles (DPNs) or circular needles, depending on your preferred knitting method.
Notions:
- A yarn needle for weaving in ends.
- A stitch marker to mark the beginning of the round.
- Scissors to cut yarn.
Once you have gathered all the necessary materials, you will be ready to start knitting your fingerless mitts. Make sure to choose a yarn and needle size that will give you the desired gauge for your project. Gauge is important to ensure that the mitts fit properly and have the desired stretch. Refer to the knitting pattern for specific gauge information.
Gauge
When knitting fingerless mitts, achieving the correct gauge is important to ensure your mitts fit properly. Gauge refers to the number of stitches and rows per inch in your knitting. It is essential to match the gauge stated in the pattern in order to achieve the proper size and fit of the mitts.
To determine your gauge, you will need to knit a swatch using the specified yarn and needle size. The pattern will typically provide instructions on how many stitches and rows should be included in the swatch. Once your swatch is complete, use a ruler or measuring tape to measure the number of stitches and rows in a one-inch section. Compare this measurement to the gauge specified in the pattern.
If your gauge is smaller than the pattern gauge, you will need to use a larger needle size to achieve the correct gauge. Conversely, if your gauge is larger, you will need to use a smaller needle size. It may take a few tries to get the gauge just right, so be patient and willing to experiment with different needle sizes.
Keep in mind that gauge can also be affected by your tension while knitting. If you tend to knit tightly, you may need to use larger needles to achieve the gauge, whereas if you knit loosely, smaller needles may be necessary.
Ensuring you have the correct gauge will allow your fingerless mitts to fit as intended and make the knitting process much more enjoyable. Remember to check your gauge before starting the project to avoid any disappointments or sizing issues.
Instructions
These easy fingerless mitts are a great project for knitters of all skill levels. With this free knitting pattern, you’ll be able to create a stylish and practical accessory in no time.
To get started, gather your materials. You’ll need a set of double-pointed or circular knitting needles in the appropriate size for your yarn, as well as a skein of yarn in the color of your choice. Make sure to choose a yarn that is soft and warm, perfect for keeping your hands cozy.
Once you have your materials ready, it’s time to cast on. Using your preferred method, cast on the desired number of stitches. This pattern is written for a standard adult size, but you can easily adjust the number of stitches to fit your hand.
Next, begin knitting in the round. If using double-pointed needles, divide the stitches evenly between three needles. If using circular needles, simply join in the round. Knit every row until the mitts reach the desired length. Feel free to customize the length to your preference.
When you’re ready to shape the thumb hole, follow the pattern instructions to create a gap in the knitting. This will allow your thumb to have freedom of movement while still being protected from the cold. Continue knitting in the round until the mitts are complete.
To finish, bind off all stitches and weave in any loose ends. Give your mitts a gentle blocking to smooth out the stitches and shape them to your hand. And that’s it, you’re done! Enjoy your new fingerless mitts and keep your hands warm and stylish all winter long.
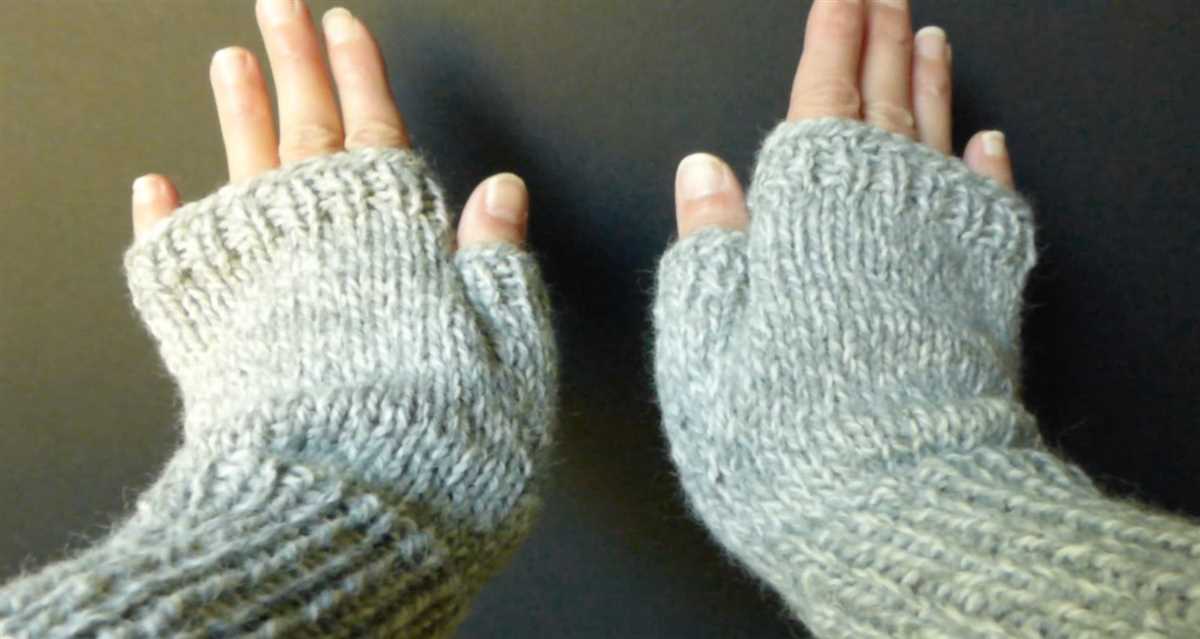
Thumb Gusset
A thumb gusset is an essential element in fingerless mitts knitting patterns. It is the section of the mitt that allows for a comfortable fit around the thumb while still providing flexibility and mobility. The thumb gusset is usually created by increasing stitches at specific points to create a triangular shape that contours to the thumb.
In the easy fingerless mitts knitting pattern provided, the thumb gusset is created by increasing stitches on each side of a designated marker. This is typically done every other row to gradually expand the width of the thumb section. The increased stitches are usually worked in a specific stitch pattern to maintain the overall design and texture of the mitt.
Here is an example of how the thumb gusset might be written in the knitting pattern:
- Row 1: Knit until marker, M1R, knit 1, M1L, knit to end of row.
- Row 2: Purl all stitches.
- Repeat Rows 1 and 2 three more times.
The above instructions indicate that on Row 1, two stitches are increased on each side of the marker by making a right-leaning and left-leaning make-one (M1R, M1L) stitch. This is then followed by a row of purl stitches to maintain the overall stitch pattern. Rows 1 and 2 are then repeated three more times, resulting in a gradually expanding thumb gusset.
By following the thumb gusset instructions in the knitting pattern, you will be able to create a fingerless mitt that fits comfortably around your thumb without restricting movement. The thumb gusset is an important feature that adds both function and style to fingerless mitts, making them a versatile and practical accessory.
Shaping the mitt
In order to shape the fingerless mitt, you will need to work a series of decreases and increases. This will create a tapered effect, allowing the mitt to snugly fit around your hand and wrist.
To begin shaping the mitt, you will need to work decreases at the outer edge of the mitt. This can be done by knitting two stitches together, or by slipping a stitch and then knitting the next stitch, and passing the slipped stitch over. These decreases should be worked every few rows, depending on the desired snugness of the mitt.
After working the decreases, you will need to increase stitches at the edge of the mitt to create the thumb opening. This can be done by knitting into the front and back of a single stitch, or by using any other preferred method of increasing stitches. These increases should be worked in the desired location for the thumb opening, and repeated every few rows until the desired width of the thumb opening is achieved.
It is important to keep track of the number of stitches you have on your needles as you shape the mitt. This will ensure that the mitt is symmetrical and fits properly. You may need to adjust the number of stitches you have on your needles as you work the shaping, depending on your desired size and gauge.
Once the shaping is complete, you can continue working in your desired stitch pattern until the desired length of the mitt is reached. This may involve working in ribbing, stockinette stitch, or any other stitch pattern that you prefer. Finally, you can bind off your stitches and weave in any loose ends to finish the fingerless mitt.
Finishing
After you finish knitting your fingerless mitts, it’s time to give them the finishing touches. First, you’ll want to weave in any loose ends using a tapestry needle. This will help ensure that your mitts look neat and tidy with no dangling yarn.
Next, you can block your fingerless mitts to help them maintain their shape and ensure that they fit properly. To do this, you’ll want to soak your mitts in lukewarm water, gently squeeze out the excess water, and then lay them flat to dry. Some knitters prefer to pin their mitts to a blocking board or use blocking wires to help shape them while they dry.
Once your mitts are dry, you can add any desired embellishments or finishing touches. This could include buttons, beads, or embroidery. You can also choose to add a ribbed cuff or a decorative edge to your mitts. The possibilities are endless when it comes to personalizing your fingerless mitts.
Finally, make sure to try on your mitts and check for any fit issues or adjustments that may need to be made. You can easily make alterations by adding or removing rows or stitches. Remember, the key is to make your fingerless mitts comfortable and functional for your hands.
By following these steps, you’ll be able to successfully finish your fingerless mitts and have a beautiful and functional accessory for those chilly days.
Tips and Tricks
When knitting fingerless mitts, there are a few tips and tricks that can help make the process easier and more enjoyable. Here are some suggestions to consider:
- Selecting the right yarn: Choosing the right yarn is important for fingerless mitts. Look for a yarn with a good amount of stretch and warmth. Wool or wool-blend yarns are often a popular choice for mitts.
- Swatching before starting: Swatching is an important step to ensure that the gauge is correct and the mitts will fit properly. Take the time to knit a swatch and measure it before starting the project.
- Using stitch markers: Stitch markers can be helpful when working on fingerless mitts, especially when shaping the thumb gusset or working in a pattern. Use stitch markers to keep track of important sections and to make the knitting process smoother.
- Working in the round: Most fingerless mitts patterns are worked in the round, either using double-pointed needles or a circular needle. Familiarize yourself with the technique of knitting in the round if you’re not already comfortable with it.
- Adding a thumb gusset: Many fingerless mitts have a thumb gusset, which helps provide a more comfortable fit. Take the time to carefully follow the pattern instructions for creating the thumb gusset, and use stitch markers to keep track of the stitches.
By following these tips and tricks, you can ensure that your fingerless mitts turn out beautifully and fit perfectly. Have fun knitting!
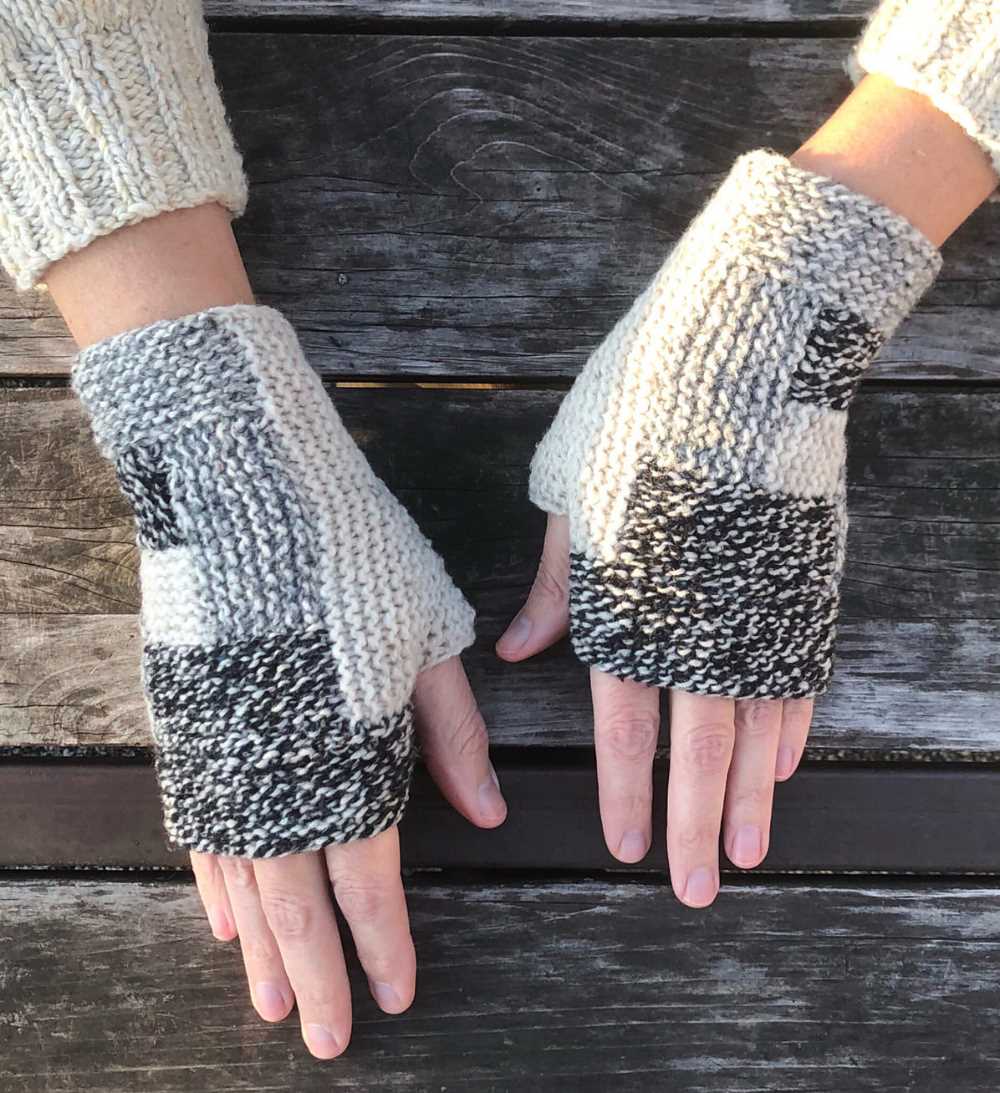
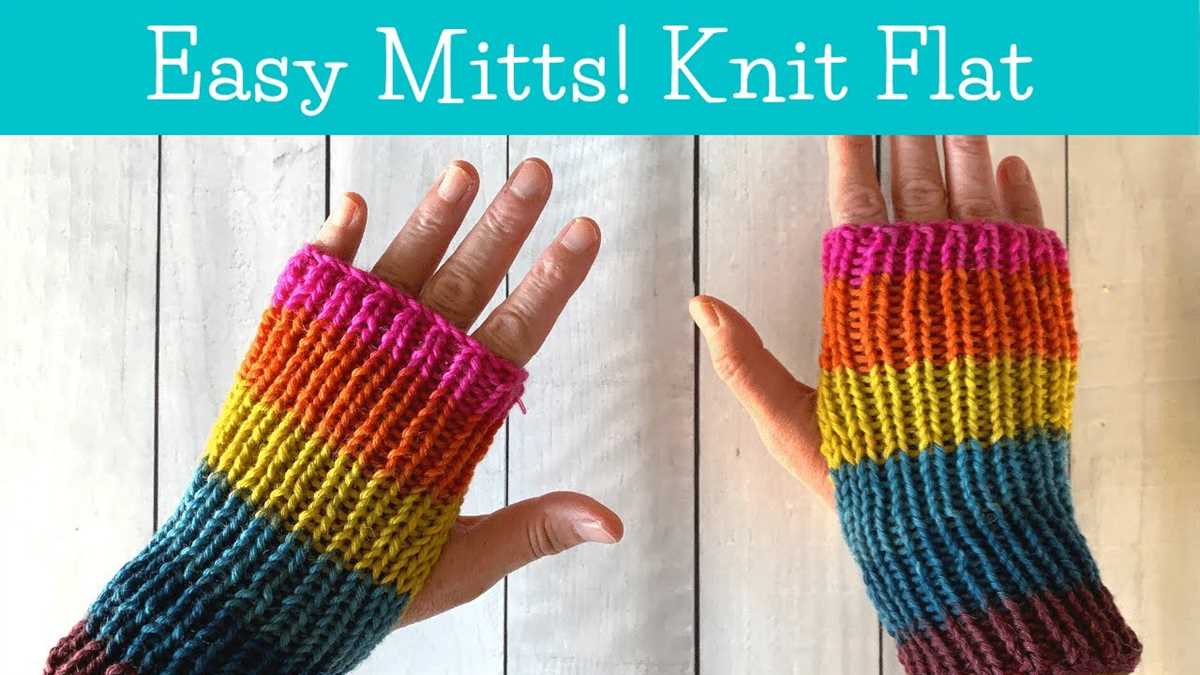
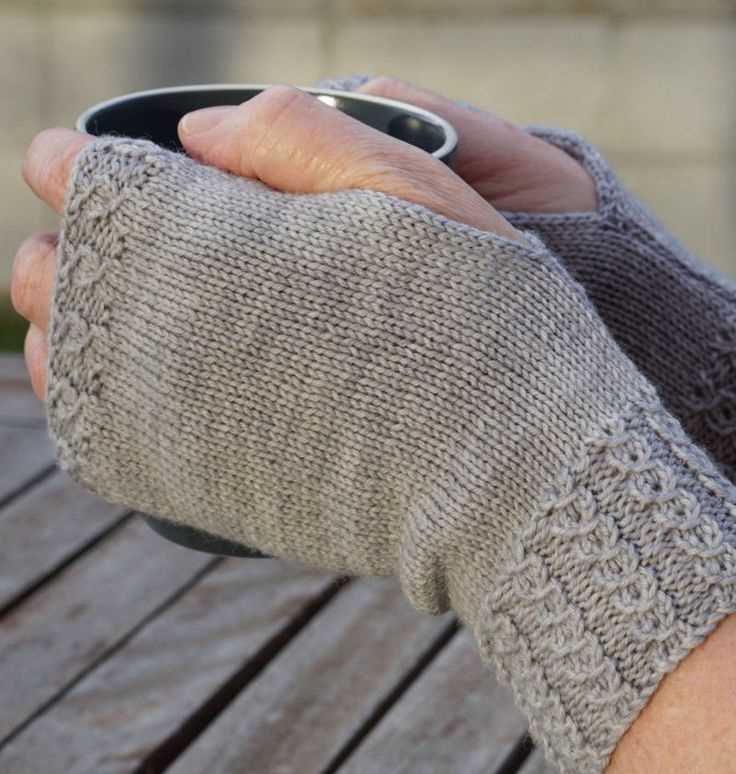
Variations
There are many ways to customize your fingerless mitts and add your own personal touch. Here are a few ideas:
Color Combinations
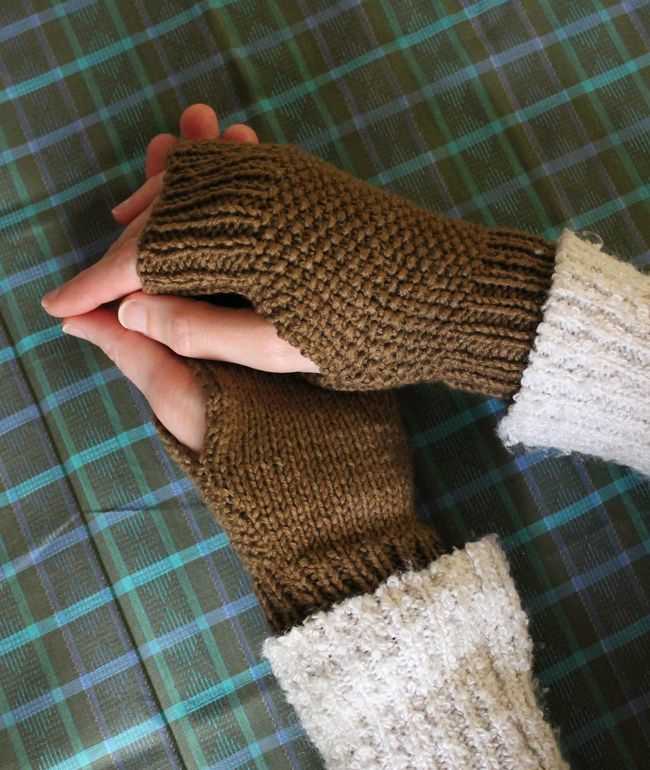
Experiment with different color combinations to create unique and eye-catching fingerless mitts. You can choose two contrasting colors for a bold look, or opt for more subtle shades for a more understated style.
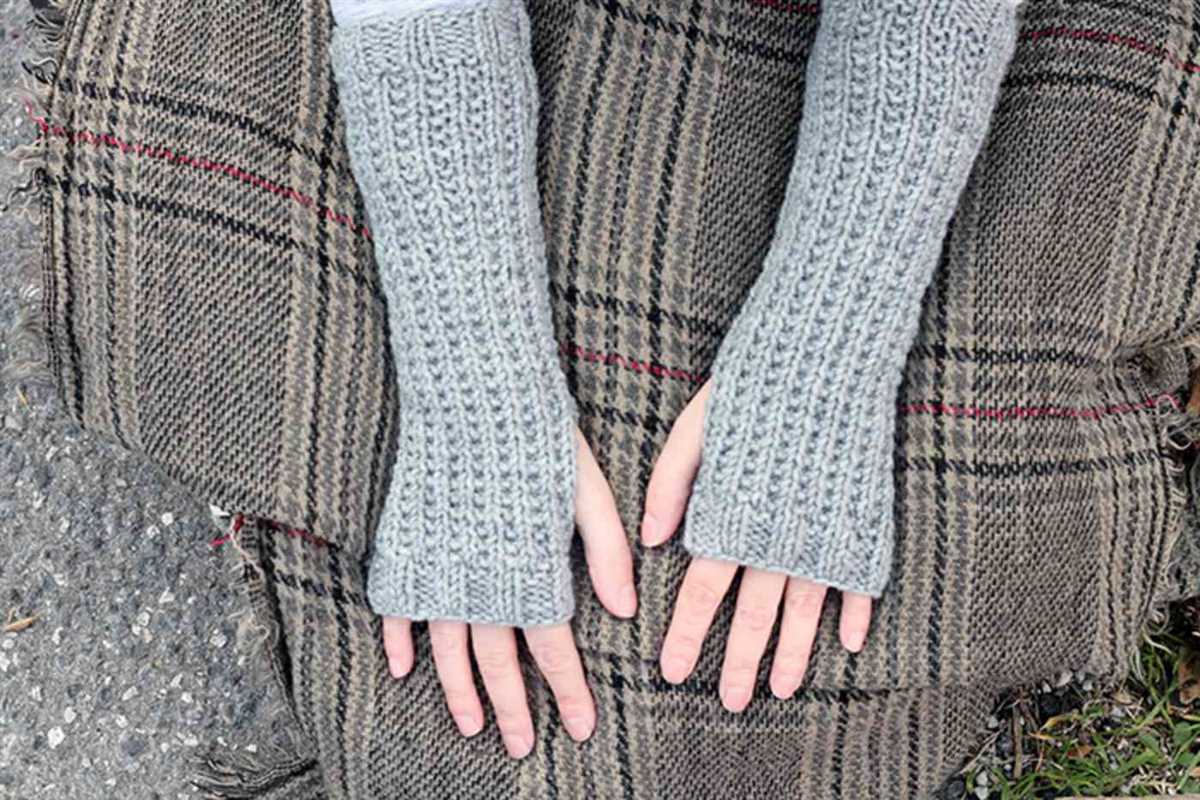
Texture
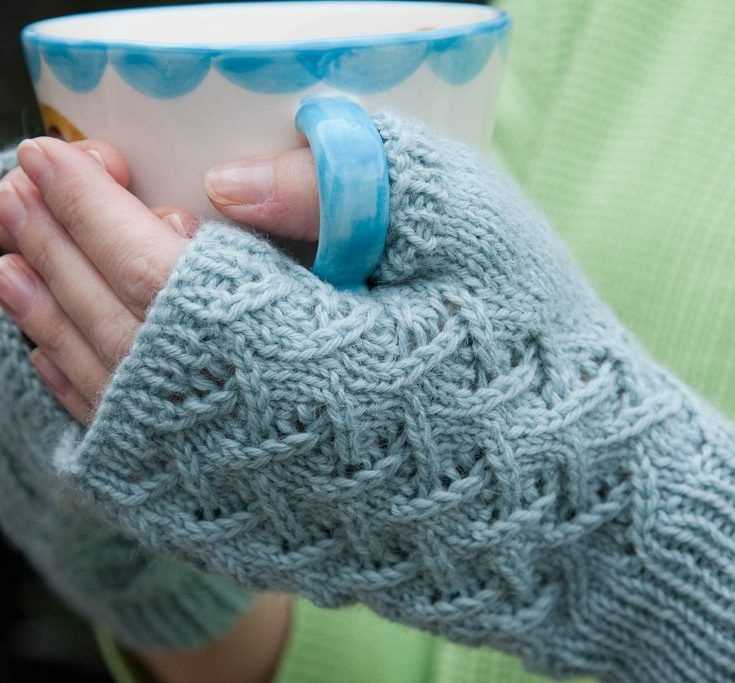
Add some texture to your fingerless mitts by incorporating different stitch patterns. You can try knitting ribs, cables, or lace patterns to create a more intricate design. You could also experiment with different yarns, such as variegated or self-striping yarn, to add even more visual interest.
Embroidery or Appliques
If you enjoy embroidery or want to add some extra flair to your fingerless mitts, you can try adding decorative stitches, motifs, or even appliques. This can be a great way to personalize your mitts and make them truly one-of-a-kind.
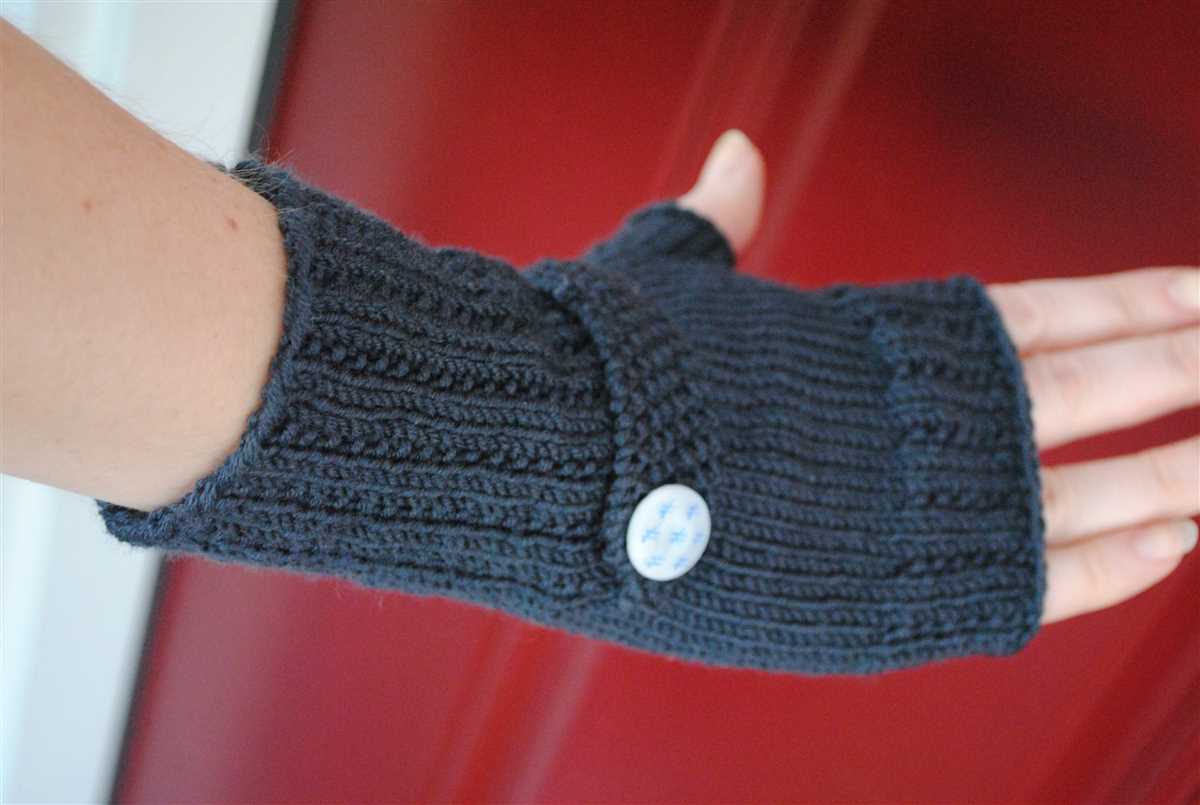
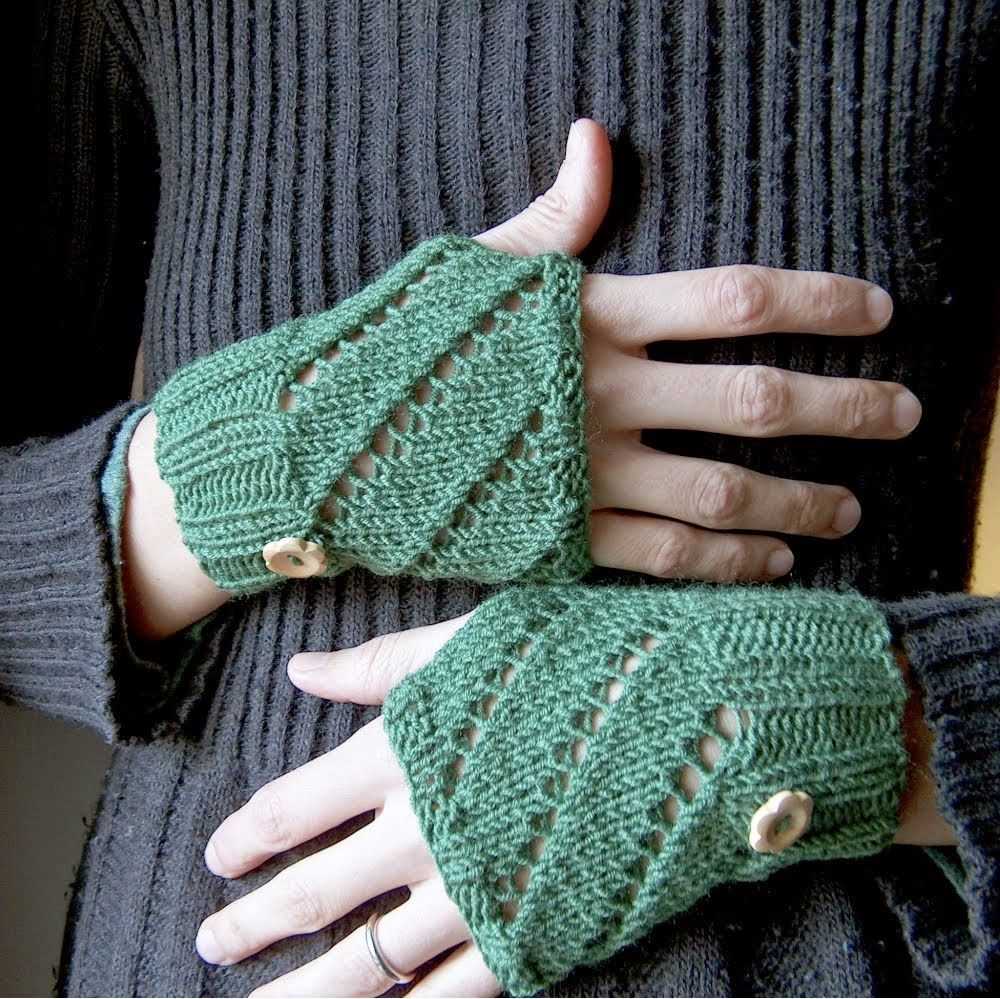
Button or Buttonhole Details
Instead of using a basic ribbed cuff, you can add button or buttonhole details to your fingerless mitts. This allows you to fasten the mitts in different ways and adds an extra touch of style.
- Experiment with different color combinations
- Add texture with different stitch patterns
- Try embroidery or appliques for extra flair
- Add button or buttonhole details for a unique look
Benefits of Fingerless Mitts
Fingerless mitts are a versatile and useful accessory that offers several benefits to the wearer. Whether you’re working outdoors or simply need a little extra warmth while typing on your computer, fingerless mitts are a great choice. Here are some of the benefits of wearing fingerless mitts:
- Warmth: Fingerless mitts provide warmth to your hands and wrists while allowing your fingers to remain free. This is especially beneficial in colder climates or during the winter months when you still need to use your fingers for tasks.
- Dexterity: Unlike regular mittens or gloves, fingerless mitts allow you to maintain your dexterity and grip. This makes them ideal for activities that require fine motor skills, such as knitting, typing, or using touchscreen devices.
- Comfort: Fingerless mitts provide a comfortable and snug fit without restricting your hand movements. They are designed to keep your hands cozy without feeling cumbersome or bulky.
- Style: Fingerless mitts come in a variety of styles and designs, allowing you to express your personal style and add a fashionable touch to your outfit. They can be worn with casual and formal attire, making them a versatile accessory for any occasion.
- Versatility: Fingerless mitts are not only practical for outdoor activities but also for indoor tasks. They can be worn while working on a computer, doing chores, or engaging in hobbies such as painting or crafting.
- Protection: Fingerless mitts provide a layer of protection from cold weather, wind, and other elements. They can help prevent dryness, chapping, and discomfort caused by exposure to harsh conditions.
In conclusion, fingerless mitts are a practical and stylish accessory that offer warmth, comfort, dexterity, and protection. Whether you need them for outdoor activities or indoor tasks, fingerless mitts are a versatile option that can enhance your overall comfort and style.