
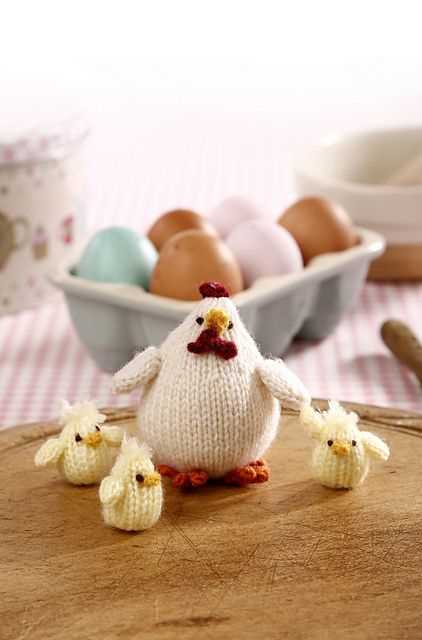
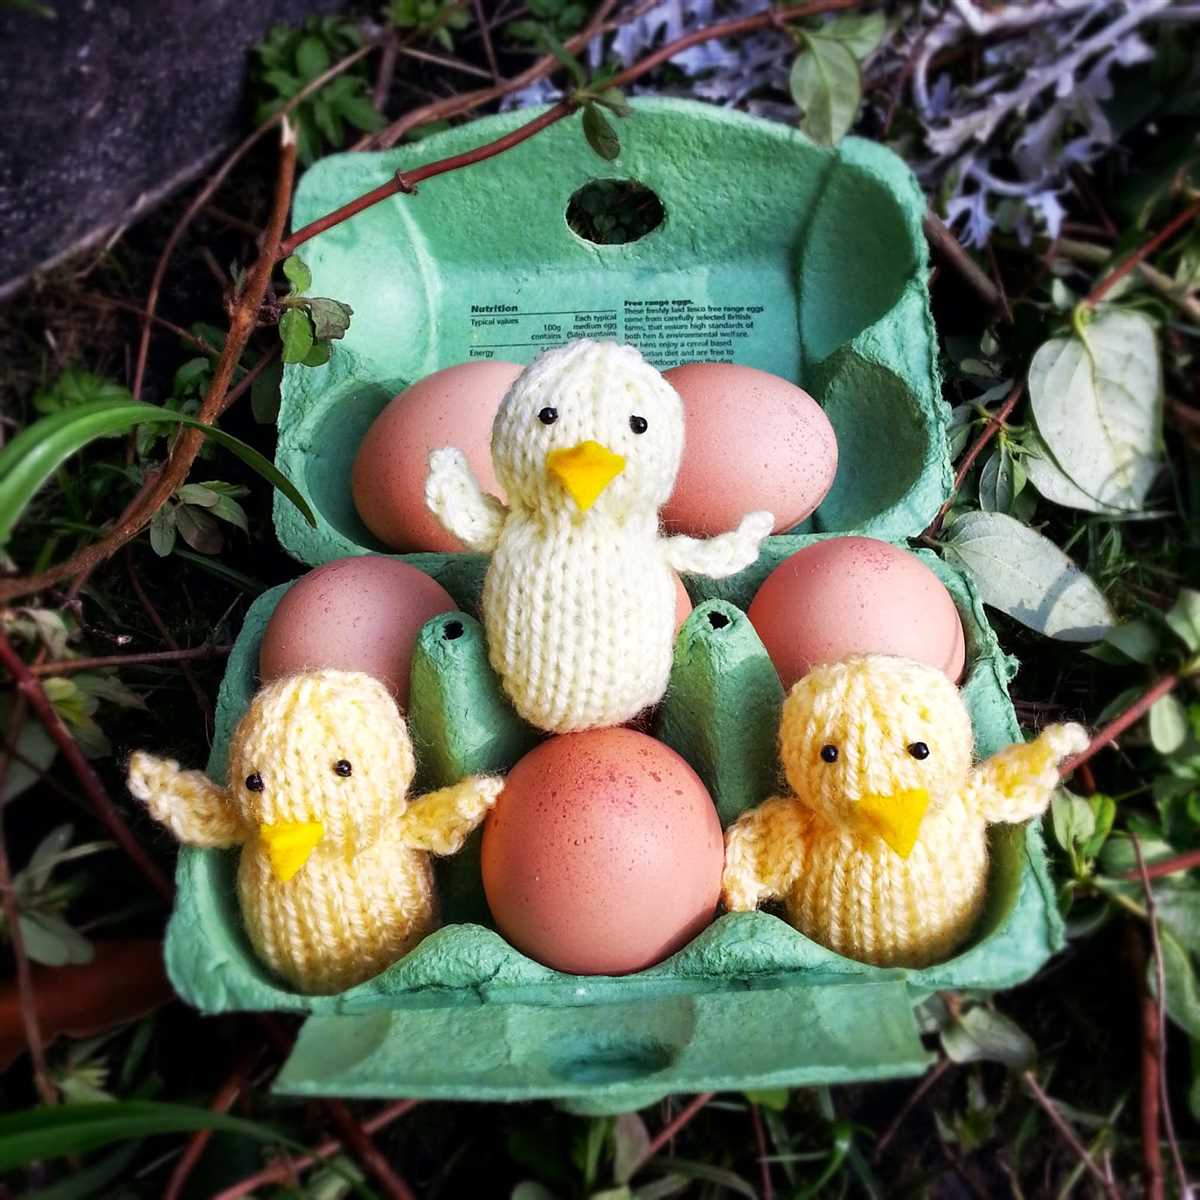
If you’re a fan of knitting and adorable animals, you’re in luck! We have a free chick knitting pattern that is sure to bring a smile to your face. This pattern is perfect for beginners and can be completed in just a few hours. Whether you want to knit a cute chick for yourself or as a gift for a loved one, this pattern is a great choice.
This free chick knitting pattern is designed to be easy to follow, with step-by-step instructions and clear diagrams. You’ll need basic knitting skills such as casting on, knitting, purling, and decreasing, but don’t worry if you’re a beginner – we’ve included helpful tips and tutorials to guide you along the way.
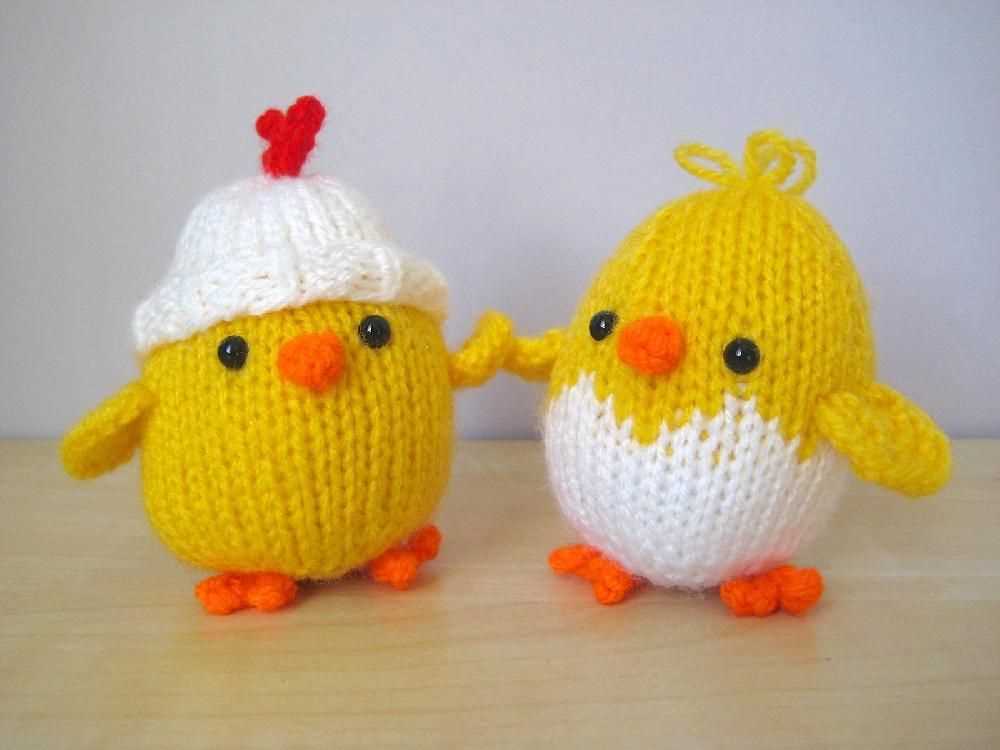
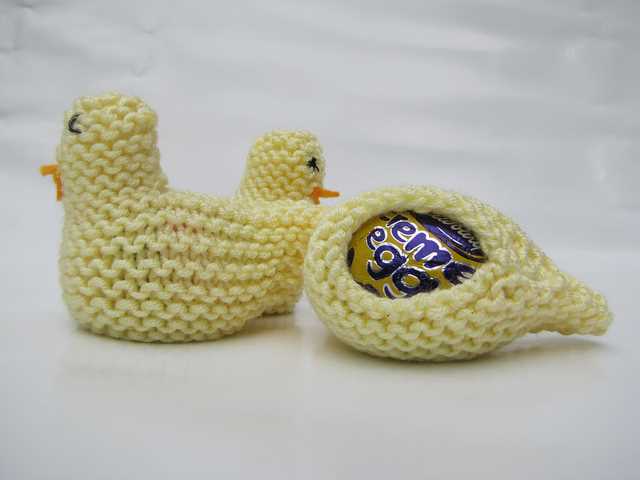
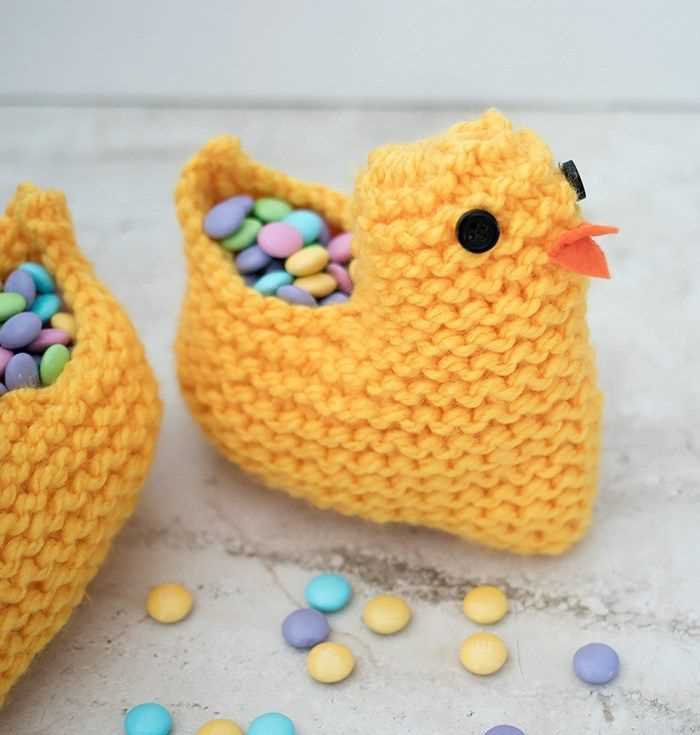
Once you’ve finished knitting your chick, you can add your own personal touches to make it truly unique. You can use different colored yarns to create a multicolored chick, or add embellishments like buttons or ribbons. The possibilities are endless, and we can’t wait to see the creative variations you come up with!
Free Chick Knitting Pattern
Are you looking for a cute and fun knitting project? Look no further than this free chick knitting pattern! Whether you’re a beginner or an experienced knitter, this pattern is perfect for creating adorable chicks that can be used as Easter decorations or as playful toys for children.
This free chick knitting pattern is easy to follow and requires basic knitting skills. The pattern includes detailed instructions and a list of materials needed, making it accessible to knitters of all levels. With this pattern, you can create a flock of adorable chicks in no time.
Materials:
- Yellow yarn
- Orange yarn
- Black yarn
- Knitting needles
- Stuffing
- Yarn needle
Instructions:
- Begin by knitting the body of the chick using yellow yarn. Start with a magic loop and knit in the round.
- Next, create the wings by knitting small rectangles with yellow yarn. Sew the wings onto the body of the chick.
- To make the beak, knit a small triangle using orange yarn. Attach it to the front of the chick’s body.
- For the eyes, use black yarn to create small french knots or attach small black beads.
- Stuff the chick with stuffing, making sure to shape it into a round body.
- Finally, close the opening and weave in any loose ends.
That’s it! You’ve completed your adorable chick using this free knitting pattern. Enjoy your new creation or gift it to someone special. Happy knitting!
Materials
When it comes to knitting a free chick pattern, you’ll need a few key materials to bring your project to life. Here’s a list of what you’ll need:
Yarn

Choosing the right yarn is crucial for creating a soft and adorable chick. Look for a worsted weight yarn in a bright yellow color. This will help your chick stand out and add a playful touch to any ensemble.
Knitting Needles
To knit your chick, you’ll need a pair of knitting needles that are appropriate for the yarn you’ve chosen. Check the yarn label for the recommended needle size and use that as a guide. Typically, a pair of US size 4 or 5 knitting needles will work well for a chick pattern.
Tapestry Needle
A tapestry needle will be handy for weaving in any loose ends and attaching any additional features to your chick, such as the eyes or beak. Choose a needle with a large eye that can easily accommodate the yarn.
Scissors
Having a pair of sharp scissors is essential for any knitting project. They’ll come in handy for cutting the yarn and trimming any excess threads.
Stuffing
To give your chick a plump and cuddly shape, you’ll need stuffing. You can purchase polyester fiberfill at a craft store or use an alternative stuffing material such as cotton balls or fabric scraps.
Optional Embellishments
If you want to give your chick some extra personality, you can consider adding optional embellishments. These can include small pom-poms for the wings or feet, googly eyes for a whimsical look, or a small fabric bow for a cute touch. Get creative and add whatever details speak to you!
Gauge

Gauge in knitting refers to the number of stitches and rows that are produced by a specific needle size and yarn. It is an important factor to consider when following a knitting pattern, as it determines the size and fit of the finished project.
To determine the gauge of a knitting project, it is recommended to knit a swatch using the same needles and yarn that will be used for the final project. The swatch should be large enough to measure at least 4×4 inches (10×10 cm) and should be washed and blocked before measuring.
When measuring the gauge, it is important to count the number of stitches and rows within the specified measurement area. For example, if the pattern states that the gauge is 20 stitches and 24 rows = 4 inches (10 cm) in stockinette stitch, you would measure the number of stitches and rows within a 4×4 inch (10×10 cm) area of your swatch.
If the gauge of your swatch matches the gauge specified in the pattern, then you can continue knitting the project as directed. However, if the gauge is off, you may need to adjust your needle size to achieve the correct gauge. If your swatch has fewer stitches and rows than the pattern gauge, you may need to use smaller needles. Conversely, if your swatch has more stitches and rows, you may need to use larger needles.
It is important to note that not all knitters have the same tension and knitting style, so gauge may vary from person to person. That’s why it is always recommended to knit a gauge swatch before starting a project, especially if you are using a different yarn or needle size than what is specified in the pattern.
In summary, gauge is an essential component of knitting, as it determines the size and fit of the finished project. By knitting a gauge swatch and measuring the number of stitches and rows within a specified area, you can ensure that your project turns out as intended. Adjusting your needle size can help you achieve the correct gauge if necessary.
Abbreviations
When it comes to knitting patterns, understanding abbreviations is essential. These abbreviations are used as shorthand in patterns to save space and make them easier to follow. Below is a list of common abbreviations you may come across in a free chick knitting pattern:
- K: Knit
- P: Purl
- St(s): Stitch(es)
- Rep: Repeat
- Inc: Increase
- Dec: Decrease
- YO: Yarn Over
- K2tog: Knit Two Together
- SSK: Slip Slip Knit
These abbreviations help to convey the actions you need to take while knitting the pattern. For example, if you see “K2tog,” it means you should knit two stitches together. If you encounter “YO,” it means you will need to bring the yarn over the needle to create an additional stitch.
It’s important to familiarize yourself with these abbreviations before starting a free chick knitting project. You can reference the abbreviations list throughout the pattern to ensure you understand each step. Some patterns may also include additional abbreviations specific to that pattern, so always check the pattern’s key or legend for any unique abbreviations.
Body
The body of the free chick knitting pattern is worked in stockinette stitch, creating a smooth and even texture. To begin, cast on the desired number of stitches using the recommended yarn and needle size. The number of stitches will vary depending on the size of the chick.
Once the stitches are cast on, begin working in rounds or rows, depending on your knitting preference. For the body, continue knitting in stockinette stitch until the desired length is reached. This will create a smooth, flat surface for the chick’s body.
Decreases: To shape the body, you will need to make decreases. This can be done by knitting two stitches together (k2tog) or by slipping, knitting, and then passing the slipped stitch over (ssk). Follow the pattern instructions for when and how to make the decreases.
Finishing: Once the body is complete, cut the yarn, leaving a long tail for sewing. Use a yarn needle to sew the bottom opening closed, leaving a small opening for stuffing. Stuff the body firmly with polyester fiberfill or your preferred stuffing material. After stuffing, sew the opening closed.
- Continue knitting in stockinette stitch.
- Use decreases to shape the body.
- Finish by sewing the bottom opening closed and stuffing the body.
The body is an essential part of the free chick knitting pattern. It serves as the base for the chick’s head, wings, and tail. By following the pattern instructions and knitting the body in stockinette stitch, you will create a soft and adorable chick that is perfect for Easter or any other occasion.
Head
The head is an important part of the knitted chick pattern. It is a cute and distinctive feature that gives the chick its character. The head is usually knitted separately and then sewn onto the body. To make the head, you will need to follow the instructions provided in the free chick knitting pattern. The pattern will guide you on how many stitches to cast on, which knitting needles and yarn to use, and how to shape the head.
When knitting the head, it is important to pay attention to the tension of your stitches to ensure an even result. You can use stitch markers to help you keep track of the beginning and end of each row. Make sure to stuff the head firmly with stuffing material such as polyester fiberfill or cotton wool to give it a plump and three-dimensional shape. Be careful not to overstuff the head, as it may distort the shape and make it difficult to sew onto the body.
Assembly:
Once you have completed knitting the head, it is time to assemble it with the rest of the chick. Using a tapestry needle and the same yarn used for knitting, sew the head onto the body. Start by aligning the head with the neck of the body and sew the two pieces together using a whipstitch or mattress stitch. Make sure to firmly attach the head to the body to prevent it from coming loose during play or handling.
To add more details to the head, you can embroider or sew on eyes, a beak, and any other desired features. This will bring the chick to life and make it even more adorable. Use contrasting colors of yarn or embroidery thread to make the features stand out. Once you have finished sewing on the details, give the head a gentle squeeze to fluff up the stuffing and shape it into the desired form.
Overall, the head is a crucial element in creating a realistic and charming knitted chick. Following the free chick knitting pattern and paying attention to the details will ensure that the head turns out beautifully and adds charm to the finished chick. Enjoy the process of knitting and assembling the head, and have fun personalizing it with your own creative touches!
Beak
The beak is an important feature of a chicken and adds character to your knitted chick. To create the beak, you will need to knit a small triangle shape to resemble the beak of a chick. You can use a different color yarn to make it stand out or keep it the same color as the body for a more subtle look.
To knit the beak, start by casting on a small number of stitches, around 8-10 stitches should be enough depending on the size you want. Then, work in garter stitch for a few rows, knitting every stitch. This will create the triangular shape of the beak. Once you have reached the desired length, you can cut the yarn and secure it by weaving the end through the stitches.
Tip: If you want to make the beak more three-dimensional, you can stuff it lightly with some polyester fiberfill before closing it off. This will give the beak a more realistic shape and make it stand out even more.
Here is an example of how to knit the beak:
- Using a different color yarn or the same color as the body, cast on 8 stitches.
- Knit every stitch for 3-4 rows.
- Cut the yarn, leaving a long tail for sewing.
- Weave the tail through the stitches to close off the beak.
- Optional: Stuff the beak lightly with polyester fiberfill before closing it off.
Eyes
The eyes are an essential part of any knitted toy. They bring life and personality to the character you’ve created. When it comes to knitting chicks, there are various options for the eyes that you can choose from.
Safety eyes: Safety eyes are a popular choice for knitted toys. They are easy to attach and provide a secure and permanent attachment. Safety eyes come in different sizes and colors, allowing you to customize the look of your chick. Make sure to follow the manufacturer’s instructions for attaching safety eyes to ensure they are securely attached and won’t pose a choking hazard.
Embroidered eyes: If you prefer a softer and more handmade look, you can embroider the eyes onto your knitted chick. Using black yarn or embroidery floss, you can create eyes of any shape or size. Embroidered eyes give your chick a more unique and personalized appearance.
If you are new to embroidery, there are many online tutorials and resources available that can guide you through the process. Take your time and practice on a scrap piece of knitting before embroidering the eyes onto your chick to ensure you are happy with the result.
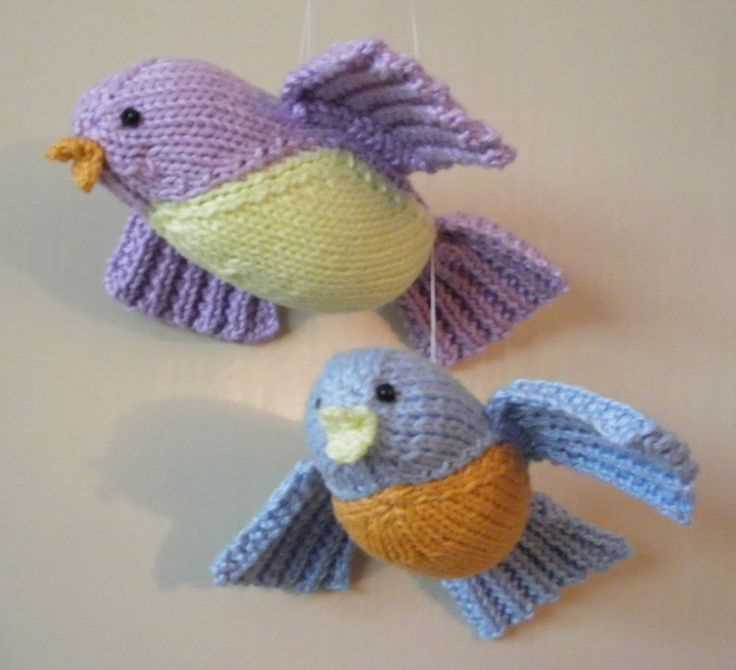
Wings
Wings are an essential part of a chick’s anatomy, allowing them to fly and navigate their environment. These delicate structures are made up of feathers that are interconnected and supported by a framework of bones and muscles. Chickens have two wings, one on each side of their body, which they use to propel themselves through the air.
Feathers
The feathers on a chick’s wings are specially designed to provide lift and control during flight. They are lightweight and flexible, allowing the bird to move their wings rapidly and generate the necessary lift to stay airborne. The feathers are arranged in rows called vanes, which overlap each other to form a smooth surface. This smooth surface helps reduce air resistance and enables the chick to fly more efficiently.
Bones and Muscles
The framework of a chick’s wing is supported by bones and muscles. The main bone in the wing is called the humerus, which connects the wing to the body. From the humerus, there are smaller bones that extend to the tip of the wing, providing support and structure. The muscles in the wing are responsible for moving the bones and feathers. The two main muscles in the wing are the pectoralis and supracoracoideus muscles, which work together to create the flapping motion needed for flight.
Flight and Navigation
Chicks use their wings not only for flight but also for navigation. They can adjust the position and angle of their wings to steer and change direction. Additionally, the feathers on the wings have sensory organs called barbs and barbules, which provide the bird with information about its surroundings while in flight. This helps the chick navigate through the air and avoid obstacles.
Conclusion
The wings of a chick are marvels of nature, allowing these birds to take to the skies and explore their environment. Through the combination of feathers, bones, and muscles, chicks can fly and navigate with agility and precision. Understanding the anatomy and function of wings is crucial for appreciating the incredible abilities of these charming creatures.
Feet
Feet are an essential part of the human body. They provide support, balance, and enable us to move and walk. Without feet, our mobility would be severely limited. It is crucial to take care of our feet to ensure their health and well-being.
Common foot problems
- Blisters: Blisters are caused by friction and can be painful. They are commonly formed by ill-fitting shoes or excessive rubbing.
- Calluses: Calluses are thick, hardened areas of skin that develop as a result of repeated pressure or friction. They often occur on the bottom of the feet.
- Corns: Corns are similar to calluses but typically have a more defined shape and are usually found on or between the toes.
- Foot odor: Foot odor can be caused by bacteria that thrive in warm, moist environments. It can be embarrassing and unpleasant.
- Athlete’s foot: Athlete’s foot is a fungal infection that commonly affects the skin between the toes. It can cause itching, burning, and discomfort.
Taking care of your feet
- Wear comfortable and properly fitting shoes: Avoid wearing shoes that are too tight or too loose. Properly fitting shoes help prevent blisters, calluses, and other foot problems.
- Maintain good hygiene: Regularly wash your feet with warm water and mild soap. Dry your feet thoroughly, especially between the toes, to prevent fungal infections.
- Keep your feet moisturized: Apply a moisturizer to your feet regularly to keep the skin soft and prevent dryness and cracking.
- Trim your toenails properly: Cut your toenails straight across and avoid cutting them too short to prevent ingrown nails.
- Avoid walking barefoot in public areas: Protect your feet from potential infections by wearing socks or shoes in public places like pools, gyms, and locker rooms.
- Seek professional help when needed: If you’re experiencing any persistent foot pain or have concerns about your foot health, consult a podiatrist or a foot specialist.
Finishing
Finishing your knitted chick is just as important as the knitting itself. Here are a few steps to complete your project:
- Weave in ends: Use a yarn needle to weave in any loose ends from color changes or joining new yarn. Make sure to secure the ends so they don’t unravel.
- Attach eyes and beak: Sew on the googly eyes to give your chick a cute and lively expression. You can also sew on a small triangle-shaped beak using a contrasting color yarn.
- Stuff and shape: Use stuffing material to fill your knitted chick to give it a round and plump shape. You can adjust the amount of stuffing to achieve your desired look.
- Closing the bottom: Once your chick is fully stuffed, use the mattress stitch or any other suitable seaming technique to close the bottom opening. Make sure the seam is secure and neat.
- Add finishing touches: You can add some decorative elements like a ribbon bow, a tiny felt flower, or a knitted scarf to personalize your chick and make it extra special.
Congratulations! You have successfully completed your knitted chick. Now you can display it proudly or gift it to someone special. Enjoy your adorable creation!