
Knitting is a therapeutic and relaxing activity that allows you to create beautiful and functional items with just a pair of needles and some yarn. One popular knitting project for fans of sports is the free throw knitting pattern. This pattern is inspired by the basketball free throw line and is a fun way to show your love for the game while honing your knitting skills.
Free throw knitting patterns can be used to make a variety of items, from scarves and blankets to hats and sweaters. The pattern typically features a block or stripe design in the colors of your favorite basketball team. You can get creative with your color choices and experiment with different stitch patterns to make each item unique.
Whether you’re a basketball enthusiast looking to show your team spirit or simply enjoy knitting and want to try something new, free throw knitting patterns are a great option. They are suitable for knitters of all skill levels, from beginners to advanced. With a little practice, you’ll be able to create personalized and stylish items that are perfect for game day or everyday wear.
What are Free Throw Knitting Patterns?

Free throw knitting patterns are detailed instructions that guide knitters in creating various designs and stitches for throwing a basketball. These patterns typically include step-by-step instructions, stitch diagrams, and illustrations to help knitters follow along and create a knitted basketball.
The free throw knitting patterns range in complexity, from simple stitches and basic shapes to more intricate designs that incorporate colorwork and texture. Whether you’re a beginner or an experienced knitter, there are patterns available for every skill level. Some patterns may also include tips and tricks for achieving the best results, such as adjusting tension and choosing the right yarn.
Knitting a basketball using a free throw knitting pattern can be a fun and creative way to show your love for the sport. You can customize your design by selecting different yarn colors to represent your favorite team or player. The finished knitted basketball can be used as a decorative item, a toy, or even a gift for a basketball enthusiast. Plus, knitting can be a calming and therapeutic activity, allowing you to relax and unwind while creating something unique and special.
Why Choose Free Throw Knitting Patterns?
Free throw knitting patterns are a great option for knitters looking for new and exciting projects. These patterns offer a variety of designs and styles, allowing knitters to create unique and personalized throws. Whether you are a beginner or an experienced knitter, free throw knitting patterns are accessible to all skill levels.
One of the main advantages of free throw knitting patterns is the cost. As the name suggests, these patterns are available for free, which means you don’t have to spend any money to access them. This makes it an affordable option for knitters who may be on a budget or simply want to try out a new pattern without investing too much.
Another benefit of free throw knitting patterns is the wide range of options available. Whether you prefer simple and classic designs or intricate and challenging patterns, you can find it all in the free pattern world. This allows you to explore different techniques, stitches, and styles, helping to expand your knitting skills and knowledge.
Furthermore, using free throw knitting patterns provides an opportunity to connect with the knitting community. Many websites and online forums offer free pattern downloads and discussion boards, where you can share your progress, ask for help, and receive feedback from fellow knitters. This sense of community and support can be motivating and inspiring, especially for beginners.
In conclusion, free throw knitting patterns are a fantastic choice for knitters of all skill levels. They offer affordability, a wide range of design options, and a sense of community. So, why not give it a try and start knitting your own unique throw today?
Top 5 Free Throw Knitting Patterns
If you love knitting and are looking for some free throw knitting patterns, you’re in luck! Whether you’re a beginner or an experienced knitter, these patterns will keep you busy and help you create beautiful throws to cozy up with on cold winter nights or give as thoughtful gifts.
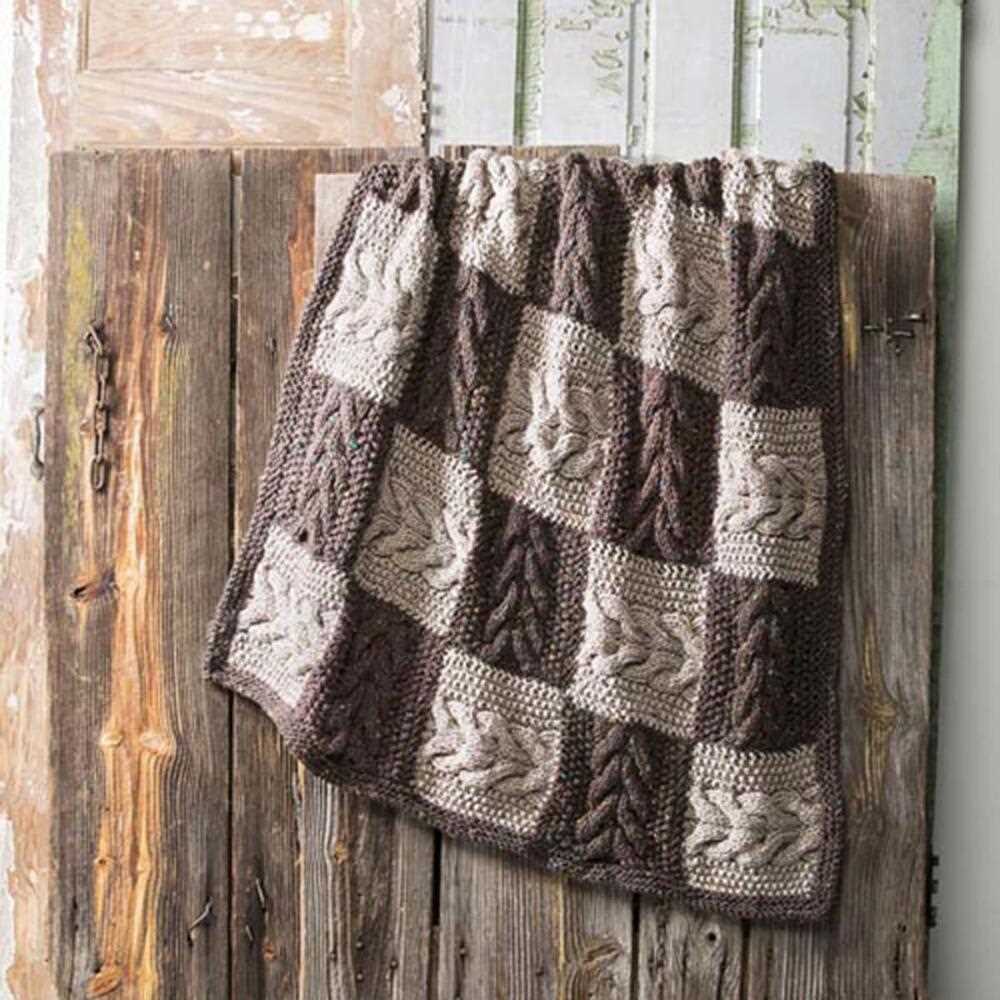
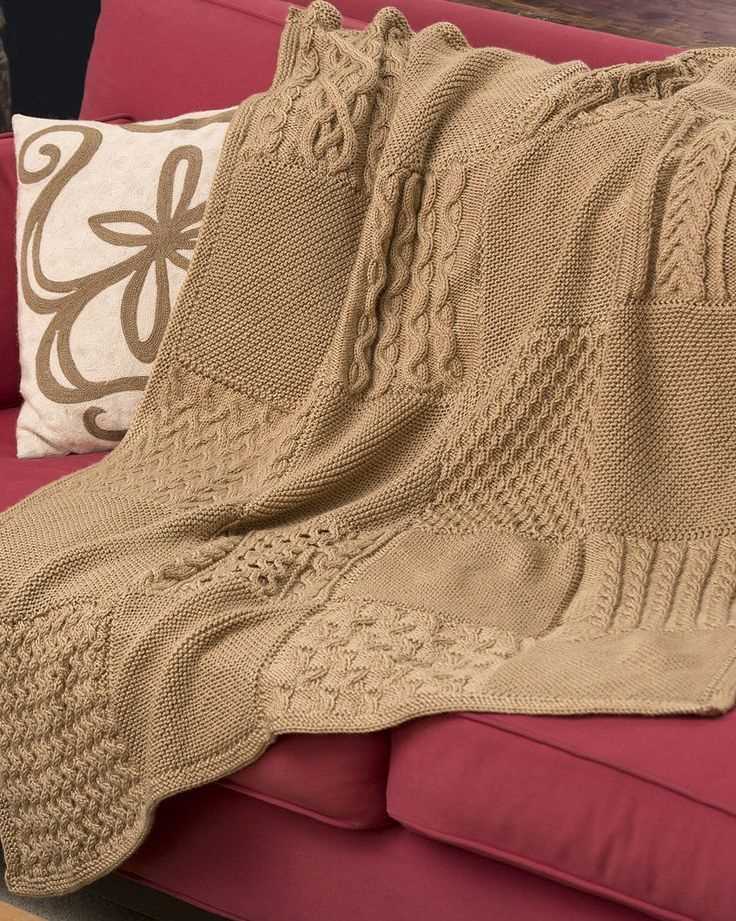
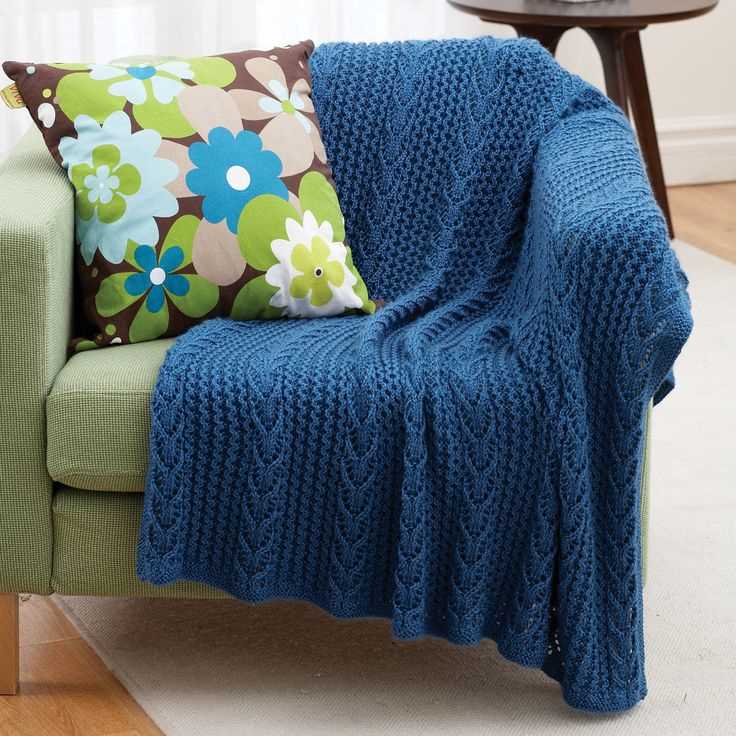
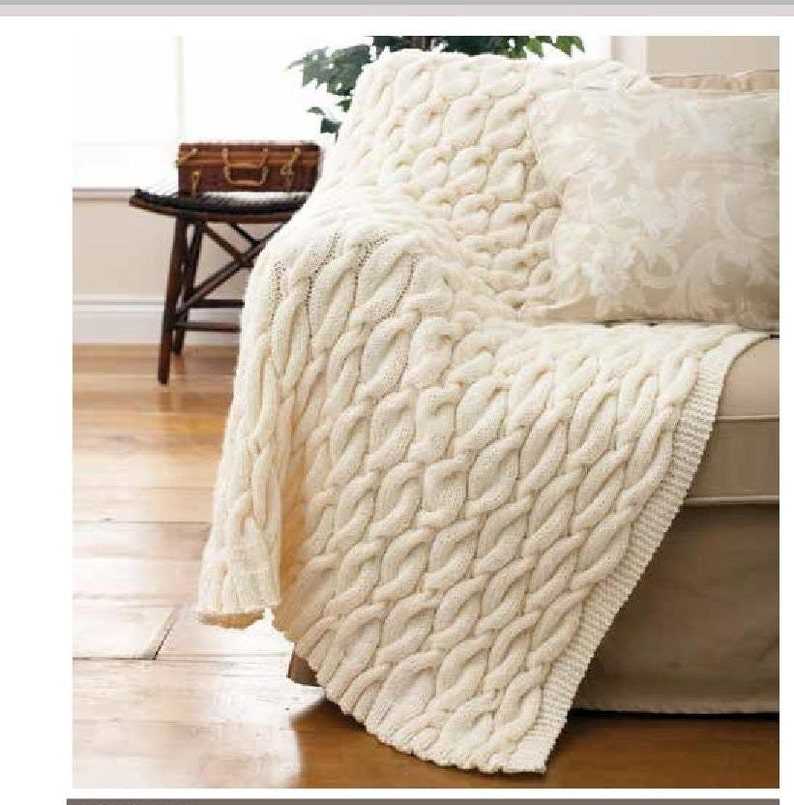
1. Cable Knit Throw: This classic pattern creates a timeless and elegant throw. The intricate cable stitches add texture and depth to your project. You can choose different sizes and colors to match your home decor or personal style. The pattern usually includes clear instructions and charts, making it suitable for knitters of all levels.
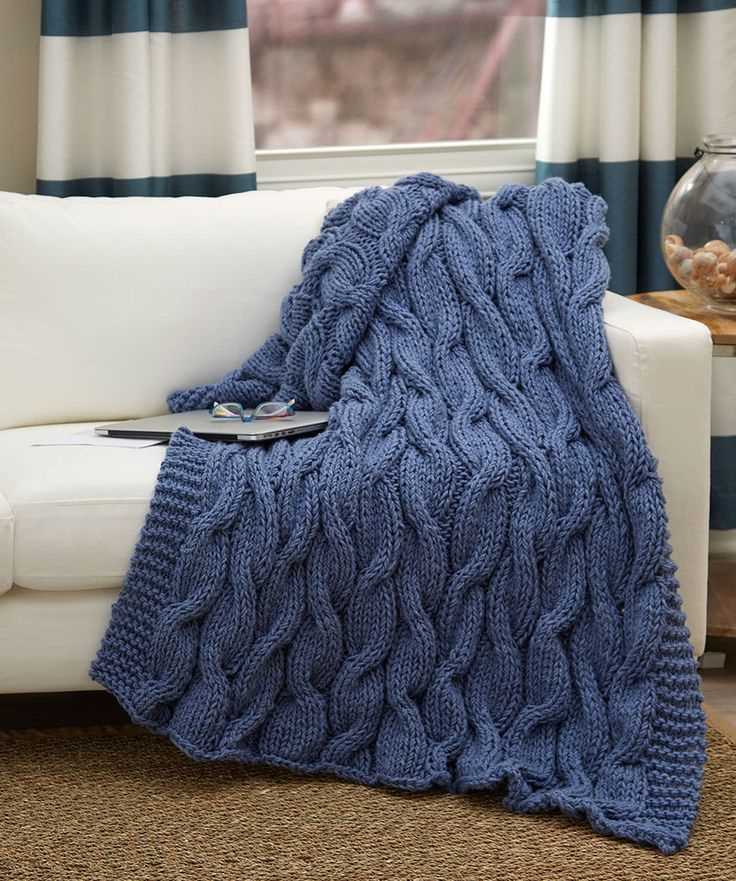
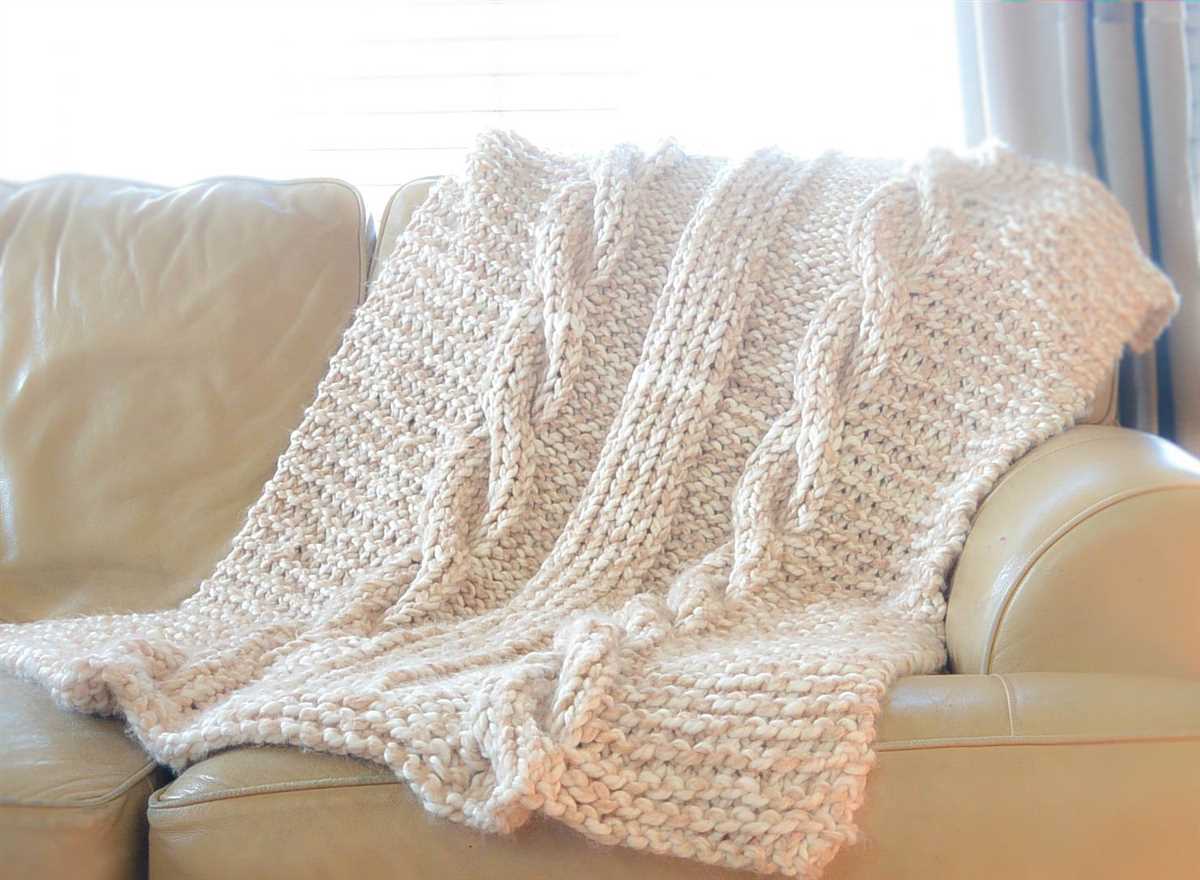
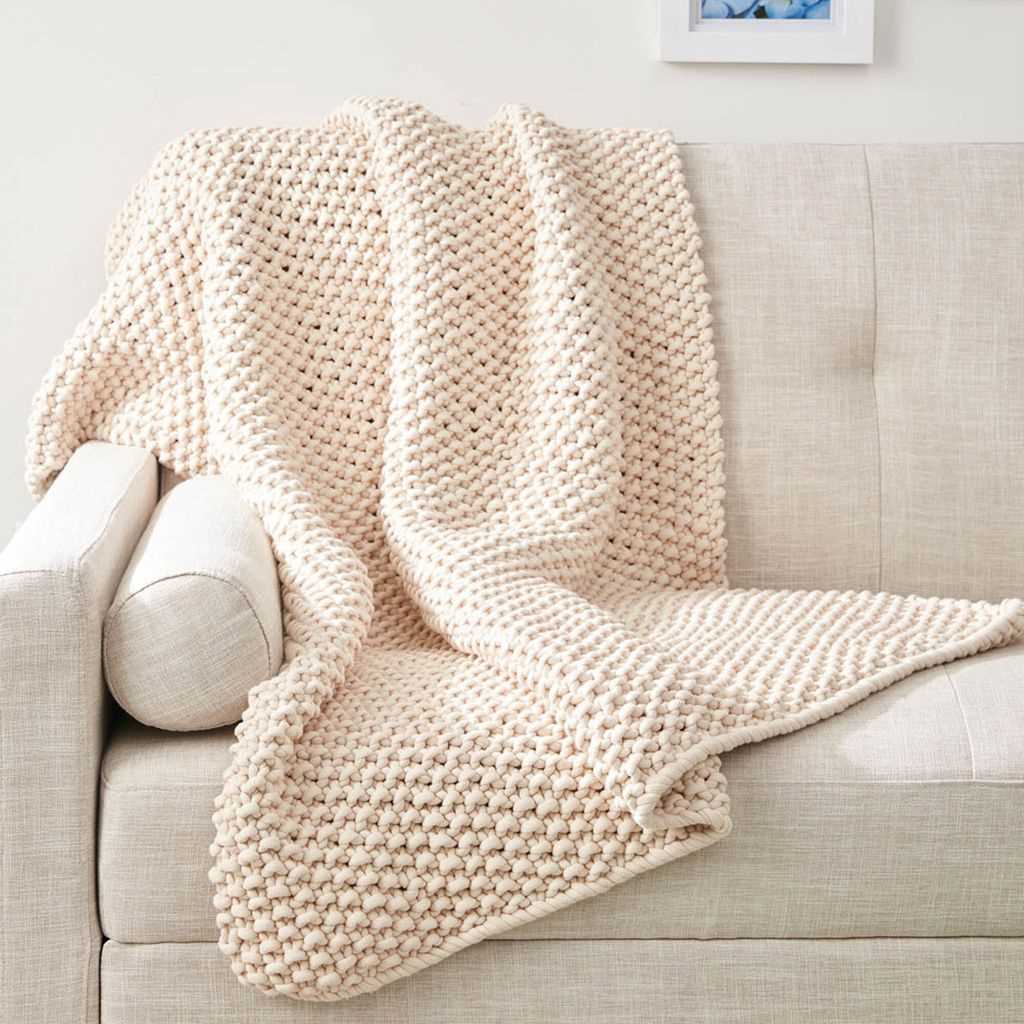
2. Chunky Ribbed Blanket: If you prefer a more modern and cozy look, the chunky ribbed blanket is perfect for you. This pattern uses thick yarn and large needles to create a warm and plush throw. The ribbed texture adds visual interest and makes it extra soft. The pattern is usually straightforward and easy to follow, making it ideal for beginners.
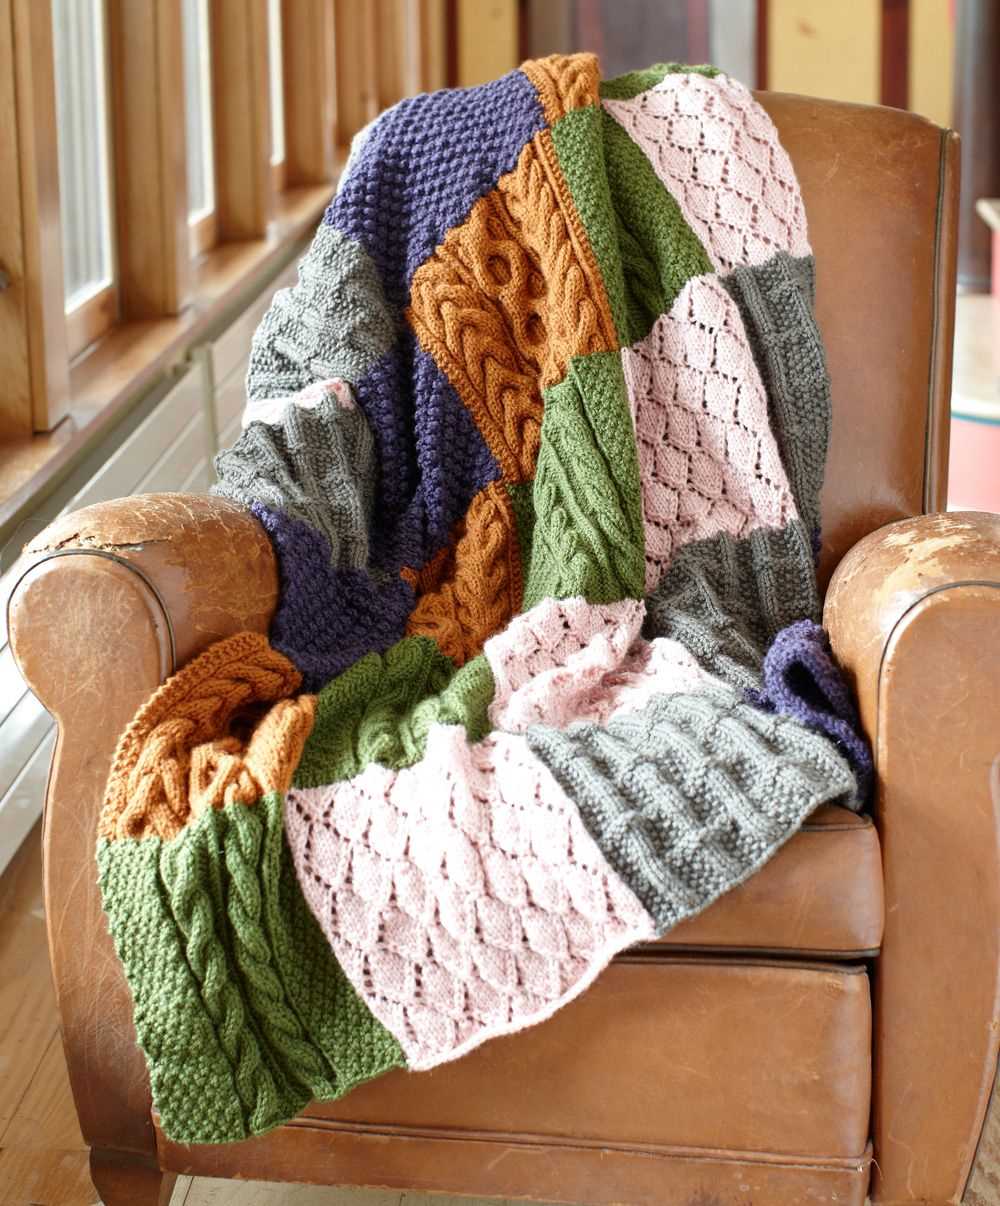
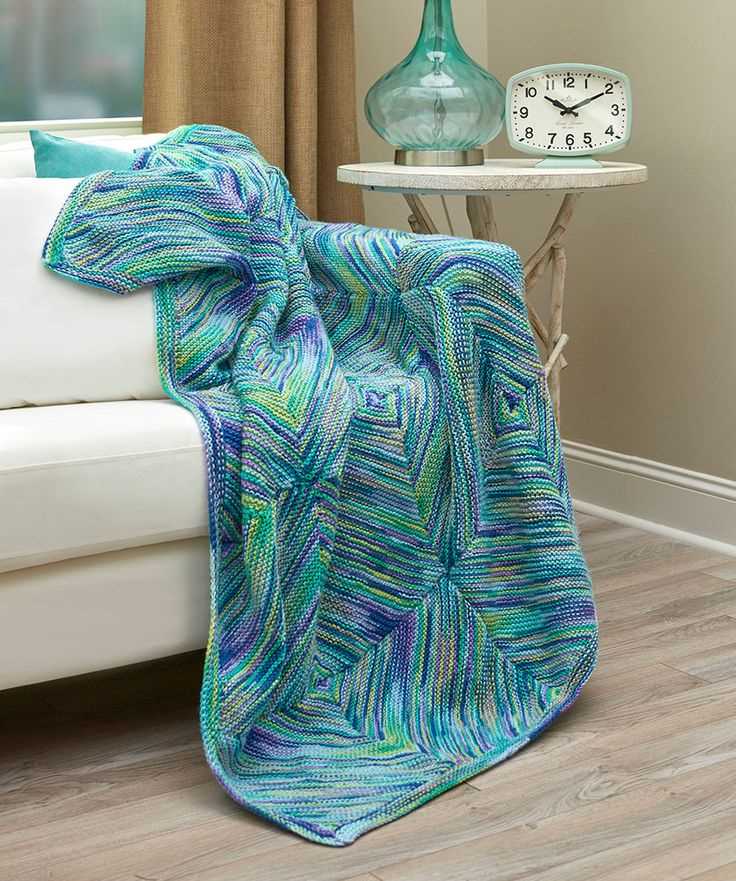
3. Color Block Throw: For a vibrant and eye-catching throw, try the color block pattern. This pattern allows you to play with different colors and create bold geometric designs. You can customize the size of each block and experiment with various color combinations to match your personal style. The pattern usually includes instructions on color changes and finishing techniques.
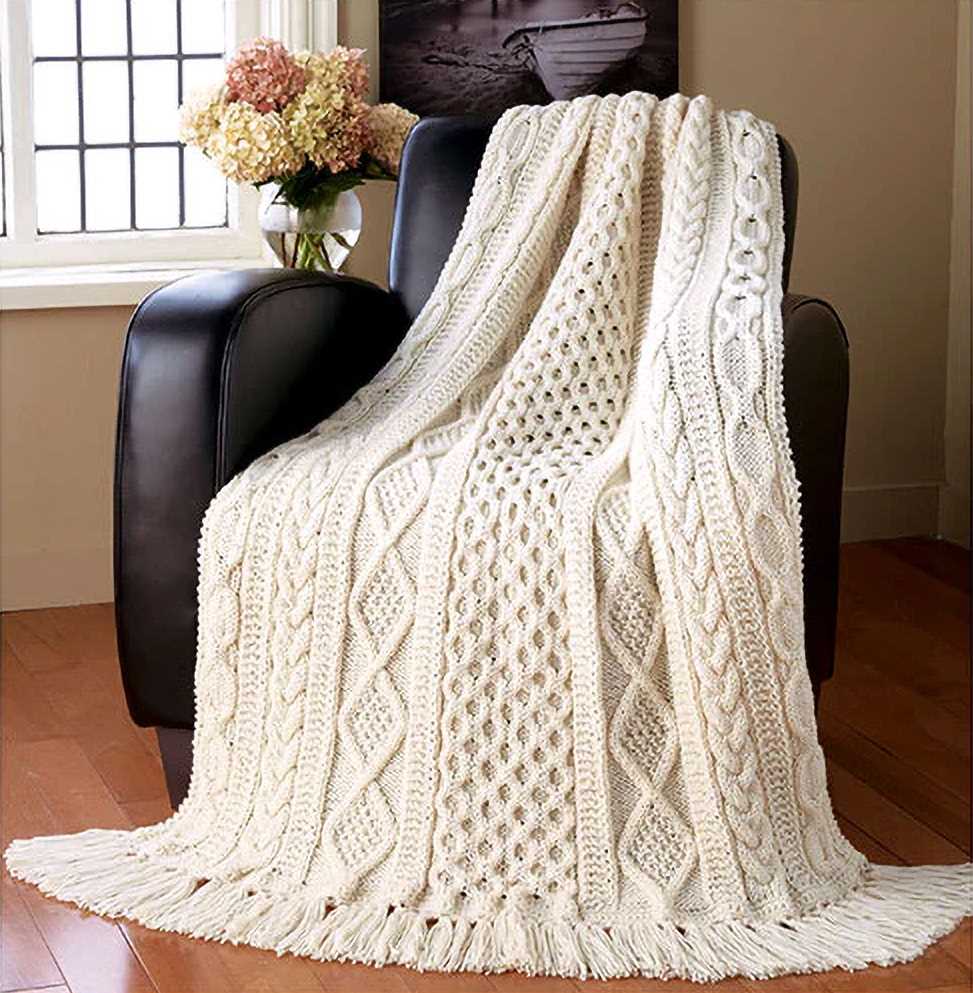
4. Lace Knit Throw: If you’re looking for an intricate and delicate pattern, the lace knit throw is a great choice. This pattern features delicate lace stitches that create an elegant and feminine look. You can use a finer yarn and smaller needles to achieve a more delicate and airy texture. The pattern may require some experience with lace knitting techniques, but the result is definitely worth the effort.
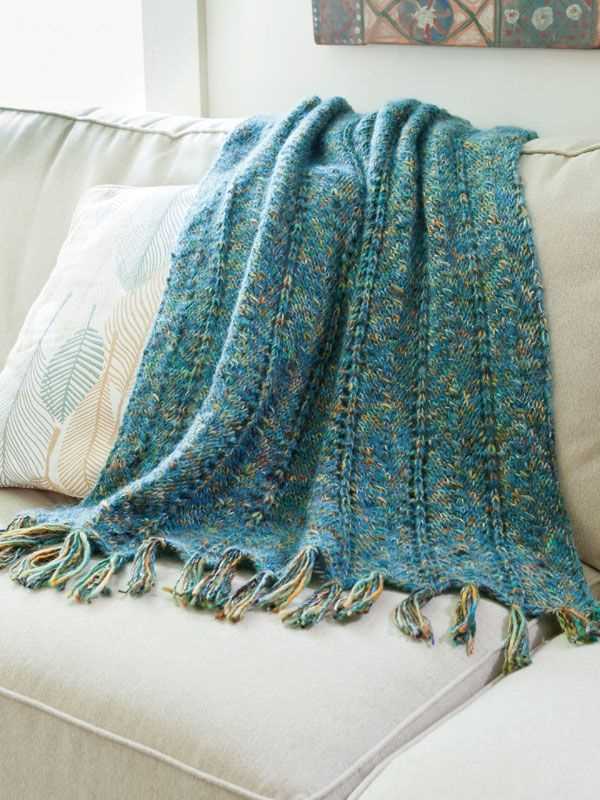
5. Fair Isle Throw: The Fair Isle throw pattern allows you to explore the art of colorwork knitting. This pattern typically includes traditional Fair Isle motifs and intricate patterns. You can choose your own color palette and experiment with different color combinations to create a unique and beautiful throw. The pattern may require some experience with stranded knitting, but the end result is truly stunning.
These top 5 free throw knitting patterns offer something for knitters of all levels and styles. Whether you prefer classic cables, cozy ribbing, vibrant color blocks, delicate lace, or intricate colorwork, there’s a pattern that will match your preferences. So grab your knitting needles, some cozy yarn, and start creating your own beautiful throw!
Tips for Choosing the Right Yarn for Free Throw Knitting Patterns
When it comes to free throw knitting patterns, choosing the right yarn is crucial to ensure that your finished project meets your expectations. With so many options available, it can be overwhelming to make a decision. However, by considering a few factors, you can find the perfect yarn for your free throw knitting project.
1. Weight: The weight of the yarn will determine the thickness and drape of the finished throw. For a cozy and warm throw, consider using a bulky or super bulky yarn. If you prefer a lighter and more delicate throw, opt for a fingering or sport weight yarn.
2. Fiber: The fiber of the yarn will impact the texture, softness, and durability of the throw. For a luxurious and soft throw, choose yarn made from natural fibers like merino wool or alpaca. If you want a throw that is easy to care for and can withstand frequent use, opt for acrylic or cotton yarn.
3. Color: The color of the yarn will determine the overall look and feel of your throw. Consider the color scheme of the room where the throw will be used and choose a yarn color that complements or adds a pop of contrast. If you want a versatile throw that goes well with any decor, neutral colors like gray or cream are a safe bet.
4. Gauge: Make sure to check the gauge recommended in the free throw knitting pattern and choose a yarn that matches it. Using the correct gauge will ensure that your finished throw turns out the right size and has the intended stitch definition.
5. Budget: Consider your budget when selecting yarn for your free throw knitting project. Yarn prices can vary greatly, so determine how much you are willing to spend and look for options within your price range. Remember that higher-quality yarns usually result in a better overall finished product.
By keeping these tips in mind, you can confidently choose the right yarn for your free throw knitting patterns. Whether you prefer a cozy, warm throw or a lightweight, delicate one, there is a yarn out there that will bring your vision to life.
Step-by-Step Guide to Knitting a Basic Free Throw
Knitting is a versatile and enjoyable craft that allows you to create beautiful and functional items. If you’re looking to knit a basic free throw, you’ve come to the right place! With this step-by-step guide, you’ll be able to create a cozy and stylish throw that will add a touch of warmth to any room in your home.
Materials Needed:
- Size 10 knitting needles
- 4 skeins of chunky yarn
- Tapestry needle
- Scissors
Step 1: Cast on
Start by casting on 100 stitches onto your knitting needles. Make sure to leave a long tail for weaving in later.
Step 2: Knit the first row
Knit every stitch in the first row. This will create the foundation for your free throw.
Step 3: Repeat rows
Continue knitting every stitch in each row until your throw reaches the desired length. You can choose to make it as long or as short as you like.
Step 4: Bind off
Once you are satisfied with the length of your throw, bind off all the stitches. This will secure the edges and keep your throw from unraveling.
Step 5: Weave in ends
Using a tapestry needle, weave in any loose ends from the cast on and bind off. This will give your throw a polished and finished look.
Step 6: Enjoy your free throw!
Now that your basic free throw is complete, it’s time to sit back, relax, and enjoy its warmth and cozy texture. You can drape it over a sofa or chair, use it as a blanket while watching TV, or give it as a thoughtful gift to a loved one.
Casting On
When starting a knitting project, the first step is to cast on. Casting on is the process of creating the first row of stitches on the knitting needle. There are several different methods for casting on, each with its own advantages and uses.
One common method of casting on is the long-tail cast on. This method creates a neat and flexible edge and is suitable for most knitting projects. To perform the long-tail cast on, you will need to estimate the amount of yarn needed for your desired number of stitches and leave a long tail of yarn. Then, you will create a slipknot on your needle, and follow a specific sequence of movements to create each new stitch. This method is relatively quick and easy to learn, making it a popular choice for beginners.
Another method of casting on is the knit cast on. This method is similar to the long-tail cast on but uses a different technique for creating each new stitch. With the knit cast on, you will insert your needle into the first stitch as if to knit, loop the working yarn around the needle, and then pull the new stitch through. This method creates a firm and even edge, and the resulting stitches are easy to work with. The knit cast on is often used in projects that require a sturdy and durable edge, such as blankets or scarves.
Commonly used casting on methods include:
- Long-tail cast on
- Knit cast on
- Cable cast on
- Tubular cast on
- Single cast on
Each casting on method has its own advantages and may be more suitable for certain projects or stitch patterns. It is important to choose the right cast on method to ensure the success of your knitting project. Practice casting on with different methods to become proficient and find the ones that you prefer. Once you have mastered casting on, you can begin working on the main body of your knitting project and create beautiful free throw knitting patterns.
Knitting Stitch Patterns
In the world of knitting, stitch patterns are the building blocks of every knitted project. They are the combination of knit and purl stitches that create a unique texture or design in the fabric. Knitting stitch patterns can range from simple to complex, and can be used to create various effects such as cables, lace, and colorwork.
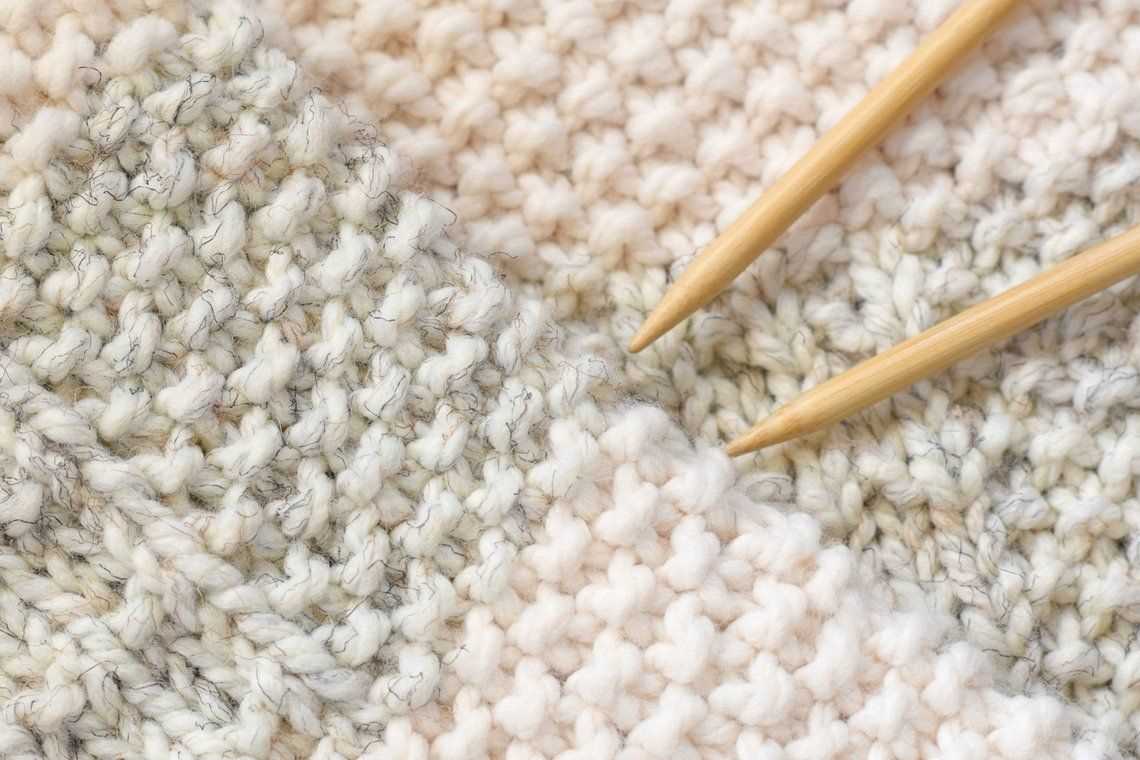
One popular knitting stitch pattern is the seed stitch, which is created by alternating knit and purl stitches in a specific pattern. This stitch pattern creates a textured fabric that is reversible and dense, making it ideal for items like scarves and blankets. Another popular stitch pattern is the rib stitch, which is created by alternating knit and purl stitches in a specific pattern. This stitch pattern creates a stretchy fabric that is often used for cuffs, hems, and necklines.
Knitting stitch patterns can be found in knitting pattern books and online resources. They often include written instructions as well as charts that show the sequence of stitches. Some patterns may also include abbreviations or symbols to represent different stitches. When using a knitting stitch pattern, it is important to follow the instructions carefully and pay attention to the stitch count and tension, as this can affect the final appearance of the fabric.
Types of Knitting Stitch Patterns
- Stockinette stitch: This is the most basic and commonly used stitch pattern, created by knitting one row and purling the next row.
- Garter stitch: This stitch pattern is created by knitting every row. It creates a fabric with ridges and is often used for scarves and baby blankets.
- Cable stitch: Cable stitch patterns create a twisted effect in the fabric. They are created by crossing stitches over each other.
- Lace stitch: Lace stitch patterns create an open and airy fabric. They often involve yarn overs and decreases to create holes and decorative motifs.
- Fair Isle stitch: Fair Isle stitch patterns involve using multiple colors in a single row to create intricate colorwork designs. They often require carrying the unused colors along the back of the work.
In conclusion, knitting stitch patterns are an essential part of knitting and can add texture and design to any project. Whether you’re a beginner or an experienced knitter, there is a wide variety of stitch patterns to explore and incorporate into your knitting projects.
Increasing and Decreasing Stitches
When knitting a project, it is essential to understand how to increase and decrease stitches. These techniques allow you to shape your knitting and create different patterns and designs. Whether you are a beginner or an experienced knitter, mastering these techniques will enhance your knitting skills and open up a world of possibilities.
Increasing stitches is the process of adding stitches to your knitting. This can be done in various ways, depending on the desired effect. One common method is the yarn over (YO), where you simply bring the yarn to the front of your work and create a loop. Another way is by knitting or purling into the same stitch, effectively creating two stitches from one. Increases are typically used to shape sleeves, hats, and other garments, or to create decorative elements like lace or cables.
Decreasing stitches is the opposite of increasing, where you subtract stitches from your knitting. There are several techniques for decreasing, each resulting in a different appearance. One common method is the knit two together (k2tog), where you insert your needle into two stitches and knit them together as one. Another technique is the slip, slip, knit (ssk), where you slip two stitches one by one, then knit them together through the back loop. Decreases are often used to shape necklines, create waistlines in garments, or achieve a tapered effect in socks or mittens.
To keep track of increases and decreases in your pattern, it is helpful to use stitch markers or write down the instructions. Additionally, practicing these techniques on small swatches can help you understand how they affect your knitting and perfect your tension. Remember to always read and follow the instructions carefully, as different patterns may use different techniques or abbreviations for increasing and decreasing stitches.
By mastering the art of increasing and decreasing stitches, you will have greater control over your knitting projects and be able to create intricate designs and shapes. So don’t be afraid to experiment with different patterns and techniques, and let your creativity shine through your knitting!
Binding Off
Binding off is the final step in knitting a project. It is the process of securing the stitches and creating a finished edge. There are several methods of binding off, each with its own look and function. The method you choose will depend on the type of project you are working on and the desired outcome.
One popular method of binding off is the basic bind off. To do this, knit the first two stitches as normal. Then, using the left-hand needle, insert it into the first stitch on the right-hand needle and pass it over the second stitch and off the needle. Repeat this process for the remaining stitches until only one stitch remains. Cut the yarn, leaving a tail, and pull it through the last stitch to secure it.
To create a stretchy bind off, you can use the suspended bind off method. This method is often used for projects that require a more flexible edge, such as socks or hats. To do this, knit the first two stitches, then insert the left-hand needle into the first stitch on the right-hand needle. Instead of passing it over the second stitch and off the needle, insert the left-hand needle back into the first stitch, knit it again, and then pass it over the second stitch and off the needle. Repeat this process until only one stitch remains, then cut the yarn and pull it through the last stitch.
Another method of binding off is the picot bind off. This technique creates a decorative edge with small loops. To do this, knit two stitches, then bind off one stitch by passing it over the second stitch and off the needle, as in the basic bind off. Then, using the cable cast on method, cast on two stitches onto the right-hand needle. Repeat this sequence until the desired number of picots is achieved. Finally, bind off all stitches normally.
Advanced Techniques for Free Throw Knitting Patterns
When it comes to knitting free throw patterns, there are a variety of advanced techniques that can take your projects to the next level. These techniques can help you create intricate designs, add texture, and enhance the overall look of your knitted free throws.
One advanced technique is colorwork, which involves knitting with multiple colors to create patterns and designs. This can be done using techniques such as fair isle, where two colors are used in each row and strands of yarn are carried along the back, or intarsia, where different colors are worked in separate sections. Colorwork can add depth and visual interest to your free throw patterns.
Another advanced technique is lace knitting, which involves creating intricate patterns using a series of yarn overs and decreases. Lace patterns can be delicate and beautiful, and can add an elegant touch to your free throw designs. This technique requires careful attention to detail and can take time to master, but the results are worth it.
Cables are another advanced technique that can be used to create interesting textures in your free throw patterns. Cables are created by crossing stitches over each other, creating a twisted effect. This technique can add depth and dimension to your free throws, and can be combined with other stitch patterns for even more variety.
Finally, using different stitch patterns can elevate your free throw knitting patterns. Textured stitches such as seed stitch, ribbing, or moss stitch can add visual interest and create a more interesting finished product. You can also experiment with different stitch combinations and make your own unique patterns.
Overall, advanced techniques for free throw knitting patterns can help you create stunning designs with more intricate patterns, texture, and visual interest. Whether you choose to incorporate colorwork, lace knitting, cables, or different stitch patterns, these techniques can take your free throws to the next level and make them stand out from the crowd.
Lace and Cable Stitch Patterns

Lace and cable stitch patterns are popular choices for knitting projects as they add intricate and beautiful textures to the final product. These patterns can be used to create a variety of items such as scarves, shawls, and even sweaters. Lace stitches are typically made up of yarn overs and decreases, creating an open and delicate design. Cable stitches, on the other hand, involve crossing stitches over each other to create a twisted and braided effect.
One popular lace stitch pattern is the “Feather and Fan” pattern. This pattern consists of a series of yarn overs and decreases repeated in a specific sequence to create a wave-like design. The “Horseshoe Lace” stitch is another popular option, featuring a series of yarn overs and decreases that create a horseshoe shape. These lace stitch patterns can be used to add elegance and sophistication to any knitting project.
When it comes to cable stitch patterns, the possibilities are endless. One common cable stitch pattern is the “Twisted Rope” cable, which involves crossing stitches over each other to create a rope-like effect. The “Braided Cable” is another popular option, featuring multiple strands twisted and braided together. These cable stitch patterns can add depth and dimension to your knitting, making them a great choice for cozy winter accessories.
Whether you’re a beginner or an experienced knitter, lace and cable stitch patterns are a great way to elevate your knitting projects. With endless options to choose from, you can create unique and stunning designs that are sure to impress. So grab your knitting needles and dive into the world of lace and cable stitches!
Intarsia and Fair Isle Techniques
Intarsia and Fair Isle are two popular techniques in knitting that allow for the creation of intricate colorwork patterns. Both techniques involve using multiple colors of yarn to create designs, but they differ in their methods of execution.
Intarsia is a technique that involves using separate balls or bobbins of yarn for each individual color in a design. This allows for the creation of large, solid blocks of color without carrying the unused yarn across the back of the work. In intarsia, the yarn is simply dropped and picked up again as needed, resulting in clean color transitions and minimal “floats” on the wrong side of the work.
Fair Isle, on the other hand, is a technique that involves carrying multiple colors of yarn across the back of the work as you knit. Typically, only a few stitches of each color are worked before switching to the next, creating a pattern with small, repeating motifs. This technique can create a beautiful, textured effect, but it requires careful tension control and attention to detail to ensure the carried yarns don’t become too tight or too loose.
Intarsia and Fair Isle techniques are often used in free throw knitting patterns to create unique and eye-catching designs. With intarsia, you can create bold, graphic patterns with clean color transitions. Fair Isle allows for intricate, multicolor motifs that add texture and depth to your knitting. Both techniques require practice and patience, but the results can be truly stunning.
Troubleshooting Common Issues in Free Throw Knitting
Knitting a free throw can be a fun and rewarding project, but it can also come with its fair share of challenges. Here are some common issues you may encounter while knitting a free throw and how to troubleshoot them.
Tangled Yarn
One of the most frustrating problems you may face while knitting a free throw is tangled yarn. This can happen when the yarn gets twisted and knotted while you’re knitting. To avoid this issue, make sure to unwind your yarn before you start knitting and keep it free from tangles as you work. If you do find a knot or tangle, gently untangle it using your fingers or a crochet hook. Taking breaks to untangle the yarn as you knit can help prevent larger tangles from forming.
Dropped Stitches
Dropped stitches are another common issue in knitting, including free throw knitting. It can be easy to accidentally let a stitch slip off your needles, especially if you’re not paying close attention. If you notice a dropped stitch, don’t panic. Use a crochet hook or a small knitting needle to pick up the dropped stitch and place it back on your working needle. If the dropped stitch has unraveled several rows down, you may need to unravel your work slightly to reach it and fix it properly.
Uneven Tension
Getting consistent tension in your knitting is important for creating an even and professional-looking free throw. Uneven tension can result in lumpy or uneven stitches. To troubleshoot uneven tension, pay attention to your knitting technique. Make sure to hold your yarn consistently, neither too tight nor too loose. Practice keeping your stitches uniform in size by adjusting your tension as needed. You can also try using a different needle size if you find that your tension is consistently off.
By being aware of these common issues and knowing how to troubleshoot them, you’ll be better equipped to tackle any challenges that come up while knitting a free throw. Remember to be patient with yourself and have fun with your project. Happy knitting!
Q&A:
What are free throw knitting patterns?
Free throw knitting patterns are knitting patterns that are available for free and are specifically designed to create items related to basketball, such as scarves, hats, and blankets.
Where can I find free throw knitting patterns?
You can find free throw knitting patterns on various websites, such as knitting blogs, online knitting communities, and websites dedicated to providing free knitting patterns.
Are these patterns suitable for beginners?
Some free throw knitting patterns are suitable for beginners, while others may require more advanced knitting skills. It’s important to read the pattern carefully and ensure that you have the necessary skills and knowledge to complete the project successfully.
Can I sell items made from these patterns?
It depends on the specific pattern and its terms of use. Some free throw knitting patterns allow you to sell the items you make from them, while others may have restrictions. It’s important to check the terms of use for each pattern to ensure you are in compliance.
Can I modify these patterns to fit my own style?
Yes, you can modify free throw knitting patterns to fit your own style. You can change the colors, add or remove stitches, or make other alterations to customize the pattern to your liking. Just keep in mind that major modifications may affect the final outcome and fit of the item.
Where can I find free throw knitting patterns?
You can find free throw knitting patterns on various websites like Ravelry, Lovecrafts, Knitting Pattern Central, and AllFreeKnitting. These websites offer a wide range of patterns for different skill levels and design preferences.
Are there any specific requirements for knitting a throw?
There are no specific requirements for knitting a throw, but it is recommended to use a soft and warm yarn that is suitable for blankets. The recommended needle size can vary depending on the pattern and yarn choice, so it’s best to check the pattern for any specific requirements or suggestions.