
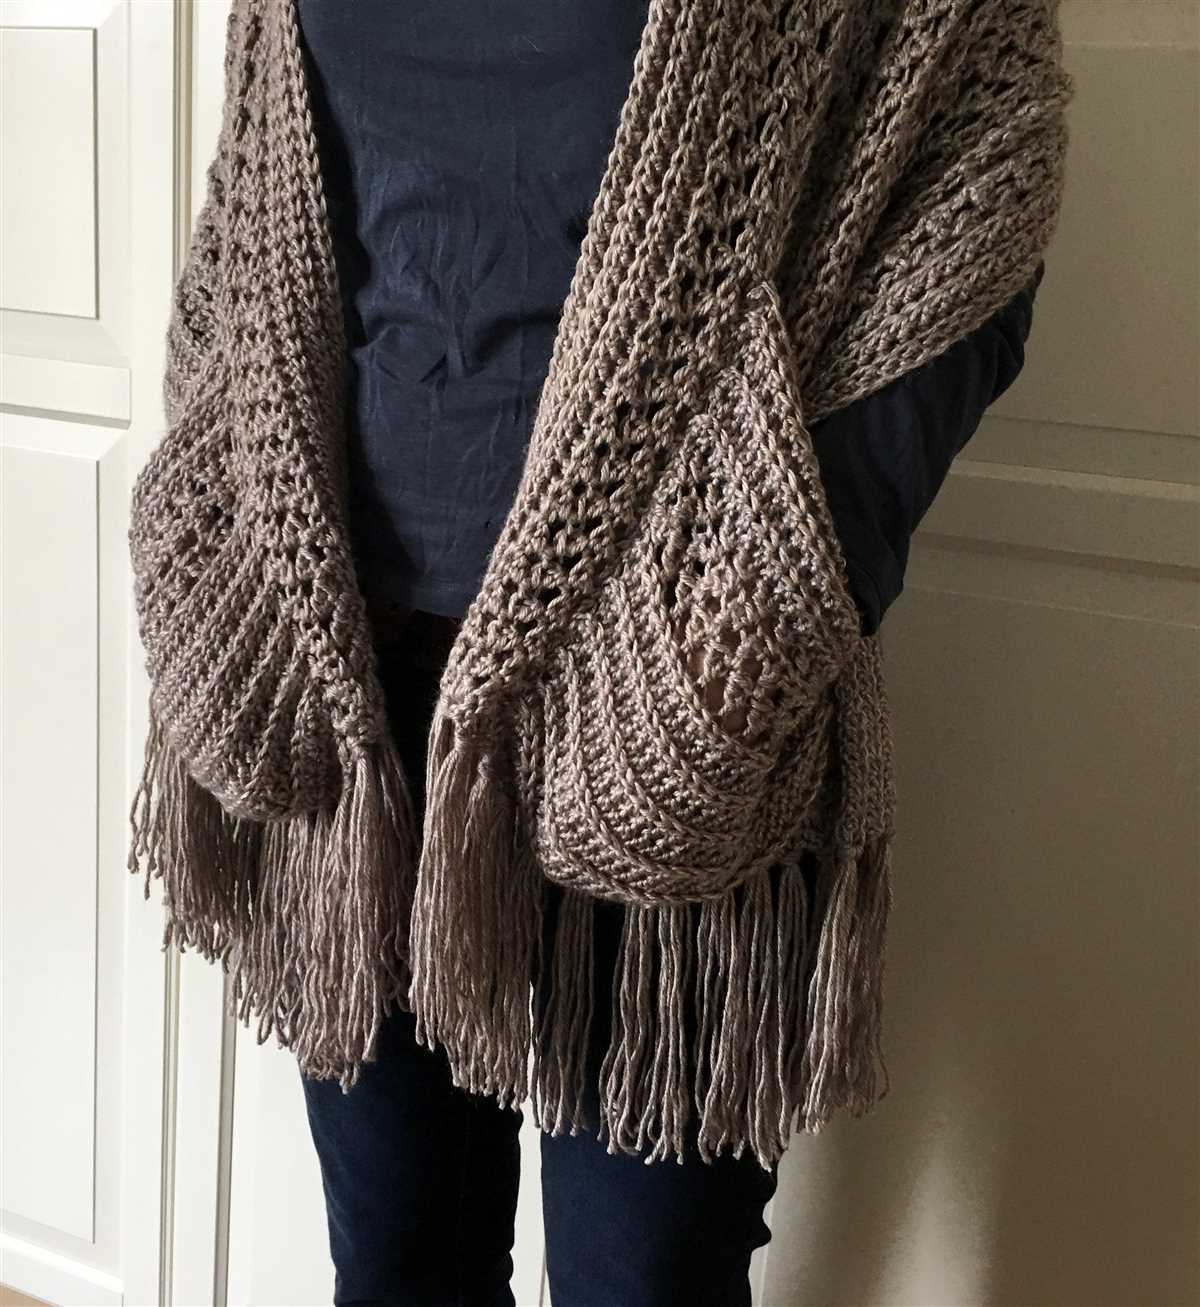
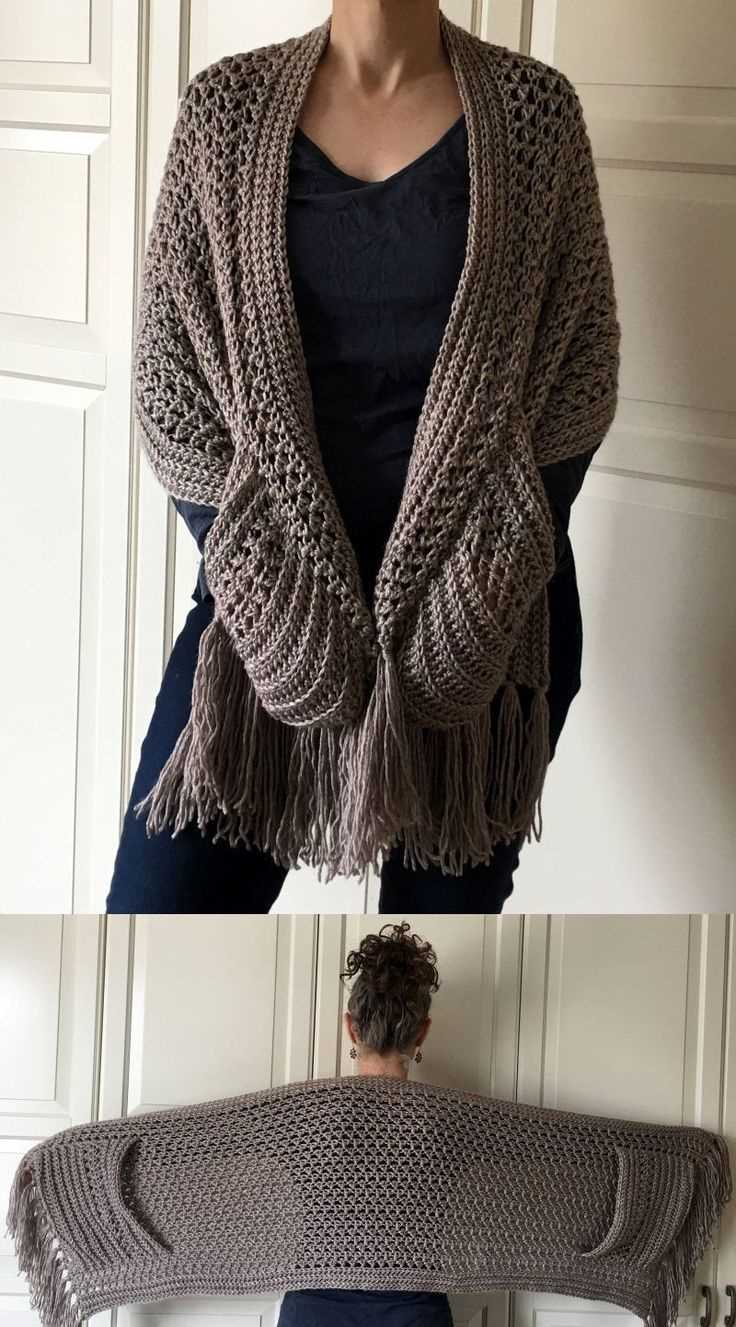
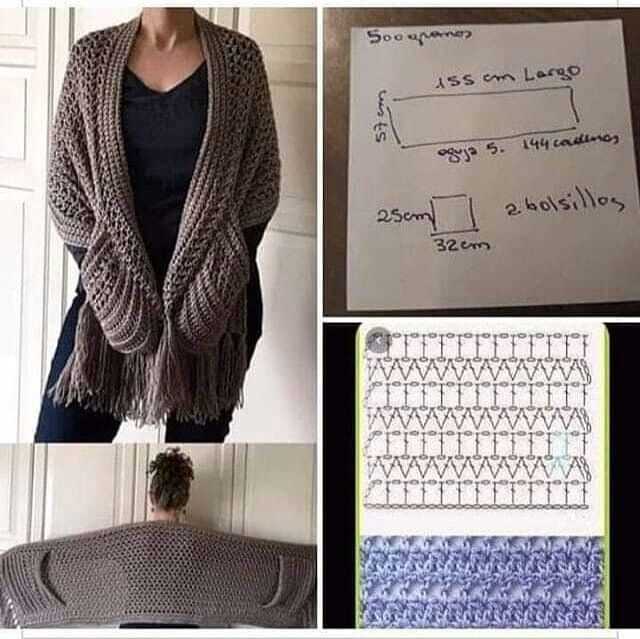
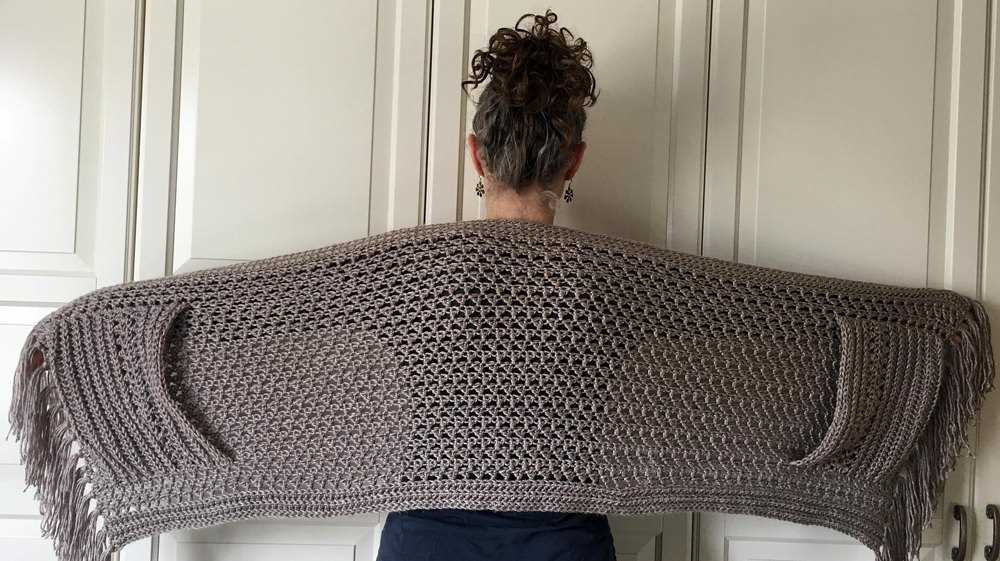
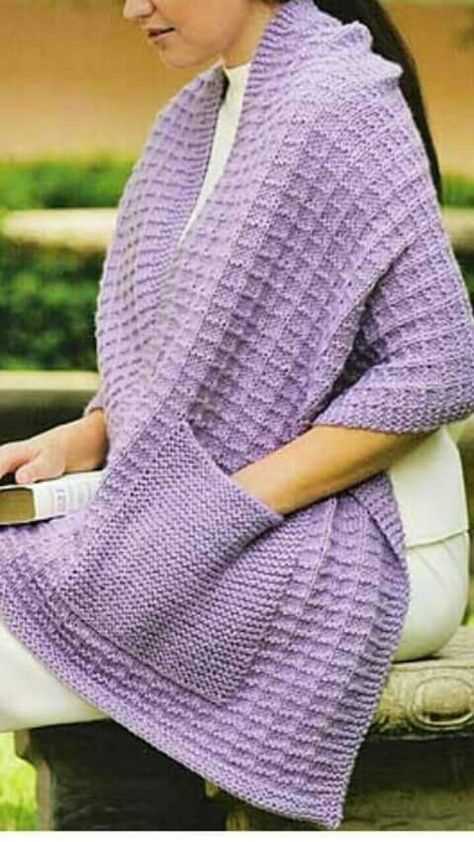
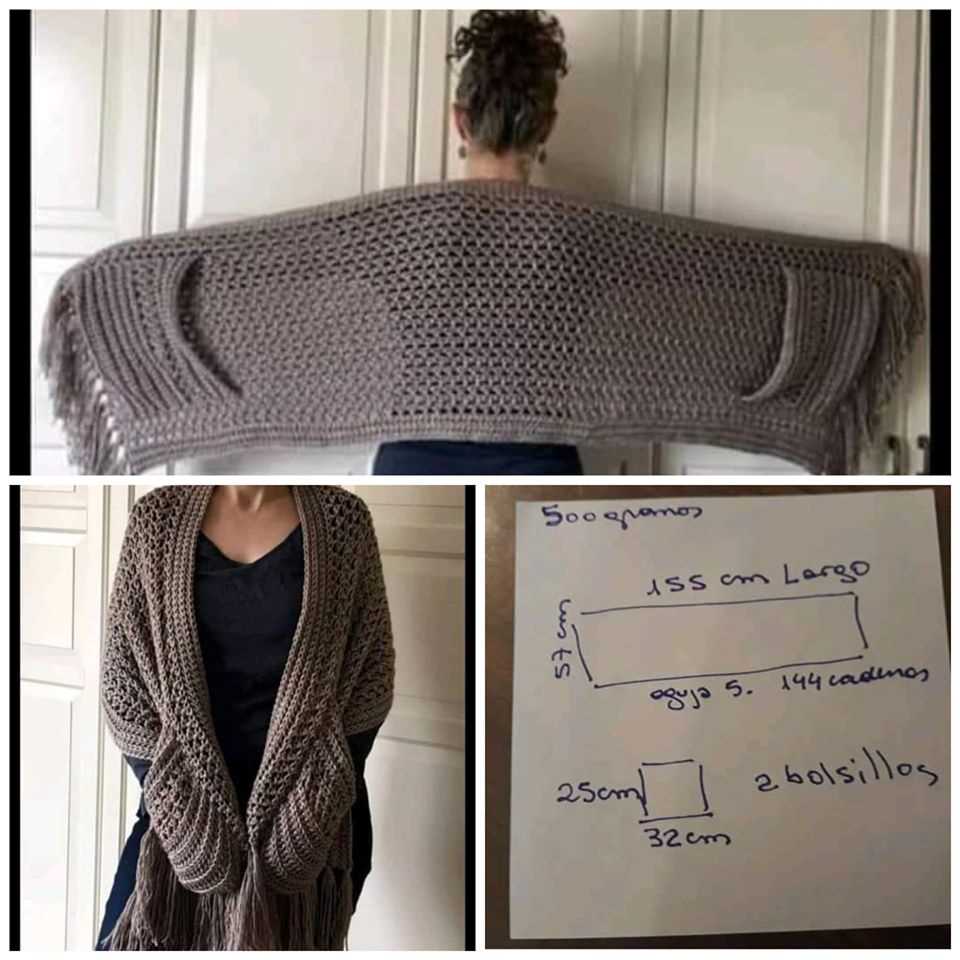
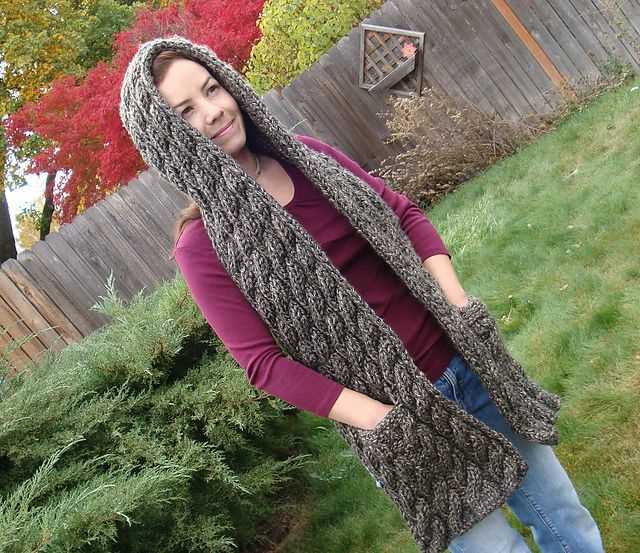
If you’re looking for a stylish and practical accessory to add to your wardrobe, a knitted shawl with pockets is the perfect choice. This versatile piece can be worn in different ways and is great for keeping you warm on chilly days. Plus, the addition of pockets gives you a convenient place to store small items like your phone or keys.
Knitting your own shawl allows you to choose the colors and materials that best suit your taste. You can opt for a soft and cozy yarn for a snuggly winter shawl or a lightweight cotton blend for a breezy summer accessory. With a wide range of yarns available, the possibilities are endless.
There are many different patterns available for knitted shawls, but one popular option is a triangular shape with pockets at the ends. This design allows you to wrap the shawl around your shoulders and secure it in place with the pockets. It also gives you the freedom to easily adjust the fit and style of the shawl.
Whether you’re an experienced knitter or just starting out, this knitted shawl with pockets pattern is suitable for all skill levels. The pattern includes detailed instructions and helpful tips to guide you through each step of the knitting process. So grab your needles and get ready to create a beautiful and functional accessory that you’ll love to wear.
How to knit a shawl with pockets pattern
Knitting a shawl with pockets can be a fun and practical project for knitters of all skill levels. This versatile accessory combines the warmth and style of a shawl with the convenience of pockets, making it perfect for chilly days or evenings.
To begin knitting a shawl with pockets, you will need a set of knitting needles and yarn of your choice. It is recommended to choose a soft and cozy yarn that will provide warmth and comfort when worn.
Instructions:
- Start by casting on the desired number of stitches for your shawl. This will depend on the size and length you want your shawl to be. You can use a circular or straight needle, depending on your preference.
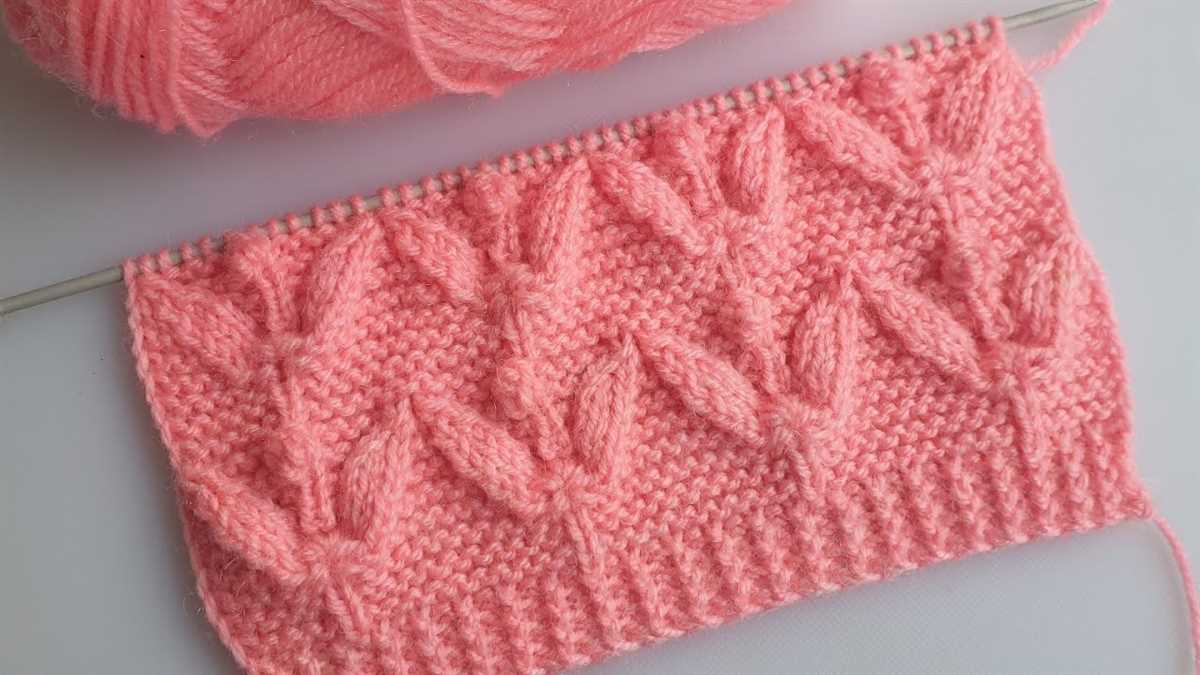
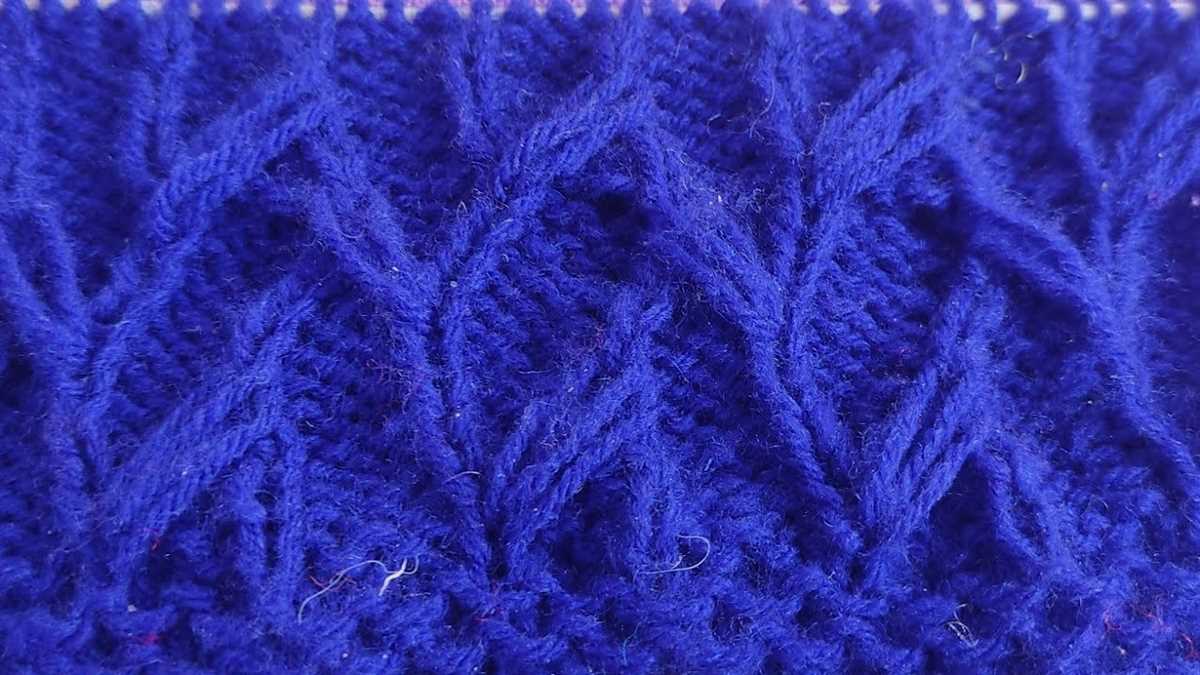
- Once you have cast on, begin knitting the body of the shawl using your preferred stitch pattern. You can choose a simple garter stitch for a textured look, or a lace stitch for a more intricate design.
- As you knit the body of the shawl, make sure to leave openings for the pockets. You can do this by binding off a certain number of stitches in the desired locations for the pockets. Make sure to keep track of these stitches and their placement.
- After completing the body of the shawl, it is time to knit the pockets. Using a separate strand of yarn, cast on the desired number of stitches for each pocket. Knit in your chosen stitch pattern until the pocket reaches the desired depth.
- Next, attach the pockets to the shawl by picking up stitches along the bound-off edge. This will create a seamless and secure connection between the shawl and the pockets. Make sure to evenly distribute the picked-up stitches to ensure a balanced look.
- Continue knitting the remaining sections of the shawl, such as the borders or edging, if desired. You can choose a simple ribbing or add decorative lace or cable patterns to enhance the overall design.
- Finally, bind off all stitches and weave in any ends to finish your shawl with pockets. Take the time to block your shawl to ensure that it has a polished and professional appearance. This will also help the pockets lay flat and maintain their shape.
Once your shawl with pockets is complete, you can enjoy the warmth and convenience it provides. It can be worn as a fashionable accessory or used as a practical item for keeping small essentials close at hand. Experiment with different yarns and stitch patterns to create unique shawls with pockets that suit your personal style.
Choose the right yarn and needles
When starting a knitted shawl with pockets project, it is important to choose the right yarn and needles to ensure the desired outcome. The type and weight of yarn will greatly affect the drape, texture, and overall appearance of the finished shawl. Additionally, the size and material of the needles will determine the gauge and stitch definition of the fabric.
Yarn: Selecting the appropriate yarn for a knitted shawl with pockets is crucial for achieving the desired result. Consider the pattern recommendations, which often suggest specific yarn weights and fiber compositions. For a lightweight and airy shawl, a fingering or lace weight yarn made from a natural fiber such as merino wool or silk would work beautifully. If you prefer a warmer and cozier shawl, consider using a worsted or bulky weight yarn made from wool or a wool blend.
Needles: The choice of needles is also important to ensure the success of your knitted shawl with pockets. The recommended needle size will depend on the yarn weight and your knitting tension. Consult the pattern for guidance and consider swatching to achieve the desired gauge. Circular needles are often used for shawls to accommodate the growing number of stitches. The material of the needles, such as bamboo or metal, can also affect your knitting experience. Choose a material that feels comfortable in your hands and allows the yarn to glide smoothly.
- Consider the pattern recommendations for yarn weight and fiber composition.
- Choose a yarn that suits the desired drape, texture, and warmth of the shawl.
- Consult the pattern for recommended needle size and consider swatching to achieve gauge.
- Use circular needles for shawls to accommodate the growing number of stitches.
- Select needles made from a material that feels comfortable and allows the yarn to glide smoothly.
Create a gauge swatch
Before starting your knitted shawl with pockets, it is important to create a gauge swatch. This will help ensure that your final piece will fit properly and have the correct dimensions. To create a gauge swatch, follow these steps:
Step 1: Choose your yarn and needles
Start by selecting the yarn and needles that you plan to use for your knitted shawl with pockets. Check the yarn label for the recommended needle size and choose a pair of needles that match. This will give you an idea of the expected gauge.
Step 2: Cast on stitches
Cast on a few more stitches than the recommended number for the pattern. For example, if the pattern suggests a cast on of 20 stitches, cast on around 30 stitches. This will give you a wider swatch to work with.
Step 3: Knit the swatch
Using the chosen yarn and needles, work in the stitch pattern specified in the pattern instructions. Knit a few rows in this pattern until your swatch is at least 4 inches in height.
Step 4: Measure the gauge
Once your swatch is complete, use a ruler or measuring tape to measure the gauge. Count the number of stitches and rows within a 4-inch square section of your swatch. Compare these measurements to the gauge specified in the pattern. If your gauge does not match, you may need to adjust your needle size or tension until the desired gauge is achieved.
Creating a gauge swatch before starting your knitted shawl with pockets will help ensure that your finished piece will have the correct size and proportions. This small investment of time at the beginning will save you from potential frustration and disappointment later on. So, take the time to create a gauge swatch and enjoy the process of creating your beautiful knitted shawl with pockets.
Start by casting on stitches
Before you begin knitting your shawl with pockets, you’ll need to cast on the required number of stitches. This will determine the width of your shawl and the size of the pockets. The pattern should specify the number of stitches you need to cast on, but make sure you have the appropriate knitting needles and yarn for your project.
To cast on stitches, start by making a slip knot. This is a simple loop that will serve as the first stitch on your needle. Insert your knitting needle into the slip knot, and tighten it onto the needle, leaving a tail of yarn. Hold the needle with the slip knot in your right hand, and the working yarn coming from the ball of yarn in your left hand.
Next, bring the working yarn over the top of the needle, from back to front. Insert your right-hand needle into the loop on your left-hand needle, going from front to back. Wrap the working yarn around the right-hand needle counterclockwise, creating a new loop. Slip this new loop onto the right-hand needle, keeping the original loop on the left-hand needle.
Continue this process of bringing the working yarn over the top of the needle, inserting the right-hand needle, wrapping the yarn counterclockwise, and slipping the new loop onto the right-hand needle. Repeat these steps until you have cast on the required number of stitches. Make sure to keep the tension of your stitches even, not too tight and not too loose.
Once you have cast on all the stitches, you can begin working the pattern for your knitted shawl with pockets. Follow the instructions in the pattern carefully, keeping track of any stitch counts or pattern repeats. Remember to take your time and enjoy the process of knitting your shawl. Happy knitting!
Work the bottom border
In order to create the bottom border of the knitted shawl with pockets, we will be using the garter stitch. The garter stitch is created by knitting every row. This simple stitch pattern creates a textured, bumpy fabric that is perfect for the border of the shawl.
To start working the bottom border, you will need to cast on the required number of stitches, as specified in the pattern. The cast-on edge will become the bottom of the shawl. Make sure to use a cast-on method that will create a stretchy edge, such as the long-tail cast-on.
Once you have cast on the stitches, you can begin working the garter stitch for the bottom border. Simply knit every row, making sure to maintain consistent tension throughout your work. The number of rows you need to knit will depend on the desired length of the border, as stated in the pattern.
Note: It is important to keep track of your rows as you work the bottom border to ensure that it matches the other borders of the shawl. You can use stitch markers or a row counter to help you keep track of your progress.
After you have completed the required number of garter stitch rows for the bottom border, you can move on to the next section of the pattern. The bottom border will provide a neat and finished edge to the shawl, as well as add extra warmth and cozy texture.
Knit the main body of the shawl
To begin knitting the main body of the shawl, start by casting on the required number of stitches using your chosen yarn and knitting needles. Follow the pattern instructions to determine the stitch pattern and the number of repeats necessary to create the desired size of the shawl.
Once you have cast on and established the stitch pattern, continue knitting each row following the instructions provided. Make sure to keep track of any shaping or pattern changes indicated in the pattern, such as increases or decreases, as these will affect the overall shape and size of the shawl.
You may need to use stitch markers to mark specific sections or repeats in the pattern, especially if there are multiple stitch patterns or design elements within the shawl. This will help you stay organized and ensure that you don’t miss any important instructions.
As you knit the main body of the shawl, take the time to periodically check your gauge to ensure that your stitches are consistent and that the shawl is being knit to the correct measurements. This is especially important if you are using a different yarn or needle size than specified in the pattern.
Continue knitting the main body of the shawl until you have reached the desired length or until the pattern instructs you to move on to the next section. Once you have completed the main body, you can move on to knitting the pockets or any other additional design elements specified in the pattern.
Remember to always refer back to the pattern instructions for any specific techniques or stitch patterns required for the main body of the shawl. Take your time and enjoy the process of creating a beautiful and practical knitted shawl with pockets.
Add the pocket openings
Once you have completed knitting the main body of the shawl, it’s time to add the pocket openings. These pockets will be a great addition to the shawl, allowing you to keep your hands warm or store small items while wearing it.
To add the pocket openings, you will need to carefully measure and mark the desired locations on the shawl. Take into account the size of the pockets you want and the placement that will be most comfortable and convenient for you. Once you have determined the location, secure the stitches in that area by placing them on stitch holders or waste yarn.
Next, you will need to create the pocket openings by removing a section of stitches. For this, you can use a technique such as the “steek” method, where you cut open the fabric between the marked stitches. Alternatively, you can also use a provisional cast on to create a temporary opening that will later be secured.
After creating the pocket openings, you will need to carefully finish the edges to prevent unraveling. You can do this by either hand-sewing the edges with a whipstitch or by using a crochet hook to create a chain stitch along the raw edges. Make sure to secure the ends of the yarn to prevent any loose threads.
Once the pocket openings are complete, you can continue knitting the rest of the shawl as instructed in the pattern. The pockets will be ready to use once the shawl is finished, providing you with a functional and stylish accessory.
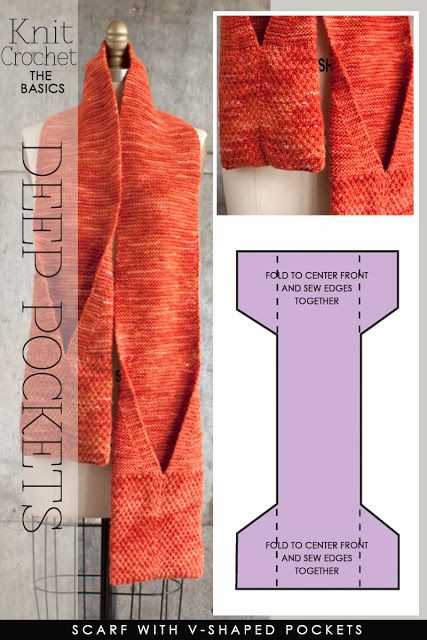
Create the pockets
To make the knitted shawl with pockets, you will need to create the pockets separately and then attach them to the shawl later. This will give the shawl a functional and stylish touch. Here’s how to create the pockets:
Step 1: Cast on stitches for the pocket
To start, you will need to cast on the desired number of stitches for the pocket. The number of stitches you cast on will depend on the size of the pocket you want. It’s a good idea to cast on an even number of stitches to ensure symmetry in the final result.
Step 2: Knit the pocket
Once you have cast on the stitches, you will begin knitting the pocket. You can choose any stitch pattern you like for the pocket, but it’s recommended to use a simple stitch pattern that will allow the pocket to stretch and hold its shape when items are placed inside. You can knit the pocket to your desired length, but typically knitting it to a few inches shorter than the length of the shawl will work well.
Step 3: Bind off the pocket
Once the pocket is at the desired length, it’s time to bind off the stitches. You can use a standard bind off method or any other bind off method that you prefer. Make sure to bind off loosely to ensure that the pocket has enough stretch to fit items comfortably.
Step 4: Attach the pocket to the shawl
After both pockets are knitted and bound off, it’s time to attach them to the shawl. You can choose to sew the pockets onto the shawl using a tapestry needle and matching yarn, or you can use a crochet hook to slip stitch the pocket into place. Make sure to position the pockets evenly on each side of the shawl, allowing enough space for items to be stored inside without stretching the shawl fabric.
By following these steps, you can create beautiful and practical pockets for your knitted shawl. The pockets will not only add a stylish touch to the shawl but also provide a convenient place to store small items such as keys, phone, or tissues. Happy knitting!
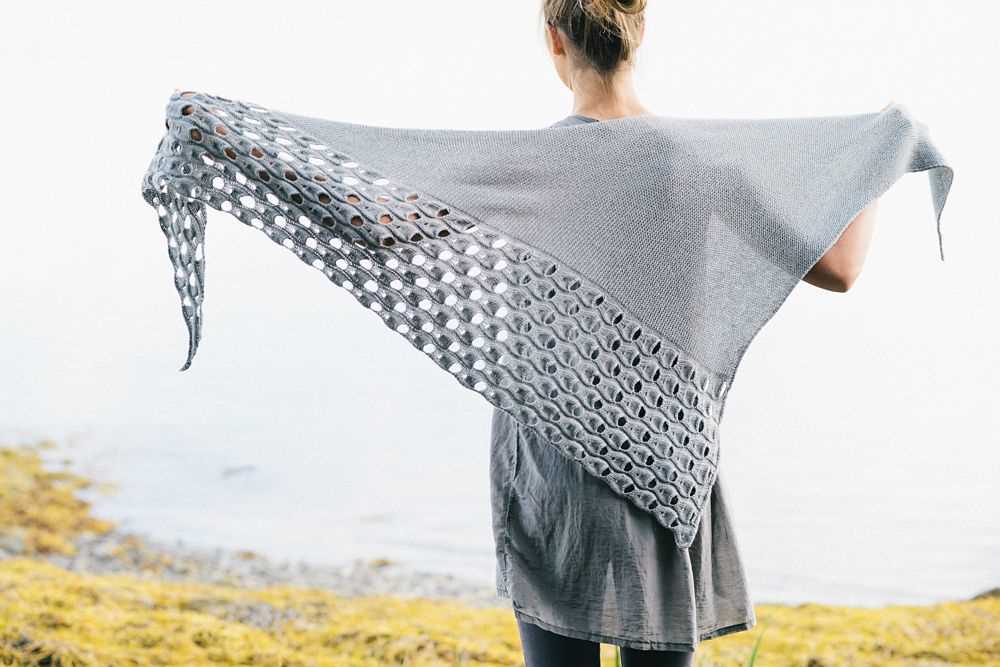
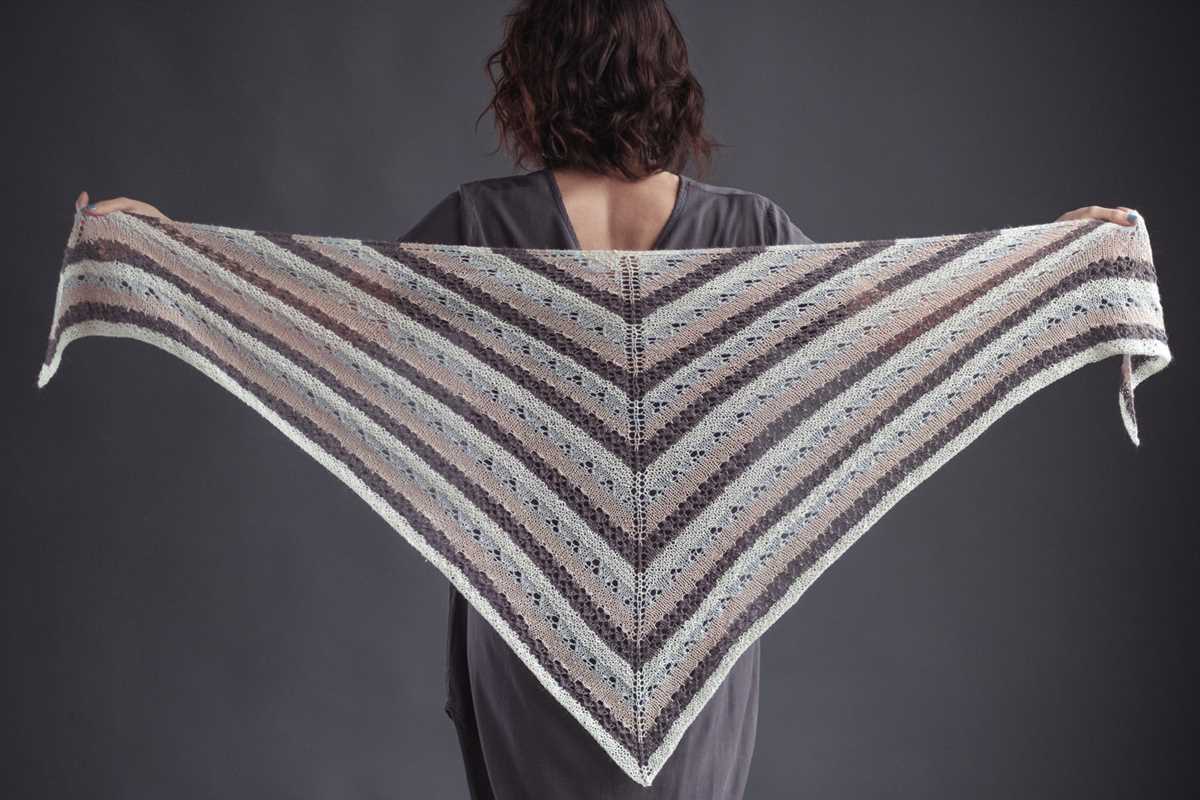
Add a decorative border
If you want to enhance the overall look of your knitted shawl with pockets, adding a decorative border is a great idea. A decorative border can add an extra touch of elegance and make your shawl look more polished and finished.
One way to add a decorative border is by using a lace or cable stitch pattern. Choose a stitch pattern that complements the style and design of your shawl. You can either use an existing stitch pattern or create your own unique pattern.
Another option for a decorative border is to incorporate different colors or textures. You can use contrasting colors to create a vibrant and eye-catching border, or choose a yarn with a different texture, such as mohair or silk, to add a luxurious touch.
To add the border, simply pick up stitches along the edges of your shawl and work the desired stitch pattern. You can either work the border in one continuous piece or work it in sections and seam the pieces together. Be sure to carefully measure and count your stitches to ensure that the border is evenly distributed and fits properly.
Once the border is complete, you can block your shawl to further enhance the stitch definition and shape of the border. Blocking the shawl will also help to relax any tension and give the shawl a professional finish.
Finish off the shawl
Once you have completed knitting the shawl and reached the desired length, it’s time to finish off the project. This involves binding off the stitches and securing any loose ends.
To bind off the stitches, start by knitting or purling two stitches, depending on the pattern. Then, using your left needle, lift the first stitch over the second stitch and off the right needle. Continue this process of knitting or purling two stitches and passing the first stitch over until only one stitch remains on the right needle.
After binding off all the stitches, cut the yarn, leaving a tail that is long enough to weave in later. Take the tail of yarn and thread it onto a yarn needle. Use the needle to weave the tail in and out of the stitches along the bind off edge to secure it in place. Be sure to weave the yarn in a few different directions to ensure it doesn’t come unraveled.
Next, you’ll want to check for any loose ends from changing colors or adding new balls of yarn. Use the same technique of threading the yarn onto a needle and weaving it in and out of the stitches to secure it.
Finally, give your shawl a gentle blocking to even out the stitches and make it lay flat. You can dampen the shawl with water or a mixture of water and wool wash, then lay it out on a flat surface and gently stretch it into shape. Allow it to dry completely before wearing or storing.
Block the finished shawl
Once you have finished knitting your shawl, it is important to block it to give it a polished and professional look. Blocking is the process of shaping and stretching the fabric to the desired size and shape.
Here are the steps to block your knitted shawl:
- Prepare your blocking materials: You will need blocking wires or pins, a blocking mat or towel, and some rustproof T-pins.
- Soak the shawl: Fill a basin or sink with lukewarm water and add a few drops of wool wash. Submerge the shawl in the water, gently pressing it down to ensure it is fully saturated. Let it soak for about 10-15 minutes.
- Remove excess water: Lift the shawl out of the water and gently squeeze out the excess water. Do not wring or twist the fabric, as this may damage the fibers.
- Stretch and shape the shawl: Lay the shawl out on the blocking mat or towel, and begin to gently stretch and shape it to the desired size and shape. Use blocking wires or pins to hold the edges in place. Pay attention to any lace or pattern details and ensure they are properly stretched and defined.
- Secure the shawl: Once the shawl is in the desired shape, use rustproof T-pins to secure the edges and any other parts that need extra support. Place the pins evenly along the edges, making sure they are secure.
- Let the shawl dry: Leave the shawl in a well-ventilated area to dry completely. This may take a day or two, depending on the thickness of the fabric and the humidity in the room.
- Remove the pins and enjoy: Once the shawl is completely dry, carefully remove the pins and admire your beautifully blocked shawl. It is now ready to be worn or gifted!
Blocking not only enhances the appearance of your shawl, but it also helps to even out the stitches and open up any lace or pattern details. It is an essential step in the finishing process of any knitted item and is well worth the time and effort.
Options for modifying the pattern

If you’re looking to put your own spin on the knitted shawl with pockets pattern, there are several options for modification. Here are a few ideas to get you started:
1. Change the stitch pattern
Instead of sticking with the recommended stitch pattern, you can experiment with different stitch patterns to create a unique look. Try lace stitches, cable stitches, or even colorwork to add visual interest to your shawl.
2. Adjust the size
If you prefer a larger or smaller shawl, you can easily modify the pattern to fit your desired dimensions. Simply adjust the number of stitches and rows to achieve the size you want. Keep in mind that modifying the size may require additional yarn.
3. Add a border
To add a decorative edge to your shawl, consider incorporating a border. This could be a simple garter stitch border, a lace border, or even a ribbed border. The possibilities are endless, and it’s a great way to add a personal touch to your shawl.
4. Customize the pockets
If you want to make the pockets stand out, you can customize them by using a contrasting color or adding a different stitch pattern. You could also consider adding buttons or other closures to the pockets for a functional and stylish detail.
5. Experiment with yarn choices
While the pattern may suggest a specific yarn type and weight, feel free to experiment with different yarns to achieve the desired texture and drape. Different yarns can create different effects, so don’t be afraid to try something new.
In conclusion, the knitted shawl with pockets pattern provides a great starting point for creating a cozy and practical accessory. By modifying aspects of the pattern, such as the stitch pattern, size, borders, pockets, and yarn choices, you can put your own creative touch on this versatile garment.