
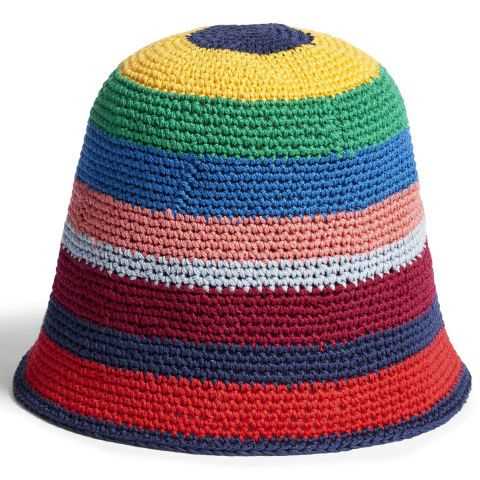
If you’re looking for a stylish and practical project to knit, look no further than a bucket hat. These hats are not only trendy and versatile, but they also provide protection from the sun and can be easily customized to fit your personal style. The best part is that you can make your own bucket hat for free with this easy-to-follow knitting pattern.
This free knit bucket hat pattern is suitable for intermediate knitters and can be completed in just a few hours. The design features a classic bucket hat shape with a wide brim and a comfortable fit. It can be adapted to any head size by adjusting the number of stitches, making it a perfect project for gift-giving or personal use.
To knit this bucket hat, all you need is some yarn in your favorite color and a set of knitting needles. The pattern uses a combination of knit and purl stitches to create a ribbed brim and a smooth body. With detailed instructions and helpful tips, even beginner knitters can successfully complete this project.
How to Make a Free Knit Bucket Hat: Step-by-Step Guide
If you’re looking to add a stylish accessory to your wardrobe, a bucket hat is a great option. Not only does it provide protection from the sun, but it also adds a fashionable touch to any outfit. The best part? You can make your own knit bucket hat for free! Follow this step-by-step guide to create your own unique hat.
Materials you will need:
- Knitting needles (size 7 or as recommended by your yarn)
- Yarn (medium weight)
- Tapestry needle
- Scissors
Step 1: Cast on
Start by casting on 100 stitches using the long-tail cast-on method. This will form the brim of your bucket hat.
Step 2: Knit the brim
Next, knit every stitch in the first row. Repeat this row for a total of 10 rows to create a sturdy brim for your hat.
Step 3: Shape the crown
To shape the crown, you will need to decrease stitches gradually. Knit two stitches together at the beginning and end of each row until you have approximately 20 stitches remaining.
Step 4: Bind off
Once you have the desired number of stitches, bind off your hat by cutting the yarn, leaving a long tail. Thread the tail through the tapestry needle and weave it through the remaining stitches, pulling tight to secure.
Step 5: Finishing touches
Using the tapestry needle, sew the side seams of your hat together, forming the crown. Weave in any loose ends of yarn and trim excess. Your knit bucket hat is now ready to wear!
With this simple step-by-step guide, you can create your own free knit bucket hat in no time. Experiment with different yarn colors and patterns to personalize your hat and make it truly unique.
Materials You’ll Need for Your Knit Bucket Hat
Before starting your knitting project, it’s important to gather all the necessary materials. Here is a list of items you’ll need to create your very own knit bucket hat:
- Knitting Needles: Choose a pair of circular knitting needles in a size suitable for your chosen yarn weight. Make sure the needles are comfortable to hold and work with.
- Yarn: Select a yarn that is appropriate for the season and provides the desired level of warmth. Worsted weight or DK weight yarns are commonly used for bucket hats. Consider the color and texture of the yarn, as well as any pattern or design preferences.
- Tape Measure: A tape measure or ruler will be handy for measuring your head circumference and determining the correct size for your hat. This will ensure a proper fit.
- Darning Needle: A darning needle or yarn needle is needed for weaving in the loose ends of yarn once you have completed your hat. Choose a needle with a large eye that will easily accommodate your yarn.
- Stitch Markers: Stitch markers are useful for marking specific stitches or sections of your pattern. They can help you keep track of your progress and prevent mistakes.
- Scissors: A pair of sharp scissors will come in handy for cutting the yarn and trimming any excess once you have finished your project.
- Pom-Pom (optional): If you want to add a fun and whimsical touch to your hat, consider including a pom-pom. You can buy pre-made pom-poms or make your own using yarn and a pom-pom maker.
Having these materials at hand will ensure you have everything you need to successfully knit your own bucket hat. Get ready to embark on a creative and rewarding knitting journey!
Choosing the Right Yarn for Your Knit Bucket Hat
When it comes to knitting a bucket hat, choosing the right yarn is essential for achieving the desired look and ensuring a comfortable fit. A good yarn choice will also determine the durability and longevity of your hat.
1. Fiber Content: Consider the fiber content of the yarn, as it will play a significant role in the hat’s comfort and performance. Natural fibers like cotton, linen, or wool are popular choices for bucket hats as they offer breathability, moisture-wicking properties, and insulation.
2. Weight and Gauge: Pay attention to the weight and gauge of the yarn, as it will determine the thickness and density of your hat. Chunky or bulky yarns will result in a thicker and warmer hat, while lighter weight yarns will create a more delicate and lightweight hat. Ensure that the yarn you choose matches the recommended gauge of the pattern to achieve the correct size and fit.
3. Color and Texture: Consider the color and texture of the yarn to complement your personal style and the overall design of the hat. Solid colors can create a classic and versatile look, while variegated or self-striping yarns can add visual interest and character to your hat. Texture can also enhance the appearance of the hat, so choose a yarn that has the desired texture for your project.
4. Care Instructions: Check the care instructions of the yarn to ensure that it aligns with your preferences and lifestyle. Some yarns require hand washing, while others can be machine washed. Consider the care requirements of the yarn to ensure that your hat remains in good condition even after repeated wear and washing.
5. Budget: Lastly, consider your budget when choosing yarn for your knit bucket hat. Yarn prices can vary greatly, and it’s important to find a balance between quality and affordability. Take into account the amount of yarn needed for your project and compare prices to find a yarn that fits within your budget without compromising on quality.
Selecting the Perfect Knitting Needles Size
When it comes to knitting, one of the most important factors to consider is the needle size. The size of your knitting needles can greatly affect the outcome of your project, including the overall size, drape, and even the texture of the fabric. Therefore, it’s essential to select the right needle size for your knitting project.
The needle size you choose will depend on several factors, including the type of yarn you’re using, the stitch pattern, and the desired outcome of your project. It’s important to keep in mind that different yarns have different recommended needle sizes, so it’s always a good idea to check the yarn label for guidance. Additionally, the stitch pattern you’re following may also have specific recommendations for needle size, especially if you’re working on a complex design or lacework.
One way to determine the right needle size is to create a gauge swatch. A gauge swatch is a small sample of knitting that allows you to check the number of stitches and rows per inch. By comparing your gauge swatch to the desired gauge for your project, you can adjust the needle size accordingly. For example, if your swatch has too many stitches per inch, you may need to switch to larger needles to achieve the correct gauge.
Keep in mind that needle sizes can vary depending on the country you’re in. While most knitting needles are labeled with both the US and metric sizes, it’s important to double-check the conversion chart if you’re using needles from a different country. Additionally, different needle materials, such as bamboo or metal, can also impact the way your stitches look and feel, so it’s worth experimenting with different materials to find the right match for your project.
In conclusion, selecting the perfect knitting needle size is crucial for achieving the desired outcome of your knitting project. Consider factors such as yarn type, stitch pattern, and gauge swatching to make an informed decision. Don’t be afraid to experiment with different needle sizes and materials to find the perfect match for your project.
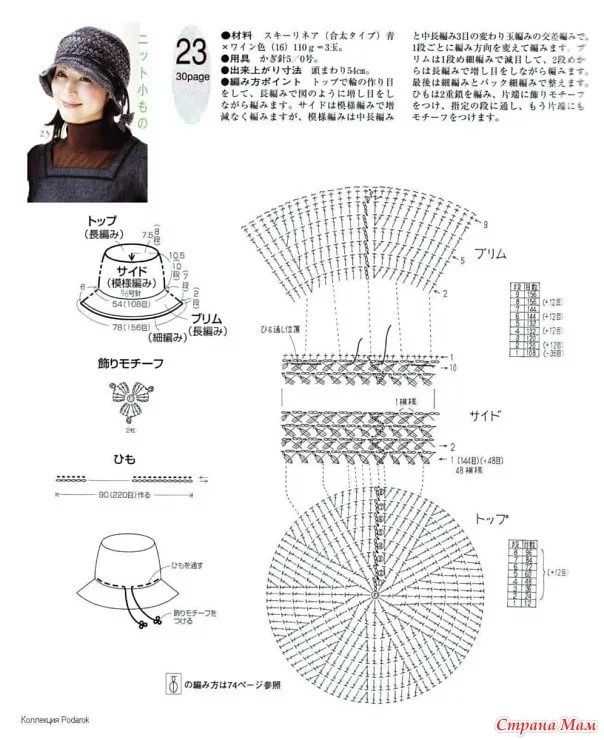
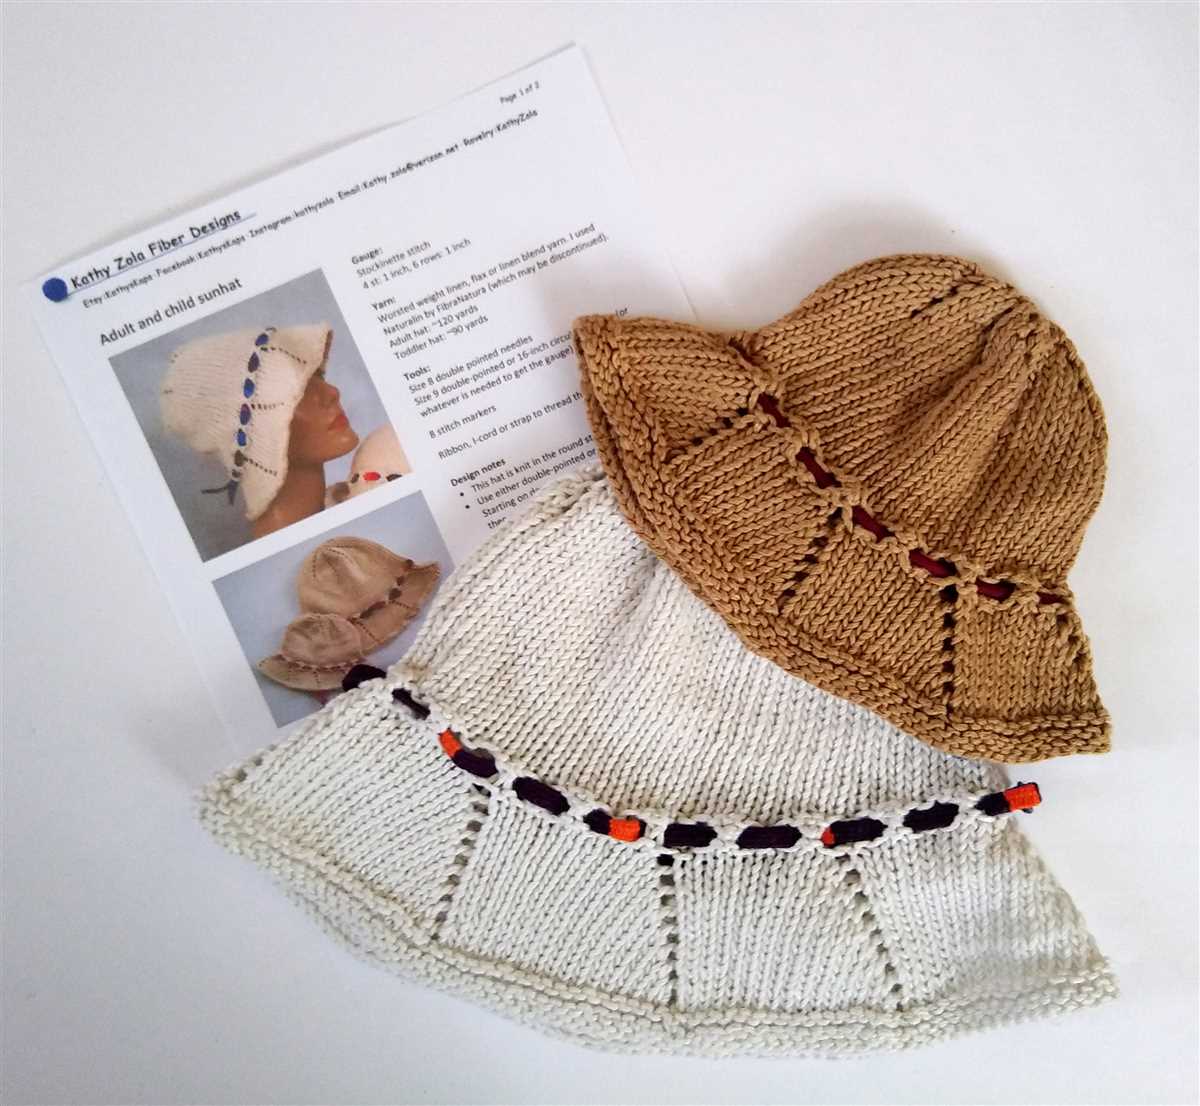
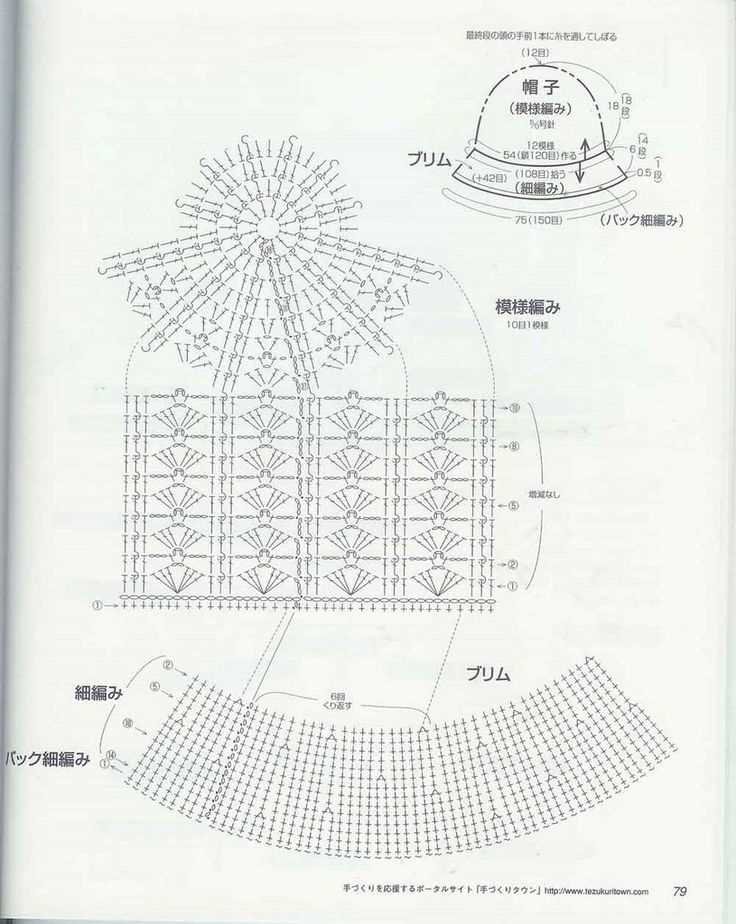
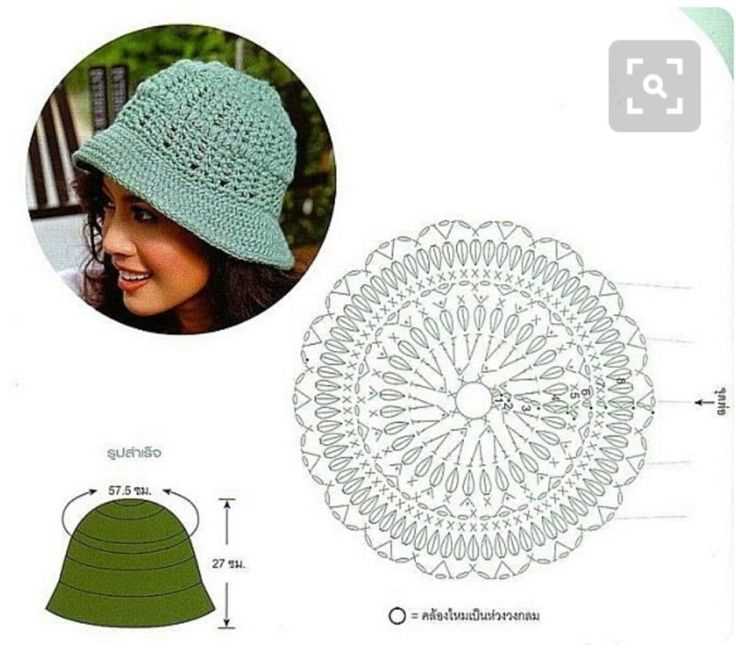
Understanding Knitting Patterns for Bucket Hats
Knitting patterns for bucket hats are a popular choice for both experienced knitters and beginners. These patterns provide a guide for creating stylish and functional hats that can be customized to suit individual preferences. Understanding these patterns is essential for successfully knitting a bucket hat.
Pattern Terminology: Knitting patterns for bucket hats often include specific terminology that may be confusing to beginners. It is important to familiarize yourself with terms such as cast on, knit, purl, decrease, and bind off. These terms will be used throughout the pattern to describe the different steps involved in creating the hat.
Gauge and Yarn: Before starting any knitting project, it is crucial to determine the correct gauge and select the appropriate yarn. The gauge refers to the number of stitches and rows per inch. Following the recommended gauge in the pattern will ensure that the hat turns out the correct size. Similarly, selecting a suitable yarn that matches the recommended gauge will ensure that the hat has the desired drape and texture.
Pattern Instructions: Knitting patterns for bucket hats typically include detailed step-by-step instructions. These instructions outline the number of stitches to cast on, the specific stitches to use, and any shaping required. The pattern may also include charts or diagrams to illustrate more complex stitch patterns. It is important to read the pattern carefully and follow the instructions closely to achieve the desired result.
Customization: One of the great things about knitting patterns for bucket hats is that they can be easily customized. The pattern may suggest different sizes, brim widths, or embellishments that can be incorporated to create a unique hat. Some knitters may choose to modify the pattern by adding stripes, cables, or lace patterns to personalize their hat. Following the basic pattern as a foundation, knitters can unleash their creativity to make the hat truly their own.
Finishing: Once the knitting is complete, the hat will require finishing touches. This may involve weaving in loose ends, sewing a lining, or blocking the hat to shape it properly. Following the finishing instructions in the pattern will ensure that the hat looks polished and ready to wear.
Understanding knitting patterns for bucket hats is crucial for successfully creating a customized and stylish hat. By familiarizing yourself with the pattern terminology, following the instructions carefully, and adding personal touches, you can create a hat that is both functional and fashionable.
Casting on Stitches for Your Knit Bucket Hat
Casting on stitches is the first step in creating your knit bucket hat. This process sets the foundation for your project and determines the size and fit of your hat. There are several methods you can use to cast on stitches, but for this pattern, we will focus on the long-tail cast-on method.
Start by measuring out a long tail of yarn, approximately three times the width of your finished hat. This tail will be used to create the initial stitches. Make a slipknot at the end of the tail, leaving a small loop.
Hold the slipknot in your right hand, and place the needle in your left hand through the loop from top to bottom, keeping the yarn tail on the left. With your right hand, bring the yarn over the needle from front to back, and then under the needle from back to front.
Next, slide the loop off your right hand and onto the needle, tightening it gently. This creates your first cast-on stitch. Repeat this process until you have cast on the desired number of stitches for your hat.
Remember to keep your stitches loose enough to easily slide along the needle but not so loose that they are too big or uneven. Once all your stitches are cast on, you are ready to begin knitting your bucket hat!
Knitting the Brim of Your Bucket Hat
Once you have completed the main body of your bucket hat, it’s time to move on to knitting the brim. The brim of the hat is what gives it structure and helps it stay in place on your head. There are several different techniques you can use to knit the brim, depending on the style you want for your hat.
If you want a simple and straightforward brim, you can use a basic ribbing pattern. This involves alternating knit stitches and purl stitches to create a stretchy and flexible fabric. Start by knitting a few rows in a ribbing pattern, and then continue in the pattern until the brim reaches your desired length.
If you prefer a more decorative brim, you can try using a lace pattern. Lace patterns can add a delicate and feminine touch to your bucket hat. There are countless lace patterns available, so you can choose one that matches your skill level and the style you want for your hat. Make sure to follow the lace pattern carefully and use stitch markers to help you keep track of your progress.
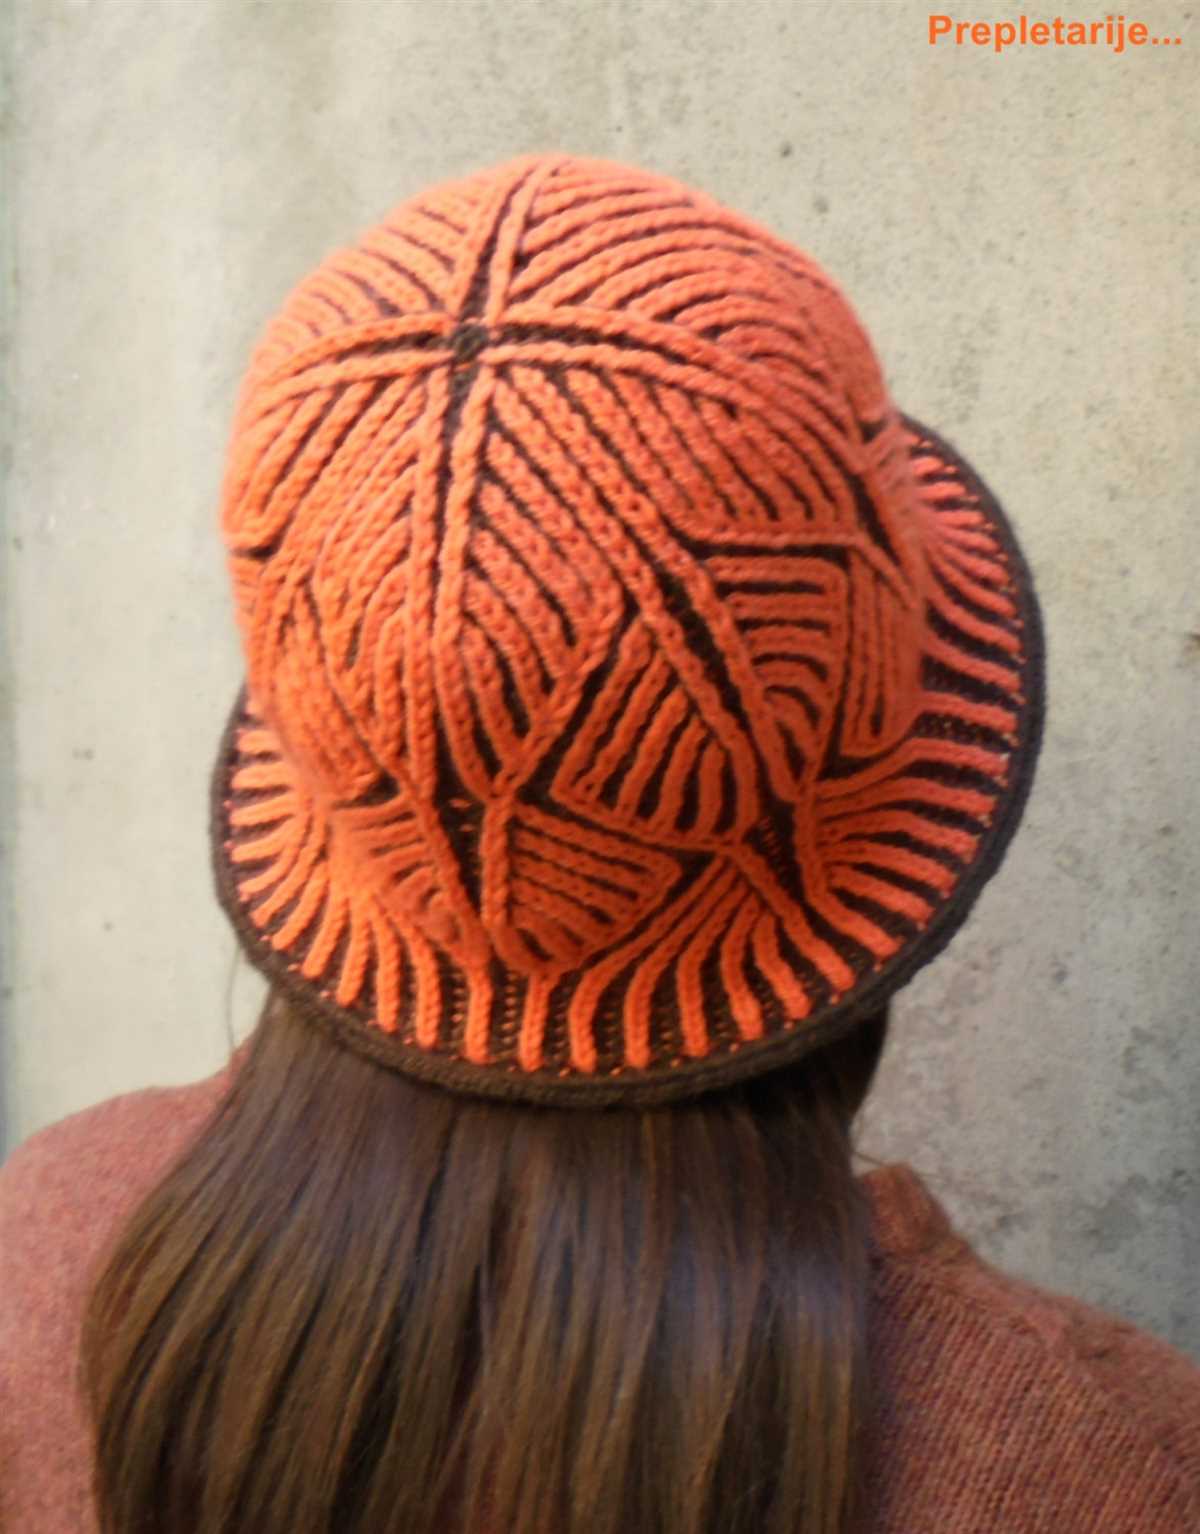
Another option for the brim of your bucket hat is to use a combination of stitches to create a textured pattern. This can add depth and visual interest to your hat. You can try using a combination of knit and purl stitches, as well as different types of decreases and increases, to create unique patterns. Experiment with different stitch patterns and see what works best for your hat.
Remember to always check your gauge before knitting the brim to ensure that it will fit properly. The brim should be slightly smaller than the circumference of your head so that it stays in place. Once you have finished knitting the brim, you can sew it onto the main body of the hat using a yarn needle. Secure the ends of the yarn and weave them in for a finished look.
Shaping the Crown of Your Knit Bucket Hat
When it comes to knitting a bucket hat, one of the most important parts to focus on is the crown. The crown is the top part of the hat that sits on your head, and shaping it correctly is essential for a comfortable and well-fitting hat. There are various techniques and patterns you can use to shape the crown of your knitted bucket hat, depending on the style and look you want to achieve.
One popular method for shaping the crown is to gradually decrease the number of stitches as you knit upwards. This creates a tapered effect and helps the hat conform to the shape of your head. To do this, you can start by knitting a few rounds in your desired stitch pattern, and then begin decreasing stitches evenly across each round. You can use techniques like knit two together (k2tog) or slip, slip, knit (ssk) to decrease stitches. Continue decreasing until you reach the desired circumference for the crown of your hat.
Another technique you can use is to create a gathered or gathered effect
- by evenly distributing increases throughout the crown of the hat. This can be done by knitting a few rounds in your stitch pattern, and then increasing stitches evenly across each round using techniques like knit front and back (kfb) or yarn over (yo). This method creates a full and rounded crown, perfect for a more relaxed and slouchy bucket hat.
- If you want a more structured and defined crown, you can also incorporate shaping through specific stitch patterns. For example, you can create a lattice or cable pattern that gradually decreases or increases in size as you knit towards the crown. This adds extra detail and texture to your hat, while still providing a well-shaped crown.
No matter which technique or pattern you choose, it’s important to try on your hat as you go to ensure a proper fit. Make adjustments as needed to ensure the crown is the right size and shape for your head. With a little patience and practice, you’ll be able to create a beautifully shaped crown for your knit bucket hat.
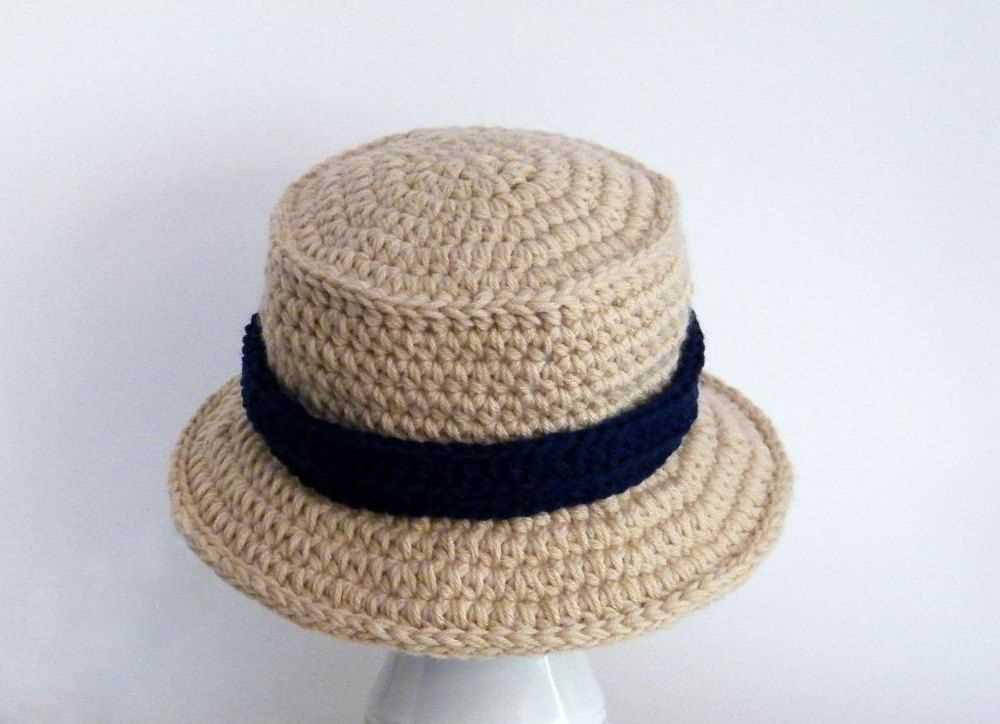
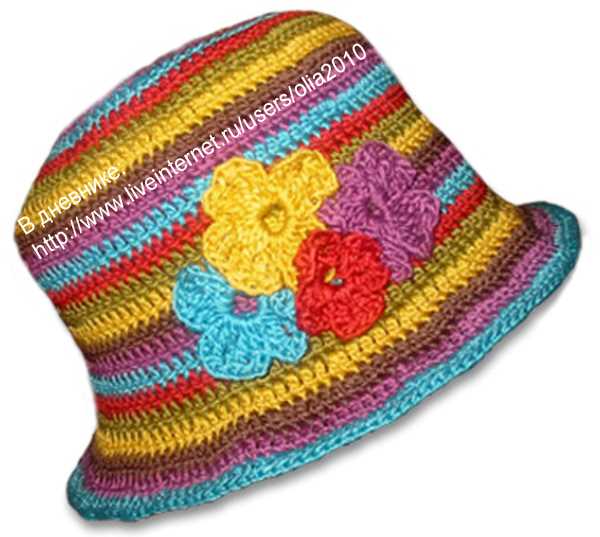
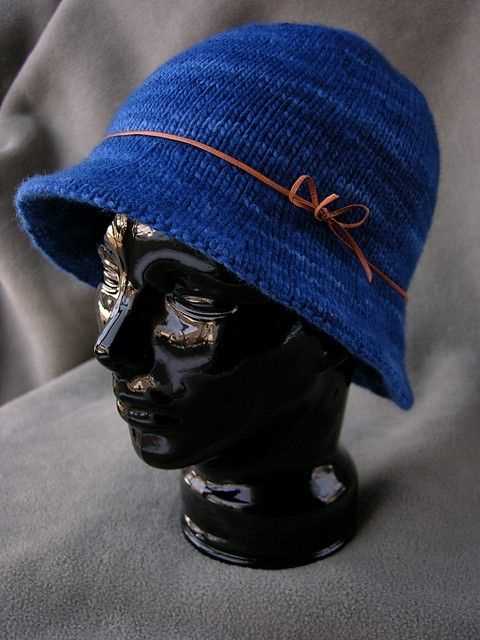
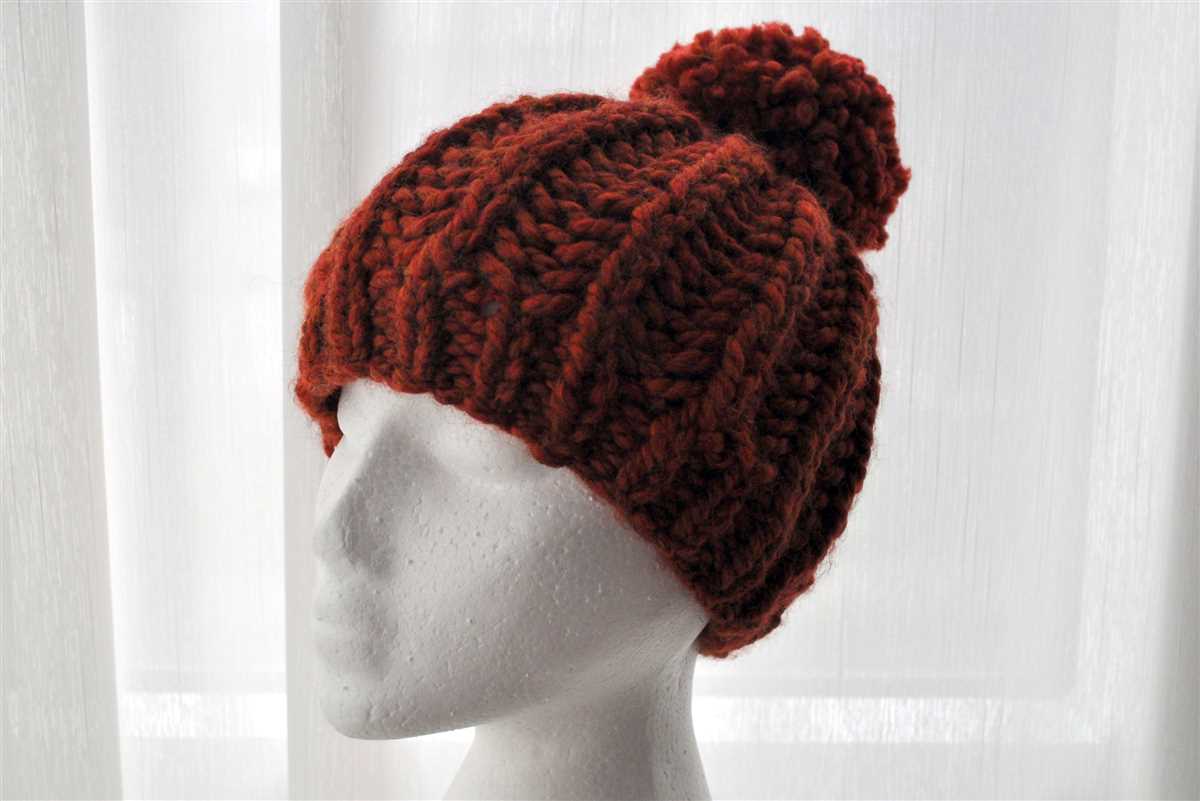
Adding a Decorative Detail to Your Knit Bucket Hat

One way to enhance the look of your knit bucket hat is to add a decorative detail. This simple addition can make your hat truly unique and showcase your personal style. Whether you prefer a subtle touch or a bold statement, there are various options to choose from.
Embroidery: Embroidery is a popular choice for adding a decorative detail to knit bucket hats. You can use colorful threads to create intricate designs, such as flowers, animals, or geometric patterns. Embroidery adds texture and visual interest to your hat, making it stand out from the crowd. You can either do the embroidery yourself or hire a professional to help you bring your vision to life.
Pom Pom: Another fun and playful option is to attach a pom pom to the top of your hat. This fluffy ball adds a touch of whimsy and can be made in various colors and sizes to match your hat or create a contrasting accent. Pom poms can be purchased ready-made or crafted from yarn using a pom pom maker. Simply attach it securely to the top of your hat, and you’re ready to make a statement.
Button: If you prefer a more minimalist look, adding a single button to the side or front of your hat can be a stylish and understated option. Choose a button that complements the color and style of your hat, whether it’s a sleek metal button or a vibrant wooden one. This simple detail can add a touch of elegance and sophistication to your knit bucket hat.
Ribbon: For a feminine and romantic touch, consider adding a ribbon to your hat. You can choose a thin ribbon that wraps around the base of the hat or a wider ribbon that cascades down the side. Satin ribbons in soft pastel colors or bold patterns can add a delicate and charming detail to your hat, making it perfect for special occasions or everyday wear.
- Embroidery
- Pom Pom
- Button
- Ribbon
Sewing the Seams of Your Knit Bucket Hat
After successfully knitting your bucket hat using the free pattern, it’s time to sew the seams together. This step is crucial in ensuring that your hat looks finished and professional.
First, lay your knitted hat flat on a clean surface with the wrong side facing up. Starting with the brim, fold it in half so that the right sides are facing each other. Align the cast-on edge with the bind-off edge and pin them together. This will create a neat and seamless brim for your hat.
Next, thread a tapestry needle with a matching yarn or thread and carefully stitch the folded edges together using a whip stitch or mattress stitch. Make sure to securely sew both the cast-on and bind-off edges to create a seamless join.
Once the brim is sewn, move on to sewing the top seams of the hat. Fold the hat in half vertically, aligning the edges, and pin them together. Start at the crown and stitch downwards, again using a whip stitch or mattress stitch. Be sure to keep the tension even and secure the stitches tightly.
Finally, weave in any loose ends of yarn using the tapestry needle to give your hat a clean and polished look. Trim any excess yarn if necessary.
By sewing the seams carefully and neatly, you can ensure that your knitted bucket hat will have a professional finish and will be a stylish addition to your wardrobe.
Blocking and Finishing Your Knit Bucket Hat
Once you have completed knitting your bucket hat, it is important to block it to give it a polished and professional finished look. Blocking is the process of shaping and stretching your knit hat to the desired size and shape. This step helps to even out any uneven stitches and gives the hat a more refined appearance.
To block your knit bucket hat, you will need a few items: a blocking mat or towels, rust-proof pins, and a spray bottle filled with water. Begin by laying your hat flat on the blocking mat or towels. Use the rust-proof pins to secure the edges of the hat to the mat, stretching it gently to achieve the desired shape. Mist the hat with water using the spray bottle, being careful not to oversaturate the fabric. Allow the hat to dry completely before removing the pins.
After blocking, you can also add finishing touches to your knit bucket hat. This may include weaving in any loose ends of yarn and trimming them, so they are not visible. You can also attach a decorative trim or band around the brim of the hat for added style. This can be a contrasting color of yarn or a ribbon. Sew the trim securely in place using a needle and thread that matches the color of the trim.
Once you have blocked and finished your knit bucket hat, it is ready to be worn or gifted to someone special. The blocking process ensures that the hat maintains its shape and structure, while the finishing touches add a personal touch and enhance its overall aesthetic. Enjoy the satisfaction of completing your knit bucket hat and showcasing your knitting skills!
Styling and Enjoying Your New Knit Bucket Hat
Now that you have completed your knitted bucket hat, it’s time to style it and enjoy wearing it! Here are some tips on how to make the most of your new accessory:
1. Pair it with casual outfits: The knit bucket hat is a versatile piece that can be dressed up or down. For a casual and effortless look, wear it with a simple t-shirt, jeans, and sneakers. The hat adds a touch of style and keeps the sun out of your eyes.
2. Experiment with different colors: Whether you opted for a neutral tone like black or beige, or a bold and vibrant color, your knit bucket hat can instantly elevate your outfit. Play around with different color combinations and find what works best with your wardrobe.
3. Consider your hairstyle: The bucket hat looks great with a variety of hairstyles. Whether you have short hair, long hair, or prefer a messy bun, there are endless ways to style your hat. Experiment with different looks to find what suits you best.
4. Protect yourself from the sun: One of the practical benefits of a bucket hat is its wide brim, which provides shade and protection from the sun. Make sure to wear sunscreen on your face and neck for added protection, especially on hot summer days.
5. Take it on your next outdoor adventure: Whether you’re heading to the beach, going for a hike, or exploring a new city, the knit bucket hat is the perfect companion. It’s lightweight, easy to pack, and adds a stylish touch to any outdoor outfit.
Conclusion
With its cozy knit and trendy design, the bucket hat is a must-have accessory for any fashion-forward individual. By following this pattern and adding your personal touch, you have created a unique and stylish hat that can be enjoyed in various settings and seasons.
So, go ahead and rock your new knit bucket hat with confidence and let it be a reflection of your personal style. Embrace the versatility of this accessory and have fun styling it for different occasions. Whether you’re lounging by the pool or running errands, your knit bucket hat will surely turn heads and become a staple in your wardrobe.