
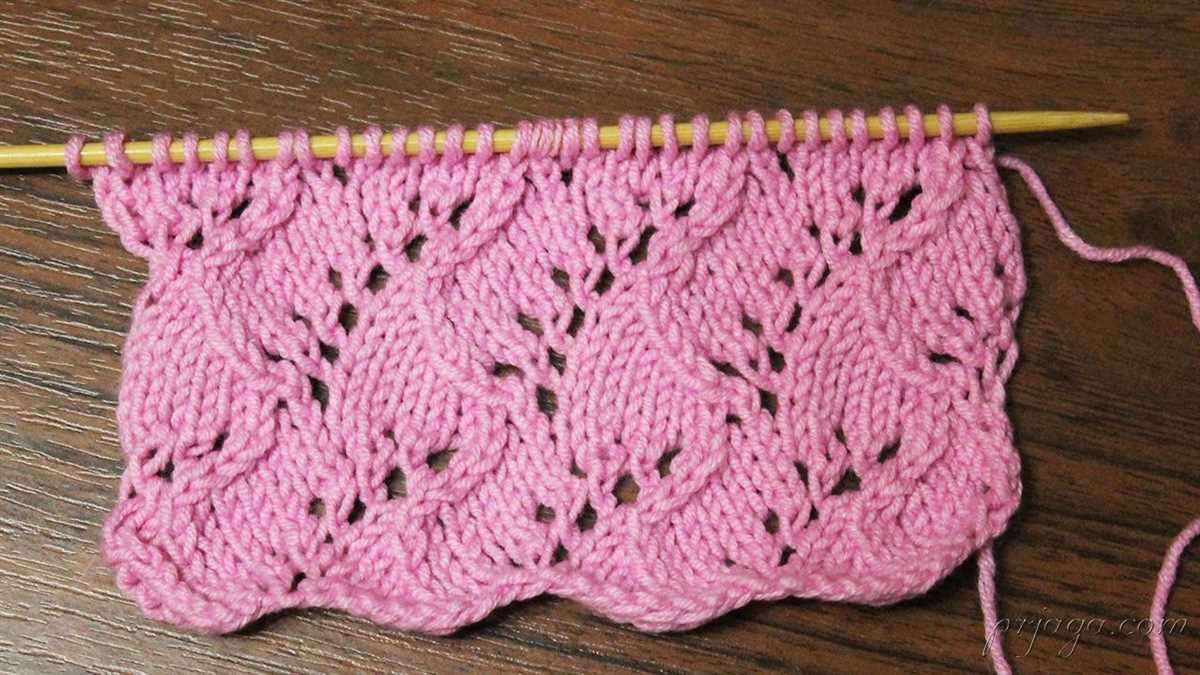
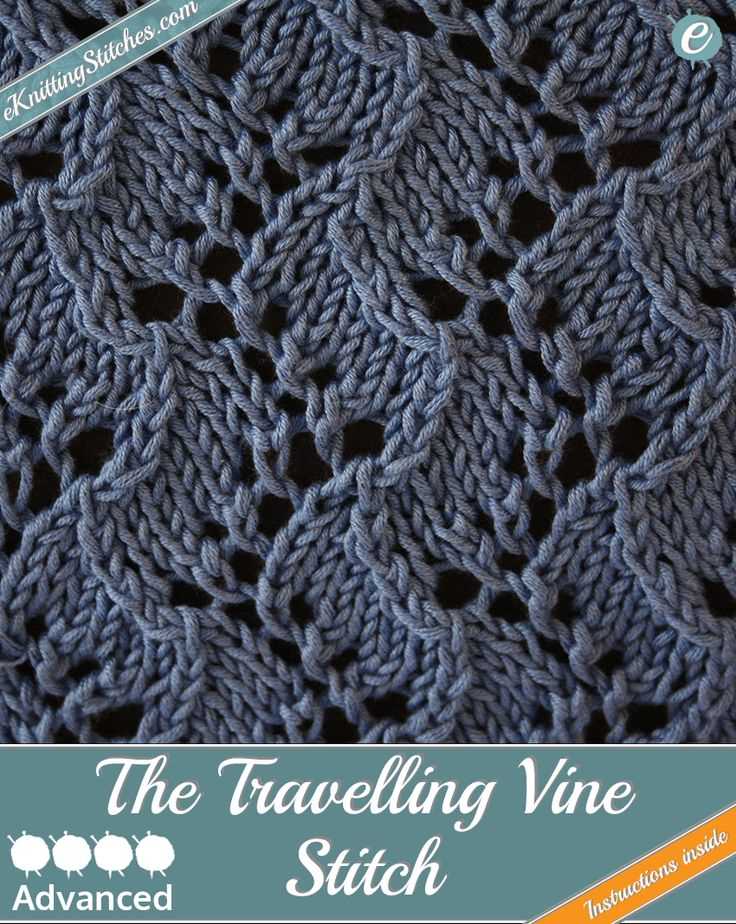
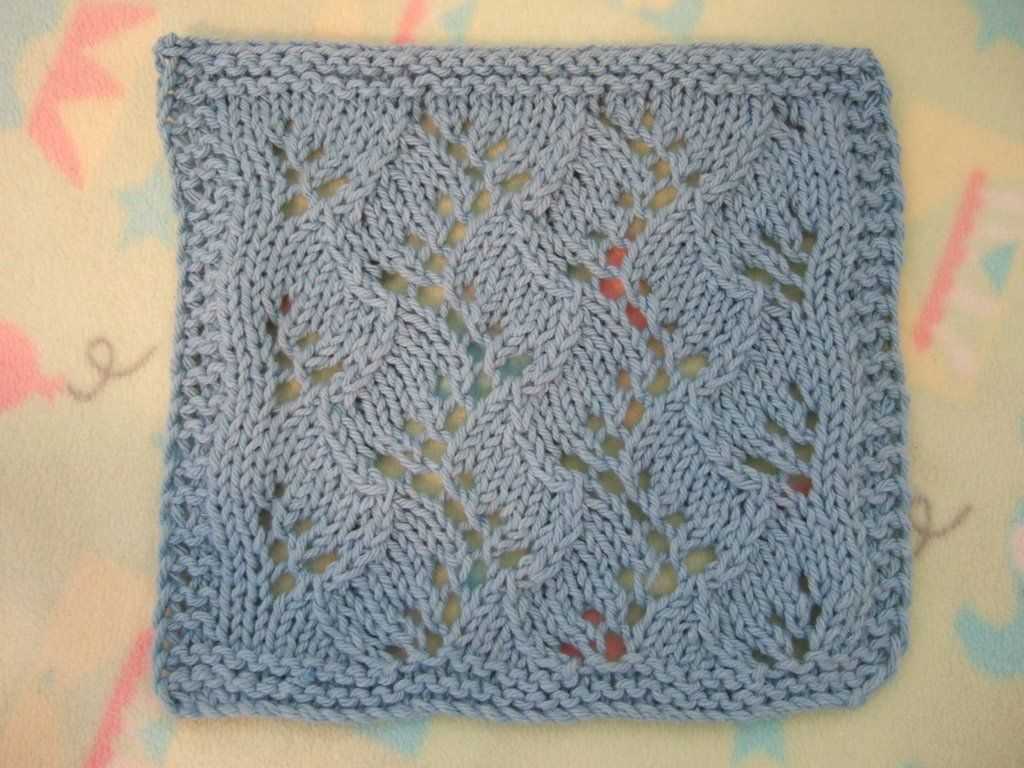
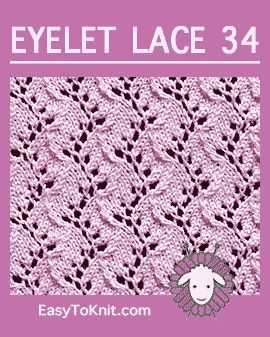
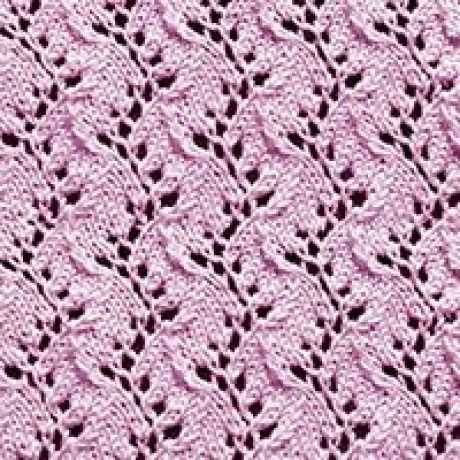
The traveling vine knitting pattern is a beautiful and intricate design that adds a touch of elegance to any knitting project. It is a versatile pattern that can be used to create various items such as scarves, shawls, and even sweaters. The pattern features a vine-like motif that twists and turns its way across the fabric, creating a stunning visual effect.
One of the best things about the traveling vine knitting pattern is its simplicity. Although the design may look complex, it is actually quite easy to master. The pattern consists of basic knitting stitches such as knit, purl, and yarn overs, making it accessible to knitters of all skill levels. Whether you are a beginner or an experienced knitter, you can easily create stunning projects using this pattern.
The traveling vine pattern is highly customizable, allowing you to make it your own. You can choose to use one color or multiple colors to create a unique look. You can also adjust the width and length of the vines to suit your preferences. This versatility makes the pattern a popular choice among knitters looking to create one-of-a-kind pieces.
What is a traveling vine knitting pattern?
A traveling vine knitting pattern is a type of knitting pattern that is characterized by the use of twisting and winding stitches, which create a vine-like design that appears to travel across the fabric. This pattern is often used to create intricate and decorative motifs on knitted garments, such as scarves, shawls, and sweaters.
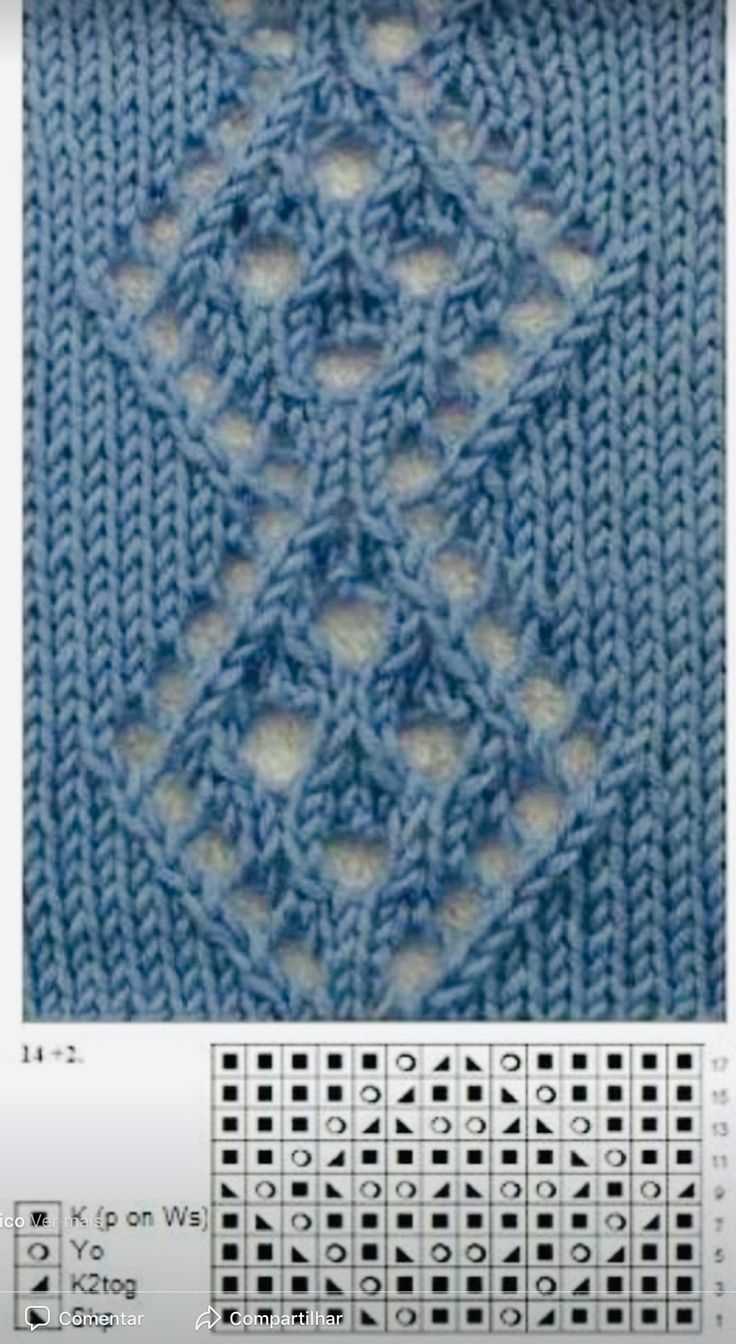
The traveling vine knitting pattern typically involves various knitting techniques, including cable knitting and lace knitting. The stitches used in this pattern are often worked over multiple rows, with some stitches crossing over others, creating the vine-like effect. By following a specific set of instructions, knitters can create beautiful and intricate designs that resemble twisting vines or branches.
To create a traveling vine knitting pattern, knitters need to have a solid understanding of the basic knitting techniques, such as casting on, knitting, purling, and binding off. They also need to be familiar with cable knitting techniques, as this is often used to create the twisting stitches that form the vine-like design. Additionally, knitters need to have a good grasp of pattern reading, as traveling vine patterns often involve complex stitch instructions.
Overall, a traveling vine knitting pattern is a versatile and decorative technique that allows knitters to add a touch of elegance and sophistication to their projects. Whether used as a focal point or as an accent, the vine-like design created by this pattern adds visual interest and texture to knitted garments, making them stand out and catch the eye.
Materials needed for the traveling vine knitting pattern
To create the beautiful traveling vine knitting pattern, you will need a few materials to get started. Here is a list of what you will need:
- Yarn: Choose a soft and durable yarn in your preferred color. The yarn should be suitable for the needle size you will be using.
- Knitting needles: You will need a pair of knitting needles in the appropriate size for your chosen yarn. Be sure to check the label on your yarn for the recommended needle size.
- Tapestry needle: A tapestry needle will be needed for weaving in any loose ends and finishing the project.
- Stitch markers: Stitch markers can be helpful for keeping track of your progress and marking any important sections in the pattern.
- Scissors: A pair of sharp scissors will be needed for cutting the yarn as needed.
- Measuring tape: A measuring tape is useful for checking your gauge and measuring the size of your work.
With these materials on hand, you will be well-equipped to tackle the traveling vine knitting pattern. Make sure to gather all the necessary supplies before you begin, and enjoy the process of creating this intricate and beautiful design.
How to cast on for the traveling vine knitting pattern
The traveling vine knitting pattern is a beautiful textured design that creates an illusion of vines traveling up your knitting project. To start knitting this pattern, you will need to cast on using the long-tail cast on method. This cast on method is perfect for creating a neat and stretchy edge that will allow the vines to flow smoothly.
To begin, measure a length of yarn that is about three times the width of your knitting project. This will be your tail. Take the tail of the yarn in your left hand and the working yarn (the yarn attached to the ball) in your right hand. Make a slipknot by looping the tail over the working yarn.
Step-by-step instructions:
- Hold the slipknot between your thumb and index finger of your left hand, leaving a short tail of about 4 inches.
- Insert the right needle from front to back into the slipknot.
- With your right hand, bring the yarn over the top of the right needle.
- Still holding the yarn with your left thumb, insert the right needle into the loop on your left thumb, going from front to back.
- With your right hand, bring the yarn over the top of the right needle again.
- Gently pull the yarn tail to tighten the stitch on the right needle
- Repeat steps 4-6 until you have cast on the required number of stitches for your pattern.
Once you have cast on all your stitches, you are ready to start knitting the traveling vine pattern. The long-tail cast on method creates a strong and flexible foundation that will complement the flowing vines of your knitting project. Happy knitting!
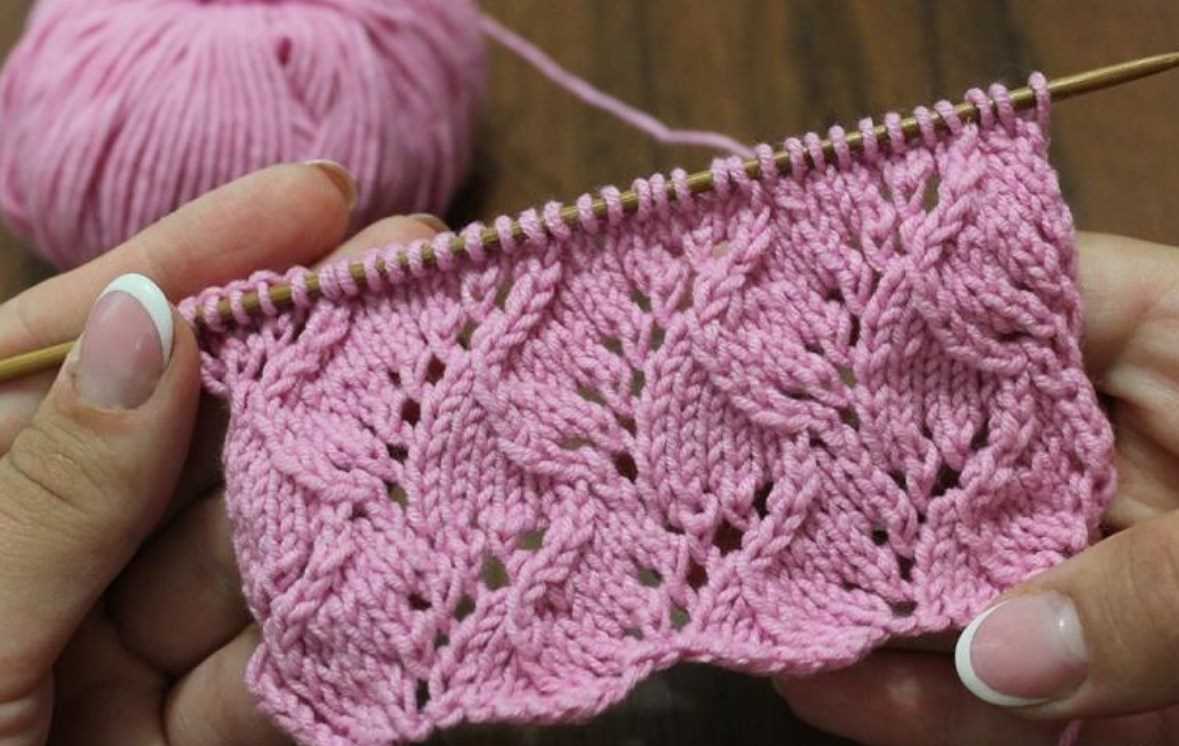
Knitting the traveling vine pattern

The traveling vine knitting pattern is a beautiful and intricate design that adds a touch of elegance to any knitting project. This pattern involves creating a series of twists and turns, resembling the growth of vines, that travel across the fabric. It is a versatile pattern that can be incorporated into various projects, such as scarves, shawls, or even garments.
To knit the traveling vine pattern, you will need to have a basic understanding of knitting techniques, such as knit, purl, and yarn overs. The pattern is typically worked on a multiple of stitches, which allows for easy customization and adjustment to fit your desired size. It is important to keep track of the pattern repeats to ensure that the vines flow smoothly across the fabric.
To begin the traveling vine pattern, cast on the desired number of stitches and start with the first row:
- Knit the first stitch.
- Bring the yarn to the front of the work, between the needles.
- Slip the next stitch purlwise.
- Bring the yarn to the back of the work, between the needles.
- Knit the next stitch.
- Repeat steps 2-5 until the end of the row.
Continue with the following rows to create the traveling vines:
- Purl all stitches.
- Knit the first stitch.
- Bring the yarn to the front of the work, between the needles.
- Slip the next stitch purlwise.
- Bring the yarn to the back of the work, between the needles.
- Knit the next stitch.
- Repeat steps 3-6 until the end of the row.
- Purl all stitches.
As you continue knitting the traveling vine pattern, you will see the vines take shape and create a visually appealing texture. It is important to maintain consistent tension throughout the project to ensure that the pattern remains even. With practice and patience, you will be able to master this beautiful knitting pattern.
How to increase and decrease stitches in the traveling vine pattern
When knitting the traveling vine pattern, it is important to know how to increase and decrease stitches to maintain the integrity of the pattern. Here are some techniques that can be used:
Increasing stitches:
- Make one (M1): Lift the strand of yarn between two stitches with the left-hand needle from front to back. Knit into the back of this strand, creating a new stitch.
- Knit front and back (KFB): Knit into the front of the stitch as usual, but instead of slipping the stitch off the left-hand needle, bring the right-hand needle to the back of the work and knit into the back of the same stitch. This creates two stitches from one.
- Yarn over (YO): Simply bring the yarn over the right-hand needle from front to back, creating an extra stitch. In the traveling vine pattern, this creates an eyelet or hole in the fabric.
Decreasing stitches:
- Knit two stitches together (K2tog): Insert the right-hand needle into the next two stitches as if knitting them together, then knit them together as one stitch.
- Purl two stitches together (P2tog): Insert the right-hand needle into the next two stitches as if purling them together, then purl them together as one stitch.
- Slip, slip, knit (SSK): Slip the next two stitches, one at a time, from the left-hand needle to the right-hand needle knitwise. Insert the left-hand needle into the front of these two stitches and knit them together through the back loops.
By using these techniques, you can easily increase or decrease stitches in the traveling vine pattern to achieve the desired shape and size of your knitting project. Experiment with different stitch combinations to add variety and interest to your design.
Tips for Maintaining Consistency in the Traveling Vine Pattern
When knitting the traveling vine pattern, it is important to maintain consistency to ensure that the design looks uniform and professional. Here are some tips to help you achieve this:
1. Use stitch markers:
Stitch markers are incredibly useful tools when working on any pattern, but especially when working on intricate designs like the traveling vine. Place stitch markers at key points in the pattern, such as the beginning and end of each vine motif. This will help you keep track of where you are in the pattern and prevent mistakes.
2. Count your stitches:
Counting your stitches regularly is essential for maintaining consistency in the traveling vine pattern. Check your stitch count after completing each row or set of rows to ensure that you haven’t accidentally added or dropped any stitches. This will help you catch any errors early on and make adjustments as needed.
3. Pay attention to your tension:
Tension plays a crucial role in the overall appearance of the traveling vine pattern. Make sure that you maintain an even tension throughout your knitting to keep the pattern consistent. If your tension starts to fluctuate, it can result in uneven stitches and distort the vine motif. Take breaks if needed to relax your hands and maintain a steady knitting rhythm.
4. Read and follow the pattern carefully:
Before starting the traveling vine pattern, thoroughly read and understand the pattern instructions. Pay attention to any special stitches or techniques involved in creating the vine motif. Follow the pattern closely, referring to it frequently as you work, to ensure that you are correctly executing the design and maintaining consistency.
5. Block your work:
Blocking your finished work is an important step that can greatly enhance the appearance of the traveling vine pattern. Blocking helps even out your stitches, relaxes any tension, and gives the pattern a more polished look. Follow the blocking instructions provided with your knitting project to achieve the best results.
By following these tips and staying diligent in your knitting, you can maintain consistency in the traveling vine pattern and create beautiful, professional-looking knitted pieces.
Adding variations to the traveling vine knitting pattern
If you’re looking to add some variety to your knitting projects, the traveling vine knitting pattern offers plenty of opportunities for customization. With a few simple tweaks, you can create different looks and textures while still maintaining the charm of the original pattern. Here are some ideas to get you started:
1. Changing the stitch count: One way to alter the appearance of the traveling vine pattern is to change the number of stitches in each repeat. By adding or subtracting stitches, you can create a wider or narrower vine design. Experiment with different stitch counts to achieve the desired effect.
2. Varying the yarn weight: Another way to change the look of the traveling vine pattern is to use yarn of different weights. Thicker yarns will create a chunkier and more textured vine, while finer yarns will result in a delicate and lacy design. Choose a yarn weight that suits your project and experiment with different options.
3. Adding color changes: To give the traveling vine pattern a pop of color, you can introduce color changes at specific points in the pattern. This can be done by using different yarn colors or by incorporating colorwork techniques such as stranded knitting or intarsia. Play around with different color combinations to create a unique and eye-catching design.
4. Trying different stitch patterns: While the traveling vine pattern is beautiful on its own, you can also incorporate other stitch patterns to add more complexity to your knitting. Consider combining the vine motif with lace stitches, cables, or textured stitches to create a more intricate and dynamic design. Mix and match different stitch patterns to create your own unique masterpiece.
By exploring these variations, you can take the traveling vine knitting pattern to new heights and create beautiful and personalized projects. Whether you’re a beginner or an experienced knitter, don’t be afraid to experiment and customize the pattern to suit your style and preferences.
Creative ways to use the traveling vine pattern in your knitting projects
The traveling vine pattern is a versatile and beautiful knitting technique that can be used in various projects to add visual interest and texture. Whether you are a beginner or an experienced knitter, incorporating this pattern into your projects can elevate your creations to the next level.
One creative way to use the traveling vine pattern is by incorporating it into a scarf or cowl design. The twisting vines create an elegant and intricate look that is sure to impress. You can experiment with different colors of yarn to enhance the vine-like appearance or even add beads or other embellishments to give it a unique touch.
The traveling vine pattern can also be used in the design of hats and headbands. By incorporating the vine pattern into the brim or band of the hat, you can create a stunning accessory that stands out from the crowd. This pattern works particularly well with lightweight yarn and can be adjusted to fit different head sizes.
If you are feeling adventurous, you can even incorporate the traveling vine pattern into larger projects such as blankets or shawls. By using larger needles and thicker yarn, you can create a cozy and eye-catching piece that will keep you warm and stylish. The flowing vines will add a touch of elegance to any room or outfit.
Incorporating the traveling vine pattern into your knitting projects allows you to showcase your creativity and skill. Whether you choose to use it in smaller accessories or larger garments, this pattern is sure to impress and elevate your knitting to new heights.
Troubleshooting common issues with the traveling vine pattern
The traveling vine knitting pattern is a beautiful and intricate design that can add a touch of elegance to any project. However, like any pattern, it can sometimes pose challenges for knitters. Here are some common issues that may arise when knitting the traveling vine pattern and how to troubleshoot them:
1. Uneven tension:
One of the most common issues knitters face when working with the traveling vine pattern is uneven tension. This can result in a finished piece that looks inconsistent and lacks a professional touch. To address this issue, it’s important to pay attention to your tension throughout the entire pattern. Take your time and ensure that your stitches are even and consistent. If you notice any areas where your tension is off, you can try adjusting your knitting style or using a different needle size to achieve a more even tension.
2. Difficulty with the cable stitches:
The traveling vine pattern involves working cable stitches, which can be tricky for some knitters, especially those who are new to cable knitting. If you’re having difficulty with the cable stitches, make sure you understand the cable instructions and how to maneuver your knitting needles to create the desired pattern. Practice the cable stitches separately before incorporating them into the full pattern. Additionally, using cable needle holders or stitch markers can help you keep track of your stitches and prevent any mistakes.
3. Losing track of the pattern repeats:
The traveling vine pattern often involves repeating a set of stitches multiple times across a row or rounds. It’s easy to lose track of where you are in the pattern and make mistakes. To avoid this issue, use stitch markers or place a piece of contrasting yarn at the beginning of each pattern repeat. This will help you visually identify where each repeat starts and ends and ensure that you stay on track.
4. Incorrect stitch counts:
Another common issue with the traveling vine pattern is ending up with incorrect stitch counts. This can happen if you accidentally skip or add stitches during the pattern. To prevent this, double-check your stitch counts after each row or round. If you notice any discrepancies, go back and carefully review your knitting to identify where the mistake may have occurred. In some cases, you may need to unravel a few rows to fix the error.
By being aware of these common issues and following the troubleshooting tips provided, you can overcome challenges while knitting the traveling vine pattern and create a beautiful finished piece.
Finishing off the traveling vine pattern
Now that you have completed the main part of the traveling vine knitting pattern, it’s time to finish off your project with some final touches. Here are a few steps to help you complete your knitting project:
1. Bind off: Start by binding off the stitches. This will secure the last row of your knitting and prevent it from unravelling. You can use your preferred bind off method, such as the basic bind off or the picot bind off, depending on the desired finish.
2. Weave in ends: Next, you’ll want to weave in any loose ends or yarn tails that were created during the knitting process. This will give your project a neat and polished look. Use a yarn needle to thread the ends through the stitches, going back and forth to ensure they are secure.
3. Block the project: Blocking is an optional step, but it can greatly improve the overall appearance of your knitting. To block your project, dampen it with water or steam, then shape it into the desired dimensions. Allow it to dry completely before handling.
4. Add any desired embellishments: If you’d like to add some extra flair to your traveling vine knitting pattern, now is the time to do it. You can sew on buttons, attach beads, or add any other decorative elements that you want.
5. Enjoy your finished project: Once you’ve completed all the finishing steps, take a moment to admire your handiwork. Whether you’ve created a scarf, a blanket, or any other item, it’s now ready to be used or gifted to someone special.
Example projects made with the traveling vine knitting pattern
The traveling vine knitting pattern is a versatile and beautiful design that can be used to create a wide range of projects, from accessories to garments. Here are a few examples of projects that can be made using this pattern:
1. Scarf
A scarf made with the traveling vine knitting pattern is an elegant and stylish accessory that can be worn with any outfit. The vine-like design adds a touch of sophistication to the scarf, making it a versatile piece that can be worn for both formal and casual occasions. Knit the scarf using a soft and cozy yarn to keep you warm during the colder months.
2. Fingerless gloves
Fingerless gloves are a trendy and practical accessory, and when made with the traveling vine knitting pattern, they become even more eye-catching. The vine design can be knitted along the back of the hand, adding a touch of elegance and femininity to the gloves. These gloves are perfect for keeping your hands warm while still allowing you to use your fingers freely.
3. Sweater
A sweater made with the traveling vine knitting pattern is an exceptional piece that will make you stand out from the crowd. The vine-like design can be knitted on the front or back of the sweater and creates a visually interesting and unique look. Choose a soft and luxurious yarn to make your sweater feel cozy and comfortable, perfect for cooler days.
4. Shawl
A shawl made with the traveling vine knitting pattern is a versatile accessory that can be worn in multiple ways. The intricate vine design adds a touch of elegance and sophistication to the shawl, making it a perfect piece for special occasions or as a stylish addition to your everyday outfits. Choose a lightweight and drapey yarn to create a shawl that will gracefully wrap around your shoulders.
5. Baby blanket
A baby blanket made with the traveling vine knitting pattern is a thoughtful and unique gift for a newborn. The delicate vine design adds a touch of whimsy and charm to the blanket, making it a beautiful addition to any nursery. Choose a soft and gentle yarn to make the blanket comfortable and cozy for the baby’s delicate skin.
Where to find more patterns and resources for the traveling vine pattern
Once you have mastered the traveling vine knitting pattern, you may want to explore more patterns and resources to further enhance your knitting skills. Luckily, there are plenty of options available online where you can find inspiration and instruction for new projects.
Here are some places you can visit to find more patterns and resources:
- Ravelry: Ravelry is a popular online community for knitters and crocheters. It offers a vast collection of patterns, including many variations of the traveling vine pattern. You can search for patterns, join forums to discuss your projects, and connect with other knitters.
- Knitting websites and blogs: Many knitting websites and blogs feature free or paid patterns that incorporate the traveling vine design. These websites often provide detailed instructions and helpful tips to help you create beautiful projects.
- Knitting magazines: Knitting magazines often include patterns and tutorials for various knitting techniques, including the traveling vine pattern. Subscribing to a knitting magazine can provide you with a regular dose of inspiration and new patterns to try.
- Knitting books: There are many knitting books available that focus on different stitch patterns and techniques. Some books specifically feature the traveling vine pattern and provide step-by-step instructions and project ideas.
- Online knitting communities: Joining online knitting communities, such as forums and social media groups, can connect you with fellow knitters who can share their experiences with the traveling vine pattern and recommend additional resources.
With so many resources available, you are sure to find endless inspiration and new patterns to try with the traveling vine knitting pattern. Whether you prefer digital resources or enjoy flipping through the pages of a knitting book, there is no shortage of options to explore and expand your knitting skills.