
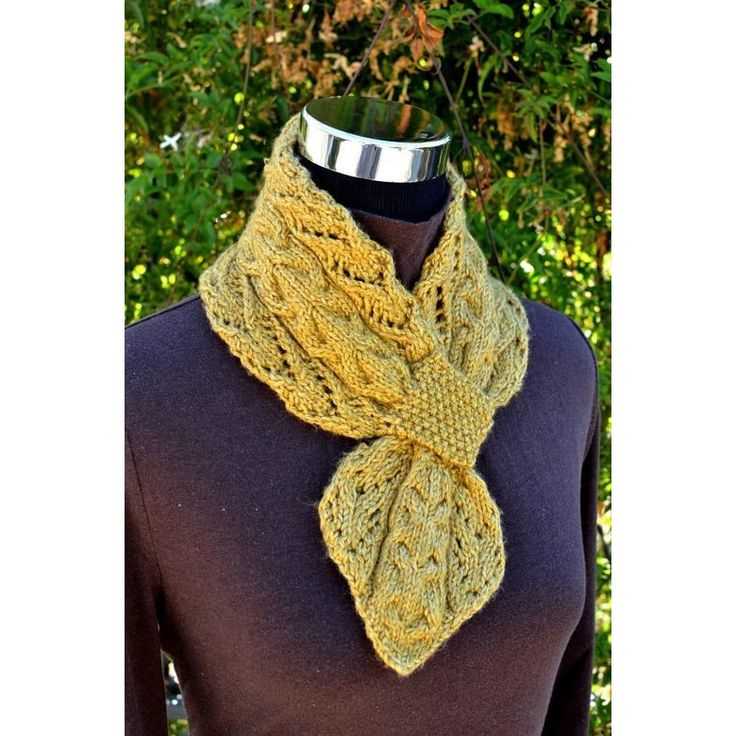
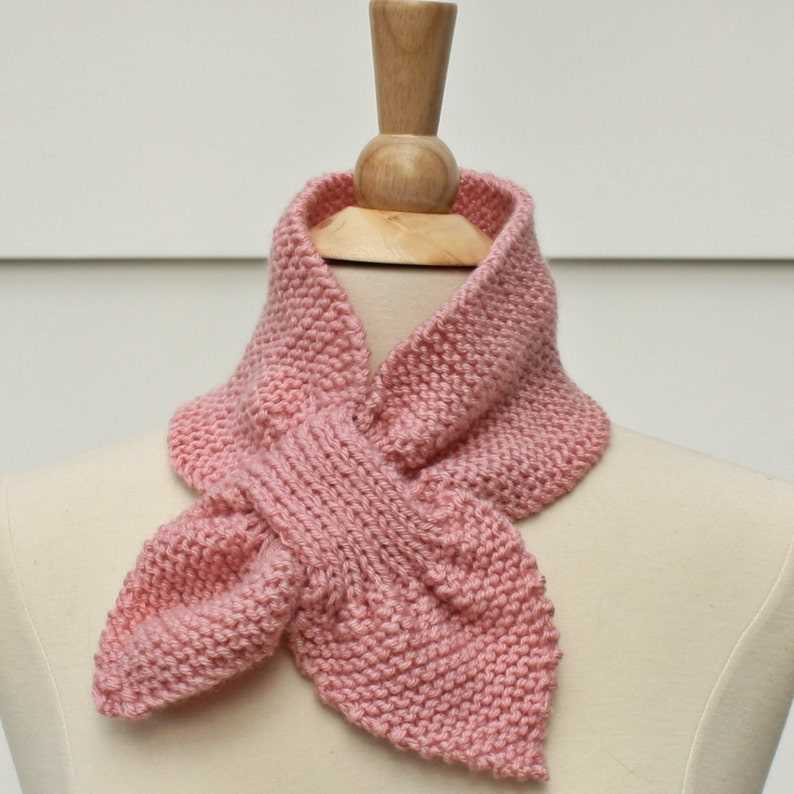
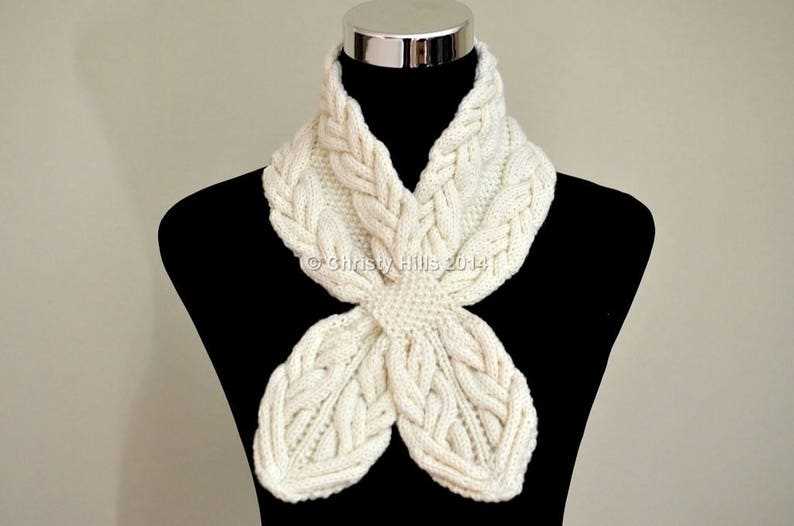
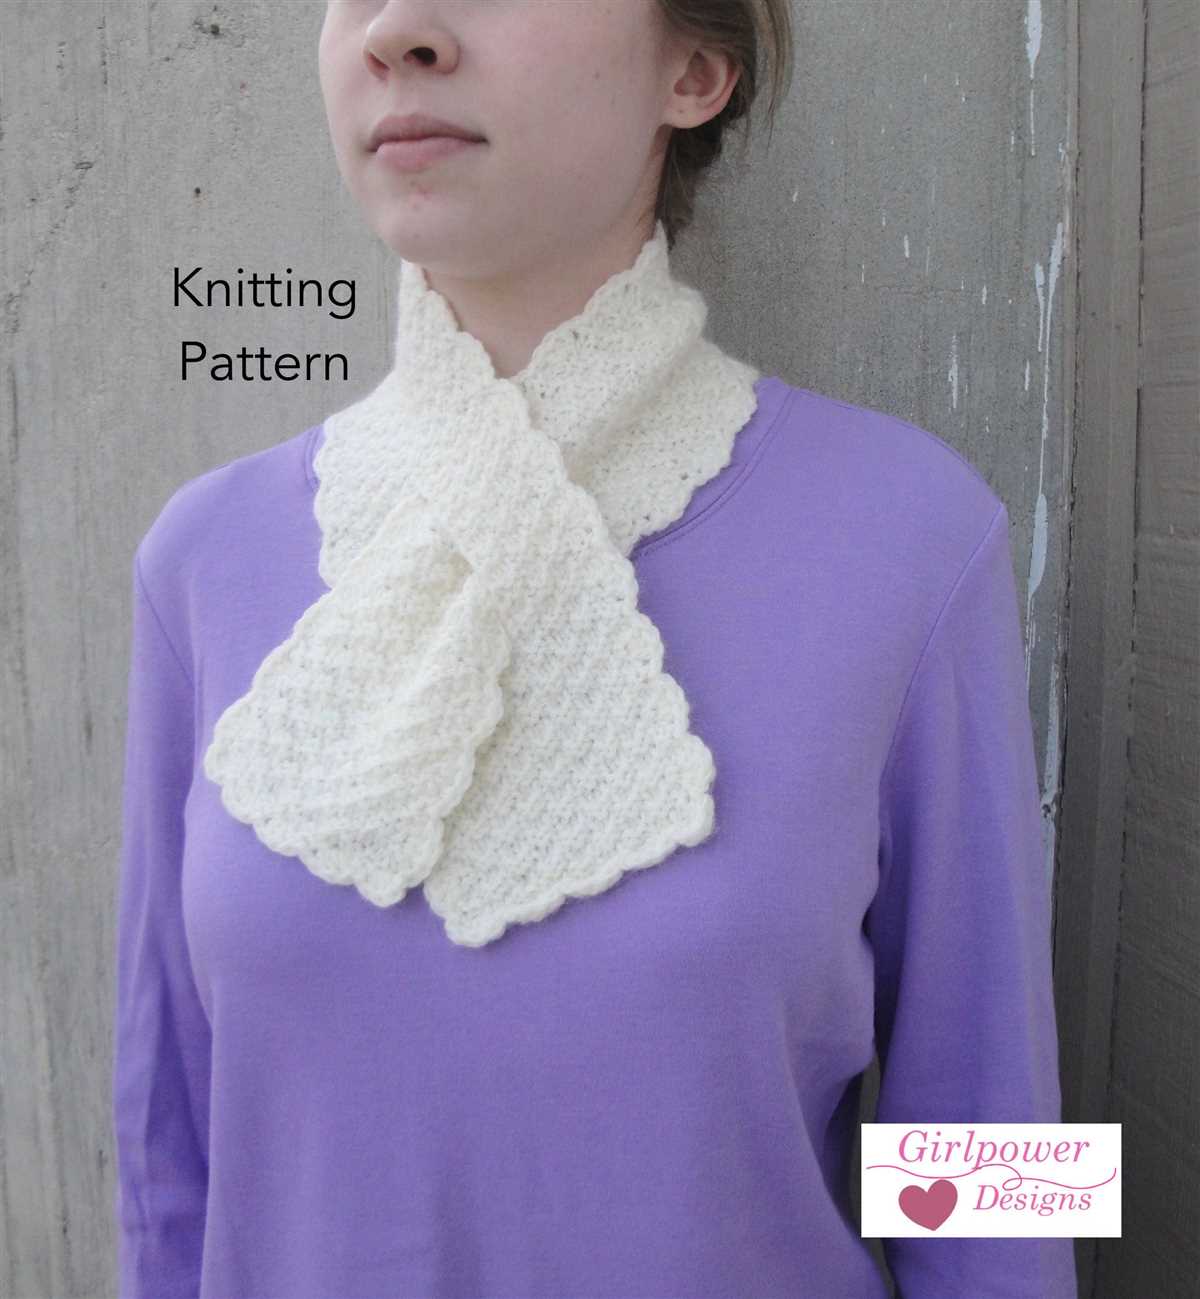
Winter is just around the corner and it’s time to start thinking about how to stylishly keep warm. If you’re looking for a versatile accessory that adds a touch of elegance to any outfit while keeping you cozy, an ascot scarf is the perfect choice. With its unique shape and intricate design, an ascot scarf is a stylish way to beat the chill.
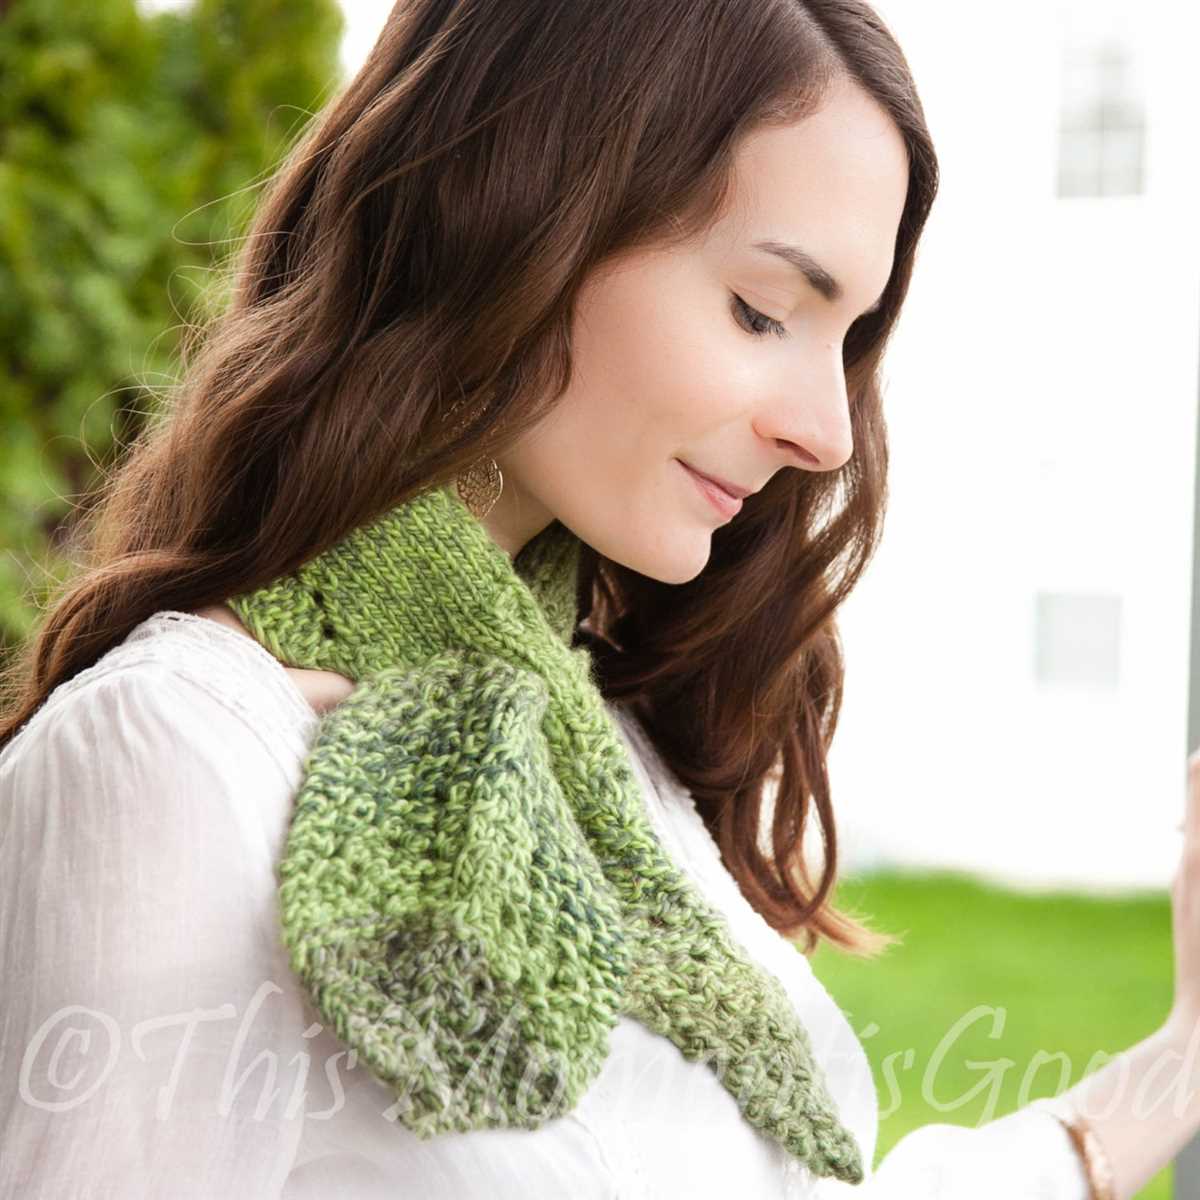
What makes the ascot scarf so special is its versatility. It can be worn in multiple ways, allowing you to customize your look for any occasion. Whether you want to wear it loose and flowing, or tie it in a chic knot, the ascot scarf adds a touch of sophistication to any outfit. Plus, it’s the perfect size to tuck into your coat for added warmth on those extra blustery days.
If you’re looking to add a personal touch to your winter wardrobe, why not try knitting your own ascot scarf? Knitting is a relaxing and rewarding hobby that allows you to create unique pieces that reflect your personal style. With a wide variety of yarns and colors to choose from, you can easily find the perfect combination to match your wardrobe.
Ascot Scarf Knitting Pattern: Create a Stylish Accessory

The Ascot scarf is a timeless and elegant accessory that adds a touch of sophistication to any outfit. Whether you’re looking to make a statement at a formal event or simply want to elevate your everyday attire, knitting your own Ascot scarf allows you to customize it to your liking and create a one-of-a-kind piece.
Materials Needed: To knit an Ascot scarf, you will need a pair of knitting needles (size 7 or 8), approximately 200 yards of medium-weight yarn, a tapestry needle, and a pair of scissors. Choose a yarn color that complements your wardrobe and suits your personal style.
- Cast On: Start by casting on 30 stitches using the long-tail cast-on method. This will create the width of your Ascot scarf.
- Knit Rows: Work in the garter stitch pattern by knitting every stitch on each row. Repeat this pattern until your scarf reaches the desired length. Typically, an Ascot scarf is around 40-50 inches long.
- Bind Off: Once you’re satisfied with the length, bind off your stitches to secure the edges. Cut the yarn, leaving a long tail for weaving in later.
- Finishing: Use a tapestry needle and the remaining yarn tail to weave in any loose ends and secure the bind-off edge. You can also add a decorative tassel or pom-pom to both ends of the scarf for an extra touch of style.
Once your Ascot scarf is complete, you can style it in various ways. For a classic look, drape the scarf around your neck and tie it loosely in a knot at the front. If you prefer a more tailored and polished appearance, fold the scarf in half diagonally and wrap it around your neck, then secure it with a pin or brooch. The versatility of the Ascot scarf allows you to experiment with different tying techniques and create different looks for different occasions.
Knitting your own Ascot scarf not only allows you to showcase your knitting skills, but it also gives you the opportunity to express your personal style and create a unique accessory that reflects your personality. With its timeless appeal and stylish versatility, the Ascot scarf is a must-have addition to any wardrobe.
Choose the Right Yarn and Needles
When it comes to knitting an Ascot scarf, choosing the right yarn and needles is key to achieving the desired result. The yarn you choose will determine the overall look and feel of the scarf, while the needles will affect the stitch definition and the drape of the fabric.
Yarn: For an Ascot scarf, it is recommended to use a soft and lightweight yarn that drapes well. Popular yarn choices for this project include silk, bamboo, alpaca, or a blend of these fibers. These yarns will create a luxurious and elegant scarf with a beautiful drape. Consider the season, climate, and personal preference when selecting the yarn.
Needles: The choice of needles is also important to achieve the desired texture and gauge. Depending on the yarn and your knitting style, you may need to experiment with different needle sizes. Typically, a pair of medium-sized knitting needles, around US 7 or 8 (4.5 mm or 5 mm), will work well for most Ascot scarf patterns. However, it is advisable to check the pattern instructions for any specific needle size recommendations.
Additionally, if you want a more open and lacy texture, using larger needles can help achieve that effect. Conversely, if you prefer a denser and tighter fabric, using smaller needles will be suitable. It is always a good idea to swatch before starting the project to ensure that you are happy with the fabric’s look and feel.
Conclusion: Choosing the right yarn and needles is essential for knitting an Ascot scarf that meets your expectations. Consider the fiber, weight, and drape of the yarn, and experiment with different needle sizes to achieve the desired texture. Swatching before starting the project will allow you to make any necessary adjustments and ensure that your final scarf is exactly as you envision it.
Cast On and Start Knitting
The first step in knitting an Ascot scarf is to cast on your stitches. This will determine the width of your scarf and how many stitches you will have on your needle. There are several different methods you can use to cast on, but the long tail cast on is a popular choice for this project. To begin, measure out a length of yarn that is about four times the width of your desired scarf. Make a slip knot about six inches from the end of the yarn, and slide it onto one of your knitting needles. Hold the needle with the slip knot in your right hand, and the other needle in your left hand.
To cast on using the long tail method, bring your right hand needle under the yarn that is attached to the slip knot. Wrap the yarn around the right hand needle from back to front, creating a loop. Slip the right hand needle up and through the loop, and at the same time, pull the yarn snug to create a new stitch. Repeat this process until you have cast on the desired number of stitches. Keep in mind that for the Ascot scarf, you will need an odd number of stitches, so be sure to cast on an odd number. Once you have cast on all of your stitches, you are ready to start knitting!
When you first start knitting, it can be helpful to place a stitch marker on your needle to mark the beginning of your row. This can help you keep track of your progress and ensure that you are knitting in the correct direction. To begin knitting, insert your right hand needle into the first stitch on your left hand needle, from left to right. Wrap the working yarn around the right hand needle from back to front, and slide the right hand needle through the loop of the first stitch. Drop the stitch off the left hand needle, and you have completed your first knit stitch. Continue knitting across the row until you reach the end of your stitches. Then, turn your work and continue knitting in this manner for each row.
Remember to always keep the working yarn in back of your work when knitting, and to tug gently on the yarn after each stitch to ensure an even tension. As you progress in your knitting, you will see the fabric begin to grow. With each stitch, you are creating a new row of knit stitches, which will eventually form your Ascot scarf. Knitting is a relaxing and rewarding hobby that allows you to create beautiful and functional items. Enjoy the process and have fun knitting your Ascot scarf!
Knit the Body of the Scarf
Once you have completed the initial setup and cast on the required number of stitches, it’s time to start knitting the body of the scarf. The body of the scarf is where you will be working the main pattern and creating the design of the Ascot scarf.
Following the pattern instructions, you will work rows of knit and purl stitches to create the desired texture and design. This may involve repeating a specific stitch pattern or changing patterns throughout the body of the scarf. It’s important to carefully read and understand the pattern instructions to ensure you are working the correct stitches and rows.
As you knit the body of the scarf, it’s important to maintain an even tension and consistent gauge. This will help ensure that the finished scarf has a professional and polished appearance. If necessary, you can use stitch markers to help keep track of specific sections or pattern repeats.
Depending on the length and width of the Ascot scarf, you will continue working the body until you reach the desired length. This may involve knitting several inches or repeating pattern repeats until reaching a specified measurement. Remember to periodically check your gauge and measurements to ensure the scarf is progressing as desired.
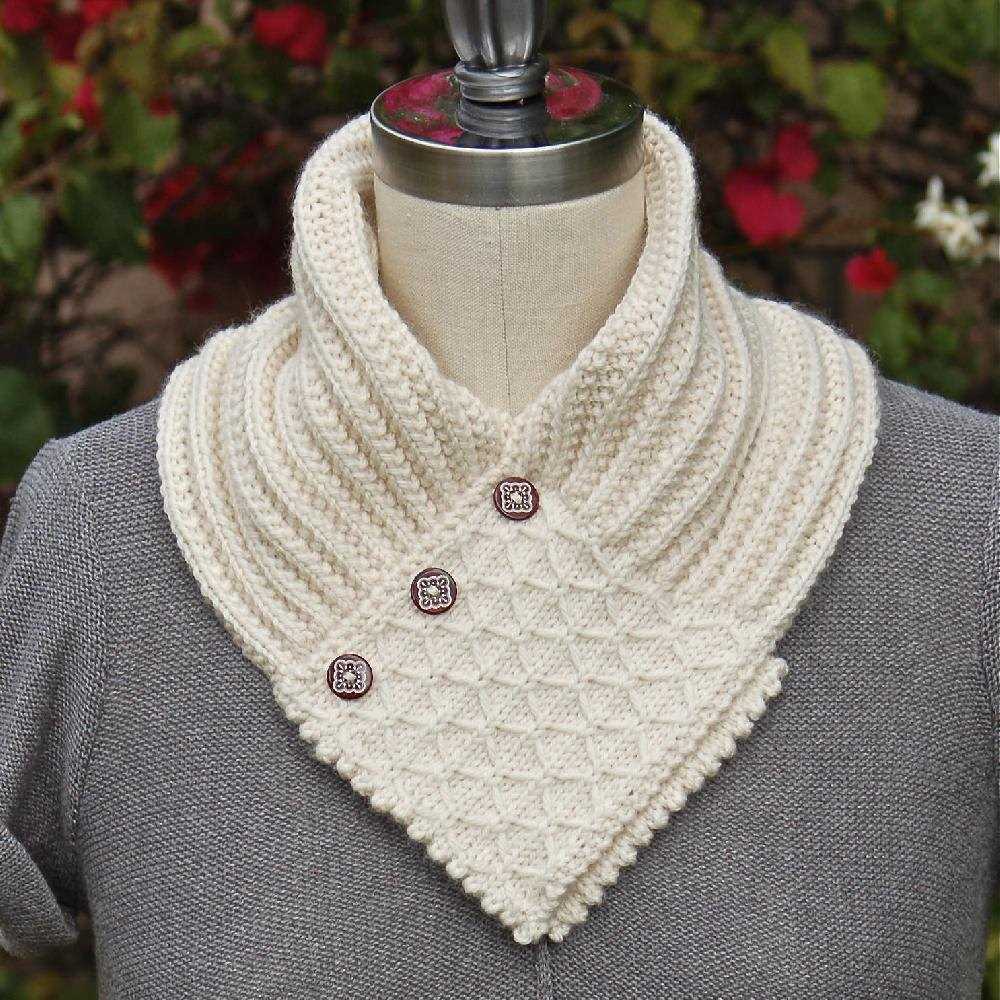
Add a Beautiful Ribbing
When knitting an Ascot scarf, adding a ribbing is a simple way to give your scarf some extra style and texture. Ribbing is a pattern of alternating knit and purl stitches that creates a stretchy fabric with vertical lines. It is a popular choice for cuffs, collars, and hems, and can easily be incorporated into the design of the Ascot scarf.
To add a ribbing to your Ascot scarf, start by casting on an even number of stitches. This will ensure that the ribbing pattern is balanced and symmetrical. You can use any type of ribbing pattern you like, such as 1×1 ribbing (alternating one knit and one purl stitch) or 2×2 ribbing (alternating two knit and two purl stitches).
1. 1×1 Ribbing: To create a 1×1 ribbing, simply knit one stitch, then purl one stitch, and continue this pattern across the row. Repeat this pattern for every row until you reach your desired length of ribbing.
2. 2×2 Ribbing: To create a 2×2 ribbing, knit two stitches, then purl two stitches, and continue this pattern across the row. Repeat this pattern for every row until you reach your desired length of ribbing.
By adding a ribbing to your Ascot scarf, you can give it a polished and professional finish. It not only adds visual interest but also provides a functional and stretchy edge. Whether you choose a 1×1 or 2×2 ribbing, the texture and structure it adds will make your Ascot scarf truly stand out.
Create a Unique Lace Pattern
Knitting an Ascot scarf is a fun and rewarding project for any knitter. One way to make your Ascot scarf even more unique is to create a lace pattern. Lace patterns add a delicate and intricate touch to any knitting project, and can really make your scarf stand out.
Choose the Right Yarn: When creating a lace pattern, it’s important to choose the right yarn. Lace patterns are typically knit with a lightweight yarn, such as lace weight yarn or fingering weight yarn. These thinner yarns create a dainty and airy look, which is perfect for lace patterns.
Research Different Lace Stitches: To create your own unique lace pattern, it’s important to research different lace stitches. There are countless lace stitches to choose from, ranging from simple eyelet patterns to more complex lace motifs. Take the time to explore different stitch dictionaries and find inspiration for your own design.
Create Your Design: Once you have a good understanding of different lace stitches, it’s time to create your own design. Start with a swatch and experiment with different combinations of lace stitches. Consider the overall look you want to achieve and how the lace pattern will fit into the overall design of your Ascot scarf.
Write a Pattern: After you have created your lace pattern, it’s important to write a clear and concise pattern. This will help you keep track of your stitches and rows as you work on your project. Include detailed instructions and any special techniques or stitches that are used in your lace pattern.
Knit and Enjoy: Finally, it’s time to start knitting your Ascot scarf with your unique lace pattern. Take your time and enjoy the process of creating a one-of-a-kind accessory. Once your scarf is complete, you can proudly wear it knowing that you have created something truly special.
Add a Decorative Border
Adding a decorative border to your Ascot scarf can enhance its overall look and add a touch of uniqueness to your creation. There are several ways you can accomplish this, depending on your knitting skills and preferences.
Crocheted Border: If you are familiar with crochet techniques, adding a crocheted border can be a great option. You can choose a crochet stitch pattern that complements the design of your Ascot scarf and use a contrasting color yarn to create an eye-catching border. This can be done by crocheting around the edges of the scarf or by picking up stitches along the edges and working the crochet border directly onto the knitting.
Lace Border: Adding a lace border to your Ascot scarf can create an elegant and delicate look. You can choose from a wide variety of lace stitch patterns, such as leaf motifs, geometric designs, or floral patterns. Knitting a lace border involves working a series of yarn overs and decreases to create an openwork pattern. This can be done by picking up stitches along the edges of the scarf and working the lace pattern onto the knitting.
Ribbed Border: A ribbed border can add texture and structure to your Ascot scarf. You can choose a rib stitch pattern, such as 1×1 or 2×2 ribbing, and work it along the edges of the scarf. This can be done by picking up stitches along the edges and knitting the ribbed border directly onto the knitting. You can also experiment with different rib stitch patterns to create a unique border design.
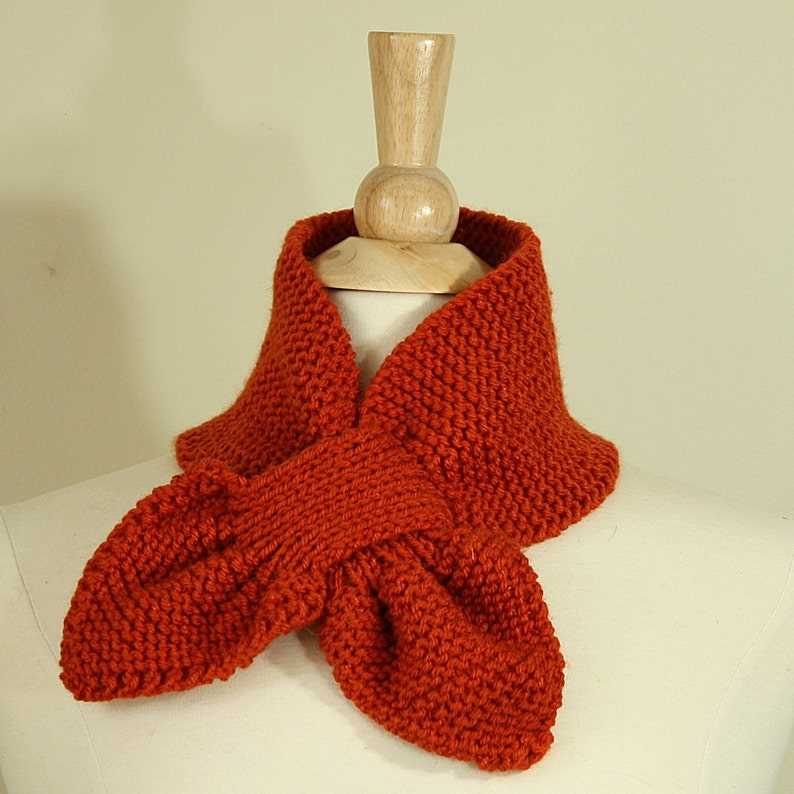
Knit the Center Back Seam
The final step in completing your Ascot scarf is to knit the center back seam. This seam will bring together the two halves of the scarf and create a neat, finished look. Follow these steps to knit the center back seam:
Step 1: Prepare your working yarn
Before you begin, make sure you have enough yarn left to complete the seam. Cut the yarn, leaving a tail that is at least twice the width of the scarf. Thread the tail through a tapestry needle to use for sewing the seam.
Step 2: Align the edges
Lay the two halves of the scarf flat, with the right sides facing up. Align the edges of the scarf so that they are even and match up along the center back.
Step 3: Start at one end
Begin sewing the center back seam at one end of the scarf. Insert the needle into the edge stitches of one half of the scarf, going from back to front. Then, insert the needle into the edge stitches of the other half of the scarf, going from front to back. This will create a continuous line of stitches along the seam.
Step 4: Continue sewing
Work your way along the entire length of the seam, using a whip stitch or mattress stitch to join the edges together. Make sure your stitches are even and secure, but not too tight to allow for some flexibility in the finished seam.
Step 5: Finish the seam
When you reach the end of the seam, secure the yarn by weaving it through the last few stitches. Cut off any excess yarn. Gently press the center back seam with a warm iron to flatten and set the stitches.
Once the center back seam is complete, your Ascot scarf will be ready to wear or give as a gift. The seam should be invisible on the right side of the scarf, creating a seamless appearance. Enjoy your cozy and stylish hand-knit accessory!
Make and Attach a Button Loop
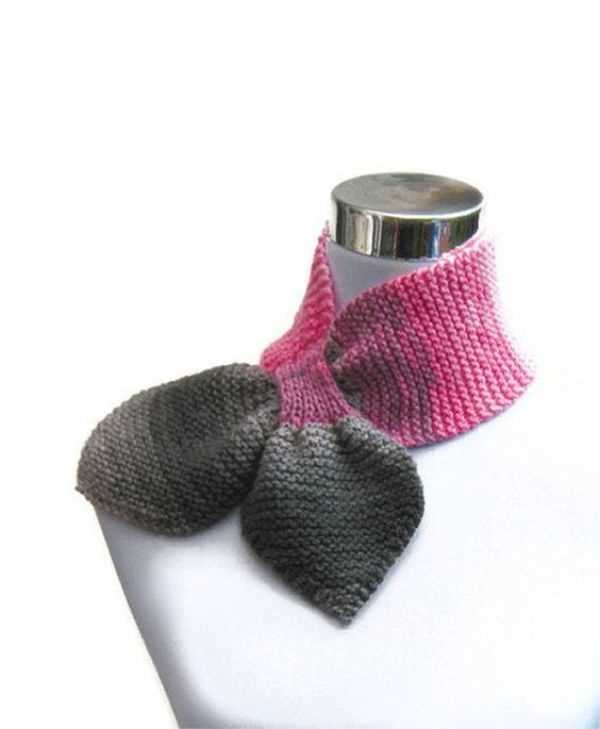
Adding a button loop to your Ascot scarf knitting project is a simple and practical way to keep your scarf secure and in place. Follow these steps to create and attach a button loop to your scarf:
- Choose the location: Determine where you want your button loop to be placed on your scarf. This can be at the center of the scarf or slightly off-center, depending on your personal preference.
- Select the button: Choose a button that complements your scarf’s color and style. It should be large enough to fit through the loop comfortably but not too loose that it will easily slip out.
- Create the loop: Using a crochet hook or knitting needles, make a loop that is slightly smaller than the button you chose. You can do this by picking up stitches along the edge of your scarf or by creating a separate loop and attaching it later.
- Attach the loop: Once you have created the loop, securely attach it to your scarf. This can be done by sewing it onto the fabric or by using a small piece of yarn to fasten it in place.
- Test the loop: Before finishing your project, test the button loop by inserting the button through it. Make sure the loop holds the button securely and that it sits comfortably on your neck when the scarf is worn.
Adding a button loop to your Ascot scarf is a great way to add a functional and stylish element to your knitted accessory. Follow these steps and enjoy your finished project with a secure and fashionable closure.
Block and Finish the Scarf
Once you have finished knitting the Ascot scarf, it is important to block and finish it to give it a polished and professional look. Blocking helps to even out the stitches and open up any lace or cable patterns, while finishing adds the final touches to the scarf.
Blocking:
Start by washing the scarf gently in lukewarm water with a mild detergent. Avoid wringing or twisting the scarf, as this can stretch or misshape the fibers. Instead, gently squeeze out the excess water and lay the scarf flat on a clean towel.
Next, it’s time to block the scarf. You can use blocking wires or T-pins to hold the scarf in place and achieve the desired shape. Stretch the scarf gently to open up any lace patterns or straighten any cables. Make sure the edges are straight and the scarf lies flat.
- If using blocking wires, insert them along the edges of the scarf, following the desired shape. Adjust the tension of the wires to achieve the desired size.
- If using T-pins, insert them through the edges of the scarf into the surface below, making sure to space them evenly.
Finishing:
Once the scarf is blocked and shaped, it’s time to finish it off. Trim any loose ends or yarn tails, leaving a tail of about 6 inches. Weave in these ends using a yarn needle, making sure to secure them tightly so they don’t come undone.
If desired, you can also add a fringe or decorative edging to the scarf. To add a fringe, cut lengths of yarn twice as long as you want the fringe to be. Fold each length in half and use a crochet hook or your needle to pull the folded end through the edge of the scarf. Pull the loose ends through the folded end, creating a knot. Repeat this process along the edges of the scarf.
Finally, let the scarf dry completely in a well-ventilated area, away from direct sunlight. This will ensure that the scarf retains its shape and the fibers set properly. Once dry, your Ascot scarf is ready to be worn or gifted to someone special!
Show Off Your Stylish Ascot Scarf
Looking for a stylish and sophisticated accessory to add to your wardrobe? Look no further than an ascot scarf. This classic piece of neckwear adds an air of elegance to any outfit, whether you’re dressing up for a special occasion or just want to elevate your everyday look. With its unique shape and versatile styling options, an ascot scarf is a must-have item for fashion-forward individuals.
Knitting your own ascot scarf allows you to customize the pattern, color, and texture to perfectly suit your personal style. Whether you prefer a chunky knit for a cozy winter look or a delicate lace pattern for a feminine touch, the possibilities are endless. Plus, knitting your own ascot scarf is a great way to showcase your creativity and craftsmanship.
Pattern Options: When it comes to knitting an ascot scarf, you have a variety of pattern options to choose from. You can opt for a simple garter stitch pattern for a classic and easy-to-knit design. Alternatively, you can challenge yourself with a more intricate lace or cable pattern to create a truly unique and eye-catching accessory.
Color Choices: Don’t limit yourself to just one color! Experiment with different color combinations to create a truly one-of-a-kind ascot scarf. From bold and vibrant hues to subtle and neutral tones, the choice is yours. Consider using variegated yarn to add an extra touch of visual interest to your scarf.
Styling Ideas: Once you’ve finished knitting your ascot scarf, it’s time to show it off in style. This versatile accessory can be worn in multiple ways, allowing you to switch up your look depending on the occasion. For a classic and sophisticated look, simply tie the ascot in a loose knot at the front. If you’re feeling more adventurous, you can experiment with different tying techniques, such as a bow or a loop knot.
In conclusion, an ascot scarf is a timeless and versatile accessory that can elevate any outfit. Whether you’re a seasoned knitter or just starting out, knitting your own ascot scarf is a rewarding and enjoyable project. So why wait? Get started on your own stylish ascot scarf today and showcase your fashion flair!
Variations and Customizations
While the basic Ascot scarf knitting pattern is a classic and timeless design, there are many ways to customize and personalize it to suit your individual style and preferences. Here are some ideas to inspire you:
- Yarn Choice: Experiment with different yarn weights and textures to create different effects. For a cozy and warm scarf, use a bulky or chunky yarn. For a lightweight and delicate scarf, use a fingering or lace weight yarn.
- Colorwork: Add color to your Ascot scarf by incorporating stripes, color blocks, or even stranded colorwork patterns. This is a great way to use up small amounts of leftover yarn or create a unique and eye-catching design.
- Edging: Instead of a simple garter stitch edging, try a ribbed or seed stitch edging for a different look and texture. You can also experiment with different bind-off techniques to add a decorative touch.
- Embellishments: Add buttons, beads, or tassels to the ends of your Ascot scarf for a touch of elegance and flair. This is a great opportunity to showcase your creativity and make your scarf truly unique.
- Lace Panels: If you’re a fan of lace knitting, consider incorporating lace panels into your Ascot scarf. This will add a delicate and feminine touch to the design.
- Length: Customize the length of your scarf to suit your preferences. You can make it shorter for a more casual look or longer for a more dramatic effect.
These are just some ideas to get you started, but feel free to let your imagination run wild and come up with your own unique variations. Knitting is a creative and personal craft, so don’t be afraid to make the pattern your own!
Remember, the most important thing is to enjoy the process and have fun with your knitting. With the Ascot scarf, you’ll not only have a stylish accessory to wear, but also a project that showcases your knitting skills and creativity.