
Knitting is a wonderful craft that can be both relaxing and rewarding. There are countless patterns available for knitters of all skill levels, allowing them to create beautiful and functional pieces. One such pattern that has gained popularity in recent years is the readers wrap.
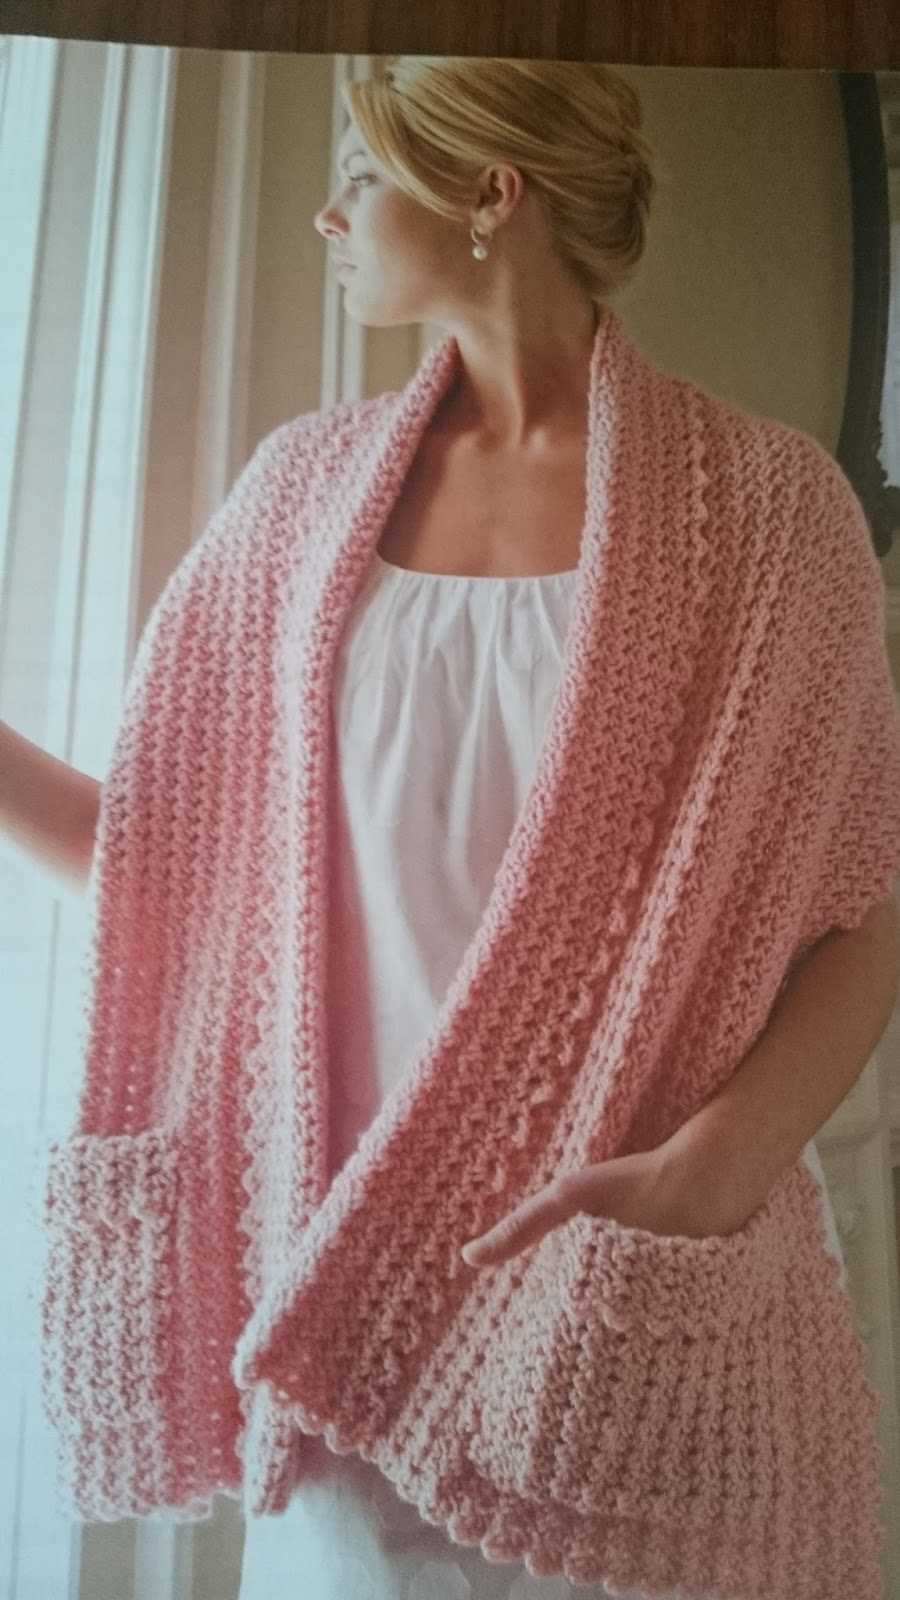
A readers wrap is a versatile accessory that combines the warmth of a shawl with the convenience of a scarf. It is designed to wrap around the shoulders and neck, providing comfort and style. This pattern typically features a simple yet elegant design, making it suitable for knitters of all levels.
What sets the readers wrap apart is its length and width. It is longer and wider than a traditional scarf, allowing it to be comfortably wrapped around the body. This generous size provides extra warmth and coverage, making it perfect for those chilly days when you need an extra layer.
Learn how to knit a readers wrap
Knitting a readers wrap is a great way to combine your love for reading with your passion for knitting. This versatile accessory can be worn as a wrap, scarf, or even a shawl, making it perfect for chilly evenings spent with a good book.
Before you start knitting your readers wrap, you’ll need to gather the necessary materials. You’ll need a pair of knitting needles, preferably in a size that suits the yarn you’ll be using. You’ll also need several skeins of yarn, depending on the desired length and width of your wrap. Choose a yarn that is soft and cozy, as you’ll want your wrap to be comfortable to wear for extended periods of time.
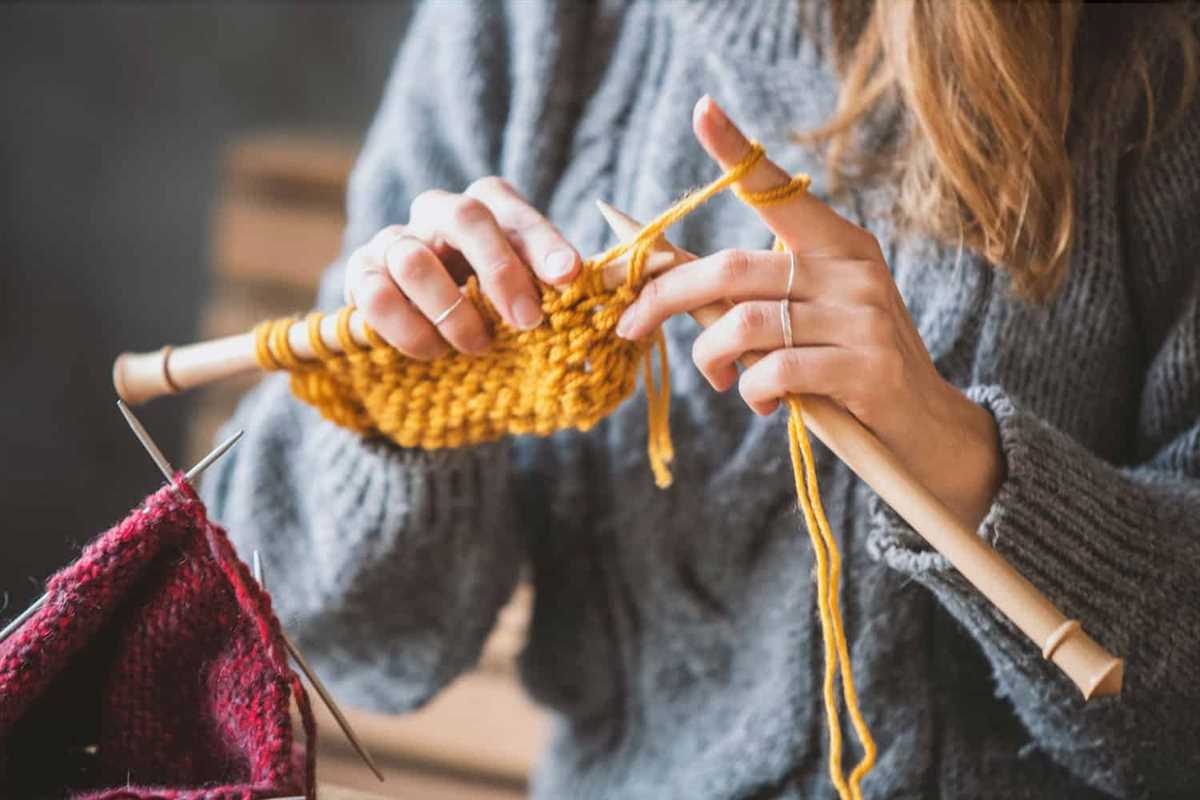
Once you have your materials ready, you can begin knitting your readers wrap. Start by casting on the desired number of stitches, making sure to leave a long tail for later finishing. Then, begin knitting in your desired stitch pattern. You can choose a simple stitch pattern, such as garter stitch or stockinette stitch, or get creative and try a more intricate pattern, such as lace or cables. The choice is yours!
As you knit, make sure to keep track of your progress by measuring the width of your wrap every few rows. This will help ensure that your wrap is the desired size and that you’re on track to achieve the desired length. Once you’ve finished knitting, bind off your stitches and weave in any loose ends. If you’d like, you can also add a fringe or other embellishments to give your readers wrap a personal touch.
When your readers wrap is complete, you can proudly wear it while enjoying your favorite books. The wrap is not only a practical accessory for keeping warm, but also a stylish addition to any outfit. Whether you’re curled up on the couch with a cup of tea or out and about running errands, your readers wrap will keep you cozy and fashionable all at once.
Why choose a readers wrap knitting pattern
Knitting is not only a popular hobby, but also a relaxing and fulfilling activity. If you enjoy reading and knitting, then a readers wrap knitting pattern might be the perfect project for you. This versatile garment combines the coziness of a shawl with the practicality of a wrap, making it an ideal accessory for book lovers.
One of the main advantages of a readers wrap knitting pattern is its functionality. Designed to be worn around the shoulders, it provides warmth and comfort during those chilly reading sessions. The wrap can be easily adjusted to fit different body shapes and sizes, ensuring a perfect fit every time.
Another reason to choose a readers wrap knitting pattern is the opportunity for creativity. With various stitch patterns and yarn choices available, you can personalize your wrap according to your style and preferences. Whether you prefer a simple and elegant design or a vibrant and eye-catching one, the possibilities are endless.
Moreover, knitting the readers wrap can be a great way to challenge your skills and learn new techniques. The pattern may include different stitches, such as cables or lace, which can add complexity and interest to your knitting project. It’s a fantastic opportunity to expand your knitting repertoire while creating a practical and fashionable accessory.
In conclusion, a readers wrap knitting pattern offers a perfect combination of functionality, creativity, and skill-building. It’s a versatile accessory that provides warmth and comfort while allowing you to express your personal style. So, grab your knitting needles, choose your favorite yarn, and embark on a delightful knitting journey with a readers wrap pattern.
Materials needed for a readers wrap project
When starting a readers wrap knitting project, it is important to gather all the necessary materials beforehand. Here is a list of items you will need:
- Yarn: Choose a soft and cozy yarn that will keep you warm. Opt for a worsted weight yarn in your preferred color.
- Knitting needles: You will need a pair of US size 8 straight knitting needles for this project. Make sure they are comfortable to hold and work with.
- Cable needle: Since the readers wrap pattern involves cable knitting, you will need a cable needle to hold stitches temporarily.
- Tape measure: A tape measure will come in handy for measuring the length and width of your wrap as you progress.
- Yarn needle: A yarn needle is essential for weaving in loose ends and finishing touches.
- Stitch markers: Stitch markers can be helpful for keeping track of pattern repeats and important sections in the wrap.
- Scissors: Keep a pair of scissors nearby for cutting yarn and trimming loose ends.
Having all these materials prepared and easily accessible will make your readers wrap knitting project more enjoyable and efficient. Make sure to check the pattern instructions for any additional materials or tools that may be needed.
Getting started with your readers wrap knitting pattern
If you’re new to knitting or just starting out with your readers wrap knitting pattern, it’s important to familiarize yourself with the instructions and gather all the necessary materials before getting started. This will help ensure a smooth and enjoyable knitting experience.
First, carefully read through the pattern instructions to understand the various stitches and techniques involved. Pay attention to any abbreviations or special instructions provided. If you come across any terms or techniques that you’re unfamiliar with, consult knitting resources or tutorials online for clarification.
Once you have a clear understanding of the pattern, gather all the materials required. This may include the appropriate size knitting needles, the specified type and weight of yarn, and any additional accessories such as stitch markers or a tapestry needle. Make sure you have enough yarn to complete the project by checking the recommended yardage in the pattern.
To get started, cast on the required number of stitches as indicated in the pattern. This will create the foundation for your readers wrap. The cast-on method recommended in the pattern may vary, so follow the instructions provided. Use stitch markers if needed to keep track of important points in the pattern, such as the beginning of a row or the placement of certain stitches.
Once you have cast on, begin working the pattern stitch according to the instructions. This may involve knitting, purling, and possibly other techniques like increases or decreases. Pay attention to any stitch repeats specified and make sure to count your stitches regularly to ensure accuracy.
Continue working through the pattern, following the instructions for each row or round. Take your time and enjoy the process of creating your readers wrap. If you make any mistakes, don’t be discouraged – knitting is a forgiving craft and mistakes can often be corrected as you go.
Finally, when you reach the end of the pattern or the desired length for your readers wrap, follow the instructions for binding off or finishing off your work. This will secure the stitches and prevent unraveling.
Remember to relax and have fun with your readers wrap knitting project. With practice, patience, and attention to detail, you’ll soon have a beautiful and cozy wrap to enjoy while you curl up with a good book.
Understanding the basic stitches for the readers wrap
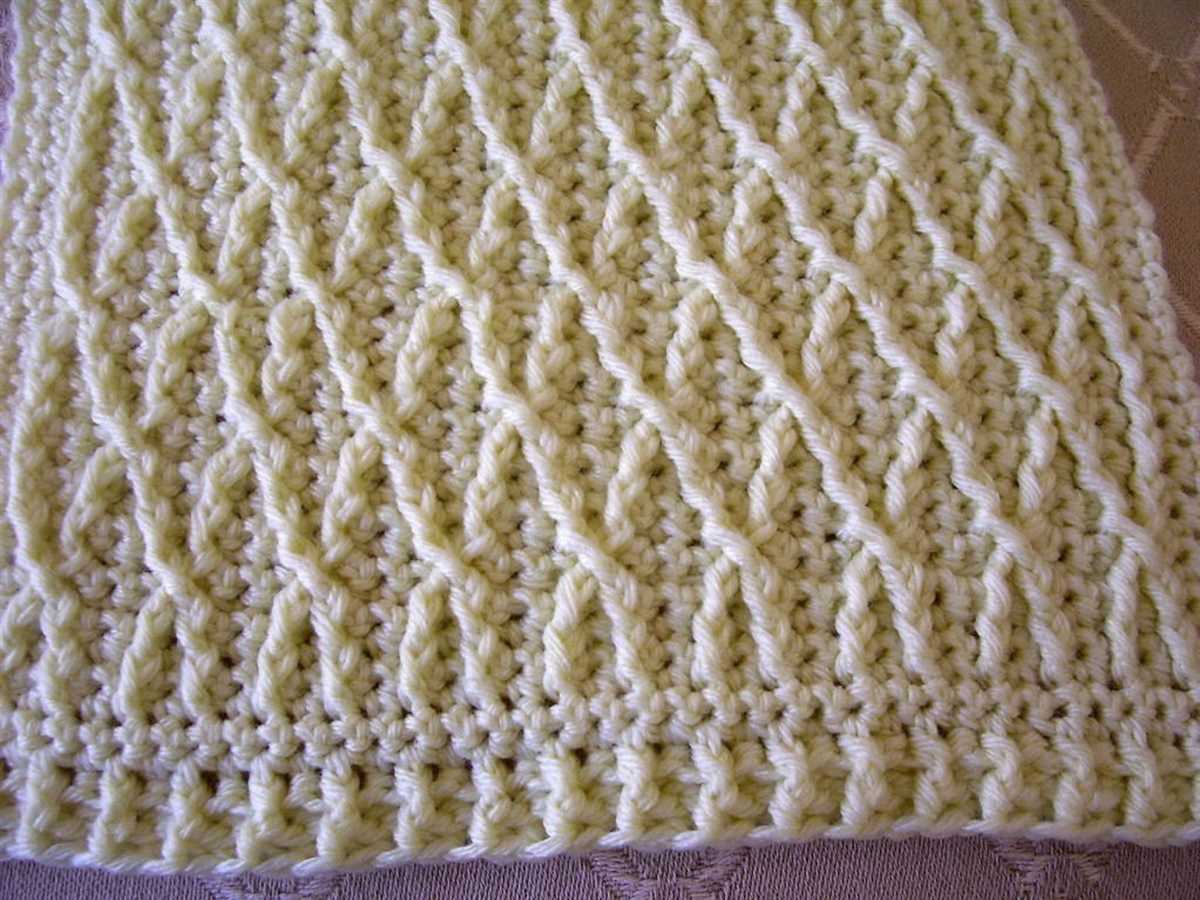
The readers wrap is a versatile and elegant accessory that can be made using various knitting stitches. Understanding the basic stitches is essential for successfully creating this cozy and stylish wrap.
Garter stitch: One of the fundamental stitches used in the readers wrap is the garter stitch. This stitch is created by knitting every row, resulting in a fabric with lovely ridges. Garter stitch is relatively easy to master and gives the wrap a beautiful texture.
Stockinette stitch: Another important stitch for the readers wrap is the stockinette stitch. This stitch is made by alternating between knitting one row and purling the next row. It produces a smooth and flat fabric with a distinct right (knit) side and wrong (purl) side. The stockinette stitch is commonly used for the main body of the wrap, creating a sleek and classic look.
Ribbing stitch: Ribbing is often used for the edges of the readers wrap to provide elasticity and a neat finish. It is created by alternating between knitted stitches and purled stitches in a regular pattern. Common ribbing combinations include K1, P1 (k1, p1 ribbing) and K2, P2 (k2, p2 ribbing). The ribbing stitch helps the wrap to stay in place when worn and adds a touch of sophistication.
Following the readers wrap knitting pattern
Knitting a readers wrap can be a rewarding and enjoyable project for anyone who loves to knit. The readers wrap knitting pattern is a versatile pattern that allows for customization and creativity, making it suitable for knitters of all skill levels. Whether you are a beginner or an experienced knitter, following the pattern step by step will help you create a beautiful and functional wrap that you can wear with pride.
Firstly, gather all the necessary materials for the readers wrap. This includes your chosen yarn, knitting needles, and any additional items specified in the pattern. The readers wrap knitting pattern may recommend a specific type or weight of yarn, so make sure to read the pattern carefully before selecting your materials. Once you have everything ready, you can begin casting on stitches to start your project.
To start knitting the readers wrap, follow the instructions provided in the pattern for the initial rows and stitches. The pattern may include specific stitch patterns or techniques to create the desired texture or design. It’s important to pay attention to the pattern’s instructions and keep track of your progress as you knit. You may find it helpful to use stitch markers or a row counter to help you stay organized.
As you continue working on the readers wrap, you will gradually see it take shape. The pattern may include instructions for increasing or decreasing stitches, shaping the wrap, or adding any desired embellishments. It’s important to follow these instructions carefully to ensure that your wrap turns out as intended.
Finally, once you have completed all the specified rows and stitches in the readers wrap knitting pattern, you can finish off your project. This may involve binding off stitches, weaving in loose ends, and blocking the wrap to give it a finished and polished look. The pattern may also provide suggestions for how to care for and maintain your finished wrap.
Following the readers wrap knitting pattern is a fun and rewarding way to create a unique and personalized accessory. With each stitch, you will be able to see your progress and watch as your wrap comes to life. Whether you plan to keep the wrap for yourself or give it as a gift, it’s sure to be cherished and admired by all who see it.
Tips and Tricks for Knitting the Readers Wrap

Knitting the readers wrap can be a satisfying and rewarding project, but it can also be a bit challenging for beginners. Here are some tips and tricks to help you along the way:
1. Choose the Right Yarn and Needles
When starting your readers wrap project, it’s important to choose the right yarn and needles. Opt for a yarn that is soft, warm, and drapes well, such as a lightweight merino wool or a soft cashmere blend. As for the needles, choose a size that will give you the desired tension and gauge for your project. If you prefer a looser stitch, go for larger needles, and if you prefer a tighter stitch, go for smaller needles.
2. Practice Your Lace Knitting Skills
The readers wrap pattern often incorporates lace knitting techniques, so it’s important to practice these skills before diving into the project. Lace knitting involves creating holes and intricate patterns in your knitting. Make sure to familiarize yourself with the different lace knitting stitches and techniques, such as yarn overs and decreases, before starting the readers wrap.
3. Use Stitch Markers
Stitch markers are a lifesaver when it comes to keeping track of your stitches and pattern repeats in the readers wrap. Place a stitch marker after every repeat to help you count your stitches and easily spot any mistakes. This will save you from having to rip out rows and make corrections later on.
4. Keep Track of Your Rows and Pattern Repeats
With the readers wrap pattern, it’s important to keep track of your rows and pattern repeats to ensure that your project turns out properly. Use a row counter or a pen and paper to keep track of your rows. You can also use a highlighter or a colored pencil to mark off pattern repeats as you complete them.
5. Block Your Finished Wrap
Blocking is an important step in finishing your readers wrap. It helps to even out your stitches, open up the lacework, and give your wrap a polished and professional look. Follow the blocking instructions provided in the pattern to ensure that your wrap is blocked to the correct measurements.
By following these tips and tricks, you’ll be able to knit your readers wrap with confidence and achieve a beautiful finished project. Happy knitting!
Adding Embellishments to Your Readers Wrap

When knitting a readers wrap, you have the opportunity to add beautiful embellishments that can enhance the overall look and style of your finished project. Whether you want to add a touch of elegance or a pop of color, there are many options to choose from.
Buttons: One of the easiest ways to embellish your readers wrap is by adding buttons. You can choose buttons in different sizes, shapes, and colors to complement your wrap. Sew them on strategically to create a decorative pattern or simply sew them in a straight line along the edge of your wrap.
Lace Inserts: If you want to add a delicate and feminine touch to your readers wrap, consider incorporating lace inserts. Knit lace panels separately and sew them onto your wrap in a visually appealing arrangement. This will give your wrap a beautiful and intricate look.
Embroidery: Another way to add embellishments to your readers wrap is through embroidery. You can use colorful yarn to create simple or intricate designs on your wrap. This can include floral motifs, geometric patterns, or even personalized initials. Embroidery adds a unique and personalized touch to your wrap.
Beading: For a more glamorous and eye-catching look, consider adding beads to your readers wrap. You can choose beads in different sizes, colors, and shapes to create a dazzling effect. Sew them onto your wrap using a beading needle and thread, and make sure to secure them tightly so they won’t come loose.
Fringes: Adding fringes to your readers wrap can give it a bohemian or playful look. You can attach fringes along the edges of your wrap or create a fringe trim that runs along the entire width. Choose yarn in complementary or contrasting colors to make the fringes stand out.
With these embellishment options, you can customize your readers wrap to your liking and create a unique and stylish accessory. Experiment with different techniques and materials to make your wrap truly one-of-a-kind.
Blocking and finishing your readers wrap
Once you have finished knitting your readers wrap, it’s time to block and finish it. Blocking is an important step in the knitting process that helps to even out stitches, relax the fibers, and give your finished project a professional, polished look. It can also help to set the shape and size of your wrap.
To block your readers wrap, start by filling a basin or sink with cool water and adding a mild soap or wool wash. Gently place your wrap into the water, making sure it is fully submerged. Let it soak for about 15-20 minutes, then drain the water and gently squeeze out any excess moisture. Avoid wringing or twisting your wrap, as this can damage the fibers.
Next, lay your wrap flat on a clean towel and roll it up, pressing gently to remove even more moisture. Then, unroll the towel and lay your wrap out on a blocking mat or flat surface. Use blocking pins or T-pins to secure the edges of your wrap, gently stretching it to the desired dimensions. Pay special attention to any lace or cable patterns, making sure to open up and define the stitches.
Leave your readers wrap to dry completely, which may take several hours or even overnight. Once dry, remove the blocking pins and admire your beautifully finished wrap. If desired, you can add any final finishing touches, such as weaving in any loose ends or adding a decorative edge.
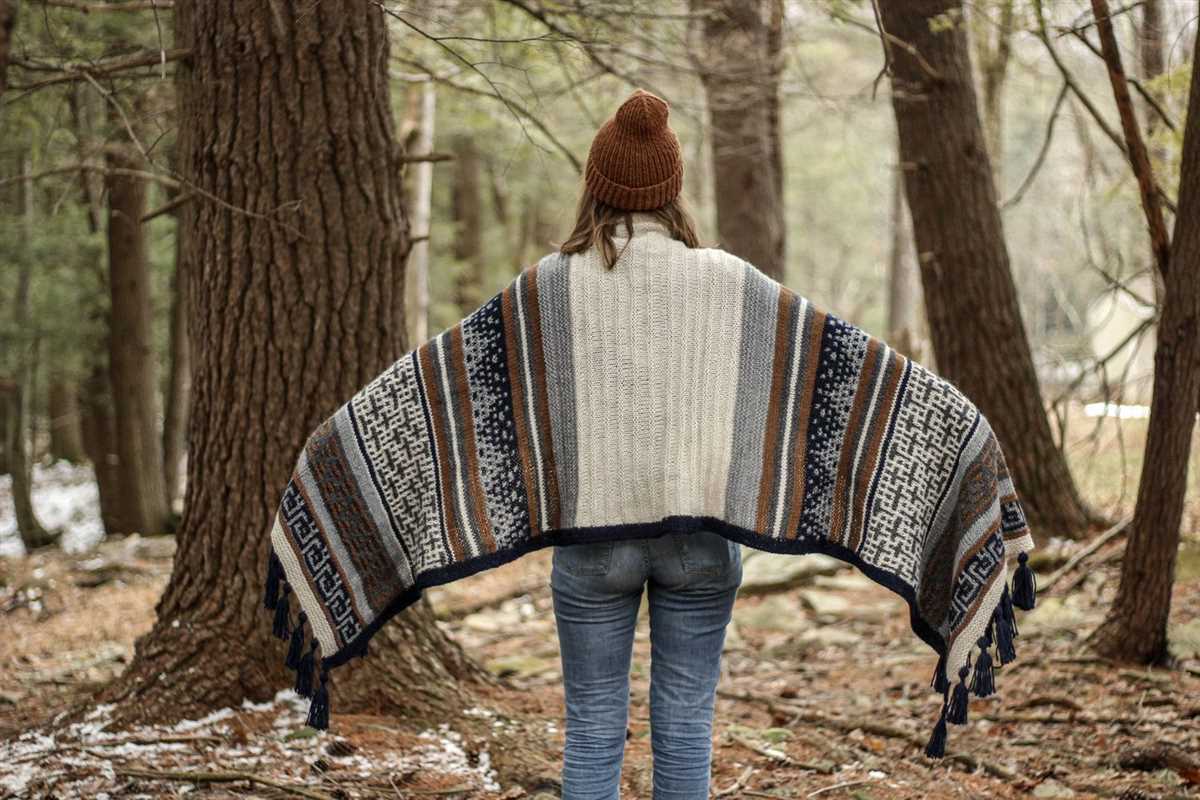
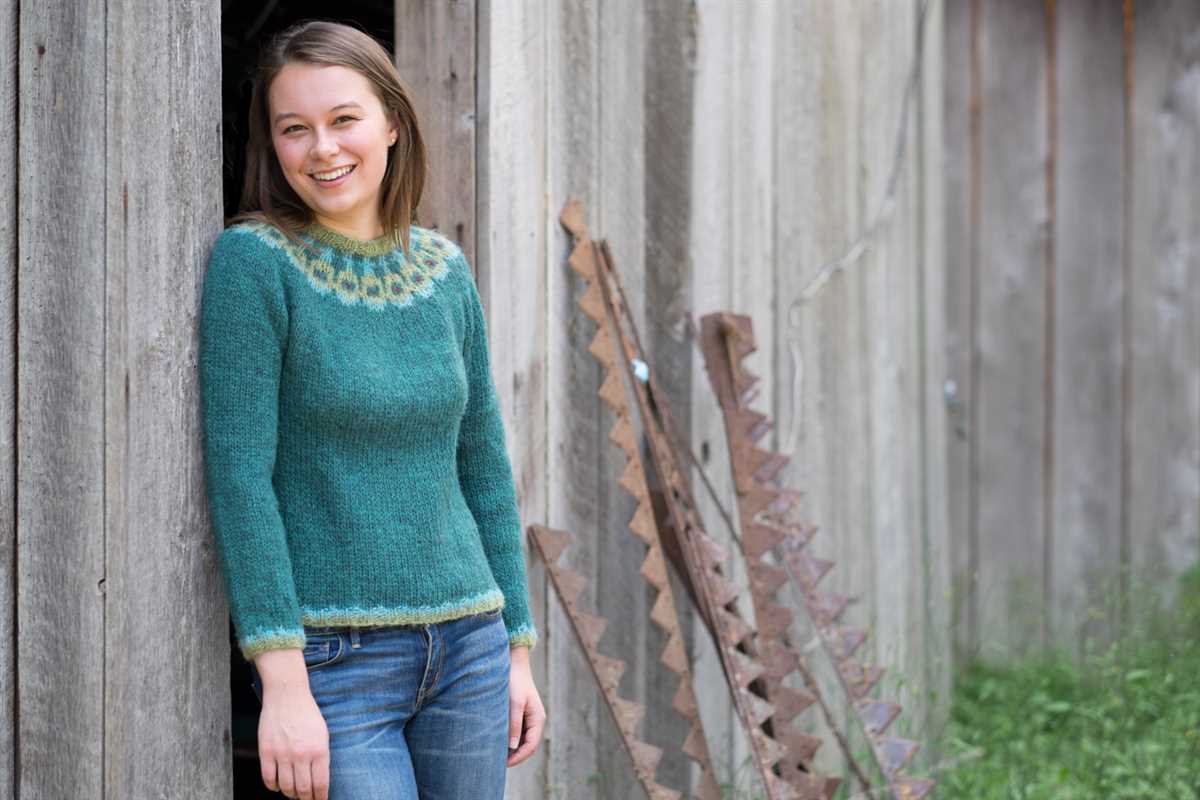
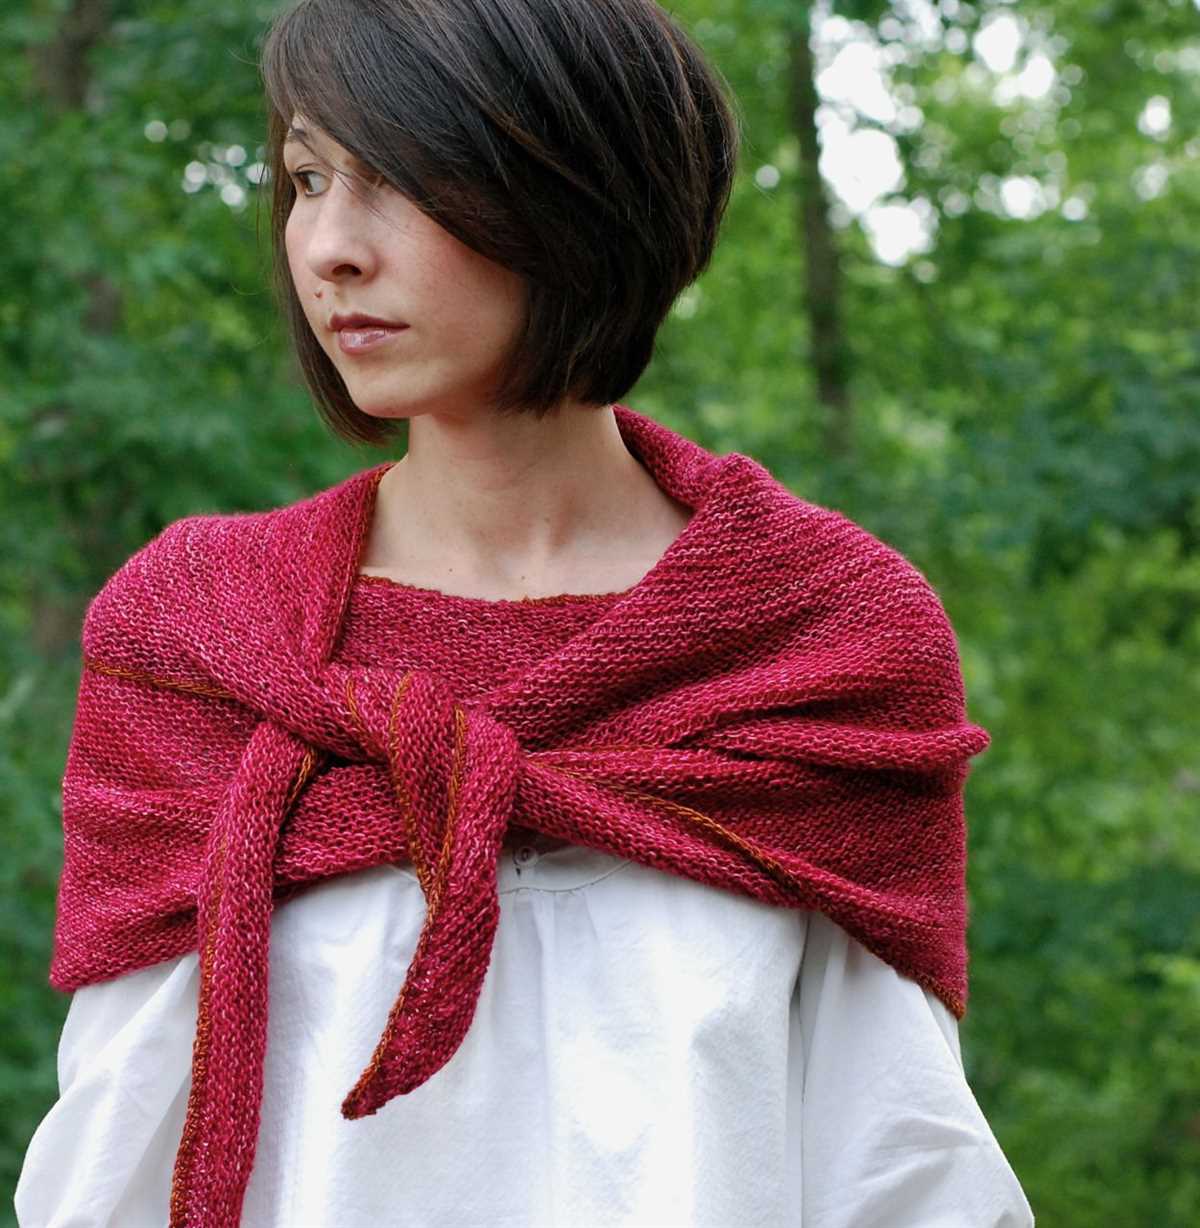
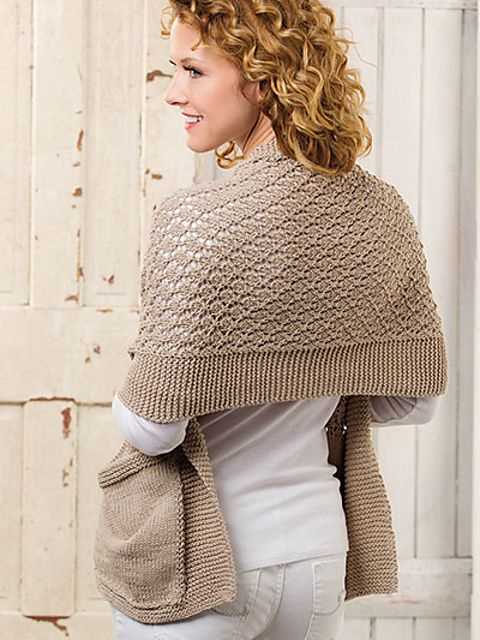
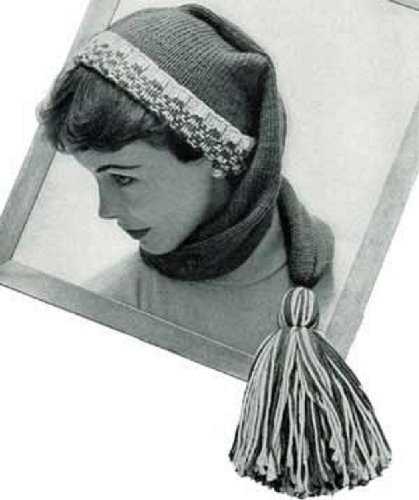
Popular variations of the readers wrap
The readers wrap is a versatile and stylish accessory that can be worn year-round. There are several popular variations of this knitting pattern that offer different styles and textures.
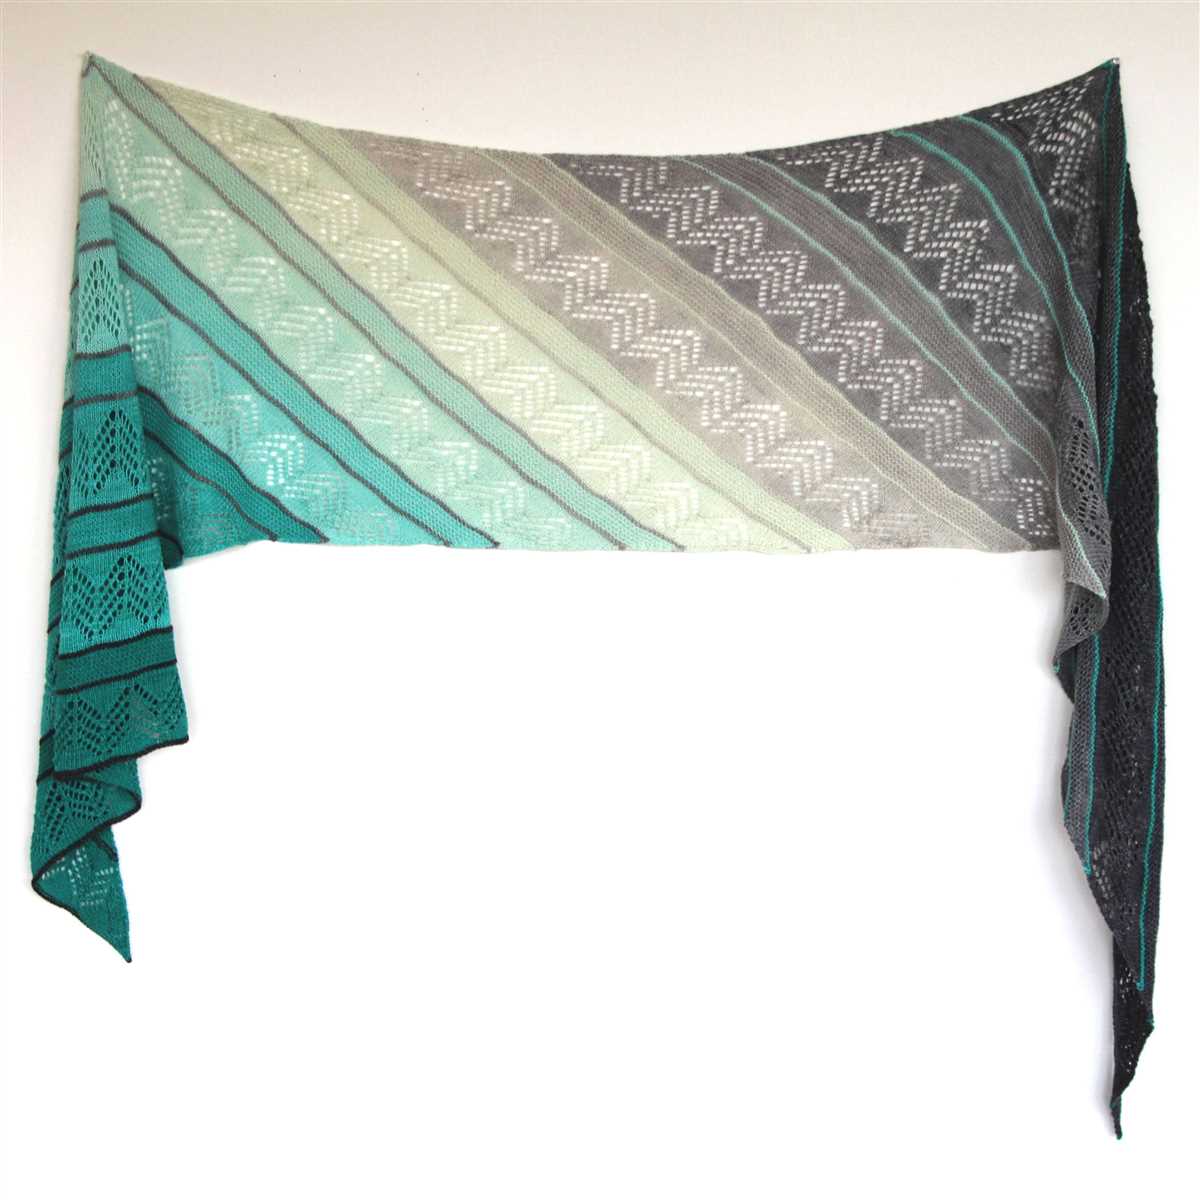
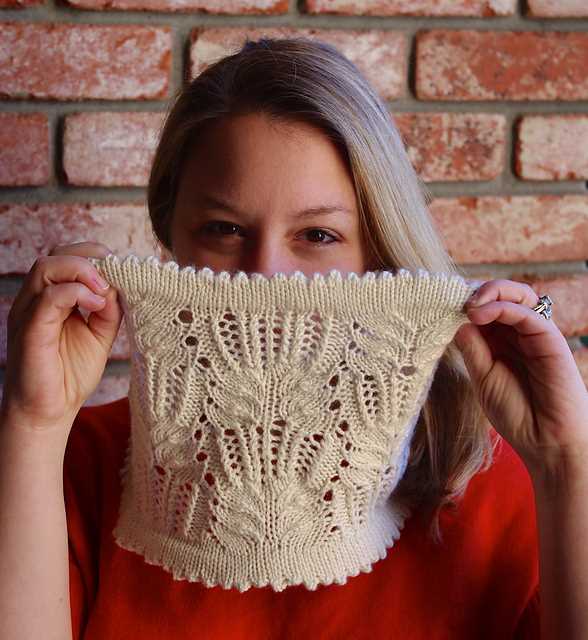
Lace Readers Wrap:
One popular variation of the readers wrap is the lace version, which features intricate lace patterns. This pattern creates a delicate and feminine look, perfect for dressing up any outfit. The lace readers wrap is often made with lighter weight yarns, such as lace or fingering weight, to create a delicate and airy feel.
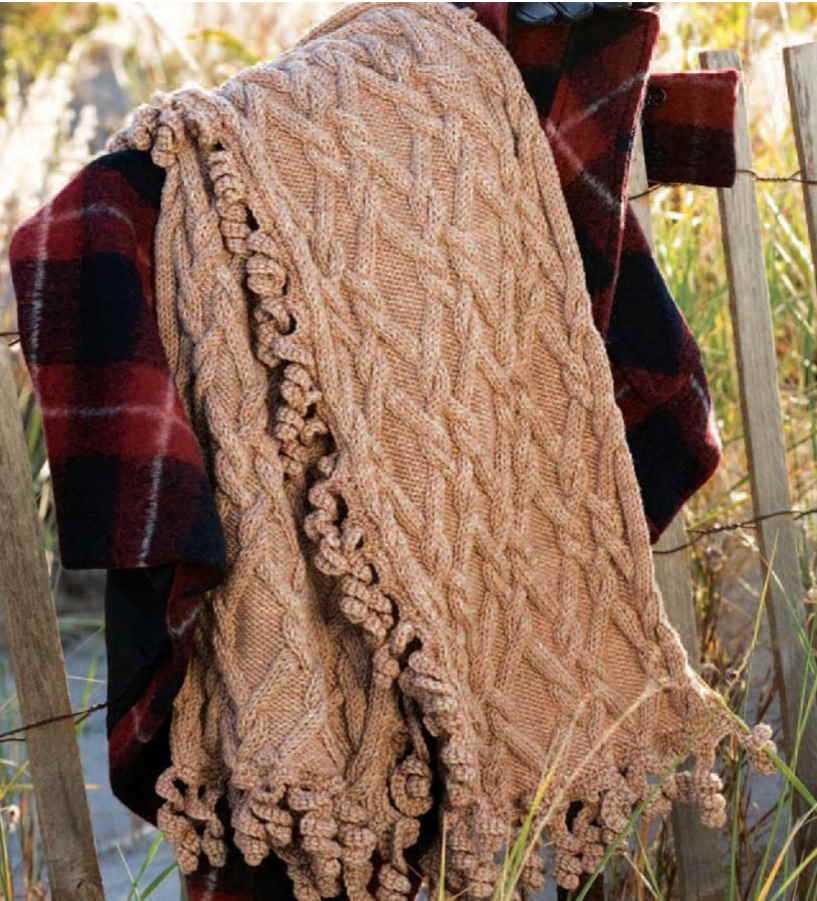
Chunky Cable Readers Wrap:
For those who prefer a more cozy and warm version of the readers wrap, the chunky cable variation is a popular choice. This pattern features chunky cables that add depth and texture to the wrap. The chunky cable readers wrap is typically made with thicker yarns, such as bulky or super bulky, to create a warm and snuggly accessory for colder months.
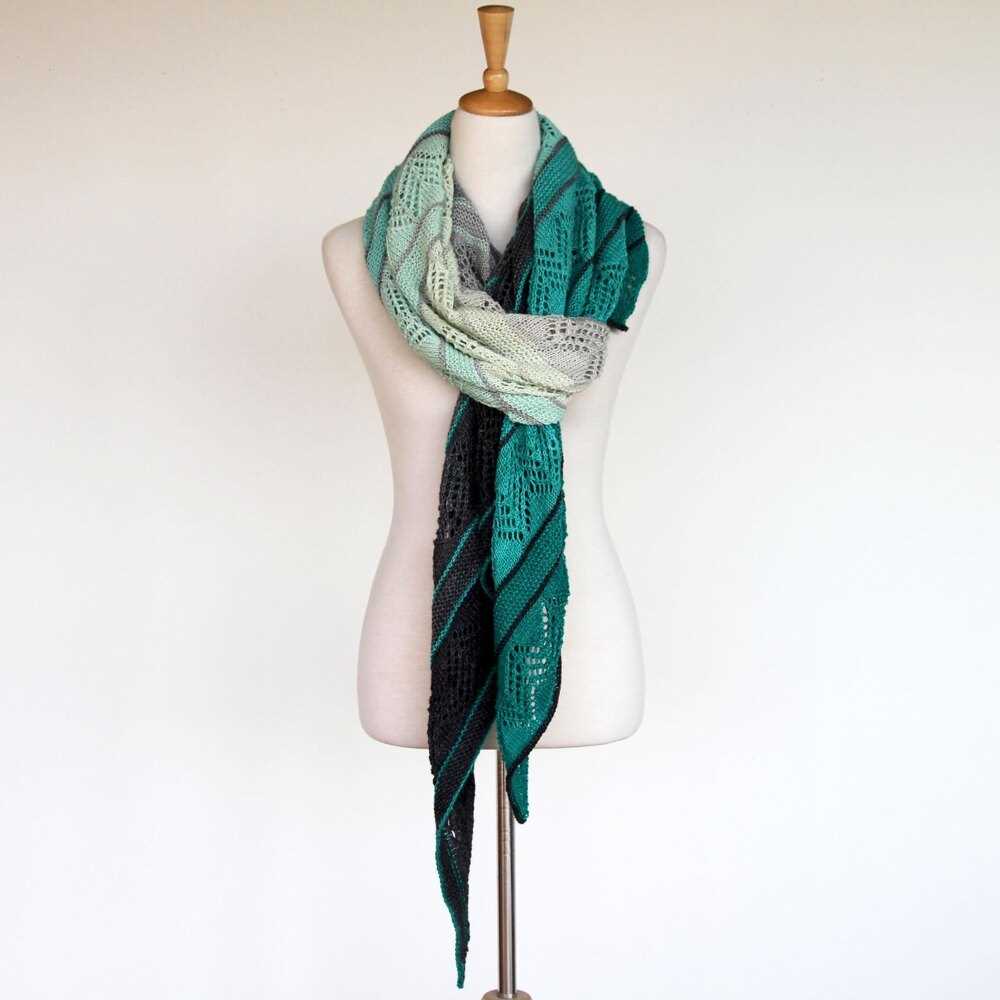
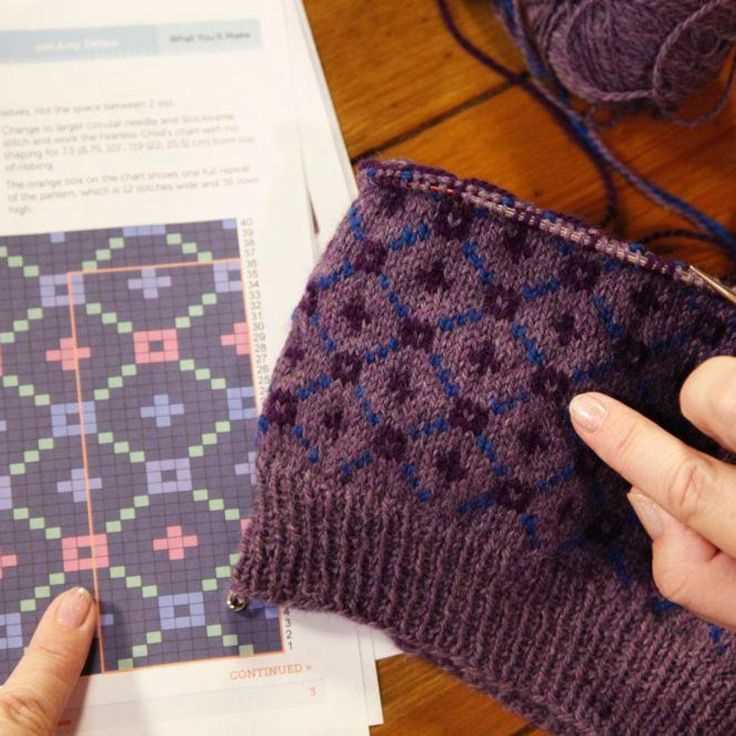
Color Block Readers Wrap:
If you enjoy playing with color, the color block variation of the readers wrap may be the perfect choice for you. This pattern involves using different colors of yarn to create bold and contrasting sections throughout the wrap. The color block readers wrap allows you to experiment with different color combinations and create a unique and eye-catching accessory.
Striped Readers Wrap:
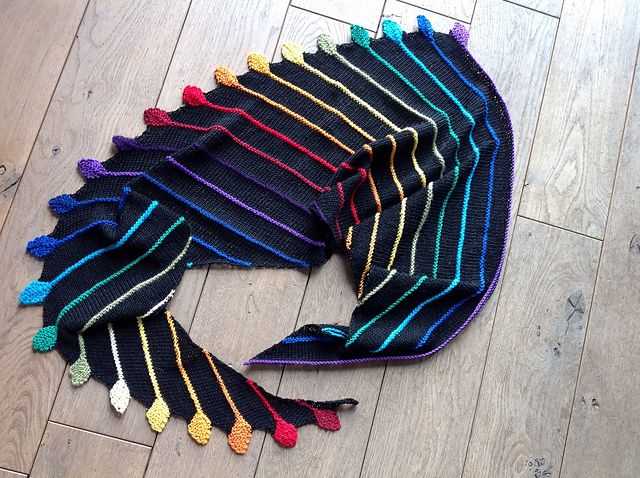
Another popular variation of the readers wrap is the striped version, which features alternating stripes of different colors. This pattern allows you to showcase your favorite color combinations and create a fun and playful look. The striped readers wrap can be made with any type of yarn, allowing you to customize the thickness and warmth of the accessory.
Whether you prefer lace, cables, color blocks, or stripes, there is a readers wrap variation for every knitting enthusiast. These popular variations offer different styles and textures, allowing you to create a unique and personalized accessory to wear while enjoying your favorite book.
Caring for your readers wrap
Whether you have just finished knitting your readers wrap or have been enjoying it for some time, it is important to take proper care of your knitted accessory to ensure its longevity and maintain its quality. Here are some tips to help you care for your readers wrap:
1. Washing:
When it comes to washing your readers wrap, it is essential to read and follow the care instructions provided with the yarn you used. Generally, hand washing is recommended for delicate knitted items like the readers wrap. Use lukewarm water and a gentle detergent suitable for hand washing wool. Gently squeeze the wrap to remove excess water and avoid wringing or twisting it, as this can stretch or distort the shape. Finally, lay the wrap flat on a towel to dry, away from direct sunlight and heat sources.
2. Storage:
To prevent your readers wrap from getting tangled or snagged, it is advisable to store it properly when not in use. Folding the wrap neatly and placing it in a drawer or a clean, dry storage bag can help maintain its shape and protect it from dust and moths. If you prefer to hang your wrap, use a padded hanger or a hook with a wide, rounded end to avoid any stretching or distortion.
3. Handling and wearing:
While wearing your readers wrap, be mindful of any sharp objects, such as jewelry or accessories, that could potentially snag or pull the delicate yarn. Handle it with care, avoiding rough or excessive handling that could cause pilling or loosening of stitches. It is also advisable to remove the wrap before engaging in activities that may cause it to become dirty or stained, such as cooking or gardening.
4. Regular maintenance:
To keep your readers wrap in top condition, it is recommended to perform regular maintenance tasks, such as gently removing any lint or fuzz that may accumulate on the surface. You can use a lint roller or a soft brush specifically designed for knitwear. Inspect the wrap for any loose threads or stitches and mend them promptly to prevent further damage.
By following these simple care tips, you can enjoy your readers wrap for many seasons to come, keeping it cozy and stylish as ever!
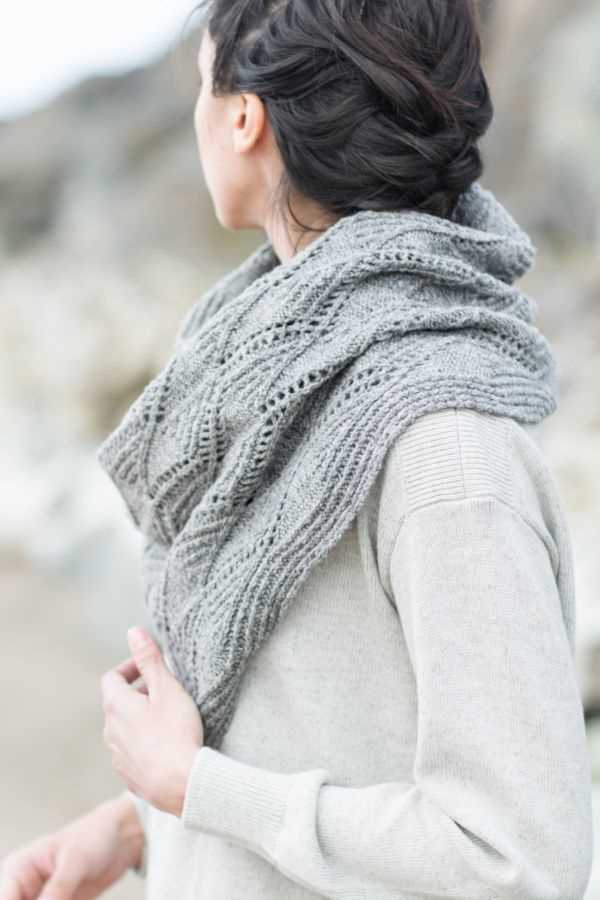
Wearing and styling your readers wrap
When it comes to wearing and styling your readers wrap, there are countless ways to make this versatile accessory the centerpiece of your outfit. Whether you’re heading to the office or going out for a casual weekend brunch, the readers wrap can add warmth and style to any look.
1. Classic Neck Wrap
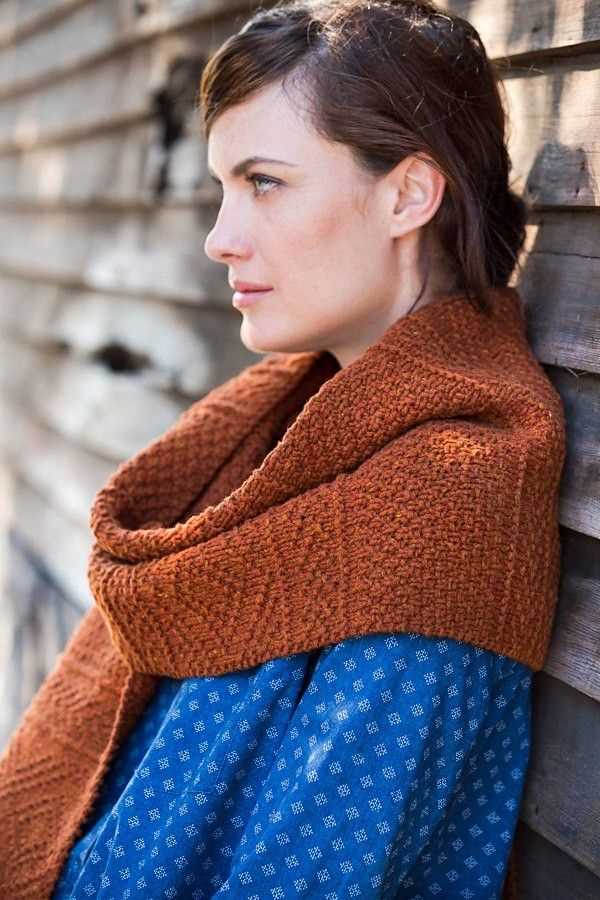
The most common way to wear the readers wrap is as a classic neck wrap. Simply drape it around your neck and let the two ends hang down in front. You can leave it loose for a casual and effortless look, or you can knot it in front for a more polished and put-together appearance.
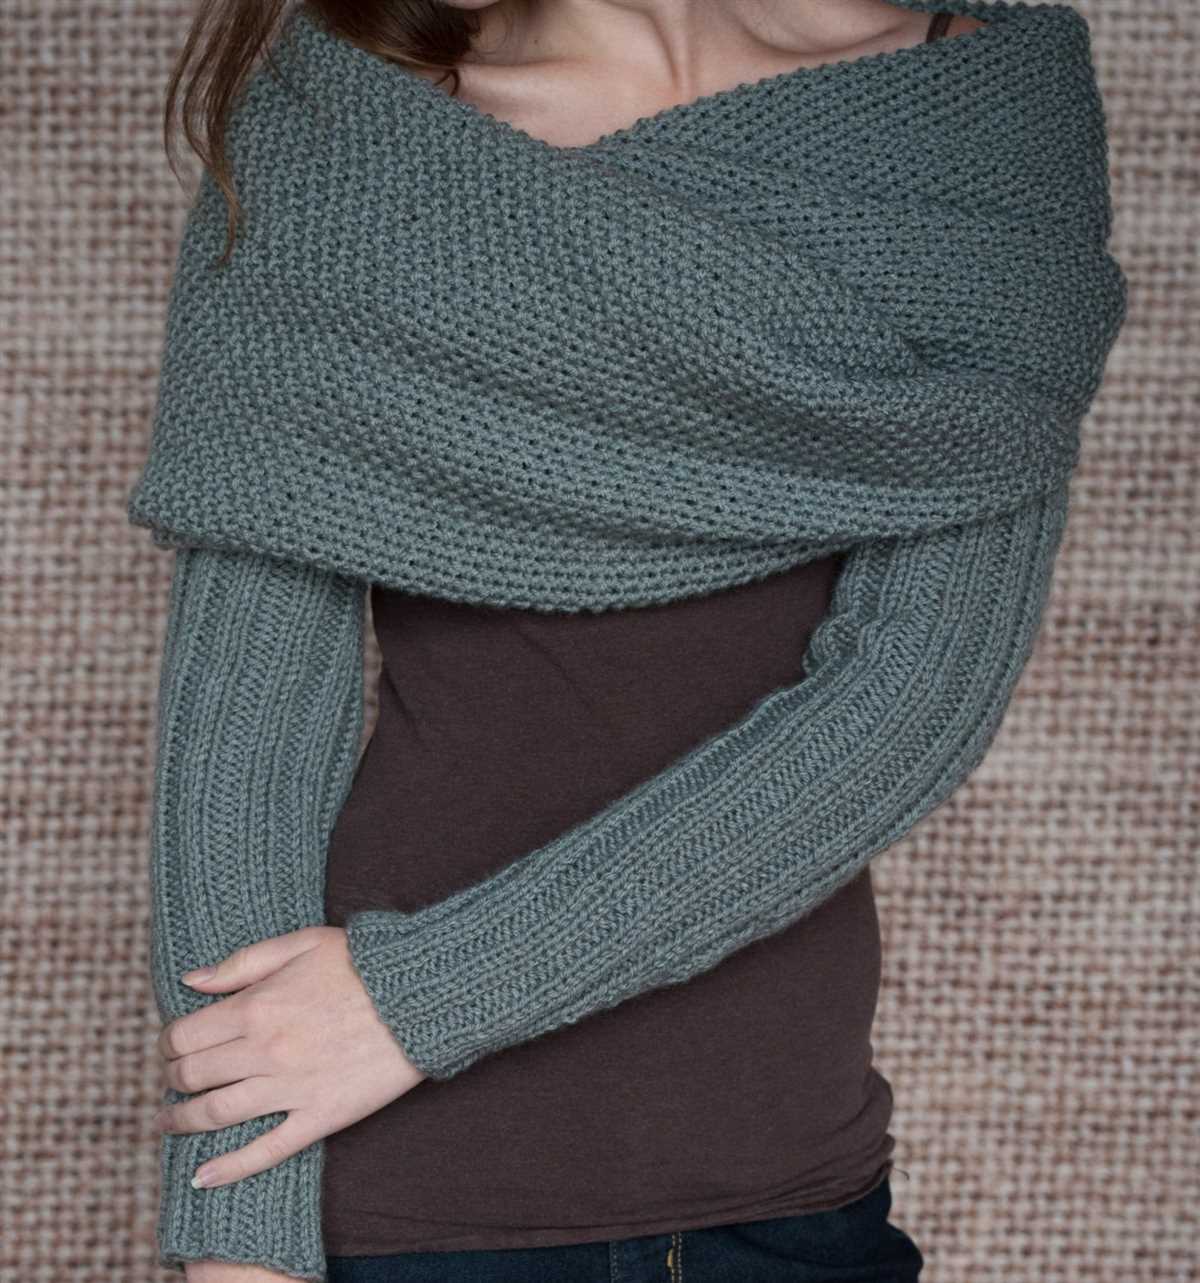
2. Shoulder Wrap
For those colder days, you can also wear the readers wrap as a shoulder wrap. Just place it around your shoulders and let it drape down your back. This gives you an extra layer of warmth and adds a touch of elegance to your outfit.
3. Belted Wrap
If you want to show off your waist and create a more structured look, you can also wear the readers wrap as a belted wrap. Simply wrap it around your body, crossing it over your chest, and then cinch it at the waist with a stylish belt. This instantly transforms the readers wrap into a chic and sophisticated accessory.
4. Head Wrap
Don’t limit the readers wrap to just your neck and shoulders – it can also be worn as a head wrap! This is a great way to keep your hair off your face and add an extra layer of warmth to your head. Fold the readers wrap into a narrower band and wrap it firmly around your head, covering your ears. You can leave the ends hanging down or tuck them underneath for a more streamlined look.
However you choose to wear it, the readers wrap is sure to become a staple in your wardrobe. With its soft and cozy material, it’s a perfect accessory for any season. Experiment with different ways to style it and make it your own – the possibilities are endless!
Get started on your readers wrap knitting project today!
Congratulations! Now that you have all the necessary information and a complete pattern for the readers wrap, it’s time to get started on your knitting project. Whether you’re a beginner or an experienced knitter, this pattern is perfect for cozying up with a good book or enjoying a brisk walk outside.
To begin, gather all the materials listed in the pattern, including your preferred yarn and knitting needles. Make sure to choose a yarn that is soft and warm, as this wrap is meant to keep you comfortable during those chilly nights.
Next, carefully read through the pattern instructions to familiarize yourself with the steps involved. It’s always helpful to have a clear understanding of the pattern before starting to knit. If you prefer, you can even highlight or make notes on the important details, such as stitch counts and repeat sections.
Once you’re ready, cast on your stitches and begin knitting according to the pattern instructions. Take your time and enjoy the process of creating something beautiful and functional with your own hands. Don’t be afraid to ask for help or refer back to the pattern if you encounter any difficulties along the way.
As you knit, you’ll start to see the readers wrap taking shape. Feel free to make any modifications or personalizations to the pattern to make it truly your own. Add a touch of lace, experiment with different stitch patterns, or even incorporate some colorwork if you’re feeling adventurous. The possibilities are endless!
Finally, once you’ve completed knitting the wrap, make sure to carefully weave in all the loose ends and block the finished piece. Blocking helps to even out the stitches and gives the wrap its final shape and drape. Follow the blocking instructions specified in the pattern to achieve the best results.
Now you can proudly wear your readers wrap and admire the fruits of your labor. Not only will it keep you warm and cozy, but it will also serve as a reminder of the time and effort you put into creating something special. So go ahead, grab your knitting needles, and embark on your readers wrap knitting journey today!