
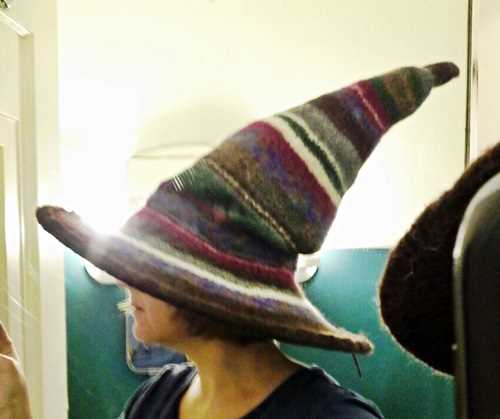
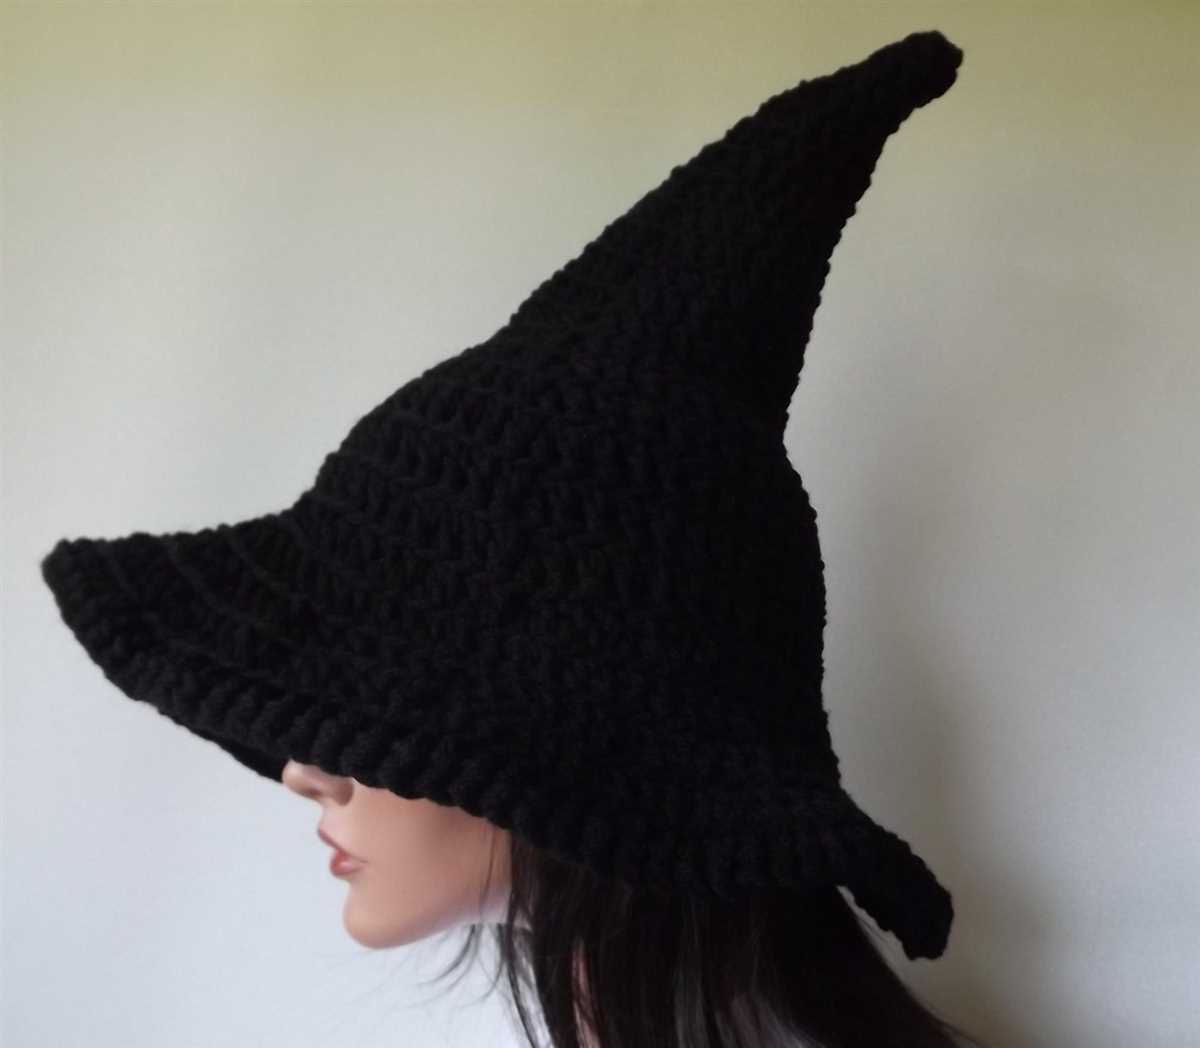
Are you looking for a fun and festive knitting project? Look no further than this knitted witch hat pattern, available for free! Whether you want to add a touch of Halloween spirit to your wardrobe or need a last-minute costume accessory, this pattern is perfect for you.
Knitting your own witch hat allows you to get creative and customize it to your liking. You can choose the color of the hat, add embellishments like ribbons or feathers, or even experiment with different stitch patterns. The possibilities are endless!
This free pattern is suitable for knitters of all skill levels. If you’re a beginner, don’t worry – the instructions are easy to follow, and there are helpful tips along the way. And if you’re an experienced knitter, you can use this pattern as a base and modify it to make it your own.
Gather your favorite yarn and knitting needles and get ready to create a one-of-a-kind witch hat that will make heads turn. Download the pattern, and let the magical knitting begin! Happy knitting!
Knitted Witch Hat Pattern Free: Create Your Magical Halloween Accessory
Are you looking to add a touch of magic to your Halloween costume this year? Look no further than a knitted witch hat! With a free pattern and some basic knitting skills, you can create a whimsical and enchanting accessory that will set you apart from the crowd.
Whether you’re a beginner or an experienced knitter, this pattern is accessible to all skill levels. The pattern includes step-by-step instructions and a list of materials needed, so you can easily follow along and create your own unique hat. And the best part? It’s completely free!
To get started, gather your materials: a set of knitting needles, a skein of black yarn, and a tapestry needle. The pattern calls for a simple rib stitch, which creates a stretchy and comfortable hat that will fit most head sizes. And don’t forget to add a touch of magic with some optional decorations like a crocheted spiderweb or a felt moon and stars.
Whether you’re attending a Halloween party or just want to add a spooky touch to your everyday wardrobe, a knitted witch hat is the perfect accessory. It’s not only functional and warm, but it also adds a fun and festive element to your outfit. So grab your knitting needles and get ready to create your very own magical Halloween accessory!
What You Need to Know Before You Start Knitting
Before you start knitting, there are a few things you need to know to ensure a successful and enjoyable knitting experience. From choosing the right yarn to understanding knitting patterns, these tips will help you get started on your knitting journey.
1. Choose the right yarn
One of the most important factors in knitting is choosing the right yarn for your project. Different yarns have different properties, such as weight, fiber content, and texture, which can affect the outcome of your project. Take into consideration the pattern requirements and desired end result when selecting your yarn.
2. Understand knitting patterns
Knitting patterns are like roadmaps for your project. They provide instructions on stitches, rows, and shaping, among other things. It’s important to take the time to read and understand the pattern before you start knitting. Pay attention to any abbreviations, charts, and special techniques that may be used in the pattern.
3. Learn the basic knitting stitches
Before diving into complex patterns, it’s important to learn and practice the basic knitting stitches. These include knit stitch, purl stitch, and casting on and off. Familiarize yourself with these essential stitches to build a strong foundation for your knitting skills.
4. Gather the necessary tools
To start knitting, you’ll need a few essential tools, including knitting needles and a tapestry needle. Knitting needles come in different sizes and materials, so choose the ones that are suitable for your project. A tapestry needle is used for weaving in loose ends and seaming your knitted pieces together.
5. Practice tension and gauge
Tension and gauge are critical to achieving the correct size and fit of your knitted project. Tension refers to the tightness of your knitting, while gauge refers to the number of stitches and rows per inch. Practice knitting a gauge swatch to ensure that your tension and gauge match the measurements specified in the pattern.
6. Start with simple projects
When you’re just starting out, it’s best to begin with simple knitting projects. This will help you build confidence and practice your skills. Scarves, hats, and dishcloths are great beginner projects that allow you to practice a variety of stitches and techniques.
By following these tips, you’ll be well-prepared to start knitting and create beautiful handmade items. Remember to be patient and enjoy the process, as knitting is a craft that takes time and practice to master.
Choosing the Right Yarn and Needles
When knitting a witch hat, it is important to choose the right yarn and needles to ensure a successful project. The right yarn will not only determine the look and feel of the hat, but also its durability and warmth. The right needles, on the other hand, can make the knitting process easier and more enjoyable.
Yarn: When selecting yarn for a knitted witch hat, consider the desired outcome and look for yarn that is suitable for hats. Worsted weight yarn is a popular choice for hats as it provides good stitch definition and warmth. Look for yarns that have a bit of stretch and elasticity to help the hat retain its shape. Variegated yarns can add visual interest to the hat, while solid colors can create a more classic and versatile look.
Needles: The size of the needles will depend on the yarn you choose and the desired tension. It is important to match the needle size to the yarn weight to achieve the correct gauge. This information can usually be found on the yarn label or in the pattern instructions. Circular needles are a popular choice for knitting hats as they allow for easy knitting in the round. They also distribute the weight of the project more evenly, making it more comfortable to hold. Double-pointed needles can also be used for knitting hats, especially for the crown shaping.
Overall, choosing the right yarn and needles is essential for knitting a successful witch hat. Consider the desired outcome, yarn weight, and needle size to ensure a hat that looks great, fits well, and stands up to wear and tear.
Getting Started: Casting On and Knitting the Brim
When it comes to knitting a witch hat, the first step is to cast on and start knitting the brim. The brim is an important part of the hat as it adds structure and stability to the shape. In this tutorial, we will guide you through the process of casting on and knitting the brim using a simple and beginner-friendly pattern.
Casting On: To start, you will need a set of knitting needles and yarn of your choice. Begin by making a slipknot and placing it on one of the needles. Hold the needle with the slipknot in your right hand, and insert the other needle through the slipknot from left to right. With your left hand, place the yarn over the tip of the right needle, wrapping it from back to front.
Once the yarn is wrapped, use the tip of the right needle to pull the loop of yarn through the slipknot, creating a new loop on the right needle. This is your first cast-on stitch. Repeat this process to cast on the desired number of stitches for the brim of your hat, ensuring that the stitches are snug but not too tight.
Knitting the Brim: Now that you have cast on the stitches, it’s time to start knitting the brim of your witch hat. Hold the needle with the cast-on stitches in your right hand, and insert the other needle into the first stitch from left to right.
- Wrap the yarn around the right needle, crossing it over the left needle from back to front.
- With the tip of the right needle, pull the loop of yarn through the first stitch, creating a new stitch on the right needle.
- Slide the original stitch off the left needle, leaving the new stitch on the right needle.
- Repeat this process for each stitch across the row, knitting every stitch until you reach the end of the row.
Continue knitting rows in this manner until the brim of your hat reaches the desired width. Remember to keep the tension even and consistent as you knit. Once the brim is complete, you can move on to knitting the body of the hat and shaping it into a pointy witch hat.
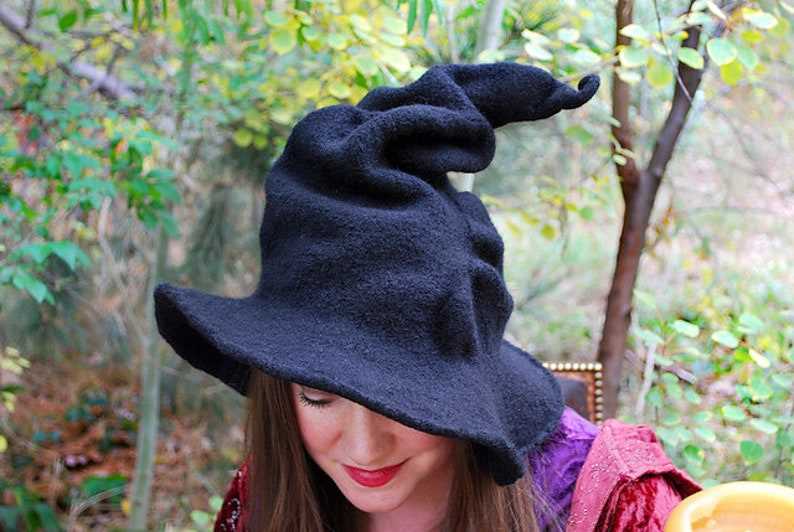
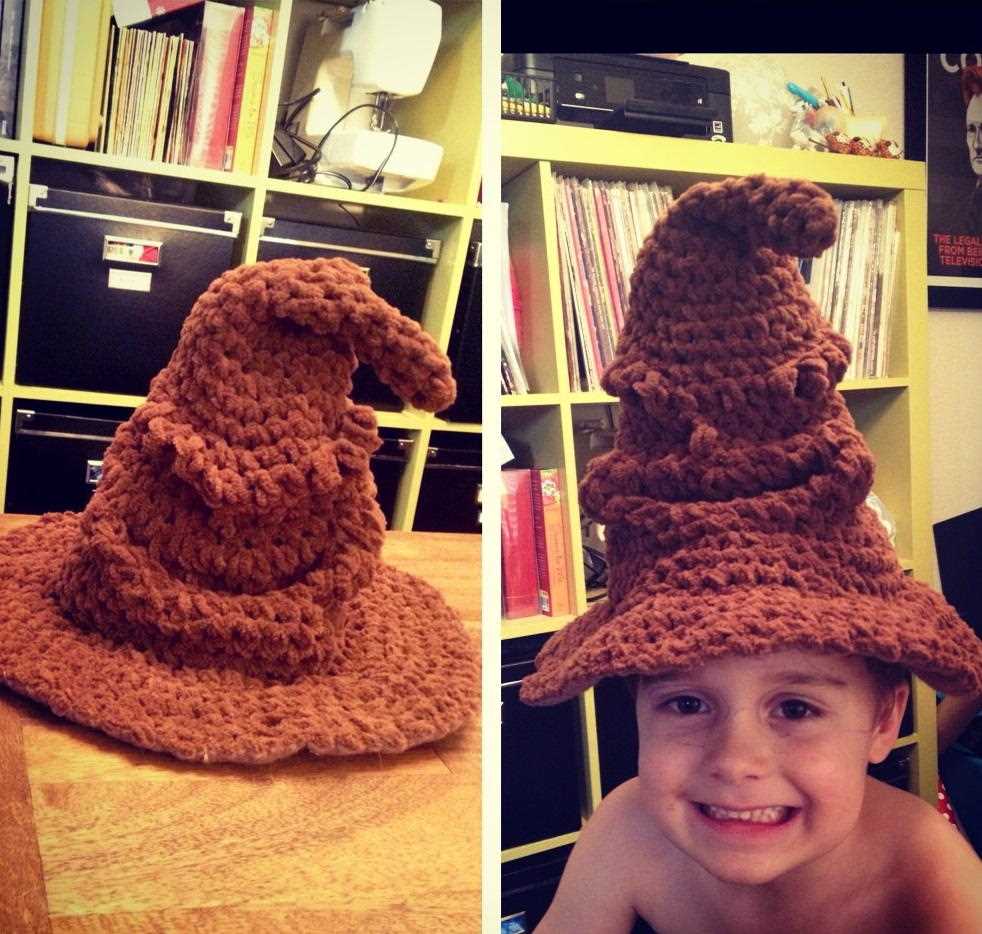
Creating the Pointed Crown
The pointed crown is an essential element of a witch hat and gives it its signature shape. To create the pointed crown, you will need to follow a specific knitting pattern that ensures the desired shape. Here is a step-by-step guide to help you with the process.
Materials:
- Double-pointed knitting needles
- Worsted-weight yarn in your chosen color
- Tape measure
- Tapestry needle
Instructions:
- Start by casting on the required number of stitches, as specified in the knitting pattern. This will determine the circumference of the base of the crown.
- Next, work in rounds using the specified stitch pattern, gradually decreasing the number of stitches as you move up. This will create a tapered effect, leading to the pointed crown.
- Continue knitting in rounds until the crown reaches your desired length. You can use a tape measure to ensure accurate measurements.
- Once the desired length is reached, it’s time to shape the crown. This is done by dividing the stitches evenly onto three or four double-pointed needles, depending on your preference.
- Using the double-pointed needles, begin working decreases at regular intervals. This will create the pointed shape of the crown. Follow the knitting pattern for specific instructions on the decrease stitches.
- Keep working the decreases until you have a small number of stitches left. At this point, cut the yarn, leaving a long tail. Thread the tail through the remaining stitches and pull tight to close the crown.
- Weave in any loose ends and shape the crown as desired.
By following these instructions and the included knitting pattern, you’ll be able to create a beautiful pointed crown for your witch hat. Remember to have fun and experiment with different colors and stitch patterns to make your hat truly unique!
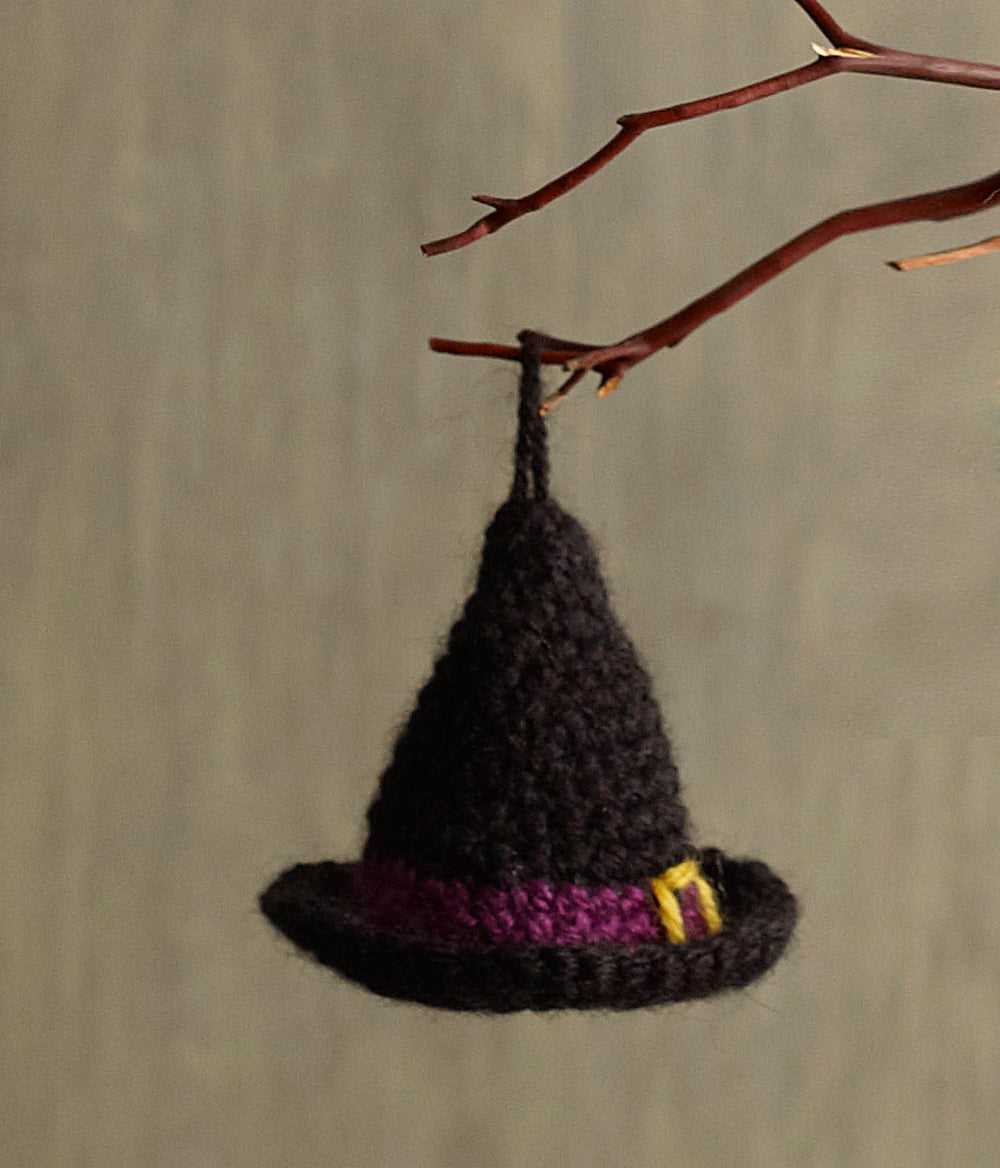
Adding a Ribbed Band for a Secure Fit
When knitting a witch hat, one of the important factors to consider is ensuring a secure fit. To achieve this, adding a ribbed band to the base of the hat is a great option.
A ribbed band is created by alternating knit and purl stitches in a specific pattern, usually 1×1 or 2×2, to create a stretchy and snug texture. This not only helps the hat to fit comfortably on the wearer’s head but also adds an attractive detail to the design.
To add a ribbed band to your knitted witch hat, you can start by measuring the circumference of the wearer’s head. This will give you an idea of how many stitches to cast on for the band. It’s usually recommended to cast on slightly fewer stitches than the head circumference, as the ribbed pattern will naturally contract and provide a snug fit.
Here are the steps to add a ribbed band:
- Cast on the desired number of stitches using a smaller needle size than the rest of the hat.
- Start knitting in the desired ribbed pattern, such as 1×1 or 2×2, for the desired length. This can be anywhere from 1 inch to a few inches, depending on personal preference.
- Switch to the larger needle size and continue knitting the rest of the hat in the desired stitch pattern, whether it’s stockinette stitch or a more intricate pattern.
- Complete the hat according to the pattern instructions, making sure to decrease stitches gradually towards the crown.
- Bind off the remaining stitches, ensuring a neat and secure finish.
Overall, adding a ribbed band to your knitted witch hat not only enhances the fit but also adds a touch of style and comfort. So, be sure to consider this option when crafting your next witch hat.
Using Decreases for a Tapered Shape
When knitting a witch hat, creating a tapered shape is essential to achieve the classic pointy look. One way to achieve this shape is by using decreases in your knitting pattern. Decreases are stitches that are worked together to decrease the total number of stitches in a row or round, creating a narrower shape.
There are several types of decreases that can be used, such as knit two together (k2tog), slip slip knit (ssk), or centered double decrease (cdd). These decreases can be strategically placed in your knitting pattern to gradually decrease the circumference of the hat and create the desired taper towards the top.
Knit Two Together (K2tog)
- To work a knit two together decrease, insert the right needle through the next two stitches on the left needle as if to knit.
- Knit these two stitches together as if they were one stitch.
- Continue knitting according to your pattern.
Slip Slip Knit (SSK)
- For a slip slip knit decrease, slip the next two stitches knitwise, one at a time, onto the right needle.
- Insert the left needle into the front of these two slipped stitches.
- Knit them together through the back loop.
- Continue knitting according to your pattern.
Centered Double Decrease (CDD)
- The centered double decrease is used to create a symmetrical decrease in the center of your knitting.
- To work a centered double decrease, slip two stitches knitwise onto the right needle.
- Knit the next stitch on the left needle.
- Pass the two slipped stitches over the knit stitch and off the right needle.
- Continue knitting according to your pattern.
By strategically using these decrease stitches, you can gradually shape your knitted witch hat into a tapered point, achieving the classic look. Experiment with different decrease placements and combinations to achieve the desired shape and fit for your hat.
Adding Embellishments: Decorative Edges and Appliques
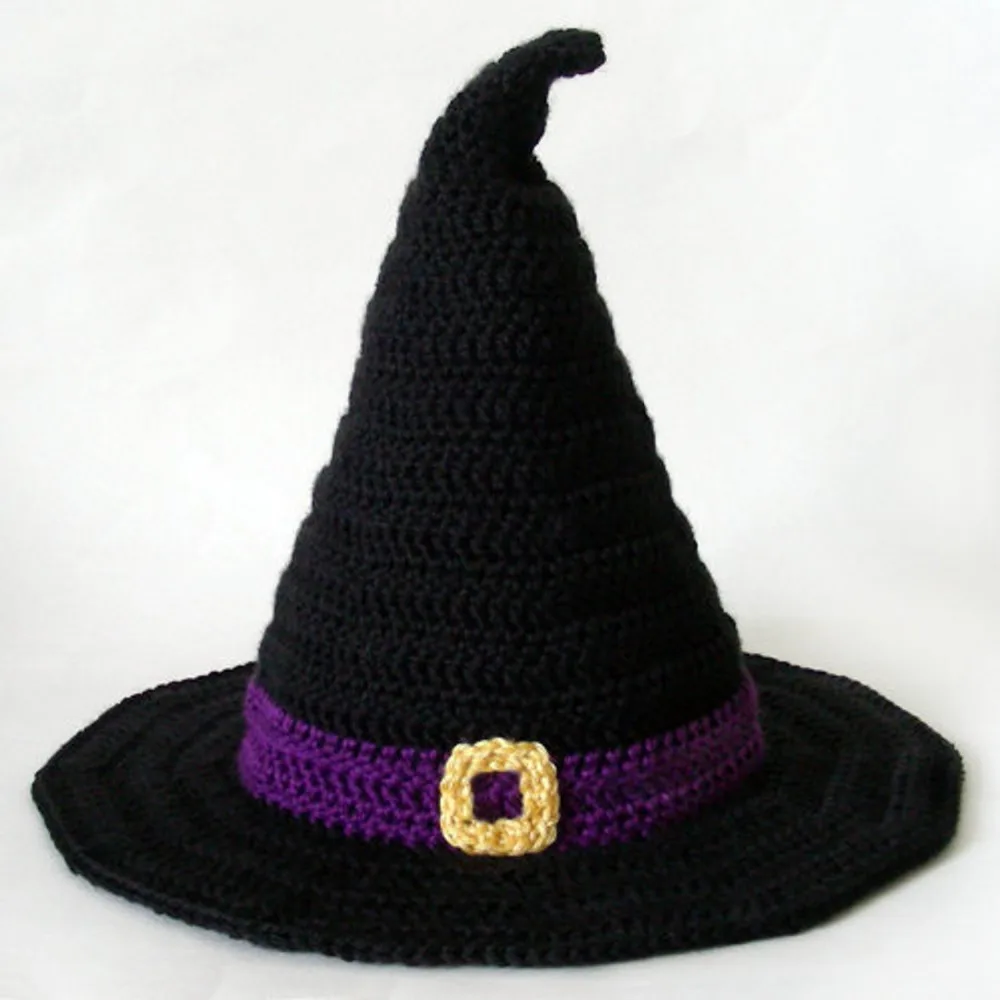
When it comes to knitted witch hats, adding embellishments can really take your hat to the next level. One way to do this is by creating decorative edges. You can use different knitting techniques to add texture and interest to the brim or the top of the hat. For example, you could use ribbing, lace, or cables to create a unique and eye-catching edge. This can elevate a simple witch hat pattern to something more intricate and special.
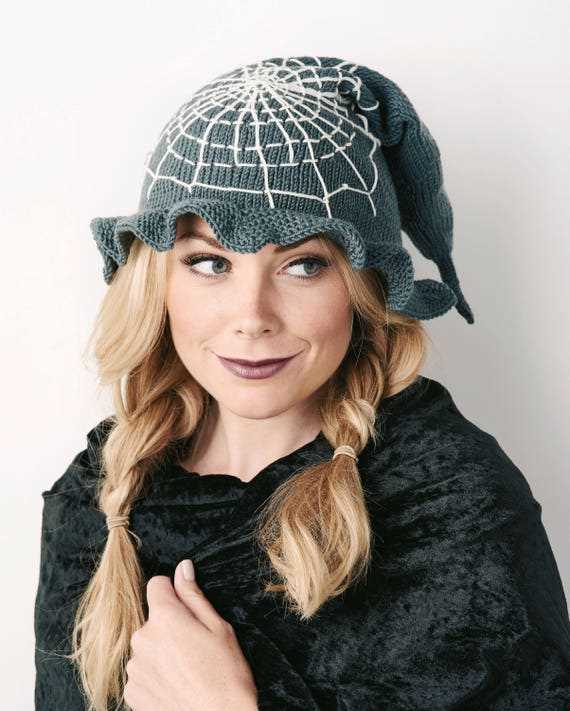
Another way to add embellishments to your knitted witch hat is by incorporating appliques. Appliques are small pieces of fabric or yarn that are attached to the hat to create a design or pattern. You can use embroidery, crochet, or even fabric and ribbon to create appliques. For a witch hat, you could add a spider web design, a moon and stars, or even a witch silhouette. Appliques are a great way to personalize your hat and make it stand out.
To create decorative edges, you can try using a picot bind off or a scalloped edge. These techniques create a delicate and feminine look that can be perfect for a witch hat. Alternatively, you can experiment with different stitch patterns to create interesting textures along the edge of the hat. Knitting in a twisted rib or adding a cable border can also add visual interest.
When it comes to appliques, consider using stranded knitting to create intricate designs. You could knit a spider web pattern using a contrasting color or use duplicate stitch to add a moon and stars. You can also experiment with different yarns and textures to create unique appliques. Mixing different colors and materials, such as using metallic or sparkly yarn, can create a magical effect.
- Experiment with different stitches and techniques to create decorative edges.
- Try incorporating appliques to personalize your witch hat design.
- Consider using stranded knitting or duplicate stitch for intricate designs.
- Mix different yarns and textures for a unique and magical effect.
Finishing Touches: Blocking and Weaving in Ends
Once you have completed knitting your witch hat, there are a few finishing touches that will help give it a polished look. Blocking and weaving in ends are two important steps that should not be skipped.
Blocking is the process of shaping and stretching your knitted piece to its intended size and shape. It helps even out the stitches and gives the hat a smoother appearance. To block your witch hat, you will need a blocking mat or towel, rust-proof pins, and a spray bottle filled with water. Lay your hat flat on the blocking mat and carefully pin it into shape, ensuring that all the edges are straight and the point at the top is well-defined. Lightly mist the hat with water, being careful not to soak it. Allow it to dry completely before removing the pins.
Weaving in ends is the final step to conceal any loose yarn tails from the color changes and joining of new yarn. Using a yarn needle, thread the loose end through the stitches on the wrong side of the hat, taking care to hide it within the fabric. Repeat this process for each loose end, making sure they are securely woven in. Trim any excess yarn, leaving a small tail that will not unravel. This will give your witch hat a clean and professional finish.
Summary:
- Blocking your witch hat helps shape and smooth out the stitches.
- Use a blocking mat, rust-proof pins, and a spray bottle filled with water for the blocking process.
- Weaving in ends is necessary to hide loose yarn tails from color changes and joining of new yarn.
- Thread the loose end through stitches on the wrong side of the hat and trim excess yarn for a clean finish.
Tips and Tricks for a Perfect Knitted Witch Hat
Are you looking to create the perfect knitted witch hat? Whether you’re making it for Halloween or just to add a touch of magic to your everyday style, we’ve got some tips and tricks to help you achieve a flawless result.
1. Choose the Right Yarn
When knitting a witch hat, it’s important to choose the right yarn for the project. Opt for a sturdy and slightly stretchy yarn that will hold its shape well. Worsted weight or chunky yarns are great options as they will create a firm fabric that won’t collapse or droop.
2. Check Your Gauge
Gauge is crucial when it comes to achieving the proper fit and shape for your witch hat. Before starting the project, take the time to knit a gauge swatch and measure it accurately. Adjust your needle size if necessary to match the pattern’s specified gauge. This will ensure that your hat turns out the right size and shape.
3. Use Double-Pointed Needles
To knit the crown of the witch hat, double-pointed needles are the best choice. They allow you to easily knit in the round and shape the top of the hat without the need for seams. Make sure to use the correct size of double-pointed needles to ensure a smooth and even knitting process.
4. Pay Attention to Increases and Decreases
Properly executed increases and decreases are essential for achieving the distinctive cone shape of a witch hat. Follow the pattern instructions carefully and pay close attention to any specific stitch or shaping techniques. This will ensure that your hat has the right proportions and maintains its structure.
5. Blocking and Finishing
Once you’ve finished knitting your witch hat, blocking is an important step to give your project a polished and professional look. Wet blocking or steam blocking can help to even out any irregularities and shape the hat perfectly. Don’t forget to weave in any loose ends and trim them neatly for a clean and tidy finish.
With these tips and tricks in mind, you’ll be well on your way to creating a perfect knitted witch hat. Remember to have fun and let your creativity shine through as you bring this magical accessory to life!
Get Ready to Show Off Your Knitted Witch Hat this Halloween!
Whether you’re a seasoned knitting pro or just starting out, this knitted witch hat pattern is the perfect project to showcase your skills and get into the Halloween spirit. Not only is it fun and festive, but it’s also a great opportunity for you to create a unique accessory to complete your Halloween costume.
With this free knitting pattern, you can customize your hat to match your personal style and preferences. Choose your favorite colors, experiment with different yarn types and textures, or add embellishments like buttons, ribbons, or even a spiderweb design. The possibilities are endless!
Remember that knitting is not only a creative outlet but also a relaxing and therapeutic activity. While you work on your hat, take some time to unwind and enjoy the process. Don’t worry if you make a mistake – knitting is all about embracing imperfections and learning as you go.
To get started, simply follow the step-by-step instructions provided in the pattern. Take your time, read through each section, and refer to the accompanying images if needed. And don’t forget to take breaks and stretch your hands and wrists to prevent any strain or discomfort.
Once you’ve completed your knitted witch hat, you’ll be ready to show it off to the world! Wear it proudly on Halloween night, as part of your costume or even as a standalone accessory. You can also gift it to a friend or family member who loves all things witchy.
To inspire you further, we have compiled a list of some of the best Halloween knitting patterns and ideas. From pumpkin decorations to spooky socks and scarves, there’s something for everyone to enjoy. So why stop at just a witch hat?
Remember, the most important thing is to have fun and let your creativity shine. Knitting is a wonderful hobby that allows you to create something unique and special with your own two hands. So grab your knitting needles, pick up some yarn, and get ready to show off your knitted witch hat this Halloween!
Q&A:
Where can I find a free knitted witch hat pattern?
You can find free knitted witch hat patterns on various websites and knitting blogs. Some popular websites for free knitting patterns include Ravelry, Knitting Pattern Central, and LoveCrafts. Simply search for “free knitted witch hat pattern” on these sites, and you should be able to find a variety of options to choose from.
What materials do I need to knit a witch hat?
To knit a witch hat, you will need a few basic materials. These include knitting needles (typically size 8 or 9), yarn (worsted weight or chunky weight), a tapestry needle for sewing seams or weaving in ends, and any additional embellishments you may want to add, such as buttons or ribbons.
Are there different styles of knitted witch hats?
Yes, there are different styles of knitted witch hats you can choose from. Some common styles include a traditional pointed hat with a wide brim, a slouchy hat with a pointed top, or a shorter beanie-style hat with a small brim. The choice of style depends on your personal preference and the look you want to achieve.
Can I modify a knitted witch hat pattern to fit a child?
Yes, you can modify a knitted witch hat pattern to fit a child by using smaller knitting needles and adjusting the number of stitches and rows. You may also need to reduce the brim size for a smaller head. It’s a good idea to measure the child’s head circumference and refer to a size guide to ensure the hat will fit properly.