
If you’re a fan of the beloved holiday movie “Elf”, you’ve probably fallen in love with Buddy the Elf and his infectious holiday spirit. Now, you can bring Buddy to life with this adorable knitting pattern. Whether you’re an experienced knitter or just starting out, this pattern is perfect for creating a handmade keepsake that will warm your heart during the holiday season.
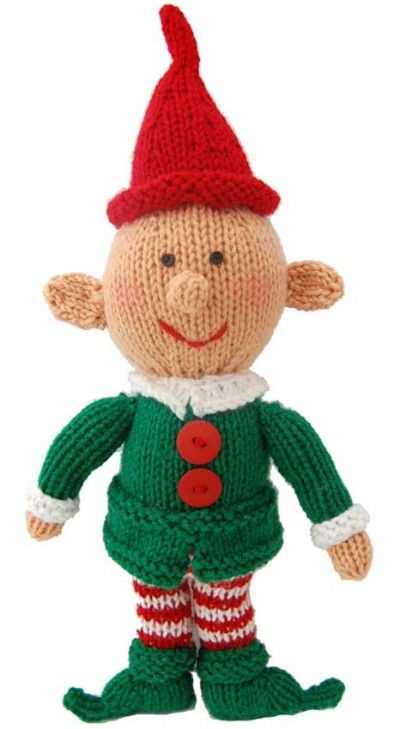
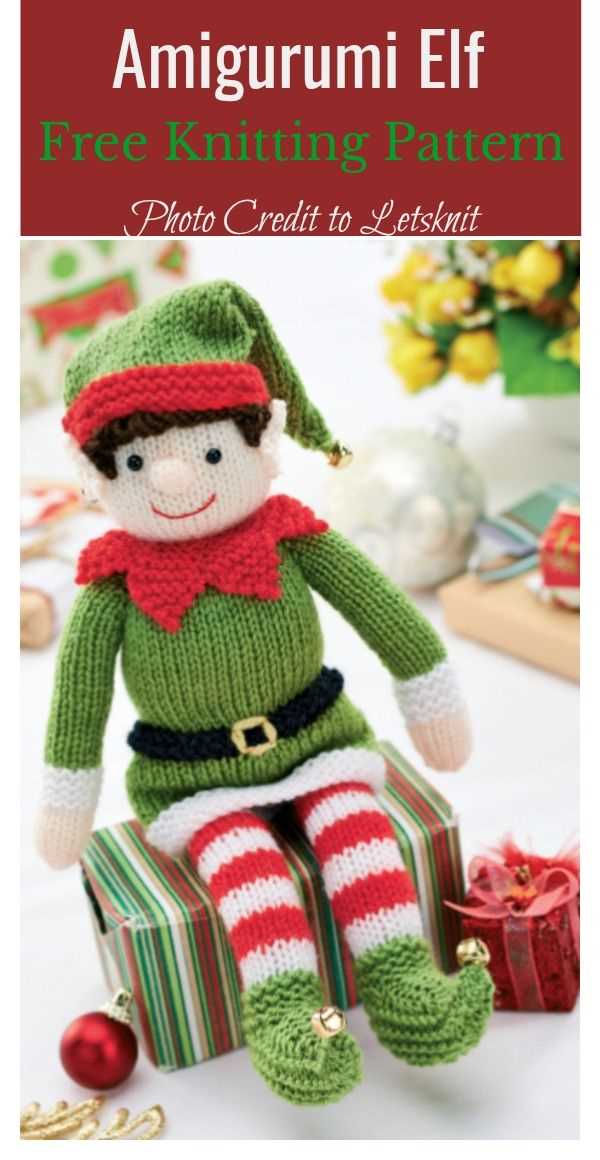
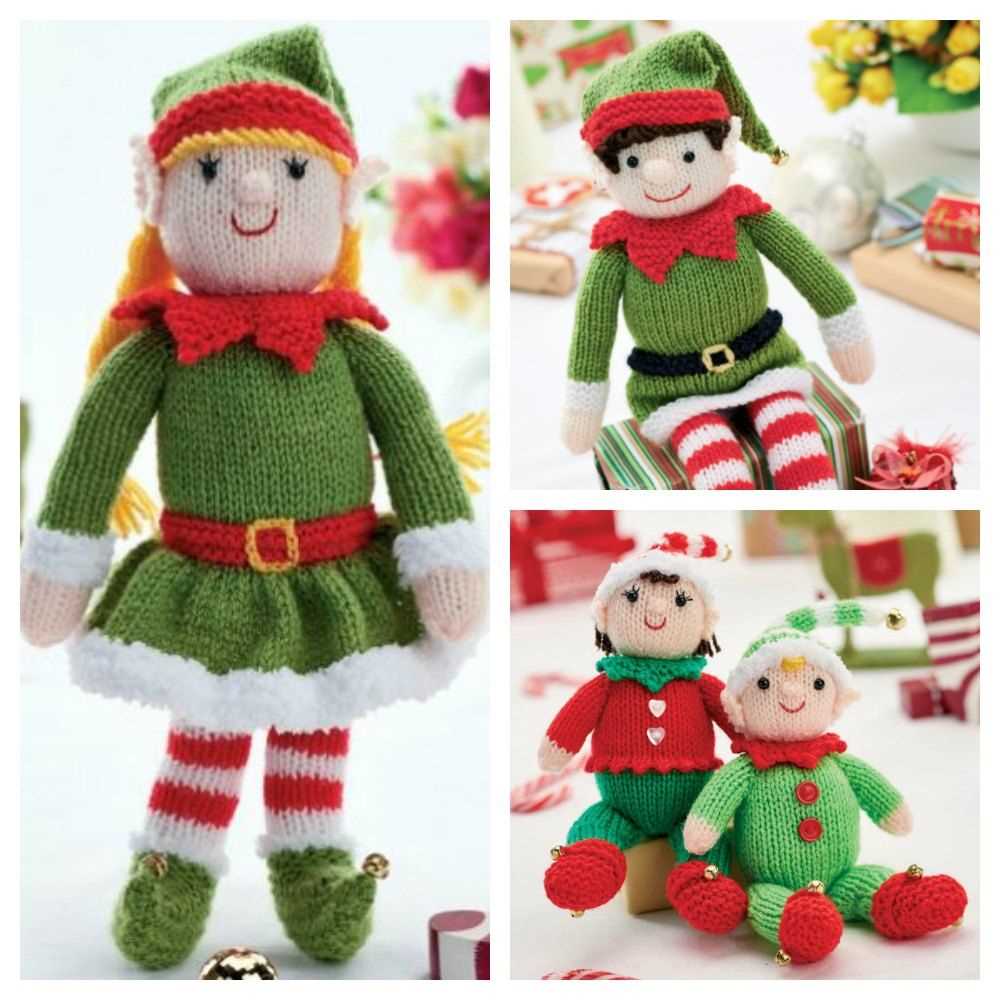
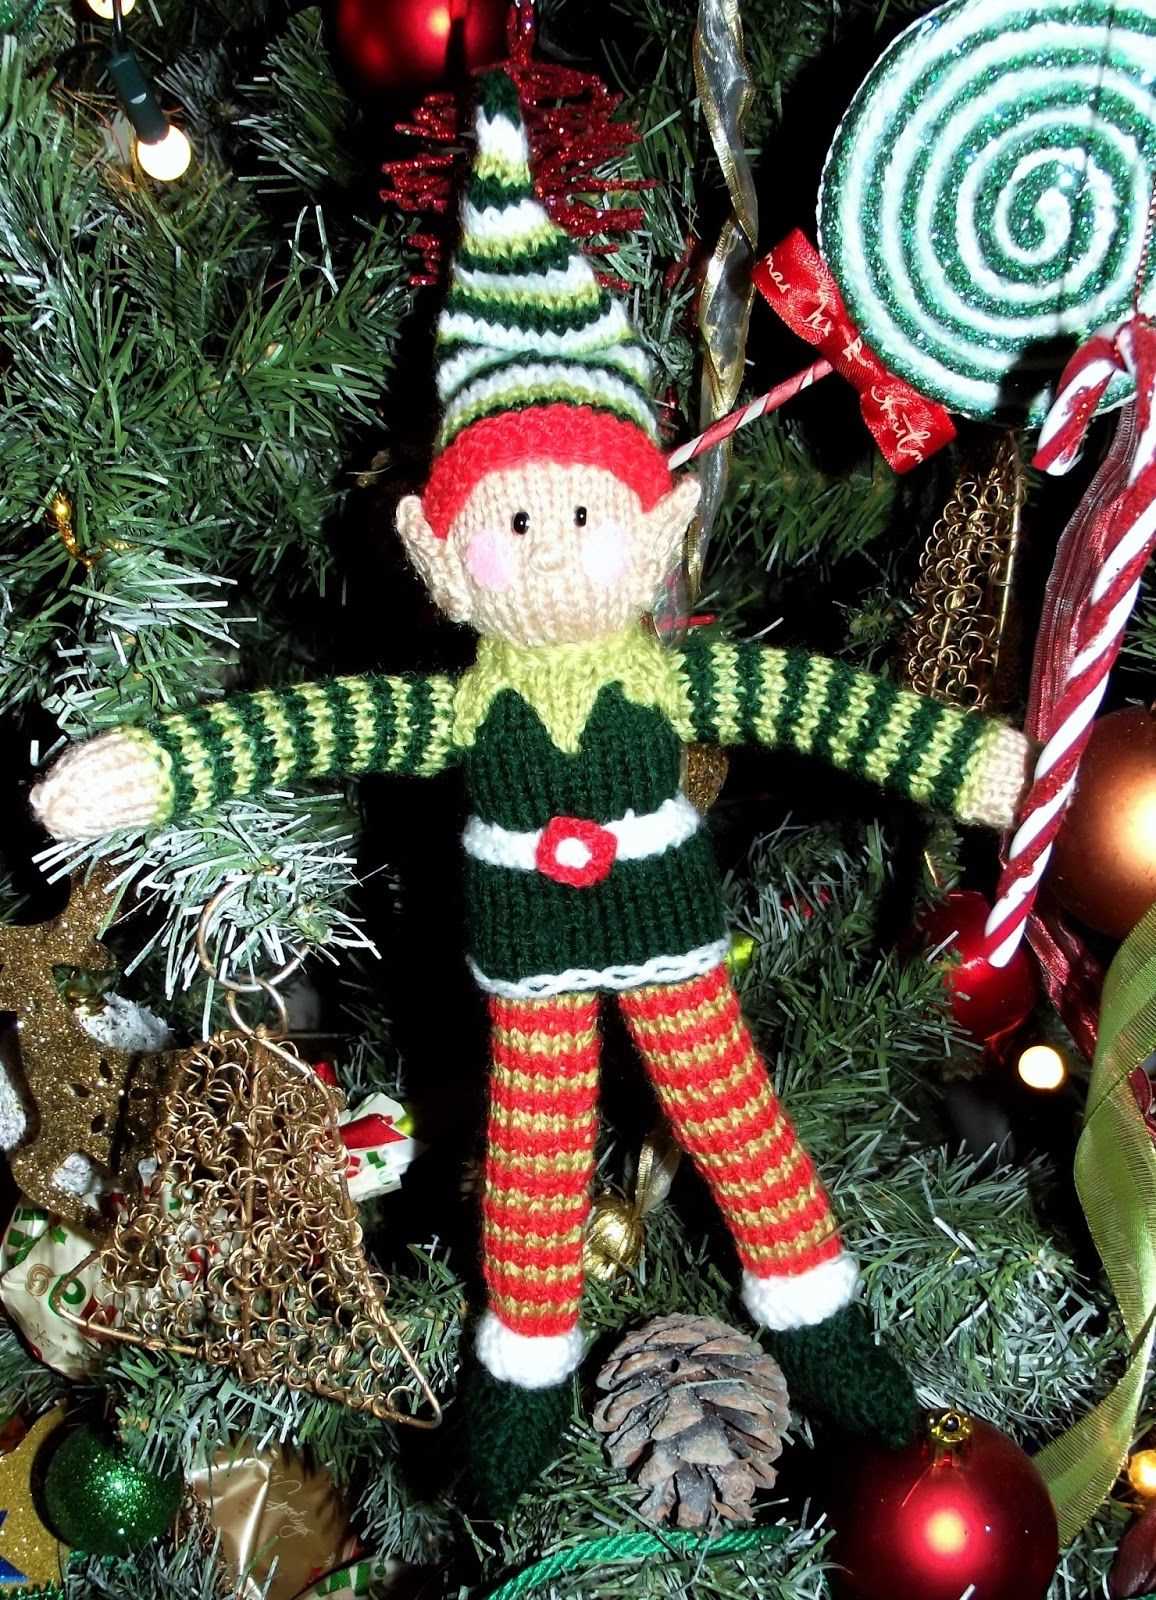
Designed with intricate detail and whimsical charm, this Buddy the Elf knitting pattern captures the essence of the character that has become a Christmas icon. From his signature green elf hat to his iconic yellow tunic and candy cane striped leggings, this pattern includes all the elements that make Buddy one of the most memorable characters in holiday movies.
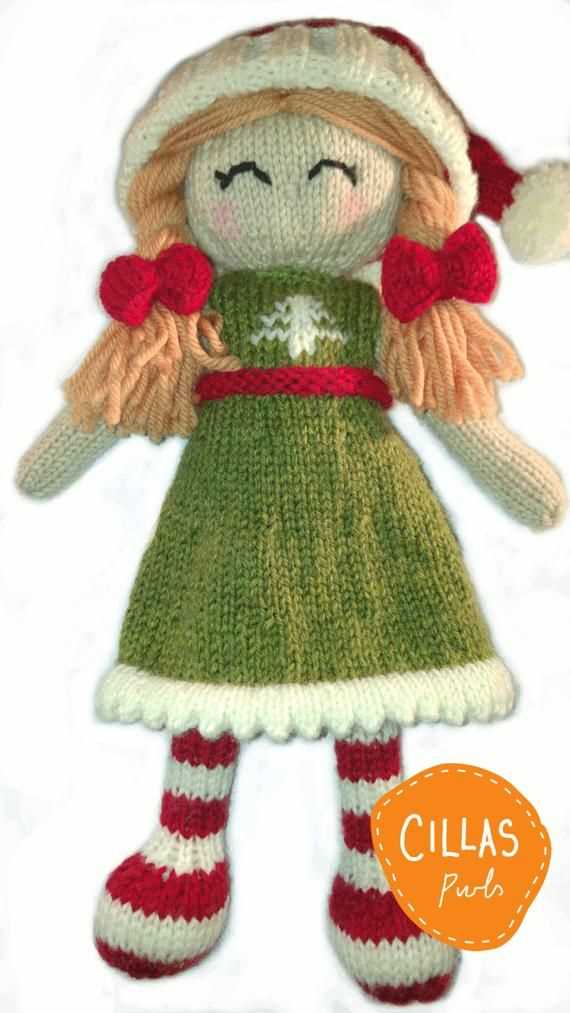
Not only is this knitting pattern a fun and creative project, but it also allows you to personalize your Buddy the Elf doll. Choose your own colors and materials to create a unique version of Buddy that reflects your own personal style. This is a great opportunity to experiment with different yarns and stitches to add your own personal touch to this classic character.
Buddy the Elf Knitting Pattern
If you’re a fan of the movie Elf, you’ll definitely want to try your hand at knitting your very own Buddy the Elf doll. This knitting pattern will guide you through the process, ensuring that you create a cute and accurate representation of everyone’s favorite elf!
To start, you’ll need the following materials:
- Size 6 knitting needles
- Worsted weight yarn in green, white, and red
- Black and white felt
- Stuffing material
- Yarn needle
- Scissors
Begin by casting on 30 stitches in green yarn. Knit in stockinette stitch for 10 rows to create Buddy’s body. Next, switch to white yarn and knit 6 rows for the cuffs of Buddy’s sleeves. Switch back to green yarn and knit another 10 rows for his lower body.
Once the body is complete, it’s time to move on to Buddy’s face. Cut out two small circles from the white felt and stitch them onto the body to create his eyes. Use the black felt to cut out small circles for the pupils, and attach them to the white felt. Embroider a smile using red or black yarn.
To create Buddy’s iconic elf hat, start with the red yarn and cast on 40 stitches. Knit in stockinette stitch for 30 rows, then decrease evenly every other row until you have 5 stitches left. Bind off and sew the edges together to form the cone shape of the hat. Attach the hat to the top of Buddy’s head with a few stitches.
Finally, stuff Buddy’s body with the stuffing material, and sew up the bottom to close it up. Add any final touches, such as buttons or a belt, with felt or embroidery to complete the look. Your Buddy the Elf doll is now complete and ready to spread holiday cheer!
Why Knit Buddy the Elf?
Knitting is a popular hobby that allows people to create personalized and unique items. One fun and festive project for knitters is to create a Buddy the Elf doll. Buddy the Elf is a beloved character from the movie “Elf” and his cheerful and quirky personality makes him a great inspiration for knitting.
Creative Gift
Knitting a Buddy the Elf doll can serve as a creative and personal gift for friends or family members who are fans of the movie. Handmade gifts are always appreciated as they show thought and effort put into creating something special. A knit Buddy the Elf doll can be a unique and memorable keepsake that will bring joy to the recipient.
Challenging Project
Knitting a Buddy the Elf doll can be a challenging project that allows knitters to improve their skills. The doll requires a variety of techniques such as colorwork, shaping, and working with smaller details like the face and accessories. This project can provide an opportunity for knitters to try new techniques and expand their knitting abilities.
Festive Decoration
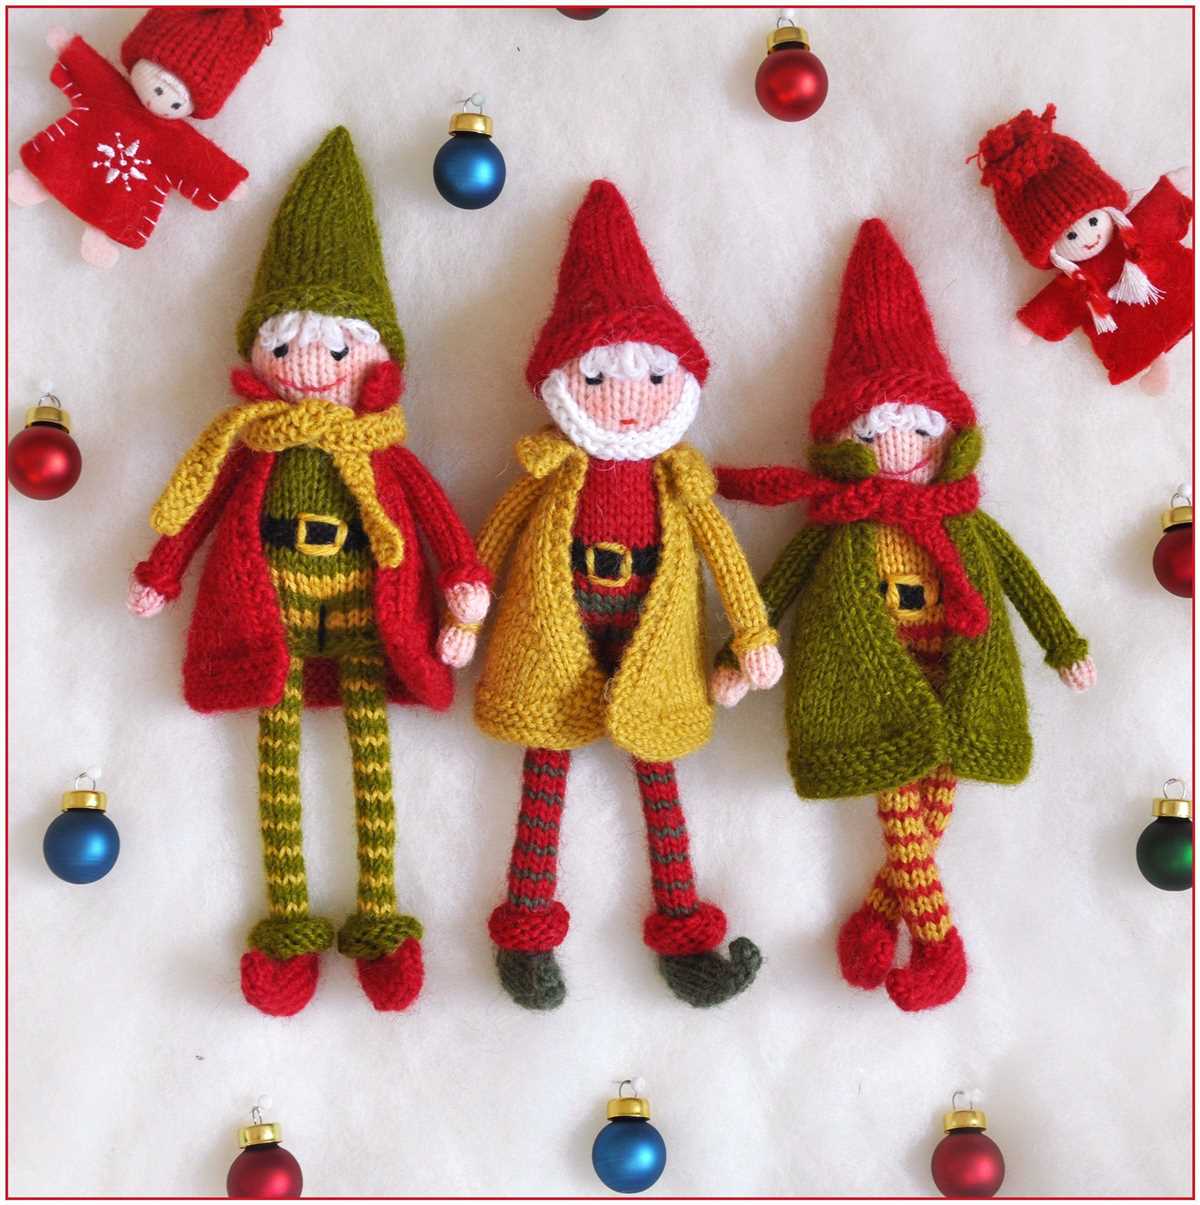
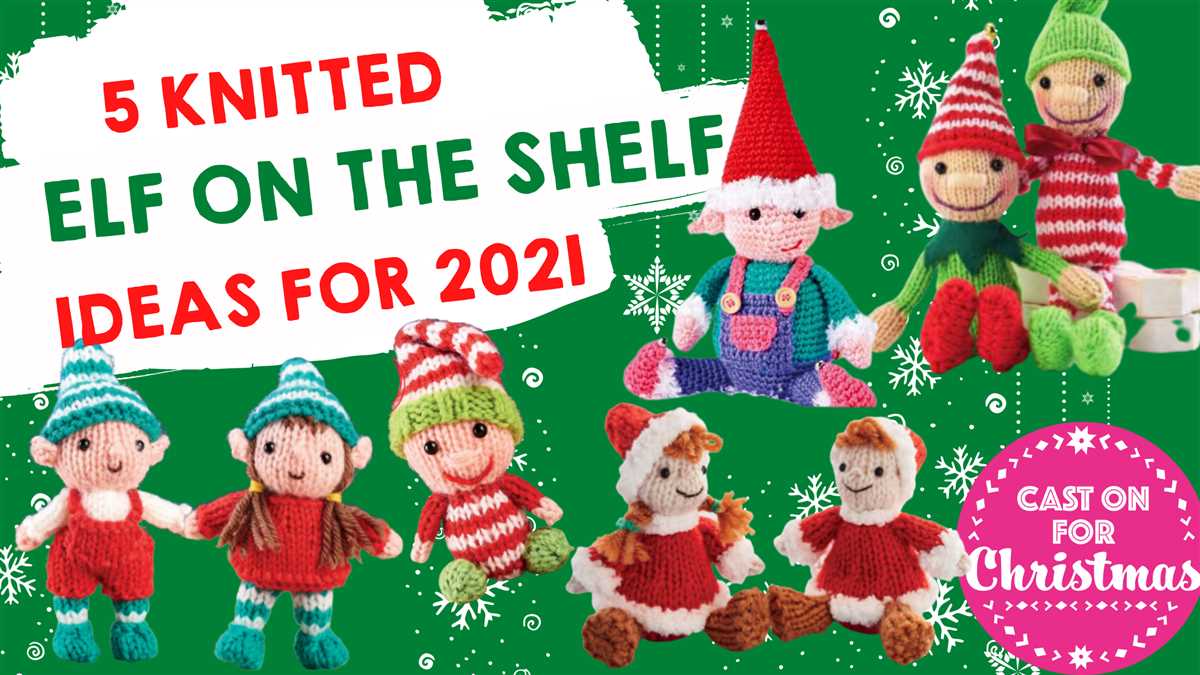
A knit Buddy the Elf doll can also serve as a festive decoration during the holiday season. The doll can be displayed on a shelf, mantel, or Christmas tree, adding a touch of whimsy and holiday spirit to the home. Knitting the doll can be a fun and creative way to add a unique and handmade touch to holiday decorations.
Satisfaction of Completing a Project
Completing a knit Buddy the Elf doll can bring a sense of satisfaction and accomplishment. Knitting requires time, patience, and attention to detail, and finishing a project successfully can be a rewarding experience. Seeing the finished doll and knowing that it was made with one’s own hands can be a source of pride and joy.
Overall, knitting a Buddy the Elf doll can be a creative, challenging, and rewarding project. Whether it’s a gift, a holiday decoration, or a personal challenge, this project allows knitters to celebrate their love for the movie “Elf” and showcase their knitting skills.
Materials Needed for the Knitting Pattern
In order to complete the Buddy the elf knitting pattern, you will need the following materials:
Yarn
- Green yarn: This will be used for the main body and limbs of Buddy the elf. Choose a soft and durable yarn that is suitable for knitting toys.
- Red yarn: This will be used for the hat and scarf of Buddy the elf. Select a vibrant and cozy yarn that complements the green yarn.
- White yarn: This will be used for the trim and details of Buddy the elf’s clothing. Opt for a bright and crisp white yarn that contrasts well with the green and red yarn.
Knitting Needles
- Size US 4 (3.5mm) double-pointed needles: These needles will be used for knitting the small circumference of the limbs and hat. Make sure the needles are the correct size to achieve the gauge specified in the pattern.
- Size US 6 (4.0mm) straight or circular needles: These needles will be used for knitting the main body and larger sections of the pattern. Again, ensure that the needles are the correct size for the desired gauge.
Additional Supplies
- Stitch markers: These will help you keep track of your stitches and mark important points in the pattern, such as the beginning of a round or the placement of a specific stitch.
- Tapestry needle: This needle is used for weaving in loose ends and sewing any necessary seams.
- Stuffing: You will need a soft and hypoallergenic stuffing material to fill the body and limbs of Buddy the elf. Ensure that the stuffing is safe for toys and won’t cause any allergies.
- Embroidery thread: Choose a coordinating color of embroidery thread to sew on any necessary embellishments, such as eyes or buttons.
With these materials on hand, you’ll be ready to start knitting Buddy the elf and bring a little bit of holiday cheer to your knitting projects!
Getting Started: Casting On
When starting a new knitting project, the first step is to cast on your stitches. Casting on creates the foundation row of your project and allows you to begin knitting. For the Buddy the Elf knitting pattern, you will need to cast on a specific number of stitches to match the width of your desired item, whether it’s a scarf, hat, or sweater.
To cast on, you will need a pair of knitting needles and your chosen yarn. Start by making a slip knot, which will serve as your first stitch. Insert one of the knitting needles through the slip knot and pull the yarn through to tighten the knot around the needle. Hold the needle with the slip knot in your dominant hand.
Next, using your non-dominant hand, hold the end of the yarn and create a loop with it by twisting it in a clockwise direction. Insert the needle into the loop from front to back, then catch the yarn with the needle and pull it through the loop, creating a new stitch on the needle. Repeat this process until you have the desired number of stitches on your needle, as specified in the pattern.
Once you have cast on all the stitches, you can move on to the next step in the pattern, which may involve knitting, purling, or a combination of both. Keep in mind that the Buddy the Elf knitting pattern may have specific instructions for the cast on, so be sure to carefully follow the pattern’s guidelines.
Summary
- To cast on, you will need knitting needles and yarn.
- Start by making a slip knot and inserting the needle through it.
- Create a loop with the yarn and insert the needle into it, pulling the yarn through to create a new stitch.
- Repeat this process until you have the desired number of stitches on the needle.
- Follow the pattern’s instructions for the specific cast on method.
Knitting Buddy’s Body

When knitting Buddy the elf, the first step is to knit his body. The body is knitted in one piece, starting from the bottom and working up to the neck.
To start, cast on the required number of stitches for Buddy’s body using the specified yarn and needles. The pattern will usually provide the exact number of stitches to cast on. Once the stitches are cast on, join them in a round using the magic loop method or double-pointed needles. This will create a seamless tube for Buddy’s body.
Continue knitting in the round until Buddy’s body reaches the desired length. The pattern will specify the number of rounds to knit. To add some shaping to Buddy’s body, you may need to decrease or increase stitches at certain points. The pattern will provide instructions on when and how to make these adjustments.
Once Buddy’s body is the desired length, it’s time to shape the neck. This is done by binding off a certain number of stitches in the center of the round. The remaining stitches will be divided evenly and placed on stitch holders or scrap yarn. These stitches will be used later to knit Buddy’s head.
After shaping the neck, you can continue knitting a few more rounds to create a smooth transition from the body to the head. This will give Buddy a realistic appearance. Once the rounds are knitted, bind off all the stitches and secure the yarn. Congratulations, Buddy’s body is now complete and ready for the next step!
Creating Buddy’s Face: Knitting the Head
When it comes to knitting Buddy the elf, the first step is to create his face, starting with the head. Knitting the head requires careful attention to detail to capture his cheerful and friendly expression. The key to achieving this is in the choice of yarn and the stitches used.
Yarn Selection: To bring Buddy’s face to life, it is best to use a flesh-colored yarn. Opt for a soft and lightweight yarn that will give the head a realistic texture. Look for a yarn in a shade that closely matches the skin tone you envision for Buddy. This will help in creating a lifelike appearance.
Knitting Techniques: To begin knitting Buddy’s head, you will need to cast on the required number of stitches using the chosen yarn. It is recommended to use a circular needle to knit in the round, which will eliminate the need for seaming later on. Knit every round until the desired length for the head is reached.
Once the head is the desired length, it is time to shape Buddy’s face. This can be accomplished through decreases to create a more tapered effect towards the top. Use knitting techniques such as knit two together (k2tog) or slip-slip-knit (ssk) to decrease the number of stitches in each round. Gradually decrease the stitches until only a few remain.
Now that the basic shape of Buddy’s head is complete, it’s time to move on to the finer details. Embroider or duplicate stitch his eyes, nose, and mouth onto the knitted fabric using contrasting yarn. Pay attention to the placement and proportion to capture Buddy’s iconic facial features accurately.
Finally, stuff the head with a soft filling material, such as polyester fiberfill, to give it a plump and three-dimensional shape. Carefully close up the top of the head, ensuring all the filling is securely enclosed.
With the knitted head complete, you can now move on to knitting the other parts of Buddy’s body, such as his ears, hair, and hat, to complete the knitting pattern and bring the beloved character to life.
Knitting Buddy’s Arms and Legs
When knitting a Buddy the Elf doll, it is important to pay attention to the details, especially when it comes to his arms and legs. These body parts give Buddy his unique and playful appearance, so it’s worth taking the time to knit them with care.
To start knitting Buddy’s arms, you will need to cast on a certain number of stitches, depending on the size you want them to be. Once you have your stitches on the needle, you can begin knitting in the round, using your preferred method. It may be helpful to use double-pointed needles or a magic loop technique to keep your stitches from slipping off.
When it comes to shaping the arms, you can use a combination of increases and decreases to achieve the desired shape. For example, you might increase stitches evenly at the beginning of each round for a few rounds to create the wider upper part of the arm. Then, you can decrease stitches evenly to taper the arm towards the wrist. Experiment with different patterns and techniques to achieve the look you want.
- Cast on the desired number of stitches for the arms, depending on the desired size.
- Knit in the round using double-pointed needles or a magic loop technique.
- Use increases and decreases to shape the arms, creating a wider upper part and tapering towards the wrist.
- Continue knitting until the arms reach the desired length, and then bind off the stitches.
When it comes to knitting Buddy’s legs, the process is similar to that of the arms. You will need to cast on the desired number of stitches and knit in the round. However, there are a few additional considerations to keep in mind.
First, you may want to consider adding some extra length to the legs to make them proportional to the rest of Buddy’s body. This can be achieved by knitting more rounds before beginning any shaping. Additionally, you can experiment with different stitch patterns, such as ribbing or seed stitch, to add some texture and interest to the legs.
Like the arms, you can use increases and decreases to shape the legs. For example, you might increase stitches evenly for a few rounds to create a wider upper part, and then decrease to taper towards the ankle. Again, it’s all about experimenting and finding the look that you want for Buddy.
- Cast on the desired number of stitches for the legs, considering any additional length you may want to add.
- Knit in the round using double-pointed needles or a magic loop technique.
- Consider adding texture with different stitch patterns.
- Use increases and decreases to shape the legs, creating a wider upper part and tapering towards the ankle.
- Continue knitting until the legs reach the desired length, and then bind off the stitches.
Adding Details: Knitting Buddy’s Hat and Scarf
When knitting Buddy the elf, one of the most important details to add is his iconic red and green striped hat. To create the hat, you will need to follow a basic rib stitch pattern using red and green yarn. Start by casting on the required number of stitches using the red yarn. Then, switch to the green yarn and continue knitting in a rib stitch pattern, alternating between knit and purl stitches, for the desired length of the hat. Finally, finish off with a few rows of red yarn to create the contrasting brim. Cut the yarn, leaving a long tail for sewing, and gather the stitches tightly to close the top of the hat. Sew the brim securely in place to complete Buddy’s hat.
In addition to the hat, Buddy is often seen sporting a long, chunky scarf in matching red and green colors. To knit his scarf, you will need to cast on a sufficient number of stitches using the red yarn. Then, switch to the green yarn and work in a simple garter stitch pattern, knitting every row, for the desired length of the scarf. Consider adding fringe to both ends of the scarf for an extra touch of charm. To do this, cut equal lengths of red and green yarn, fold them in half, and attach them to the ends of the scarf using a crochet hook or by hand. Trim the fringe to your desired length.
Bringing Buddy to Life: Adding Facial Features
When it comes to knitting a Buddy the elf doll, one of the most important steps is adding the facial features. After all, Buddy’s jovial personality comes through his expressive face. By carefully crafting his eyes, nose, and mouth, you can truly bring Buddy to life.
Eyes: To start, you’ll need to knit Buddy’s eyes. Using black yarn, create two small circles and attach them securely to the doll’s face. To add depth and a bit of whimsy, consider attaching small plastic or black buttons for pupils. This will give Buddy’s eyes a charming, cartoon-like look.
Nose: Buddy’s nose is another key feature that brings out his adorable, mischievous charm. Knit a small triangular shape using flesh-colored yarn. Attach it to the face, slightly below and between the eyes. Make sure it is securely fastened so that it won’t come loose during playtime.
Mouth: Buddy’s wide smile is one of his most iconic features. To create his beaming grin, you’ll need to knit a U-shaped mouth using red yarn. Position the mouth below the nose, leaving some space in between. Be sure to sew it on securely so that it stays in place as Buddy is played with and loved.
Adding these key facial features will truly bring your Buddy the elf doll to life. Remember to take your time and pay attention to the placement and security of each feature. The facial expressions and characteristics of the doll will play a crucial role in capturing the joyful spirit of Buddy the elf.
*This knitting pattern is for personal use only. Please respect copyright laws and do not sell or distribute the pattern or the finished product without permission.
Assembly: Sewing Buddy’s Body Parts Together
Once you have completed knitting all the individual body parts for Buddy the elf, it is time to assemble them together. This step-by-step guide will walk you through the process of sewing Buddy’s body parts together, so you can bring your adorable elf to life.
Sewing Materials: Before you begin, make sure you have the following sewing materials handy:
- Yarn needle
- Scissors
- Pins
- Matching yarn
Step 1: Prepare the Body Parts
First, lay out all the knitted body parts of Buddy the elf. This includes the head, body, arms, and legs. Make sure they are all facing the right direction and that any loose ends or yarn tails are neatly tucked away.
Step 2: Sew the Head to the Body
Using a yarn needle and matching yarn, begin by sewing the head to the body. Start at the back of the head, aligning it with the top of the body. Use a whip stitch or mattress stitch to securely attach the two pieces together. Make sure to evenly distribute the stitches and sew all the way around until the head is firmly attached to the body.
Step 3: Attach the Arms
Next, sew the arms to the sides of the body. Position the arms where you want them to be and use pins to hold them in place. Then, using the same sewing technique as before, sew the arms onto the body. Take care to ensure that the arms are sewn securely and evenly on both sides.
Step 4: Sew the Legs
Finally, sew the legs to the bottom of the body. Place the legs where you want them to be and use pins to hold them in place. Sew the legs onto the body using the same sewing technique as before. Make sure the legs are firmly attached and evenly spaced.
Congratulations! You have successfully sewn Buddy the elf’s body parts together. Give your creation a gentle tug to ensure everything is securely attached and neatly aligned. Now you can add any additional details or accessories to personalize your Buddy the elf knitting project.
Finishing Touches: Embroidering Buddy’s Details
Completing your Buddy the Elf knitting project is an exciting moment, and adding the finishing touches with some embroidery will bring the character to life. With a few simple stitches, you can create the signature details that make Buddy recognizable and adorable.
To start, you’ll need some basic embroidery supplies, including embroidery floss in colors that match your yarn choices, an embroidery needle, and a pair of small scissors. Referencing a picture or a diagram of Buddy will help you achieve accurate placement and proportions for his features.
1. Embroidering the Eyes: Using a satin stitch or a series of small straight stitches, create Buddy’s bright and expressive eyes. Start by stitching the outline of each eye with black or dark brown floss, and then fill in the shape with white or cream floss.
2. Adding the Nose: Buddy’s nose is a prominent feature that can be easily embroidered using a simple satin stitch or a small triangle shape. Choose a red or pink floss that complements the other colors in your project and stitch the nose in the appropriate location on Buddy’s face.
3. Stitching the Mouth: Buddy’s wide grin is an important part of his cheerful expression. Use black or dark brown floss to create a smiling mouth shape, stitching small straight stitches or a backstitch along the line. Make sure to position the mouth in the center of Buddy’s face, just below his nose.
4. Detailing the Hair: Buddy’s wild and curly hair can be recreated using a combination of long and short straight stitches in a medium or dark brown shade. Experiment with different stitch lengths and directions to achieve a textured and voluminous look.
5. Finishing Touches: Once you have completed embroidering Buddy’s eyes, nose, mouth, and hair, step back and assess the overall appearance. Make any necessary adjustments or additions to ensure that the embroidered details enhance the overall character’s appearance and likeness to Buddy the Elf.
By taking the time to meticulously embroider these details, you’ll add an extra layer of charm and personality to your Buddy the Elf knitting project. Whether you plan to gift your creation or keep it as a cherished decoration, the embroidered features will make Buddy come alive and delight both children and adults alike.
Displaying and Caring for Your Finished Buddy
Congratulations on completing your Buddy the Elf knitting project! Now it’s time to display and care for your finished Buddy so that you can enjoy it for years to come.
To display your Buddy, you can place it on a shelf, a mantel, or even in a decorative basket. Buddy’s vibrant colors and playful expression will surely bring a touch of joy to any space. Consider positioning your Buddy near other holiday decorations or as a fun addition to any room all year round.
Caring for Your Buddy:
- Keep your Buddy away from direct sunlight, as this can fade the colors over time.
- To clean your Buddy, gently spot clean with a damp cloth and mild soap if necessary. Avoid submerging it in water.
- If your Buddy gets wrinkled or loses its shape, you can gently steam it or use a low heat iron with a pressing cloth to reshape the knitted parts.
- When not displaying your Buddy, store it in a cool, dry place to avoid any damage from humidity.
Remember to take care of your Buddy and enjoy the joy it brings to your home or as a gift to others. Knitting Buddy the Elf is a labor of love, and now you can proudly display and cherish your completed project.