
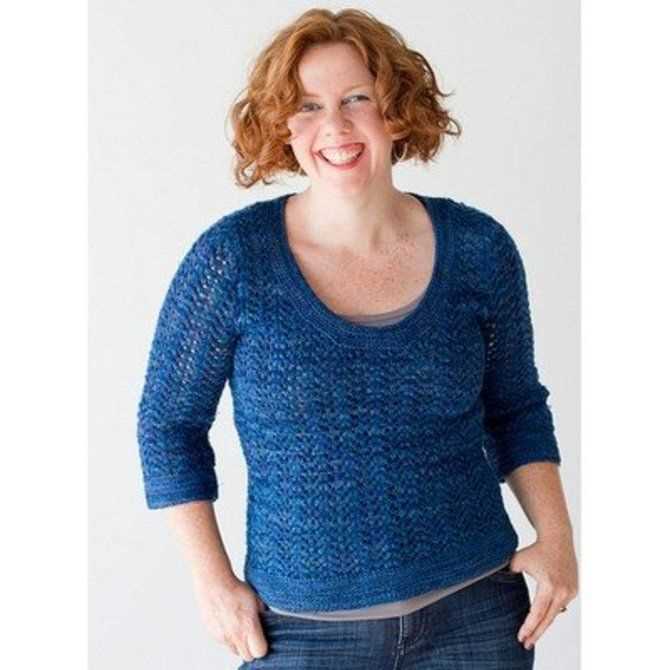
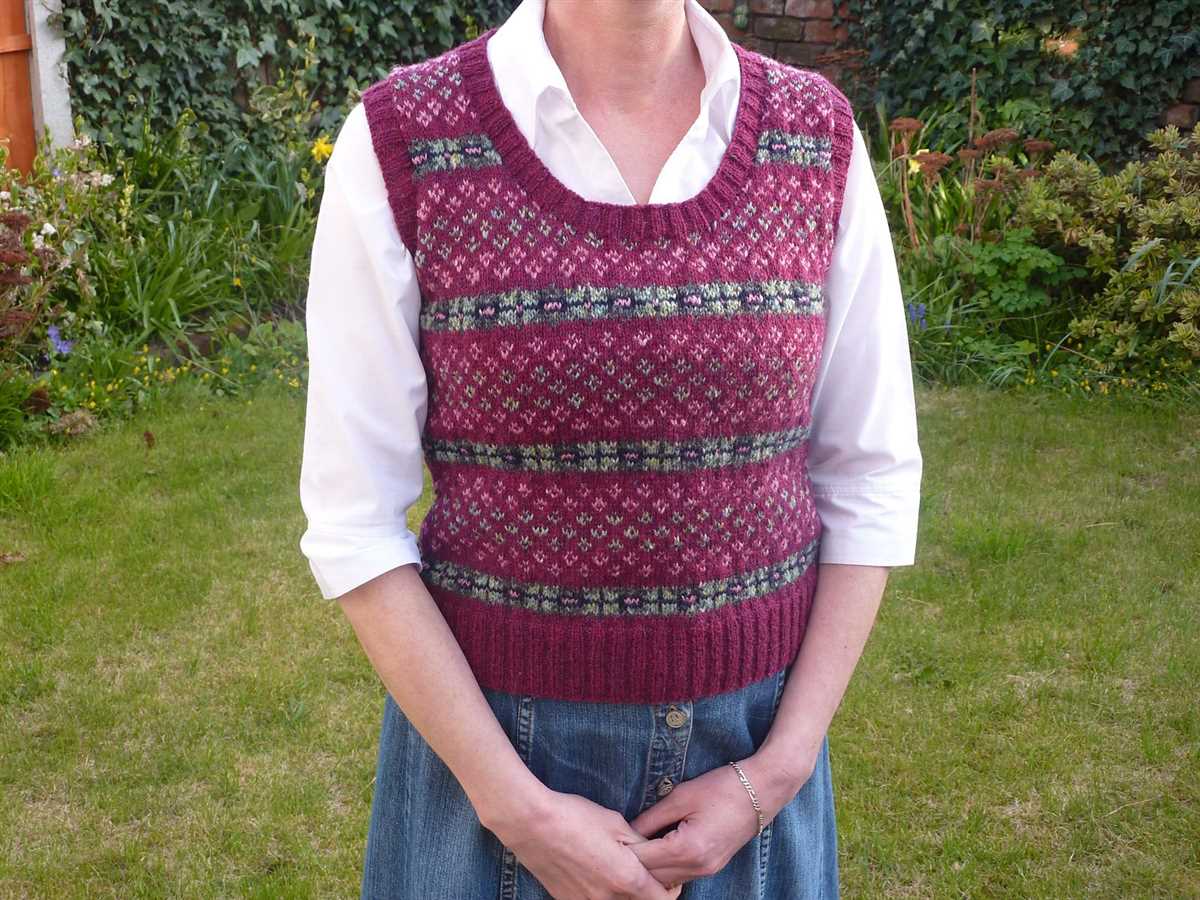
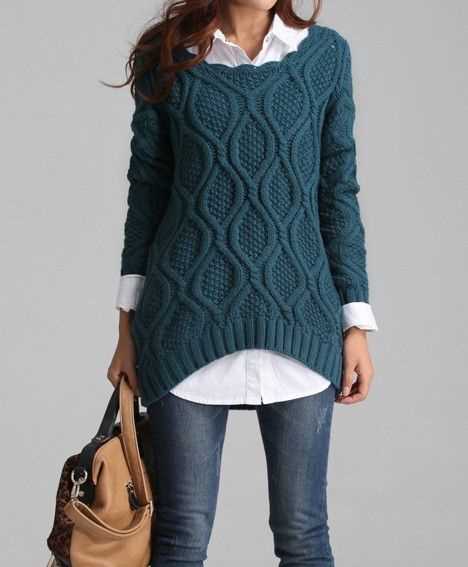
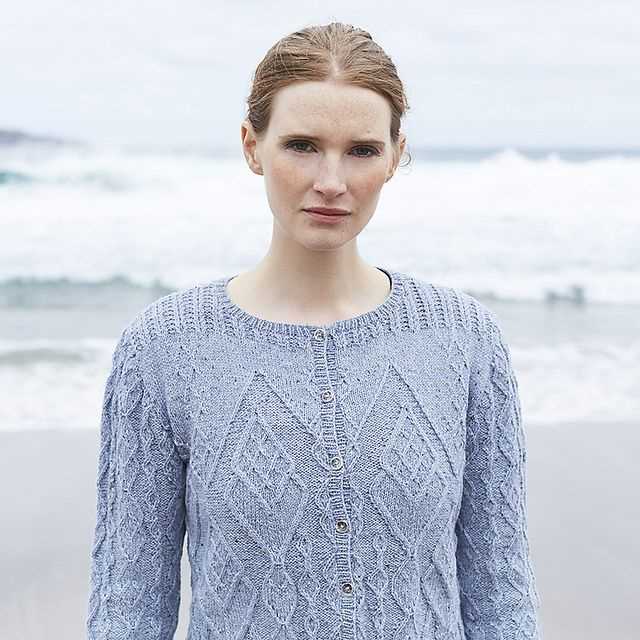
Are you looking for a new knitting project to keep you cozy this winter? Look no further than the scoop neck sweater knitting pattern. This stylish and versatile sweater is perfect for all skill levels, whether you’re a beginner or an advanced knitter.
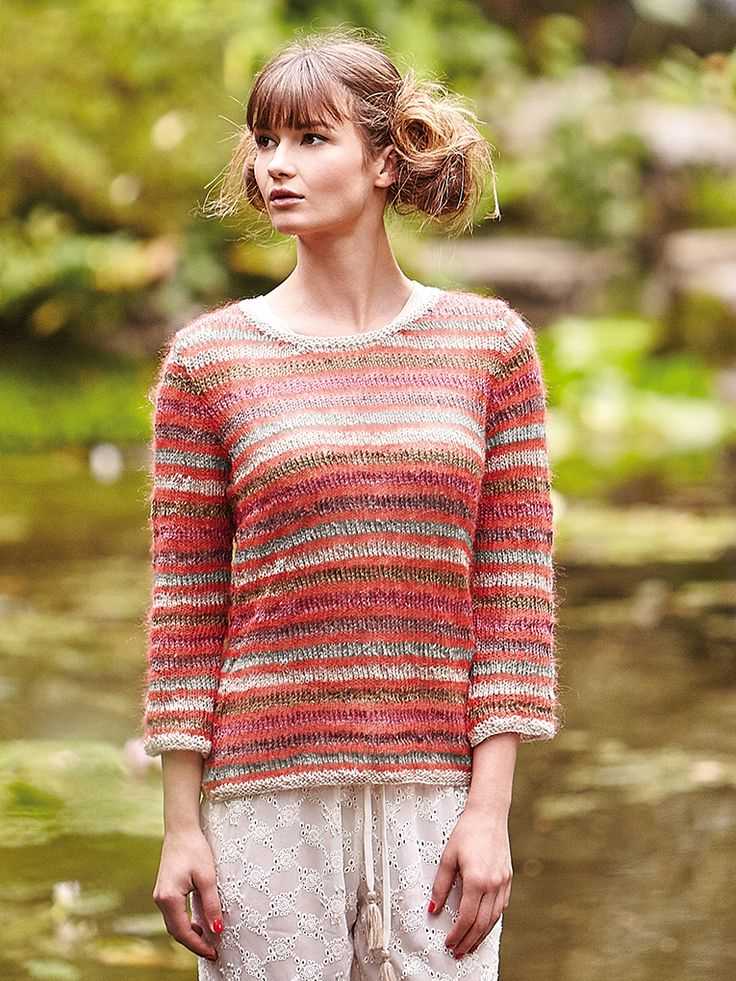
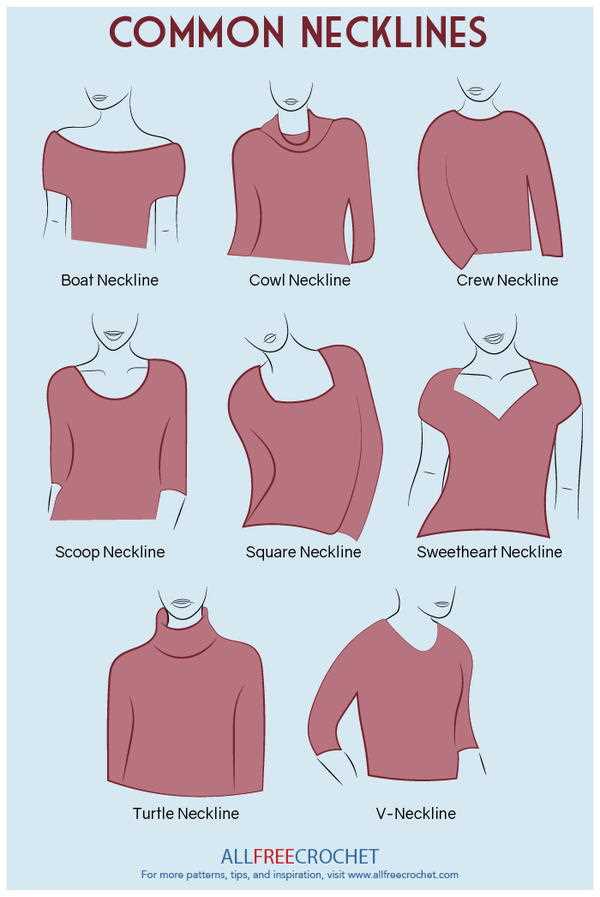
With its flattering scoop neckline and comfortable fit, this sweater is a wardrobe staple that can be dressed up or down for any occasion. Whether you’re heading to the office or lounging at home, this sweater is sure to keep you looking chic and feeling comfortable.
Knitting your own sweater is not only a fun and rewarding project, but it also allows you to create a piece that is truly unique to you. You can choose your favorite color and adjust the length and fit to suit your personal style. Plus, with the scoop neck design, you can show off your favorite statement necklace or scarf.
So grab your knitting needles and yarn, and let’s get started on creating your very own scoop neck sweater. Whether you’re a seasoned knitter or just starting out, this pattern is sure to become a favorite in your knitting collection.
Scoop Neck Sweater Knitting Pattern
Knitting a scoop neck sweater is a fun and rewarding project for any knitting enthusiast. With this pattern, you can create a stylish and comfortable sweater that will be perfect for any occasion.
To start, gather your materials. You will need a set of knitting needles, yarn in your desired color and weight, stitch markers, and a tapestry needle for weaving in ends.
Begin by casting on the required number of stitches for your size. Follow the pattern instructions for knitting the body of the sweater, working in your chosen stitch pattern. The scoop neck can be created by decreasing stitches gradually on both sides of the front piece.
Once the body is complete, you will move on to the sleeves. Follow the pattern instructions for knitting the sleeves, making any necessary increases or decreases to achieve the desired shape. Once the sleeves are complete, you can sew them onto the body of the sweater using your tapestry needle.
Finally, finish off your sweater by knitting the collar. This can be done by picking up stitches along the neckline and working in ribbing or another suitable stitch pattern. Make sure the collar is stretchy enough to fit comfortably over the head.
Your scoop neck sweater is now ready to be worn and enjoyed! Whether you choose to dress it up or down, this versatile garment will quickly become a staple in your wardrobe. Happy knitting!
Materials
To knit a scoop neck sweater, you will need the following materials:
- Yarn: Choose a yarn that is suitable for the sweater knitting pattern. Consider the weight and fiber content of the yarn, as well as the color you want for your sweater.
- Knitting Needles: Select the appropriate needle size for your chosen yarn. Check the knitting pattern for the recommended needle size.
- Tapestry Needle: This will be used for weaving in loose ends and sewing seams.
- Stitch Markers: These can be helpful for keeping track of specific sections or stitch patterns in the pattern.
- Scissors: You’ll need a pair of scissors for cutting yarn and trimming any excess.
- Measuring Tape: A measuring tape or ruler will be useful for checking your gauge and measuring the dimensions of the sweater.
- Buttons or Other Closure: If your scoop neck sweater has a button placket, you’ll need buttons or another type of closure to complete the garment.
- Optional Accessories: Depending on the pattern, you may also need additional materials such as ribbons, decorative buttons, or embellishments for finishing touches.
Make sure you gather all the necessary materials before starting your project. Having everything prepared will make the knitting process more enjoyable and efficient.
Choosing the Right Yarn

When knitting a scoop neck sweater, choosing the right yarn is essential to achieving the desired look and fit. The type of yarn you select will determine the drape and feel of your finished garment. Here are a few factors to consider when choosing yarn for your project:
- Fiber content: The fiber content of the yarn plays a significant role in determining the characteristics of the finished sweater. Different fibers have different properties, such as warmth, breathability, and elasticity. Wool, for example, is known for its warmth and elasticity, making it an excellent choice for a cozy winter sweater. Cotton, on the other hand, is lightweight and breathable, making it perfect for a summer sweater.
- Thickness: The thickness, or weight, of the yarn will impact the overall appearance and feel of your sweater. Thicker yarns tend to create a bulkier, more textured look, while thinner yarns create a more delicate and lightweight garment. It’s important to consider the pattern and style of the sweater when choosing the thickness of the yarn.
- Color: The color of the yarn can make a big difference in the overall aesthetic of your sweater. Solid colors are classic and timeless, while variegated or self-striping yarns can add visual interest and depth to your project. Consider the color palette that complements your skin tone and personal style when selecting yarn for your scoop neck sweater.
- Care instructions: It’s important to consider the care instructions of the yarn before making your final selection. Some yarns require delicate handling, such as hand washing or dry cleaning, while others can be machine washed and dried. Make sure to choose a yarn that aligns with your preferred care routine to ensure that your sweater remains in good condition for years to come.
By taking these factors into consideration and selecting the right yarn for your scoop neck sweater, you can ensure that your finished garment is both comfortable and stylish!
Selecting the Correct Needles
When knitting a scoop neck sweater, selecting the correct needles is crucial to ensure the desired outcome. The needles you choose will determine the size, tension, and overall appearance of your finished garment. Here are some factors to consider when selecting your needles:
1. Gauge:
One of the most important factors in selecting the correct needles for your scoop neck sweater is achieving the correct gauge. Gauge refers to the number of stitches and rows per inch in your knitting. To determine your gauge, follow the pattern’s instructions and knit a swatch using the recommended needle size. If your swatch matches the pattern’s gauge, then you have selected the correct needle size. If not, adjust your needle size accordingly to achieve the correct gauge.
2. Needle Material:
The material of your needles can also impact your knitting. Different materials have varying levels of grip and smoothness. Common needle materials include aluminum, bamboo, wood, and plastic. Aluminum needles tend to be slick and provide little resistance, which can be helpful for knitters who prefer faster knitting. On the other hand, bamboo and wood needles have more grip, making them ideal for slippery yarns or for knitters who prefer more control. Consider your personal preference and the characteristics of your yarn when selecting the needle material.
3. Needle Length:
The length of your needles can also affect your knitting experience. When knitting a scoop neck sweater, you will need a longer needle length to accommodate the width of the garment. Generally, circular needles with a length of 32 inches or longer are recommended. This allows you to comfortably knit the front and back of the sweater without crowding the stitches. Ensure that your chosen needle length is suitable for the size of your sweater and provides enough space for all your stitches.
By considering the gauge, needle material, and needle length, you can select the correct needles for your scoop neck sweater knitting project. Taking the time to choose the appropriate needles will result in a well-fitting and professional-looking garment that you can be proud of.
Gauge Swatch
A gauge swatch is an essential step in any knitting project, including a scoop neck sweater. It allows you to determine the correct tension and ensure that your finished garment will fit properly. The gauge is the number of stitches and rows per inch in a knitted fabric, and it can vary depending on the yarn weight, needle size, and your personal knitting style.
To create a gauge swatch for your scoop neck sweater, start by selecting the yarn and needle size recommended in the knitting pattern. Cast on a sufficient number of stitches to create a 4×4 inch square, typically between 20-30 stitches. Knit a few rows in a simple stitch pattern, such as garter stitch or stockinette, ensuring that your tension is consistent throughout.
Measuring the Gauge

- Once you have completed your gauge swatch, lay it flat on a table or other smooth surface.
- Using a ruler or a gauge ruler, measure the number of stitches and rows within a 1-inch section of your swatch.
- Compare these measurements to the gauge specified in the knitting pattern.
- If your gauge matches the pattern, you can proceed with confidence knowing that your sweater will have the correct dimensions.
- If your gauge is too loose, meaning you have fewer stitches or rows per inch than the pattern, you will need to switch to smaller needles to achieve the correct tension.
- If your gauge is too tight, meaning you have more stitches or rows per inch than the pattern, you will need to switch to larger needles.
- Continue making adjustments to your needle size and knitting tension until your gauge matches the pattern.
Remember, taking the time to create a gauge swatch can save you a lot of frustration and disappointment in the end. It ensures that your scoop neck sweater will fit properly and look as stunning as you imagined.
Casting On
Before starting any knitting project, you need to cast on your stitches. Casting on is the process of adding the first row of stitches to your knitting needles. There are different casting on methods that you can choose from, depending on the type of project and the desired outcome.
One popular casting on method for a scoop neck sweater is the long-tail cast on. This method creates a neat and flexible edge, perfect for the neckline of your sweater. To begin, measure a tail of yarn that is approximately three times the width of your finished piece. Make a slip knot on your needle, leaving a long tail of yarn.
The next step is to knit the first stitch using both the tail and working yarn. This will create a secure edge and prevent any gaps from forming. After knitting the first stitch, continue casting on by working the desired number of stitches using the working yarn only. Once you have cast on all your stitches, you can begin working the rest of your scoop neck sweater pattern.
Knitting the Body
Once you have completed the ribbing for the neckline, it’s time to move on to knitting the body of the scoop neck sweater. This is where you will start to see your project take shape and begin to resemble the garment you envision.
Row 1: Begin by knitting the first stitch of row 1, and then continue in the stitch pattern as established for the ribbing. This may involve knitting in stockinette stitch, using a combination of knit and purl stitches, or following a specific stitch pattern for the design you have chosen.
As you work row by row, it’s important to pay attention to any shaping or stitch pattern changes that may be required. This could involve increasing or decreasing stitches at certain points to create a more fitted or flared shape, or following a specific pattern for cables or lacework.
Note: Make sure to consult the sweater pattern you are using for any specific instructions or stitch pattern details for the body.
- Continue knitting row by row, following the pattern instructions and maintaining the established stitch pattern.
- Keep track of your progress by counting rows or using stitch markers to indicate important points in the pattern.
- Check your gauge periodically to ensure that your tension remains consistent throughout the body of the sweater.
- If necessary, make any necessary adjustments to your stitch count or tension to ensure that the sweater fits properly.
The body of the scoop neck sweater is often the longest section to knit, so it’s important to stay focused and maintain your rhythm as you work. Take breaks as needed, but try to keep a steady pace to ensure consistent progress. As you near the end of the body, you can start getting excited to move on to the next step: knitting the sleeves!
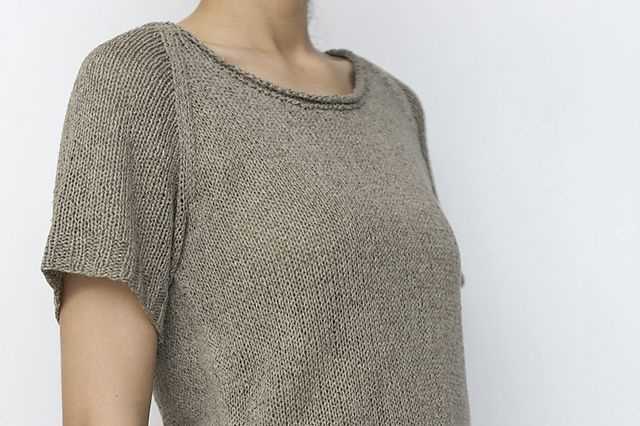
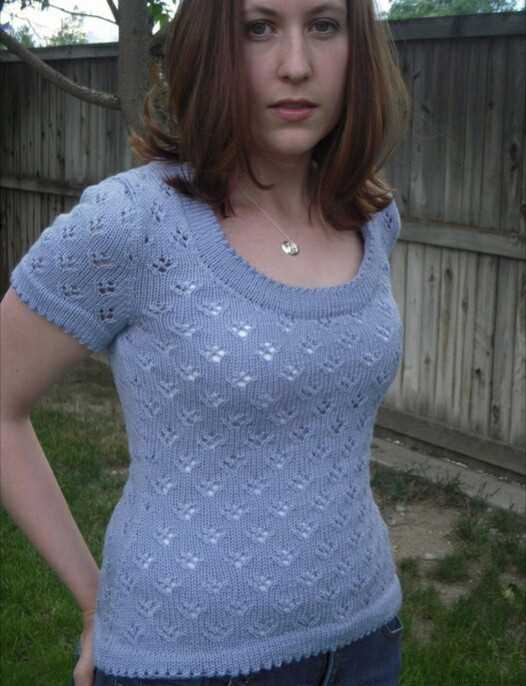
Creating the Scoop Neck
One of the key elements of a scoop neck sweater is, of course, the scoop neck itself. The scoop neck is a flattering and versatile neckline that can be created in a variety of ways. In this knitting pattern, we will be using a simple ribbing technique to create the scoop neck.
To start, cast on the required number of stitches for your size using the specified yarn and needle size. Begin knitting the body of the sweater in the specified stitch pattern until you reach the point where you want to create the scoop neck. This is usually around the neckline area.
To create the scoop neck, you will need to decrease the number of stitches gradually. This can be done by knitting two stitches together or by using a more decorative decrease such as a centered double decrease. Follow the knitting pattern instructions for the specific decrease method to use and the number of stitches to decrease.
Once you have decreased the required number of stitches, continue knitting the body of the sweater as instructed. The scoop neck should start to take shape and become more defined as you progress. If desired, you can further enhance the scoop neck by adding a border or edging in a contrasting color or stitch pattern.
Finally, when you have completed the body of the sweater and finished any additional details, bind off the remaining stitches at the neck edge. You can then proceed to complete the rest of the sweater, such as sewing the side seams, adding sleeves, and finishing any ribbing or edging.
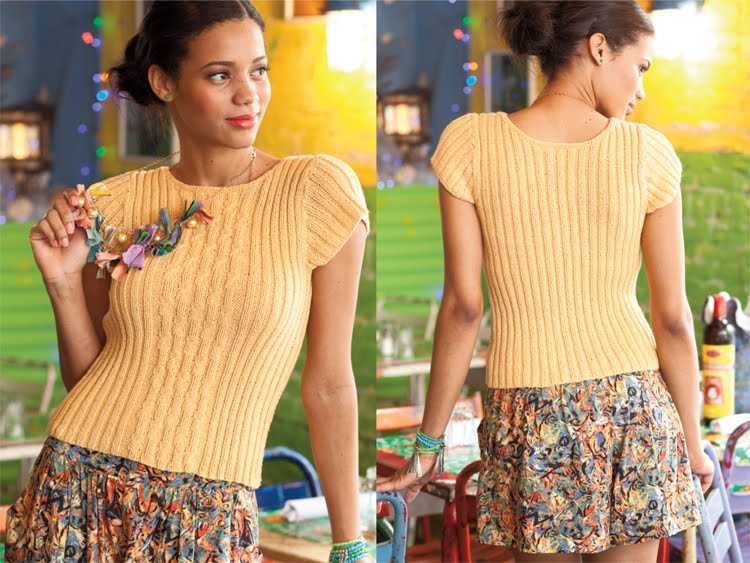
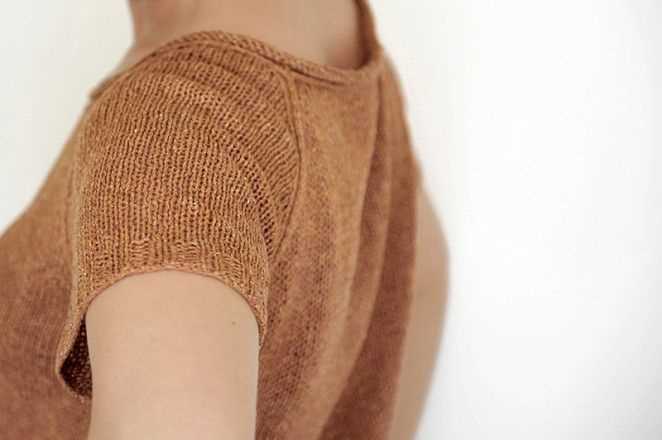
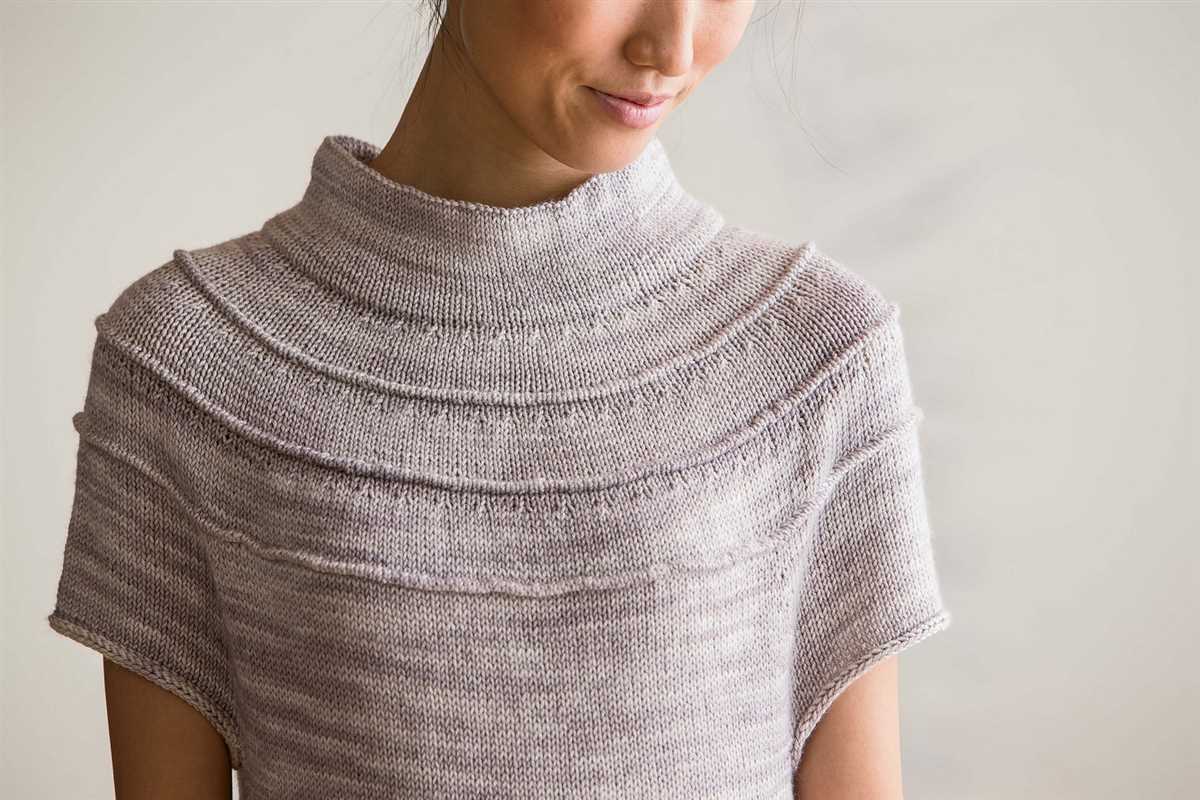
Shaping the Shoulders
When knitting a scoop neck sweater, it is important to pay attention to shaping the shoulders to ensure a good fit. The shoulder shaping is done using decreases to create a sloping transition from the body of the sweater to the shoulders.
To shape the shoulders, you can use various decrease methods such as knit two together (K2tog) or slip slip knit (SSK) to decrease stitches evenly across the shoulder section. It is important to follow the pattern instructions carefully to determine the number of stitches to decrease and the specific decrease method to use. This will ensure that the shaping is done evenly on both sides of the sweater.
Typically, the shoulder shaping is done over several rows, gradually decreasing the number of stitches. This creates a smooth, sloping line that allows the sweater to sit comfortably on the shoulders. The exact number of rows and decreases will vary depending on the size of the sweater and the specific pattern instructions.
When shaping the shoulders, it is important to keep track of the decreases and make sure they align with the pattern instructions. Using stitch markers can be helpful to mark the beginning and end of the shoulder shaping section. This will make it easier to keep track of where the decreases should be made.
Once the shoulder shaping is complete, you can continue knitting the rest of the sweater according to the pattern instructions. The shaped shoulders will provide a better fit and ensure that the scoop neck sweater sits nicely on your shoulders.
Knitting the Sleeves
Once you have finished knitting the body of your scoop neck sweater, it’s time to move on to the sleeves. Knitting the sleeves is an important step in completing your sweater and adding a beautiful finishing touch.
To begin, you will need to pick up stitches along the armhole edge. Using double-pointed needles or a circular needle, start picking up stitches from one side of the armhole. Make sure to evenly space the stitches to ensure a smooth and symmetrical sleeve.
Tip: If you are new to knitting sleeves, it may be helpful to place some stitch markers along the armhole edge. This will help you keep track of your stitch count and ensure you are picking up the correct number of stitches.
Once you have picked up all the required stitches, you can start knitting the sleeves in the desired pattern. Follow the instructions of the scoop neck sweater knitting pattern for the specific stitch pattern and shaping details.
Tip: If you want your sleeves to have a tapered fit, you can gradually decrease the number of stitches as you knit up the sleeves. This will create a more fitted look and prevent the sleeves from being too baggy.
Continue knitting the sleeves until you reach the desired length. Make sure to periodically try on the sweater to ensure the sleeves fit well and are the right length for you. Once you are satisfied with the length, bind off your stitches and weave in any loose ends.
Tip: If you want to add a decorative touch to your sleeves, you can consider adding ribbing or a different stitch pattern at the cuff. This will add some visual interest to your sweater and make it even more unique.
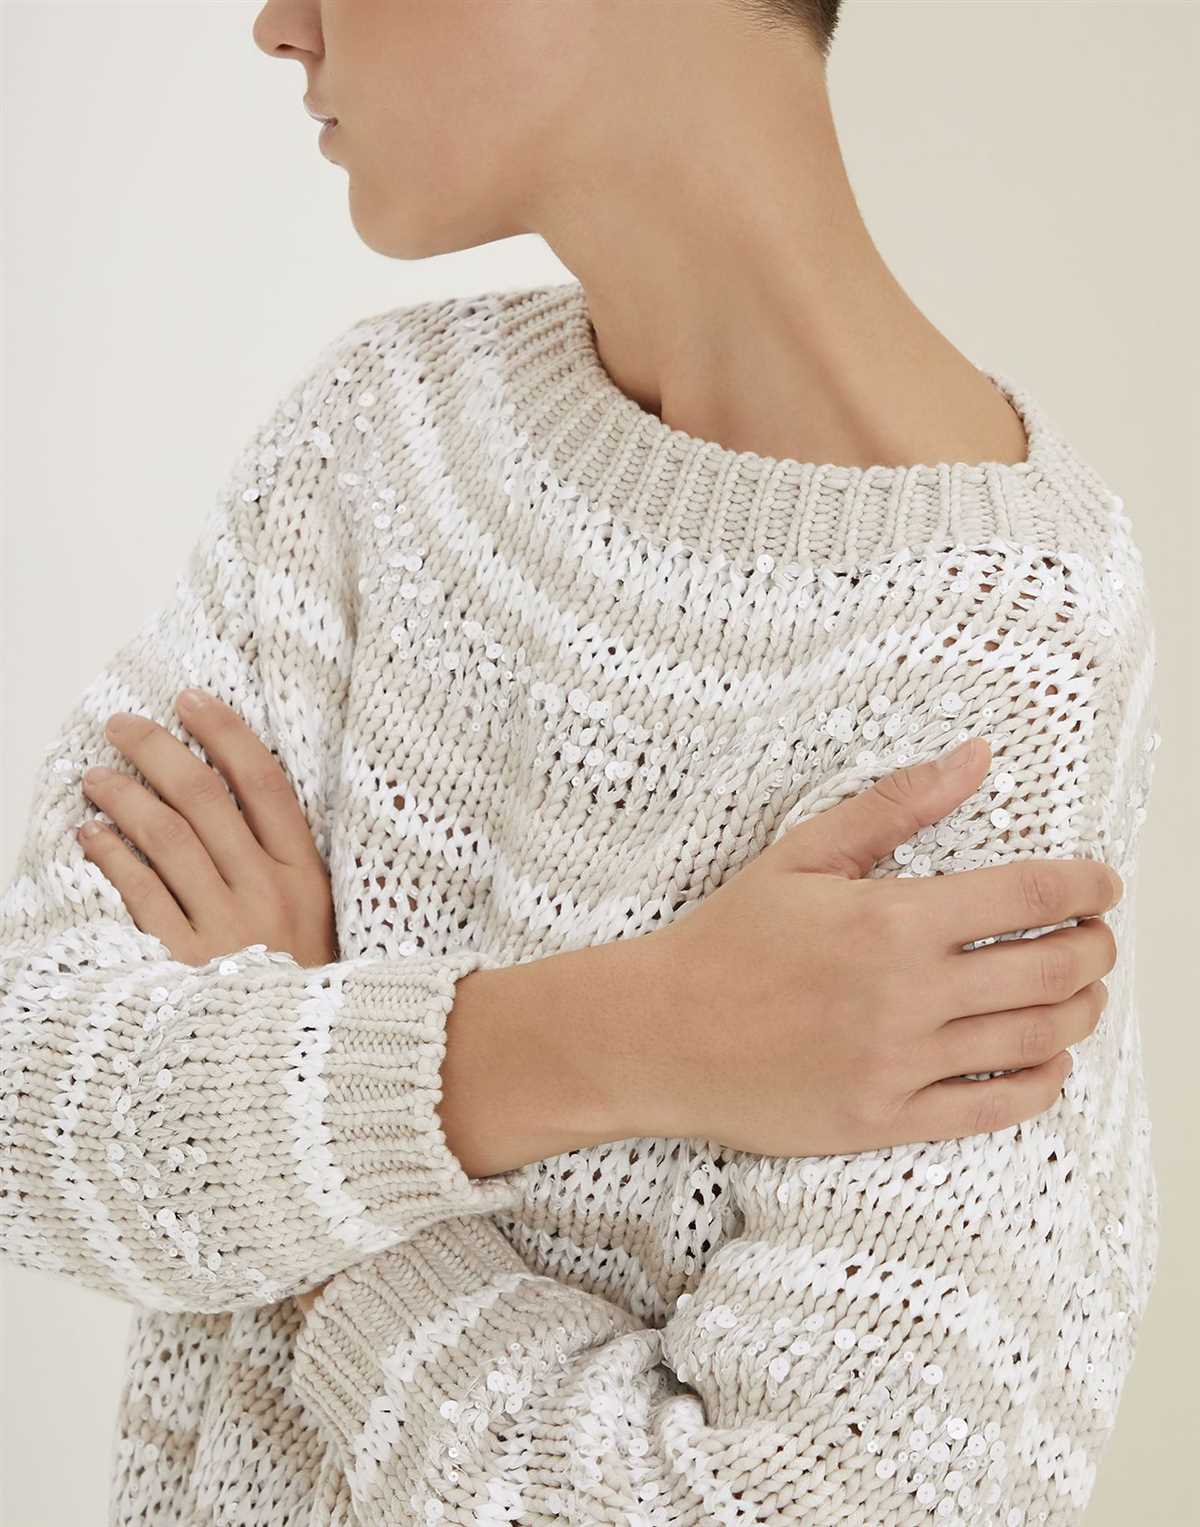
Finishing Touches
Once you have completed knitting your scoop neck sweater, it’s time to add the finishing touches to make it truly special. These small details can elevate your sweater from a simple knit to a fashionable statement piece.
First, consider blocking your sweater. Blocking is the process of wetting your knitted piece and gently stretching it into shape to even out any inconsistencies in tension and give it a polished look. To block your sweater, fill a basin with lukewarm water and a mild detergent. Immerse your sweater in the water, gently squeezing out any air bubbles. Let it soak for about 15 minutes, then carefully remove it and gently press out the excess water without wringing. Lay your sweater flat on a clean towel, shaping it as desired, and let it dry completely.
Next, you can add ribbing to the neckline, cuffs, and hem of your scoop neck sweater. Ribbing is a common finishing technique that gives your sweater a more structured and finished look. To add ribbing, switch to a smaller-sized needle and work a few rounds of knit and purl stitches in a ribbing pattern (such as k2, p2) around the desired edges. This will create elasticity and help your sweater retain its shape.
Another finishing touch you can consider is adding buttons or other closures to your sweater. This allows you to customize the look of your sweater and add a personal touch. Choose buttons that complement the color and style of your sweater, and carefully sew them on using a matching thread. Alternatively, you can use other types of closures such as toggles, snaps, or even a zipper, depending on your preference.
Finally, don’t forget to weave in any loose ends of yarn from your knitting. Use a blunt tapestry needle to carefully thread the ends through the stitches on the wrong side of your sweater, securing them in place. This will ensure that your sweater looks neat and professional.
By taking the time to add these finishing touches to your scoop neck sweater, you can create a beautifully crafted garment that you will be proud to wear. Enjoy the process of adding these final details and admire the finished result of your hard work and creativity.
Tips and Tricks

Knitting a scoop neck sweater can be a fun and rewarding project. To help you along the way, here are some tips and tricks to consider:
- Choose the right yarn: When selecting yarn for your sweater, consider the fiber content, weight, and drape. Look for a yarn that will provide the desired level of warmth and comfort.
- Check your gauge: Before you start knitting, it’s important to check your gauge to ensure your sweater will fit correctly. Adjust your needle size if necessary to match the gauge specified in the pattern.
- Understand the pattern: Take the time to read and understand the pattern before you begin. Make sure you are familiar with any special stitches or techniques required, and double-check the sizing and shaping instructions.
- Use stitch markers: Stitch markers can be a helpful tool for keeping track of stitch patterns or increases and decreases. Place them at regular intervals or as instructed in the pattern to make your knitting easier.
- Seam carefully: If your sweater requires seaming, take your time to sew the seams neatly and securely. Use a mattress stitch or a method recommended in the pattern to achieve a professional-looking finish.
- Add customizations: Don’t be afraid to make the pattern your own by adding customizations. You could experiment with different stitch patterns, add stripes or colorwork, or incorporate a unique detail like a lace panel.
- Block your sweater: After completing your sweater, block it to give it a polished look. Blocking can help even out the stitches, relax the fibers, and give your sweater a neat and smooth finish.
With these tips and tricks in mind, you’ll be well-equipped to tackle your scoop neck sweater knitting project. Enjoy the process and have fun creating a beautiful and cozy garment!