
Knitting has become an increasingly popular hobby in recent years. Many people enjoy the relaxing and creative process of crafting their own garments and accessories. However, knitting can also be used to create intricate and detailed works of art, such as knitted village patterns. These patterns allow knitters to create miniature villages, complete with houses, shops, and even tiny inhabitants.
The art of knitted village patterns has its roots in the traditional craft of miniatures. Knitters would often create small dolls and toys out of yarn, and the idea of making an entire village eventually evolved from there. Today, there are countless different patterns and designs available for knitters who want to try their hand at creating their own knitted village.
One of the reasons why knitted village patterns have become so popular is that they offer knitters a chance to showcase their creativity and imagination. Each village can be customized to suit the knitter’s tastes and preferences, and the possibilities are truly endless. Some knitters choose to recreate real-life villages, while others prefer to create their own fictional villages filled with whimsical characters and landmarks.
Knitted Village Patterns: Create Your Own Miniature World
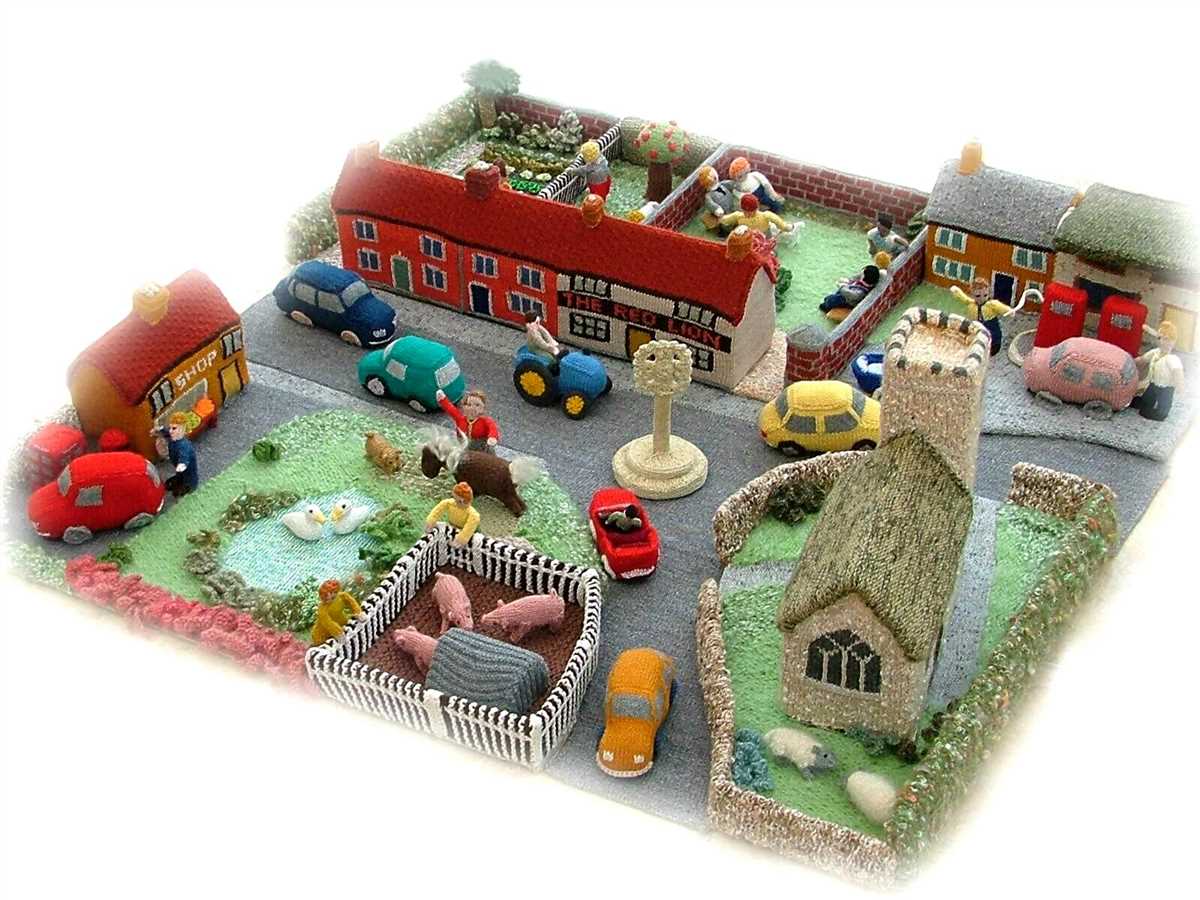
Knitting is not only a great way to relax and express your creativity, but it can also be a way to create an entire miniature world. With knitted village patterns, you can bring to life a charming and detailed village scene, complete with houses, trees, and even tiny knitted villagers. Whether you’re a seasoned knitter or just starting out, creating your own knitted village can be a fun and rewarding project.
How to Get Started
To get started, you’ll need to find a knitted village pattern that suits your skill level and preferences. There are many patterns available online, ranging from simple and beginner-friendly to more complex and intricate designs. Look for patterns that include instructions for various elements of the village, such as houses, animals, and decorations.
Choosing Your Yarn and Needles
Once you have your pattern, it’s time to choose your yarn and needles. The type of yarn you choose will depend on the size and texture you want for your village. Thicker yarns will create larger, chunkier houses, while thinner yarns will create more delicate and detailed designs. As for needles, choose a size that will create the desired tension for your project.
Knitting Your Village
Once you have your pattern, yarn, and needles, it’s time to start knitting your village. Follow the pattern instructions carefully, paying attention to stitch counts and shaping details. As you knit each element of the village, you’ll start to see your miniature world come to life. Take your time and enjoy the process of creating each tiny detail.
Adding the Finishing Touches
Once you have knitted all the elements of your village, it’s time to add the finishing touches. This can include sewing on windows and doors, adding decorations like flowers or Christmas lights, and even creating small accessories for your knitted villagers. Let your creativity shine as you bring the final touches to your miniature world.
Displaying Your Knitted Village
Once your knitted village is complete, you may be wondering how to display it. There are many options, from creating a dedicated display shelf or table to incorporating it into your existing home decor. Some knitters even create themed scenes, such as a winter wonderland or a quaint summer village. Whatever you choose, be sure to find a way to proudly showcase your hard work and create a cozy and inviting atmosphere in your home.
What are knitted village patterns
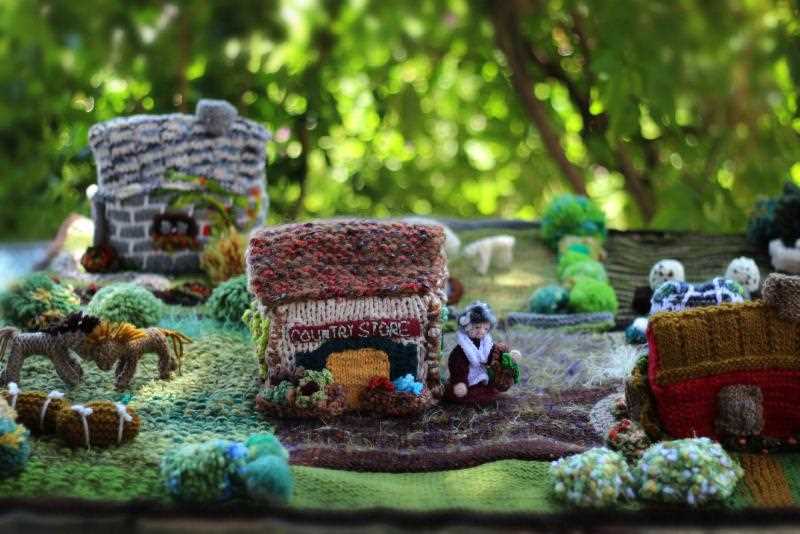
Knitted village patterns are a unique and creative way to bring a touch of coziness and charm to your home. These patterns involve knitting miniature houses, shops, and other buildings that can be used as decorations or even as a playset for children. The patterns typically include detailed instructions on how to create each building, as well as suggestions for customizing them with different colors and embellishments.
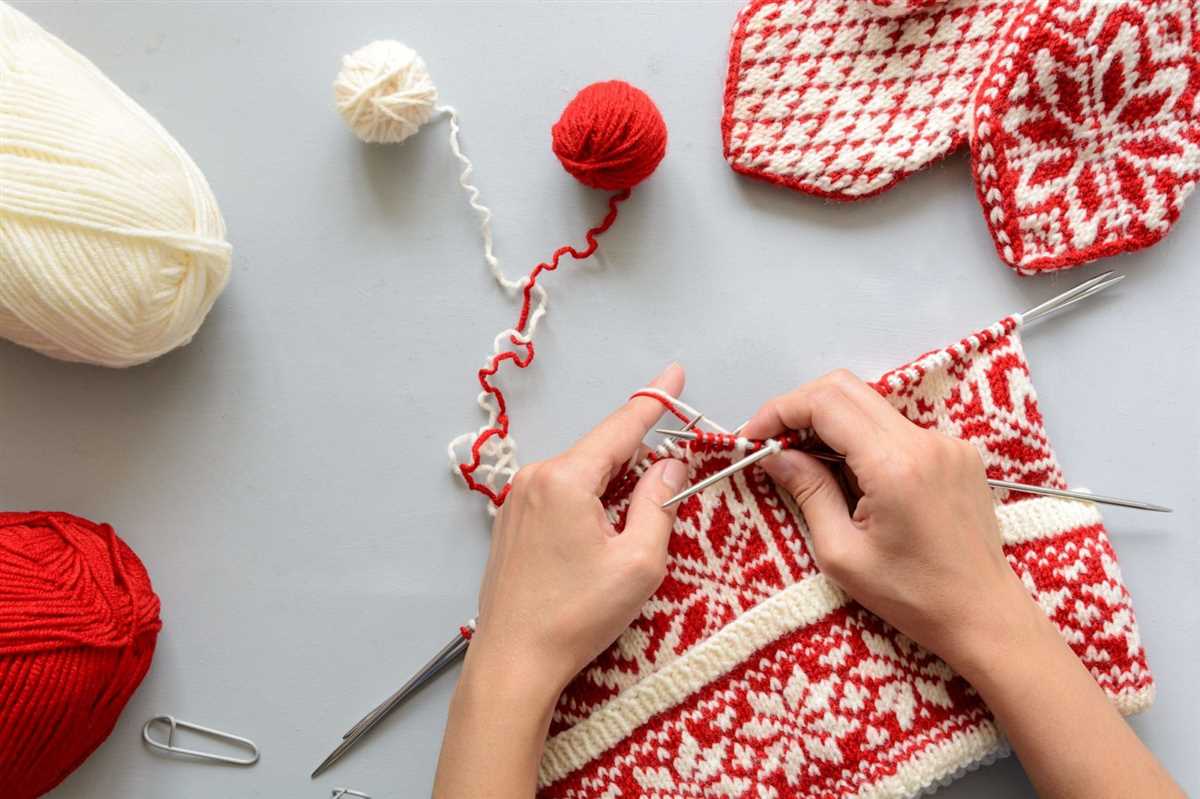
One of the main advantages of knitted village patterns is that they allow you to showcase your knitting skills while creating something truly special. Knitting a miniature village requires a certain level of precision and attention to detail, making it a great project for experienced knitters who are looking for a challenge. The patterns often include techniques such as colorwork, lace knitting, and embroidery, allowing you to expand your knitting repertoire.
When it comes to choosing knitted village patterns, there are plenty of options to suit different tastes and preferences. Some patterns focus on creating traditional village scenes with cottages, churches, and gardens, while others offer more whimsical designs, such as fairy tale-inspired houses or colorful village shops. Whether you prefer a rustic countryside look or a vibrant and playful aesthetic, there is a knitted village pattern out there that will capture your imagination.
Some popular knitted village patterns include:
- A cozy village with snow-covered houses and a quaint town square
- A seaside village with knitted beach huts and a sandy shoreline
- A fantasy village with whimsical mushroom houses and magical creatures
With knitted village patterns, you can create your own little world, filled with charming buildings and endless creative possibilities. Whether you display them on a mantelpiece, use them as part of a holiday centerpiece, or give them as gifts to loved ones, these knitted villages are sure to bring joy and warmth to any space.
History of Knitted Villages
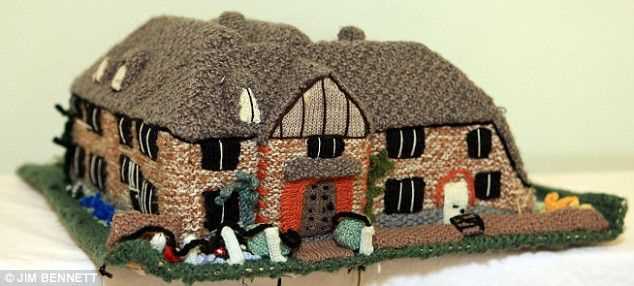
The tradition of knitted villages has a rich history that dates back centuries. This unique craft originated in Europe, particularly in countries such as England, Scotland, and the Netherlands. Knitted villages were created as a way for communities to showcase their knitting skills and to create intricate, detailed miniature replicas of their local villages.
One of the early examples of knitted villages can be traced back to the 1600s in the Netherlands. These knitted villages were often made by women in rural communities as a form of entertainment and creativity during the long winter months. The villages were meticulously crafted, with every detail of the buildings, landscapes, and even the people, knitted with precision and care.
The art of knitting villages spread to other parts of Europe during the 18th and 19th centuries. In England, knitting villages became particularly popular in the northern regions, where knitting was already a common pastime. Women in these communities would come together and knit intricate pieces that were then assembled into village scenes. These knitted villages became prized possessions, often displayed in homes as a symbol of craftsmanship and community pride.
As the industrial revolution took hold in the 19th century, the popularity of knitting villages began to decline. The rise of mass production and the availability of factory-made goods made traditional crafts like knitting less economically viable. However, in recent years, there has been a revival of interest in knitted villages as a form of art and nostalgia.
Today, knitted villages continue to be created and cherished by individuals and communities who appreciate the skill and creativity required to bring these miniature worlds to life. Knitters from around the world are inspired by the intricate details and craftsmanship of the past, and they continue to create their own unique versions of knitted villages.
Benefits of knitting your own village
Knitting your own village can bring a multitude of benefits, both for your personal enjoyment and for the community. Whether you are an experienced knitter or just starting out, creating a knitted village can be a fulfilling and rewarding project. Here are some of the benefits you can experience:
1. Creativity and self-expression
Knitting your own village allows you to unleash your creativity and express yourself in a unique way. You have the freedom to design and create your own buildings, roads, and landscapes, giving each piece a personal touch. From choosing color combinations to adding intricate details, every village you create becomes a reflection of your own creativity.
2. Stress relief and relaxation
Knitting has long been known to have therapeutic benefits, helping to reduce stress and promote relaxation. While knitting your own village, you can immerse yourself in the repetitive motions of knitting, allowing your mind to unwind and focus on the present moment. The rhythmic nature of knitting can be calming and meditative, providing a much-needed break from the fast-paced modern life.
3. Sense of accomplishment
Completing a knitted village can give you a great sense of accomplishment. Seeing all the pieces come together and witnessing the transformation of a few balls of yarn into a charming village is incredibly satisfying. As you progress through your knitting project, you can set goals and milestones, giving you a sense of purpose and achievement at each stage. With each building or tree you finish, you will feel a burst of pride and joy.
4. Community engagement
Knitted villages often become community projects, bringing people together and fostering a sense of belonging. You can organize knitting circles or workshops where people can come together to knit their own village pieces, share tips and techniques, and connect with like-minded individuals. The finished knitted village can then be displayed in a public space, becoming a focal point for community engagement and a source of pride for the participants.
So, whether you are looking for a creative outlet, stress relief, a sense of accomplishment, or a way to connect with others, knitting your own village can be a wonderful and fulfilling endeavor.
Materials needed for knitted villages
Creating a knitted village requires a variety of materials to bring the charming miniature world to life. From cozy houses and colorful gardens to bustling streets and quaint shops, knitted villages are a delightful project that can be enjoyed by knitters of all skill levels. Here is a list of materials needed to get started on your own knitted village:
1. Yarn:
Yarn is the primary material for knitting the different elements of a knitted village. Choose a variety of colors and textures to create unique and interesting buildings, animals, and people. Worsted weight yarn is commonly used for this type of project, but you can experiment with different yarn weights to achieve different effects.
2. Knitting Needles:

A set of knitting needles is essential for working with the yarn and creating the different pieces of the knitted village. Choose the appropriate needle size for the yarn you are using, typically between US size 6 and 8 for worsted weight yarn.
3. Knitting Patterns:
Having a collection of knitting patterns specifically designed for knitted villages is helpful for getting started. These patterns provide step-by-step instructions for creating different elements of the village, such as houses, trees, and people. They often include pictures and diagrams to make the process easier.
4. Stuffing:
To give the knitted elements of the village structure and shape, stuffing is required. Polyfill or other soft materials can be used to stuff the houses, animals, and other objects, making them three-dimensional and realistic.
5. Embroidery Thread:
Embroidery thread is used for adding details and features to the knitted elements. You can use different colors of embroidery thread to create windows, doors, faces, and other intricate details that bring the village to life.
- 6. Scissors
- 7. Tapestry Needle
- 8. Sewing Pins
- 9. Buttons and Beads
- 10. Optional Accessories: If you want to add extra elements to your knitted village, consider including small accessories such as tiny felt flowers, miniature flags, or street signs. These details can enhance the overall appearance and make your village even more charming.
With these materials in hand, you’ll be well-prepared to embark on the delightful journey of creating your own knitted village.
Different styles and themes for knitted villages
Knitted villages offer a charming and unique way to create miniature worlds that can be displayed and enjoyed. There are many different styles and themes that can be explored when it comes to creating knitted villages, allowing crafters to bring their imagination to life.
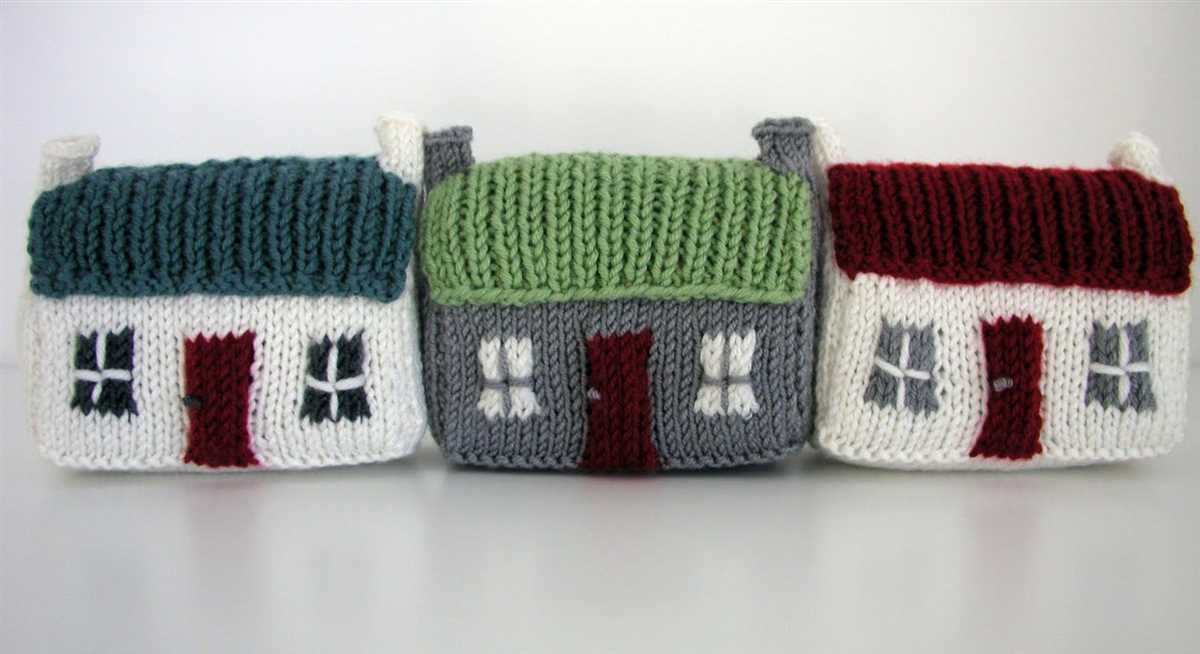
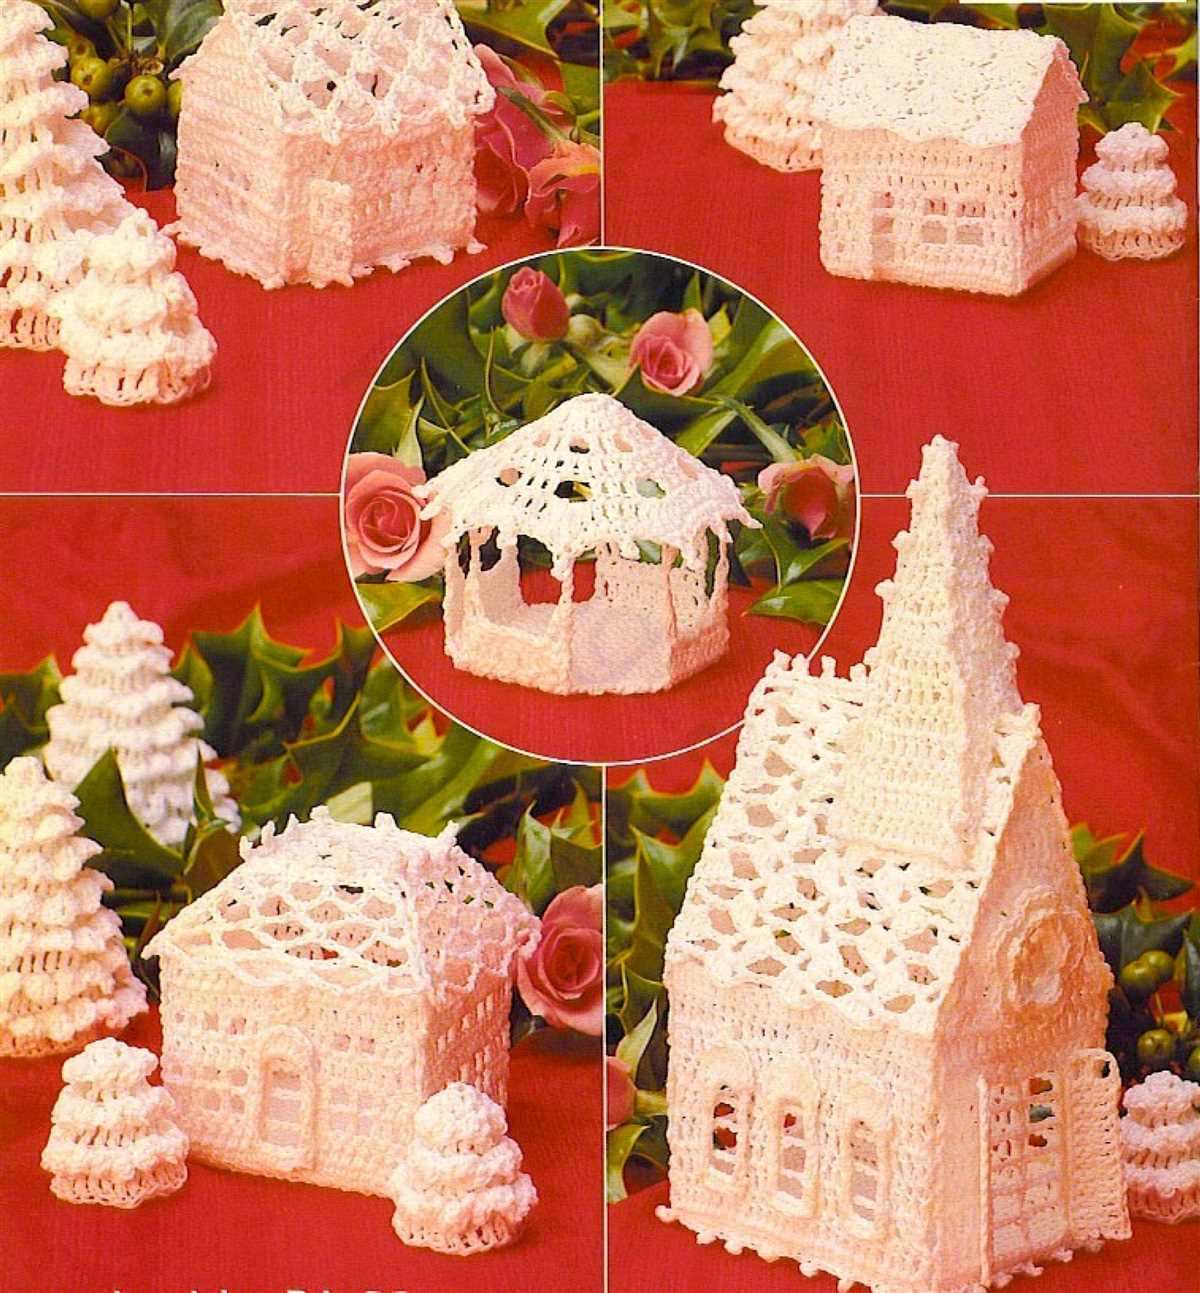
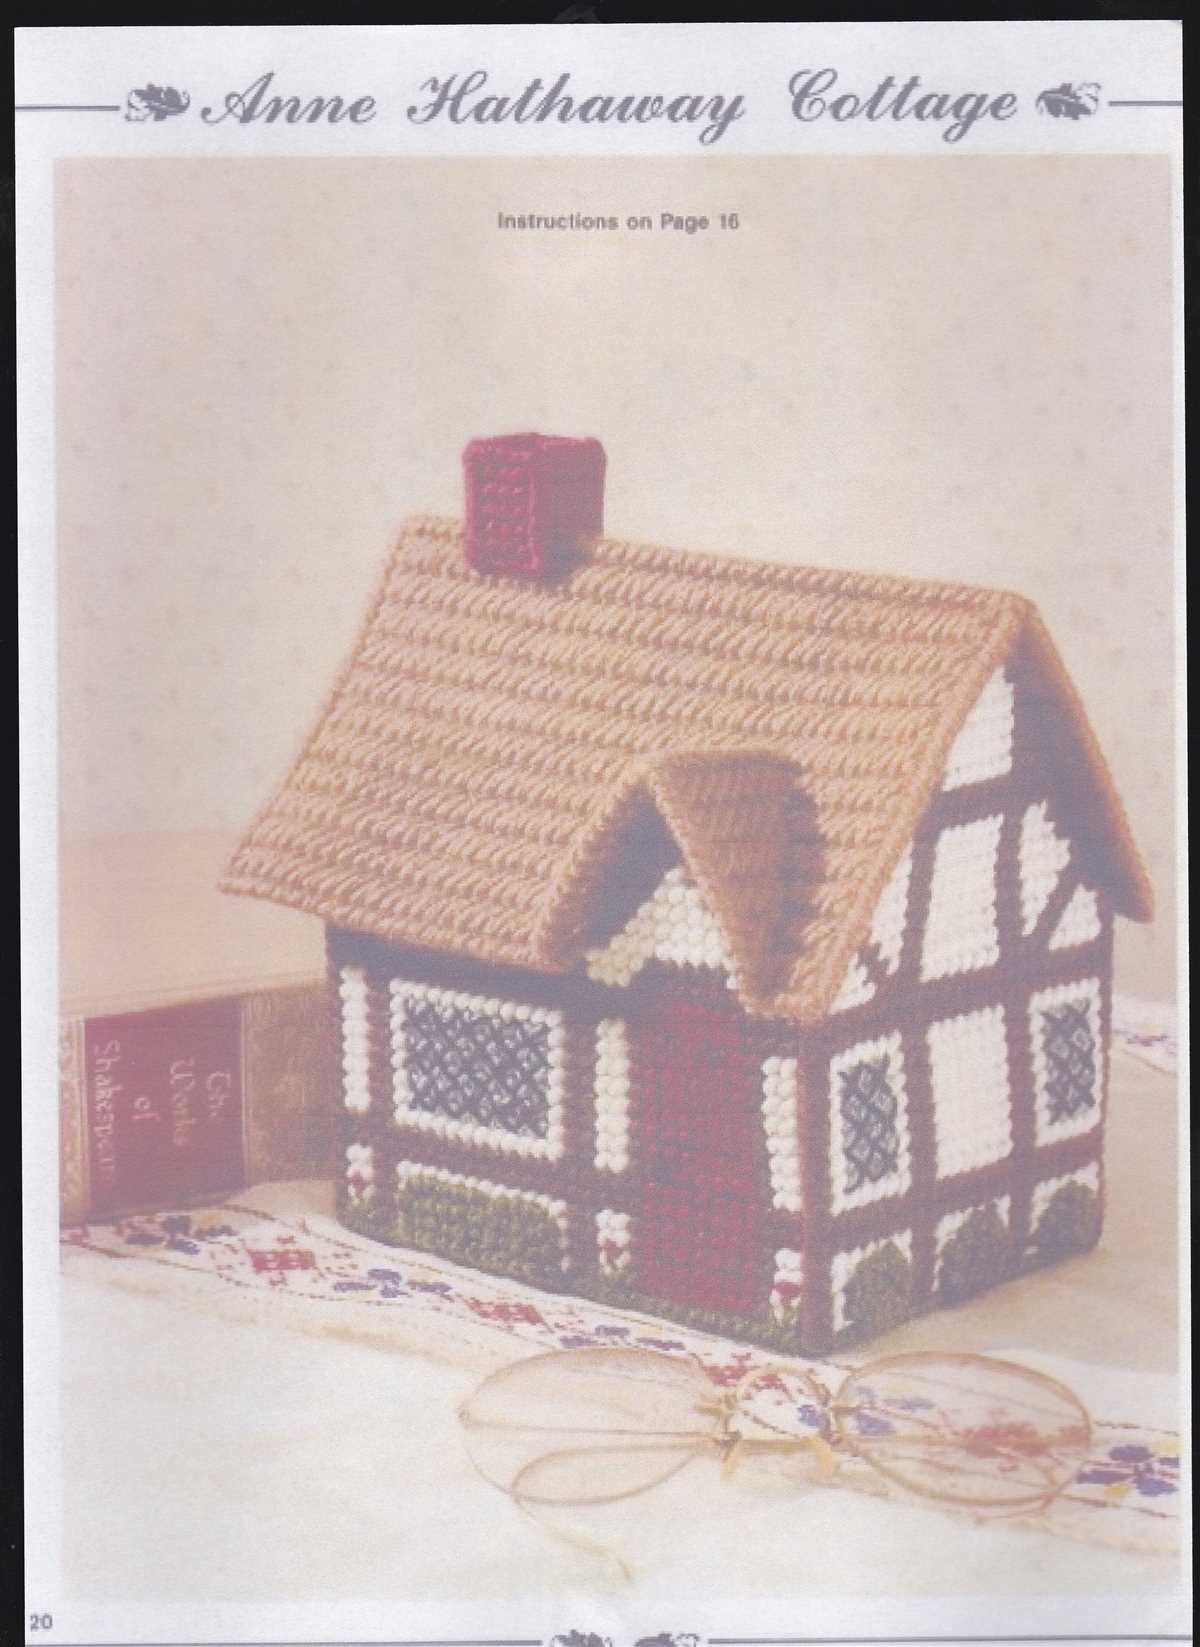
1. Traditional village: One popular style for knitted villages is the traditional village theme. This style often includes cozy cottages, winding streets, and a warm and inviting atmosphere. Crafters can use traditional knitting techniques and patterns to create the intricate details of the village, such as tiny doors, windows, and chimneys.
2. Holiday village: Another popular theme for knitted villages is the holiday village. This style is perfect for the festive season and can include knitted decorations such as Christmas trees, Santa’s workshop, and even a knitted ice rink. Crafters can incorporate holiday-themed colors and patterns to bring the village to life.
3. Fairy tale village: For those with a love for fairy tales, a fairy tale village theme can be a magical choice. Crafters can create knitted castles, enchanted forests, and tiny characters inspired by classic tales. This style allows for creative expression and the opportunity to create unique and whimsical scenes.
4. Coastal village: A coastal village theme can bring a touch of the seaside to the knitted village. Crafters can create tiny knitted houses with nautical details, such as sailboats, lighthouses, and seashells. This style can incorporate shades of blue and other coastal colors to capture the essence of the ocean.
5. Historical village: A historical village theme allows crafters to recreate a specific era or time period in their knitted village. Whether it’s a medieval village with knights and castles or a Victorian village with elegant houses and horse-drawn carriages, this style offers the opportunity for research and attention to historical accuracy.
In conclusion, knitted villages provide a wonderful way for crafters to showcase their creativity and passion for knitting. Whether it’s a traditional village, a holiday village, a fairy tale village, a coastal village, or a historical village, there are endless options for styles and themes to explore. The only limit is the crafter’s imagination!
Choosing the right yarn for your knitted village
When it comes to creating a knitted village, choosing the right yarn is crucial for achieving the desired outcome. The yarn you select will determine the overall texture, appearance, and durability of your knitted creations. Here are some essential factors to consider when choosing the yarn for your knitted village.
1. Fiber type
One of the first decisions you’ll need to make is the type of fiber you want to use. There are various options available, including acrylic, wool, cotton, and blends. Each fiber type has its own unique qualities and characteristics. Acrylic yarns are often affordable and come in a wide range of colors, making them a popular choice for beginners. Wool, on the other hand, provides warmth and can give your knitted village a cozy feel. Cotton is known for its breathability and is a good choice if you live in a warmer climate.
2. Weight and thickness
The weight and thickness of the yarn will determine the size and scale of your knitted village. Thicker yarns, such as bulky or chunky weight, will create larger and more substantial pieces, while thinner yarns, like sport or fingering weight, will result in smaller and more delicate creations. Consider the overall aesthetic you want to achieve and the size of the knitted village structures before selecting the yarn weight.
3. Color selection
The color palette you choose for your knitted village can greatly impact its overall appeal. Consider the theme or setting of your village and select yarn colors that complement or enhance the desired atmosphere. Earthy tones may be ideal for a rustic or countryside setting, while vibrant colors could work well for a whimsical or fantasy village. Additionally, using variegated or self-striping yarns can add visual interest and dimension to your knitted creations.
4. Durability and washability
Since your knitted village is likely to be handled and displayed, it’s important to consider the durability and washability of the yarn. Some fibers, like acrylic, are machine washable and can withstand regular use. Others, such as wool, may require more delicate care. Take into account the intended use and maintenance requirements of your knitted village when selecting yarn that will hold up well over time.
By considering the fiber type, weight and thickness, color selection, and durability of the yarn, you can make informed decisions when creating your knitted village. Experiment with different yarns and techniques to bring your miniature world to life and showcase your knitting skills.
Knitting techniques for creating village buildings
Creating a knitted village is an exciting and rewarding project for crafters who enjoy both knitting and creating miniature scenes. In order to bring the village buildings to life, there are several knitting techniques that can be used to achieve different architectural elements and structures. Whether you’re a beginner or an experienced knitter, these techniques can help you create charming and realistic knitted buildings for your village.
1. Garter stitch
- Description: The garter stitch is one of the simplest and most basic knitting stitches, involving knitting every row. It creates a textured fabric with ridges and is often used for creating walls and roofs of knitted buildings.
- How to use: To create walls or roofs with garter stitch, simply knit every row until you reach the desired height or length. You can experiment with different colors or yarn textures to add variety and depth to your buildings.
2. Stockinette stitch
- Description: The stockinette stitch is another basic knitting stitch that creates smooth and even fabric with a “V” pattern. It’s commonly used for creating windows and doors, as well as for adding details and textures to the buildings.
- How to use: To create windows or doors with stockinette stitch, alternate between knitting on the right side and purling on the wrong side of the fabric. This will create a smooth and flat surface that resembles glass or wooden panels.
Aside from these basic stitches, other knitting techniques such as lace knitting, cables, and colorwork can be used to add intricate details, textures, and patterns to the village buildings. Lace knitting can be used to create delicate trims and accents, while cables can be used to mimic architectural details like columns or pillars. Colorwork, on the other hand, can be used to depict different materials such as brick or stone, or to add colorful patterns to the buildings.
When creating your knitted village, don’t be afraid to experiment with different techniques and stitches to bring your buildings to life. Combine techniques, play with colors and textures, and let your creativity soar. With time and practice, you’ll be able to create a charming and realistic knitted village that will be admired by all.
Embellishing your knitted village with details
Creating a knitted village is a delightful and creative project that allows you to bring a miniature world to life. When it comes to adding those finishing touches to your knitted village, paying attention to the details can make all the difference. Here are some ideas for embellishing your village and making it truly unique.
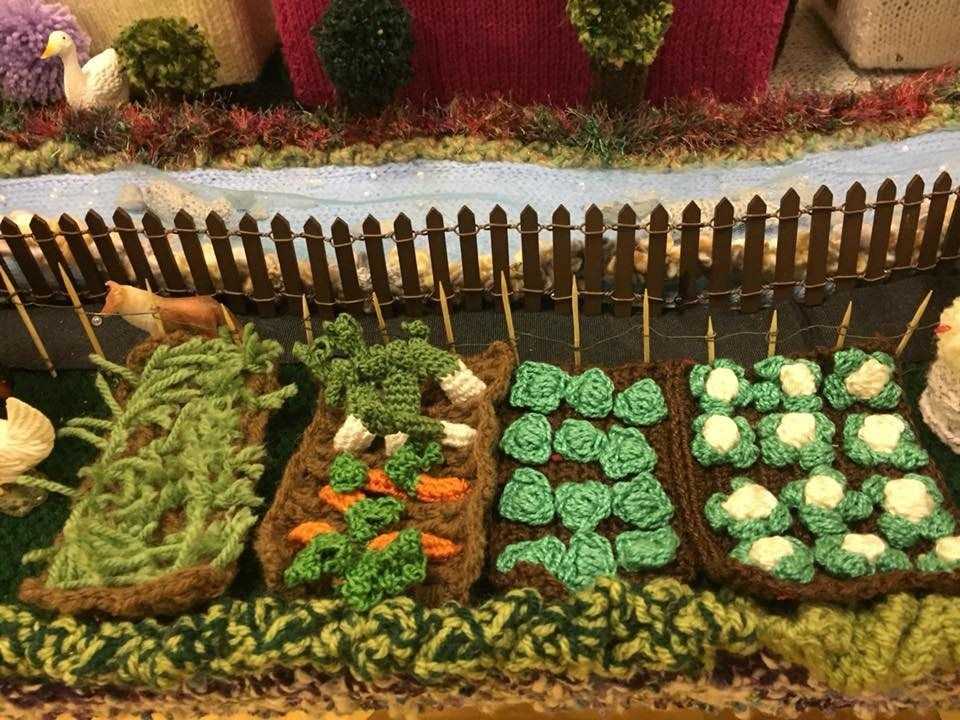
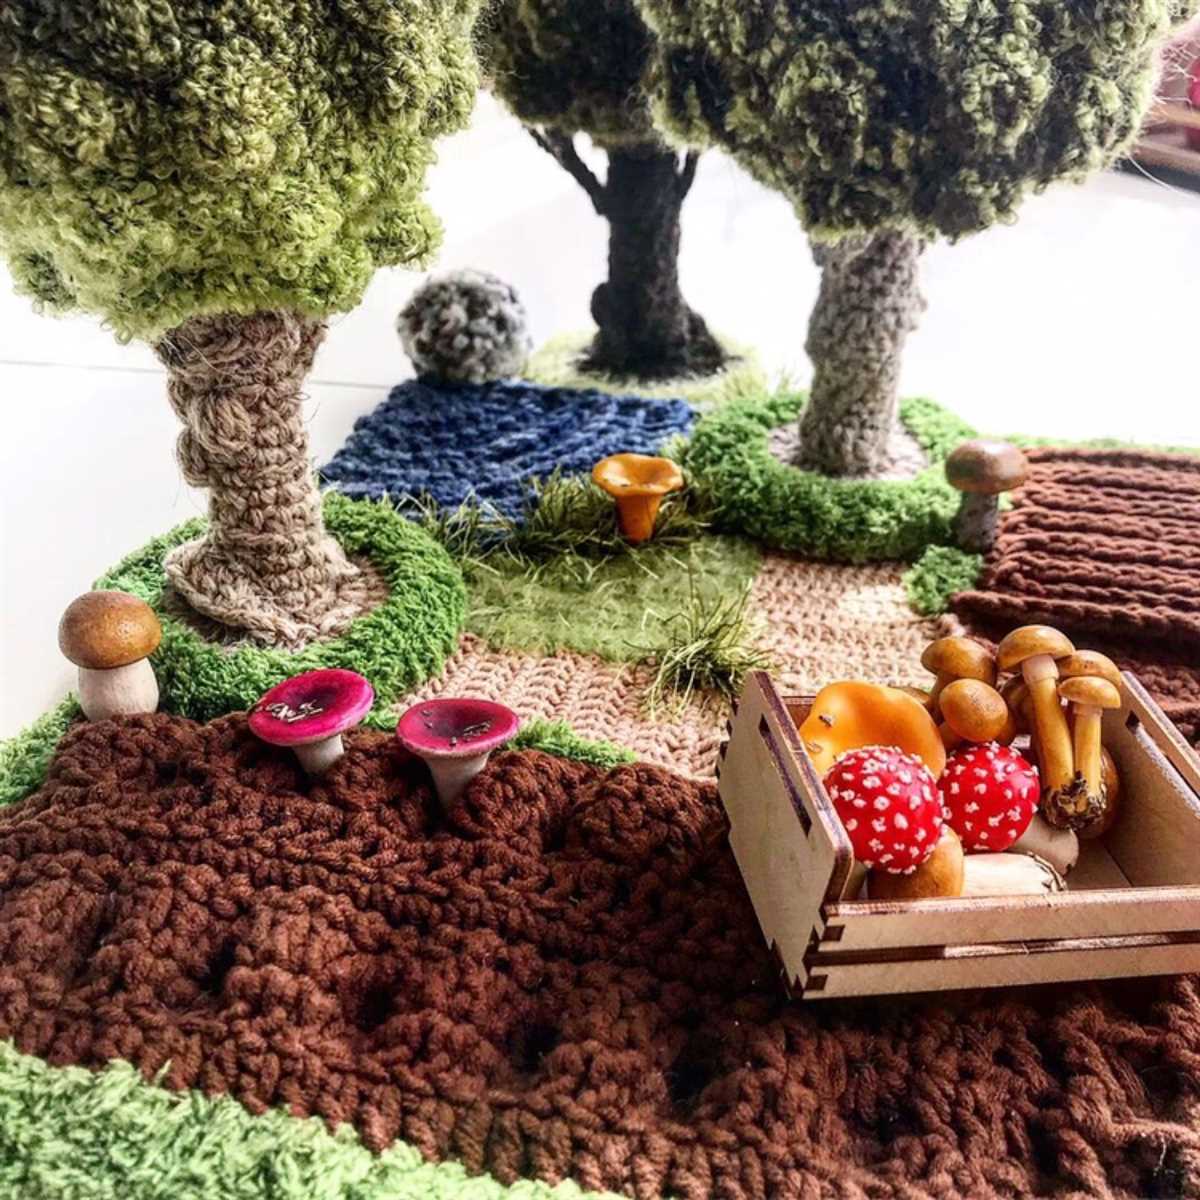
1. Landscaping and outdoor features
Enhance the natural beauty of your knitted village by adding landscaping and outdoor features. Perhaps you can knit tiny trees, bushes, or flowers to adorn your village green or park. Don’t forget to include charming details such as footpaths, fences, or benches to create a realistic and inviting outdoor space.
2. Architectural details
Give your knitted village houses character and charm by paying attention to architectural details. You can knit small windows with curtains, flower boxes, or even tiny wreaths for the front doors. Extra touches like chimneys, shutters, or window boxes filled with colorful flowers can add depth and visual interest to your village.
3. Street furniture and accessories
No village is complete without street furniture and accessories. Consider knitting lamp posts, mailboxes, or street signs to line the streets of your knitted village. You could also add small accessories such as bicycles, benches, or even a miniature market stall to bring your village to life.
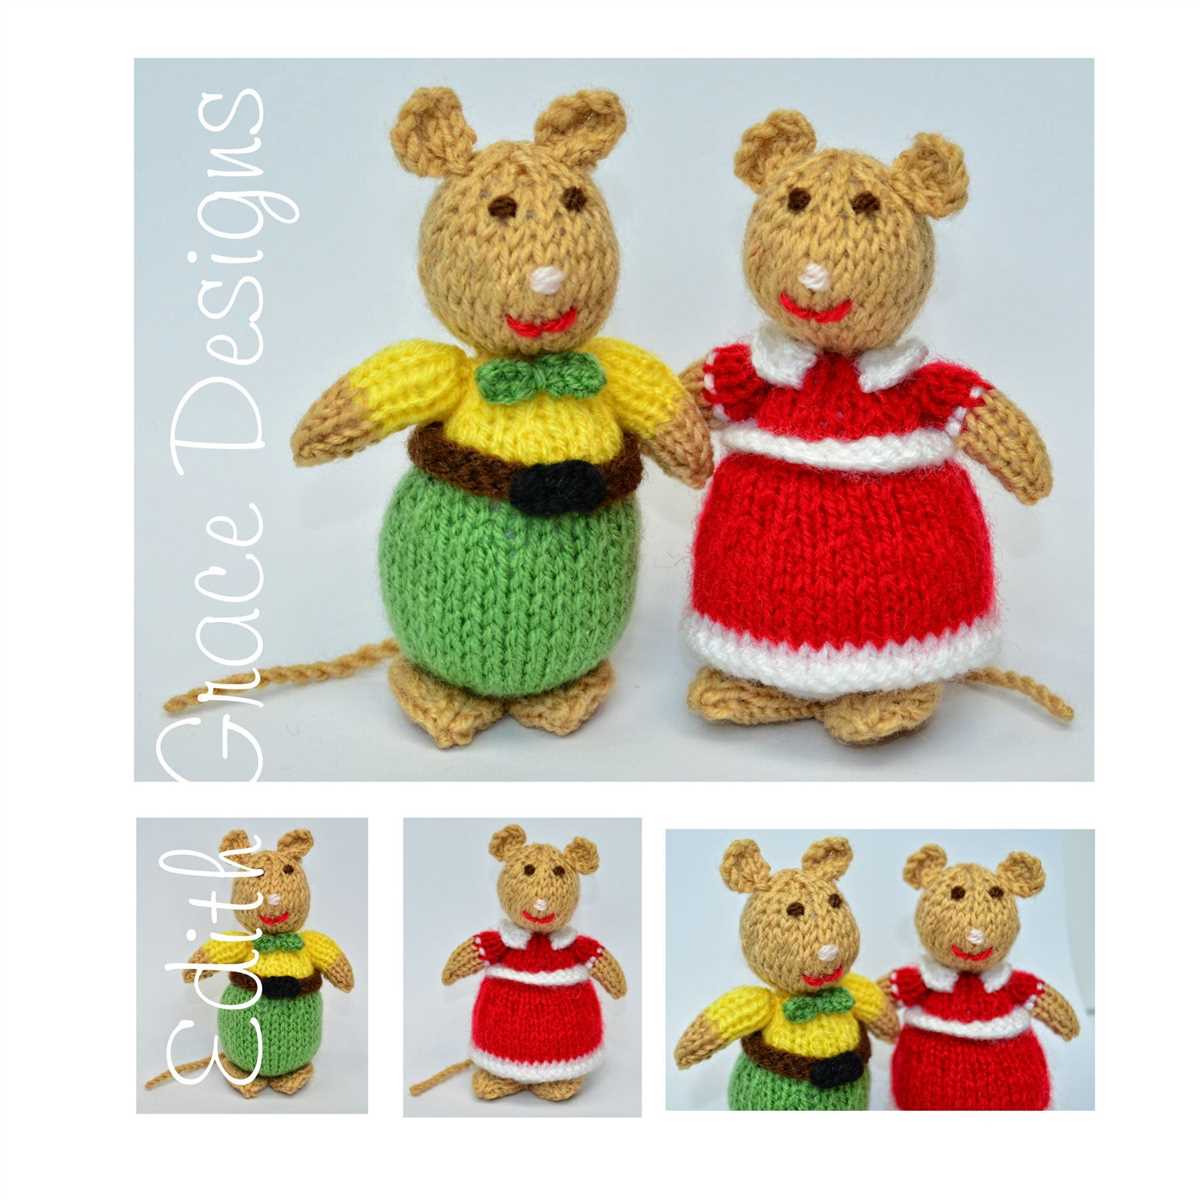
4. People and animals
To make your knitted village feel inhabited, include tiny knitted people and animals. You can create villagers going about their daily activities, children playing, or even animals roaming the streets. Adding these small figures can inject personality and a sense of life into your village.
By paying attention to these details, your knitted village will become a charming and whimsical world that is sure to captivate and delight everyone who sees it. Let your imagination run wild and enjoy the process of creating a truly unique and personalized knitted village.
Tips and tricks for assembling your knitted village
Creating a knitted village can be a fun and rewarding project, but assembling all the different pieces can sometimes be a challenge. Here are a few tips and tricks to help you with the assembly process:
1. Start with a plan

Before you begin assembling your knitted village, it’s a good idea to have a plan in place. Decide on the layout and placement of each building and accessory, and make a sketch or take a photo to refer to. This will help you stay organized and ensure that everything fits together nicely.
2. Use blocking techniques
To make sure that your pieces fit together smoothly, it’s important to block them before assembly. Blocking involves wetting your knitted pieces and shaping them to the correct dimensions. This can help even out any uneven edges or wonky shapes, and make assembly much easier.
3. Seam carefully
When it comes to joining your knitted pieces together, take your time and seam carefully. Use a tapestry needle and matching yarn to stitch the pieces together using a technique such as mattress stitch or whip stitch. Be sure to keep your tension even and hide the yarn tails as you go for a clean finish.
4. Pay attention to details
As you assemble your knitted village, pay attention to the small details that can make a big difference. Add any additional embellishments, such as buttons or beads, to bring the village to life. Take the time to sew on windows, doors, and other features, and make sure everything is securely attached.
5. Don’t be afraid to make adjustments
If something doesn’t quite fit or look right as you assemble your knitted village, don’t be afraid to make adjustments. You can easily undo seams and try again if needed. Be patient and take your time to ensure that everything looks just the way you want it to.
By following these tips and tricks, you can successfully assemble your knitted village and create a charming and delightful display for all to enjoy.
Showcasing and displaying your knitted village
Once you have finished knitting your village, it’s time to showcase your hard work and creativity! There are many options for displaying your knitted village, whether you want to create a charming centerpiece for your home or showcase it at a craft fair.
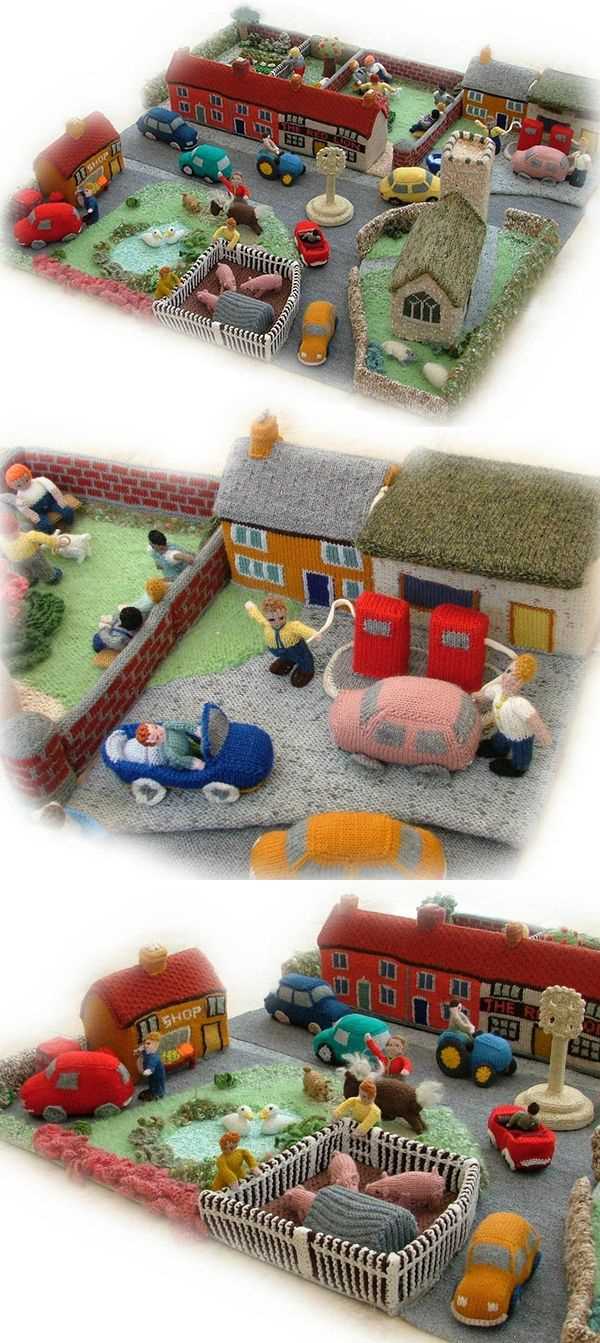
One option is to create a dedicated display area for your knitted village. This could be a table or shelf that allows you to arrange the buildings and scenery in an appealing way. Consider using a neutral-colored tablecloth or a backdrop to make the village stand out. You can also add props and accessories to enhance the overall scene, such as miniature trees, fake snow, or even small figurines to bring the village to life.
Another idea is to create a diorama or shadow box to showcase your knitted village. This involves arranging the buildings and scenery within a framed box or display case. You can add depth and dimension by using different levels or layers, and you can even incorporate small LEDs or fairy lights to create a magical effect.
If you’re showcasing your knitted village at a craft fair or exhibition, it’s important to have a professional and eye-catching display. Consider using a tiered stand or display risers to elevate the buildings and make them more visible. It’s also a good idea to have a sign or banner with information about your knitted village, including your name or brand, to attract attention and engage potential buyers or admirers.
Remember to take good quality photographs of your knitted village to share online or create a portfolio. This will allow you to showcase your talent and attract potential customers or admirers. Use natural lighting and different angles to capture the details and charm of your knitted village.
Showcasing and displaying your knitted village is a wonderful way to share your creativity and hard work with others. Whether it’s creating a charming centerpiece for your home or showcasing at a craft fair, there are many options to showcase your knitted village in a visually appealing way. Have fun experimenting with different display ideas and let your knitted village shine!