
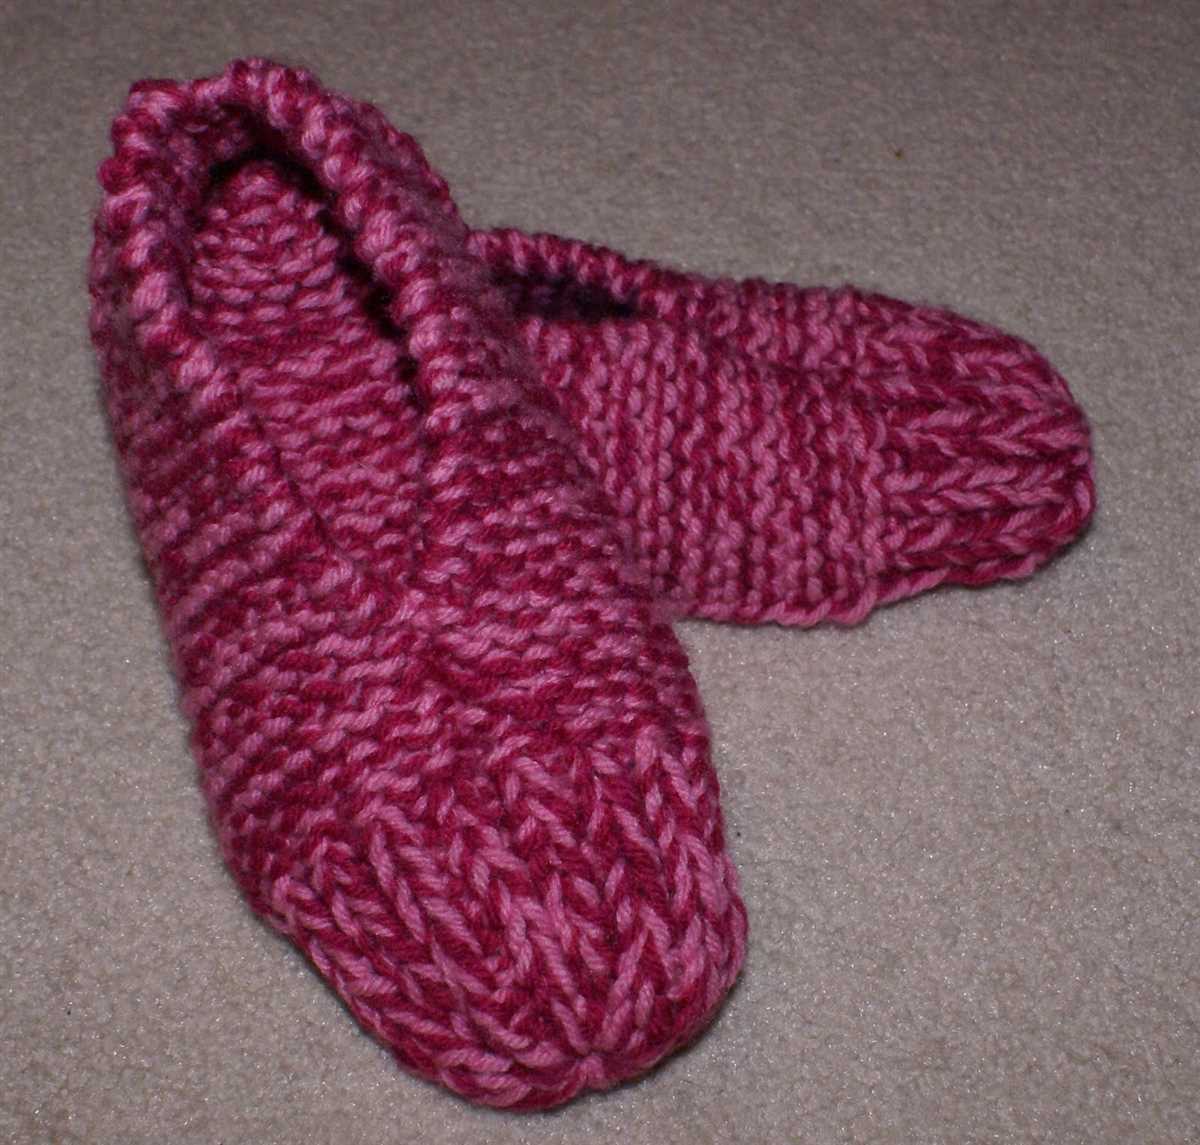
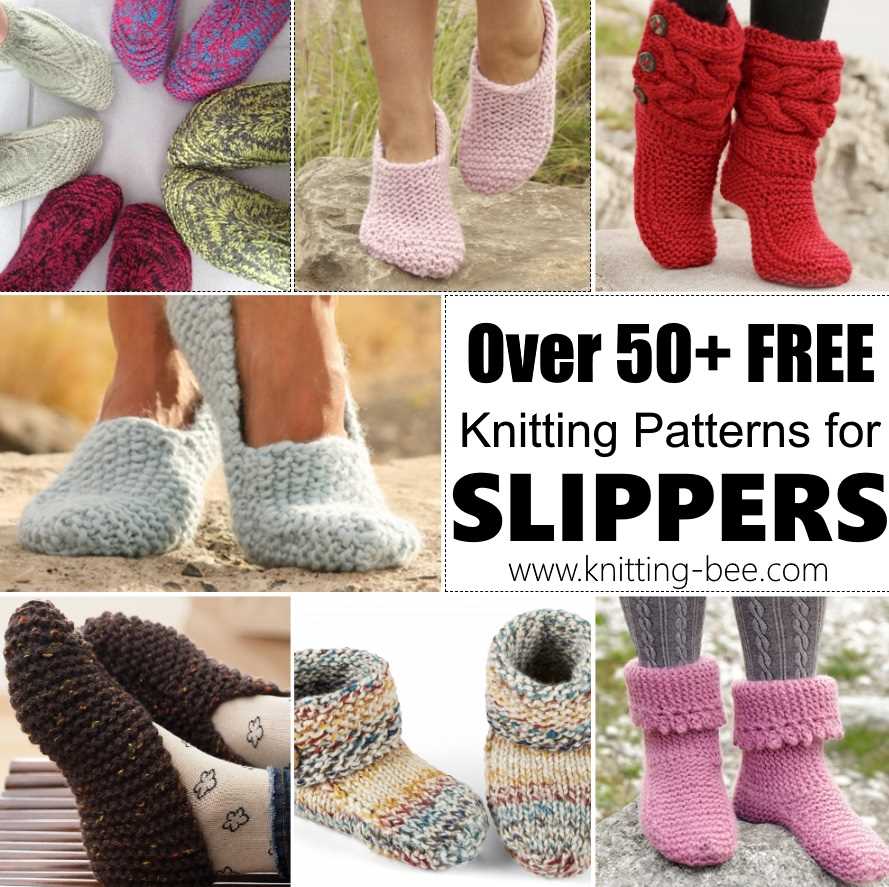
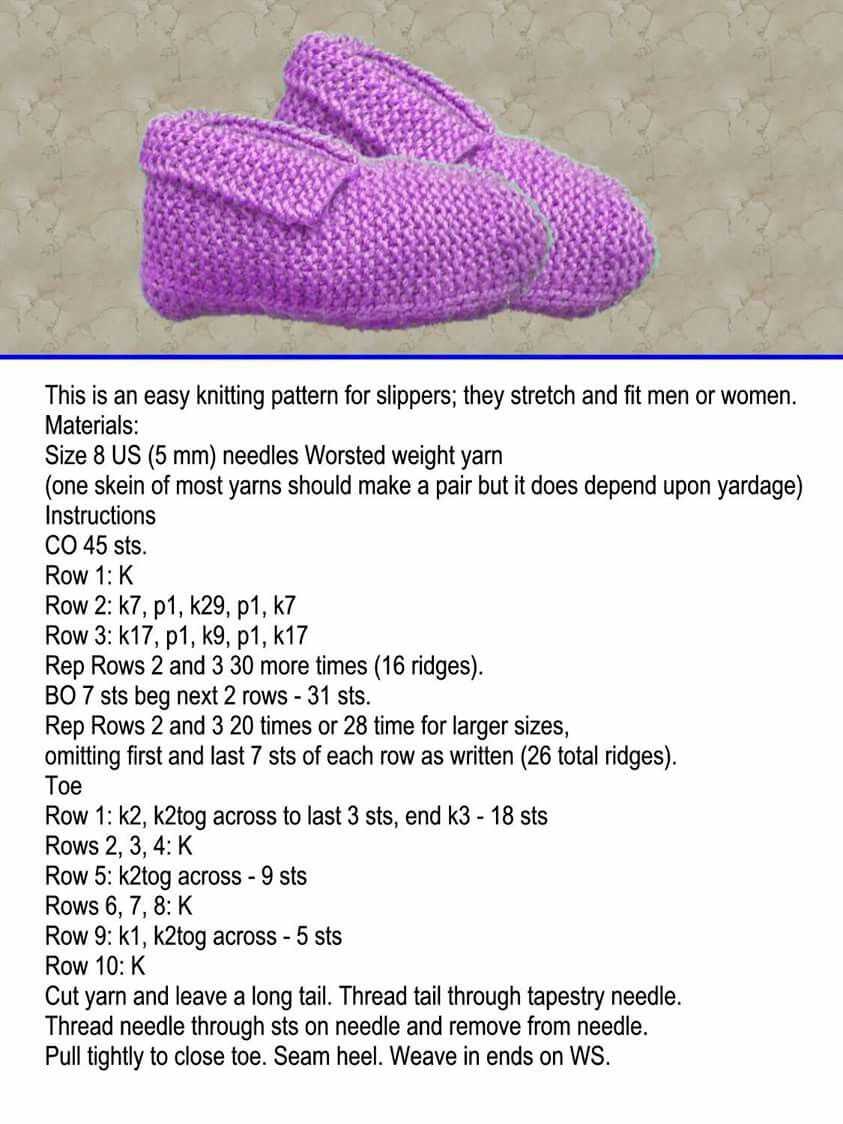
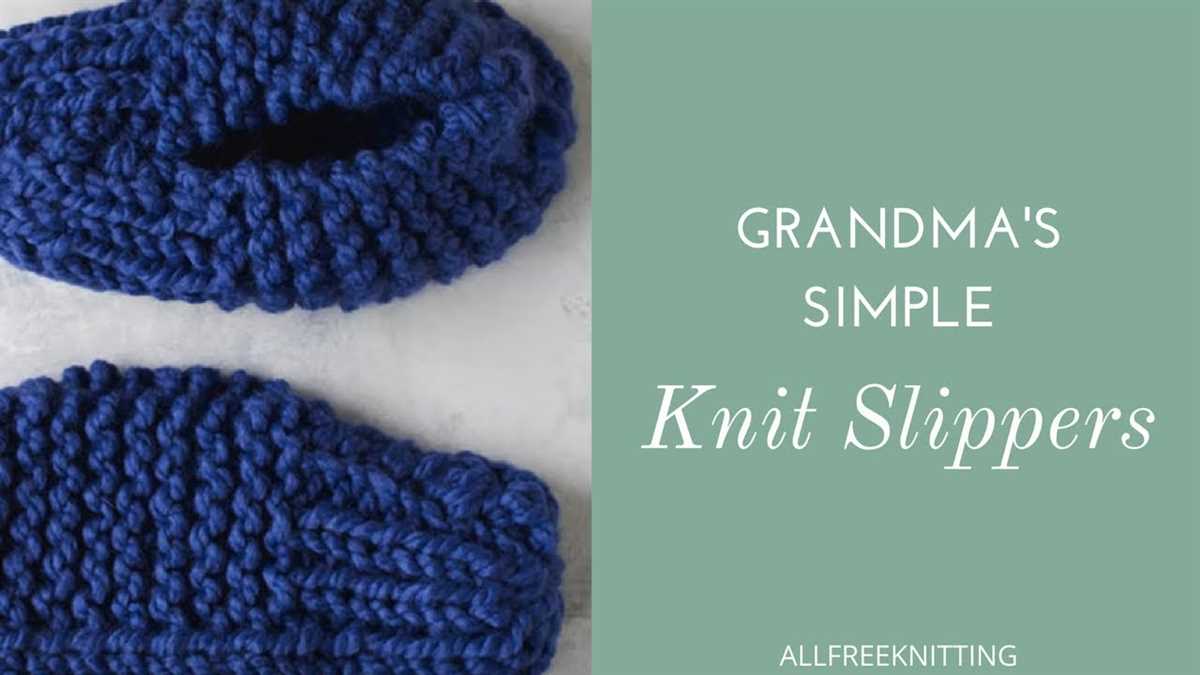
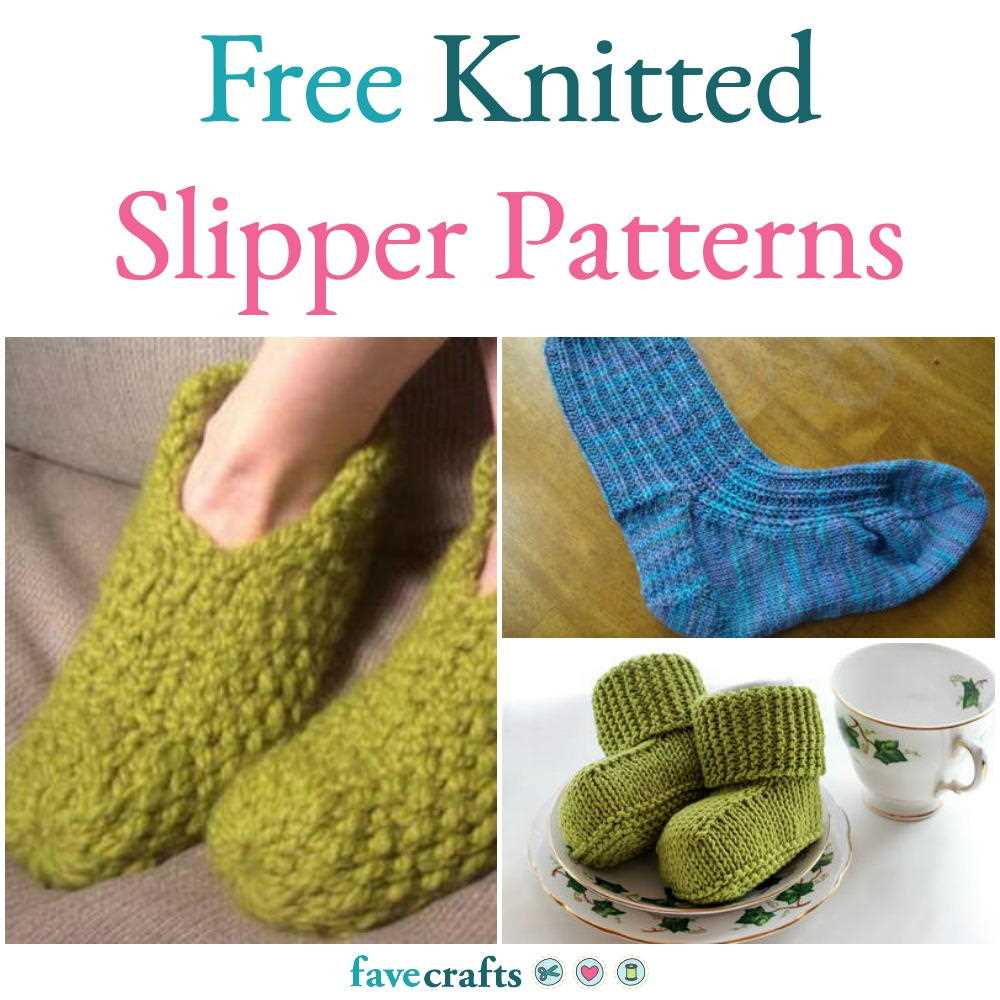
Knitting is a wonderful craft that allows you to create cozy and personalized items for yourself and your loved ones. One of the most popular items to knit are slippers. Knitted slippers are not only warm and comfortable, but also stylish and versatile. Whether you are a beginner or an experienced knitter, this easy pattern will guide you through the process of making your own pair of knitted slippers.
To start, you will need a few basic materials: knitting needles, yarn, and a tapestry needle. The pattern calls for a medium-weight yarn and size 8 knitting needles, but feel free to adjust the materials based on your preference. Additionally, you will need to know a few basic knitting stitches, such as the knit stitch and the purl stitch.
The pattern is worked in the round, so you will need to be familiar with circular knitting or be willing to learn. Don’t worry if you’ve never tried circular knitting before – it’s easier than it sounds! With this pattern, you will be able to practice the technique and create a beautiful pair of slippers at the same time.
Once you have gathered your materials and are comfortable with the basic knitting stitches, you can begin casting on and knitting your slippers. The pattern includes step-by-step instructions, along with helpful tips and tricks, to ensure that even a beginner can successfully complete the project. Before you know it, you will have a cozy pair of knitted slippers that you can wear or gift to someone special.
Materials you will need
In order to knit the slippers using the easy pattern, you will need to gather the following materials:
- Yarn: Choose a comfortable and warm yarn of your choice. It is recommended to use a medium weight or bulky yarn to ensure the slippers are cozy.
- Knitting Needles: You will need a pair of knitting needles in the appropriate size for your selected yarn. Check the yarn label for the recommended needle size.
- Tape Measure: This will help you take accurate measurements for your slippers.
- Stitch Markers: Stitch markers are helpful for marking specific stitches or sections in the pattern.
- Yarn Needle: A yarn needle with a large eye is necessary for weaving in loose ends and sewing any seams.
- Scissors: A pair of scissors is essential for cutting the yarn.
Make sure you have all of these materials ready before you begin knitting your slippers to ensure a smooth and enjoyable knitting experience. Once you have everything prepared, you can proceed with following the easy pattern to create cozy slippers for yourself or as a thoughtful gift!
Getting started with knitting
Knitting is a popular hobby that has been enjoyed by people of all ages for centuries. It is a versatile craft that allows you to create beautiful and functional items such as scarves, hats, blankets, and even slippers. If you’re new to knitting, getting started may seem a bit overwhelming, but with a few basic supplies and some practice, you’ll be well on your way to becoming a skilled knitter.
Gather your supplies: To begin knitting, you’ll need a few essential supplies. The most important one is a pair of knitting needles. There are different types and sizes of knitting needles available, but beginners often find it easiest to start with medium-sized straight needles. You’ll also need some yarn, preferably a medium weight yarn that is easy to work with. Other useful tools include a pair of scissors, a tapestry needle for weaving in ends, and stitch markers to help you keep track of your stitches.
Learn the basic stitches: Once you have your supplies ready, learn the basic knitting stitches. The two main stitches you’ll need to know are the knit stitch and the purl stitch. These stitches form the foundation of most knitting patterns. Practice knitting and purling on a small swatch of fabric until you feel comfortable with the motions. There are plenty of online tutorials and instructional videos available to help you learn these stitches.
Start with a simple project:
After you’ve mastered the basic stitches, it’s time to start your first knitting project. Choose a simple pattern that matches your skill level, such as a scarf or a dishcloth. These projects usually involve a combination of knit and purl stitches, allowing you to practice your skills while creating something useful. It’s important to start with a project that is small and manageable so that you don’t feel overwhelmed.
Practice and patience: Like any skill, knitting takes time and practice to master. Don’t get discouraged if your first few projects don’t turn out perfectly. Remember that even experienced knitters started as beginners. With each project, you’ll improve your knitting techniques and gain confidence. Keep practicing, be patient with yourself, and soon you’ll be able to tackle more complex patterns and create your own unique knitted items.
In conclusion, knitting is a rewarding and enjoyable hobby that allows you to unleash your creativity and produce beautiful handmade items. By gathering the necessary supplies, learning the basic stitches, starting with simple projects, and practicing regularly, you’ll soon become a skilled knitter. So grab your needles and yarn, and let the knitting journey begin!
Choosing the right yarn for your slippers
When it comes to knitting slippers, choosing the right yarn is essential to ensure a comfortable and durable end result. While there are many different types of yarn available, you’ll want to consider a few key factors to find the perfect yarn for your project.
1. Fiber content:
One of the most important considerations when choosing yarn for slippers is the fiber content. You’ll want a yarn that is soft and cozy, but also sturdy enough to withstand daily wear. Natural fibers such as wool or alpaca are popular choices as they provide warmth and insulation, while also being breathable. Acrylic yarns can also be a good option, as they are often soft and easy to care for.
2. Weight and thickness:
The weight and thickness of the yarn will determine the warmth and thickness of the slippers. For colder climates or winter wear, a thicker yarn with a bulky or chunky weight would be ideal, as it will provide more insulation. If you prefer slippers that are lighter and more breathable, a thinner yarn with a sport or DK weight would be a better choice.
3. Durability and washability:
Since slippers are often worn frequently and subjected to wear and tear, it’s important to choose a yarn that is durable and can withstand regular use. Look for yarns that have a high twist or a blend of fibers that offer durability. Additionally, consider whether the yarn is machine washable or requires special care, as this will affect the long-term maintenance of your slippers.
4. Color and texture:
The choice of color and texture is often a personal preference, but it can also contribute to the overall look and feel of your slippers. Consider whether you want a solid color or a variegated yarn, and whether you prefer a smooth texture or one with more texture or fuzziness. Keep in mind that lighter colors may show dirt and wear more easily, so darker shades could be a practical choice.
By considering these factors and taking your personal preferences into account, you’ll be able to choose the perfect yarn for your knitted slippers. Whether you prioritize warmth, durability, or aesthetics, there is a yarn out there that will meet your needs and help you create cozy and stylish slippers.
Step-by-step knitting instructions
In order to knit a pair of comfortable and cozy slippers, follow these step-by-step instructions.
Materials:
- Knitting needles (size 8 or as desired)
- Worsted weight yarn
- Measuring tape
- Tapestry needle
Step 1: Begin by casting on 40 stitches.
Step 2: Knit the first row.
Step 3: Continue knitting in garter stitch for the next 20 rows.
Step 4: For the next row, start shaping the slipper. Knit 10 stitches, (knit 2 together, knit 1) 7 times, knit the last 10 stitches.
Step 5: Repeat Step 4 for the following row.
Step 6: Knit the next row.
Step 7: Repeat Steps 4-6 until there are 10 stitches remaining on the needle.
Step 8: Cut the yarn, leaving a long tail. Thread the tail through a tapestry needle and slip the remaining 10 stitches onto the needle. Pull the yarn tight to close the toe of the slipper.
Step 9: Seam the back of the slipper together using a tapestry needle and the long tail of yarn.
Step 10: Repeat Steps 1-9 to create the second slipper.
Once you have completed both slippers, they are ready to be worn and enjoyed! These simple and easy-to-follow instructions will allow you to quickly knit a pair of cozy slippers for yourself or as a thoughtful gift for a loved one. Happy knitting!
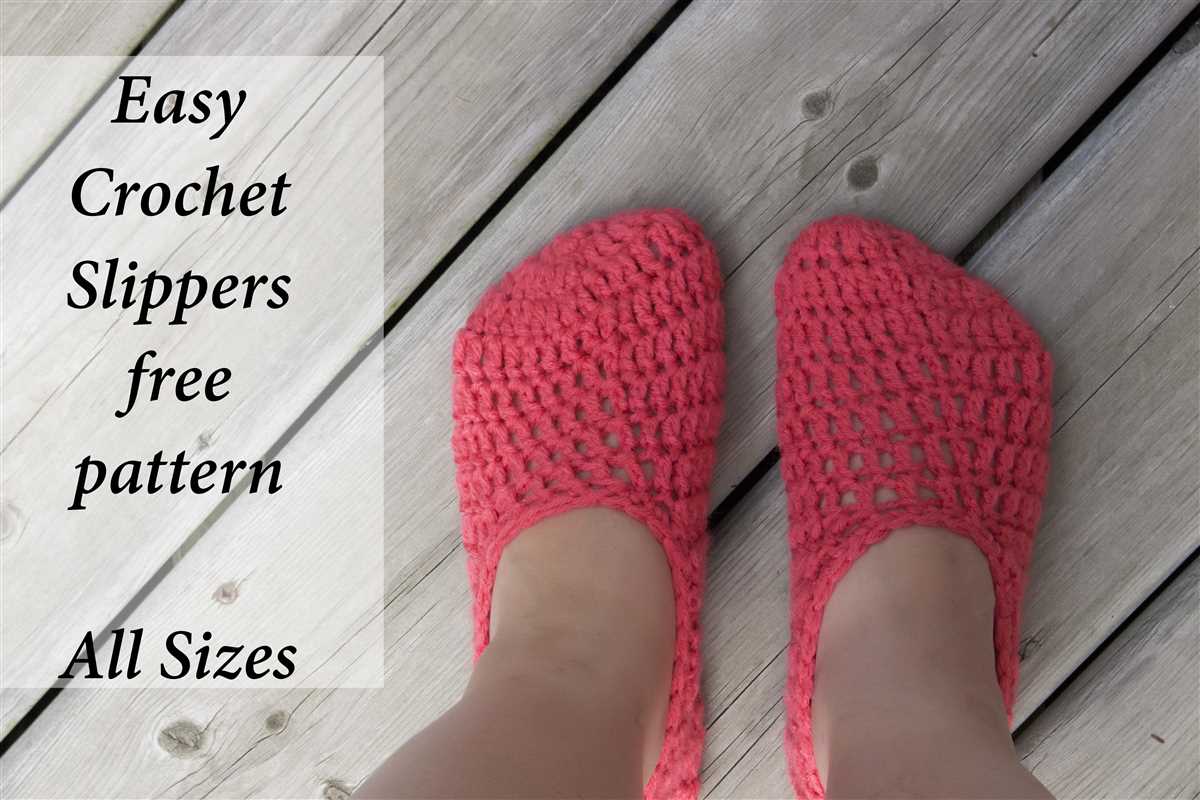
Creating the sole
When knitting slippers, one of the most important parts to get right is the sole. The sole provides cushioning and support for the foot, so it’s important to create a strong and sturdy base. Here is a pattern for creating the sole of the slipper:
Materials:
- Worsted weight yarn in your desired color
- US size 8 (5mm) knitting needles
- Tapestry needle
Instructions:
- Start by casting on the desired number of stitches for your slipper size. If you’re unsure, you can measure the length of your foot and use that as a guide. It’s better to cast on too few stitches than too many, as you can always increase later.
- Work in a basic stockinette stitch pattern, knitting every row, until the sole is the desired length. You can try the slipper on as you go to ensure a good fit. A general rule of thumb is to knit until the sole reaches just past the arch of your foot.
- To shape the toe, you can begin decreasing stitches. This can be done by knitting two stitches together at the beginning and end of each row. Continue decreasing until you have a small enough number of stitches to finish off the toe.
- Once the sole is complete, you can weave in any loose ends and secure them with a tapestry needle. This will help prevent unraveling and give your slipper a neat finish.
By following these instructions, you can create a strong and comfortable sole for your knitted slippers. Remember to adjust the pattern to fit your own foot size and personalize it with your favorite yarn colors. Happy knitting!
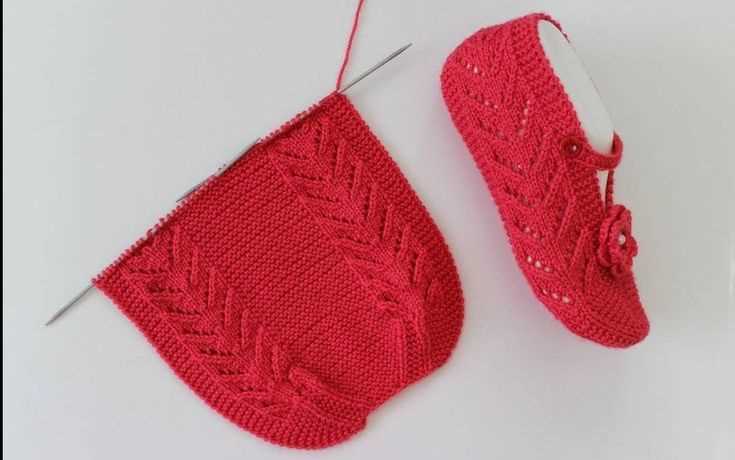
Knitting the foot part
Once you have completed the cuff of your slippers, it’s time to move on to the foot part. This section will cover the steps to knit the foot of the slipper.
Step 1: Divide the stitches
Start by dividing the total number of stitches evenly between the needles. This will help you work with a smaller number of stitches and make the process more manageable.
Step 2: Knit in the round

Continue knitting in the round, using the same pattern as the cuff or a different one if desired. Make sure to follow the pattern instructions carefully to create the desired texture or design for the foot part of the slipper.
Step 3: Measure the length
As you work, periodically measure the length of the slipper against your foot to ensure a proper fit. You can use a measuring tape or compare it to an existing slipper or shoe. Remember to take into account any stretching that may occur when the slipper is worn.
Step 4: Shape the toe
Once you have reached the desired length, it’s time to shape the toe. You can do this by decreasing stitches in a specific pattern, such as k2tog (knit two stitches together) or ssk (slip, slip, knit), to create a gradual taper towards the toe. Follow the pattern instructions for the specific decreases to use.
Step 5: Bind off
After shaping the toe, bind off the remaining stitches to secure the end of the slipper. Cut the yarn, leaving a tail for weaving in later. Make sure the slipper is long enough to cover your foot and that the toe is comfortable to wear.
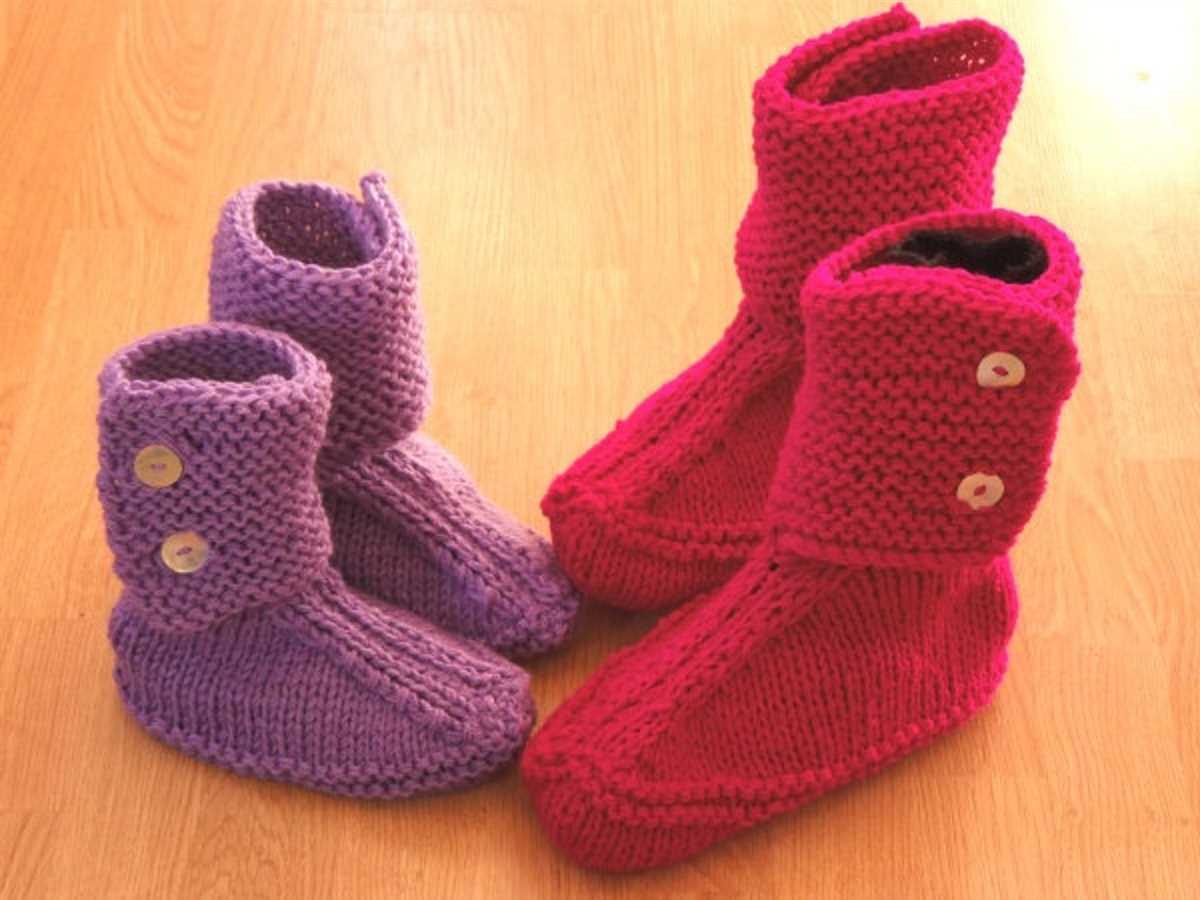
Adding the heel
Once you have completed the foot portion of your slipper, it’s time to add the heel. This is an important step to ensure a comfortable fit and to give the slipper its shape. Follow these instructions to add the heel to your knitted slipper:
- Divide your stitches: Start by counting your stitches and dividing them in half. This will help you determine the placement of your heel. It’s important to have an even number of stitches on either side.
- Knit the first half of stitches: Begin by knitting the first half of stitches. This will define the back of the slipper and create the heel flap.
- Turn your work: Once you have knitted the first half of stitches, turn your work and purl the second half of stitches. This will create a neat and comfortable surface for the back of the slipper.
- Continue knitting: From this point, you will continue knitting the back of the slipper in a pattern that suits your style. You can choose to use a ribbed pattern, garter stitch, or any other stitch that you prefer. Just make sure to maintain an even number of stitches on either side.
- Shape the heel: Once you have reached your desired heel height, it’s time to shape the heel. You can do this by decreasing stitches gradually on each side of the heel flap. This will give the slipper its rounded shape.
- Bind off: Finally, bind off all stitches to secure the heel in place. You can use a traditional bind off or any other bind off method that you prefer.
With the heel added, your slipper is now ready to be worn and enjoyed. The heel not only provides a comfortable fit, but also adds structure and stability to the slipper. Feel free to customize the pattern and add any embellishments or additional details to make the slipper uniquely yours.
Shaping the toe
The toe of the slipper is an important part to shape in order to ensure a comfortable fit. To do this, you will continue knitting the slipper with decreases at the toe section.
Start by placing markers on the sides of the slipper to indicate where the decreases will be made. These markers will help you keep track of your progress and ensure that the decreases are evenly distributed.
Once the markers are in place, you will begin decreasing by knitting two stitches together (k2tog) on either side of each marker. This will gradually decrease the total number of stitches in the toe section.
Continue knitting in this manner until the desired number of stitches remains. This will vary depending on the size of the slipper and the gauge of your knitting. It’s a good idea to refer to the pattern or measurements to determine the correct number of stitches to end with.
After the desired number of stitches has been reached, you can fasten off the yarn and weave in any loose ends. This will complete the shaping of the toe and give the slipper its final form.
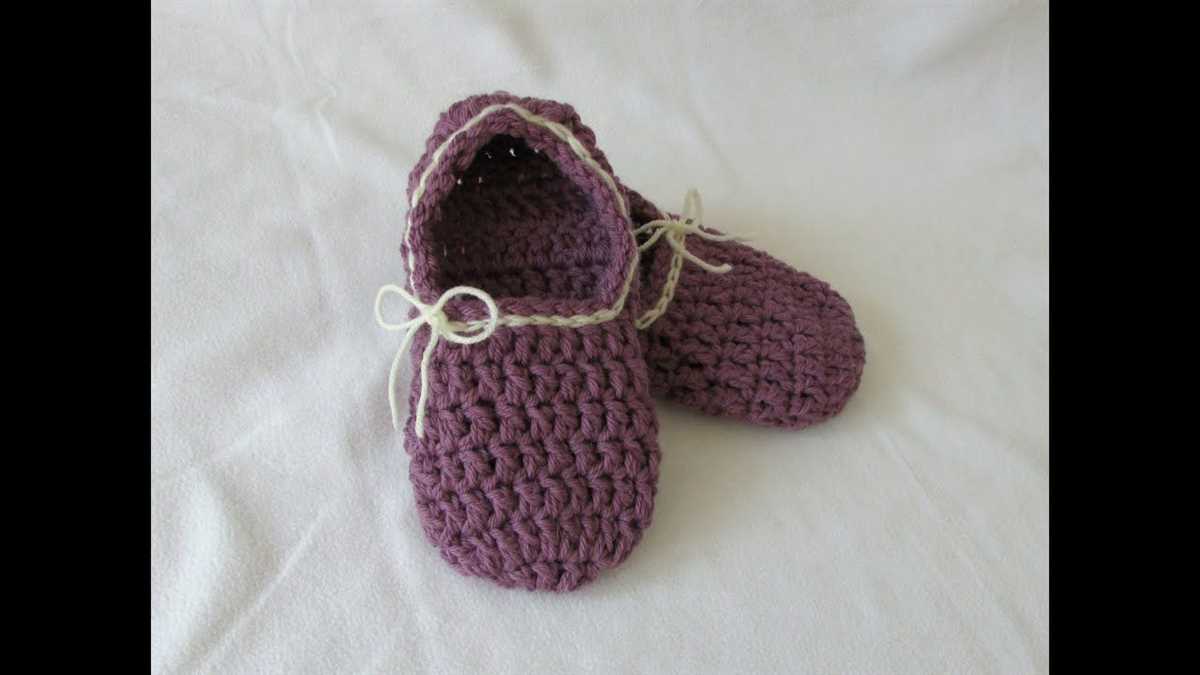
Finishing and Assembling the Slippers
After completing the knitting pattern for the slippers, it’s time to finish and assemble them. Here are the steps you can follow to achieve the perfect pair of cozy slippers:
1. Weaving in the loose ends
First, take a darning needle and use it to weave in any loose ends on the slippers. Start by threading the needle with a piece of yarn that matches the color of your slippers. Then, carefully insert the needle into the stitches at the edge of the slipper, going back and forth to secure the yarn. Continue this process until all the loose ends are neatly woven in.
2. Blocking the slippers (optional)
If you want your slippers to have a more polished look, you can choose to block them. Blocking helps to shape the slippers and even out any uneven stitches. To block your slippers, dampen them with water and gently stretch them to the desired shape. You can use blocking pins to hold the slippers in place while they dry. Once the slippers are dry, remove the pins and they will be beautifully blocked.
3. Sewing the sides
To assemble the slippers, fold each slipper in half, matching the edges. Thread a darning needle with yarn and sew the side seams together using a mattress stitch or any other preferred method. Make sure to secure the yarn tightly at the beginning and end of each seam. Repeat this step for both slippers.
4. Attaching the sole
If your slipper pattern includes a separate sole piece, now is the time to attach it. Place the sole on the underside of the slipper, aligning it with the edges. Use a darning needle and yarn to sew the sole to the slipper, making sure to catch both layers of fabric. Take care to sew neatly and evenly around the edges of the sole.
Once you have completed these steps, your slippers are ready to be worn and enjoyed! Whether you keep them for yourself or give them as a gift, these cozy knitted slippers are sure to keep your feet warm and comfortable.
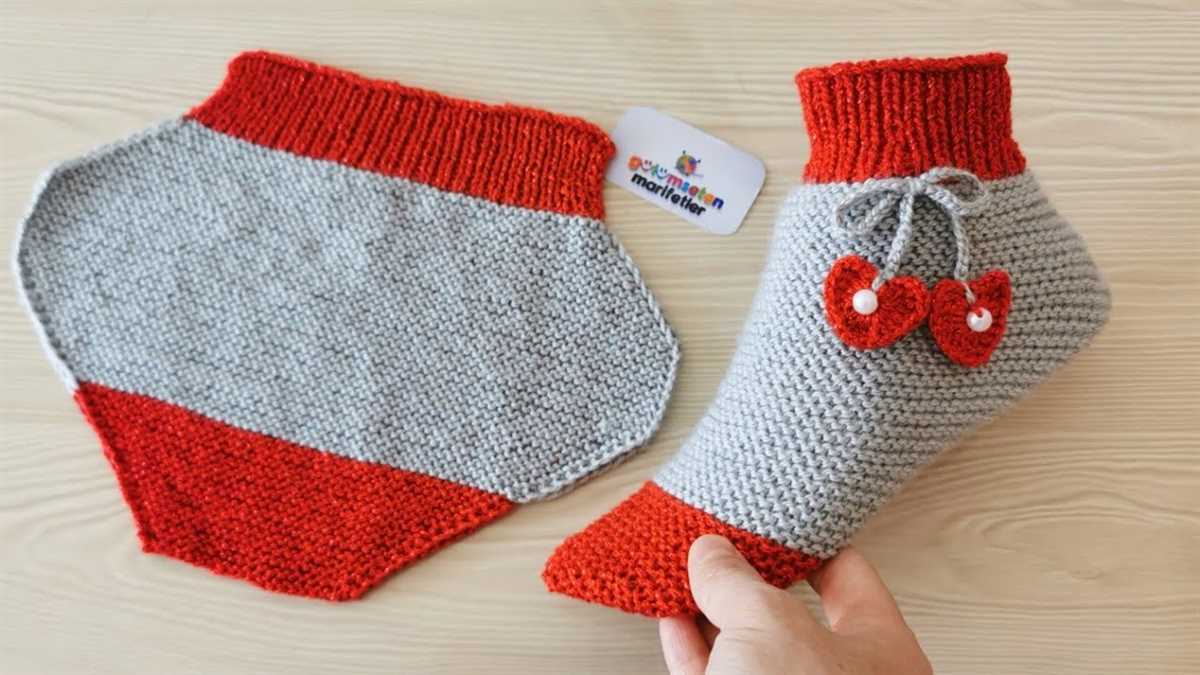
Adding decorative elements
Once you have mastered the basic pattern for knitting slippers, you can start adding decorative elements to make your slippers unique and personalized. There are several ways you can do this.
1. Embroidery
One of the easiest and most common ways to add decorative elements to your slippers is through embroidery. You can use a variety of stitches and colors to create different designs, such as flowers, animals, or geometric patterns. To start, you will need an embroidery needle, embroidery thread, and a hoop to hold the fabric taut while you work. Sketch out your design on paper first, then transfer it onto the slipper using a disappearing ink pen. Once you have embroidered your design, make sure to knot the thread securely on the inside of the slipper to prevent it from unraveling.
2. Appliques
Another option for adding decorative elements to your slippers is by applying appliques. Appliques are pre-made designs or patches that can be sewn or glued onto the slipper fabric. You can find a wide variety of appliques in craft stores or online. To apply an applique, simply position it on the slipper fabric and use a needle and thread or fabric glue to secure it in place. You can choose appliques that match your personal style, such as flowers, hearts, or even your favorite animal.
3. Beads and sequins
If you want to add some sparkle and shine to your slippers, you can use beads and sequins to decorate them. You can sew on beads individually or create patterns and designs using different colors and sizes. Sequins can be sewn or glued onto the fabric to create a shimmering effect. Just make sure to use a strong thread or adhesive to secure the beads and sequins in place so they don’t fall off with wear.
- Experiment with different decorative elements to find your own unique style.
- Remember to consider the durability of the decorative elements you choose, as slippers are meant to be worn and walked in.
- Have fun and get creative with your designs!
Tips and techniques for a better result
When knitting slippers, it’s important to pay attention to a few key tips and techniques to ensure a better end result. By following these guidelines, you can create slippers that are not only comfortable but also durable and long-lasting.
1. Choose the right yarn:
One of the most important factors in knitting slippers is selecting the right yarn. Opt for a yarn that is soft, yet sturdy, such as wool or a wool blend. Avoid using too thin or flimsy yarns, as they may not provide sufficient warmth or durability.
2. Follow the pattern carefully:
Make sure to carefully read and understand the knitting pattern before you begin. Take note of any special techniques or stitches required, and follow the instructions closely. Pay attention to gauge, as it can greatly affect the fit of the slippers.
3. Use stitch markers:
When working on the slipper pattern, stitch markers can be extremely helpful for keeping track of different sections or increases and decreases. Use them to mark the beginning of a round or specific stitch counts to ensure accuracy.
4. Take accurate measurements:
Before starting to knit, take accurate measurements of the intended wearer’s foot. This will help ensure that the slippers will fit properly. Consider both the length and width of the foot, and adjust the pattern accordingly if needed.
5. Add non-slip soles:
To make the slippers safer to wear, consider adding non-slip soles. You can either sew on pre-made soles or knit your own using a slip-stitch or double knitting technique. This will provide extra grip and prevent slipping on smooth surfaces.
By following these tips and utilizing proper knitting techniques, you can create slippers that are not only cozy and stylish but also functional and long-lasting. Enjoy the process of knitting and creating something practical for yourself or loved ones.
Common mistakes to avoid
While knitting slippers, there are a few common mistakes that beginners often make. It’s important to be aware of these mistakes and learn how to avoid them for a successful outcome.
1. Incorrect gauge
One of the most common mistakes that knitters make is not checking their gauge before starting the project. Gauge refers to the number of stitches and rows per inch in the knitting. If the gauge is too tight or too loose, the slipper may not fit properly. To avoid this mistake, it’s crucial to swatch and measure the gauge accurately before starting the project.
2. Using the wrong yarn
Another mistake is using the wrong yarn for the pattern. Different yarns have different properties, such as thickness, fiber content, and elasticity. Using the wrong yarn can affect the size, fit, and overall appearance of the slippers. It’s important to use the yarn specified in the pattern or choose a similar yarn that matches the recommended gauge.
3. Not reading the pattern carefully
Not reading the pattern carefully is another mistake that can lead to errors in the project. It’s important to read the pattern thoroughly and understand each step before starting. Skipping or misinterpreting instructions can result in a poorly constructed slipper. Taking the time to read and understand the pattern will help prevent mistakes and ensure a smooth knitting process.
4. Skipping stitch markers
Stitch markers are essential tools for marking specific points in the pattern, such as increases or decreases. Skipping stitch markers can make it difficult to keep track of stitch counts and pattern repeats, leading to mistakes in the final product. Using stitch markers as indicated in the pattern will help maintain the correct stitch count and ensure the slipper turns out as designed.
5. Lack of attention to tension
Tension refers to the tightness or looseness of your knitting. Inconsistent tension throughout the project can result in uneven stitches and an ill-fitting slipper. It’s important to maintain a consistent tension by paying attention to the tightness of your stitches. Practice can help improve tension control, so don’t get discouraged if it’s not perfect from the start.
Conclusion
Avoiding these common mistakes will greatly increase your chances of successfully knitting a pair of slippers. Remember to check your gauge, use the correct yarn, read the pattern carefully, use stitch markers, and pay attention to your tension. With practice and attention to detail, you’ll be able to create beautiful and comfortable slippers for yourself or as gifts.
Q&A:
Which materials do I need to knit slippers?
To knit slippers, you will need yarn, knitting needles, a tapestry needle, and scissors.
What is the easiest pattern to knit slippers?
An easy pattern to knit slippers is the basic garter stitch pattern, which involves knitting every row.
How do I knit slippers?
To knit slippers, start by casting on stitches according to the size you want. Then, knit each row in the garter stitch pattern until your work measures the desired length. Finally, stitch the sides together and weave in any loose ends.
Can I knit slippers for beginners?
Yes, knitting slippers can be a great project for beginners. The basic garter stitch pattern is simple and easy to follow, making it accessible for those who are new to knitting.
Are there any variations to the basic slipper pattern?
Yes, there are many variations to the basic slipper pattern. You can add ribbing or decorative stitches, use different colors or types of yarn, or even incorporate cables or lace patterns.