
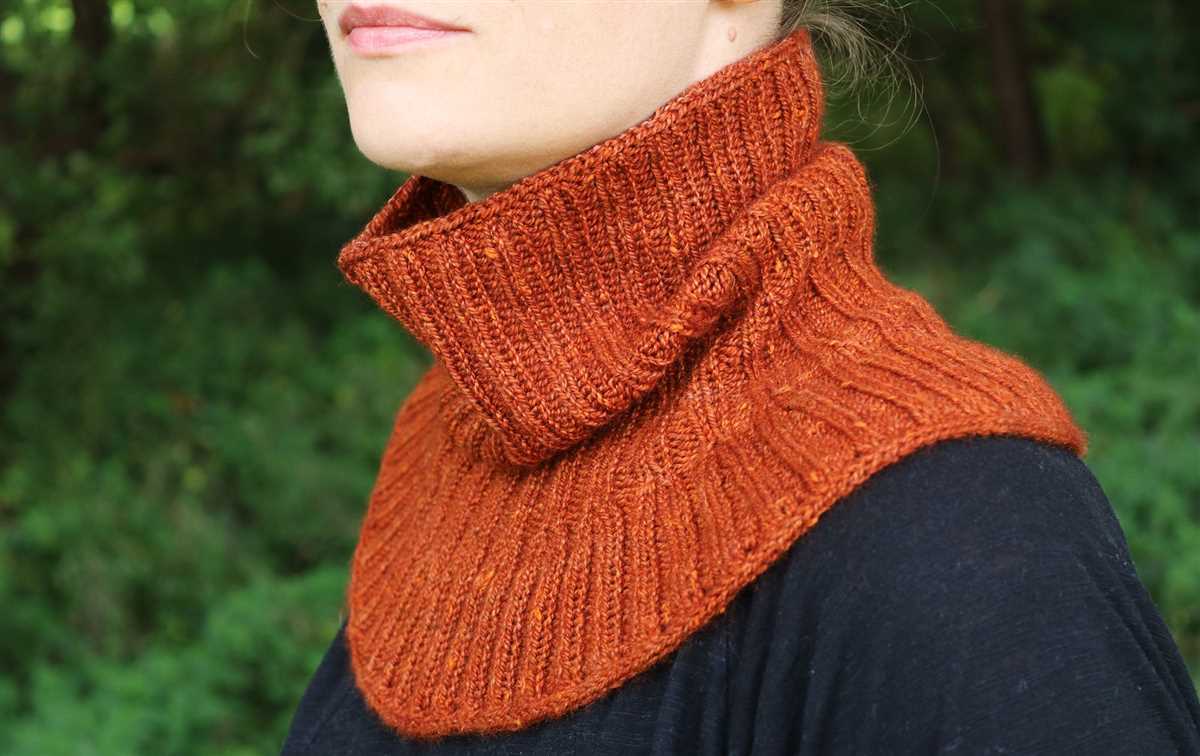
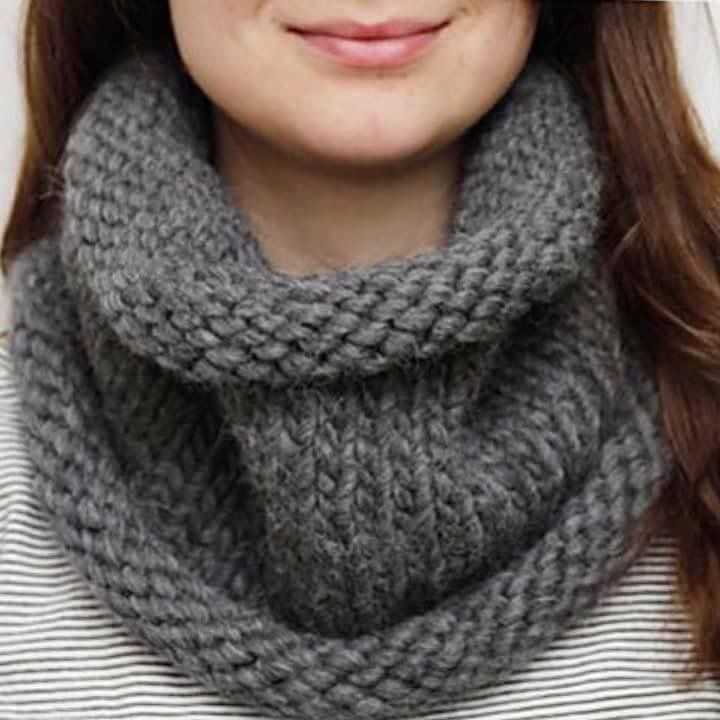
Are you looking for a cozy and stylish accessory to keep you warm during the chilly winter months? Look no further than a snood! A snood is a versatile and trendy fashion piece that can be worn in a variety of ways. Whether you wear it around your neck, as a headband, or even draped over your shoulders, a snood is both practical and fashionable.
If you enjoy knitting, why not try making your own snood? With our free knitting pattern, you can create a personalized snood that suits your style and keeps you warm throughout the winter. This pattern is suitable for knitters of all levels, from beginners to advanced, and can be completed in just a few hours.
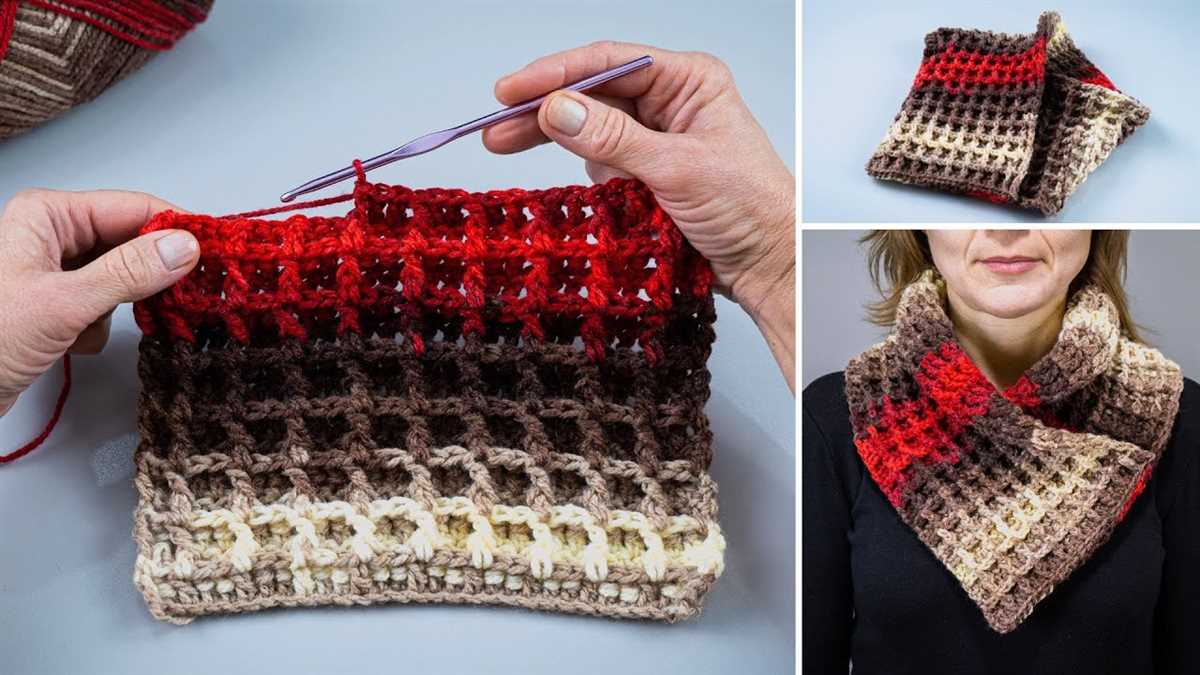
To get started, all you need is some soft and chunky yarn, knitting needles, and a few basic knitting techniques. Our pattern includes detailed instructions and step-by-step photos to guide you through the process. You can choose from a range of colors and textures to create a snood that matches your wardrobe and personal taste.
Why you need a snood
A snood is a versatile accessory that every knitter should have in their wardrobe. Whether you’re knitting for yourself or for others, a snood can be a stylish and practical addition to any outfit. Here are a few reasons why you need a snood:
1. Warmth and comfort:
A snood is a great way to keep your neck and shoulders warm during cold weather. The snug fit and soft yarn will provide insulation and protection against harsh winds. It can also be a cozy accessory for indoor wear, providing comfort and warmth while relaxing at home.
2. Fashion statement:
A snood can be a chic and fashionable accessory that adds a touch of style to any outfit. With various patterns and colors available, you can easily find a snood that matches your personal style and complements your wardrobe. It can be worn with casual or formal attire, making it a versatile accessory for different occasions.
3. Easy to wear:
Unlike scarves, snoods are easy to wear and require no special folding or tying. Simply slip it over your head, and you’re ready to go. This makes it a convenient accessory for those who are always on the go and don’t have time to fuss with their outfit. It’s also a great option for kids, as it stays in place and avoids the hassle of loose ends.
4. Practicality:
Snoods not only serve as a fashionable accessory but also have practical uses. They can be used to cover your face during dusty or polluted environments, provide additional warmth when worn as a hood, or even double as a headband. With their versatility, snoods can be a valuable item in your wardrobe that serves multiple purposes.
In conclusion, a snood is a must-have accessory for any knitter. Whether you’re looking to keep warm, make a fashion statement, or just add a practical item to your wardrobe, a snood can fulfill all these needs. So grab your knitting needles and start creating your own snood using a free knitting pattern!
Choosing the Right Yarn
When it comes to knitting a snood, choosing the right yarn is crucial. The type of yarn you select will determine the overall look and feel of your snood, as well as its level of warmth and durability. Here are some important factors to consider when choosing yarn for your snood:
1. Fiber Content
The fiber content of the yarn will greatly impact the properties of your snood. Wool is a popular choice due to its warmth and insulation. It is also naturally water-resistant, making it a great option for colder climates. If you are looking for a vegan alternative or have allergies, you can opt for plant-based fibers like cotton or bamboo. These fibers are lightweight and breathable, perfect for snoods that will be worn in warmer weather.
2. Weight
The weight of the yarn refers to its thickness or thinness. Snoods can be made with various weights of yarn, and the choice depends on the desired drape and warmth of the finished snood. Thicker yarns, such as bulky or chunky weight, will create a snood that is cozy and warm. On the other hand, thinner yarns, like fingering or sport weight, will result in a snood that is lightweight and more suitable for layering.
3. Texture
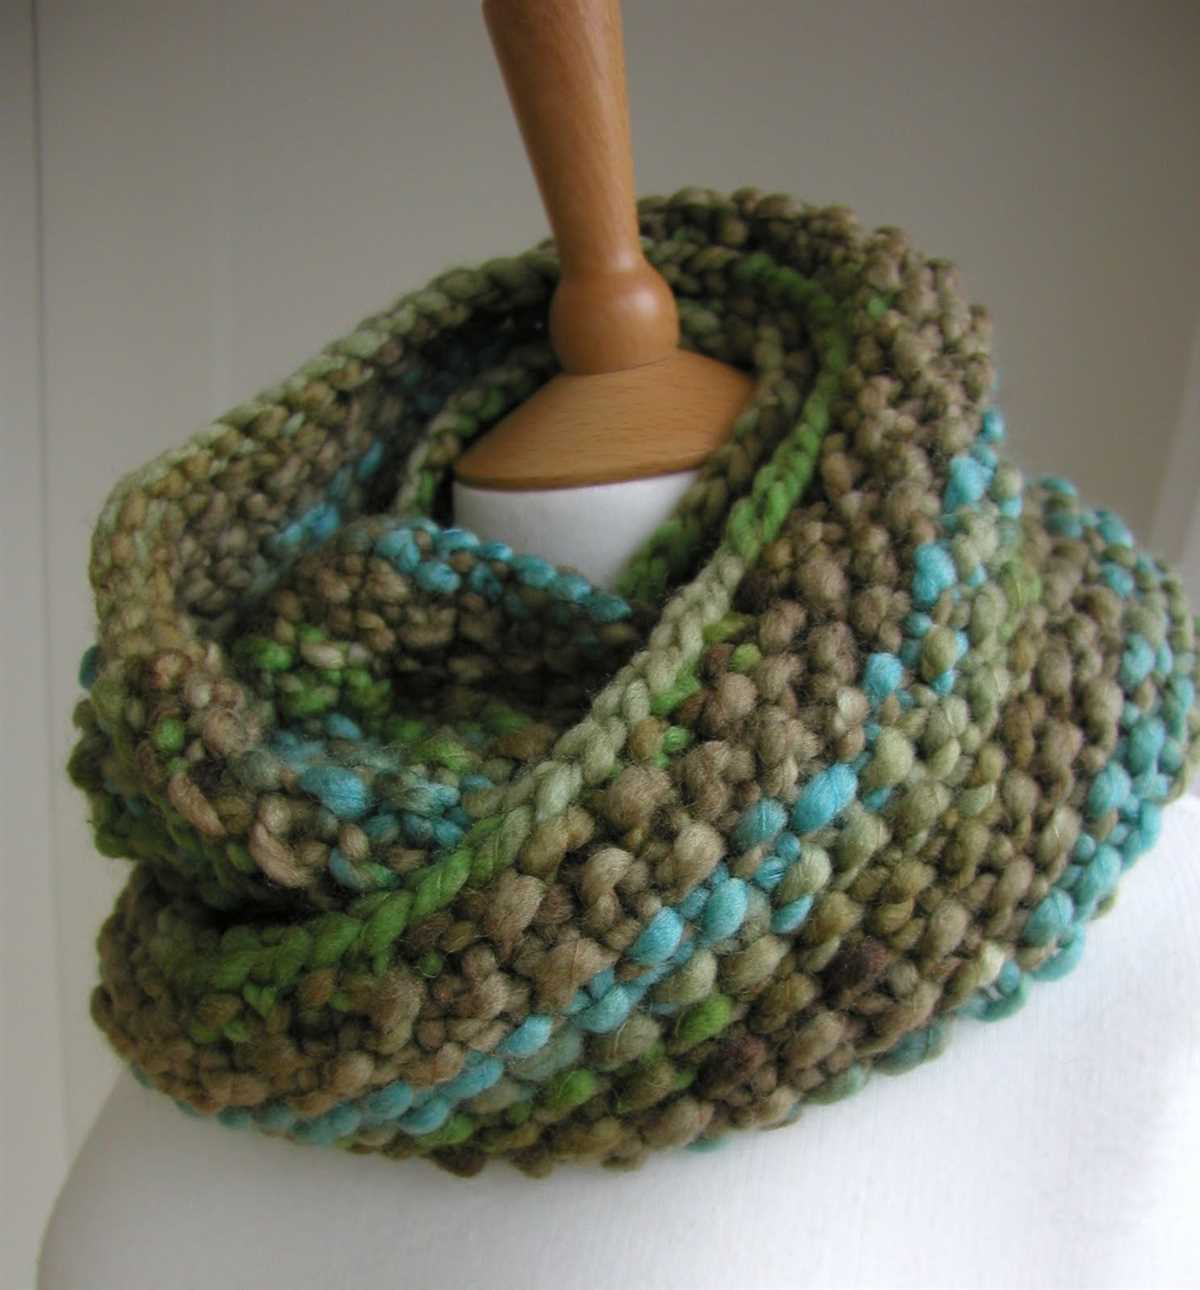
The texture of the yarn can add visual interest and dimension to your snood. Smooth, solid-colored yarns are ideal for showcasing intricate stitch patterns, while variegated or self-striping yarns can create a more playful and unique look. Additionally, textured yarns like boucle or mohair can give your snood a fluffy and textured appearance.
4. Durability
Consider the durability of the yarn, especially if you plan to wear your snood frequently. Yarns with a higher percentage of natural fibers like wool or cotton tend to be more durable and long-lasting. Additionally, yarns with a tighter twist or plied construction are less likely to pill or lose their shape over time.
By considering these factors and experimenting with different yarns, you can find the perfect yarn to knit your snood and create a cozy accessory that suits your style and needs.
Tools you’ll need
When it comes to knitting a snood, there are a few essential tools that you will need to have on hand. These tools will help you create your snood with ease and ensure that your finished product looks polished and professional.
Knitting Needles: The most important tool you will need for knitting a snood is a pair of knitting needles. The size of the needles will depend on the type of yarn you are using and the desired tension of your stitches. It’s a good idea to have a few different sizes of needles on hand so that you can experiment and find the best fit for your project.
- Straight Needles: Straight needles are the most common type of knitting needles and are typically used for flat knitting. They have a pointed end on one side and a knob or stopper on the other to prevent stitches from falling off.
- Circular Needles: Circular needles are a great option for knitting a snood, as they allow you to work in the round and create a seamless tube. They consist of two needle tips connected by a flexible cord, which can be adjusted to accommodate different stitch counts.
- Double-Pointed Needles: Double-pointed needles are often used for small circumference knitting, such as when shaping the top of a hat or working on small accessories. While they may not be necessary for knitting a snood, they can be handy to have on hand for certain techniques.
Tapestry Needle: A tapestry needle, also known as a yarn needle or darning needle, is an essential tool for finishing your snood. It is used to weave in loose ends of yarn and sew any seams or stitches that need to be closed. Look for a tapestry needle with a large eye and a blunt tip for easier threading and maneuvering.
Stitch Markers: Stitch markers are small, removable markers that are used to mark specific stitches or sections of your knitting. They can be particularly useful when knitting in the round or when working on complex stitch patterns. They come in a variety of sizes and materials, such as plastic or metal, and can easily be slipped onto your knitting needles.
Scissors: A pair of sharp scissors is essential for any knitting project. They will come in handy for cutting yarn, trimming loose ends, and making any necessary adjustments. Choose a pair of scissors that is small and lightweight so that you can easily carry them with your knitting supplies.
Measuring Tape: A measuring tape is useful for checking the length and circumference of your snood as you knit. It can also be used to measure your gauge and ensure that your stitches are the correct size. Look for a flexible measuring tape that is easy to manipulate and has clear markings.
Having these essential tools on hand will make knitting your snood a breeze. With the right tools and a little practice, you’ll be able to create a beautiful and cozy snood that you’ll love wearing.
Getting started
Before you start knitting your snood, it’s important to gather all the necessary materials. You will need a pair of knitting needles, preferably in a size that corresponds to the yarn weight you have chosen. Make sure to check the recommended needle size on the yarn label. Additionally, you will need a skein or ball of yarn in your chosen color.
Once you have your materials ready, it’s time to familiarize yourself with the knitting pattern. Take some time to read through the instructions and make sure you understand the different stitches and techniques involved. If you’re new to knitting, it may be helpful to watch some tutorial videos or consult a beginner’s knitting book to get a better understanding of the basics.
Step 1: Casting on
Start by casting on the required number of stitches onto your knitting needle. This will form the foundation row of your snood. Follow the instructions in the pattern for the specific casting on method to use.
Step 2: Knitting the rows
Once you have cast on, you will proceed to knit the rows according to the pattern. This may involve different combinations of knit and purl stitches to create the desired texture or pattern. Make sure to follow the pattern instructions carefully, counting your stitches and rows as you go.
Step 3: Shaping and decreasing
As you knit, the pattern may require you to shape and decrease the stitches in specific ways to achieve the desired shape and size for your snood. Pay close attention to these instructions and make any necessary adjustments to your knitting as you go along.
Step 4: Finishing off
Once you have completed all the required rows and shaping, it’s time to finish off your snood. This usually involves binding off the stitches to create a neat edge. Follow the pattern instructions for the specific finishing off method to use.
Remember to take your time and enjoy the process of knitting your snood. It can be a relaxing and rewarding hobby, and with practice, you’ll soon be able to create beautiful snoods for yourself and your loved ones.
Knitting the snood body
Once you have gathered all the necessary materials and have cast on the appropriate number of stitches, you can begin knitting the body of the snood. The body is the main part of the snood that will wrap around your neck, providing warmth and style.
Start by knitting in the round, using the desired stitch pattern or combination of stitches. You can choose from a variety of stitch patterns, such as garter stitch, stockinette stitch, or a textured pattern like seed stitch or ribbing. Make sure to follow the instructions provided in the knitting pattern for the snood.
For example: If the pattern specifies a garter stitch pattern, you will knit every stitch in every row. If the pattern specifies a stockinette stitch pattern, you will knit on the right side rows and purl on the wrong side rows. If the pattern specifies a ribbing pattern, you will alternate between knitting and purling stitches.
Continue knitting in the desired pattern until the snood reaches the desired length. You can measure the length by trying it on or by using a tape measure. Make sure to periodically check the gauge to ensure that your knitting is consistent with the pattern.
Tip: If you want a snood with a looser fit, you can use larger knitting needles or cast on more stitches. If you want a snood with a tighter fit, you can use smaller knitting needles or cast on fewer stitches.
Adding Texture and Patterns
When knitting a snood, adding texture and patterns can make the finished piece more interesting and visually appealing. There are various techniques and stitch patterns that can be incorporated to achieve different effects.
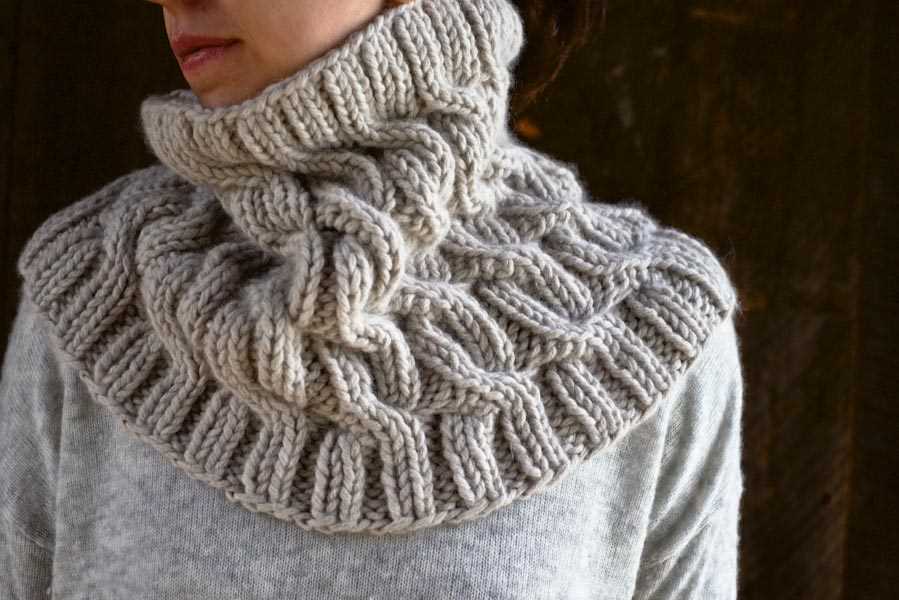
Cables: Cables are a popular choice for adding texture to knitted snoods. They create a twisted rope-like design that adds depth and dimension to the fabric. To knit cables, certain stitches are held to the front or back of the work, creating the crossed effect.
Lace: Lace patterns can give a delicate and airy look to a snood. They usually involve yarn overs, decreases, and various combinations of knit and purl stitches. Lace can range from simple eyelet designs to intricate floral or geometric motifs.
Fair Isle: Fair Isle knitting involves using multiple colors in a single row to create patterns and designs. This technique can be used to add color and texture to a snood, and it allows for endless creative possibilities. It’s important to ensure that the tension remains consistent when switching between colors to achieve an even and balanced fabric.
Ribbing: Ribbing is commonly used for the edges of a snood or as a textured panel within the main body. It involves alternating knit and purl stitches in a specific pattern, such as 1×1 or 2×2. Ribbing adds elasticity and gives a structured appearance to the knitted fabric.
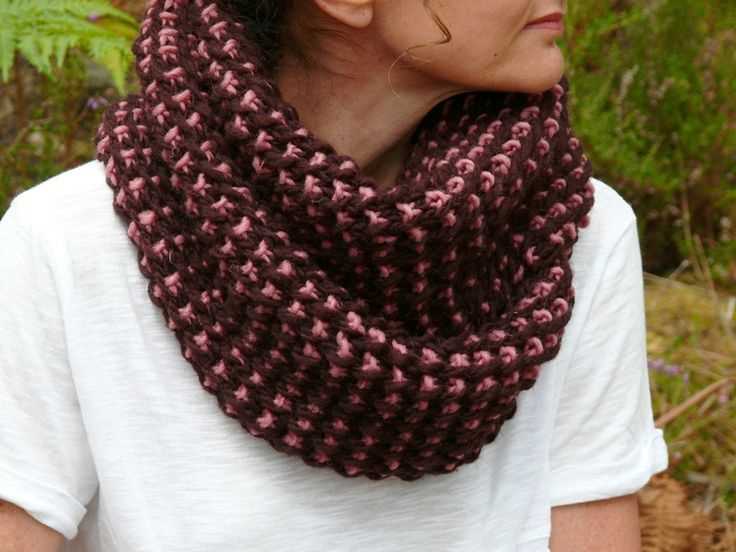
Seed Stitch: The seed stitch is a simple pattern that alternates between knit and purl stitches within the same row. It creates a bumpy texture that is similar to the texture of seeds, hence the name. This stitch pattern can be used as an all-over design or as an accent to add interest and variety to a snood.
Choosing the right combination of textures and patterns can elevate a simple snood into a stylish and unique accessory. Experimenting with different stitches and techniques can open up a world of possibilities and allow knitters to showcase their creativity and personal style.
Knitting the snood edge
When knitting a snood, one of the most important parts is creating a clean and neat edge. The edge of the snood not only provides a finished look to the overall design, but it also helps keep the snood in place when worn. There are several techniques you can use to achieve a polished edge, depending on your preference and skill level.
1. Slip stitch edge

An easy and simple technique to create a clean edge is to use a slip stitch edge. This involves slipping the first stitch of each row without knitting or purling it. By doing this, you create a chain-like edge that helps prevent the snood from curling and gives it a professional finish.
2. Ribbed edge
If you prefer a more textured edge, you can opt for a ribbed edge. This involves alternating knit and purl stitches at the beginning and end of each row. A common ribbed edge pattern is the 1×1 rib, where you knit one stitch and purl one stitch in a repeating pattern. This creates a stretchy and decorative edge that adds interest to your snood.
3. Picot edge
If you want to add a feminine touch to your snood, you can consider adding a picot edge. This involves creating small loops or scallops along the edge of your snood. To create a picot edge, you will need to knit a small number of stitches, then bind off a few stitches to create a loop. This loop is then secured by knitting it together with the next stitch. The result is a delicate and decorative edge that gives your snood a delicate and sophisticated look.
These are just a few examples of techniques you can use to create a beautiful edge for your snood. Depending on your knitting skills and the overall design of your snood, you can experiment with different edge patterns to achieve the desired look. Remember to always practice and swatch before starting on your final project to ensure that the edge technique you choose complements the overall design of your snood.
Finishing Touches
Once you have finished knitting your snood, it’s time to add some final touches to complete the project. These finishing touches will not only enhance the overall look of the snood but also ensure that it is functional and comfortable to wear.
Blocking: Before moving on to the finishing touches, it is important to block your knitted snood. Blocking helps to shape and stretch the fabric, giving it a neat and professional look. To block your snood, simply wet it with water and lay it flat to dry, gently shaping it as desired.
Seaming: If you have knitted your snood in separate panels, you will need to seam them together to create a seamless and continuous loop. Use a yarn needle and the same yarn that you used for knitting to stitch the panels together. Make sure to hide the tail ends of the yarn by weaving them into the fabric.
Edging: Adding an edging to your snood can give it a polished and finished look. You can choose to add a simple garter stitch or ribbing edging, or get creative with lace or cable patterns. Pick a complementary color or yarn type to make the edging stand out.
Embroidery or Appliques: If you want to add some personalization or embellishment to your snood, consider embroidering or adding appliques. You can use contrasting yarn colors to create intricate designs, or attach pre-made appliques for a quick and easy customization.
Lining: If you want your snood to be extra cozy and warm, consider adding a lining. Choose a soft fabric, like fleece or microfiber, and sew it inside the snood. This will not only provide additional insulation but also prevent the snood from stretching too much.
Finishing touches play a vital role in knitting projects. They add that extra touch of professionalism and personalization to your snood, making it stand out from the crowd. Take your time to carefully consider and execute these finishing touches, and you will be rewarded with a beautiful and functional snood that you can proudly wear or gift to someone special.
Blocking the snood
Blocking is an essential step in the knitting process that helps to give your snood a polished and professional finish. It involves shaping and stretching the knitted fabric to ensure that it retains its shape and has an even appearance.
Before you start blocking, it’s important to first wash your snood according to the yarn’s instructions. This will help to remove any dirt or oils that may be on the fabric, and allow the fibers to relax and settle into their final form. Once your snood is clean and damp, you’re ready to begin the blocking process.
The first step is to lay your snood out on a clean surface, such as a blocking mat or towels. Use rustproof pins to gently stretch and shape the snood to its desired dimensions. Pay attention to any stitch patterns or cables, making sure they are evenly spaced and defined. Pinning the edges can also help to create a straight and smooth edge.
Once your snood is pinned, leave it to dry completely. This can take anywhere from a few hours to a day, depending on the humidity and thickness of the yarn. Avoid moving or touching the snood while it’s drying, as this can disturb the shape and cause it to lose its blocked form.
After the snood is dry, carefully remove the pins and admire your beautifully blocked creation. The fabric should be soft, smooth, and have a nice drape. Blocking not only enhances the appearance of your snood, but it also helps to set the stitches and improves the overall wearability of the garment. Now you’re ready to show off your snood and enjoy the warmth and style it brings to your wardrobe!
Styling options
A snood is a versatile accessory that can be styled in various ways to complement different outfits and occasions.
Here are some styling options to consider:
- Classic Wrap: Simply wrap the snood around your neck once or twice for a cozy and classic look. This style works well with a casual or formal outfit, adding warmth and elegance.
- Double Layer: For extra warmth and a more voluminous look, fold the snood in half and pull it over your head. This style is perfect for cold winter days and can be paired with a coat or jacket.
- Loose Drape: Instead of wrapping the snood tightly around your neck, let it hang loosely for a relaxed and effortless look. This style is great for adding a pop of color to a simple outfit.
- Headscarf: Transform your snood into a stylish headscarf by pulling it up and over your head. This style is perfect for keeping your hair in place on windy days or adding a bohemian touch to your look.
- Shoulder Wrap: Instead of wearing the snood around your neck, drape it over your shoulders like a shawl or cape. This style adds an elegant and sophisticated touch to any outfit.
Experiment with these styling options and find the one that suits your personal style and the occasion. Whether you prefer a classic or more unique look, a snood can be a versatile accessory that adds both style and warmth to your outfit.
Get started on your snood today!
With this free knitting pattern for a snood, you can create a stylish and practical accessory in no time. Whether you’re a beginner or an experienced knitter, this project is perfect for you. So gather your supplies and let’s get started!
First, make sure you have all the necessary materials, including the appropriate size knitting needles and the recommended yarn. You can find the specific requirements in the pattern instructions. Once you have everything you need, it’s time to begin.
Step 1: Cast on
The first step is to cast on the required number of stitches. Follow the instructions carefully, ensuring an even tension and spacing between stitches.
Step 2: Knit the rows
Continue knitting the rows according to the pattern. Pay attention to any stitch variations or repeats, adjusting your technique as needed. Remember to take breaks and rest your hands and wrists to avoid fatigue.
Step 3: Finish and bind off
Once you’ve reached the desired length, it’s time to finish your snood. Follow the pattern instructions for binding off, making sure to secure the stitches so they don’t unravel. Trim any excess yarn and weave in any loose ends for a neat finish.
Now that you’ve completed your snood, you can enjoy wearing it or give it as a thoughtful handmade gift. Feel free to experiment with different yarns, colors, and stitch patterns to create your own unique snood designs. Happy knitting!