
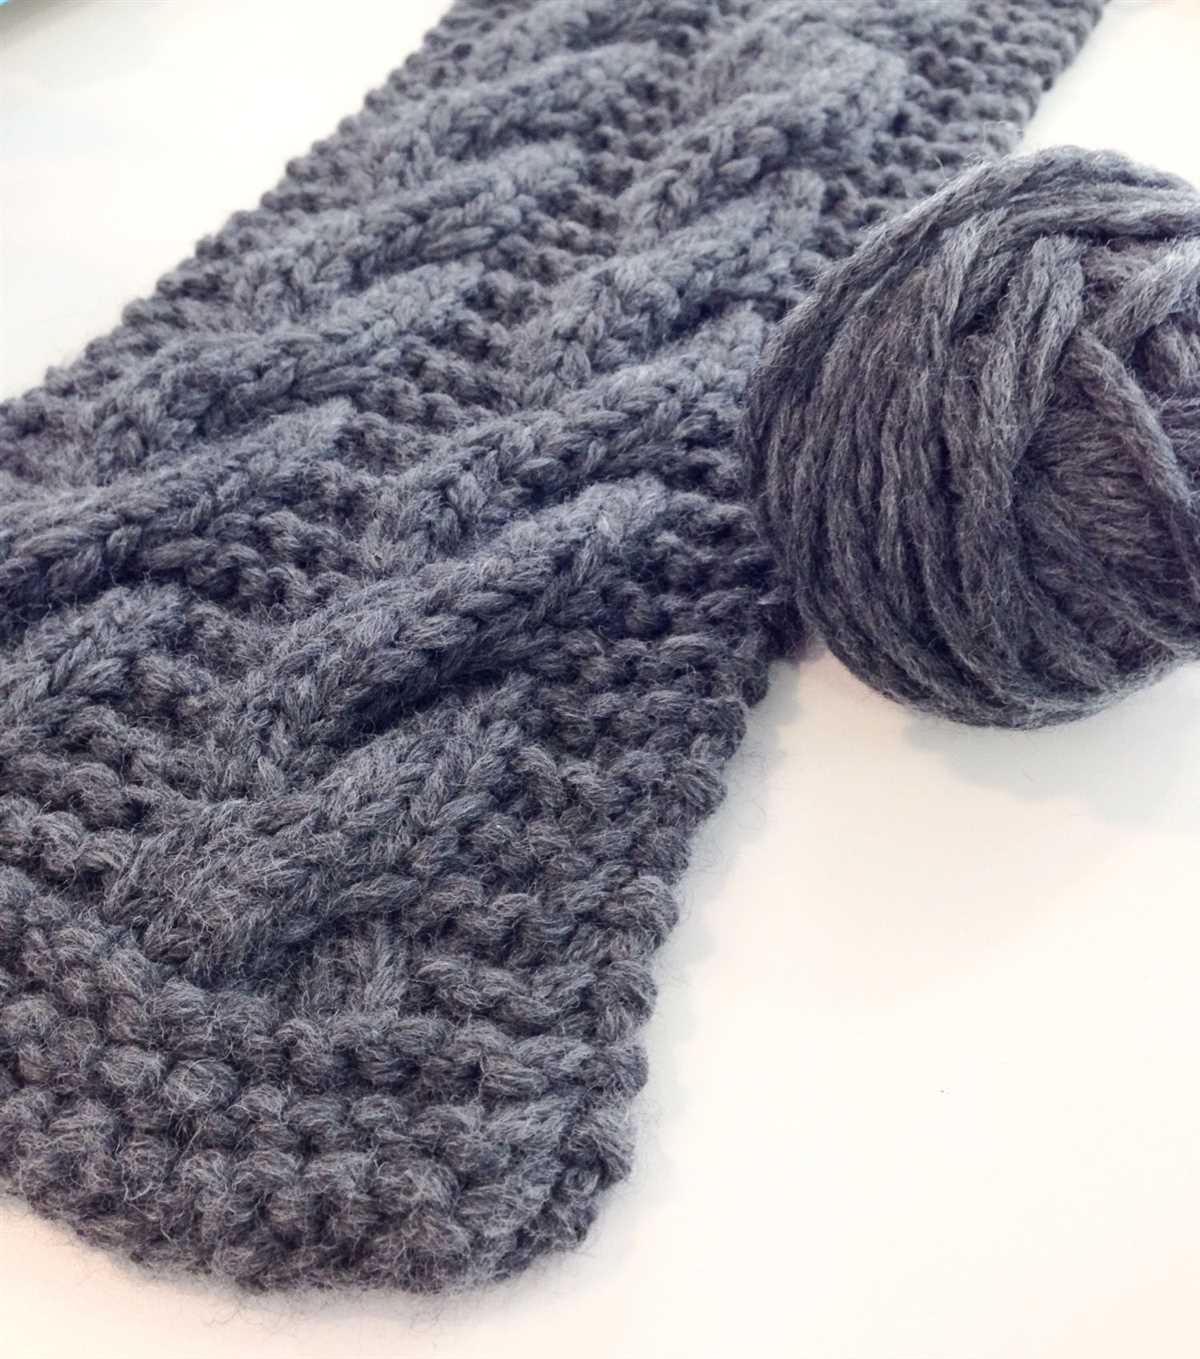
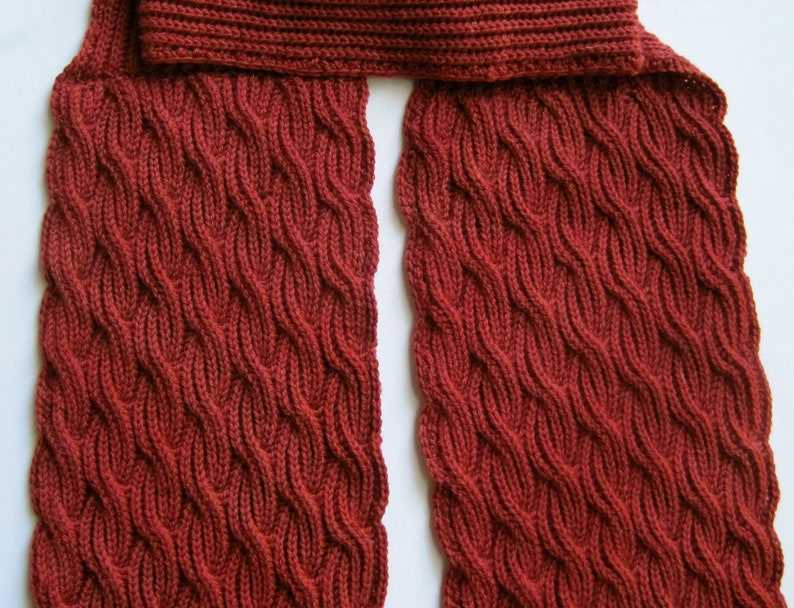
If you enjoy knitting and love the look of cable patterns, then the single cable knit scarf pattern is perfect for you. This pattern is a great way to practice your cable knitting skills and create a stylish accessory at the same time.
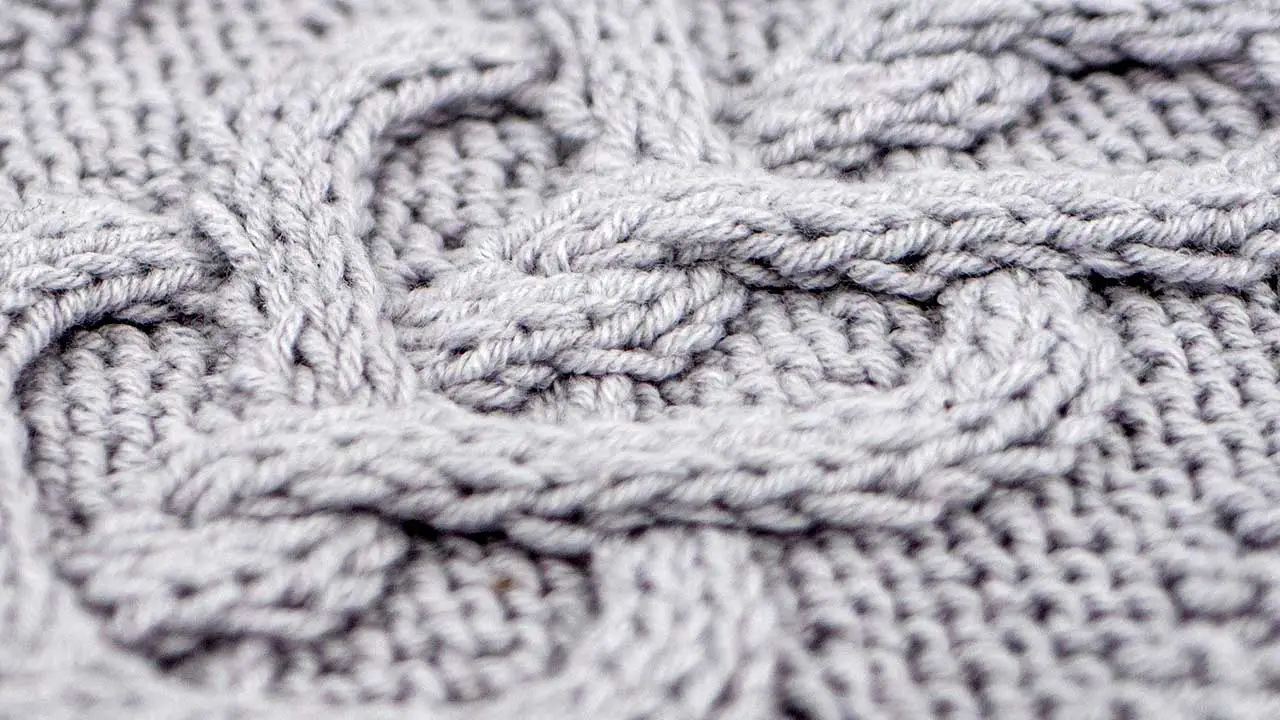
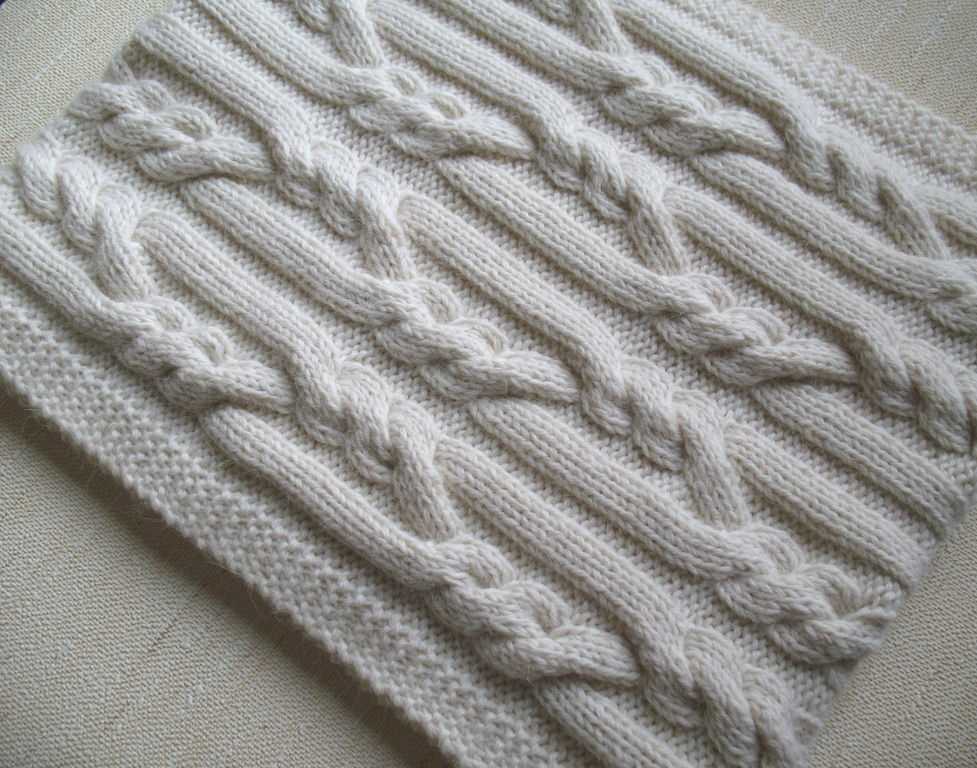
Cable knitting is a technique that involves crossing stitches to create a design that resembles a cable. It adds texture and visual interest to your knitted projects. The single cable knit scarf pattern features a single cable running along the length of the scarf, creating a bold and eye-catching design.
To create this scarf, you’ll need to know how to knit and purl stitches, as well as how to cross stitches to create the cable. The pattern typically requires a medium weight yarn and appropriate knitting needles for that yarn weight. You can choose any color or variegated yarn to make your scarf unique and personalized.
Single Cable Knit Scarf Pattern
A cable knit scarf is a classic and timeless accessory that can add an extra layer of warmth and style to any outfit. If you are a beginner knitter looking for a simple and elegant project, a single cable knit scarf pattern is a great option. This pattern is perfect for those who have basic knitting skills and want to practice cable knitting.
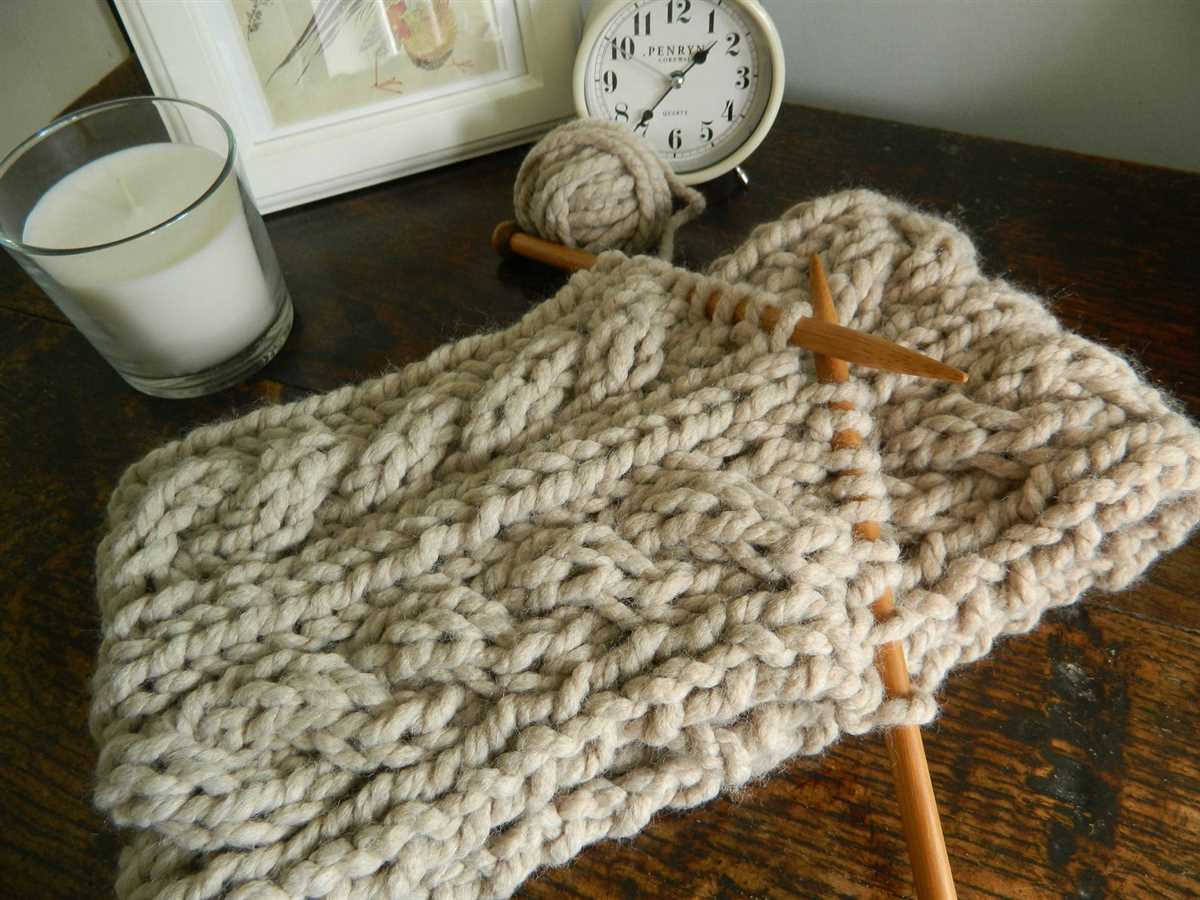
To start this project, you will need a pair of knitting needles and a ball of medium weight yarn in your desired color. Begin by casting on an even number of stitches, typically around 30-40 stitches. You can adjust the width of your scarf by increasing or decreasing the number of stitches.
Next, you will start the cable pattern. Cable knitting involves crossing stitches over each other to create a twisted design. In this single cable knit scarf pattern, you will be working a basic 4-stitch cable. Every few rows, you will cross stitches to the back or front to create the cable effect.
To create the cable pattern, follow these steps:
- Row 1: Knit all stitches
- Row 2: Purl all stitches
- Row 3: *Knit 2 stitches, hold the next 2 stitches on a cable needle and place at the back of your work, knit the next 2 stitches, then knit the 2 stitches from the cable needle. Repeat from * to the end of the row.
- Row 4: Purl all stitches
- Repeat rows 1-4 until your scarf reaches the desired length, ending with row 2.
Once you have completed the cable pattern, you can finish off your scarf by binding off all stitches. Weave in any loose ends and your single cable knit scarf is ready to wear or gift to a loved one. This simple yet elegant pattern is perfect for showcasing the beauty of cable knitting and will keep you cozy during the colder months.
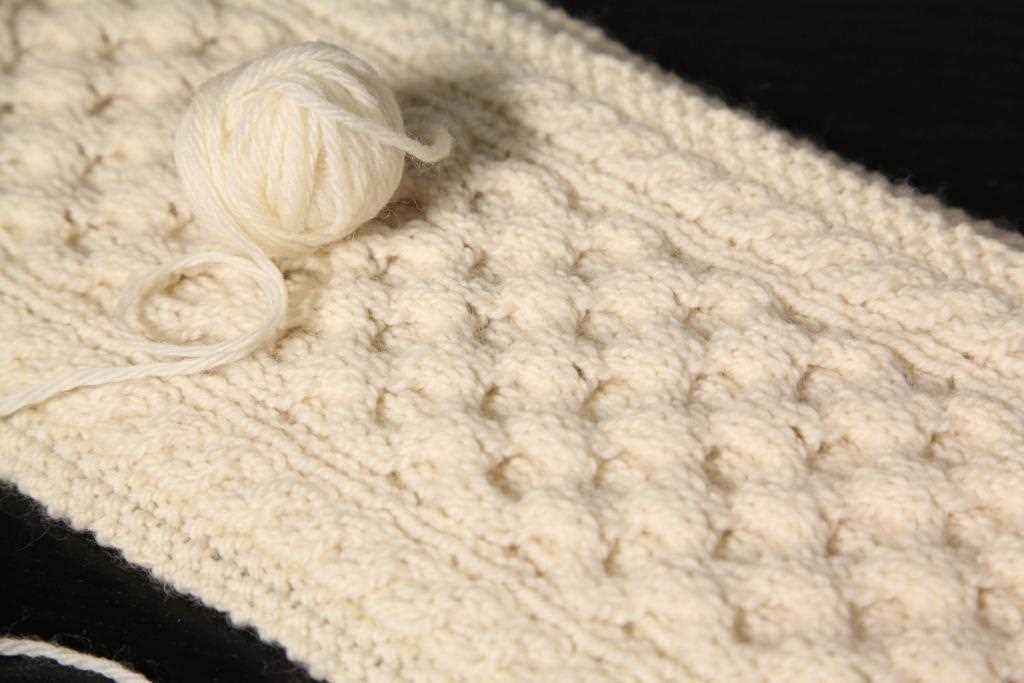
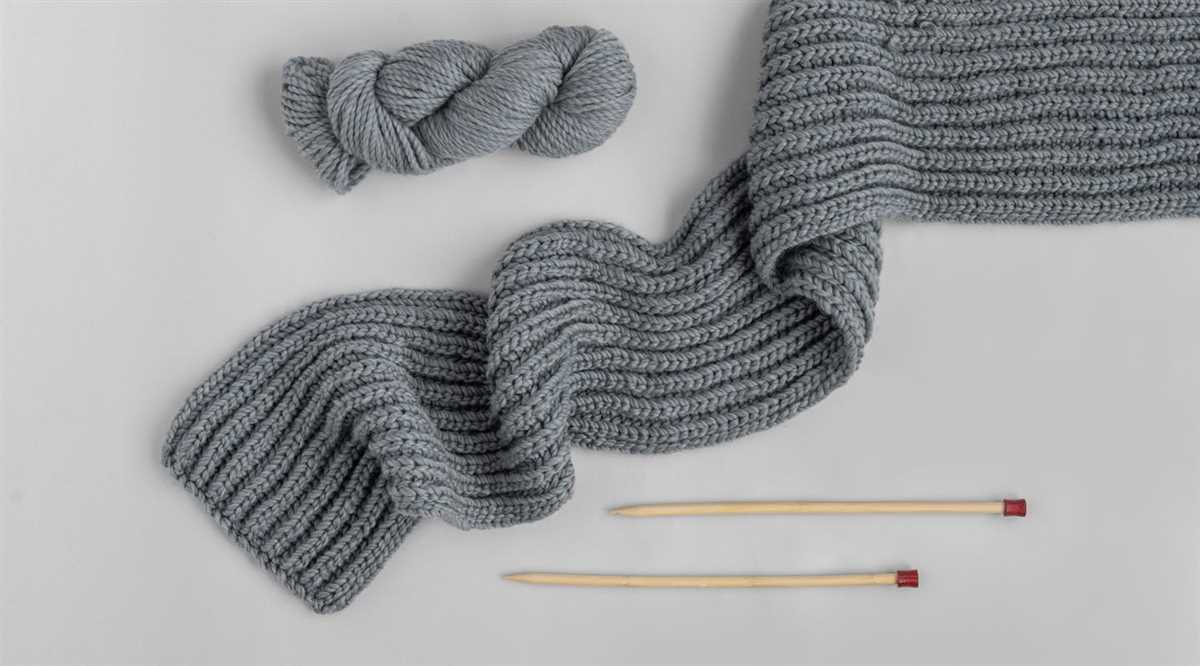
Materials
In order to create your own single cable knit scarf, you will need a few essential materials. These materials will vary depending on your personal preferences, but generally include:
- Yarn: Choose a yarn that is suitable for scarves and knitting. Consider the texture, weight, and color of the yarn to match your desired style.
- Knitting Needles: You will need a pair of knitting needles that are compatible with the yarn you have chosen. The size of the needles will depend on the gauge you want to achieve.
- Cable Needle: A cable needle is a specialized needle used to hold stitches while crossing cables in the knitting process. It is an essential tool for creating the cable pattern of the scarf.
- Scissors: You will need a sharp pair of scissors to cut the yarn when needed.
- Tapestry Needle: A tapestry needle is used for weaving in loose ends and finishing touches.
These are the basic materials needed to get started on your single cable knit scarf. Feel free to personalize your project by choosing different colors, yarn textures, and needle sizes. Remember to always check the gauge and follow the pattern instructions to ensure the best results.
Gauge and Measurements
Before starting your single cable knit scarf, it’s important to understand the gauge and measurements involved in the pattern. The gauge refers to the number of stitches and rows per inch in a knitted fabric. It helps ensure that your finished scarf will have the correct size and fit. To determine the gauge, you can knit a swatch using the recommended yarn and needle size. Measure a 4×4 inch square in the middle of the swatch and count the number of stitches and rows. If your gauge matches the pattern’s gauge, then you can proceed confidently with the project.
The measurements for the single cable knit scarf pattern will depend on the desired length and width of the finished scarf. The pattern may provide specific measurements or guidelines, such as casting on a certain number of stitches and working a specified number of rows. It’s important to follow these measurements accurately to achieve the desired size. Keep in mind that the gauge and yarn weight can also affect the final measurements. If you want a longer or wider scarf, you may need to adjust the number of stitches or rows accordingly.
Cast On
The cast on is the first step in starting your single cable knit scarf pattern. It is the foundation row of stitches that you will work with throughout the pattern. There are different methods of casting on, but for this pattern, we will use the long tail cast on method.
Long Tail Cast On
To begin the long tail cast on, you will need a long tail of yarn, approximately three times the width of your finished scarf. Make a slipknot at the end of the yarn and slide it onto your knitting needle. Hold the needle with the slipknot in your right hand and the tail of the yarn in your left hand.
Take the needle and insert it from front to back under the yarn between your thumb and index finger. Bring the needle over the yarn and back under it. Slip the new loop onto the end of the needle, keeping the tension loose enough so the stitches slide easily, but tight enough to keep them secure.
Repeat this process until you have cast on the required number of stitches for your pattern. Make sure to keep the tension consistent throughout the cast on. Once you have cast on all the stitches, you are ready to begin knitting your single cable knit scarf pattern.
Cable Pattern
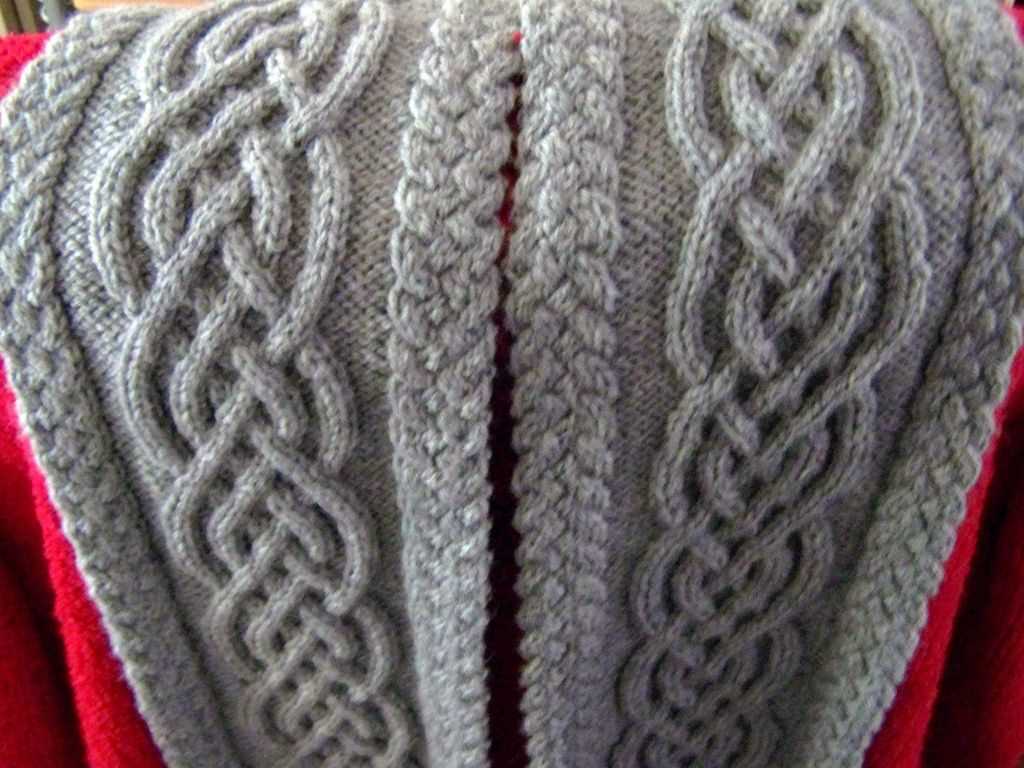
The cable pattern is a knitting technique that creates a twisted design by crossing groups of stitches over each other. It is a popular pattern that adds texture and visual interest to knitted items, such as scarves, sweaters, and blankets. Cable patterns can range from simple designs with just a few twists, to complex patterns with intricate braids and cables.
To create a cable pattern, you will need a cable needle or a double-pointed needle. The cable needle is used to hold the stitches while you knit the crossed stitches. The cable pattern usually consists of a combination of knit and purl stitches, with occasional increases or decreases to shape the pattern.
There are many different cable patterns to choose from, ranging from traditional designs to more modern variations. Some common cable patterns include the braided cable, the horseshoe cable, and the honeycomb cable. Each cable pattern has its own unique look and requires different knitting techniques.
When working with a cable pattern, it is important to keep track of your stitches. You may find it helpful to use stitch markers or a row counter to keep track of where you are in the pattern. It is also important to knit at a consistent tension and to check your gauge before starting your project.
Overall, the cable pattern is a versatile and timeless knitting technique that adds depth and complexity to any knitted item. Whether you are a beginner or an experienced knitter, trying out different cable patterns can be a fun and rewarding way to expand your knitting skills and create beautiful, textured pieces.
Row Repeat
One of the great things about the single cable knit scarf pattern is its row repeat. This means that once you learn the pattern for a row, you can easily repeat it for the entire length of the scarf. This makes it a great project for beginner knitters or for those who want a simple and relaxing knitting project.
To start the row repeat, cast on the desired number of stitches for your scarf. Then, follow the instructions for the pattern row, which usually involves a combination of knit and purl stitches. Repeat this pattern row for the desired length of the scarf.
If you’re new to knitting or need a refresher, here’s a breakdown of the basic techniques used in the row repeat:
- Knit stitch: Insert the right-hand needle through the front of the stitch on the left-hand needle, wrap the yarn around the right-hand needle, and pull it through to create a new stitch.
- Purl stitch: Insert the right-hand needle through the back of the stitch on the left-hand needle, wrap the yarn around the right-hand needle, and pull it through to create a new stitch.
- Cable stitch: This is where the pattern gets its name. To create a cable stitch, slip a specified number of stitches onto a cable needle and hold it in the front or back of your work. Then, knit or purl the next stitches on your left-hand needle, and finally, knit or purl the stitches from the cable needle. This creates the twisted cable effect.
By following the row repeat and mastering these basic techniques, you’ll be able to create a beautiful single cable knit scarf that’s sure to keep you warm and stylish during the colder months.
Increasing and Decreasing
In the process of knitting a single cable knit scarf, it is important to understand how to increase and decrease stitches. These techniques are used to create shaping and add or subtract stitches to achieve the desired size and fit of the scarf.
Increasing stitches is done to add width or create a decorative element in the knitting pattern. There are several ways to increase stitches, including yarn overs, make 1 (M1), knit front and back (kfb), and lifted increases. Yarn overs are the simplest method and involve simply wrapping the yarn around the needle before knitting the next stitch. Make 1 (M1) is done by picking up the horizontal loop between stitches and knitting into it. Knit front and back (kfb) is done by knitting into the front of the stitch and then into the back loop of the same stitch to create two stitches. Lifted increases involve picking up the strand between stitches and knitting into it.
Decreasing stitches is done to remove width or shape the knitting pattern. There are various methods for decreasing stitches, including knit two together (k2tog), slip slip knit (ssk), slip slip slip knit (sssk), and knit three together (k3tog). Knit two together (k2tog) involves knitting two stitches together as one. Slip slip knit (ssk) involves slipping two stitches as if to knit, knitting the next stitch, and then passing the slipped stitches over the knit stitch. Slip slip slip knit (sssk) is similar to ssk, but involves slipping three stitches instead of two. Knit three together (k3tog) is done by knitting three stitches together as one.
- To increase stitches:
- Yarn over (yo)
- Make 1 (M1)
- Knit front and back (kfb)
- Lifted increases
- Knit two together (k2tog)
- Slip slip knit (ssk)
- Slip slip slip knit (sssk)
- Knit three together (k3tog)
Understanding how to properly increase and decrease stitches will allow you to create various patterns and designs in your single cable knit scarf. Practicing these techniques will help you gain confidence in your knitting skills and enhance your ability to create beautiful and well-fitting knitted items.
Finishing
Once you have completed knitting your single cable knit scarf, it’s time to finish it off and make it ready for wearing or gifting.
To finish the scarf, you will need to weave in any loose ends or tails from where you started or finished your knitting. Use a yarn needle to carefully thread the loose ends through the stitches on the wrong side of the scarf. Make sure to weave the ends in securely and trim any excess yarn. This step will give your scarf a polished and tidy look.
To further enhance the appearance and durability of your single cable knit scarf, you can also block it. Blocking is a process where you dampen the knitted item and shape it to the desired dimensions, allowing the stitches to relax and even out. To block your scarf, fill a sink or basin with cool water and a small amount of mild detergent. Submerge the scarf in the water and gently squeeze to remove any air bubbles. Let it sit for about 10-15 minutes, then carefully remove it and gently squeeze out the excess water. Lay the scarf flat on a clean towel and use your hands or blocking pins to shape it to the desired size and dimensions. Allow it to air dry completely before removing the pins or using it.
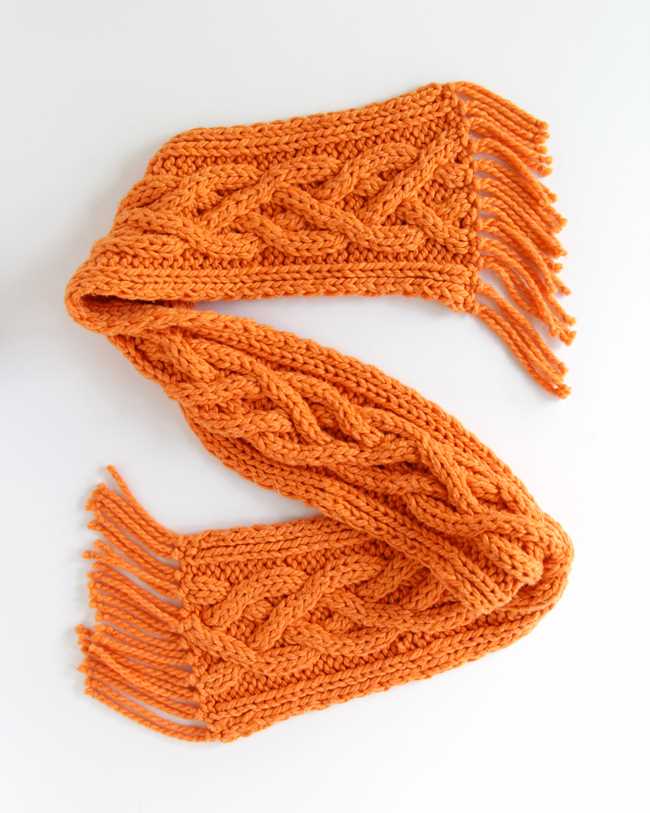
If you prefer a more decorative finish, you can also add fringe to your single cable knit scarf. Cut several strands of yarn, each double the desired length of the fringe. Fold the strands in half and use a crochet hook or your knitting needle to pull the looped end through a stitch at the edge of the scarf. Pull the loose ends through the loop and tighten to secure the fringe. Repeat this process along both edges of the scarf, spacing the fringe evenly. Trim the ends of the fringe to the desired length.
Blocking

Blocking is an essential step in the finishing process of a knitted item, including a single cable knit scarf. It involves gently reshaping the fabric to ensure it retains its shape and to enhance its appearance.
Why is blocking important?
Blocking helps to even out the tension in the stitches, allowing them to lie flat and appear more uniform. It also helps to relax and soften the fibers, making the fabric drape better and feel more comfortable to wear. Additionally, blocking can help to fix any inconsistencies in the size or shape of the knitted piece, ensuring that all components of the scarf are the same length and width.
How to block a single cable knit scarf
To block a single cable knit scarf, you will need the following materials:
- T-pins or blocking wires
- A clean towel or blocking mat
- A spray bottle filled with lukewarm water
- A measuring tape or ruler
- Begin by filling the spray bottle with lukewarm water.
- Lay the clean towel or blocking mat on a flat surface that is large enough to accommodate the entire scarf.
- Place the scarf on top of the towel or mat, making sure it is laid out flat and not twisted or stretched.
- Spray the scarf lightly with water, ensuring that it is evenly dampened but not soaking wet.
- Gently pat and shape the fabric, using your hands to smooth out any wrinkles or uneven stitches.
- Use T-pins or blocking wires to secure the scarf in place, pinning it out to the desired measurements and shape. Pay special attention to the cable pattern, making sure the cables are well-defined and not distorted.
- Leave the scarf to dry completely, usually overnight. Avoid moving or disturbing it during this time.
- Once the scarf is dry, remove the pins or wires and admire your beautifully blocked single cable knit scarf!
Blocking can make a significant difference in the final look and feel of a single cable knit scarf. It is worth taking the time to perform this step to achieve the best possible result and ensure that your scarf looks its best when worn or gifted to someone.
Optional Embellishments
If you want to add some extra flair to your single cable knit scarf, there are several optional embellishments you can consider. These embellishments can help to personalize your scarf and make it truly unique.
One option for embellishing your scarf is to add fringe. Fringe can be added to the ends of the scarf by attaching strands of yarn in the same color or a contrasting color. This can give your scarf a bohemian or playful look.
Another option is to add buttons. You can attach buttons to one end of the scarf to create a button closure. This not only adds a decorative element but also makes the scarf more practical by helping to keep it in place.
For a more delicate touch, you can add beadwork to your scarf. This can be done by stringing beads onto the yarn and incorporating them into the knitting. Beads can add a touch of elegance or sparkle to your scarf.
If you want to add some additional warmth to your scarf, you can consider attaching a faux fur trim. This can be sewn onto the edges of the scarf or added as a separate trim. The faux fur can create a luxurious and cozy look.
Lastly, you can also experiment with different yarn textures and colors. By using a variegated yarn or a yarn with different textures, you can create a visually interesting pattern and add depth to your single cable knit scarf.
Tips and Troubleshooting
Knitting a cable knit scarf can be a rewarding and enjoyable project, but it can also come with its fair share of challenges. Here are some tips and troubleshooting suggestions to help you along the way:
Tension:
One common issue when knitting cables is maintaining consistent tension. This is particularly important when working with cables, as any variation in tension can affect the overall appearance of the stitches. To help ensure an even tension, try using a yarn that is appropriate for the pattern and needle size recommended. Also, take regular breaks to relax your hands and wrists, as tension can sometimes occur from knitting too tightly.
Reading Cable Chart:
Reading a cable chart can be intimidating, especially for beginners. However, with practice and patience, it becomes easier. It helps to start with simple cable patterns and gradually work your way up to more complex ones. When reading a cable chart, follow the symbols and instructions carefully and use stitch markers to keep track of your progress. If you find yourself getting confused, refer back to the written instructions or watch video tutorials that demonstrate the cable pattern.
Fixing Mistakes:
Everyone makes mistakes while knitting, and fixing them can be a bit tricky with cable patterns. If you notice a mistake in your cables, it’s best to fix it as soon as possible before continuing with the pattern. One way to fix a mistake is to carefully drop the stitches involved in the cable and ladder them down to the mistake. Then, use a crochet hook or a cable needle to rework the stitches in the correct order. Take your time and work slowly to avoid dropping any extra stitches. If you’re unsure how to fix the mistake, seek guidance from fellow knitters or consult online resources.
Blocking:
Blocking is an important step in finishing any knitting project, including a cable knit scarf. Blocking helps even out the stitches and shape the final piece. It can also improve the drape and overall appearance of the scarf. To block your cable knit scarf, gently soak it in lukewarm water, squeeze out the excess moisture, and lay it flat on a towel to dry. You can use blocking pins to adjust and shape the edges if necessary. Avoid stretching the cables too much, as they may lose their definition.
Remember, knitting is a skill that improves with practice. If you encounter any difficulties or challenges while working on your single cable knit scarf, don’t get discouraged. Take your time, be patient with yourself, and enjoy the process. Happy knitting!
Variations
There are many ways to customize your single cable knit scarf pattern to create unique and personalized designs. Here are some variations to consider:
Color variations:
- Try using different colored yarns to create a striped effect. You can alternate between two or more colors for a bold and eye-catching look.
- Experiment with variegated yarns that have subtle color changes throughout. This can add depth and visual interest to your scarf.
- Add a contrasting color for the cable portion of the pattern to make it stand out even more.
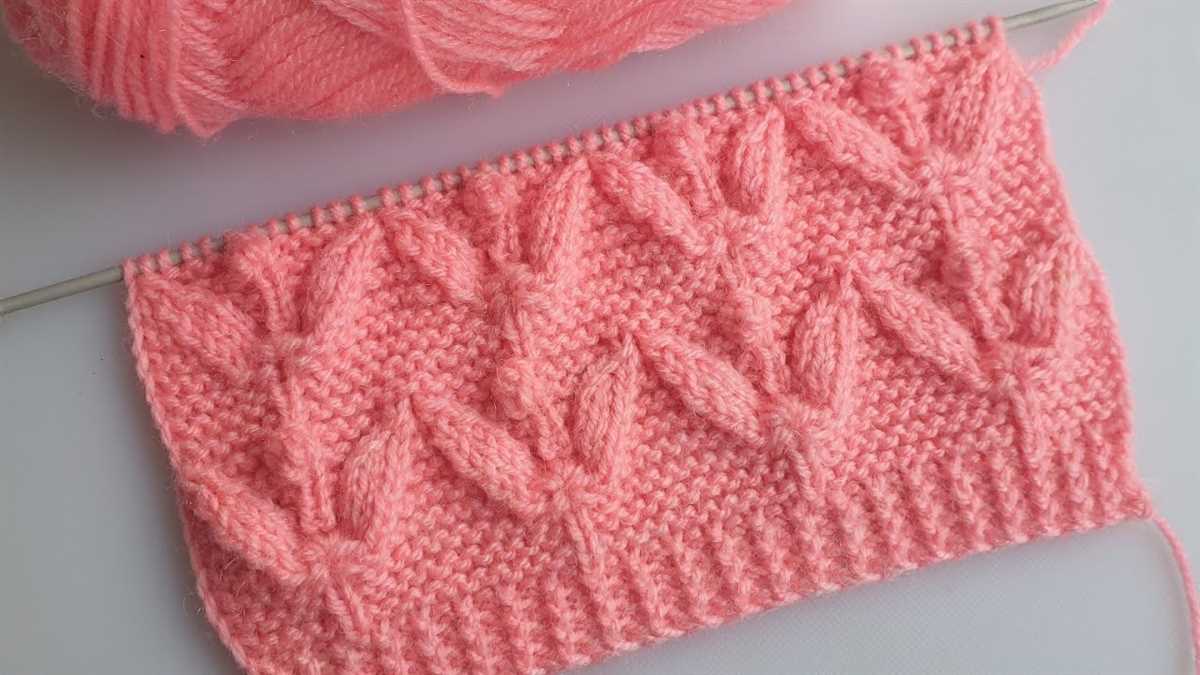
Texture variations:
- Instead of using a traditional cable stitch, try experimenting with different textured stitches such as ribbing, seed stitch, or moss stitch.
- Combine different types of stitches in the pattern, such as incorporating a simple cable stitch with a lace stitch for a more intricate design.
- Create a reversible scarf by using stitches that look the same on both sides, such as a double-sided cable or a seeded rib stitch.
Length variations:
- Adjust the length of your scarf to your preference. You can make a shorter scarf for a more casual or accessory-like look, or make it longer for added warmth and versatility.
- Add fringe to the ends of your scarf for a playful and bohemian touch.
- Consider making a matching set by creating a coordinating hat or fingerless gloves using the same stitch pattern.
With these variations, you can create a single cable knit scarf that is truly unique and tailored to your personal style.
Wrap-up
In conclusion, knitting a single cable knit scarf can be a fun and rewarding project for both beginners and experienced knitters. The cable pattern adds a touch of elegance and sophistication to the scarf, making it a stylish accessory for any outfit.
Throughout this article, we have discussed the materials and tools needed, as well as the step-by-step instructions for knitting a single cable knit scarf. We have also provided tips and techniques to help you achieve the best results.
To recap, here are the key points to remember:
- Choose a soft and warm yarn, preferably in a solid color, to showcase the cable pattern.
- Use appropriate knitting needles to create a tight and even stitch.
- Follow the cable pattern chart or written instructions carefully.
- Repeat the cable pattern throughout the scarf for a consistent look.
- Finish off the edges neatly with a garter stitch or ribbing.
With these guidelines in mind, you are now ready to embark on your own single cable knit scarf project. Remember to take your time, enjoy the process, and don’t be afraid to experiment with different cable patterns or variations.
Happy knitting!