
Knitting is a popular craft that allows individuals to create beautiful and unique garments, accessories, and home decor items. One of the most important aspects of knitting is understanding how to read and interpret knitting patterns. These patterns provide a set of instructions that guide knitters through each row and stitch, allowing them to create intricate designs and patterns.
Graphing knitting patterns is a useful technique that helps to visually represent these instructions. By using a graph paper or a knitting chart, knitters can graphically represent each stitch and row of the pattern, making it easier to follow along and track progress. This can be especially helpful when working on complex patterns with multiple color changes or intricate stitch patterns.
Creating a knitting graph may seem intimidating at first, but with a few simple techniques and tools, it can become an essential part of a knitter’s toolkit. This article will provide a step-by-step guide on how to graph knitting patterns and offer tips and tricks for accuracy and efficiency. Whether you’re an experienced knitter or just starting out, learning how to graph knitting patterns can greatly enhance your knitting skills and open up a world of creative possibilities.
How to Graph Knitting Patterns
Graphing knitting patterns can be a helpful tool for visualizing and planning your knitting projects. Whether you’re designing your own pattern or following an existing one, creating a graph can help you map out the stitches and colors and ensure that your finished project turns out just how you envisioned it.
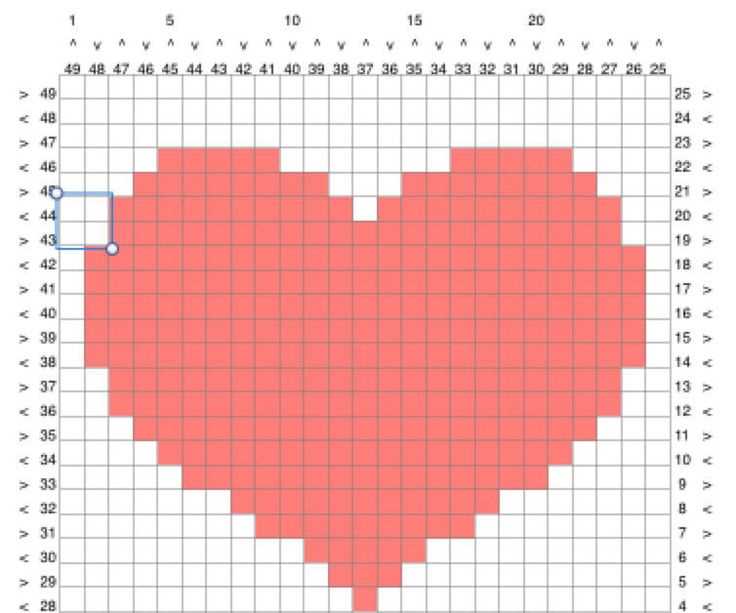
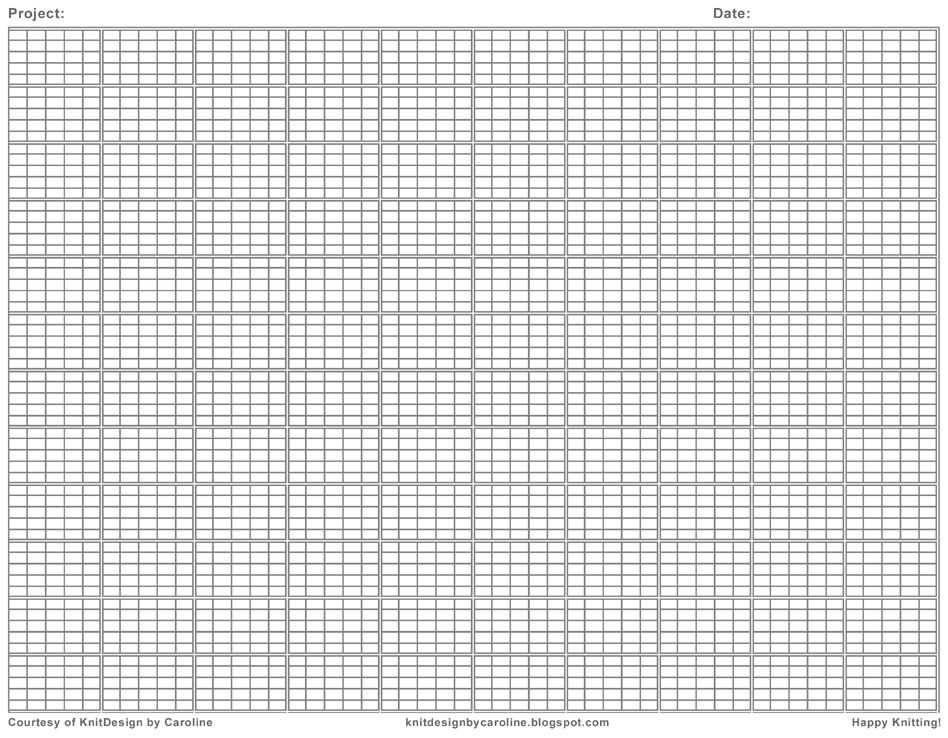
To begin graphing a knitting pattern, you will need graph paper or a digital graphing tool. The graph paper should have small squares that will represent individual stitches. Each square on the graph paper will correspond to one stitch in your knitting pattern.
Step 1: Start by deciding on the size of your graph. Determine how many stitches and rows you will need to include. For example, if you are designing a scarf that will be 20 stitches wide and 100 rows long, you will need a graph that is 20 squares wide and 100 squares long.
Step 2: Use a pencil or pen to mark the squares on the graph paper to represent your stitches. If your pattern includes stitches of different colors, you can use different colored pencils or pens to indicate these color changes on the graph. This will help you visualize how the colors will be distributed in your finished piece.
Step 3: Once you have marked the stitches and colors on your graph, you can begin to follow the pattern row by row. Use the graph as a guide to help you keep track of where each stitch should be placed and what color it should be. You can also use the graph to check for any mistakes or inconsistencies in your pattern.
Step 4: As you knit, you can color in the squares on your graph to keep track of your progress. This can be especially helpful for larger, more complex patterns. Seeing your progress visually can be satisfying and motivating.
By graphing your knitting patterns, you can create a visual representation of your project and easily make any necessary adjustments or modifications before starting your knitting. It can also help you stay organized and focused as you work on your project. Happy graphing and happy knitting!
What is graph knitting?
Graph knitting is a technique used in knitting that involves creating a visual representation of a design or pattern using a graph or chart. It is a popular method for creating intricate, detailed designs in knitting, particularly for items like sweaters, blankets, and accessories.
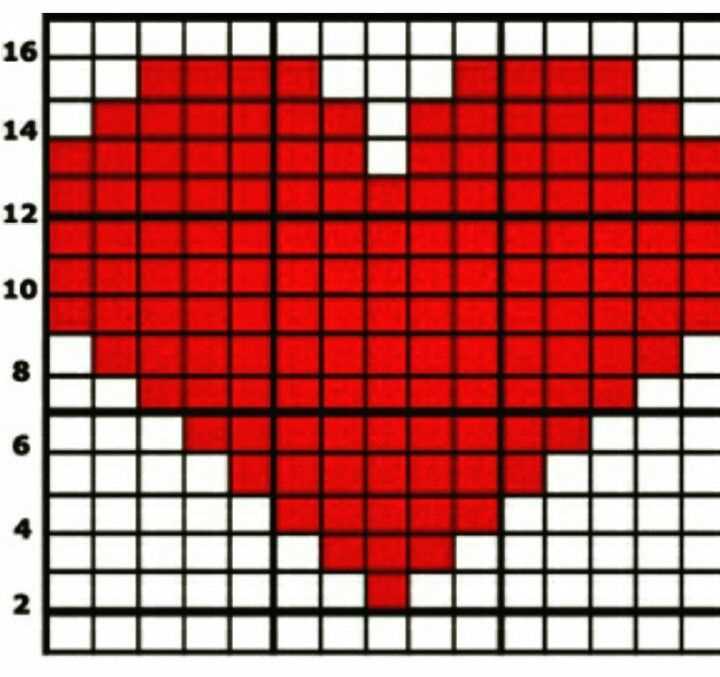
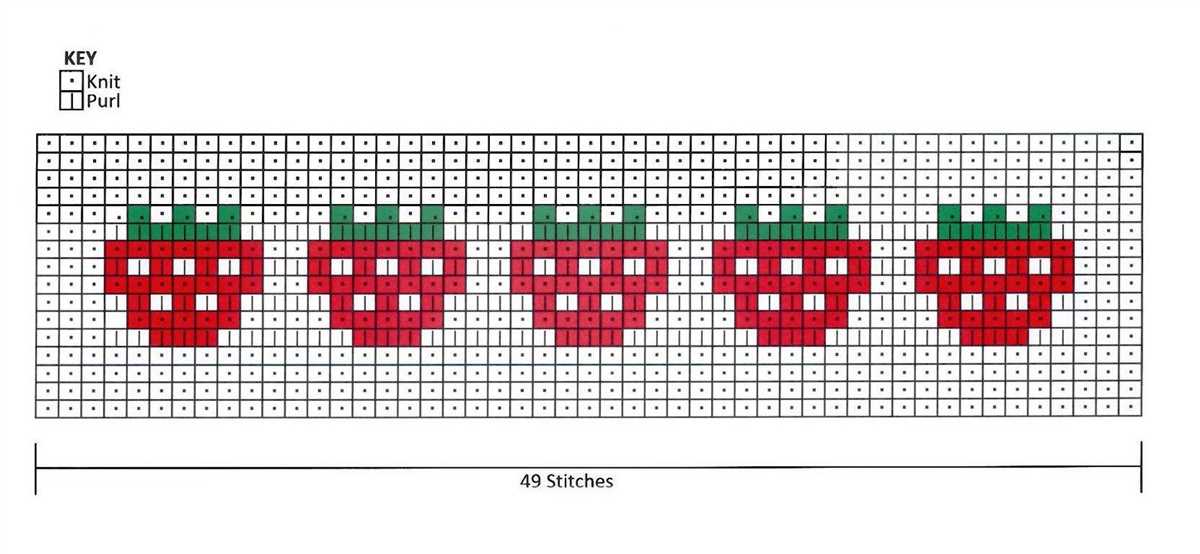
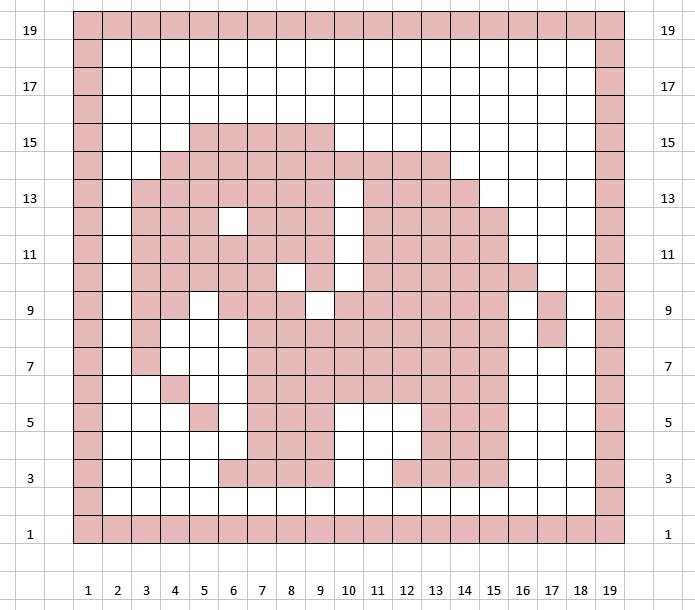
Instead of using traditional written instructions, graph knitting uses a grid-like chart to represent each stitch and color of the design. Each box in the chart represents one stitch, and the colors or symbols in the box represent the color of yarn to use for that stitch. By following the chart row by row, knitters can create complex patterns with precision and accuracy.
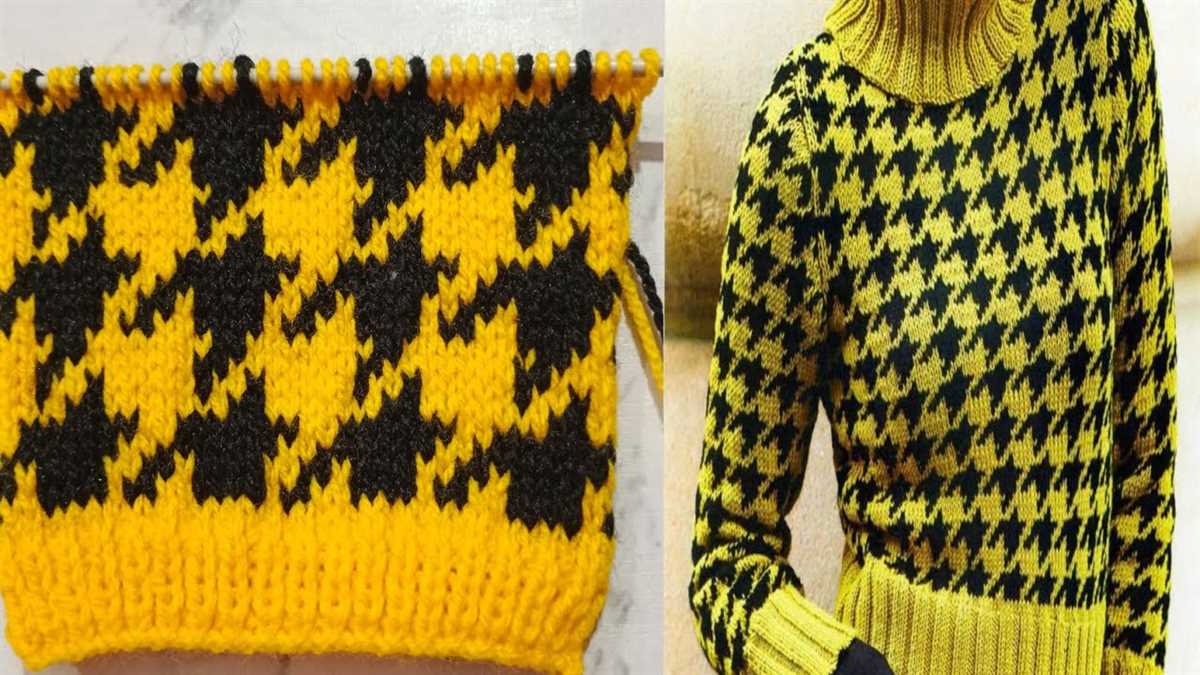
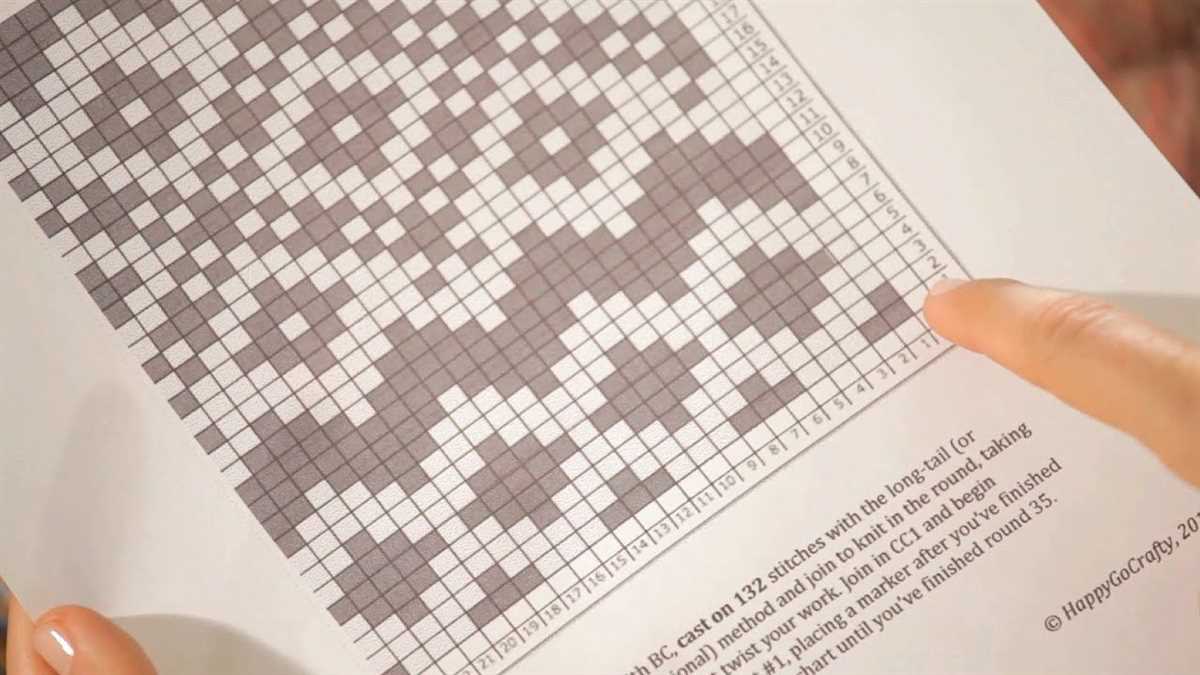
This method is especially helpful when working with complex colorwork patterns, such as Fair Isle or intarsia, where multiple colors are used in each row. The chart allows knitters to easily see which color to use for each stitch, making it easier to keep track of the pattern and ensure the colors are placed correctly.
Graph knitting charts can be created using various tools, such as graph paper or specialized knitting software. Knitters can also find pre-designed charts for popular patterns or create their own custom charts for unique designs. Overall, graph knitting is a versatile technique that opens up endless possibilities for creating beautiful, intricate knitted patterns.
Benefits of Graph Knitting
Graph knitting is a popular technique used by many knitters to create intricate and detailed patterns. It involves using a chart or graph to represent each stitch and color in a knitting pattern. There are several benefits to using graph knitting in your projects.
1. Visual Representation:
One of the main benefits of graph knitting is that it provides a visual representation of the knitting pattern. By using a chart or graph, you can easily see the stitches and colors required for each row of the pattern. This visual representation makes it easier to follow the pattern and ensures that you don’t miss any stitches or make mistakes along the way.
2. Increased Accuracy:
Graph knitting also helps to improve the accuracy of your knitting. The chart or graph allows you to see exactly how the stitches and colors should be arranged, making it easier to maintain the correct tension and stitch count. This can be especially helpful when working on complex patterns or patterns that require multiple color changes.
3. Portability:
Another benefit of graph knitting is its portability. Once you have created a graph for your knitting pattern, you can easily take it with you wherever you go. This means that you can work on your project while traveling, waiting in line, or during your lunch break. The compact nature of the graph makes it much more convenient to carry around compared to bulky written instructions.
4. Easy Pattern Sharing:
Graph knitting also allows for easy pattern sharing among knitters. Since the chart or graph provides a visual representation of the pattern, it can be easily shared and understood by other knitters. This makes it easier to collaborate on projects, exchange ideas, and learn new techniques from other knitters.
In conclusion, graph knitting offers several benefits to knitters, including a visual representation of the pattern, increased accuracy, portability, and easy pattern sharing. If you want to take your knitting projects to the next level and create intricate and detailed patterns, graph knitting is definitely worth exploring.
Choosing the right graph paper
When it comes to graphing knitting patterns, choosing the right graph paper is essential. The type of graph paper you use will determine how accurately you can translate your design onto paper and ultimately onto your knitting project.
Choosing the right size: Graph paper comes in various sizes, with different sized squares. The size you choose will depend on the scale of your pattern and the level of detail you want to capture. If you’re working on a complex Fair Isle design, you may need a smaller grid with finer squares to accurately capture the intricacy of the pattern. On the other hand, if you’re designing a simple colorblock pattern, larger squares may be sufficient.
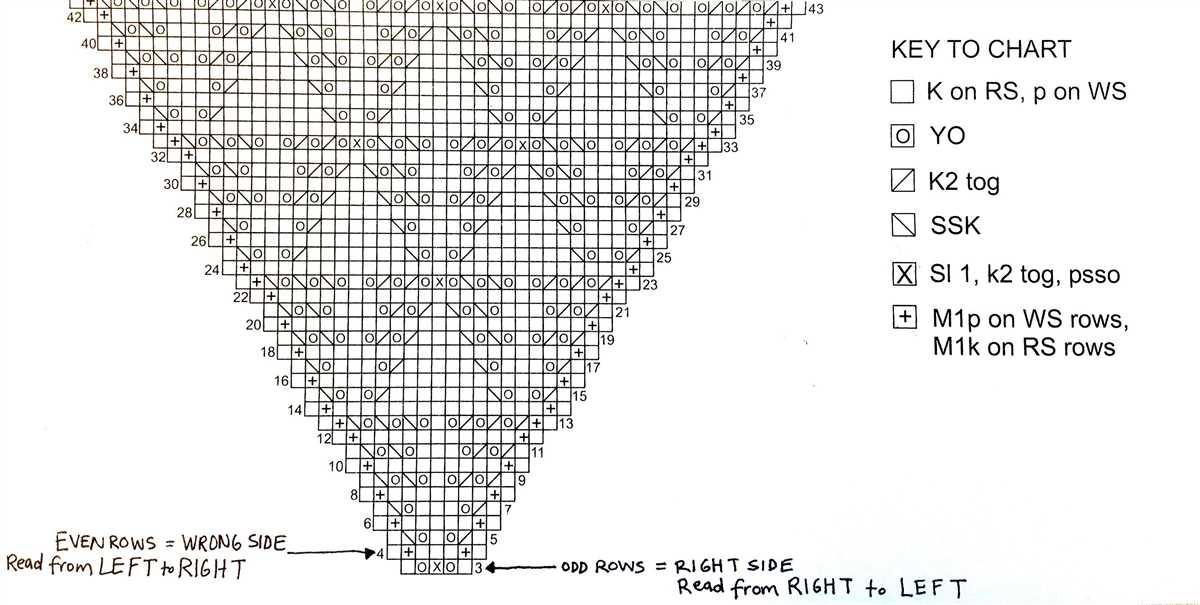
Grid style: In addition to size, the style of the grid is also important to consider. There are different types of graph paper designs, such as square, isometric, and triangular grids. Square grids are the most common and versatile, making them suitable for most knitting patterns. Isometric grids, with their diagonal lines, can be particularly useful for mapping out geometric shapes or patterns with sharp angles. Triangular grids are often used for lace knitting patterns and can help visualize decreases and increases more clearly.
Color choices: While most graph paper comes in black and white, you may also find colored graph paper options. Colored graph paper can be helpful in visualizing different elements of your design. For example, you can use one color for the main stitch pattern and another color for any additional details or colorwork. This can make it easier to see how the different parts of your pattern interact and come together.
Accessibility: Finally, consider choosing graph paper that is easily accessible to you. Whether you prefer printable graph paper, digital graphing software, or physical notebooks with pre-printed grids, make sure the method you choose is convenient and user-friendly for you to work with.
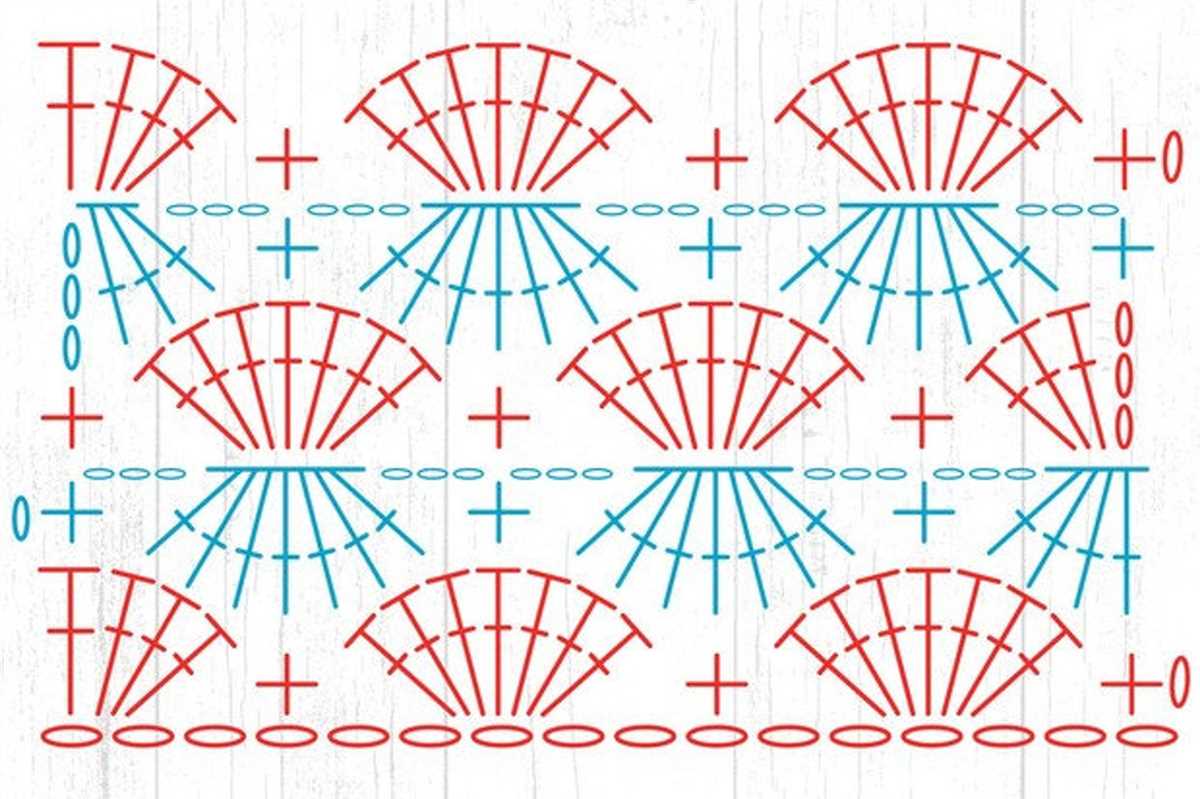
Understanding knitting symbols
When it comes to reading knitting patterns, understanding the symbols used is essential. Knitting patterns often use a combination of letters, numbers, and symbols to represent different stitches and techniques. These symbols help knitters visualize the pattern and make it easier to follow along.
Key knitting symbols:
- K: This symbol represents a knit stitch. On a pattern, it is usually followed by a number indicating how many knit stitches to make.
- P: This symbol represents a purl stitch. Similar to the knit stitch symbol, it is followed by a number indicating how many purl stitches to make.
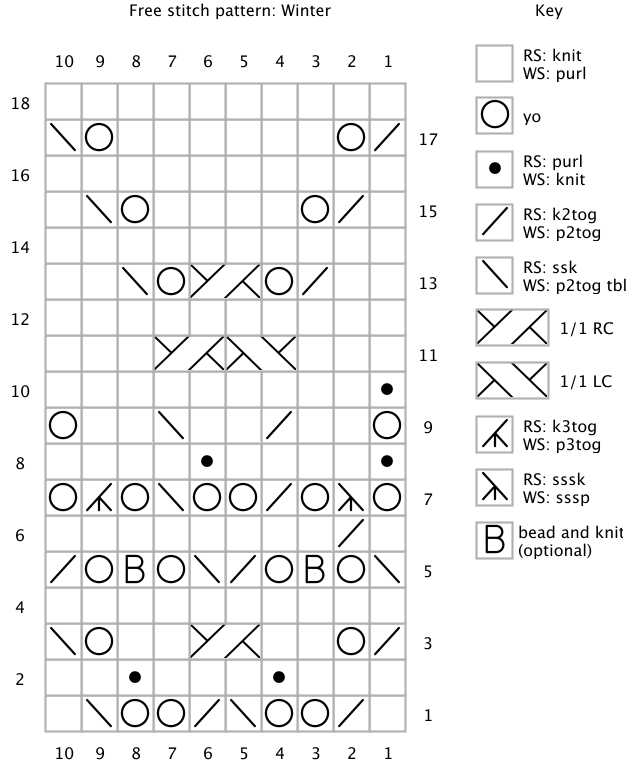
- YO: This symbol represents a yarn over. It is used to create an extra loop on the needle, which results in an eyelet or lace pattern.
- SSK: This symbol represents a slip, slip, knit decrease. It is often used to decrease stitches and create a slant in the knitting.
- K2tog: This symbol represents a knit two together decrease. It is also used to decrease stitches and create a slant.
These are just a few examples of knitting symbols used in patterns. It’s important to familiarize yourself with these symbols and their meanings before attempting a knitting project. By understanding the symbols, you’ll be able to navigate through patterns with ease and create beautiful knitted garments.
Start with a simple project
When learning how to graph knitting patterns, it’s best to start with a simple project. This will allow you to familiarize yourself with the basics and build your confidence before moving on to more complex designs.
One simple project you can start with is a basic scarf. Choose a simple stitch pattern, such as garter stitch or stockinette stitch, and create a graph to represent the pattern. You can use graph paper or a digital knitting software to create the graph. Begin by drawing a grid on the paper or using the software’s grid function. Each square on the grid will represent one stitch.
Drawing your knitting pattern on the graph paper
When it comes to creating your own knitting patterns, having a clear and accurate graph can make all the difference. Graph paper, with its grid of small squares, is the perfect tool for this task. By drawing out your pattern on graph paper, you can easily visualize the stitches and rows, and accurately plan the colorwork and shaping.
Step 1: Choose the right graph paper
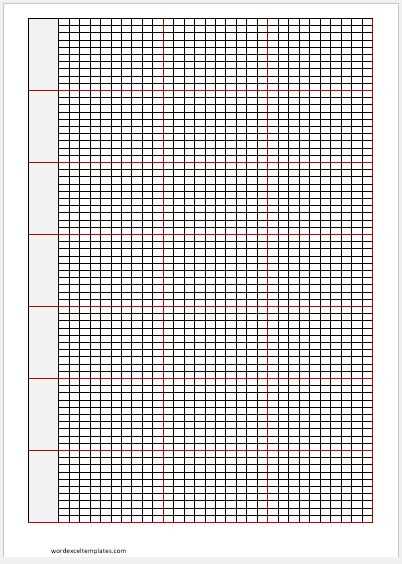
Not all graph papers are created equal. When working on a knitting pattern, it’s important to choose graph paper that has the same number of squares horizontally and vertically. This will ensure that your pattern is proportional and can be easily translated onto your knitting project. You can find knitting-specific graph paper online or print out plain graph paper and use colored pencils or markers to represent different stitches.
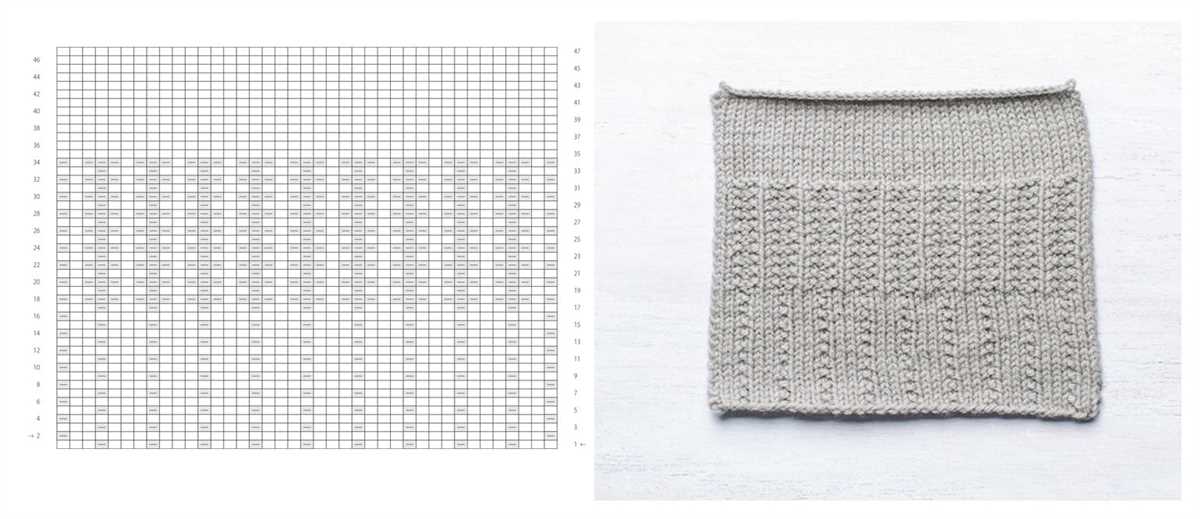
Step 2: Map out the stitches and rows
Start by mapping out your stitches and rows on the graph paper. Each square on the graph paper represents a single stitch or row. Use a pencil to lightly sketch out your design, keeping in mind that each stitch and row will be represented by a square. If you’re working with colorwork or shaping, use different colors or shading to represent different stitches or rows.
Step 3: Fill in the details
Once you have the basic structure of your knitting pattern mapped out, it’s time to add in the details. Use different symbols or abbreviations to represent different types of stitches or repeats. For example, you can use a dot to represent a purl stitch or an X to represent a decrease. Indicate any increases or decreases in stitches by adding or removing squares on the graph paper.
Step 4: Use the graph paper as a guide
As you start working on your knitting project, refer back to the graph paper to ensure that you’re following the pattern correctly. Each row on the graph paper represents a single row of stitches in your knitting. By using the graph paper as a guide, you can easily keep track of where you are in the pattern, how many stitches you need to increase or decrease, and any color changes.
Using graph paper to draw out your knitting pattern can help you create a more accurate and visually appealing design. Take your time, plan out your stitches and rows, and use the graph paper as a guide as you work on your project.
Color coding your pattern
Color coding your knitting pattern can be a helpful tool when it comes to graphing out your design. By assigning different colors to different stitches or sections of your pattern, you can easily see which stitches need to be worked in which color.
One way to color code your pattern is to use colored pencils or markers to mark each stitch or section with a different color. For example, you could use red for knit stitches, blue for purl stitches, and green for decreases. This visual representation of your pattern can make it much easier to follow along as you work.
Another option is to create a color legend at the beginning of your pattern. List out the different colors you will be using and assign each one to a specific stitch or stitch combination. For example, you could use red for knit stitches, blue for purl stitches, and yellow for yarn overs. This way, you can reference the legend as you work through the pattern to easily determine which stitch to use.
Using color coding in your knitting patterns can also be helpful when it comes to reading a chart or graph. By assigning different colors to different symbols or stitches on the chart, you can quickly identify which stitch to work. This can be especially useful for complex or intricate patterns where it is easy to get lost or confused.
Overall, color coding your knitting pattern can be a valuable tool to help you stay organized and keep track of your stitches. Whether you choose to use colored pencils, markers, or a color legend, finding a method that works for you can make the knitting process much more enjoyable and efficient.
Using software for graph knitting
If you’re a knitter looking to create your own graph knitting patterns, using software can make the process much easier and more efficient. There are several software options available that are specifically designed for graph knitting, allowing you to easily create and edit your designs.
One popular software option for graph knitting is Stitch Fiddle. This software provides a user-friendly interface that allows you to create detailed knitting charts. You can choose from a variety of stitch symbols, colors, and grid sizes to customize your design. Stitch Fiddle also allows you to easily make modifications to your pattern, such as adding borders or changing stitch counts.
If you prefer a more advanced software option, you can consider using Adobe Illustrator. With Illustrator, you have complete control over every aspect of your design. You can create complex stitch patterns, add colors and gradients, and even import images to incorporate into your knitting chart. However, keep in mind that Illustrator has a steeper learning curve compared to other software options.
No matter which software you choose, it’s important to remember that graph knitting requires attention to detail. Pay close attention to stitch counts, color changes, and any other specific instructions in your pattern. Using software can help streamline the design process, but it’s still important to thoroughly check your graph and make any necessary adjustments before starting your project.
Overall, using software for graph knitting can greatly enhance your ability to create and customize knitting patterns. Whether you’re a beginner or an experienced knitter, utilizing software can make the design process more efficient and enjoyable. So go ahead and give it a try, and watch your knitting patterns come to life!
Following the pattern while knitting
When it comes to knitting, following the pattern is essential to create a successful and beautiful end result. The pattern serves as a guide, providing instructions on how to create different stitches and patterns to achieve the desired design.
Understanding the pattern: Before starting any knitting project, it is important to carefully read and understand the pattern. This includes familiarizing yourself with the abbreviations, symbols, and terminology used in the pattern. Take your time to study the pattern’s instructions and make sure you know exactly what each step means before you start knitting.
Preparation:
- Gather your materials: Before beginning the project, gather all the necessary materials such as yarn, knitting needles, stitch markers, and a tape measure. It’s important to have everything you need within reach to avoid interruptions while following the pattern.
- Casting on: Start by casting on the required number of stitches as indicated in the pattern. Make sure to count your stitches to ensure accuracy and adjust if necessary.
- Markers: Place markers at specific points as instructed in the pattern. This will help you keep track of your progress and distinguish different sections of the pattern.
- Read the instructions before starting each row: Before starting a new row, carefully read the instructions to understand what stitches, increases, or decreases are required. This will prevent mistakes and help you maintain the correct stitch count.
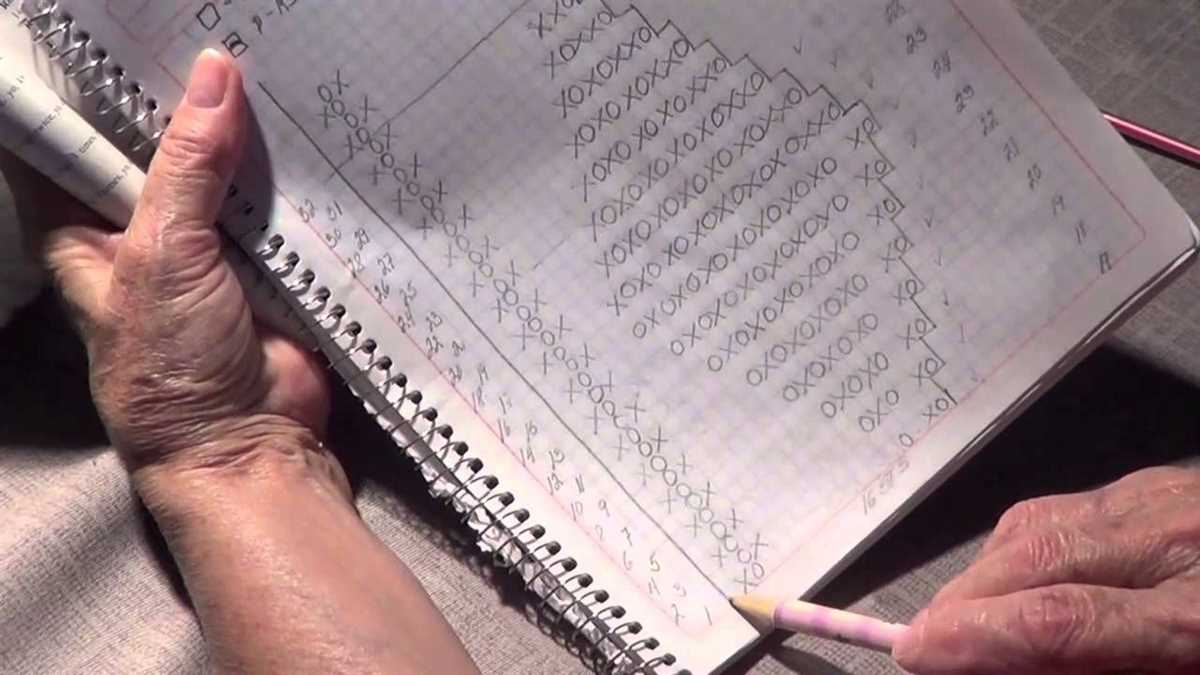
While knitting:

- Keep track of your progress: Use a row counter or a pen and paper to track the number of rows or pattern repeats completed. This will help you stay organized and ensure that you are following the pattern correctly.
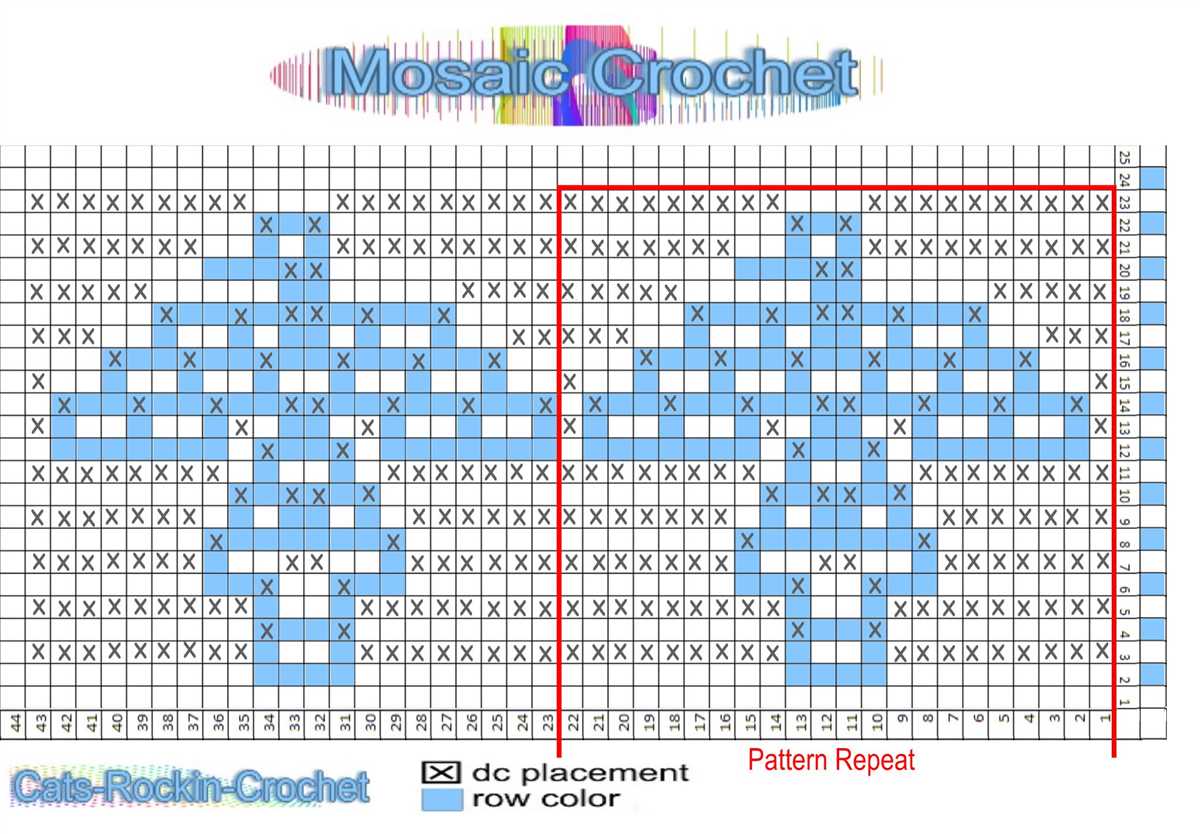
- Make use of stitch markers: If the pattern requires repeating a set of stitches or creating a specific pattern, place stitch markers to mark the beginning and end of these sections. This will make it easier to visually identify where the pattern repeat begins and ends.
- Check your work regularly: After completing a few rows, take the time to check your work for any mistakes. It’s easier to fix mistakes early on rather than having to undo several rows of knitting.
Following the pattern while knitting may require patience and attention to detail, but it is an essential skill that can lead to beautifully crafted projects. Take your time, stay organized, and enjoy the process of creating stunning knitted items.
Tips and Tricks for Graph Knitting
Graph knitting is a technique that involves creating colorwork patterns by following a chart or graph. It allows knitters to create intricate and detailed designs, such as Fair Isle or intarsia, by simply following a pattern. Here are some tips and tricks to help you master the art of graph knitting.
1. Start with simple patterns
If you’re new to graph knitting, it’s best to start with simple patterns that have fewer color changes and stitches. This will help you get familiar with reading and following the chart, as well as practicing the technique of carrying yarn and changing colors.
2. Use stitch markers
When working with a complex graph, it’s easy to get lost and lose track of where you are. Using stitch markers can be extremely helpful in keeping track of your progress. Place a marker at the beginning of each row or repeat to help you stay organized.
3. Follow a legend
Most graph knitting patterns come with a legend that explains the symbols or colors used in the chart. Take the time to familiarize yourself with the legend before you start knitting. It will make the process much easier and prevent any confusion or mistakes.
4. Check your tension
When working with multiple colors, it’s important to maintain an even tension to ensure that your stitches are consistent. Make sure to check your tension periodically as you knit to avoid any puckering or bunching of the fabric. Adjust your tension if needed.
5. Practice color changes
One of the key aspects of graph knitting is the ability to change colors smoothly. Practice weaving in the yarn as you change colors to avoid any loose or bulky strands on the back of your work. Experiment with different techniques and find the one that works best for you.
- Remember, practice makes perfect when it comes to graph knitting. Don’t be afraid to start with simple patterns and work your way up to more complex designs.
- Keep your knitting area organized by using yarn bobbins or small cups to hold different colors of yarn. This will make it easier to switch between colors and prevent tangling.
- Take breaks if you find yourself feeling overwhelmed or fatigued. Graph knitting requires concentration and can be mentally taxing, so it’s important to give yourself time to rest and recharge.
Final Thoughts
In conclusion, graphing knitting patterns allows you to visually represent your designs and helps you keep track of your progress. Whether you are creating your own patterns or following an existing one, graphing can be a helpful tool in understanding stitch placement, color changes, and pattern repeats.
By using graph paper or digital graphing tools, you can create clear and detailed charts that make it easier to read and follow knitting patterns. Additionally, graphing can help you customize patterns to suit your individual preferences, allowing for greater creativity and personalization in your knitting projects.
Remember, practice makes perfect when it comes to graphing knitting patterns. As you continue to explore different design ideas and techniques, you will become more comfortable with translating your vision into a graph and ultimately into a beautifully knit piece.
So, grab your knitting needles, some graph paper or a graphing app, and start exploring the world of graphing knitting patterns. Happy knitting!