
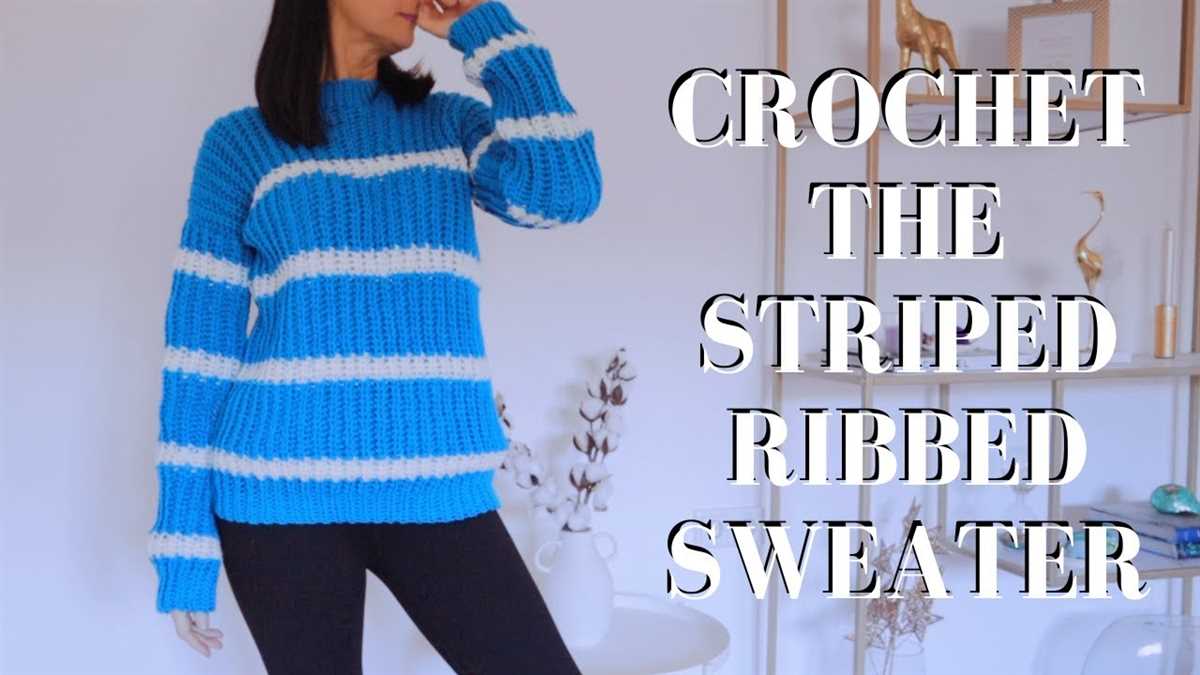
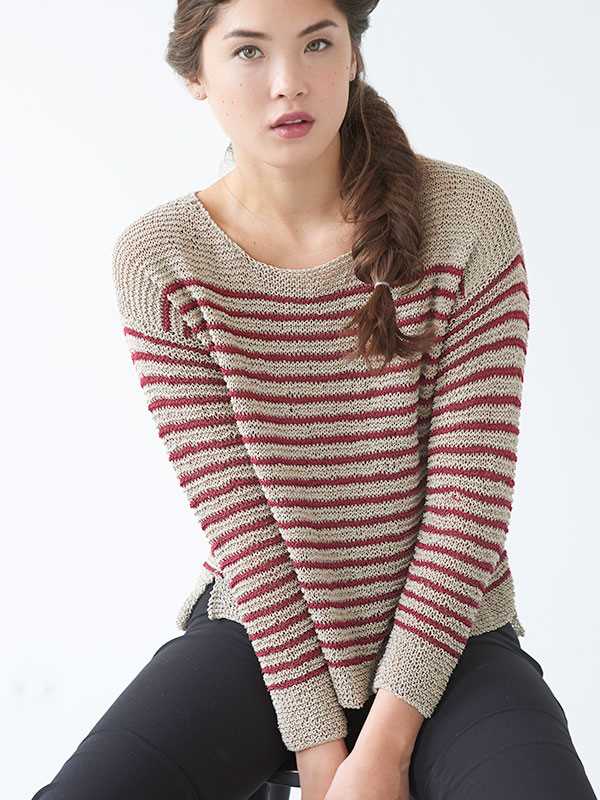
If you’re a fan of cozy and stylish sweaters, then this free boat neck sweater knitting pattern is just for you. The boat neck style is a classic design that is both elegant and versatile, making it a perfect addition to any wardrobe. Whether you’re a seasoned knitting pro or a beginner, this pattern is suitable for all skill levels, and with its detailed instructions, you’ll be able to create a beautiful sweater in no time.
This boat neck sweater pattern features a relaxed fit and a simple yet stunning ribbed design. The wide boat neck adds a touch of femininity, while the ribbed pattern adds texture and interest to the overall look. The sweater is knitted from the bottom up, starting with the ribbed hem and working up to the boat neck collar. The sleeves are then picked up and knitted in rounds, creating a seamless finish.
With this free knitting pattern, you’ll also have the freedom to customize your sweater to your own preferences. You can choose your favorite yarn color and adjust the length and fit of the sweater to suit your body shape. The pattern includes sizes ranging from small to extra large, ensuring there’s a size for everyone.
So, if you’re looking for a new knitting project that combines style and comfort, this free boat neck sweater knitting pattern is the perfect choice. Grab your knitting needles, your favorite yarn, and get ready to create a timeless piece that you’ll love to wear for years to come.
Overview
In this free knitting pattern, you will learn how to create a stylish boat neck sweater. The boat neck is a classic design that is both flattering and versatile, making it a perfect addition to your wardrobe. Whether you are an experienced knitter looking for a new project or a beginner eager to try your hand at sweater knitting, this pattern will guide you through the process step by step.
The pattern provides detailed instructions for knitting the sweater from start to finish, including information on materials, gauge, and sizing. You will learn how to cast on, knit, purl, and bind off, as well as how to shape the neck, sleeves, and body. With clear explanations and helpful tips, you will be able to confidently complete this project and create a beautiful boat neck sweater that fits your personal style.
Key Features:
- Free knitting pattern for a boat neck sweater
- Step-by-step instructions with clear explanations and helpful tips
- Detailed information on materials, gauge, and sizing
- Learn essential knitting techniques, including casting on, knitting, purling, and binding off
- Instructions on shaping the neck, sleeves, and body
With this free knitting pattern, you can create a stylish boat neck sweater that is both comfortable and fashionable. Whether you choose to knit it for yourself or as a gift for a loved one, this pattern is sure to become a favorite in your knitting repertoire.
Materials

Before you start knitting the boat neck sweater, make sure you have all the necessary materials ready. Here is a list of items you will need:
- Yarn: Choose a yarn that is suitable for the project. The pattern may suggest a specific type and weight of yarn, such as worsted weight or bulky weight. Make sure you have enough yarn to complete the sweater.
- Knitting Needles: Depending on the size of the sweater, you will need a pair of knitting needles in the appropriate size. The pattern will indicate the recommended needle size, usually in US or metric measurements.
- Tape Measure: A tape measure will come in handy for taking measurements and ensuring that the sweater is the correct size.
- Stitch Markers: Stitch markers are useful for marking certain points in the pattern, such as the beginning of a round or where to place a specific stitch.
- Tapestry Needle: A tapestry needle is essential for weaving in loose ends and finishing touches.
- Scissors: Keep a pair of small scissors nearby for trimming yarn and cutting any excess.
- Pattern: Lastly, you will need the free boat neck sweater knitting pattern. Make sure you have printed it out or have it accessible on your computer or device.
Once you have gathered all the necessary materials, you are ready to begin knitting the boat neck sweater. Double-check the pattern instructions and make sure you understand any abbreviations or special stitches before you start. Happy knitting!
About Gauge
Gauge is an important factor in knitting, especially when it comes to creating garments that fit properly. It refers to the number of stitches and rows per inch in a knitting pattern or project. Determining the correct gauge is crucial for achieving the right size and fit of your finished piece.
To measure gauge, you can use a gauge swatch, which is a small sample of knitting worked in the pattern stitch. The gauge swatch is then washed and blocked to mimic how the finished garment will look. By measuring the number of stitches and rows in the swatch, you can determine if your knitting matches the pattern’s recommended gauge.
When following a knitting pattern, it will often specify a gauge that you should strive to achieve. This is typically stated as a certain number of stitches and rows per inch. It’s important to match the pattern’s gauge to ensure that your finished project will have the intended size and shape.
If your gauge is too tight or too loose, it can result in the finished garment being too small or too large. To adjust your gauge, you may need to change your needle size or adjust your tension while knitting. It’s always recommended to make a gauge swatch before starting a project, as it can save you time and frustration in the long run.
Remember that everyone knits differently, so it’s important to find your own personal gauge. Some people may naturally knit tighter or looser than others. By experimenting with different needle sizes and practicing your tension, you can achieve the correct gauge for any knitting pattern.
Size
When knitting a boat neck sweater, it is important to consider the size you will be making. The free pattern typically includes instructions for multiple sizes, allowing you to create a sweater that fits your specific measurements. Common sizes range from small to extra-large, but the pattern may also include options for petite or plus sizes.
Before you begin knitting, take accurate measurements of your bust, waist, and hips to determine which size will best fit you. You can find a measurement chart included with the pattern, which will indicate the corresponding size based on your measurements. It is important to choose a size that will provide a comfortable fit, with some ease for movement and layering.
Included Sizes

The free boat neck sweater knitting pattern typically includes a range of sizes to accommodate different body types. The sizes are often listed in the pattern as numerical values, such as Small (S), Medium (M), Large (L), and Extra-Large (XL). In addition, the pattern may also provide specific measurements for each size, such as bust and waist circumference, sleeve length, and sweater length, allowing you to easily compare your own measurements and select the appropriate size to knit.
- Small: Bust 32-34″, Waist 24-26″, Hips 34-36″
- Medium: Bust 36-38″, Waist 28-30″, Hips 38-40″
- Large: Bust 40-42″, Waist 32-34″, Hips 42-44″
- Extra-Large: Bust 44-46″, Waist 36-38″, Hips 46-48″
Keep in mind that these are just example sizes and measurements, and the actual pattern you are using may have different size options. It is always important to refer to the specific pattern instructions to determine the sizes available. Some patterns may also provide instructions on how to adjust the sizing to fit your individual needs.
Abbreviations
When reading and following a knitting pattern, it is important to understand the various abbreviations that are commonly used. These abbreviations are shortcuts for longer knitting terms, making patterns easier to read and understand. Here are some common abbreviations that you may come across when working on a free boat neck sweater knitting pattern:
- K: Knit
- P: Purl
- St(s): Stitch(es)
- Rnd(s): Round(s)
- Inc: Increase (usually by knitting or purling into the front and back of a stitch)
- Dec: Decrease (usually by knitting or purling two stitches together)
- Rep: Repeat
- Foll: Following
- BO: Bind Off
In addition to these common abbreviations, a knitting pattern may include specific abbreviations that are unique to that pattern. It is essential to carefully read the pattern’s abbreviation key to understand any unfamiliar abbreviations that are used. Taking the time to familiarize yourself with these abbreviations will help you navigate knitting patterns more confidently and successfully complete your free boat neck sweater.
Instructions

In order to knit the boat neck sweater, follow the step-by-step instructions below:
- Gather materials: Make sure to gather all the necessary materials for the project. This includes the specific type and color of yarn, knitting needles, and any additional tools or accessories required.
- Read the pattern: Carefully read through the free boat neck sweater knitting pattern provided. Take note of the gauge, measurements, and any special stitches or techniques mentioned in the pattern. Familiarize yourself with the instructions before starting the project.
- Cast on: Start by casting on the required number of stitches onto your knitting needles. This will form the foundation of the sweater. Follow the pattern’s instructions for the cast on method and stitch count.
- Begin knitting: Once the stitches are cast on, start knitting according to the pattern. This may involve repeating certain stitch patterns, increasing or decreasing stitches, and shaping the sweater as required. Pay close attention to the pattern’s instructions for each row or section.
- Continue knitting: Follow the pattern’s instructions to knit all the necessary rows and sections of the sweater. Take note of any color changes, stitch variations, or shaping details mentioned in the pattern. Make sure to keep track of your progress and check for any errors along the way.
- Complete the sweater: Once all the required rows and sections are knitted, follow the pattern’s instructions to finish off the sweater. This may involve binding off stitches, sewing up seams, adding any necessary embellishments, and blocking the final piece to ensure the desired shape and fit.
- Final touches: After completing the sweater, make sure to trim any loose ends, secure any necessary closures (such as buttons or hooks), and give the finished piece a final inspection. Check for any uneven stitches, holes, or other imperfections, and make any necessary adjustments or repairs.
- Enjoy your new boat neck sweater: Once all the finishing touches are complete, proudly wear and enjoy your newly knitted boat neck sweater!
Casting on
When starting a knitting project, the first step is to cast on the stitches. This is the process of creating the foundation row of stitches on the knitting needle. There are several methods of casting on, but for this boat neck sweater pattern, we will be using the long-tail cast on method.
The long-tail cast on is a versatile and commonly used method that creates a neat and elastic edge. To begin, you will need to determine the length of the tail by estimating how much yarn is needed to cast on all the required stitches. It’s always better to have a longer tail than a shorter one, as it can be trimmed later.
To perform the long-tail cast on, first, make a slipknot by creating a loop with the yarn and pulling the end through. Then, insert the needle through the loop, twist it, and pull the loop snugly onto the needle. This slipknot counts as the first stitch.
Now, hold the needle with the slipknot in your right hand and the working yarn in your left hand. Place your thumb and index finger of your left hand in between the two strands of yarn, creating a V shape. With your right hand, bring the needle from back to front and between the two strands of yarn in the V shape.
Next, wrap the working yarn around the needle anticlockwise. Bring the needle back through the loop, catching the yarn strand that is behind the needle. Slide this loop onto the needle, and you have added a new stitch.
Repeat this process for each stitch until you have cast on the required number of stitches for your boat neck sweater. Make sure to keep an even tension throughout the process to ensure the stitches are consistent in size. Once all the stitches are cast on, you are ready to begin knitting the body of the boat neck sweater!
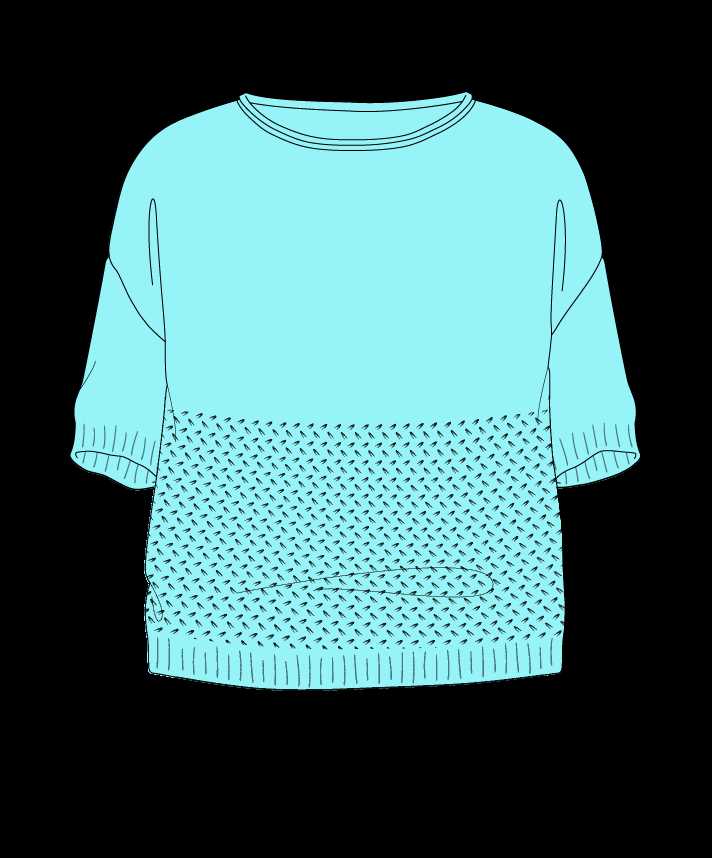
Body

The body of the boat neck sweater is knit in a simple stockinette stitch, which creates a smooth and even surface. This stitch pattern is achieved by alternating between knitting and purling rows. The stockinette stitch gives the sweater a classic and clean appearance.
As you work on the body of the sweater, you will see it gradually take shape. The boat neck is designed to be slightly loose and draping, providing a relaxed and comfortable fit. It is perfect for layering over a top or wearing on its own.
To ensure a proper fit, it is important to take accurate measurements and choose the appropriate size. The pattern usually includes multiple size options, ranging from small to extra-large. Make sure to measure your bust size and select the size that corresponds to your measurements.
As you knit the body of the sweater, you may also want to consider adding any desired modifications or embellishments. For example, you can incorporate colorwork or texture patterns to make your sweater more unique. Additionally, you can customize the length of the sweater to suit your preference.
Once the body is complete, you can move on to the next step, which is often the sleeves. The boat neck sweater pattern typically provides instructions for knitting the sleeves separately and then attaching them to the body. This construction method allows for easier customization and better overall fit.
Sleeves
The sleeves of the boat neck sweater are an essential part of the design, adding comfort and style to the overall garment. Knitted with the same pattern as the body, the sleeves create a cohesive look that is both fashionable and cozy. The pattern provides instructions for three different sleeve lengths: short, 3/4, and long, allowing you to customize your sweater to your preferred style and climate.
The boat neck sweater sleeves are knitted in the round, starting from the cuff and working your way up to the armhole. The pattern features a ribbed cuff, which helps to prevent the sleeves from rolling up and adds a touch of elegance to the design. The sleeves have a slight taper towards the armhole, creating a flattering fit and ensuring comfortable movement.
To achieve the perfect fit, the pattern provides detailed instructions on how to measure your arm to determine the necessary number of stitches for the cuff. This allows you to create sleeves that are tailored to your individual measurements, ensuring a seamless and comfortable fit. Whether you prefer a slim-fitting sleeve or a looser, more relaxed fit, the pattern can be easily adjusted to meet your preferences.
- Short sleeves: Ideal for transitional seasons or warmer climates, the short sleeves are perfect for adding a touch of style and femininity to your boat neck sweater.
- 3/4 sleeves: These sleeves are a versatile option, suitable for a wide range of temperatures. They provide a bit more coverage without being too warm, making them perfect for spring or fall.
- Long sleeves: If you’re looking for maximum warmth and coziness, the long sleeves are the way to go. Perfect for winter weather or those who tend to get cold easily, they provide ample coverage and comfort.
Regardless of the sleeve length you choose, the boat neck sweater is sure to become a staple in your wardrobe. Its classic design and comfortable fit make it a versatile garment that can be dressed up or down, depending on the occasion.
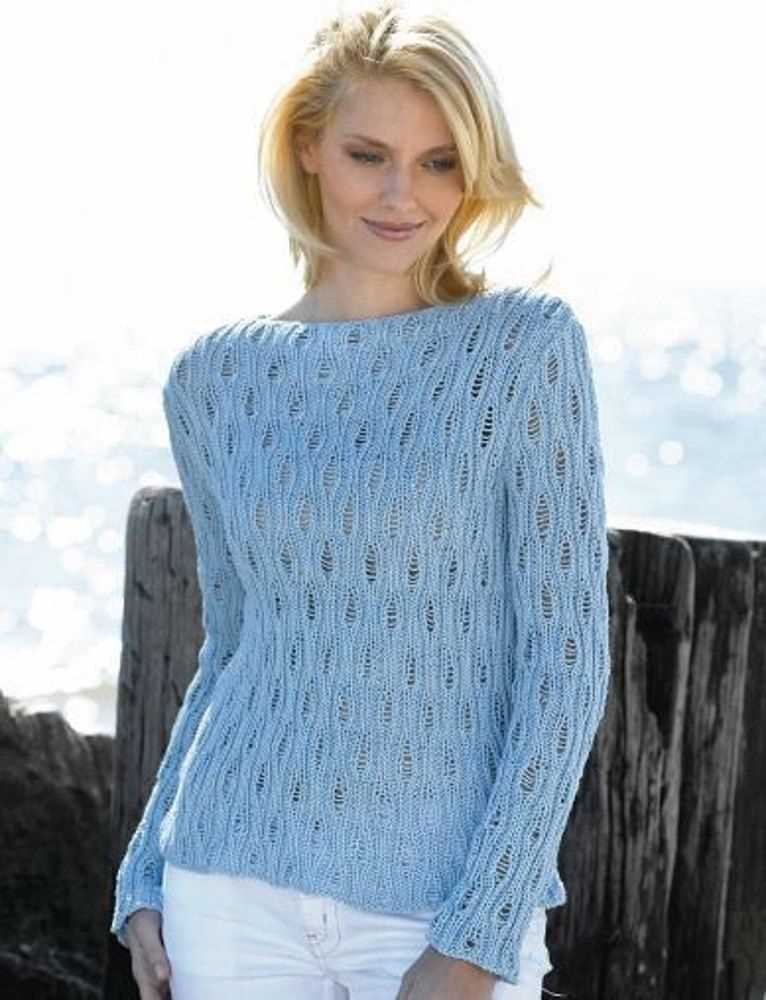
Neckline
The neckline of a sweater can greatly impact its overall style and appearance. The boat neck, or bateau neck, is a classic neckline that is characterized by its wide, horizontal shape that sits across the collarbone. This type of neckline creates a flattering and feminine look, drawing attention to the shoulders and framing the face. It is often used in sweaters and tops to create an elegant and timeless silhouette.
When knitting a boat neck sweater, it is important to pay attention to the neckline shaping. The width and depth of the neckline can be customized to achieve the desired fit and style. This can be done by increasing or decreasing stitches at the neckline edge, or by using short rows to create a gentle curve. Careful attention should also be paid to the finishing details, such as the neckline ribbing or edging, to ensure a polished and professional finish.
Create a Boat Neck Sweater
- Start by casting on the desired number of stitches for the body of your sweater.
- Work in the desired stitch pattern until the piece measures the desired length.
- Begin shaping the boat neck by decreasing stitches evenly across the neckline edge. This can be done by knitting two stitches together, or by using other decreasing methods.
- Continue decreasing stitches until the desired width of the neckline is reached.
- Work the remaining stitches in ribbing or another desired edging pattern for the neckline.
- Continue knitting the rest of the sweater according to the pattern, including the sleeves and any additional shaping.
- Finish the sweater by seaming the sides, attaching the sleeves, and adding any desired finishing touches.
A boat neck sweater is a versatile and stylish addition to any wardrobe. It can be dressed up or down, depending on the occasion, and can be easily customized to achieve the desired fit and style. With a little bit of knitting skill and creativity, you can create a beautiful boat neck sweater that you will love to wear.
Finishing

Once you have completed all of the knitting, it’s time to finish your boat neck sweater. Follow these steps to give your sweater a polished look:
1. Weave in the ends: Use a tapestry needle to weave in all of the loose yarn ends on the wrong side of the sweater. Make sure to secure the ends tightly so that they don’t come loose in the future.
2. Block your sweater: Wet blocking your sweater will help to even out the stitches and give it a professional finish. Fill a sink or basin with lukewarm water and a gentle wool wash. Submerge your sweater and let it soak for about 15 minutes. Gently squeeze out the excess water and lay your sweater flat on a towel. Shape the sweater to the correct dimensions, making sure the boat neck sits nicely. Let it dry completely before wearing or storing.
Note: Different yarns may require different blocking techniques, so always check the yarn label for specific instructions.
3. Sew the side seams: Use your tapestry needle and matching yarn to sew the side seams of your sweater. Align the edges and sew them together using an invisible seam or mattress stitch for a clean finish.
4. Sew the shoulder seams: With right sides together, sew the shoulder seams using the same technique as the side seams. Again, make sure the seams are secure and neat.
5. Add any desired finishing touches: You may choose to add ribbing or a contrasting trim to the cuffs, hem, and neckline of your sweater. Follow the pattern instructions for any additional details.
Congratulations! You have successfully completed your boat neck sweater. Now, you can enjoy wearing your cozy and stylish creation.
Q&A:
What is a boat neck sweater?
A boat neck sweater is a type of sweater that has a wide neckline that resembles the shape of a boat. The neckline of a boat neck sweater sits slightly higher on the shoulders and runs horizontally across the collarbone.
Where can I find free boat neck sweater knitting patterns?
You can find free boat neck sweater knitting patterns on various websites and online knitting communities. Some popular websites that offer free knitting patterns include Ravelry, Knitting Patterns Central, and Loveknitting.
Are there different variations of boat neck sweaters?
Yes, there are different variations of boat neck sweaters. Some boat neck sweaters may have a wider or shallower neckline, and the overall fit and style of the sweater can vary. Boat neck sweaters can also come in different sleeve lengths, such as long sleeves, three-quarter sleeves, or sleeveless.
What materials are commonly used to knit boat neck sweaters?
Boat neck sweaters can be knitted using various materials, depending on personal preference and the desired outcome. Commonly used materials include wool, cotton, acrylic, and blends of different fibers. The type of yarn used will affect the overall look, feel, and warmth of the sweater.
Are boat neck sweaters suitable for both men and women?
Yes, boat neck sweaters can be worn by both men and women. The style and fit of the sweater can vary to suit different body types and preferences. Men’s boat neck sweaters may have a slightly larger neckline and a more relaxed fit, while women’s boat neck sweaters may be more fitted and have a narrower neckline.
What is a boat neck sweater?
A boat neck sweater is a type of sweater that has a wide neck opening that sits slightly off the shoulder, resembling the shape of a boat’s neckline.