
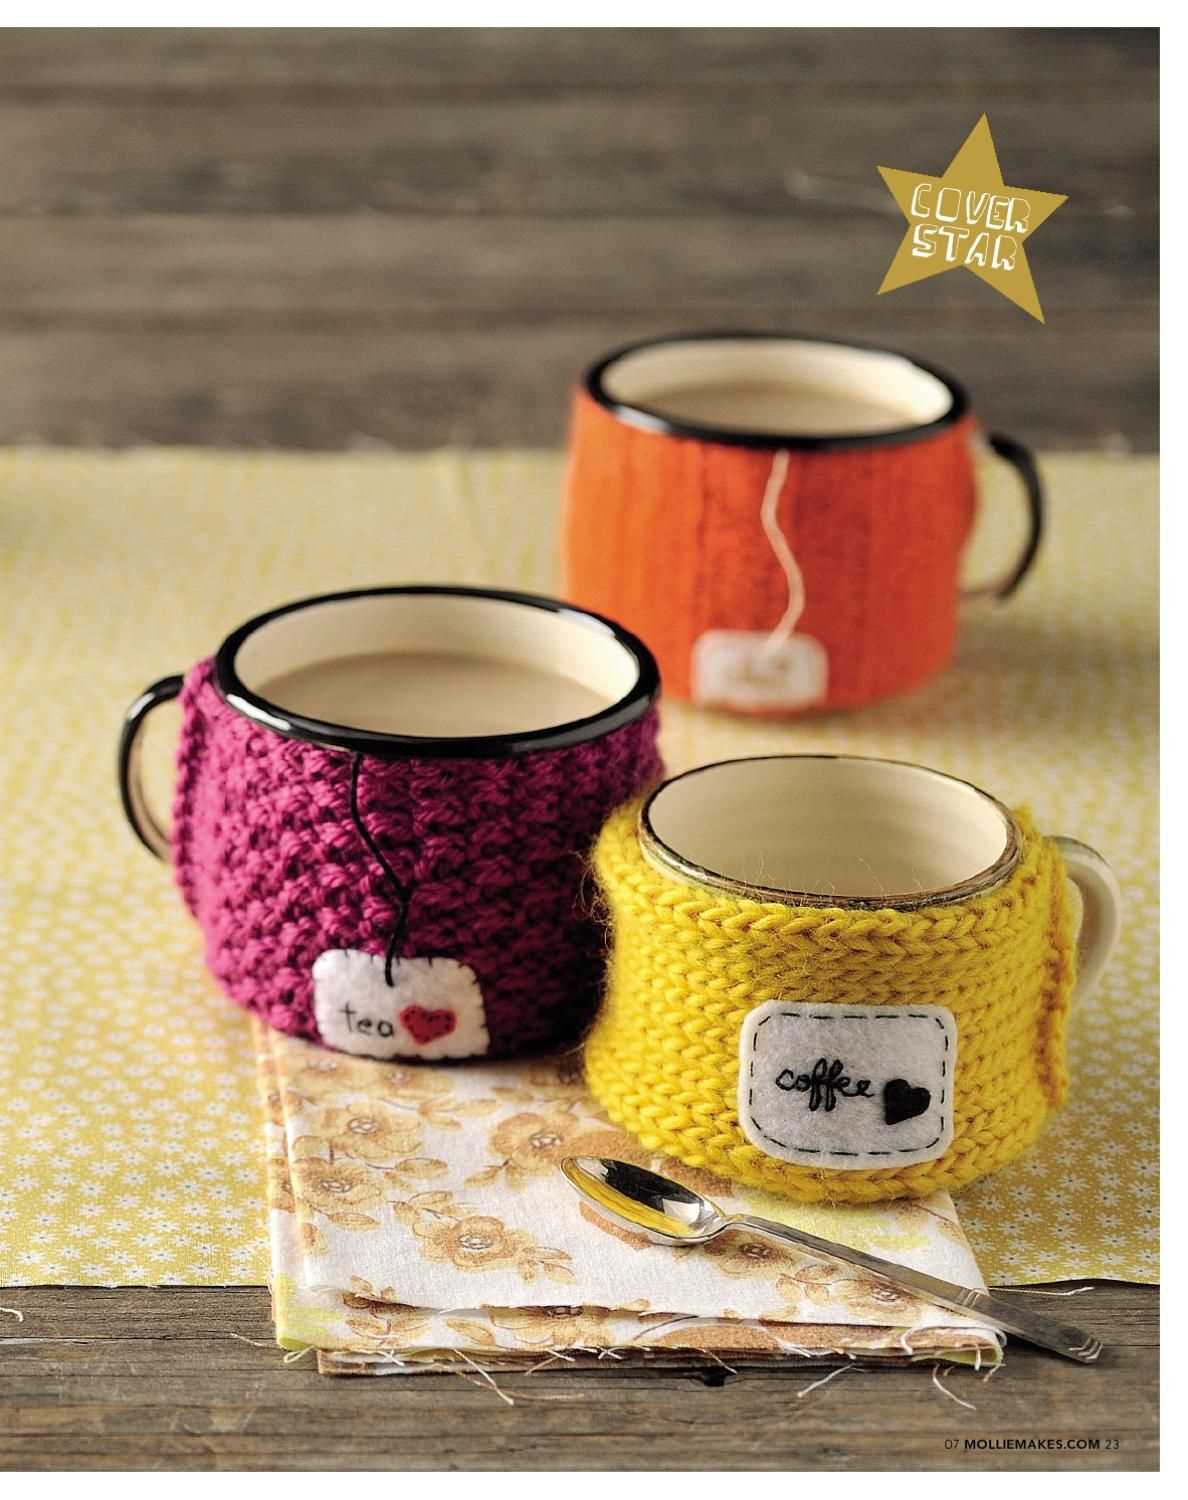
Knitted cup warmers are the perfect accessory for those cold winter days when you want to enjoy a hot cup of coffee, tea, or hot chocolate without burning your hands. These adorable and functional cup warmers can be made in a variety of colors and patterns to match your personal style, and they also make great homemade gifts.
There are plenty of free cup warmer knitting patterns available online, from simple designs for beginners to more complex patterns for experienced knitters. Whether you prefer a classic ribbed design or a fun and whimsical motif, you’re sure to find a pattern that suits your taste.
Not only are knitted cup warmers practical, but they are also eco-friendly alternatives to disposable cup sleeves. By using a reusable cup warmer, you can reduce waste and make a small but meaningful difference in the fight against climate change. Plus, knitting your own cup warmer is a relaxing and enjoyable way to unwind after a long day.
Top 5 Knitted Cup Warmer Patterns for Beginners
If you love knitting and want to keep your favorite cup of tea or coffee warm, knitted cup warmers are the perfect project to start with. They are quick, easy, and make for great gifts. Here are the top 5 knitted cup warmer patterns for beginners:
-
Garter Stitch Cup Warmer: The garter stitch is the easiest stitch in knitting, making it perfect for beginners. This pattern is as simple as knitting every row, resulting in a cozy cup warmer that will keep your drink hot for longer.
-
Ribbed Cup Warmer: The ribbed stitch adds a bit of texture to your cup warmer, making it more visually appealing. This pattern combines knit and purl stitches in a repeating pattern, creating a stretchy and snug fit for your cup.
-
Seed Stitch Cup Warmer: The seed stitch is another beginner-friendly stitch that adds a nice texture to your knitting. This pattern alternates between knit and purl stitches, resulting in a fabric that has a bumpy appearance. It’s a simple yet stylish choice for your cup warmer.
-
Stockinette Stitch Cup Warmer: The stockinette stitch is a versatile stitch that is commonly used in knitting. This pattern involves knitting one row and purling the next, creating a smooth and even fabric. It’s a classic choice for cup warmers and can be easily personalized with embellishments.
-
Fair Isle Cup Warmer: If you’re up for a bit more challenge, the Fair Isle technique is a great way to add some color and detail to your cup warmer. This pattern involves knitting with two different colored yarns and carrying the unused color across the back of your work. It creates a beautiful pattern that will impress everyone.
With these top 5 knitted cup warmer patterns for beginners, you’ll be able to create practical and stylish accessories for your favorite hot beverages. Whether you prefer simple stitches or more intricate designs, there’s a pattern for everyone to enjoy. Happy knitting!
Easy Knitted Ribbed Cup Warmer Pattern
Looking for a quick and easy knitting project? Why not try making a knitted ribbed cup warmer? Not only is it a great way to keep your drink warm, but it also adds a stylish touch to your mug. This pattern is perfect for beginners and can be completed in just a few hours.
To get started, you will need:
- Worsted weight yarn
- Size 8 knitting needles
- Tapestry needle
Once you have your materials ready, cast on 40 stitches using the long tail cast on method. The ribbed pattern is created by alternating knit and purl stitches.
Row 1: *K2, P2* repeat until the end of the row.
Continue this pattern for about 2 inches or desired length, ending on a purl stitch. Then, switch to only knitting for the next 1 inch. This will create a band at the top of the cup warmer.
Next, it’s time to decrease the stitches. Knit the first 2 stitches together, then purl the next 2 stitches. Repeat this pattern until the end of the row. You should now have 30 stitches.
Continue knitting the ribbed pattern for another 2 inches or desired length, ending on a purl stitch. Bind off all stitches and weave in any loose ends.
Your cup warmer is now complete! Simply slide it onto your favorite mug and enjoy a warm drink without worrying about it cooling down too quickly.
Simple Striped Cup Warmer Pattern
Looking for a straightforward and stylish cup warmer pattern? This Simple Striped Cup Warmer Pattern is just what you need. With its clean and modern design, it will not only keep your beverage warm but also add a touch of elegance to your cup.
The pattern uses basic knitting techniques and requires only a few supplies. You will need two colors of yarn, one main color (MC) and one contrasting color (CC), and knitting needles suitable for your chosen yarn weight. For this pattern, we recommend using a worsted weight yarn and size US 7 (4.5mm) knitting needles.
To begin, cast on an even number of stitches with your MC. This will be the base of your cup warmer. Knit every stitch for the first row. For the second row, alternate knitting one stitch with MC and then one stitch with CC. Continue this pattern for the desired length of your cup warmer.
Once you have reached the desired length, bind off all stitches using your MC. Weave in any loose ends and trim off excess yarn. Your cup warmer is now complete and ready to use!
This Simple Striped Cup Warmer Pattern is perfect for beginners and makes for a quick and satisfying knitting project. Whether you knit it for yourself or as a gift for a friend, it is sure to be a hit. Enjoy your warm beverages in style with this cozy and fashionable cup warmer!
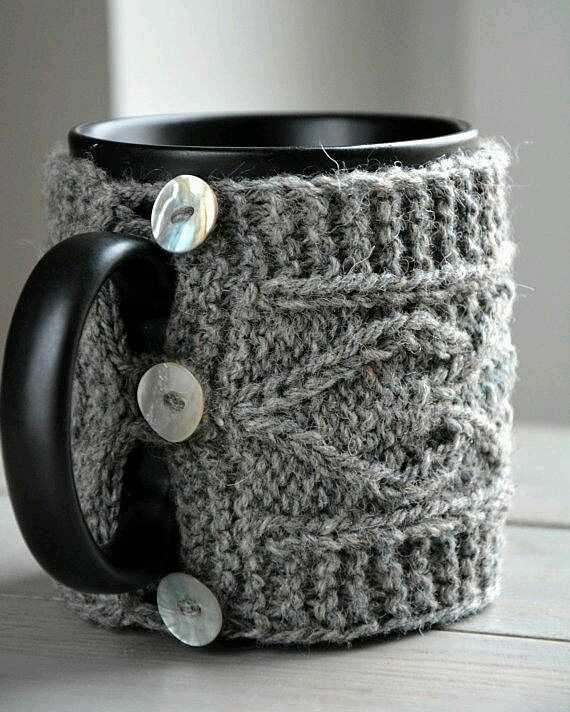
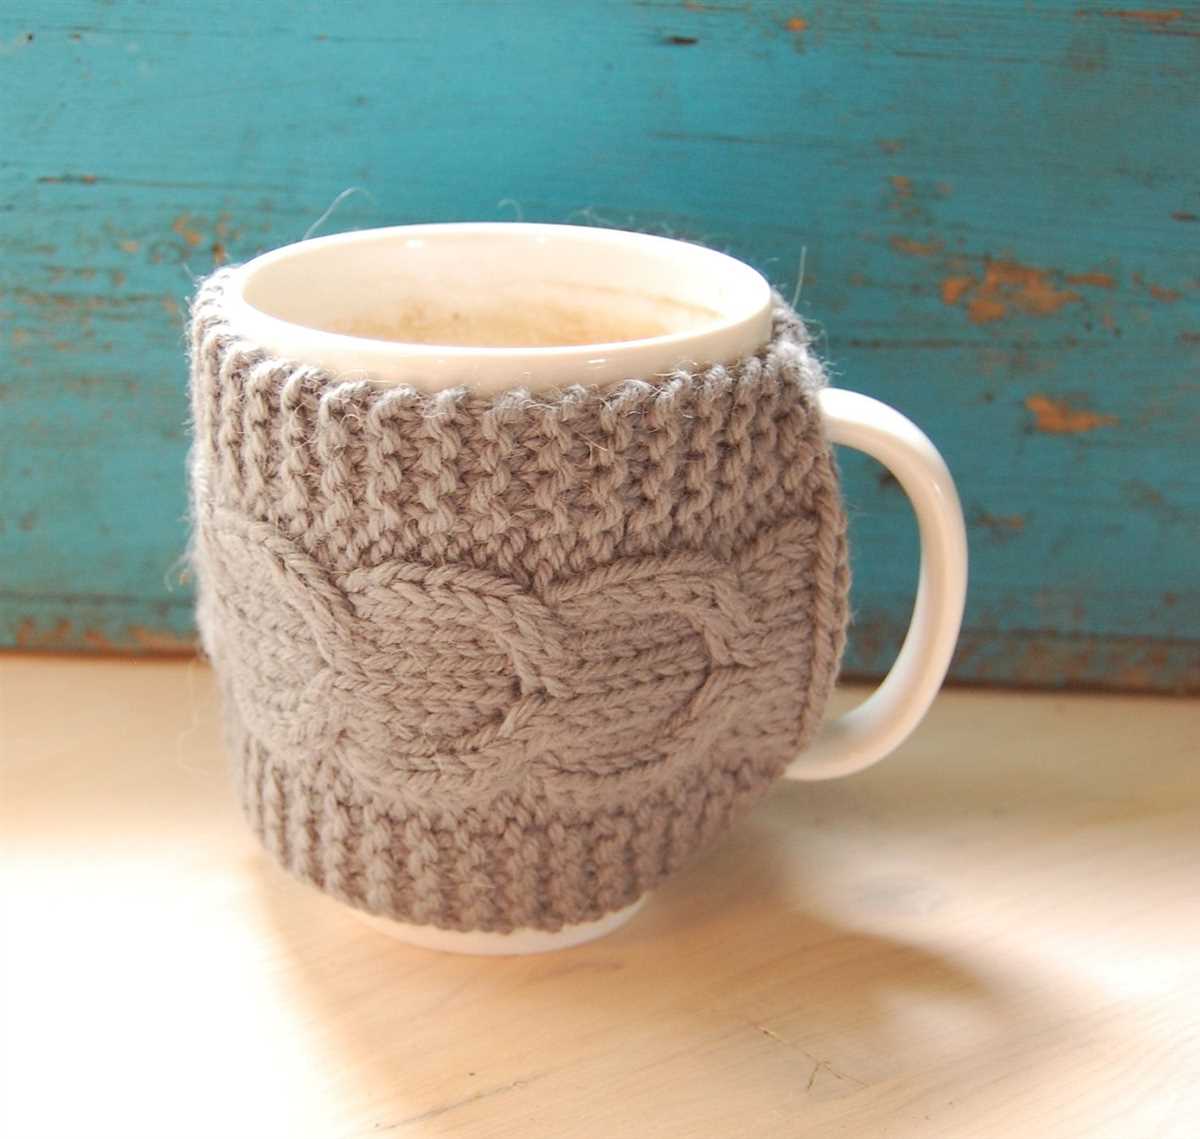
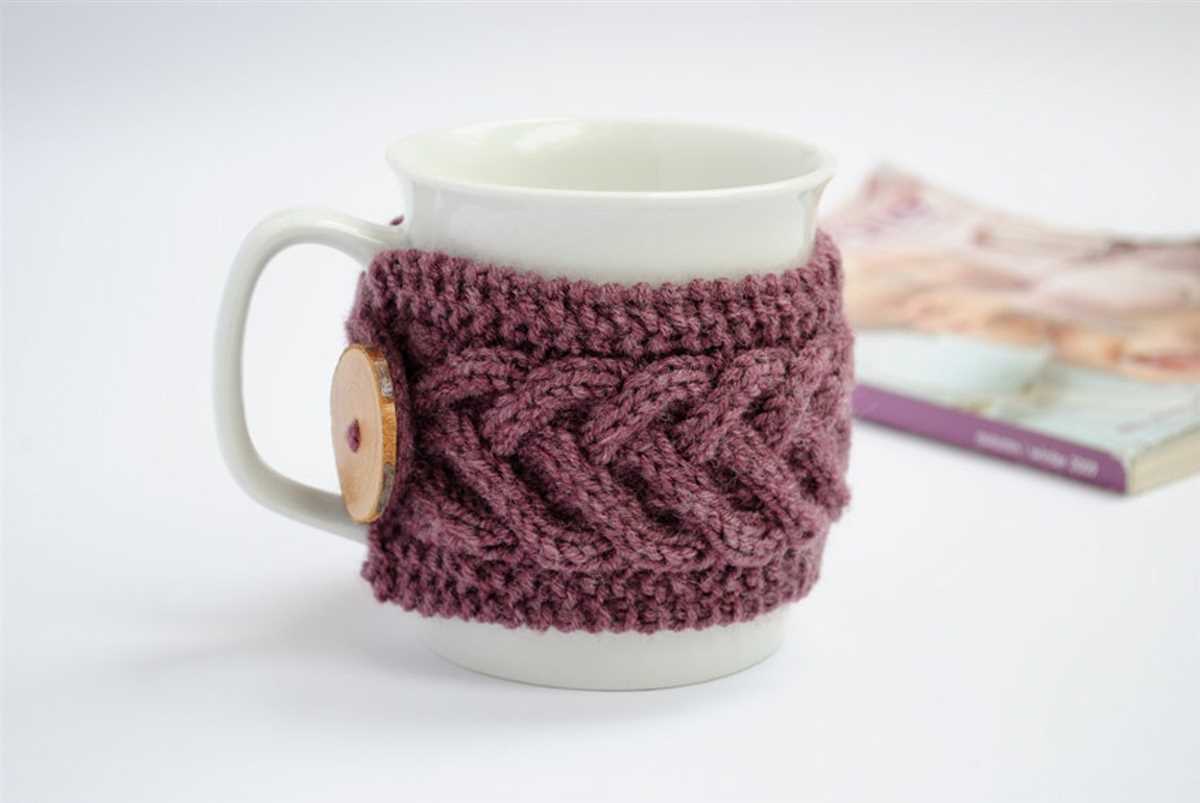
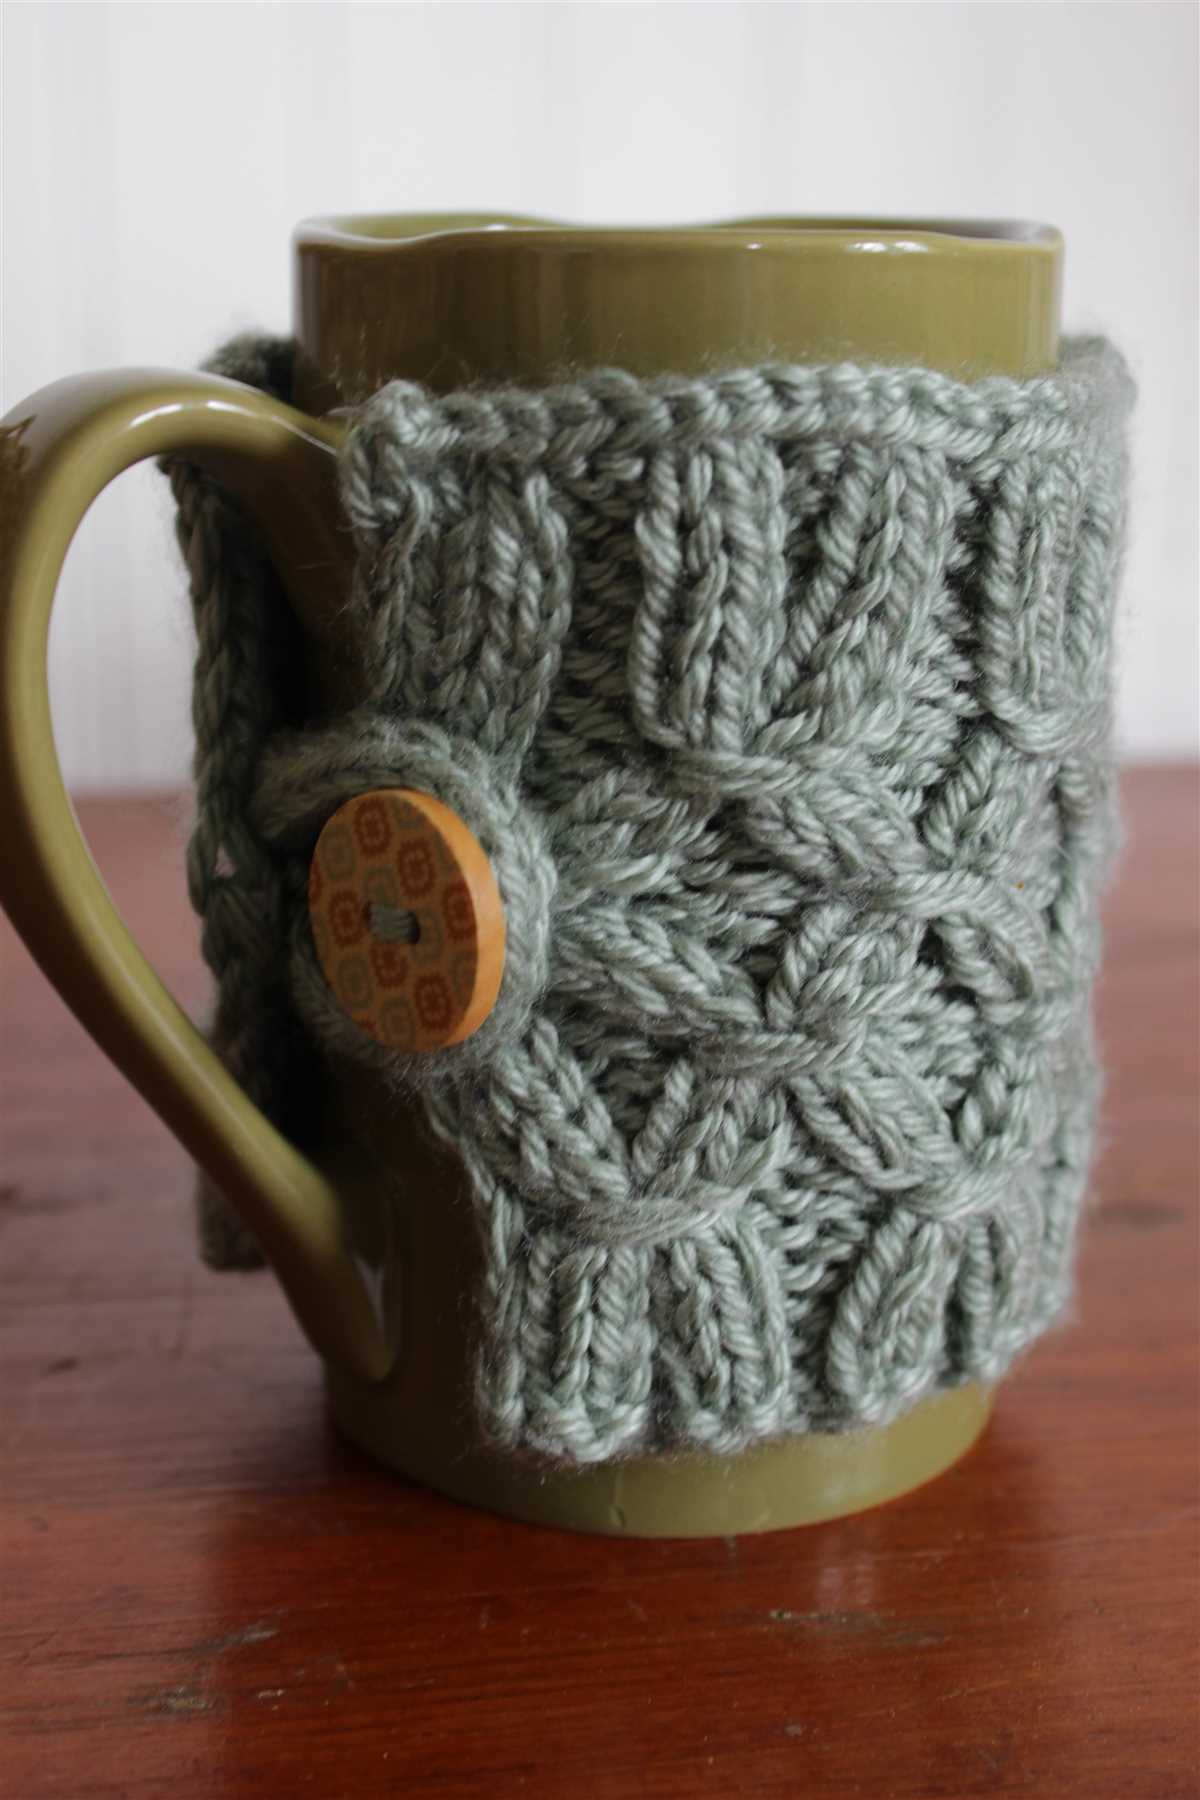
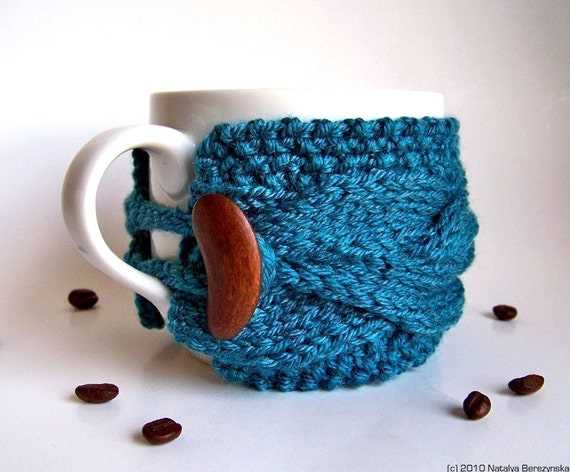
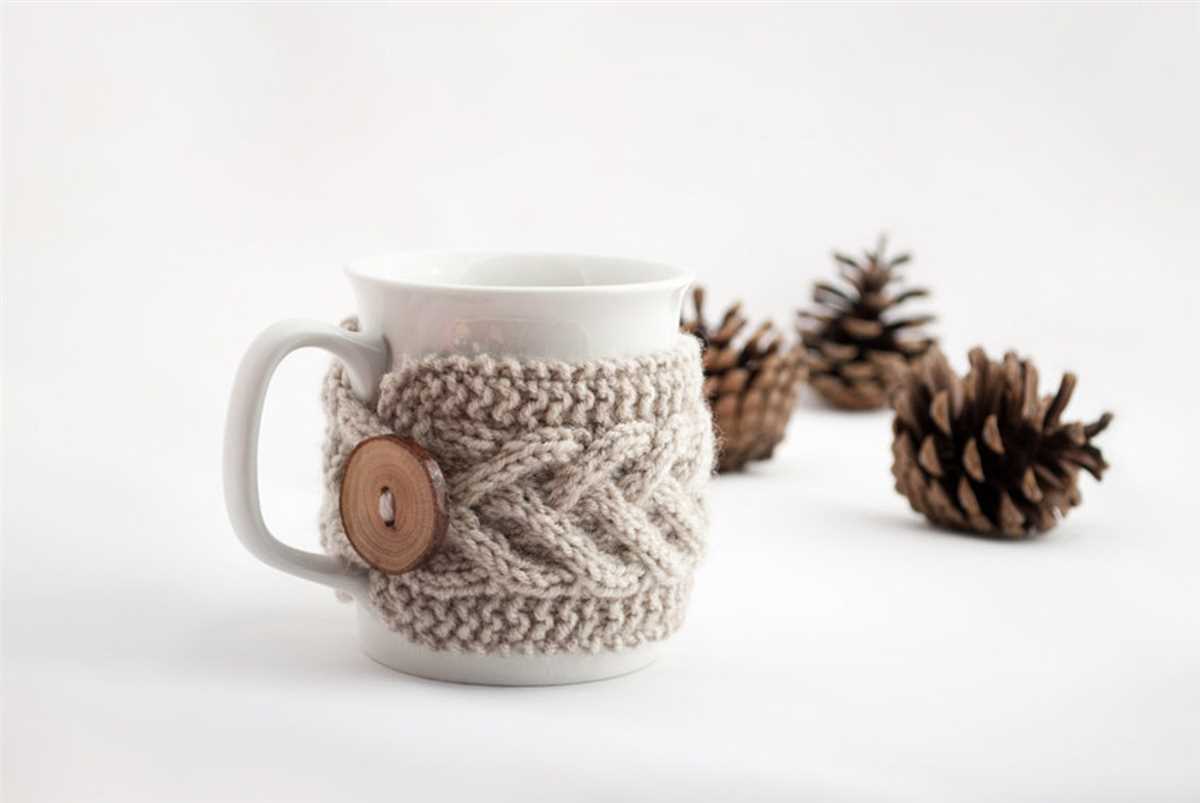
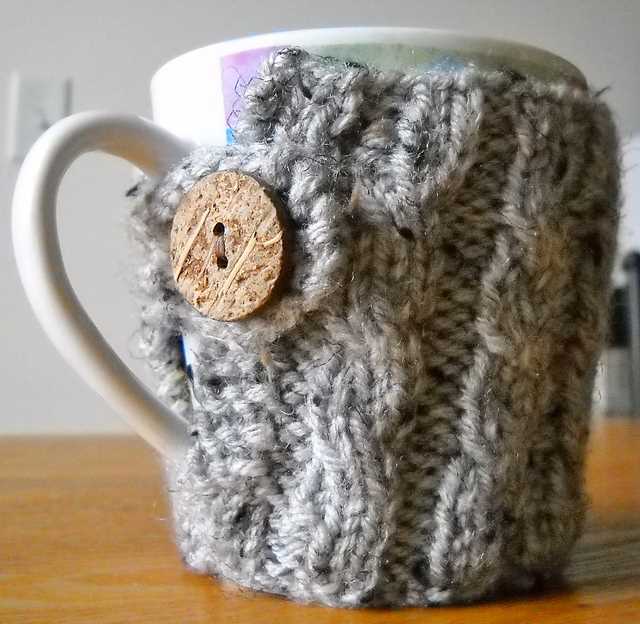
Basic Cable Knit Cup Warmer Pattern
Cable knit patterns are a classic and timeless design that can add a touch of elegance to any cup warmer. This basic cable knit cup warmer pattern is perfect for beginners and experienced knitters alike. With just a few simple stitches, you can create a cozy and stylish accessory for your favorite hot beverage.
To start, you will need a set of knitting needles and a ball of yarn in your desired color. Choose a chunky or worsted weight yarn for a thicker, warmer cup warmer. Begin by casting on an even number of stitches, depending on the size of your cup. For example, if your cup is 10cm in circumference, you may want to cast on around 40 stitches.
Once you have cast on your stitches, you can begin working the cable knit pattern. This pattern consists of two main stitches: the cable stitch and the purl stitch. To create the cable stitch, you will need to cross a set of stitches over each other. This can be done by slipping a certain number of stitches onto a cable needle, holding it in front or in the back of your work, and knitting or purling the remaining stitches. The cable stitch creates the beautiful intertwining pattern that gives cable knit its distinctive look.
In between the cable stitches, you can use the purl stitch to add texture and depth to your cup warmer. The purl stitch is created by bringing the yarn to the front of your work, inserting the needle into the next stitch from right to left, and wrapping the yarn around the needle before pulling it through.
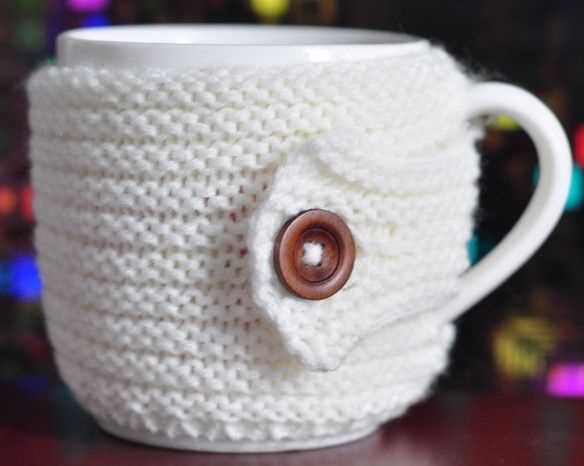
Continue working the cable stitch and purl stitch in alternating rows until your cup warmer is the desired length. To finish, bind off your stitches and weave in any loose ends. You can also add embellishments such as buttons or pom-poms to personalize your cup warmer.
With this basic cable knit cup warmer pattern, you can create a cozy and stylish accessory for your favorite hot beverage. Whether you’re knitting for yourself or as a gift, this pattern is sure to impress with its classic design and intricate detailing.
Chunky Knit Cup Warmer Pattern
If you’re looking for a quick and easy knitting project that will keep your hot beverages warm, look no further than the chunky knit cup warmer pattern. This pattern is perfect for beginners and advanced knitters alike, and it’s a great way to use up any extra yarn you have lying around.
To get started, you’ll need some chunky yarn and a pair of size 10 knitting needles. Cast on 30 stitches to begin your cup warmer. If you want a snug fit, you can cast on fewer stitches, or if you want a looser fit, you can cast on more stitches. The choice is up to you! Once you have your stitches cast on, join them in the round and place a stitch marker to mark the beginning of the round.
For the body of the cup warmer, you’ll be knitting in a simple rib stitch pattern. Knit 2 stitches, purl 2 stitches, and repeat this pattern until you reach the desired length. You can make your cup warmer as long or as short as you like. If you want to add some extra texture, you can also experiment with different stitch patterns, such as a seed stitch or a cable stitch.
Once you’re happy with the length of your cup warmer, it’s time to bind off. Cut the yarn, leaving a long tail, and thread it through the remaining stitches on your knitting needle. Pull tight to secure the stitches, and weave in any loose ends. Your cup warmer is now ready to use!
Not only will this chunky knit cup warmer keep your beverages warm, but it also makes for a cute and stylish accessory. You can make them in a variety of colors to match your personal style or to give as gifts to friends and family. So grab your knitting needles and get started on this fun and practical project today!
Lace Pattern Cup Warmer Pattern
Looking for a delicate and elegant cup warmer pattern? Try the Lace Pattern Cup Warmer pattern. This pattern features a beautiful lace design that adds a touch of sophistication to any cup. Whether you’re sipping on a hot cup of tea or enjoying a creamy latte, this cup warmer will keep your beverage warm and your hands cool.
To create this cup warmer, you’ll need a set of knitting needles and a ball of fine lace weight yarn. The pattern begins with a simple ribbing technique to create a snug fit around the cup. Then, the lace pattern is worked over the body of the cup warmer, creating a delicate and intricate design. This pattern is perfect for those with intermediate knitting skills, as it requires some knowledge of lace knitting techniques.
The Lace Pattern Cup Warmer pattern is versatile and customizable. You can choose any color of yarn to match your personal style and taste. Additionally, you can adjust the length of the cup warmer to fit different sizes of cups. This pattern is a great project for gift-giving or for making a set of cup warmers for yourself.
- Materials: knitting needles, fine lace weight yarn
- Techniques: ribbing, lace knitting
- Difficulty: intermediate
Get ready to create a beautiful and functional cup warmer with the Lace Pattern Cup Warmer pattern. Enjoy your hot beverages in style with this elegant accessory.
Knitted Cup Warmer Patterns for Experienced Knitters
If you’re an experienced knitter looking for a new challenge, why not try knitting cup warmers? These small and quick projects are not only practical, but also allow you to showcase your skills and creativity. There are various cup warmer patterns available that cater specifically to experienced knitters, offering intricate designs and advanced techniques.
One popular pattern for experienced knitters is the fair isle cup warmer. Fair isle knitting involves working with multiple colors and creating beautiful stranded patterns. With this pattern, you can experiment with different color combinations and create unique cup warmers that are both stylish and functional.
Another option for experienced knitters is the lace cup warmer pattern. Lace knitting involves creating delicate and intricate patterns using yarn overs and decreases. Knitting a lace cup warmer allows you to showcase your precision and attention to detail, while adding a touch of elegance to your drinkware.
If you’re looking for a more challenging project, you can try the cable cup warmer pattern. Cable knitting involves crossing stitches to create intricate cable patterns. Knitting a cable cup warmer not only adds texture and interest to your knitting, but also offers a cozy and snug fit for your cup.
For those who enjoy experimenting with different techniques, the intarsia cup warmer pattern is a great choice. Intarsia knitting involves knitting with multiple colors, but unlike fair isle knitting, each color is used to create separate blocks of color. This technique allows you to create unique designs and motifs on your cup warmers, making them truly one-of-a-kind.
In conclusion, if you’re an experienced knitter looking for a new challenge, trying out different cup warmer patterns can be a fun and rewarding project. Whether you choose to knit fair isle, lace, cable, or intarsia cup warmers, these patterns offer opportunities to showcase your skills and create unique, personalized accessories for your hot beverages.
Intricate Fair Isle Cup Warmer Pattern
The Intricate Fair Isle Cup Warmer Pattern is a challenging but rewarding knitting project for those who love intricate colorwork. This pattern incorporates the traditional Fair Isle technique, which involves using multiple colors in a single row to create intricate patterns and motifs.
To begin the Intricate Fair Isle Cup Warmer, you will need to gather the following materials:
- 3 skeins of yarn in different colors
- Size 5 (3.75mm) knitting needles
- Tapestry needle
Once you have your materials ready, you can start knitting the cup warmer using the following steps:
- Cast on 60 stitches using the first color of yarn.
- Work in a 2×2 rib stitch for the first 2 inches.
- Switch to the second color and begin the Fair Isle pattern. You can find various Fair Isle charts online or create your own design.
- Continue knitting in the Fair Isle pattern for the desired length.
- Switch back to the first color and work in a 2×2 rib stitch for the last 2 inches.
- Bind off your stitches and weave in any loose ends.
The result of the Intricate Fair Isle Cup Warmer Pattern is a beautiful and unique cup cozy that will be the envy of all your friends. The intricate colorwork adds depth and texture to the design, making it stand out from other cup warmers. Whether you use it for your morning coffee or tea, or gift it to a loved one, this cup warmer is sure to be cherished for its beauty and functionality.
Textured Basketweave Cup Warmer Pattern
A cup warmer is a great way to keep your beverage hot for longer. The Textured Basketweave Cup Warmer pattern is a beautiful and functional accessory to add to your collection.
This pattern uses a textured basketweave stitch, which adds both visual interest and insulation. The stitch creates a dense fabric that helps to keep the heat in and protect your hands from the hot cup.
To knit this cup warmer, you will need:
- Worsted weight yarn in your choice of color
- Size 7 knitting needles
- Tapestry needle
Start by casting on 40 stitches.
Next, begin the basketweave stitch pattern. This pattern is worked over a multiple of 8 stitches, so it’s easy to adjust the size if desired.
Row 1: *K4, p4* repeat to the end of the row
Row 2: *P4, k4* repeat to the end of the row
Continue these two rows until the cup warmer measures your desired length.
Bind off all stitches and weave in any loose ends.
This Textured Basketweave Cup Warmer pattern is a great project for knitters of all skill levels. It’s a quick and satisfying project that also makes a great gift. Enjoy your warm beverages in style with this cozy cup warmer!
Advanced Lace Cup Warmer Pattern
A cup warmer is not only a functional item that keeps your drink hot, but it can also be a beautiful accessory that adds a touch of elegance to your tea or coffee time. If you’re looking for a more challenging cup warmer pattern, the advanced lace cup warmer pattern is perfect for you.
This pattern features intricate lace motifs that create a delicate and feminine design. It requires intermediate to advanced knitting skills and familiarity with lace knitting techniques. The finished cup warmer will make a stunning addition to your table setting or a thoughtful handmade gift for a tea or coffee lover.
Materials:
- Yarn: Fine weight yarn in your preferred color
- Knitting needles: Size US 3 (3.25 mm) or size needed to obtain gauge
- Tapestry needle
Instructions:
- Cast on 40 stitches.
- Work in a lace pattern of your choice for the desired length. Be sure to follow the lace chart and instructions carefully to create the intricate lace design.
- Bind off all stitches.
- Join the ends of the cup warmer using the mattress stitch or your preferred seaming technique.
- Weave in any loose ends.
Feel free to experiment with different lace patterns to create a unique cup warmer that suits your style. The advanced lace cup warmer pattern allows you to showcase your knitting skills and create a stunning accessory that will make your tea or coffee experience even more enjoyable.
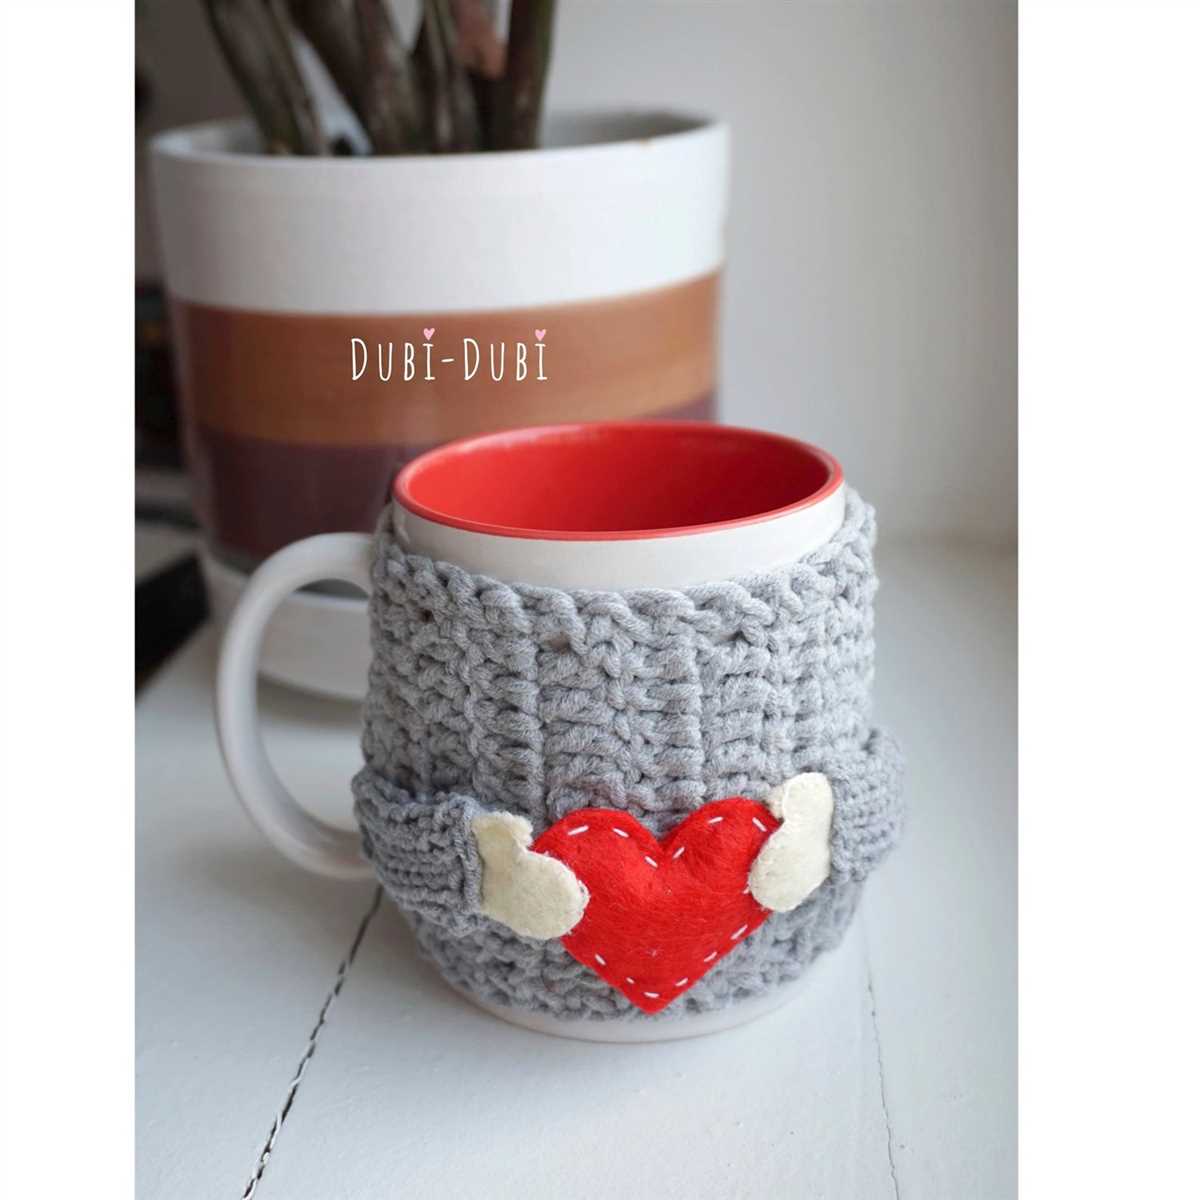
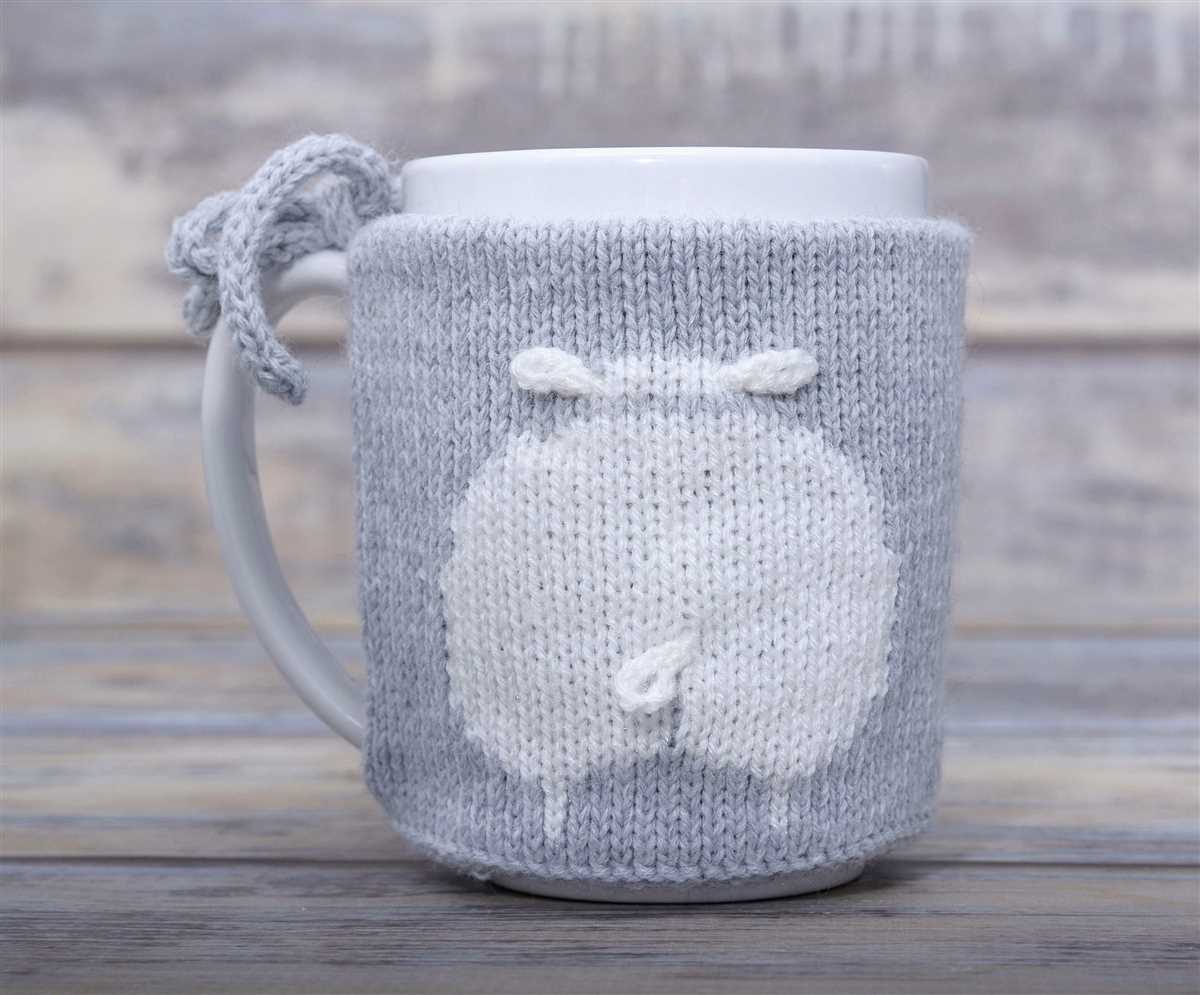
Colorful Intarsia Cup Warmer Pattern
A cup warmer can not only keep your favorite beverage warm for a longer period of time but also add a touch of color and style to your daily routine. The Colorful Intarsia Cup Warmer Pattern is a fun and creative way to decorate your cup and show off your knitting skills. This pattern uses the intarsia technique, which involves knitting with multiple colors to create a picture or pattern.
To create this colorful cup warmer, you will need multiple colors of yarn, knitting needles suitable for the yarn weight, and a tapestry needle for weaving in the ends. The pattern consists of a repeating motif, such as a geometric design or a whimsical image, that will be knit onto the cup warmer using the intarsia technique. The pattern can be easily customized to fit different cup sizes by adjusting the number of stitches and rows.
Materials:
- Multiple colors of yarn
- Knitting needles suitable for the yarn weight
- Tapestry needle
Instructions:
- Cast on the desired number of stitches for the cup warmer.
- Follow the chart or written instructions for the intarsia pattern, knitting with the different colors as indicated.
- Continue knitting in the pattern until the cup warmer reaches the desired height.
- Bind off the stitches and weave in all loose ends.
The Colorful Intarsia Cup Warmer Pattern is a great way to use up leftover yarn and create a unique and personalized cup warmer. You can experiment with different color combinations and motifs to create a cup warmer that reflects your own style and personality. This pattern is suitable for knitters with some experience in colorwork techniques, but it can also be a fun challenge for beginners looking to expand their skills. So grab your yarn and needles, and start knitting your own colorful cup warmer today!
Geometric Pattern Cup Warmer Pattern

Looking for a cup warmer pattern that is stylish and modern? The geometric pattern cup warmer is the perfect choice! With its clean lines and bold shapes, this cup warmer will add a touch of modern elegance to your morning coffee routine.
The geometric pattern cup warmer is not only aesthetically pleasing, but also functional. The thick knitted fabric will keep your cup of coffee or tea warm for longer, allowing you to savor every sip. Plus, the pattern is easy to follow, making it a great project for knitters of all skill levels.
To create this cup warmer, you will need the following materials:
- Worsted weight yarn in three different colors
- Size 6 knitting needles
- Tapestry needle
Here is the pattern for the geometric pattern cup warmer:
- Cast on 40 stitches using the first color of yarn.
- Row 1: Knit across all stitches.
- Row 2: Purl across all stitches.
- Repeat rows 1 and 2 until the cup warmer measures 2 inches in length.
- Switch to the second color of yarn.
- Row 1: Knit across all stitches.
- Row 2: Purl across all stitches.
- Repeat rows 1 and 2 until the cup warmer measures 4 inches in length.
- Switch to the third color of yarn.
- Row 1: Knit across all stitches.
- Row 2: Purl across all stitches.
- Repeat rows 1 and 2 until the cup warmer measures 6 inches in length.
- Bind off all stitches.
- Using the tapestry needle, weave in any loose ends.
The geometric pattern cup warmer can be customized by choosing different colors or using a variegated yarn. You can also experiment with different stitch patterns to create your own unique design.
So why settle for a boring cup warmer when you can make a stylish geometric pattern cup warmer? Grab your yarn and knitting needles, and start creating your own modern masterpiece!