
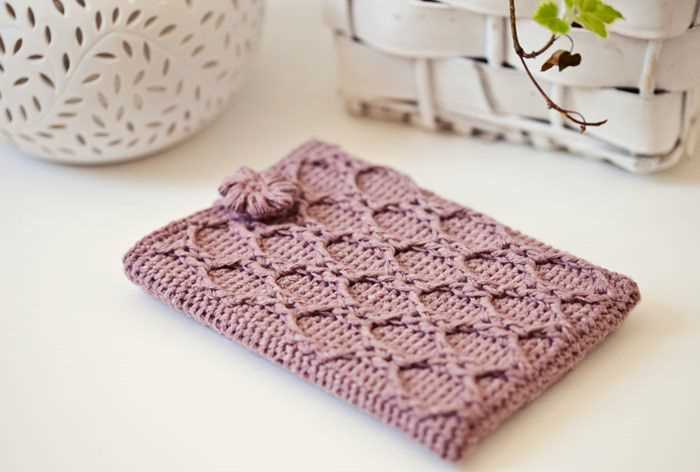
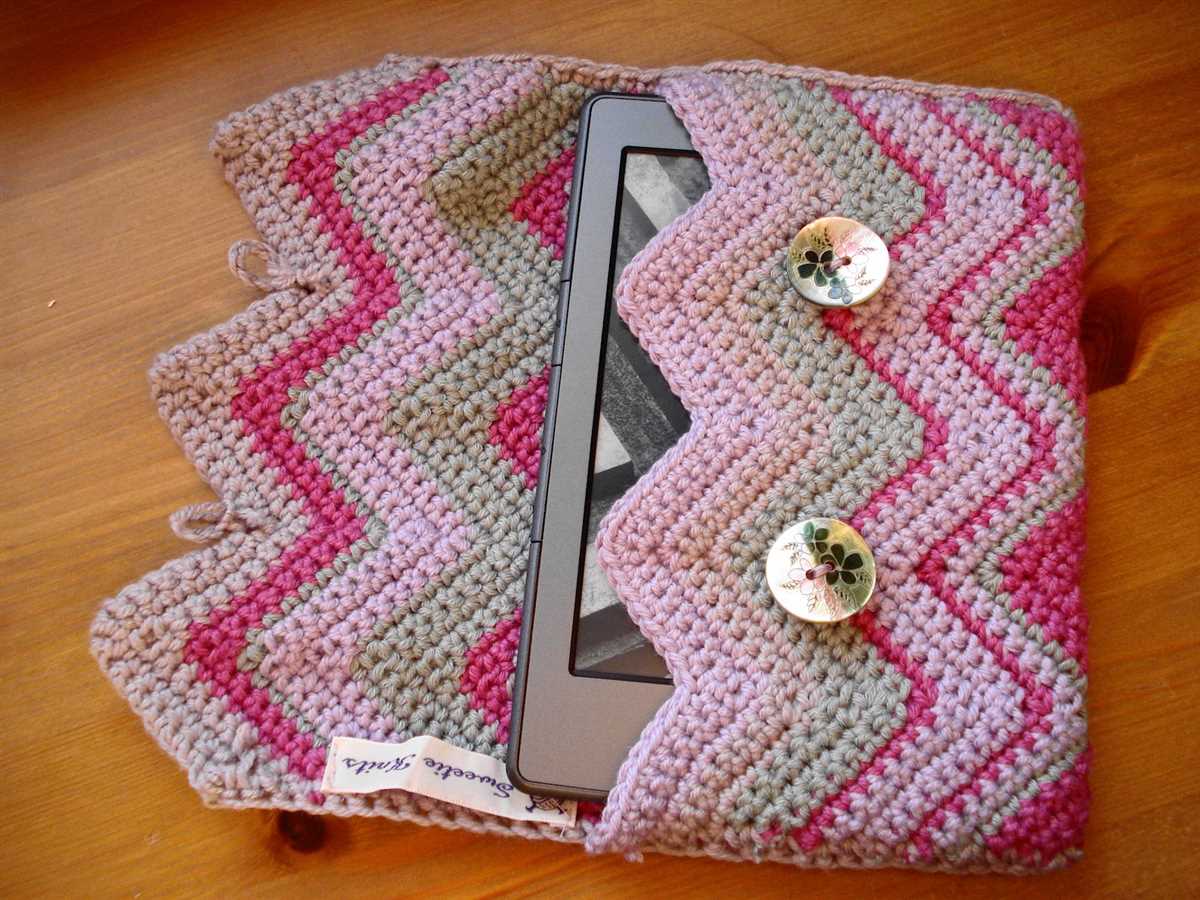
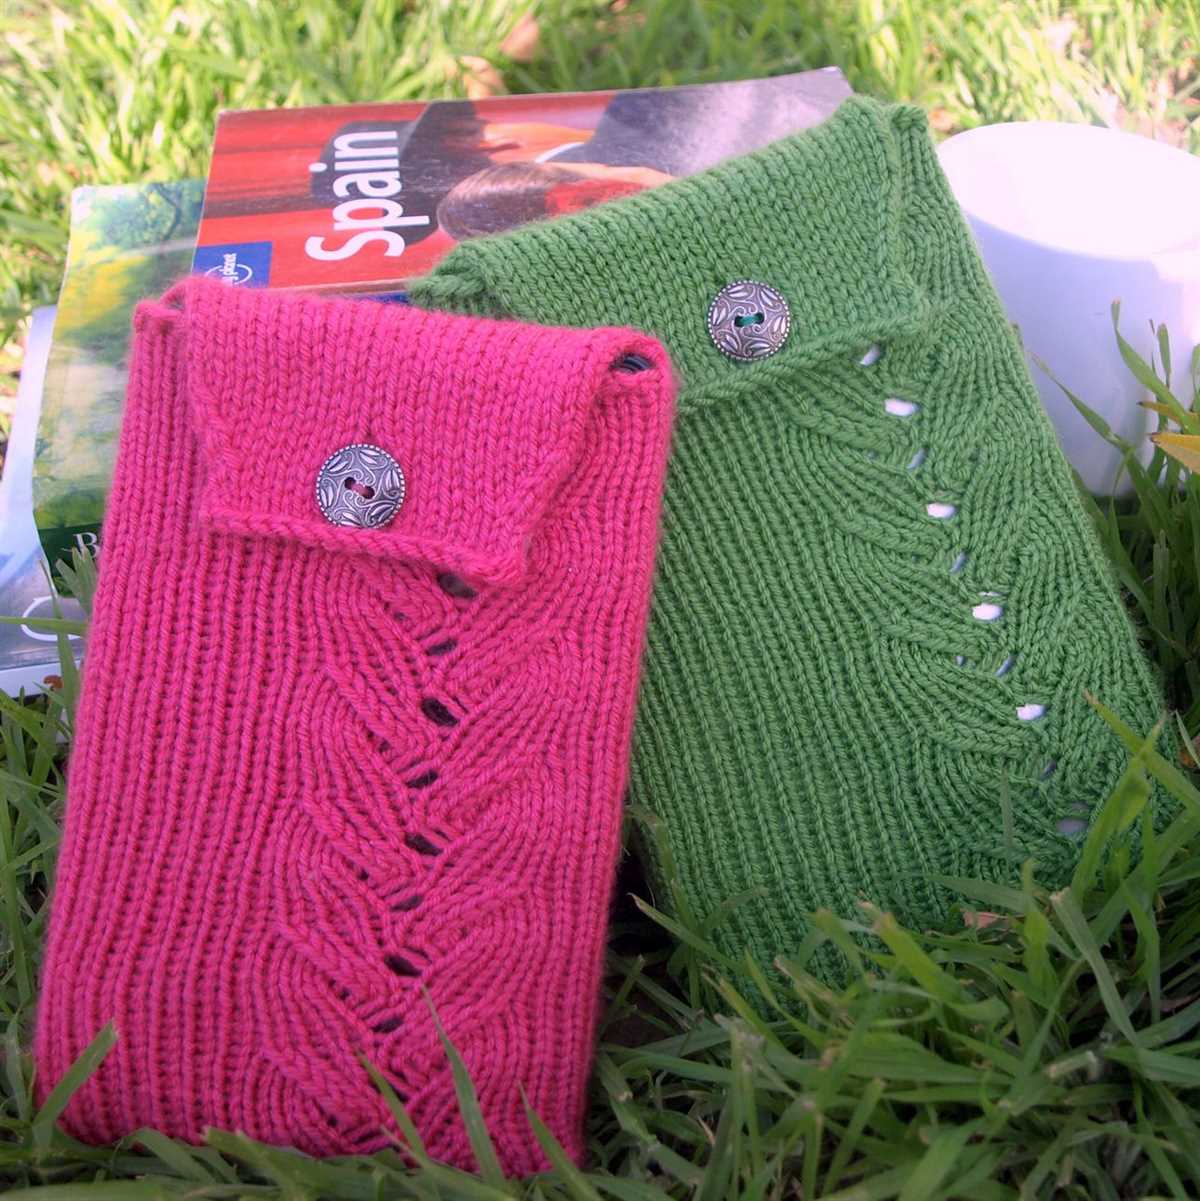
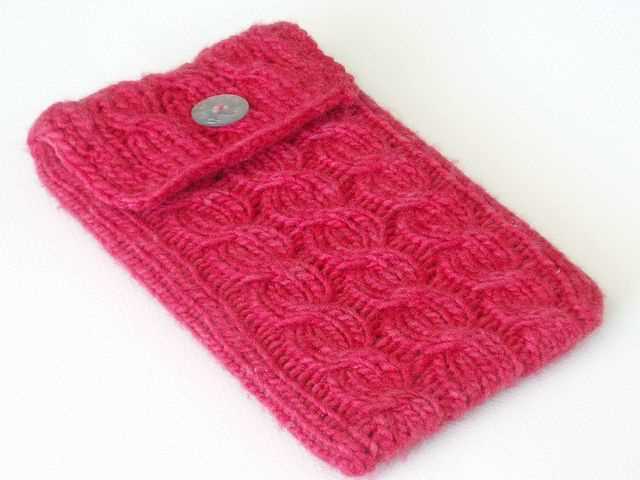
Protect your Kindle in style with a handmade knit cover! This easy-to-follow pattern will guide you through the steps of creating a cozy and personalized cover for your device. Whether you’re a beginner or an experienced knitter, this project is perfect for showcasing your skills and adding a touch of charm to your reading experience.
With this pattern, you can choose your favorite colors and yarn to create a cover that reflects your personal style. The design features a stretchy ribbed pattern that will snugly fit your Kindle and keep it safe from scratches and bumps. The cover also includes a button closure to ensure that your Kindle stays securely in place while you’re on the go.
Not only is this knit cover practical, but it also makes for a great gift for the bookworms in your life. Imagine the joy on their face when they unwrap a customized knit cover that they can use to protect their beloved Kindle. It’s a thoughtful and functional present that will be cherished for years to come.
Why You Need a Knit Kindle Cover
If you are an avid reader and own a Kindle, then you know how important it is to protect your device from scratches and damage. One way to do this is by using a knit Kindle cover. These covers are not only stylish but also functional, providing an extra layer of protection for your Kindle.
Protection: A knit Kindle cover offers excellent protection for your device. The soft, knitted material acts as a cushion, preventing your Kindle from getting scratched or damaged while in your bag or backpack. It also helps to protect the screen from dust and dirt, keeping it clean and clear for reading.
Style: Knit Kindle covers come in a variety of colors and patterns. Whether you prefer bold and vibrant colors or a more subtle and elegant design, there is a knit cover that will suit your style. The textured knit adds a touch of sophistication to your Kindle, making it stand out from the crowd.
Functionality: In addition to protecting your Kindle, a knit cover also serves a functional purpose. Most knit covers have a built-in pocket where you can store a pen or stylus for easy access. Some covers even have a built-in stand, allowing you to prop up your Kindle for hands-free reading.
Customization: One of the best things about a knit Kindle cover is that you can customize it to your liking. If you have knitting skills, you can create your own cover using your choice of yarn and pattern. This allows you to have a one-of-a-kind cover that reflects your personal style and creativity.
In conclusion, a knit Kindle cover is a must-have accessory for any Kindle owner. Not only does it provide excellent protection for your device, but it also adds a touch of style and functionality. So why wait? Get yourself a knit Kindle cover today and enjoy the benefits it has to offer.
Materials and Tools to Start Knitting
Knitting is a popular craft that allows you to create beautiful garments and accessories using just a pair of knitting needles and some yarn. To begin your knitting journey, you will need a few essential materials and tools.
1. Knitting Needles:
The most basic knitting tool is the knitting needle. These come in various sizes, lengths, and materials. The size of the needle determines the size of the stitches, while the length of the needle determines the number of stitches you can hold. Common materials for knitting needles include wood, metal, and plastic.
2. Yarn:
Yarn is the main material you will be working with when knitting. It comes in different colors, textures, and weights. The weight of the yarn refers to its thickness, which affects the drape and warmth of the finished piece. For beginners, it is recommended to start with a medium-weight yarn in a light color, as it is easier to see the stitches.
3. Stitch Markers:
Stitch markers are small circular or split rings that are used to mark specific stitches or sections of your knitting. They can come in handy when following patterns or when you need to keep track of certain stitch counts or pattern repeats. Stitch markers are particularly useful in projects with complex stitch patterns.
4. Scissors:
A pair of sharp scissors is an essential tool for any knitter. You will need them to cut the yarn at the end of a project or to fix any mistakes you may have made. Make sure to choose scissors with a fine point for precision cutting.
5. Tapestry Needle:
A tapestry needle, also known as a yarn needle or darning needle, is used for weaving in loose yarn ends and seaming knitted pieces together. It has a large eye and a blunt tip, which makes it easier to thread the yarn and navigate through stitches.
Aside from these basic essentials, there are other tools that can come in handy while knitting, such as a row counter to keep track of the number of rows, a measuring tape for checking gauge and sizing, and a needle gauge to determine the size of your knitting needles. Having these materials and tools ready will ensure a smooth knitting experience and enable you to create beautiful and functional knitted items.
Yarn
Yarn is the essential material used in knitting and crocheting projects. It is made from various types of fibers, including wool, cotton, acrylic, and synthetic blends. Each type of yarn has its own unique qualities and is suited for different types of projects.
Wool yarn: This type of yarn is popular for its warmth and durability. It is often used for making winter accessories like hats and scarves. Wool yarn is available in different thicknesses, from fine to bulky, allowing for a variety of stitch patterns and designs.
Cotton yarn: Cotton yarn is known for its softness and breathability. It is ideal for making lightweight garments and baby items. Cotton yarn comes in a range of colors and is great for creating textured patterns.
Acrylic yarn: Acrylic yarn is a synthetic fiber that is widely used in knitting and crocheting. It is known for its affordability and easy-care properties. Acrylic yarn is available in a wide range of colors and is suitable for making blankets, sweaters, and accessories.
Synthetic blends: Yarns made from synthetic blends, such as acrylic and nylon or wool and polyester, offer the benefits of both fibers. These blends can provide added stretch, durability, and softness to knitted or crocheted items. They are often used for making socks, hats, and other accessories.
When choosing yarn for your projects, consider the desired texture, stitch definition, and drape of the finished item. Also, take into account the care instructions for the yarn, as some may require special care or may not be suitable for machine washing.
Knitting Needles
When it comes to knitting, choosing the right needles is crucial. Knitting needles come in various sizes, materials, and styles, each suited for different types of projects and yarns. Whether you’re an experienced knitter or just starting out, understanding the different types of knitting needles and their uses will help you achieve the best results in your projects.
Straight Needles: Straight knitting needles are the most basic type of needles. They consist of two long, straight shafts with a point at one end and a knob or stopper at the other. These needles are ideal for beginners as they are easy to handle and control. They are commonly used for knitting flat pieces such as scarves, blankets, and dishcloths.
Circular Needles: Circular knitting needles are versatile and can be used for both flat and tubular knitting. They consist of two needle tips connected by a flexible cable. Circular needles are great for larger projects as they distribute the weight of the work evenly, reducing strain on the wrists. They are also useful for knitting in the round, such as making hats, sweaters, and socks.
Double-pointed Needles: Double-pointed needles (DPNs) come in sets of four or five and have points at both ends. They are used for knitting small circumference projects in the round, such as gloves, socks, and sleeves. DPNs are also great for creating intricate patterns and lacework.
Interchangeable Needles: Interchangeable knitting needles are sets of needle tips and cables that can be combined and changed to create different lengths. These needles offer versatility as you can adjust the cable length to accommodate different project sizes. Interchangeable needles are a great investment for knitters who like to have a variety of needle sizes and lengths without needing to buy individual pairs.
Before choosing your knitting needles, consider the project you’ll be working on, the yarn’s weight, and your personal preference. Trying different types of knitting needles can also help you discover which ones you enjoy working with the most. Remember, finding the right needles can make your knitting experience more enjoyable and help you create beautiful, professional-looking projects.
Choosing the Right Knitting Pattern
When it comes to choosing a knitting pattern, there are several factors to consider. First and foremost, you should think about the type of project you want to make. Are you looking to knit a cozy sweater, a warm scarf, or a decorative pillow? Different patterns will be suited to different types of projects, so it’s important to have a clear idea of what you want to create.
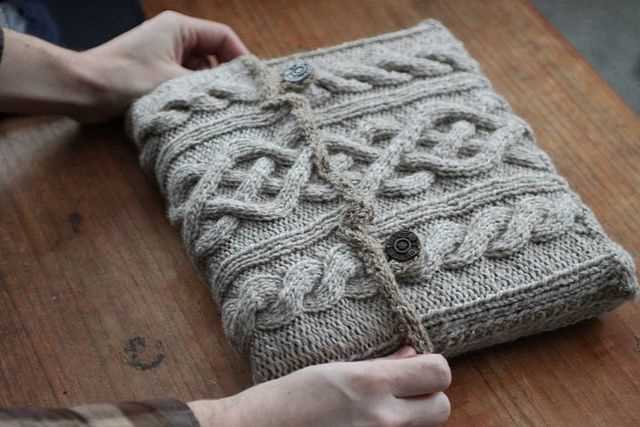
Another factor to consider is your skill level. If you’re a beginner knitter, you may want to start with a simple pattern that uses basic stitches and techniques. On the other hand, if you’re an experienced knitter looking for a challenge, you might want to choose a pattern that incorporates more advanced techniques, such as cables or colorwork.
Colors and yarn weight are also important considerations when choosing a knitting pattern. If you have a favorite color or a specific color scheme in mind, you’ll want to look for patterns that allow you to incorporate those colors. Additionally, the weight of the yarn you choose will affect the final outcome of your project, so make sure to choose a pattern that is designed for the weight of yarn you have or want to use.
- One more thing to keep in mind is the size of the finished project. Some knitting patterns will have multiple size options, while others may only have one size. Consider whether you want to make an item that will fit you or if you’re looking to make something for a specific person or purpose.
- The availability of resources is another important factor to consider. Some knitting patterns are readily available online for free or for purchase, while others may be more difficult to find. Make sure to do your research and ensure that you have access to the pattern you want before starting your project.
Ultimately, the most important thing is to choose a knitting pattern that excites you and matches your knitting skills and preferences. Take your time to explore different patterns, read reviews, and don’t be afraid to try something new. With the right pattern, you can create a beautiful and unique knitted item that you’ll be proud to show off.
Step-by-Step Guide to Knit a Kindle Cover
Knitting a Kindle cover is a fun and practical project that allows you to protect your e-reader while adding a personal touch. With this step-by-step guide, you’ll be able to create your very own knitted cover in no time.
Materials Needed:
- 1-2 skeins of medium weight yarn (depends on the size of your Kindle)
- Size 8 knitting needles
- Tapestry needle
- Scissors
Step 1: Measure and Cast On
Start by measuring your Kindle’s dimensions. This will help you determine how many stitches to cast on for your cover. Using the size 8 knitting needles, cast on the required number of stitches. Make sure to leave a long tail for sewing up the sides later.
Step 2: Create the Base
Knit in the stockinette stitch until your work measures the desired length for the base of your Kindle cover. This will ensure a snug fit for your e-reader. Remember to keep track of your rows using a row counter or by making notes.
Step 3: Shaping the Top
Once the base is complete, it’s time to shape the top to accommodate the Kindle’s screen. Start by knitting until you reach the desired height for the screen area. Then, begin decreasing on each end of the row by knitting two stitches together. Continue shaping until you have reached the desired width for the top of your cover.
Step 4: Finishing Touches
Once you have reached the desired dimensions for your Kindle cover, bind off all stitches. Use a tapestry needle to sew up the sides of the cover using the long tail left from casting on. Make sure to secure the yarn ends and weave them in for a clean finish. Trim any excess yarn with scissors.
Congratulations! You’ve just completed your very own knitted Kindle cover. Now you can enjoy reading your favorite books while keeping your e-reader safe and stylish.
Cast On Stitches
Before you can start knitting your Kindle cover, you need to cast on stitches onto your knitting needles. This is the first step in any knitting project and sets the foundation for the rest of the piece. There are several different methods for casting on stitches, but the two most common ones are the long tail cast on and the knitted cast on.
Long Tail Cast On: To begin, hold the knitting needle in your right hand and make a slipknot with the yarn. Insert the needle into the loop of the slipknot from left to right, and then tighten the loop around the needle. Next, hold the needle and the yarn in your left hand, and use your right hand to wrap the yarn around your thumb and index finger. Insert the needle under the loop on your thumb, then over the loop on your index finger, and pull the yarn through the loop. Repeat this process until you have cast on the desired number of stitches.
Knitted Cast On: Start by making a slipknot and place it on the left knitting needle. Hold the needle in your right hand and insert it into the slipknot from left to right, as if you were going to knit. Wrap the yarn around the needle, and then pull it through the slipknot. Keep the loop on the right needle and slide the left needle out of the loop, so that you have one stitch cast on. Repeat this process until you have cast on the desired number of stitches.
Once you have cast on the stitches for your Kindle cover, you can begin the actual knitting process. However, it’s important to make sure you have the correct number of stitches and that they are evenly distributed on your needles before you start knitting. This will ensure that your cover turns out the right size and shape.
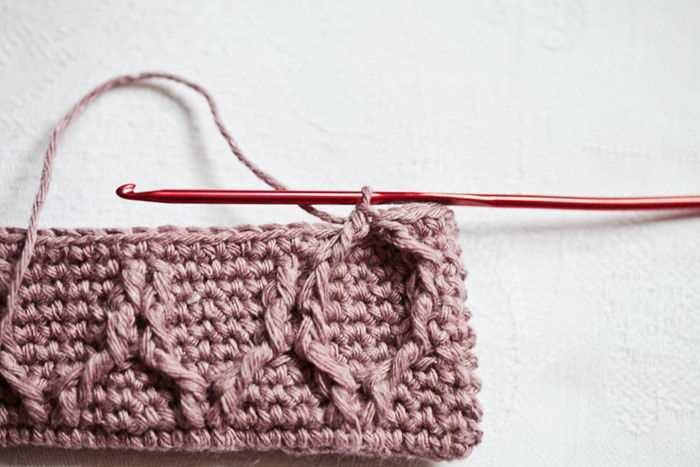
Knit the Body
The body of the kindle cover is knitted in stockinette stitch, which creates a smooth fabric with rows of knit stitches on the right side and purl stitches on the wrong side. This stitch pattern is perfect for showcasing the colors and textures of the yarn you choose for your cover.
To begin knitting the body, cast on the required number of stitches onto your knitting needles. You can use either the long-tail cast-on method or any other cast-on method you prefer. Make sure to keep the tension loose and even to ensure that the cover will fit your kindle properly.
Once you have cast on, you will work in stockinette stitch for the body of the cover. This means that on the right side rows, you will knit all stitches, and on the wrong side rows, you will purl all stitches. Repeat these two rows until you have reached the desired length for your cover.
For a neat and clean edge, it is recommended to knit the first and last stitches of each row, also known as the selvedge stitches, in a different stitch pattern. You can choose to knit them in garter stitch, seed stitch, or any other stitch pattern that you prefer. This will prevent the edges from curling and give your cover a polished finish.
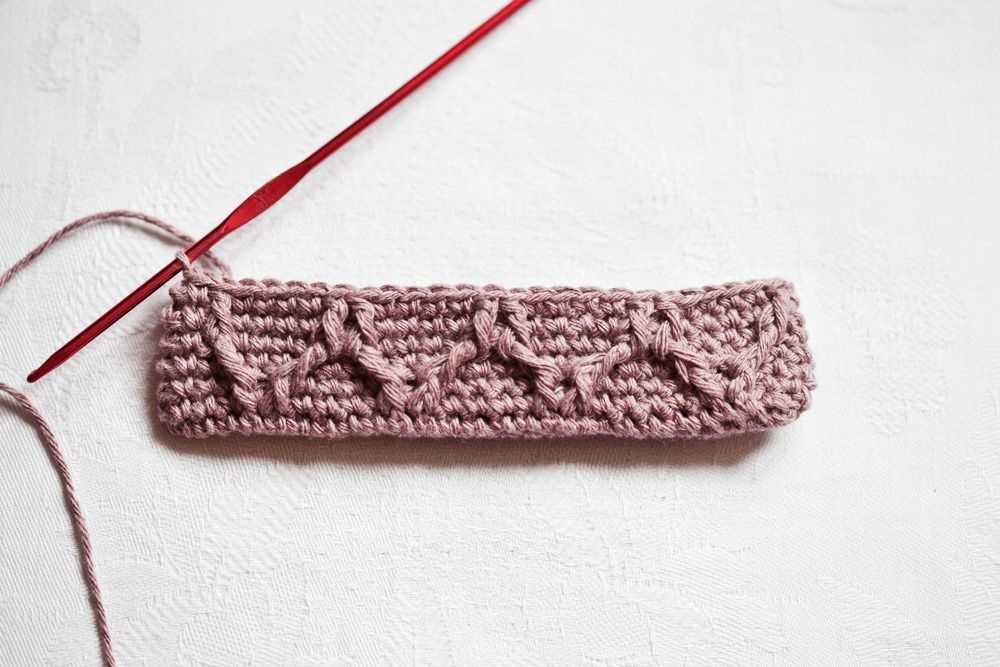
Create Buttonholes
When knitting a kindle cover, it is important to include buttonholes so you can easily secure the cover in place. Buttonholes allow you to easily access the buttons on your kindle without removing the cover entirely, making it both functional and stylish.
To create buttonholes, you will need to plan their placement in advance. Consider where you want the buttons to be positioned and make sure to leave enough space between each buttonhole. This will ensure that the cover fits snugly around your kindle and the buttons align correctly.
Step 1: Decide on the size of your buttonholes. The size will depend on the thickness of the buttons you plan to use. Measure the diameter of your buttons and add a few extra stitches to allow for easy buttoning and unbuttoning.
Step 2: Once you have determined the size, you can begin creating the buttonholes. There are several techniques you can use, including yarn overs, double yarn overs, or binding off and casting on stitches to create a gap for the button to slip through.
One common method is to use the double yarn over technique. To do this, simply knit to the desired location of the buttonhole, yarn over twice (wrap the yarn around the needle twice), then continue knitting as usual. On the next row, when you come to the double yarn over, drop one of the wraps to create a hole. This will create a buttonhole large enough for most standard-sized buttons.
Remember to test the size of your buttonholes as you go along to ensure they are the right fit for your buttons. You can easily adjust the size of the buttonholes by adding or subtracting stitches or wraps, depending on your preference.
By following these steps, you can easily create buttonholes in your kindle cover pattern. Adding buttonholes will not only make your cover functional, but it will also give it a professional and finished look.
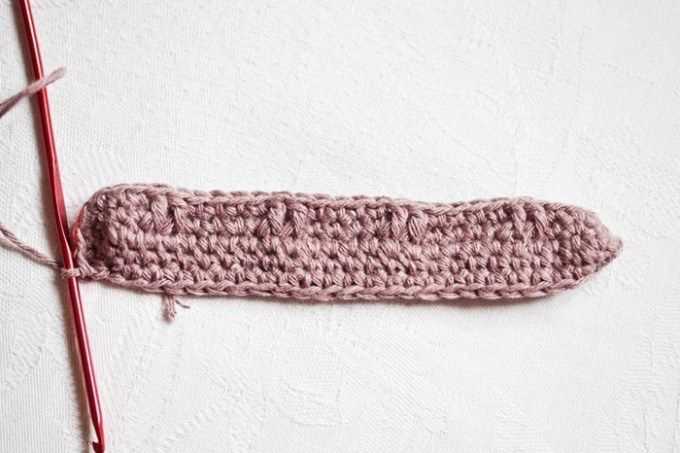
Knit the Flap
Once you have completed your basic knit cover, it’s time to move on to the flap. The flap is an important part of the cover as it helps protect your Kindle and keep it secure. Follow these instructions to knit the flap:
Materials:
- Knitting needles (size may vary depending on your yarn)
- Yarn in your desired color
- Tape measure
- Yarn needle
Instructions:
- Start by casting on the required number of stitches for the flap. This will depend on the width of your cover and the size of your Kindle.
- Continue knitting in your chosen stitch pattern until the flap reaches the desired length. Make sure to measure it against your Kindle to ensure a snug fit.
- Once the flap is long enough, it’s time to shape the top. You can do this by decreasing stitches gradually. Follow a decrease pattern that matches your chosen stitch pattern to maintain consistency.
- After shaping the top, bind off the remaining stitches and cut the yarn, leaving a long tail for sewing.
- Using a yarn needle, sew the sides of the flap to the body of the cover, leaving an opening for the Kindle screen and buttons.
- Secure all loose ends and make any necessary adjustments to ensure a perfect fit for your Kindle.
Now your knit Kindle cover is complete with a flap! It adds an extra layer of protection and convenience to your device, allowing you to enjoy reading with peace of mind. Customize your cover with different stitch patterns, colors, and embellishments to make it uniquely yours.
Remember to always follow the specific instructions included with your chosen knitting pattern and adapt them to fit your Kindle’s dimensions. Happy knitting!
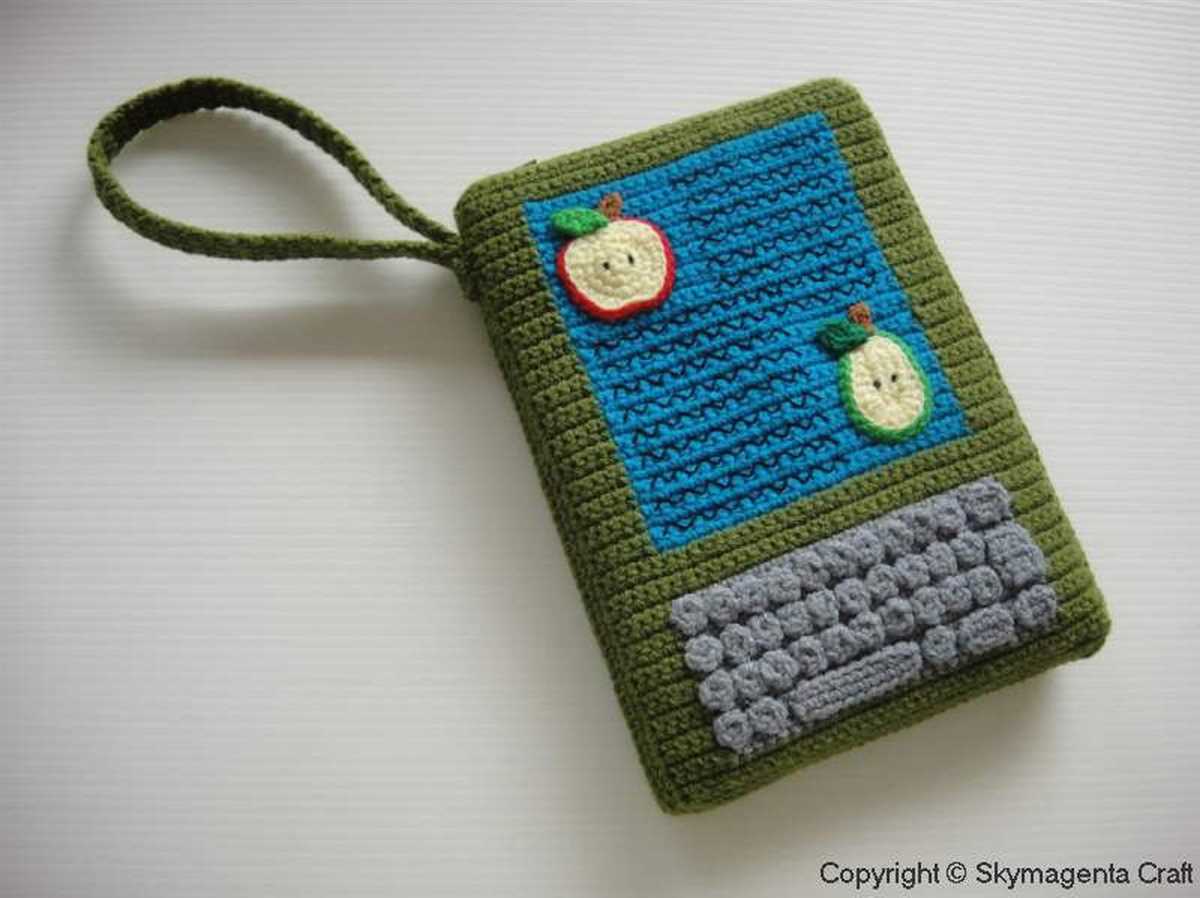
Embellishments and Personalization
If you’re looking to give your knit kindle cover a personal touch, consider adding some embellishments. There are many ways to personalize your cover, whether it’s through embroidery, appliqué, or beading. These embellishments can make your cover unique and add a special touch.
If you’re skilled in embroidery, you can add intricate designs to your cover. It could be a simple monogram or a more intricate pattern, like flowers or animals. Embroidery adds texture and visual interest to your cover, and it’s a great way to show off your creativity and artistic skills.
Another option is to incorporate appliqué into your knit kindle cover. Appliqué involves sewing fabric shapes onto your cover to create a design. You can use a contrasting fabric or even repurpose old clothing or scraps to create unique appliqué designs. This technique allows you to add color and texture to your cover.
For those who love a touch of sparkle, adding beads or sequins to your knit kindle cover is a great option. You can sew them directly onto the cover or use them to create patterns or designs. Beads and sequins can give your cover a glamorous and eye-catching look.
Whether you choose embroidery, appliqué, or beading, adding embellishments to your knit kindle cover allows you to showcase your own style and personality. With so many options available, you can create a cover that is truly one-of-a-kind.
Adding Buttons
If you want to add buttons to your knit kindle cover, you have a few options to consider. Buttons can not only add functionality to your cover but also give it a decorative touch. Here are some methods you can use to add buttons:
Sewn-On Buttons:
The most common way to add buttons to your knit kindle cover is to sew them on. You can choose buttons of various sizes, shapes, and colors to match your design. To attach the buttons, thread a needle with a contrasting color yarn and sew through the knit fabric, securing the button in place. Make sure to sew the buttons securely so that they don’t come off easily.
Buttonholes:
If you want the buttons to fasten your knit kindle cover, you’ll need to create buttonholes. This can be done by carefully cutting small slits or openings in the knit fabric where the buttons will be attached. You can reinforce the edges of the buttonholes by using a crochet hook to slip stitch along the edges. Make sure to measure your buttons and create buttonholes that are slightly smaller than the buttons to ensure a snug fit.
In addition to sewn-on buttons and buttonholes, you can also experiment with other methods of attaching buttons, such as using snaps or Velcro. Consider the overall design and functionality of your knit kindle cover to determine the best method for adding buttons that will enhance its look and usability.
Embroidery Details
In addition to the cozy and functional knit design, you can enhance your Kindle cover with beautiful embroidery details. Embroidery adds a personal touch and can make your cover truly unique. Here are some ideas to get you started:
- Initials: Embroider your initials or monogram onto the cover to personalize it.
- Patterns: Create intricate patterns with different embroidery stitches, such as French knots or satin stitches.
- Quotes: Stitch your favorite book quote or a motivating phrase onto the cover for inspiration.
- Floral Designs: Embroider small flowers or leaves for a nature-inspired look.
- Animals or Objects: Add cute animal or object motifs, such as birds or bicycles, for a whimsical touch.
When embroidering, you can use embroidery floss or thread in various colors to create different effects. You can also experiment with different stitches and techniques to achieve unique textures and designs.
Remember to plan your embroidery before starting and mark the design on the cover with a washable fabric marker or chalk. This will help you ensure that the embroidery is placed correctly and looks balanced.
With these embroidery details, you can take your knit Kindle cover to the next level and showcase your creativity and personal style. Whether you choose a simple monogram or an intricate pattern, your embroidered cover will surely stand out and become a conversation starter.
Q&A:
What is a knit kindle cover pattern?
A knit kindle cover pattern is a set of instructions and guidelines that you can follow to create a knitted cover for your Kindle e-reader. It includes information on the materials you will need, the stitches and techniques used, and the measurements and dimensions of the finished cover.
Where can I find a knit kindle cover pattern?
You can find knit kindle cover patterns in various places. Online platforms like knitting websites, craft blogs, and pattern-sharing communities often have a wide selection of patterns to choose from. You can also check out knitting books and magazines that feature patterns for electronic device covers.
What materials do I need for a knit kindle cover pattern?
The materials needed for a knit kindle cover pattern typically include yarn in the desired color or colors, knitting needles (usually in a size appropriate for the chosen yarn), a tapestry needle for sewing or finishing, and any additional embellishments or closures as specified in the pattern.
Are knit kindle covers easy to make?
Knit kindle covers can range in difficulty depending on the pattern and the knitter’s skill level. Some patterns may be suitable for beginners with basic knitting skills, while others may require more advanced techniques such as cables or colorwork. It is always a good idea to read through the pattern and assess your skill level before starting.
Can I customize a knit kindle cover pattern?
Yes, you can definitely customize a knit kindle cover pattern to suit your preferences. You can choose different colors, add or omit certain design elements, or modify the size and shape to fit your Kindle or other e-reader model. Knitting patterns often leave room for personalization and creativity.
Where can I find a knit kindle cover pattern?
You can find knit kindle cover patterns on various websites, such as Ravelry, Etsy, and Pinterest. There are also many knitting books and magazines that feature patterns for kindle covers.