
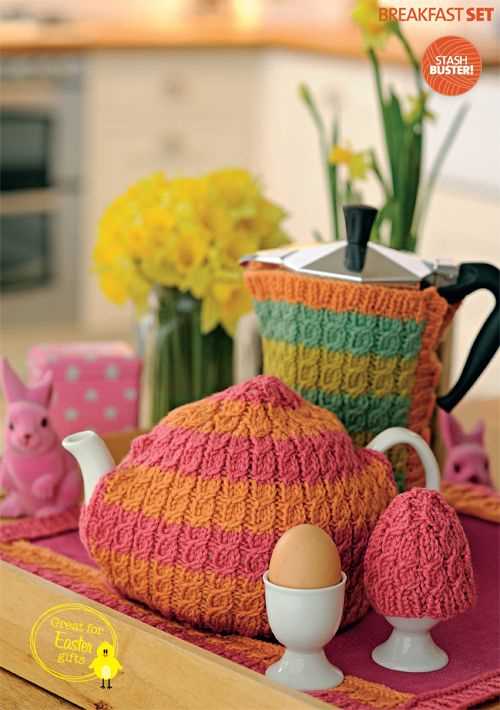
Knitting is a popular hobby that allows people to relax and create beautiful items with their own hands. One of the most adorable and practical things you can knit is an egg cosy. An egg cosy is a small knitted cover that keeps boiled eggs warm and adds a touch of charm to breakfast.
If you enjoy knitting and want to try something new, we have a free knitting pattern for an egg cosy that you will love. This pattern is suitable for beginners and experienced knitters alike, as it requires basic knitting skills and uses simple stitches. With just a few hours of your time and some colorful yarn, you can create a collection of cosy egg covers that will make your breakfasts more enjoyable.
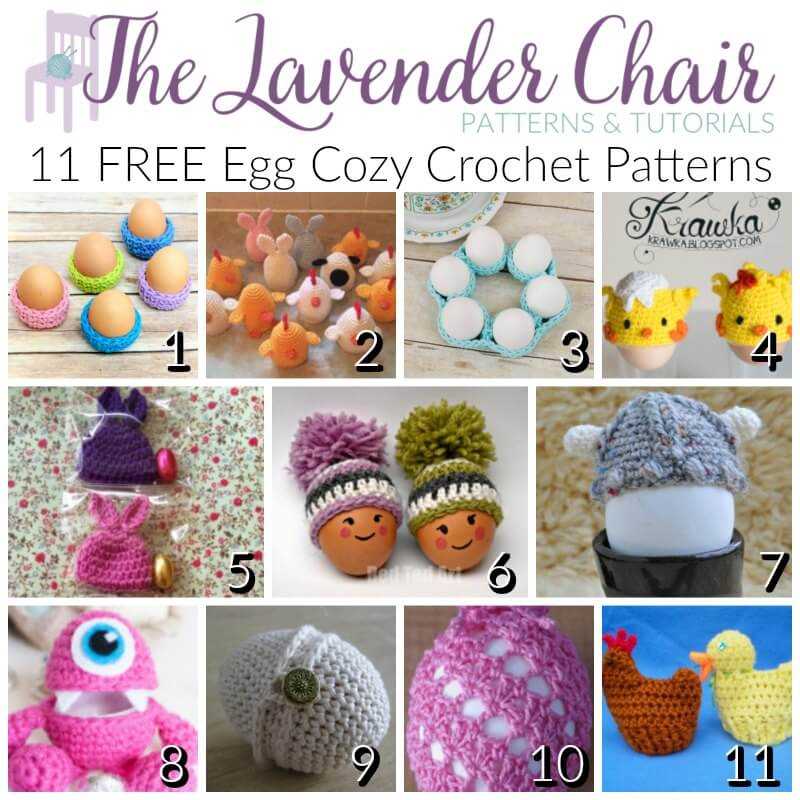
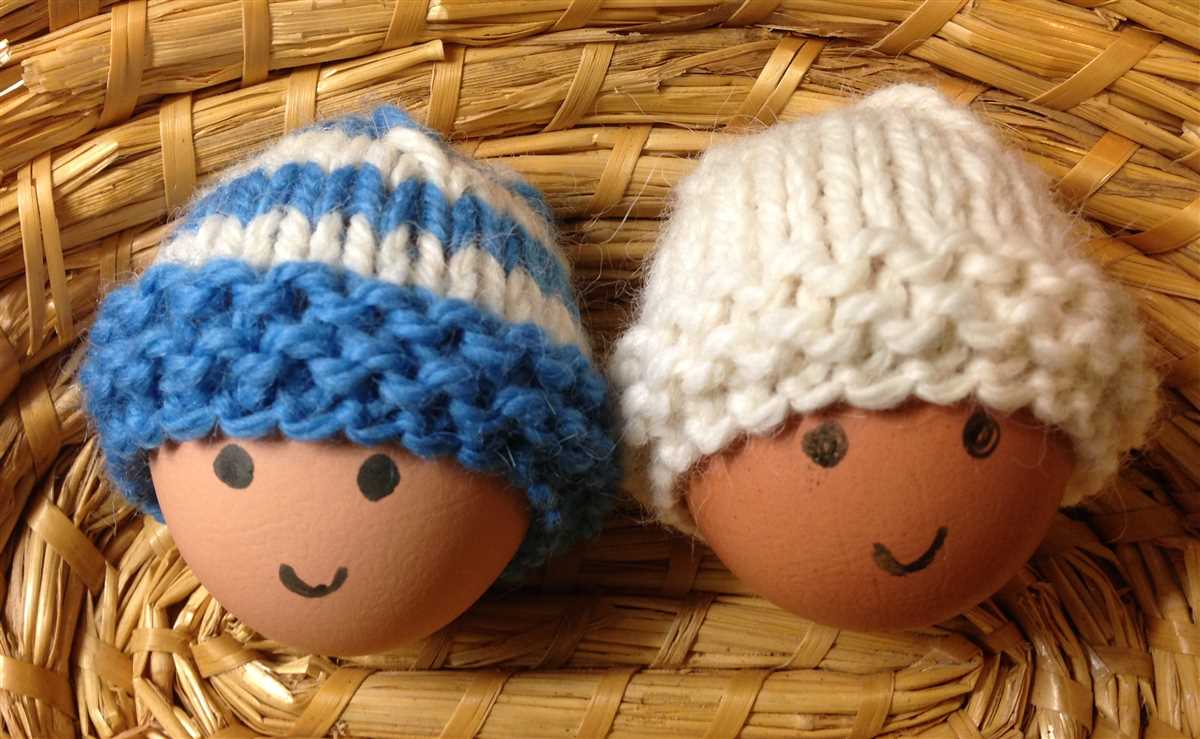
Our free knitting pattern provides step-by-step instructions and a list of materials you will need to complete the project. You can choose from a variety of designs, including cute animal faces, classic stripes, or even personalized patterns. The possibilities are endless, and you can let your creativity shine through with each cosy you make.
Free Knitting Pattern for Egg Cosy
If you love knitting and want to add a touch of coziness to your breakfast table, why not try making your own egg cosies? In this article, we will share a free knitting pattern for an adorable egg cosy that can keep your boiled eggs warm and stylish!
To begin with, gather your materials. You will need some yarn in your desired colors, knitting needles (size may vary depending on the thickness of your yarn), a tapestry needle for sewing, and a pair of scissors. Once you have everything prepared, you’re ready to start knitting!
Step 1: Cast on 24 stitches using your main color yarn.
Step 2: Knit 2 rows in garter stitch (knit every stitch).
Step 3: Begin the pattern: *knit 2, purl 2* for the next 6 rows.
Step 4: Switch to your contrasting color yarn. Knit 2 rows in stockinette stitch (knit one row, purl one row).
Step 5: Switch back to your main color yarn. Follow the pattern: *knit 2, purl 2* for the next 6 rows.
Step 6: Knit 2 rows in garter stitch.
Step 7: Cast off all stitches.
Once you have completed the knitting part, you can use your tapestry needle to sew the edges together, leaving a small opening at the top for the egg to peek through. Don’t forget to weave in any loose ends of yarn.
This simple yet charming egg cosy pattern will add a touch of handmade warmth to your breakfast table. You can personalize it by adding embellishments like buttons, bows or pom-poms. Get creative and have fun experimenting with different colors and patterns. Happy knitting!
Choosing the Right Yarn
When it comes to knitting, choosing the right yarn is crucial to ensure the success of your project. The type of yarn you select will determine the final appearance, feel, and even durability of your knitted item. There are several factors to consider when choosing yarn, including fiber content, weight, and texture.
Fiber content: The fiber content of the yarn will greatly affect how your finished project looks and feels. Some common fiber options include wool, cotton, acrylic, and blends of different fibers. Each type of fiber has its own unique characteristics, so it’s important to consider the desired outcome and how the yarn will be used. For example, wool yarn is known for its warmth and elasticity, while cotton is cooler and more breathable.
Weight: Yarn weight refers to the thickness of the yarn. It is categorized using a standard system, which ranges from lace weight (the thinnest) to super bulky (the thickest). The chosen weight of yarn will impact the drape and overall appearance of your project. Thicker yarns tend to create bulkier and warmer items, while thinner yarns are ideal for delicate and lightweight pieces.
Texture: The texture of the yarn can add an interesting visual and tactile element to your project. Some yarns have smooth, even textures, while others may be fluffy, textured, or have other unique characteristics. Consider the desired look and feel of your knitted item and choose a yarn that complements it. For example, a textured yarn can add depth and dimension to a simple stitch pattern, while a smooth yarn can enhance intricate lacework.
In conclusion, choosing the right yarn is an important step in any knitting project. Consider factors such as fiber content, weight, and texture to ensure that your finished item has the desired appearance and characteristics. With the wide variety of yarn options available, you can find the perfect yarn to bring your knitting projects to life.
Selecting the Perfect Needles
When it comes to knitting, one of the most important tools you’ll need is a pair of good knitting needles. The right needles can make all the difference in your knitting experience, so it’s important to choose the perfect ones for your project.
1. Material: Knitting needles come in a variety of materials, including metal, wood, and plastic. Each material has its own unique qualities that can affect your knitting. Metal needles are smooth and sturdy, making them great for fast knitting. Wooden needles have a natural warmth and are perfect for delicate yarns. Plastic needles are lightweight and flexible, making them ideal for travel.
2. Size: Needles come in different sizes, which are measured by their diameter. The size of the needle you choose will depend on the thickness of the yarn you’re using and the desired gauge of your project. It’s important to check the yarn label for recommended needle sizes or to make a gauge swatch before starting your project.
3. Length: Knitting needles also come in different lengths, ranging from short straight needles to long circular needles. The length of the needle you choose will depend on the type of project you’re working on. Short needles are ideal for small projects like socks or gloves, while long needles are great for larger projects like blankets or sweaters.
4. Tips: The tips of knitting needles can be either blunt or pointed. Blunt tips are perfect for beginners as they are less likely to split the yarn, while pointed tips are great for intricate stitch patterns and lacework. It’s important to consider the type of stitches you’ll be working with when choosing the tip style.
5. Ergonomics: Finally, consider the ergonomics of the knitting needles. Some needles have a smooth finish or a comfortable grip that can reduce hand fatigue during long knitting sessions. It’s worth trying out different types of needles to see what feels most comfortable in your hands.
- Consider the material, size, length, tips, and ergonomics when selecting knitting needles.
- Metal needles are smooth and sturdy, wooden needles have a natural warmth, and plastic needles are lightweight and flexible.
- Choose the right size needle based on the thickness of your yarn and the desired gauge of your project.
- The length of the needle will depend on the type of project you’re working on.
- Blunt tips are perfect for beginners, while pointed tips are great for intricate stitch patterns.
- Consider the ergonomics of the needles to reduce hand fatigue during knitting.
Getting Started: Casting On

Before you can start knitting your egg cosy, you need to cast on your stitches. Casting on is the process of creating the foundation row of stitches on your knitting needles. This is the first step in almost every knitting project.
To begin casting on, you will need to make a slipknot. This is a loop that will serve as the first stitch on your needles. Hold the end of your yarn in your right hand and create a loop by crossing the yarn over itself. Pull the end of the yarn through the loop to create a knot. Adjust the loop so that it is snug but not too tight.
Once you have your slipknot, insert your right knitting needle through the loop from front to back. Hold the needle in your right hand and the end of the yarn in your left hand. With your left thumb and index finger, hold the yarn that is attached to the ball.
Now, with your right hand, bring the needle under the yarn that is attached to the ball, creating a loop around the needle. Hold the yarn that is attached to the ball with your left thumb and index finger and use your right hand to pull the needle and the loop of yarn through the loop on the needle. This creates your first cast-on stitch.
Continue this process until you have cast on the required number of stitches for your egg cosy pattern. Make sure to keep the tension even as you work, so that the stitches are neither too loose nor too tight. Once all the stitches are cast on, you can begin working the rest of the pattern, following the instructions for each row.
Basic Knitting Stitches
When it comes to knitting, there are several basic stitches that every knitter should know. These stitches form the foundation of many knitting patterns and can be used to create a wide range of textures and designs. Whether you’re a beginner or an experienced knitter, mastering these basic stitches is essential for creating beautiful and professional-looking knitted items.
Knit Stitch
The knit stitch, also known as the garter stitch, is one of the most basic and commonly used stitches in knitting. It creates a smooth and flat fabric with a series of interlocking loops. To knit stitch, simply insert the right-hand needle into the first stitch on the left-hand needle from left to right, bring the yarn over the right-hand needle and pull it through the stitch, leaving the stitch on the right-hand needle. Repeat this process for each stitch until the row is complete.
Purl Stitch
The purl stitch is another basic stitch in knitting that creates a bumpy texture on the fabric. It is often used in combination with the knit stitch to create ribbing or stockinette stitch patterns. To purl stitch, insert the right-hand needle into the first stitch on the left-hand needle from right to left, bring the yarn under the right-hand needle and pull it through the stitch, leaving the stitch on the right-hand needle. Repeat this process for each stitch until the row is complete.
Stockinette Stitch
The stockinette stitch is a pattern that is created by alternating knit and purl stitches on consecutive rows. It creates a smooth and flat fabric on the right side, and a bumpy texture on the wrong side. To create a stockinette stitch, knit the first row, then purl the second row. Repeat these two rows until the desired length is reached. This stitch pattern is commonly used for creating clothing items such as sweaters and scarves.
Rib Stitch
The rib stitch is a pattern that is created by alternating knit and purl stitches on the same row. It creates a fabric with raised vertical lines that are often used for cuffs, collars, and borders. The most common rib stitch pattern is the 1×1 rib, where one knit stitch is followed by one purl stitch. Another popular rib stitch pattern is the 2×2 rib, where two knit stitches are followed by two purl stitches. The rib stitch pattern can be customized by adjusting the number of knit and purl stitches in the pattern.
Working the Body of the Cosy
After you have finished knitting the ribbing for the bottom of the cosy, it’s time to start working on the body. The body of the cosy is where you can get creative with your knitting pattern. You can stick to a simple stockinette stitch or try out different stitch patterns to add some texture.
Once you have decided on the stitch pattern you want to use, continue knitting in the round. Make sure to keep track of your stitch count, especially if you are using a stitch pattern that requires a specific number of stitches.
If you want to add some shaping to the body of the cosy, you can do so by incorporating increases or decreases. For example, you can knit a few rounds and then decrease a few stitches evenly spaced across the row to create a tapered effect. Alternatively, you can add increases to create a flared shape.
Remember to periodically try the cosy on your egg to ensure it is the right size. Adjust your stitch count or needle size if necessary. Once you are happy with the length of the body, you can start working on the top of the cosy.
Next, you can choose to either continue with the same stitch pattern or switch to a different one for the top. You can also add some decorative elements like colorwork or a lace panel. Knit the top until it is the desired length and then bind off your stitches.
With the body of the cosy complete, you can now move on to any additional embellishments or finishing touches. This can include adding buttons, embroidery, or even sewing on beads. Get creative and make your cosy truly unique!
Creating the Shaping
Now that you have completed the ribbing, it’s time to start shaping your egg cosy. To create the shaping, you will be decreasing stitches in a specific pattern to form the top of the cosy. This will give it a rounded shape that is perfect for fitting snugly over your boiled egg.
First, you will need to divide your stitches evenly onto three double-pointed needles. This will allow you to easily work in the round and shape the cosy. Make sure that the stitches are evenly distributed so that you have an equal number on each needle.
Next, you will begin the decrease rounds. The specific pattern will depend on the chosen knitting pattern for the egg cosy. Common decrease techniques include knit two together (k2tog) and slip-slip-knit (ssk). Follow the instructions provided in the knitting pattern to determine the proper decrease sequence.
Continue working the decrease rounds until the desired number of stitches remains. This will create the rounded top of the egg cosy. Make sure to read the knitting pattern carefully to ensure that you are following the correct number of decrease rounds and maintaining the correct stitch count.
Once you have completed the shaping, you can finish off the egg cosy by binding off the stitches and weaving in any loose ends. Your cosy is now ready to be used to keep your eggs warm and cozy!
Adding a Fun Design or Pattern
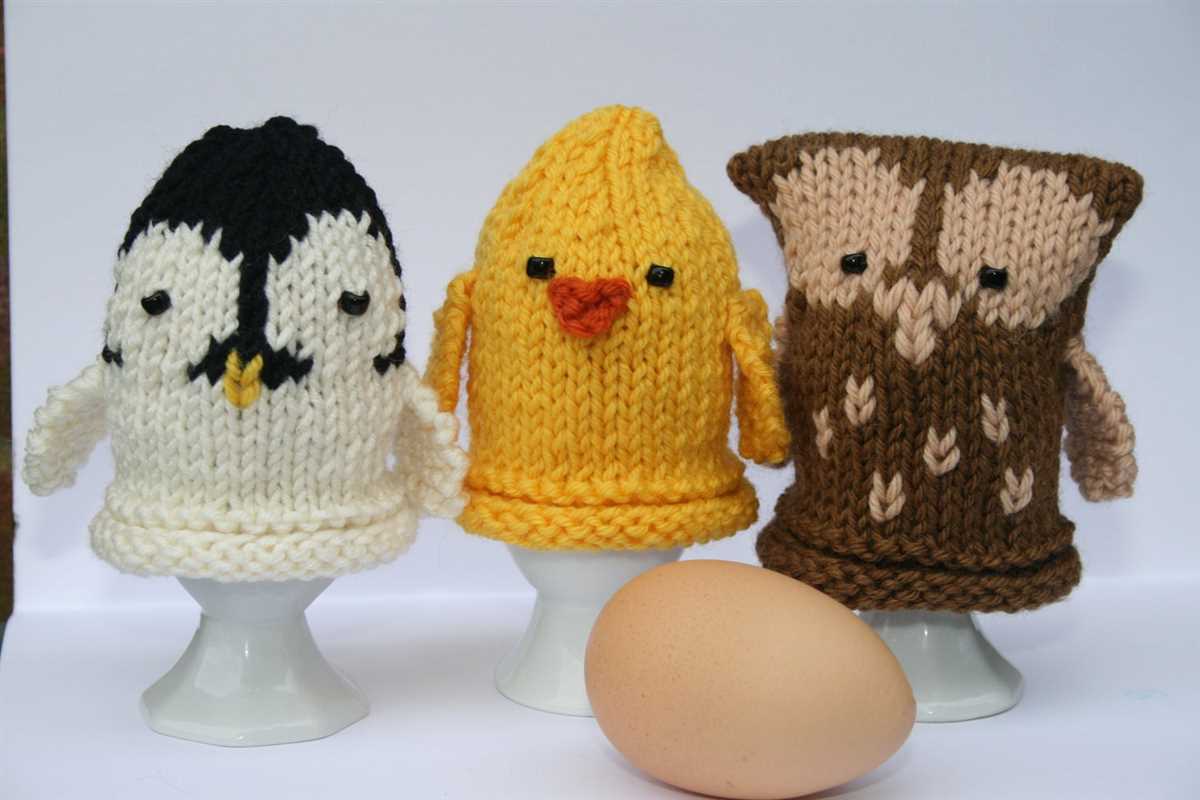
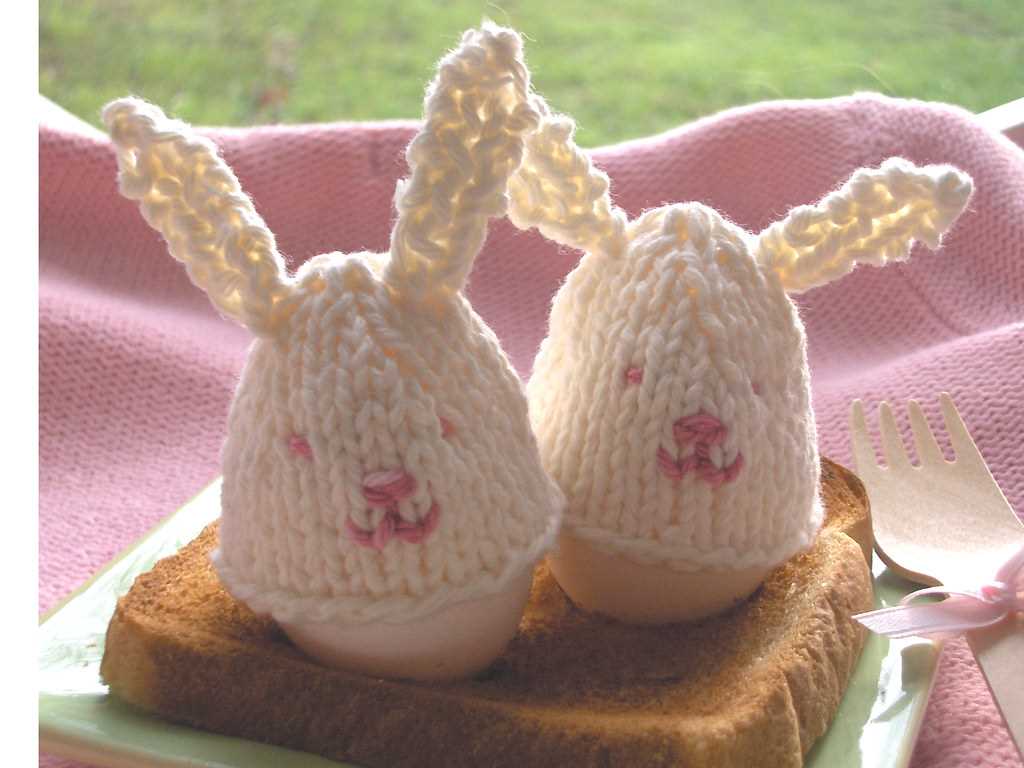
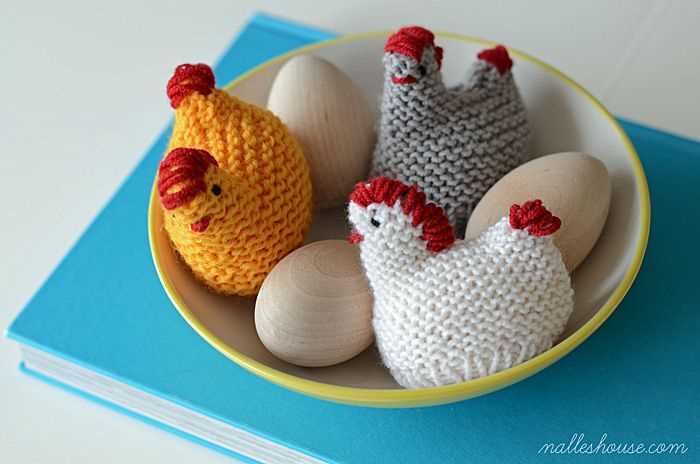
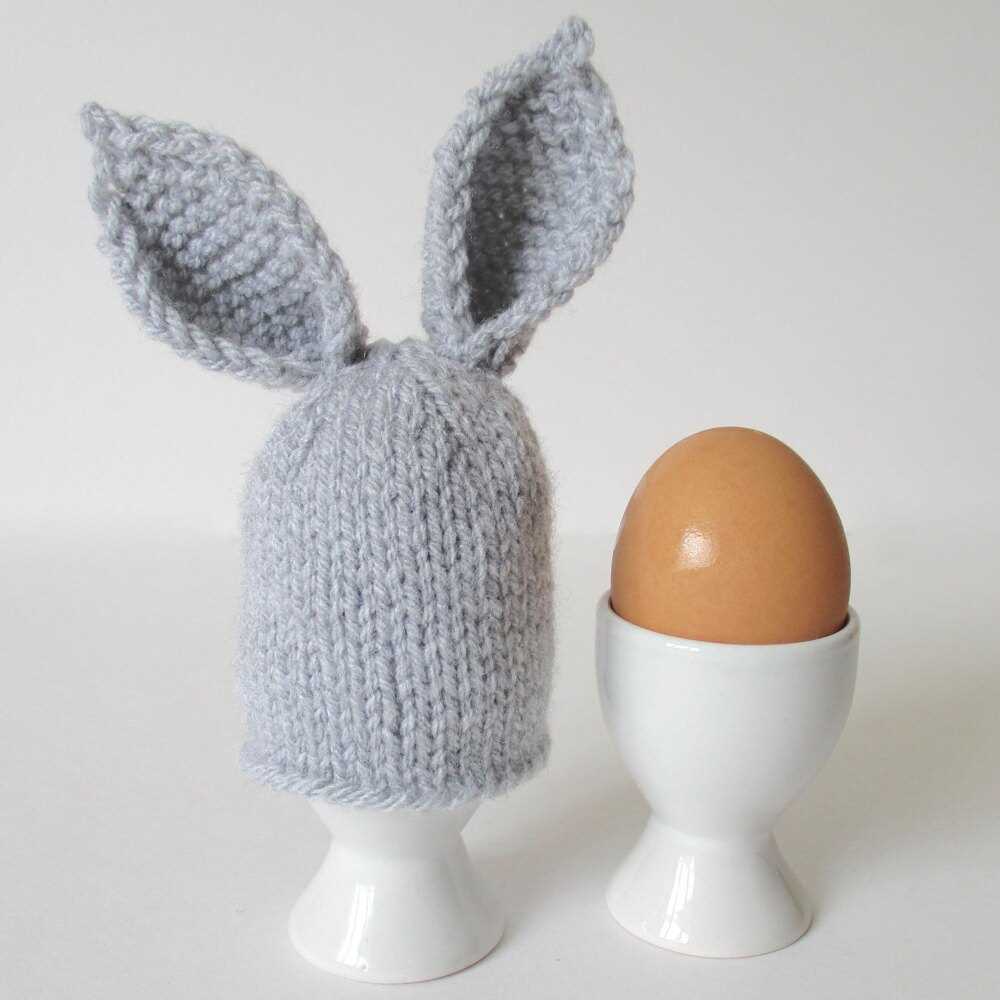
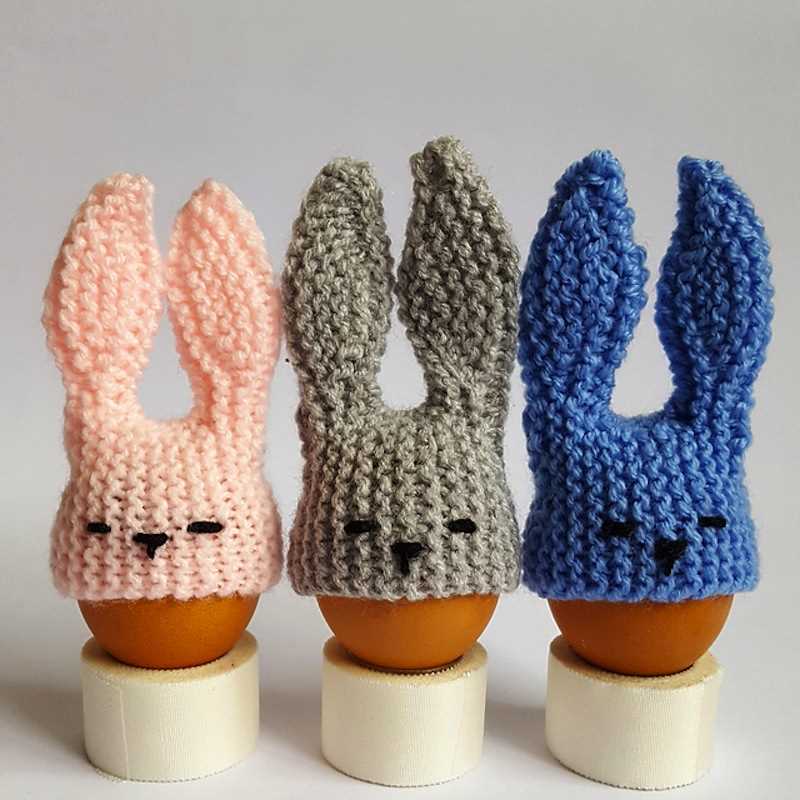
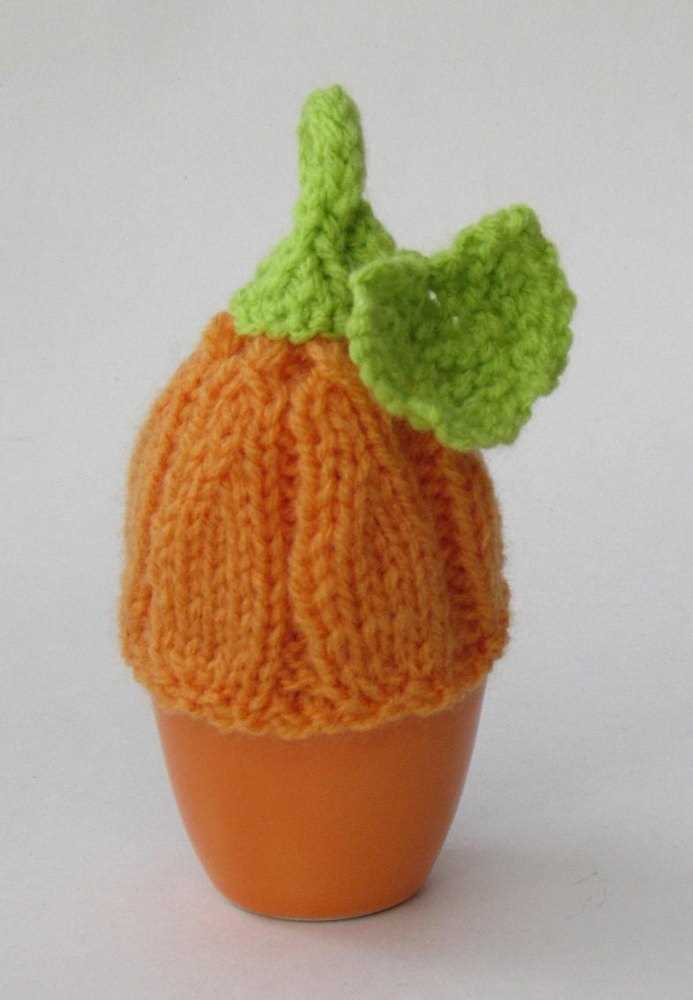
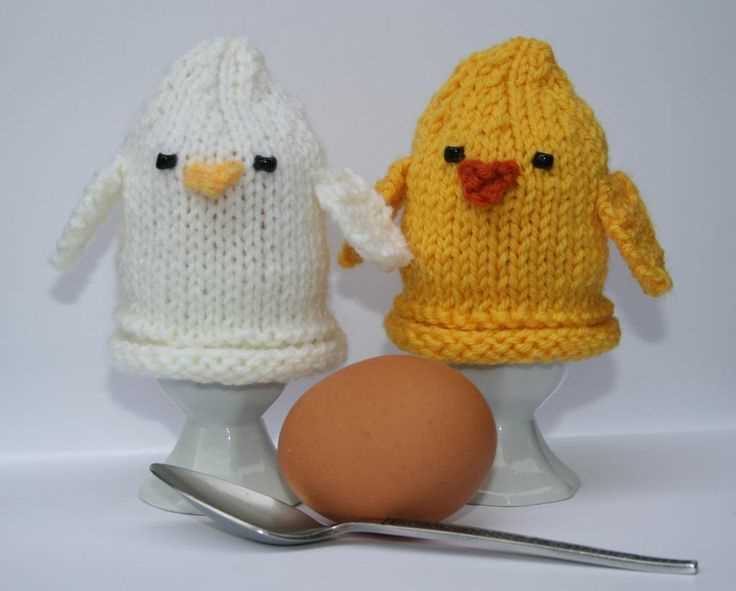
When it comes to knitting egg cosies, adding a fun design or pattern can make them even more delightful and whimsical. One popular option is to incorporate animal-inspired designs, such as cute bunnies or playful owls. These can be knitted using different colored yarns to create a vibrant and eye-catching finished product.
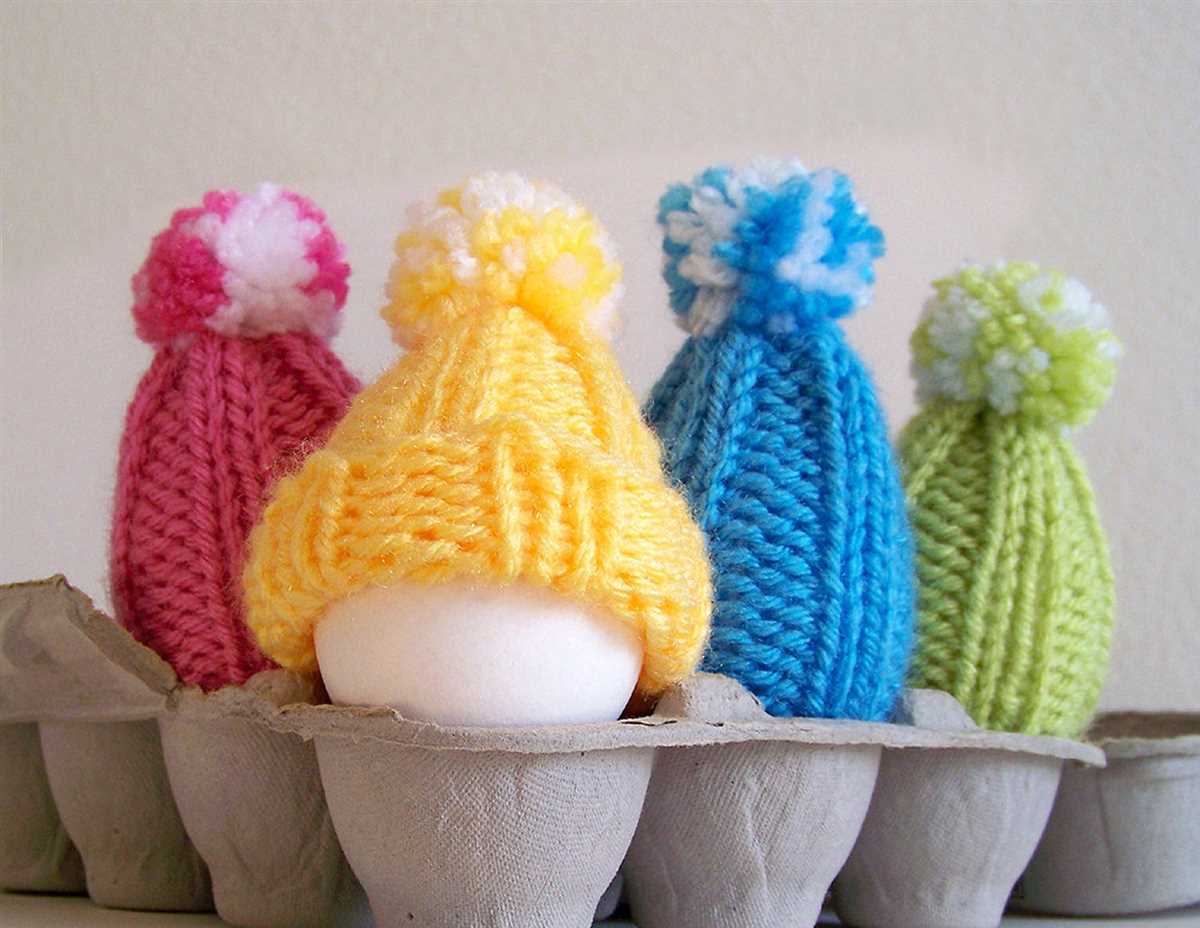
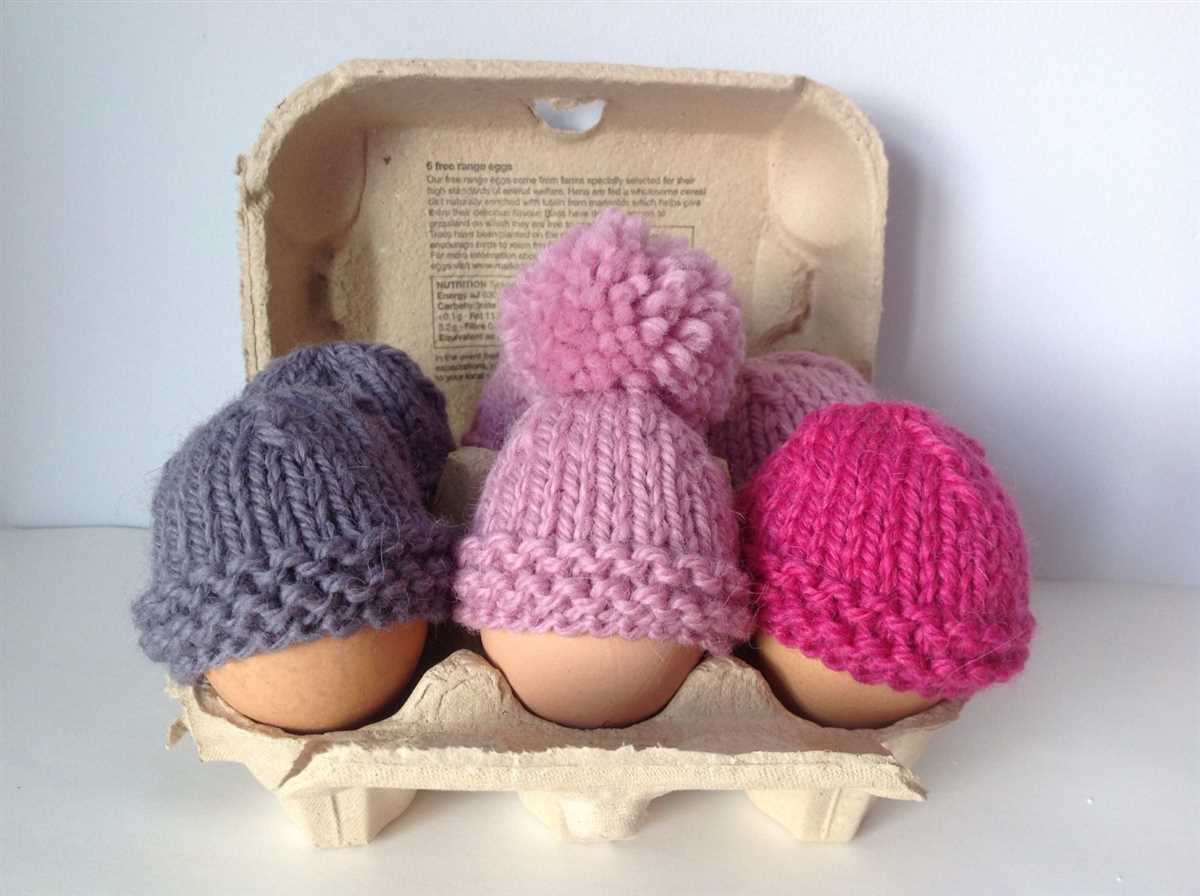
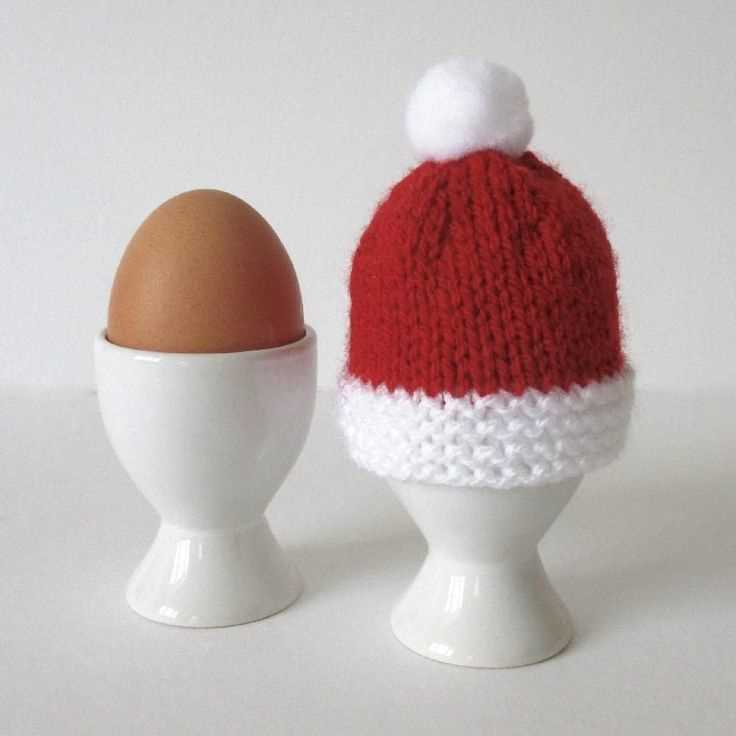
Another fun design idea is to create knitted egg cosies that resemble characters or objects. You can knit an egg cosy in the shape of a tiny hat, complete with a pom-pom on top, or even create one that looks like a miniature sweater. These unique and creative designs will add a touch of personality to your breakfast table.
To achieve these fun designs, you can use different knitting techniques, such as colorwork or intarsia. Colorwork involves knitting with multiple colors to create a pattern, while intarsia allows you to knit individual areas of color within a larger piece. These techniques can be used to create intricate and detailed designs on your egg cosies.
If you prefer a simpler approach, you can experiment with different stitch patterns to add texture and visual interest to your egg cosies. You can try knitting ribbing or cables to create a cozy and warm texture. Alternatively, you can incorporate lace patterns to give your egg cosies an elegant and delicate look.
Finishing Touches: Binding Off
Once you have completed your knitting project, whether it’s an egg cosy or any other item, it’s time to finish off your work by binding off. Binding off is the process of securing the stitches on your needles so that they don’t unravel or come undone. It’s an essential step in completing any knitting project.
To bind off, you will need a pair of knitting needles, a pair of scissors, and a yarn needle. Start by knitting two stitches as usual. Insert the left needle into the first stitch on the right needle and lift it up and over the second stitch. Now you have one stitch left on your right needle.
Continue binding off by knitting one stitch, then passing the previous stitch over the new stitch and off the needle. Repeat this process until you have only one stitch left. Cut the yarn, leaving a tail that is long enough to weave in later.
Next, take your yarn needle and thread the tail through its eye. Weave the tail through the remaining stitch on your needle, then pull it tight to secure the stitch. Now, you can remove the needle from the loop of yarn and your knitting is complete.
Finally, take the yarn needle and weave in the loose ends of yarn from the beginning and end of your knitting. This will help to prevent any unraveling and give your project a polished look. You can also block your project, if desired, by gently washing it and then laying it flat to dry in the desired shape.
With this simple binding off technique, you can confidently finish off your knitting projects and enjoy the satisfaction of a job well done.
Seaming and Assembly
Once you have finished knitting all the pieces for your egg cosy, it’s time to seam and assemble them together. This final step will bring your cosy to life and make it ready to keep your eggs warm and cozy.
1. Sew the side seams: Start by folding the main body piece in half, with the right sides together. Use a tapestry needle and the same yarn to stitch the seams together. You can use different techniques such as mattress stitch or whip stitch to join the pieces. Make sure to align the stitches properly so that the seam looks neat and invisible.
2. Attach the base: Next, take the base piece and position it at the bottom of the main body piece. Use the tapestry needle and the yarn to sew the base to the body, following the same seaming technique as before. This will create a sturdy bottom for your egg cosy and prevent it from sliding off the egg.
3. Add the face details: Now it’s time to add some personality to your egg cosy. You can use contrasting yarn to embroider eyes, nose, and mouth onto the front of the cosy. Alternatively, you can also sew on small buttons or use felt cutouts to create the face. Get creative and make your cosy unique.
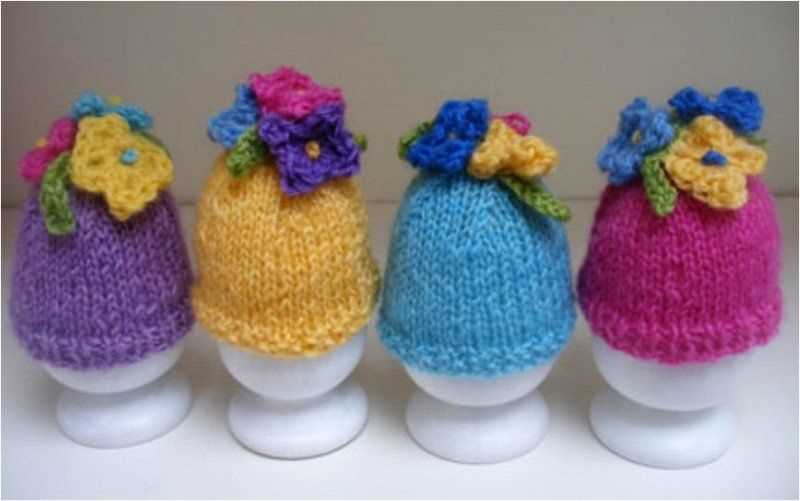
4. Embellishments: If you want to add some extra flair to your egg cosy, you can attach decorative elements such as pom-poms, bows, or flowers. Simply sew them onto the cosy using the same yarn and needle you used for seaming. This will give your cosy a personalized touch and make it even more visually appealing.
Once you have completed all these steps, your egg cosy is ready to be used. Place it over a boiled egg and enjoy a warm and cozy breakfast or brunch. These cosies also make great gifts for friends and family who appreciate handmade items.
Customizing Your Egg Cosy

If you’re looking to add a personal touch to your egg cosy, there are several ways you can customize it to suit your style or match your kitchen decor. Here are a few ideas to get you started:
1. Color
Choose a color that reflects your personality or matches your kitchen color scheme. You can use yarn in a variety of colors to create a unique and eye-catching egg cosy. Consider using a multicolored yarn for a fun and vibrant look.
2. Embellishments
Add some extra flair to your egg cosy by attaching embellishments such as buttons, beads, or ribbons. You can sew them onto the cosy or use hot glue to secure them in place. Get creative and experiment with different shapes and sizes to create a one-of-a-kind design.
3. Embroidery
Personalize your egg cosy by adding embroidered designs or initials. Use contrasting colors of yarn to create intricate patterns or simply stitch your initials for a personal touch. Embroidery can add a touch of elegance and sophistication to your cosy.
4. Appliques
If you’re feeling crafty, consider adding appliques to your egg cosy. You can create small fabric shapes such as flowers, animals, or abstract designs and attach them to the cosy. This can give your cosy a unique and whimsical look.
5. Texture
Experiment with different knitting techniques to add texture to your egg cosy. Try using ribbing, cables, or lace patterns to create a visually interesting design. Adding texture can make your cosy stand out and make it even more appealing.
By customizing your egg cosy, you can create a unique and personal item that adds a touch of style to your kitchen. Whether you prefer bold colors, intricate patterns, or simple elegance, there are endless possibilities for making your egg cosy one-of-a-kind.
Tips and Tricks
When knitting an egg cosy, there are a few tips and tricks that can help you achieve the best results.
First, make sure to use the correct size of knitting needles and yarn to match the free knitting pattern. This will ensure that your egg cosy is the right size and shape.
Here are some additional tips and tricks:
- Always read the pattern thoroughly before starting, and make sure you understand all the instructions.
- Use stitch markers to keep track of your stitches and pattern repeats.
- If you make a mistake, don’t be afraid to frog (rip out) your work and start again. It’s better to fix mistakes early on rather than trying to fix them later.
- Pay attention to your tension. Try to keep your knitting consistent throughout the project to achieve a professional-looking finish.
- If you’re struggling with a particular stitch or technique, don’t hesitate to look up tutorials or ask for help. There are many online communities and resources available for knitters.
- Block your finished egg cosy to give it a polished and neat appearance. Blocking can help even out your stitches and shape your project.
- Have fun with your egg cosy! Experiment with different yarns, colors, and embellishments to personalize your project and make it unique.
Remember, knitting is a skill that improves with practice. Don’t be discouraged if your first egg cosy doesn’t turn out exactly as you envisioned. Keep trying and enjoy the process of creating something with your own hands.
Happy knitting!