
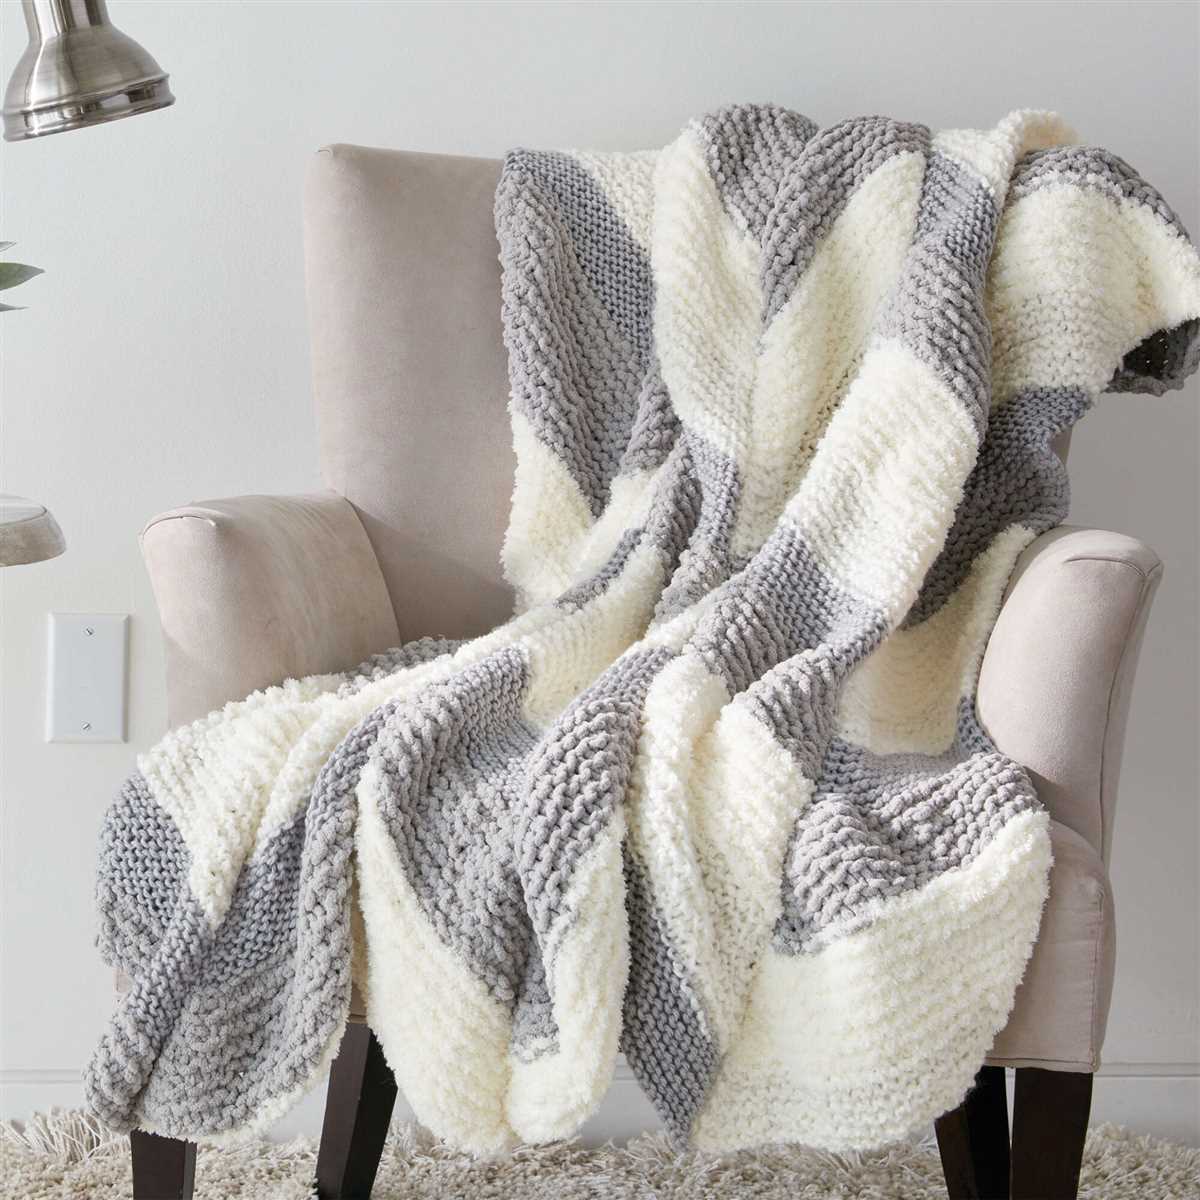
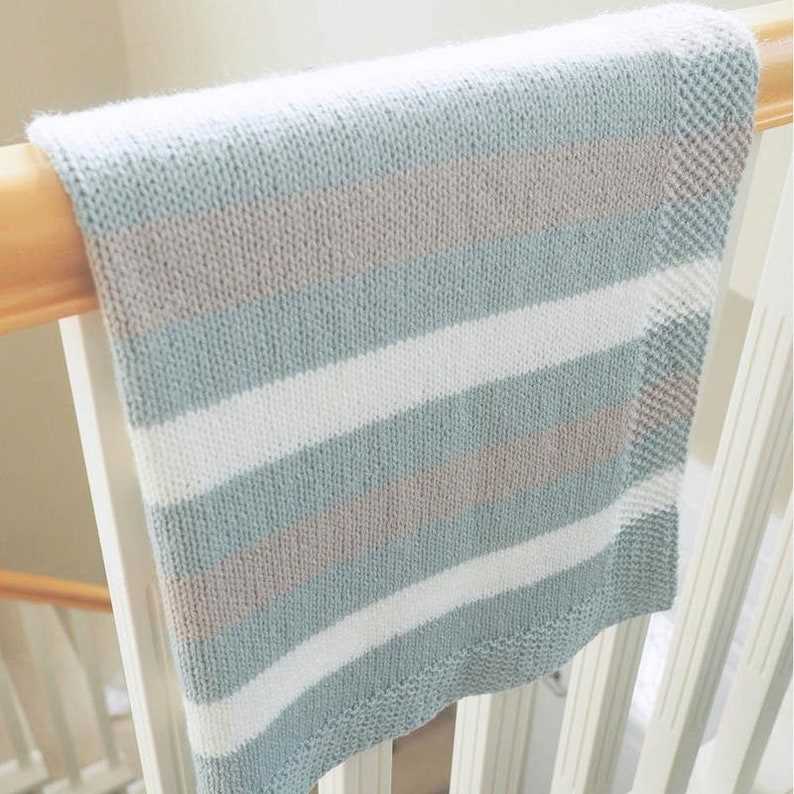
Knitting is a popular pastime that can be enjoyed by people of all ages and skill levels. One of the most satisfying projects for knitters is creating a warm and cozy blanket. Whether you’re a beginner or an experienced knitter, this easy striped knit blanket pattern is perfect for you.
This pattern uses basic knitting stitches and techniques, making it suitable for those who are just starting out. The simple design of alternating stripes adds visual interest and allows you to experiment with different color combinations. With this pattern, you can create a beautiful and functional blanket that will keep you warm during the colder months.
To get started, all you need is some soft and bulky yarn in your favorite colors, and a pair of knitting needles. The pattern provides step-by-step instructions and a stitch diagram to guide you along the way. You’ll be able to see your progress as the blanket grows with each row you complete.
Whether you decide to keep the blanket for yourself or gift it to a loved one, this easy striped knit blanket pattern is sure to be treasured. So grab your knitting needles and get ready to create a cozy masterpiece!
Easy Striped Knit Blanket Pattern
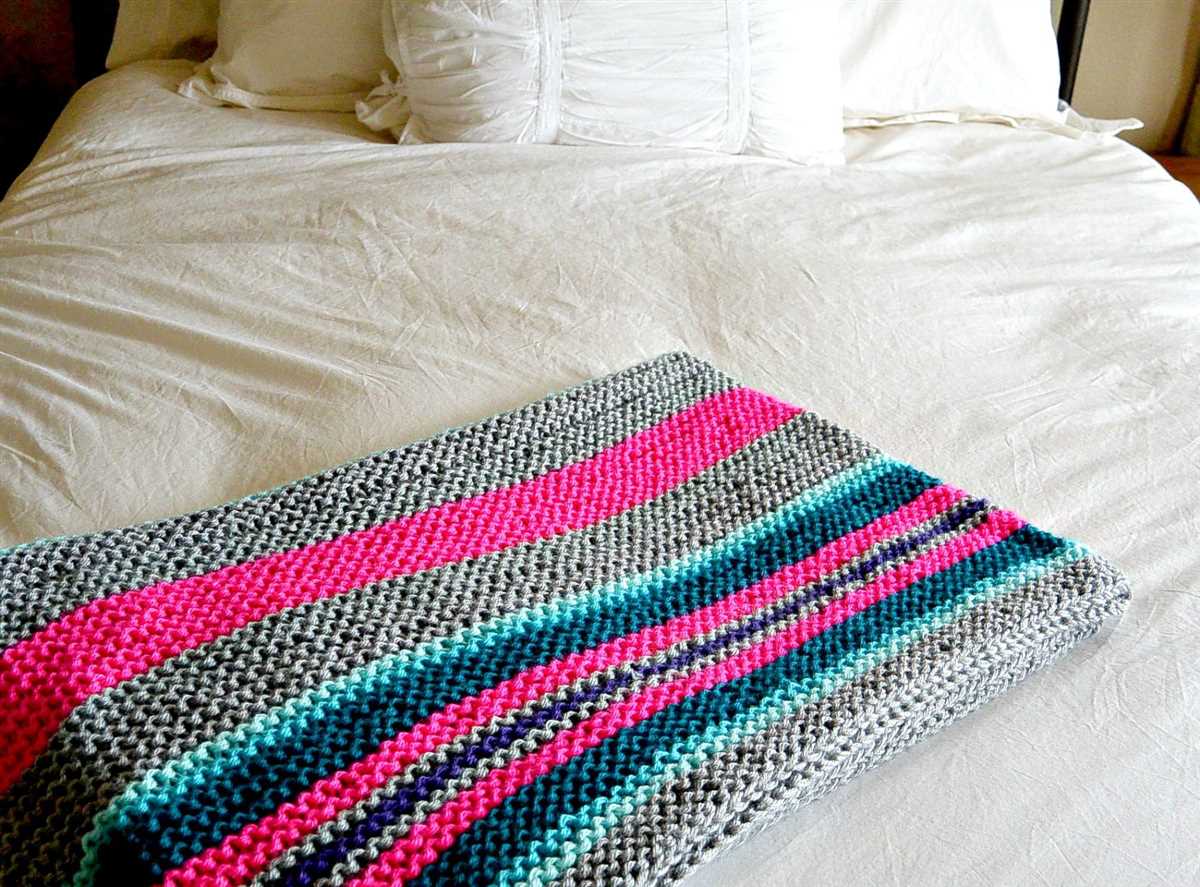
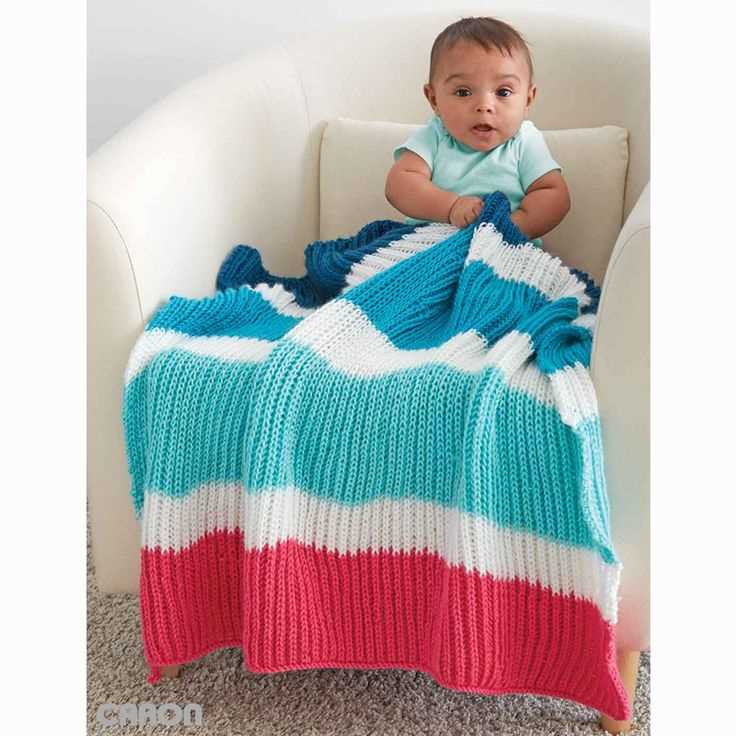
Looking for a fun and simple knitting project? Try knitting your own easy striped blanket! This pattern is perfect for beginners and experienced knitters alike. With just a few basic stitches, you can create a beautiful and cozy blanket that will keep you warm all winter long.
To start, gather your materials. You’ll need two different colors of yarn, one for the main body of the blanket and one for the stripes. Choose colors that complement each other and match your personal style. You’ll also need knitting needles in an appropriate size for your yarn, and a pair of scissors.
Begin by casting on the desired number of stitches for your blanket. The number of stitches will depend on the size of the blanket you want to create. If you’re uncertain, start with a smaller number of stitches and you can always add more later.
Once you have your stitches cast on, start knitting the main body of the blanket in your chosen color. Use the knit stitch to create a garter stitch pattern, where every row is knit. This simple stitch pattern creates a stretchy and textured fabric that is perfect for blankets.
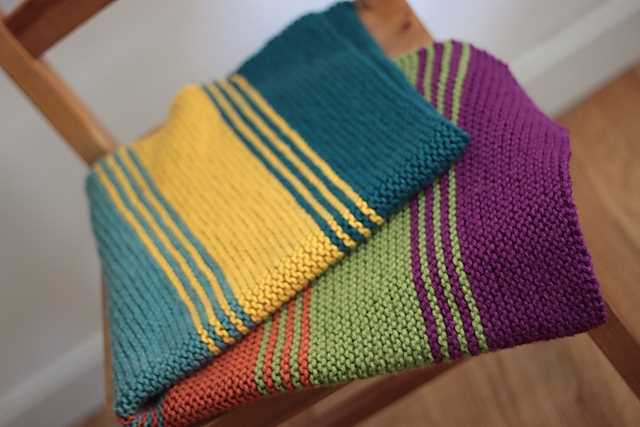
After you’ve completed a few rows of the main color, it’s time to add in the stripes. Switch to your second color of yarn and knit a few rows in this color. You can make the stripes as thin or as thick as you’d like. Experiment with different widths to create a unique and interesting pattern.
Continue alternating between the two colors, knitting rows of the main color and then switching to the second color for the stripes. You can create as many stripes as you’d like. Play around with different color combinations and stripe patterns to personalize your blanket.
Once you’ve reached your desired length, it’s time to finish off your blanket. Bind off your stitches, cut the yarn, and weave in any loose ends. Give your blanket a gentle blocking if needed, and then it’s ready to use or gift to a loved one. Enjoy the warmth and comfort of your handmade striped knit blanket!
Materials
In order to create an easy striped knit blanket, you will need a few key materials. These items will help you achieve the desired look and feel of your blanket, while also making the knitting process easier and more enjoyable.
Yarn
One of the most important materials you will need for this project is yarn. Choose a yarn that is soft and warm, as well as durable. This will ensure that your blanket is cozy and comfortable, while also being able to withstand regular use. You will also need at least two different colors of yarn to create the striped pattern.
Knitting Needles
In addition to yarn, you will also need a pair of knitting needles. The size of the needles will depend on the weight of the yarn you choose. It is recommended to use larger needles for thicker yarn and smaller needles for thinner yarn. The knitting needles should be long enough to comfortably hold all of the stitches.
Tapestry Needle
A tapestry needle is an essential tool for weaving in loose ends and sewing pieces of the blanket together. This needle has a large eye and a blunt tip, making it easy to thread and manipulate the yarn. It is important to have a tapestry needle on hand to finish your blanket and give it a polished look.
Scissors
Scissors are necessary for cutting the yarn and trimming any excess. It is important to have a sharp pair of scissors that can easily cut through the yarn without fraying or damaging it. This will help you achieve clean, precise cuts throughout the knitting process.
Measuring Tape
A measuring tape is useful for checking the dimensions of your blanket as you knit. It will help you ensure that your blanket is the desired size and that your stripes are the same width. A measuring tape will also come in handy when it comes time to block and finish your blanket.
Stitch Markers
Stitch markers can be helpful for keeping track of your stitches and rows, especially when working on a pattern with multiple repeats or changes. They can be placed on the knitting needles to mark specific stitches or sections, making it easier to follow the pattern and prevent mistakes.
Row Counter
A row counter is a handy tool for keeping track of the number of rows you have completed. It can be attached to your knitting needles or held separately. A row counter will help you stay organized and ensure that your blanket has a consistent stitch count throughout.
Blocking Materials
When your blanket is complete, you may want to block it to ensure that it lays flat and the stitches are even. Blocking materials can include blocking mats, rustproof pins, and a spray bottle for spritzing the blanket with water. These materials will help you achieve a professional finish for your blanket.
Gauge and Needle Size
When knitting a blanket, it’s important to pay attention to the gauge and needle size recommended in the pattern. The gauge refers to the number of stitches and rows per inch that you should aim for in order to achieve the desired finished size of the blanket. The needle size, on the other hand, determines the thickness or looseness of the stitches.
In the easy striped knit blanket pattern, the recommended gauge is 16 stitches and 24 rows = 4 inches (10 cm) in stockinette stitch. This means that if you want your blanket to be the same size as the one in the pattern, you should make sure to match this gauge. To do so, you may need to adjust your needle size up or down to obtain the correct gauge.
To determine the right needle size, it’s best to make a gauge swatch before starting the blanket. A gauge swatch is a small sample of knitting that enables you to measure your stitch and row count to see if it matches the pattern’s gauge. If your swatch has too many stitches per inch, it means your stitches are too tight, so you should try using a larger needle. Conversely, if your swatch has too few stitches, your stitches are too loose, so you should switch to a smaller needle.
Keep in mind that the gauge and needle size can affect not only the size of the blanket, but also its drape and overall appearance. So, even if you’re not concerned about matching the exact finished dimensions of the pattern, it’s still a good idea to pay attention to the gauge and needle size to ensure that your blanket turns out just the way you want it to.
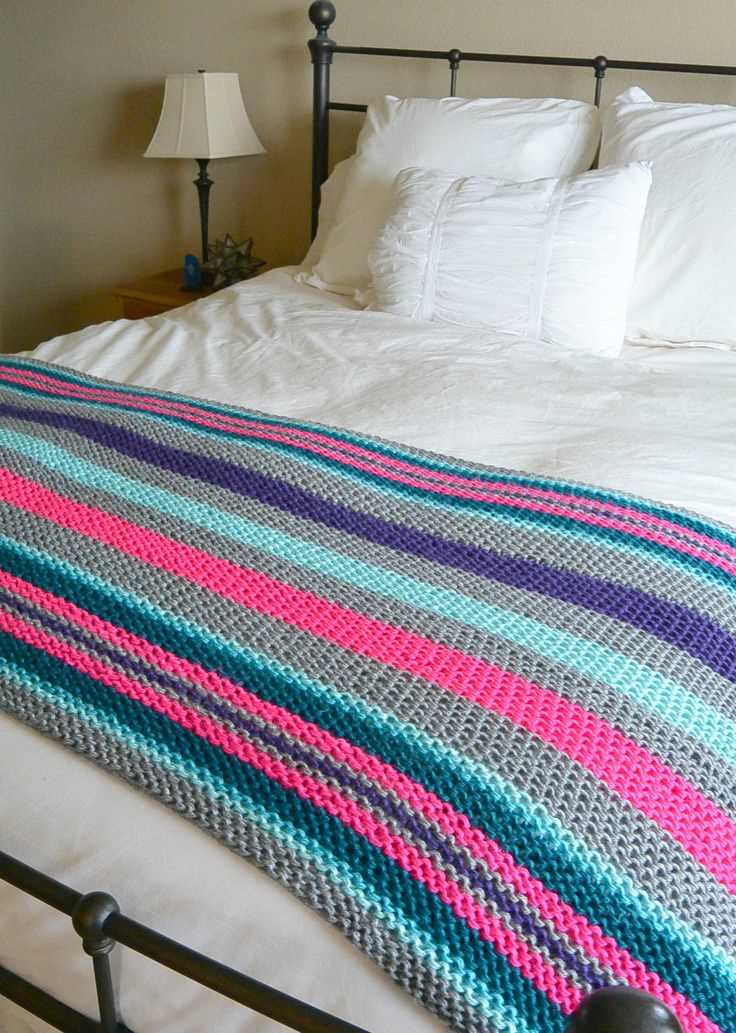
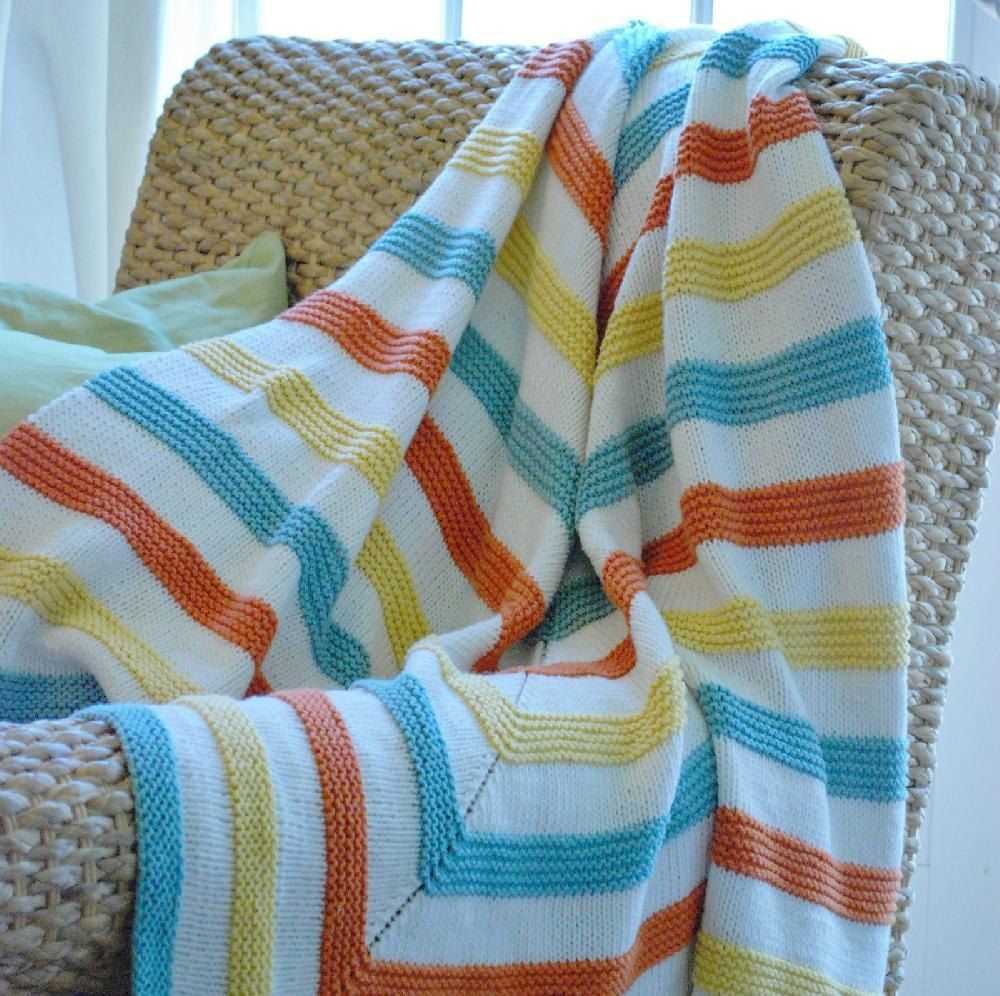
Choosing Yarn Colors
When it comes to knitting a striped blanket, choosing the right yarn colors is essential to create a beautiful and visually pleasing design. The colors you select will greatly impact the overall look and feel of your blanket, so it’s important to make thoughtful choices.
Consider the style and theme: Before diving into the wide array of yarn colors available, take a moment to think about the style and theme you want to achieve with your blanket. Are you going for a bold and vibrant look, or do you prefer more subtle and muted tones? Consider the room or space where the blanket will be used and think about how the colors will complement the overall aesthetic.
Experiment with color combinations: One of the joys of knitting a striped blanket is the opportunity to play with different color combinations. Don’t be afraid to mix and match various shades and hues to create an interesting and eye-catching pattern. You can opt for contrasting colors for a bold and striking effect or choose more harmonious colors for a soothing and calming vibe.
Consider the season: Another factor to keep in mind when selecting yarn colors is the season in which the blanket will be used. For example, during the colder months, you might want to choose cozy and warm colors like deep reds or rich browns. In contrast, for spring or summer, lighter and more vibrant shades like pastels or brights can add a fresh and cheerful touch to your blanket.
Get inspired: If you’re feeling unsure about which colors to choose, it can be helpful to seek inspiration from various sources such as nature, fashion, or interior design. Look for color combinations that catch your eye and try to incorporate those ideas into your blanket. Pinterest and color palette websites can also be valuable resources for finding color inspiration.
Consider the recipient’s preferences: If you’re knitting the blanket as a gift for someone, it’s a good idea to consider their personal preferences when selecting yarn colors. Think about their favorite colors or any specific color schemes they are fond of. Taking their taste into account will ensure that the blanket is not only beautiful but also tailored to their liking.
By taking the time to carefully choose your yarn colors, you can create a striped knit blanket that is not only visually stunning but also reflects your personal style and the intended ambiance of the space it will be used in.
Casting On
Before you can start knitting your easy striped knit blanket, you’ll need to cast on. Casting on is the process of creating the first row of stitches on your knitting needle. There are several methods for casting on, but the long tail cast on is a popular choice for many knitters.
To start the long tail cast on, you’ll need to estimate how much yarn you’ll need for the width of your blanket. This can be done by wrapping the yarn around your needle a few times, taking into account the number of stitches you’ll be casting on. Once you have your estimate, leave a long tail of yarn and make a slipknot at the end.
To begin the cast on, hold the slipknot in your left hand and the working end of the yarn in your right hand.
Place the needle in your left hand between the slipknot and the working yarn, and hold it like a pencil. Insert the tip of the needle into the slipknot from above, going from left to right.
With your right hand, bring the working yarn under and over the needle, crossing it over the slipknot. This will create a loop of yarn on your needle.
Repeat this process, inserting the needle into the loop from above, bringing the yarn under and over the needle, and creating a new loop.
Continue casting on until you have the desired number of stitches for your blanket. Remember to keep your tension even and not too tight, as this can make it difficult to work with later on.
Once you have cast on all your stitches, you are ready to start knitting your easy striped knit blanket. Happy knitting!
Knitting the Main Section
Once you have finished the cast on and set up rows, it’s time to start knitting the main section of the blanket. In this pattern, the main section is worked in a simple striped pattern using two colors. This creates a visually interesting design while still being easy to knit.
To begin the main section, you will continue knitting in the established pattern, switching colors every two rows. The pattern calls for knitting one row with color A, then purling one row with color B, and repeating these two rows until the desired length is reached. This creates a classic garter stitch texture, which is both warm and squishy.
As you knit the main section, be sure to keep your tension even to ensure a neat and consistent fabric. It can be helpful to periodically check your tension by measuring your gauge swatch against the pattern’s recommended gauge. Adjust your needle size if necessary to achieve the correct gauge.
Knitting the main section is a repetitive and relaxing process. As you work, you can easily see your progress and watch the stripes grow. If you prefer more variety in your knitting, you can also experiment with different stripe patterns or incorporate other stitch patterns within the main section.
It’s important to note that the yarn requirements for the main section will depend on the desired blanket size and the stripe pattern you choose. Be sure to have enough yarn of each color to complete your project. If you run out of yarn in the middle of a stripe, you can always improvise and add a contrasting color stripe to finish off the blanket.
Once you have completed the desired length for the main section, you will move on to the next section of the blanket, such as the border or edging. The specific instructions for this will depend on the pattern you are following. The main section sets the foundation for the blanket and creates a beautiful canvas for the rest of the design.
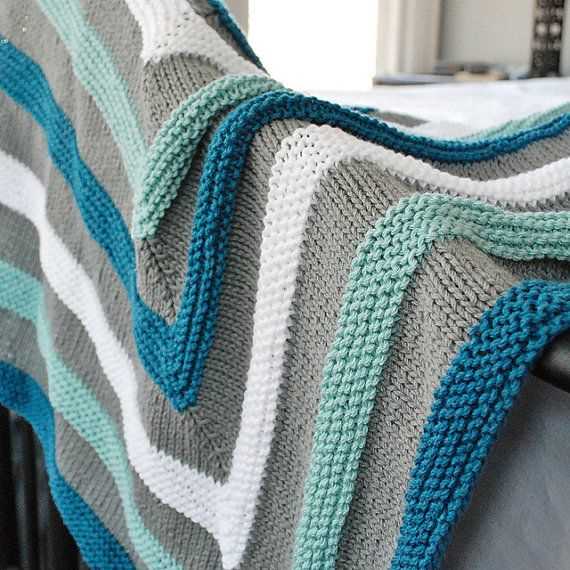
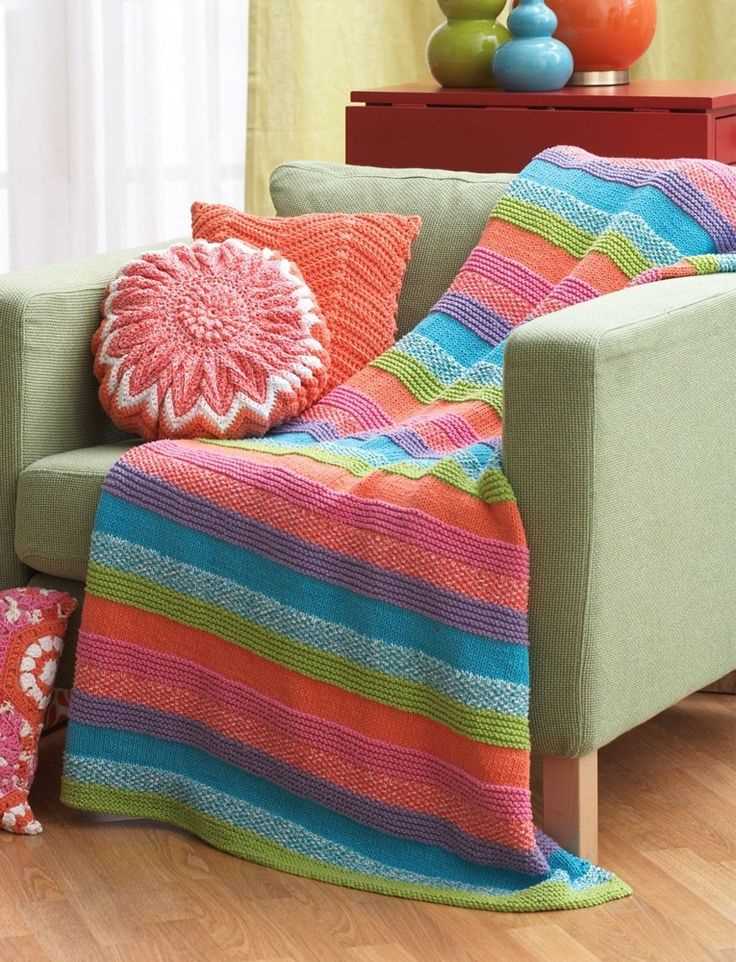
Adding Stripes
Adding stripes to your knit blanket can be a fun way to incorporate different colors and create a unique design. There are several ways to add stripes, depending on your skill level and desired outcome.
1. Basic Method: The easiest way to add stripes is to simply switch colors at regular intervals. For example, you could knit a certain number of rows in one color, then switch to another color and continue knitting. This method creates bold, distinct stripes.
Tip: If you want to ensure smooth color transitions, be sure to carry the unused yarn up the side of your work. This will prevent loose ends and make it easier to switch back to a previous color if needed.
2. Alternating Stripes: To create a more dynamic look, you can alternate between two or more colors in a stripe pattern. For example, you could knit two rows in one color, then switch to another color for the next two rows, and so on. This method creates a visually interesting pattern with more subtle stripes.
3. Variegated Yarn: If you prefer a more seamless look without the need to switch colors, you can use variegated yarn. Variegated yarn is pre-dyed with multiple colors, creating a striped or multi-tonal effect as you knit. This is a great option for beginners or those who want to save time on color changes.
4. Gradient Stripes: For a gradual color change, you can use gradient yarn. Gradient yarn is dyed in a sequence of colors that gradually blend into each other. As you knit, the colors will smoothly transition from one shade to the next, creating a beautiful ombré effect.
Note: To enhance the striped effect, you can experiment with different stitch patterns. For example, alternating between stockinette stitch and garter stitch can create texture and make the stripes stand out even more.
By adding stripes to your knit blanket, you can add visual interest and personalize your project. Whether you choose bold, alternating, variegated, or gradient stripes, have fun and let your creativity shine!
Changing Colors
One of the best ways to add visual interest to your striped knit blanket is by changing colors. By using a variety of colors, you can create a unique and eye-catching design that will make your blanket stand out.
When selecting colors for your blanket, consider the overall aesthetic you want to achieve. Soft, muted colors create a calming and cozy feel, while bright, bold colors can create a more modern and vibrant look. You can also use color to create a theme or tell a story. For example, using shades of blue and green can create a beachy vibe, while using shades of pink and purple can create a feminine and romantic feel.
To change colors in your knit blanket, start by knitting until you reach the point where you want to switch colors. Then, simply drop the current color and pick up the new color, leaving a long enough tail to weave in later. To ensure a clean color change, twist the two colors together at the edge of the row before you start knitting with the new color. This will create a smooth transition that won’t leave any gaps or loose ends.
Experiment with different color combinations and patterns to create a unique and personalized striped knit blanket. Whether you choose to stick with a simple alternating pattern or get creative with color blocks or gradients, changing colors is a fun way to add personality and style to your project.
Knitting the Border
After completing the striped pattern for the main body of the blanket, it’s time to add the border. The border will bring the blanket together and provide a neat and finished look.
First, you’ll need to choose a complementary color for the border. This could be a solid color that matches one of the stripes or a contrasting color that adds a pop to the overall design. Once you have your yarn, you’ll also need to select the appropriate needle size for knitting the border.
When starting the border, begin by picking up stitches along one edge of the blanket. This can be done by inserting the needle into the loops at the edge and wrapping the yarn around the needle to create new stitches. The number of stitches you pick up will depend on the size of your blanket and the desired width of the border.
As you continue knitting the border, you can choose from a variety of stitch patterns to add texture and interest. Common border stitch patterns include garter stitch, ribbing, seed stitch, or even a simple stockinette stitch. You can also incorporate decorative details such as cables, lace, or colorwork if desired.
Remember to keep an eye on your tension as you knit the border to ensure it matches the tension of the main body of the blanket. It’s also a good idea to periodically measure the width of the border to ensure it remains consistent.
Once you’ve completed knitting the border on all four sides of the blanket, you can finish off by binding off your stitches and weaving in any loose ends. Give the blanket a final blocking to even out the stitches and ensure the border lays flat. Your striped knit blanket is now complete and ready to be enjoyed!
Finishing Touches
When it comes to finishing a striped knit blanket, there are a few important steps that can make a big difference in the final result. Taking the time to carefully weave in the loose ends of yarn can help prevent them from unraveling over time and ensure a more polished look. This can be done using a yarn needle, weaving the ends back and forth through the stitches of the blanket.
Another important finishing touch is blocking the blanket. Blocking involves pinning the blanket to the desired dimensions and then wetting it with water or using steam to reshape it. This process can help even out any uneven stitches and ensure that the blanket lays flat and looks its best. Blocking can be especially important for a striped knit blanket, as it can help to even out any differences in tension between the stripes.
One final finishing touch for a striped knit blanket is adding any desired edging. This can be a simple border of single crochet stitches, a picot edging, or even a more elaborate lace design. The choice of edging can depend on personal preference and the overall aesthetic of the blanket. Adding an edging can help to frame the blanket and give it a more finished and polished look.
In conclusion, taking the time to weave in loose ends, block, and add an edging can make all the difference when finishing a striped knit blanket. These finishing touches can help to ensure that the blanket looks its best and holds up well over time. So don’t rush through the final steps and take the time to give your blanket the attention it deserves.
Care Instructions
When caring for your easy striped knit blanket, it is important to follow these care instructions to ensure its longevity and maintain its softness and appearance.
Washing: We recommend hand washing your blanket in cold water using a gentle detergent. Avoid using bleach or fabric softeners as they can damage the fibers and affect the color of the stripes. If machine washing is necessary, place the blanket in a mesh laundry bag to protect it during the wash cycle.
Drying: Lay the blanket flat to dry, preferably on a clean towel. Avoid wringing or twisting the blanket, as this can cause it to lose its shape. Do not hang the blanket to dry, as this can stretch it out or cause it to deform.
Storage: When not in use, store your blanket in a cool and dry place, away from direct sunlight. Avoid folding it too tightly to prevent creasing and permanently affecting its shape. If you need to fold it, try not to fold it along the same lines repeatedly to prevent excessive wear and tear.
Repairs: In the event of a snag or tear, we recommend repairing your blanket as soon as possible to prevent further damage. Use a needle and thread that matches the color of the affected area and carefully sew it back together. If you are unsure or uncomfortable with the repair process, we recommend taking it to a professional seamstress or tailor.
Warning: Keep your blanket away from sharp objects or jewelry that may snag the yarn. Also, be cautious of pets that may chew or scratch the blanket, as this can cause irreparable damage.
Table:
| Washing: | Hand wash in cold water or machine wash in a mesh laundry bag on a gentle cycle |
| Drying: | Lay flat to dry, do not wring or twist |
| Storage: | Store in a cool and dry place, away from direct sunlight |
| Repairs: | Repair snags or tears with a matching needle and thread |
| Warning: | Avoid sharp objects and pets that may damage the blanket |
Final Thoughts
In conclusion, the easy striped knit blanket pattern is a fantastic project for knitters of all skill levels. Whether you’re a beginner looking for a simple and rewarding project or an experienced knitter wanting to make a quick and stylish gift, this pattern has something to offer.
The pattern’s simplicity makes it great for beginners who are just starting to learn the basics of knitting. The repetitive nature of the striped pattern allows for easy memorization and quick progress. Additionally, the pattern provides an opportunity to practice essential techniques like knitting, purling, and changing colors. With a little bit of patience and practice, even the most novice knitter can create a beautiful and functional blanket.
For more experienced knitters, this pattern offers room for creativity and personalization. By choosing different colors and yarn weights, you can create a unique and customized blanket that reflects your own style. You can also experiment with different stitch patterns or add embellishments to make the blanket even more special.
Overall, the easy striped knit blanket pattern is a versatile and enjoyable project that can be adapted to suit any knitter’s preferences. So pick up your needles and get started on creating a cozy and stylish blanket that you’ll be proud to display in your home or give as a thoughtful gift.