
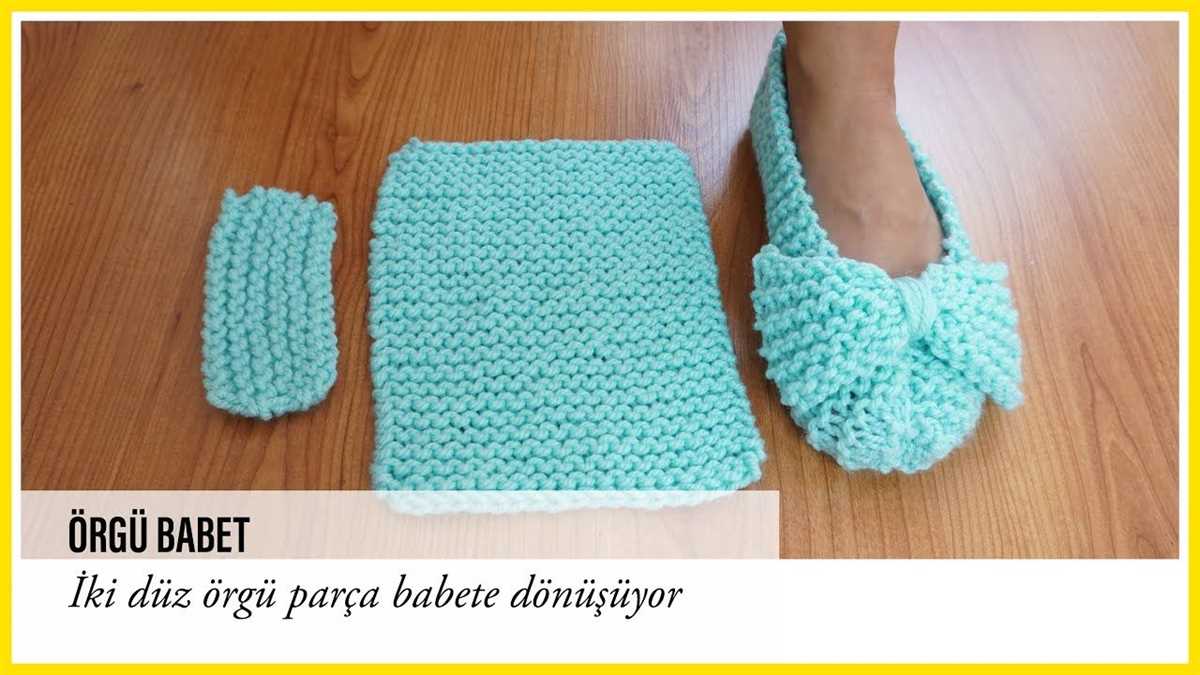
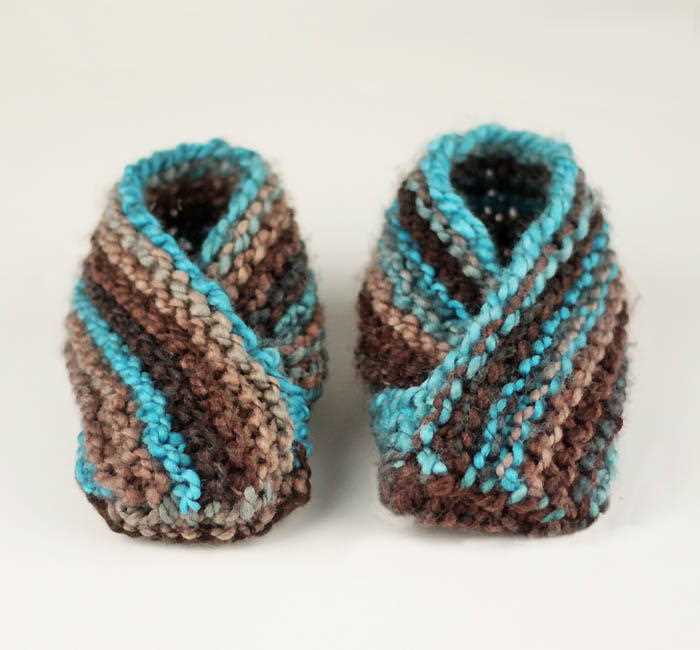
If you are looking for a quick and easy knitting project, then this free knitted square slipper pattern is perfect for you. These slippers are not only cozy and comfortable to wear, but they are also a great way to use up leftover yarn. Knitting squares and then sewing them together to create the slippers is a simple technique that even beginners can master.
To get started, gather your materials. You will need a pair of knitting needles, yarn, and a yarn needle for sewing the squares together. The pattern calls for a medium weight yarn, but you can easily adjust the size by using a different weight yarn and adjusting the number of stitches and rows.
Once you have your materials ready, cast on the desired number of stitches and knit your squares. The pattern provides instructions for knitting a basic square, but you can also experiment with different stitch patterns to add some variety to your slippers. Knitting each square to the same size will ensure that your slippers fit properly when they are sewn together.
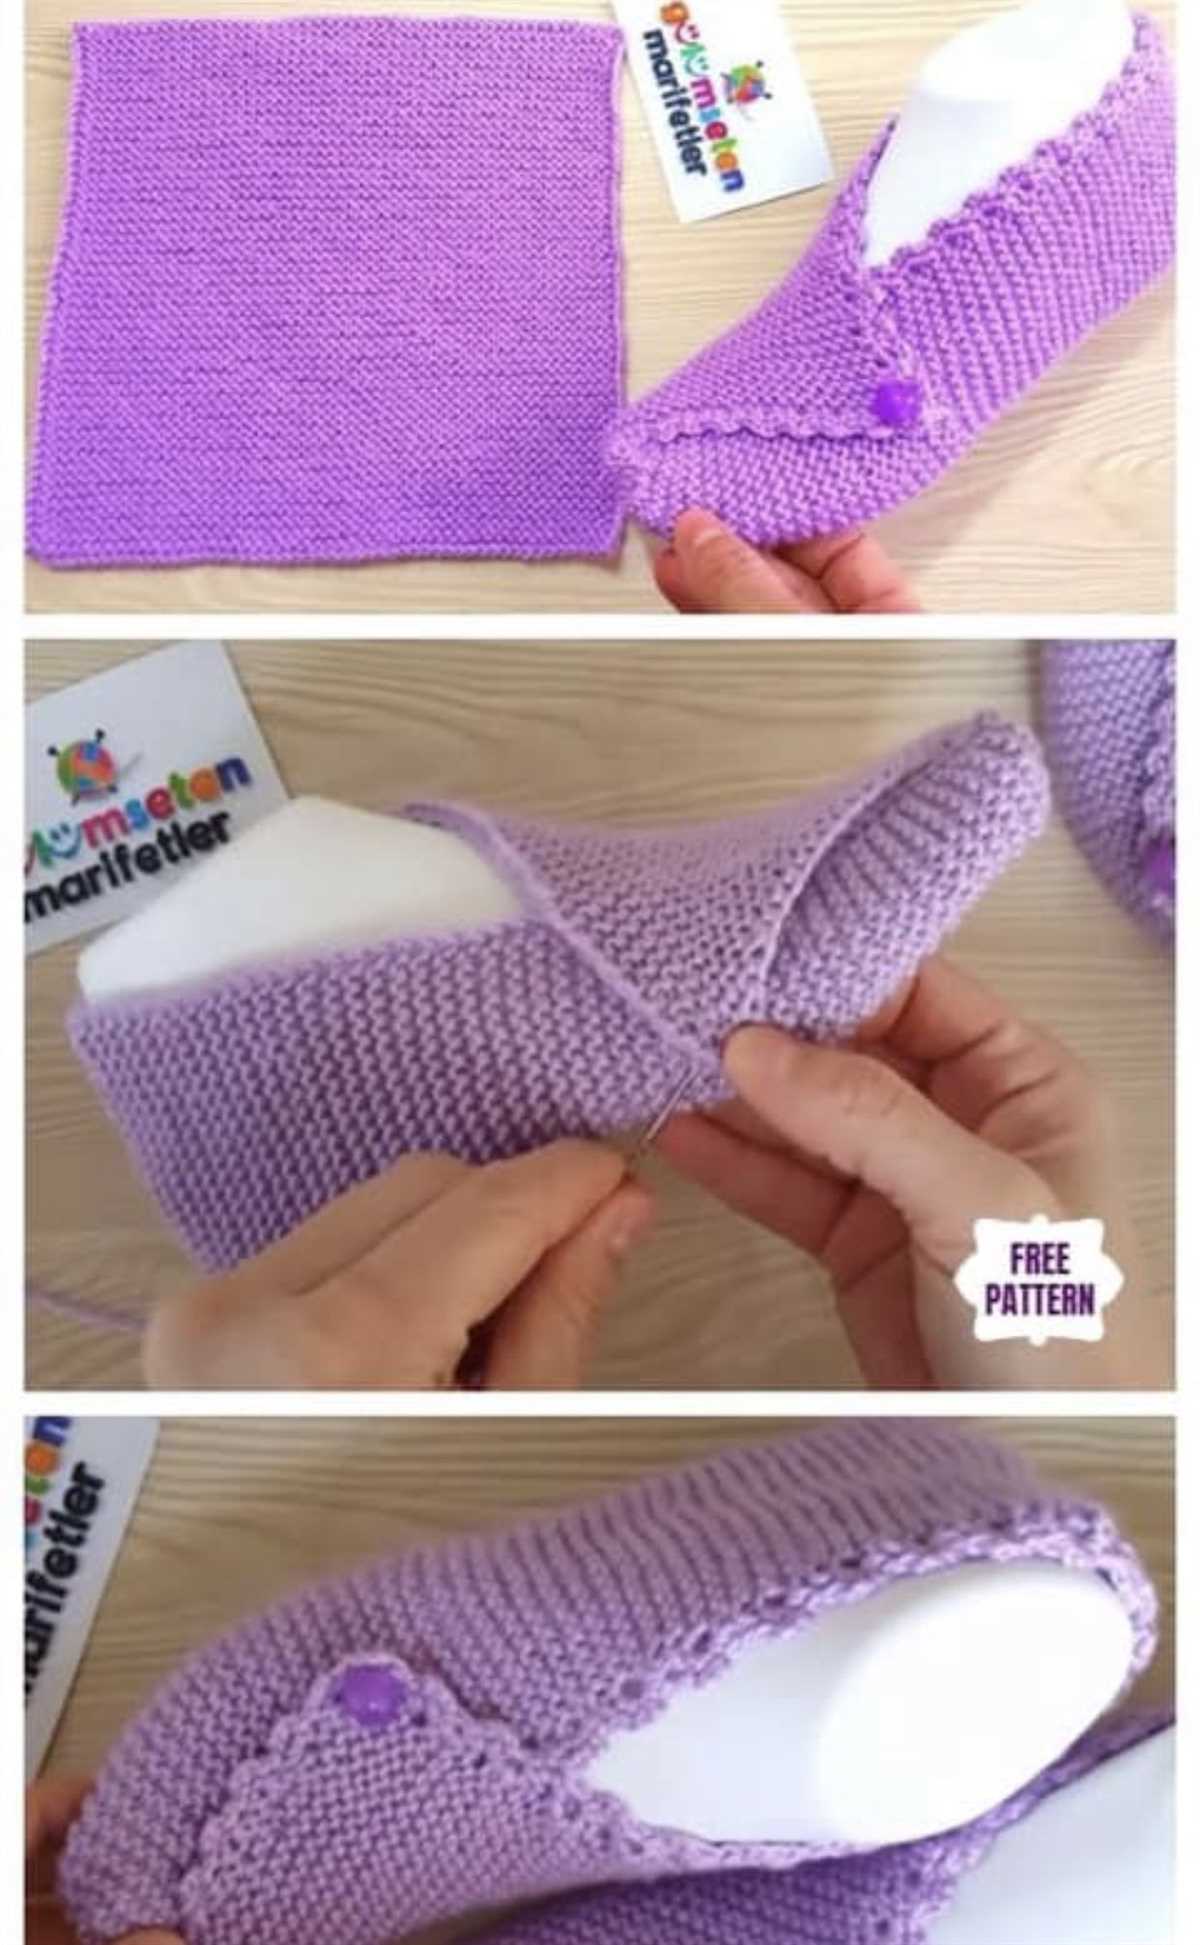
When you have finished knitting all of your squares, it’s time to sew them together. Lay the squares out in the desired pattern, making sure to align the edges as evenly as possible. Thread your yarn needle with a length of yarn, and use a whipstitch or mattress stitch to sew the squares together. Take care to sew the squares together securely, as this will ensure that your slippers hold up well with wear.
Finally, it’s time to finish off your slippers. Trim any excess yarn and weave in the loose ends to give your slippers a polished look. You can also add extra details such as pom-poms or buttons if desired. Once your slippers are complete, slip them on, and enjoy the cozy warmth they provide.
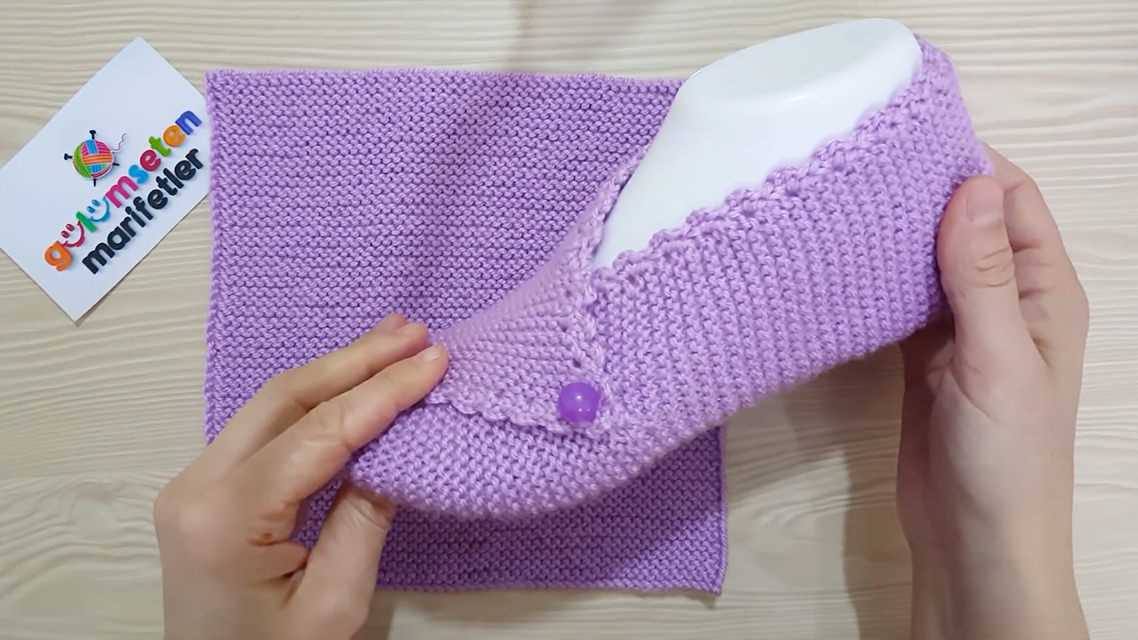
How to Make Knitted Square Slippers: A Free Pattern
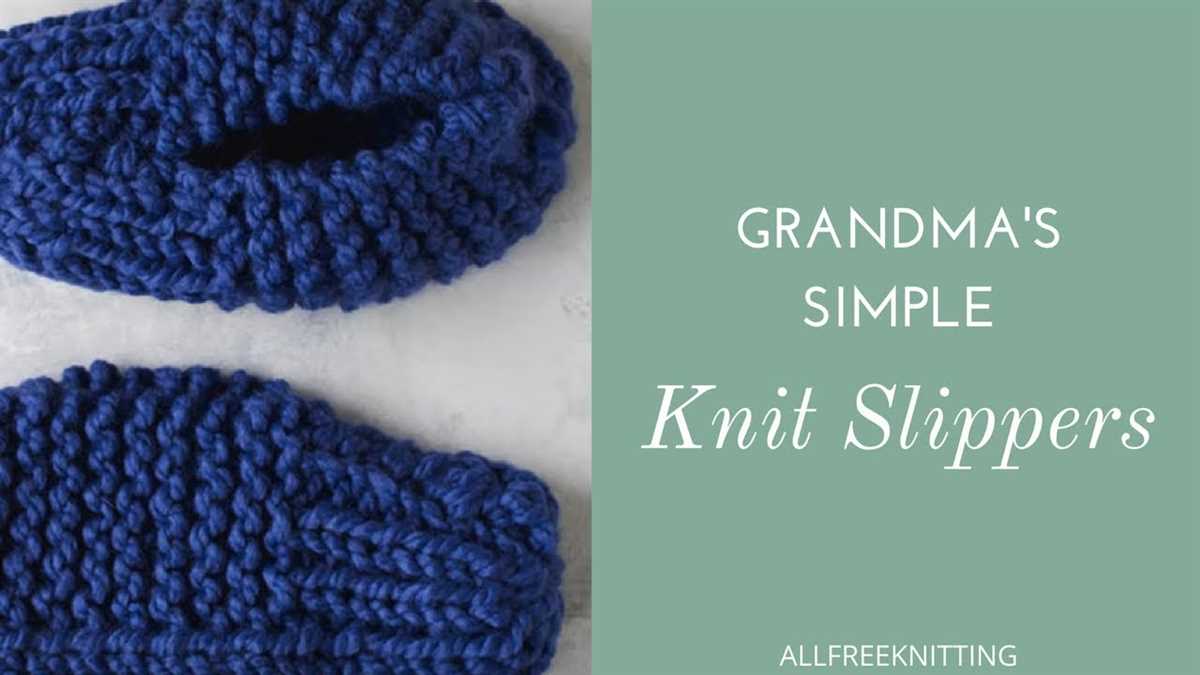
If you enjoy knitting and want to make a cozy pair of slippers for yourself or a loved one, look no further than this free knitted square slipper pattern. With just a few basic knitting stitches, you can create a pair of comfortable and stylish slippers that are perfect for lounging around the house.
To get started, you’ll need to gather your materials. You’ll need a pair of knitting needles, a ball of yarn in your preferred color, a tapestry needle for weaving in ends, and a pair of scissors. Once you have all your materials ready, you can begin knitting your slippers.
The first step is to cast on the required number of stitches. This pattern suggests casting on 36 stitches, but you can adjust the number to fit the size of your feet. After casting on, you’ll begin working in a garter stitch pattern, which means knitting every row. This creates a cozy texture and helps keep your feet warm.
As you continue knitting your slippers, you’ll shape and decrease the stitches to create the toe and heel areas. The pattern provides detailed instructions on how to do this, so even if you’re a beginner knitter, you’ll be able to follow along easily. Once you’ve finished knitting the slipper pieces, you’ll need to sew them together using a tapestry needle and yarn, leaving an opening for your foot to slide into.
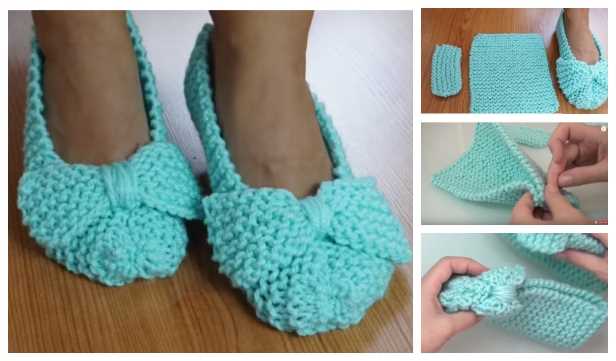
After sewing the slipper pieces together, you can add any embellishments or decorations you’d like. You could add a pom-pom or a decorative button to the top, or even sew on some ribbons or bows. Get creative and make the slippers your own.
In no time, you’ll have a cozy and comfortable pair of knitted square slippers that you can wear around the house or give as a thoughtful gift. So gather your knitting supplies and start working on this free pattern today!
Materials Needed for Knitted Square Slippers
In order to knit a pair of square slippers, you will need a few materials to get started. These materials are essential for creating a comfortable and stylish slipper that will keep your feet warm and cozy.
Yarn: Choose a soft and cozy yarn that is suitable for slippers. Acrylic or wool yarns are often the best choice, as they provide both comfort and durability. Select a yarn color that matches your personal style or complements your favorite loungewear.
Knitting Needles: You will need a pair of knitting needles that are appropriate for the weight of your chosen yarn. The recommended needle size is usually indicated on the yarn label. A set of double-pointed needles or a circular needle may also be required, depending on the slipper pattern you choose.
Tapestry Needle: A tapestry needle, also known as a yarn needle, is used for sewing up the seams and weaving in loose ends. Make sure your tapestry needle has a large enough eye to accommodate the thickness of your yarn.
Scissors: A good pair of scissors is essential for cutting the yarn and trimming any excess. Look for sharp and durable scissors that are comfortable to hold.
Stitch Markers: Stitch markers are helpful for marking specific points in your knitting, such as the beginning of a round or a pattern repeat. You can use specialized stitch markers or simply use a contrasting piece of yarn or safety pin.
Measuring Tape: A measuring tape is useful for checking gauge and measuring the length of your slipper. This will ensure that your finished slippers fit properly.
By gathering these materials, you will be well-equipped to start knitting your own pair of square slippers. Remember to check the slipper pattern for any additional materials needed, such as buttons or ribbons for embellishment.
Step-by-Step Instructions for Knitting Square Slippers
Knitting your own slippers can be a rewarding and cozy project. This step-by-step guide will walk you through the process of knitting square slippers, giving you warm and comfortable footwear for those chilly days.
Materials Needed:
- Size US 8 (5mm) knitting needles
- Medium weight yarn (approximately 200 yards)
- Tapestry needle
- Scissors
Step 1: Cast On
To begin knitting your square slippers, cast on 36 stitches using your desired cast on method. Make sure to leave a long tail for sewing the slippers together later.
Step 2: Knit the Sole
Work the sole of the slipper by knitting in garter stitch (knit every row) for approximately 9 inches. This will create a square shape for the bottom of the slipper.
Step 3: Shape the Upper
Next, you will shape the upper part of the slipper. Knit 18 stitches, then turn your work. Continue knitting these 18 stitches for 3 more inches, working in garter stitch.
Step 4: Create the Heel
To shape the heel, you will now work short rows. Knit 2 stitches, then wrap the next stitch. Turn your work, purl the wrapped stitch, and wrap the next stitch. Turn your work again, knit the wrapped stitch, and wrap the next stitch. Repeat this process until you have wrapped all remaining stitches except for the last 2.
Step 5: Finish the Heel and Toe
Continue knitting in garter stitch, working across all stitches including the wrapped stitches. Once you reach the end of the row, knit 2 stitches together to decrease. Repeat this decrease at the beginning of each row until there are only 4 stitches remaining. Bind off these stitches.
Step 6: Assembly
Using your tapestry needle, sew the sides of the slipper together, leaving a hole for your foot to slip into. Use the long tail from the cast on to sew the sole of the slipper to the upper portion.
And there you have it! Follow these step-by-step instructions to successfully knit your own square slippers. Enjoy the warmth and comfort of your handmade footwear!
Choosing the Right Yarn for Your Slippers
When it comes to knitting slippers, choosing the right yarn is essential for creating a comfortable and durable pair. The type of yarn you choose can greatly affect the overall feel and fit of your slippers, as well as their ability to keep your feet warm and cozy.
Consider the Thickness: One important factor to consider when selecting yarn for your slippers is the thickness, or weight, of the yarn. Thicker yarns, such as chunky or bulky options, are great for creating slippers that provide extra warmth and cushioning. On the other hand, if you prefer a lighter and more breathable slipper, opt for a thinner yarn, like a fingering or sport weight.
Look for Softness: Since slippers are meant to be worn directly on your feet, it’s crucial to choose a yarn that feels soft and comfortable against your skin. Look for yarns labeled as “soft” or “baby” for a luxurious and cozy feel. Alpaca, cashmere, and merino wool are popular options known for their softness.
Consider Durability: Slippers are subjected to a lot of wear and tear, so it’s important to choose a yarn that can withstand regular use. Look for yarns that are labeled as durable or designed for socks or other high-wear items. Wool blends, superwash wool, and acrylic blends are often good choices for slippers that will hold up over time.
Evaluate Washability: Slippers can easily become dirty or smelly, so it’s essential to choose a yarn that is easy to clean. Consider yarns that are labeled as machine washable or can be easily hand washed without losing their shape or softness. This will help ensure that your slippers can be kept fresh and clean with minimal effort.
By considering factors such as thickness, softness, durability, and washability, you can choose the perfect yarn for your knitted square slippers. Experiment with different yarn types and weights to find the combination that creates slippers that are not only cozy but also meet your specific preferences and needs.
Tips for Properly Gauge Swatching
When knitting a project, getting the correct gauge is crucial to ensure that the finished item will fit properly. A gauge swatch is a small sample knitted to determine the number of stitches and rows per inch. Here are some tips to help you properly gauge swatch your project:
1. Use the recommended yarn and needles
Using the same yarn and needles recommended in the pattern will give you the best chance of achieving the correct gauge. Different yarns and needle sizes can produce different results, so it’s important to stick to the materials specified in the pattern.
2. Knit a large enough swatch
A small swatch may not accurately represent your knitting tension, so it’s important to knit a swatch that is at least 4 inches square. This allows for more accurate measurements and will give you a better idea of whether you need to adjust your knitting tension.
3. Block your swatch
Blocking your swatch is essential to get the most accurate gauge measurement. Wet your swatch, gently squeeze out the excess water, and then pin it down to the correct dimensions. Allow it to dry completely before measuring the gauge. Blocking can help relax the stitches and give you a more accurate representation of the finished project.
4. Measure your gauge using a ruler or gauge tool
Using a ruler or gauge tool specifically designed for knitting, measure the number of stitches and rows in your swatch per inch. Count the stitches across a section of your swatch and then count the rows vertically. Compare your measurements to the gauge listed in the pattern to determine if you need to adjust your knitting tension.
5. Make adjustments as needed
If your gauge swatch doesn’t match the pattern’s gauge, you may need to adjust your needle size or knitting tension. If your swatch has too few stitches per inch, try using smaller needles. If it has too many stitches per inch, try using larger needles. You can also adjust your knitting tension by consciously knitting more loosely or tightly. Make another swatch with the adjusted changes and measure again until you achieve the correct gauge.
By properly gauge swatching your project, you can ensure that your knitted item fits properly and matches the dimensions specified in the pattern. It may take some trial and error, but taking the time to gauge swatch can save you frustration and disappointment in the long run.
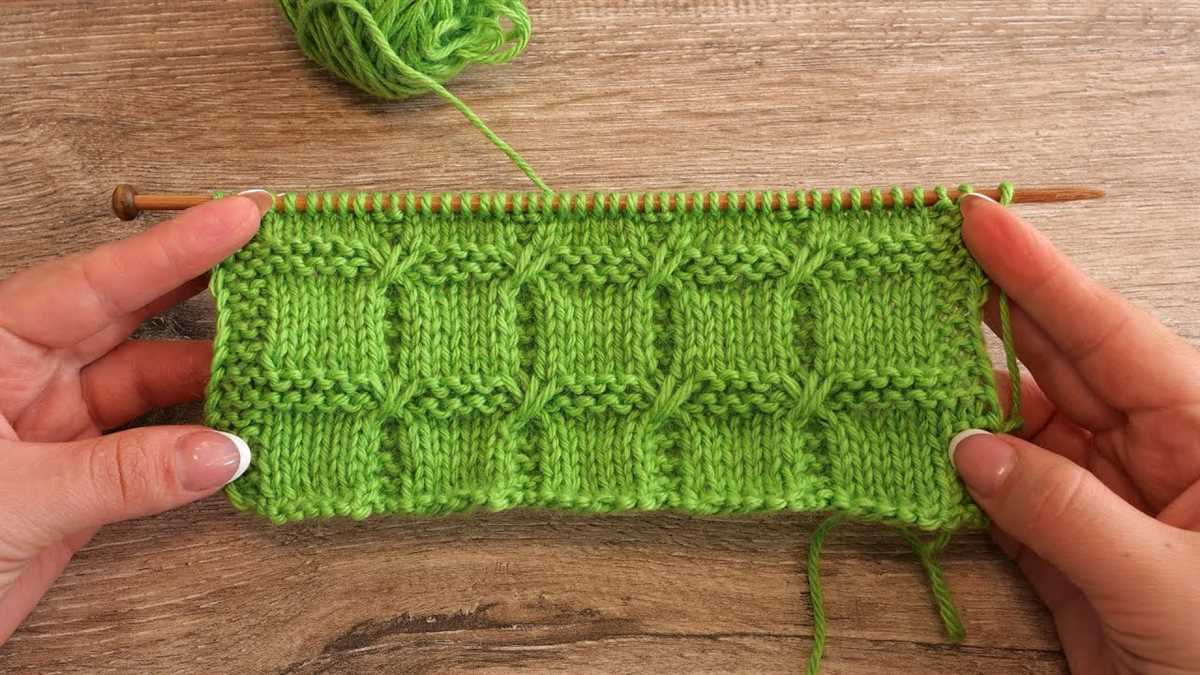
Basic Knitting Stitches Used in the Pattern
In order to create the free knitted square slippers, there are a few basic knitting stitches that are used throughout the pattern. These stitches are simple to learn and execute, making them perfect for beginners or those looking for a quick and easy knitting project.
1. Knit Stitch:

The knit stitch is the most fundamental stitch in knitting. It is created by inserting the right needle into the front of the first stitch on the left needle, wrapping the yarn around the right needle from the back to the front, and pulling the right needle through the first stitch, sliding it off the left needle. This stitch creates a smooth and neat fabric.
2. Purl Stitch:
The purl stitch is another basic knitting stitch that is used in the pattern. It is the reverse of the knit stitch and creates a bumpy texture on the fabric. To purl, the yarn is brought to the front of the work, the right needle is inserted into the front of the first stitch on the left needle from right to left, and the yarn is wrapped around the right needle from front to back. The right needle is then pulled through the stitch, sliding it off the left needle.
3. Slip Stitch:
The slip stitch is a technique used to move stitches from one needle to another without knitting or purling them. In this pattern, the slip stitch is used to create a decrease in the number of stitches and give the slippers their shape. To slip a stitch, the needle is inserted into the first stitch as if to purl, but instead of purling, the stitch is simply transferred from the left needle to the right needle without working it.
By mastering these three basic knitting stitches – knit, purl, and slip – you will be able to create the free knitted square slippers with ease. The pattern will guide you on when and how to use each stitch to create the desired shape and texture for the slippers. With practice, you will be able to knit up a cozy pair of slippers in no time!
Adding on Embellishments to Your Slippers
Once you have finished knitting your square slippers according to the free pattern, you can take your creativity a step further and add on embellishments to make them truly unique. These additional details can give your slippers a personal touch and make them even more enjoyable to wear.
One way to embellish your slippers is by adding buttons. You can sew on buttons in a contrasting color to create a pop of visual interest. Another option is to use buttons with unique shapes or designs to add a touch of whimsy to your slippers. Sew the buttons securely onto the slippers using a needle and thread, making sure they are properly positioned for comfort.
If buttons aren’t your style, consider using yarn to add some decorative stitches. You can embroider a simple design onto the slippers using a tapestry needle and a contrasting color of yarn. This could be a small flower, a heart, or any other motif that appeals to you. Experiment with different stitches, such as French knots or satin stitches, to create texture and dimension.
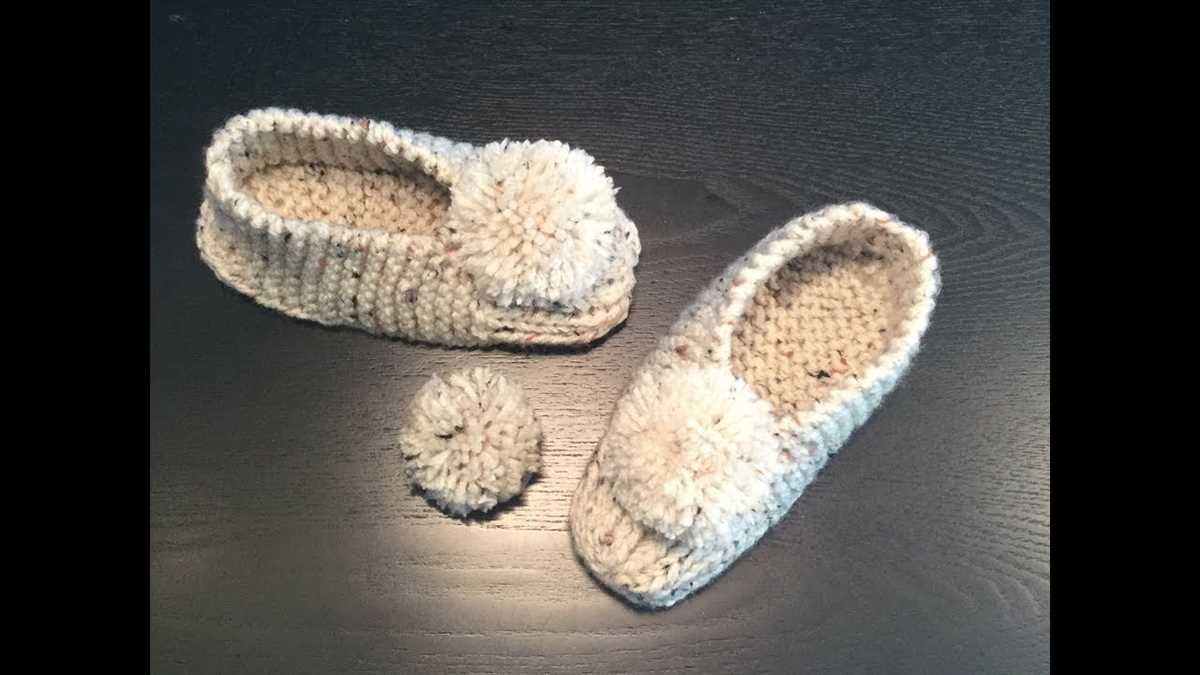
Another way to enhance your slippers is by incorporating pom poms. You can make pom poms using yarn and a pom pom maker or simply by wrapping yarn around your fingers and securing it in the middle with a separate piece of yarn. Attach the pom poms to the slippers by sewing them on with a needle and thread. You can add one or multiple pom poms to each slipper, depending on your preference.
Finally, consider adding some non-slip soles to your slippers for added functionality. You can purchase pre-made soles or make your own using a textured material like rubber or silicone. Cut the soles to fit the bottom of your slippers and secure them in place using a strong adhesive. This will not only make your slippers safer to wear on slippery surfaces but also prolong their lifespan.
By adding on embellishments such as buttons, decorative stitches, pom poms, or non-slip soles, you can transform your basic knitted square slippers into one-of-a-kind creations. Get creative and have fun experimenting with different embellishments to make your slippers truly unique to you.
Making Adjustments for Different Foot Sizes
When knitting slippers, it’s important to consider the different foot sizes that people have. Not everyone has the same size feet, so making adjustments to the pattern can ensure a better fit for the recipient.
To accommodate different foot sizes, there are a few adjustments that can be made. One option is to adjust the number of stitches cast on for the sole of the slipper. You can either increase or decrease the number of stitches to make the sole wider or narrower. This will allow for a better fit around the foot.
Another adjustment to consider is the length of the slipper. Some people may have longer or shorter feet, so adjusting the length of the slipper can help ensure a good fit. You can simply knit more or fewer rows to make the slipper longer or shorter.
If the slipper pattern includes any ribbing or cuff at the top, you may also need to adjust the number of stitches or rows to accommodate different foot sizes. A smaller foot may require fewer stitches or rows for a snug fit, while a larger foot may require more.
It’s important to keep in mind that while making adjustments, maintaining the overall proportions of the slipper is crucial. Altering the pattern too much may result in an ill-fitting slipper or one that looks disproportionate. So, it’s best to make small adjustments and try the slipper on as you go to ensure a good fit.
Caring for and Washing Your Knitted Slippers
After spending time and effort knitting your own pair of cozy knitted slippers, it’s important to know how to properly care for them to ensure they last. With the right care, your slippers can stay soft, warm, and in great condition for years to come.
Hand Washing: To clean your knitted slippers, it’s best to hand wash them. Fill a basin or sink with lukewarm water and add a mild detergent suitable for delicate items. Gently agitate the water to create suds.
Soaking: Place the slippers in the soapy water and allow them to soak for about 10 minutes. Avoid excessive rubbing or twisting, as this can cause stretching or damage to the knitted fabric.
Rinse: Drain the soapy water and refill the basin with clean, lukewarm water. Gently swish the slippers around to remove any remaining detergent. Repeat this rinsing process if necessary, until the water runs clear.
Drying: After rinsing, gently press the slippers against the side of the basin or sink to remove excess water. Avoid wringing or twisting them, as this can misshape the slippers. Lay a clean towel on a flat surface and place the slippers on top. Reshape them if necessary and allow them to air dry completely, away from direct heat or sunlight.
Storage: When not in use, it’s best to store your knitted slippers in a cool, dry place. Avoid storing them in plastic bags or containers, as this can trap moisture and lead to mold or mildew growth. Instead, consider placing them in a breathable fabric bag or simply leaving them to air out.
By following these care instructions, your knitted slippers will stay clean, soft, and cozy for many seasons to come. Enjoy the warmth and comfort they bring to your feet while knowing they are well taken care of.
Customizing Your Slippers with Different Colors
Adding a touch of color to your knitted square slippers can be a fun way to personalize your footwear. By using different colors of yarn, you can create unique and eye-catching slippers that reflect your personal style. Whether you prefer bold and vibrant hues or soft and subtle tones, there are endless possibilities for customizing your slippers.
One way to incorporate different colors into your slippers is by using a variegated or multicolored yarn. These yarns feature multiple colors in a single skein, creating a beautiful marbled effect when knitted up. You can choose a variegated yarn that complements the color of your main yarn, or opt for a contrasting color for a more striking look.
If you prefer more control over the colors in your slippers, you can also use multiple solid-colored yarns. For example, you could knit the main body of the slipper in one color and use a contrasting color for the trim or edging. This allows you to create a more tailored and coordinated look. You can also experiment with different color combinations to create unique patterns or stripes.
In addition to yarn, you can also customize your slippers with embellishments such as buttons, ribbons, or appliques. Adding small accents like these can bring additional color and texture to your slippers. You can choose to match the color of your embellishments to the yarn or use contrasting colors for a pop of visual interest.
When customizing your slippers with different colors, it’s important to consider the overall design and aesthetic you’re going for. Think about the colors that complement each other and work well together. It’s also a good idea to swatch and test different color combinations before committing to a final design.
By customizing your slippers with different colors, you can create a unique and one-of-a-kind pair of footwear that reflects your personal style and creativity. Whether you choose to use variegated yarn, multiple solid colors, or add embellishments, the possibilities are endless. Have fun experimenting with different color combinations and make your slippers truly your own.
Other Uses for the Knitted Square Slipper Pattern
If you’ve mastered the knitted square slipper pattern and have already created a pair for yourself or for loved ones, you might be wondering what else you can use this versatile pattern for. Here are some alternative uses for the knitted square slipper pattern:
1. Coasters
You can easily adapt the knitted square slipper pattern to create charming coasters. Simply knit a smaller version of the slipper pattern using thinner yarn and smaller needles. These coasters will add a cozy touch to your table while keeping it protected from heat or spills.
2. Decorative Pouches
By adding a button or a drawstring to the top of a knitted square slipper, you can transform it into a cute pouch. These pouches can be used to store small items like jewelry, coins, or even as a unique packaging for small gifts. The possibilities are endless!
3. Pet Beds
If you have a furry friend who loves soft and cozy spots, why not use the knitted square slipper pattern to create a comfortable bed for them? By knitting multiple squares and sewing them together, you can create a custom-sized pet bed that will keep your beloved pet warm and snug.
4. Pot Holders
With a few modifications, the knitted square slipper pattern can be turned into functional pot holders. Simply knit a square using heat-resistant yarn or add a layer of insulating material between two knitted squares. These pot holders will protect your hands from the heat while adding a touch of handmade charm to your kitchen.
In conclusion, the knitted square slipper pattern can be used for more than just creating cozy slippers. Whether you decide to turn it into coasters, decorative pouches, pet beds, or pot holders, this pattern offers a creative and versatile way to put your knitting skills to good use.